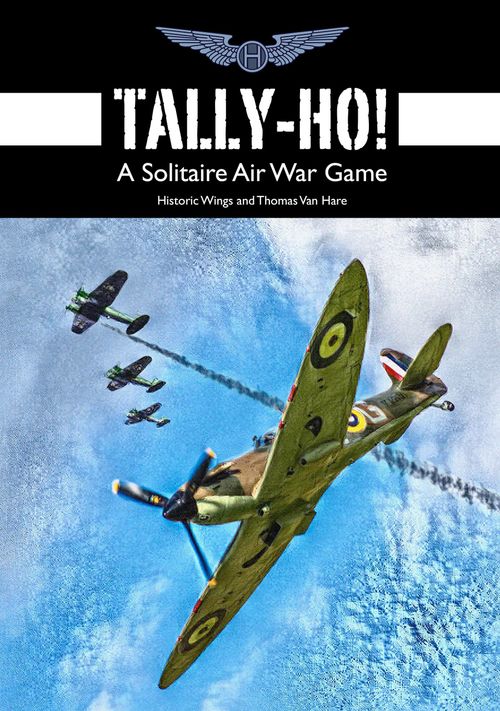
Tally-Ho! (2022)
Tally-Ho! (2022) Rulebook
Table of Contents
Table of Contents
- Introduction
- Game Rules – How to Play
- 2. Mission Set Up
- 3. Sequence of Play
- 4. Movement
- 5. Combat
- 6. Bombing and Strafing
- 7. Victory Conditions
- Example of Play
- History and Missions
- Campaign Tracking Sheet
- The Campaign Game
- Gameplay Materials for Photocopying
- Game Design Notes
- Player Guide & Advisory
Introduction
Background
Tally-Ho! is an air war game book that puts you into the role of a Sector Controller during the Battle of Britain in the Summer of 1940. You direct Royal Air Force (RAF) fighter squadrons as you struggle to protect England from attack by incoming Luftwaffe raids. There are too many raiders, however, and too few RAF aircraft, yet you have one major advantage – England's "Chain Home" radar network.
Meanwhile, in the coastal ports of France, the German Wehrmacht is preparing for Operation Seelöwe – the invasion of England. Intelligence reports suggest that Deputy Führer Rudolf Hess may be planning a personal flight in a Messerschmitt Bf 110 on a "journey of peace" to meet with the Duke of Hamilton at his home of Dungavel House, in Glasgow, Scotland. Will his flight be to accept England's surrender or will it go down in history as the folly of a madman?
Fifteen individual missions are included in this book-based game. Each mission relates to one of the key aerial engagements of the Battle of Britain. Most missions can be completed in less than thirty minutes. This is not a simulation of air-to-air combat between individual fighter planes, nor is it intended to be a realistic depiction of the air war. Rather, it is an entertaining educational tool that allows you to experience the story of the conflict through strategic decision-making set against a backdrop of the real history of the Battle of Britain – as if you were there.
The future of England rests on your shoulders!
About Capitalization and Terminology
The terms Mission, Set Up, Squadron, Staffel, Stormo, Vic, Schwarm, Sciame, Victory Points, and others are capitalized in this book to represent key concepts in gameplay. This capitalization is not practiced in the Introduction, nor in the sections of the book about the history of the Battle of Britain, the Aircraft Glossaries, or in the Campaign Game.
Most of the time, you cannot stop the Luftwaffe. Bombs will fall. Airfields will be strafed. Convoys at sea will suffer. Your performance in each mission will affect the setup of subsequent missions by reducing or increasing the number of aircraft on each side. If you direct your squadrons skillfully, you might prevail and save England.
In practical terms, Squadron, Staffel, and Stormo are equivalent concepts that represent up to twelve (12) aircraft in a unit organization. Each is divided into Vics, Schwarms, or Sciami, which, though they differed in history, are used in this game to represent three (3) aircraft each, the basic unit size for gameplay. This determines the number of dice rolled to resolve attacks and to determine the results of bombing and strafing.
When you have completed all fifteen missions, the results are tallied to create a formal Fighter Command War Report, which you can read yourself. Based on your results, the War Cabinet and Parliament vote to fight on or surrender.
A Final Note
All aspects of gameplay, aircraft performance, the relative advantages and disadvantages of each type of aircraft, the geography, and the phases of the Battle of Britain are represented in this game. The game can serve as a learning tool to better understand the events of World War II.
If you failed in your mission to protect England from Luftwaffe attacks, what choice would Parliament have but to negotiate terms with Berlin to spare the nation from invasion?
Game Rules – How to Play
1.1 Overview
There are fifteen Missions in this game, each comprised of Mission Tables and a corresponding Sector Map. At the end of the book are the Mission Tracking Sheet and the Aircraft Performance Chart, and other pages critical to gameplay. Consider photocopying these for handy reference. Alternatively, use blank sheets of paper, create your own Mission Tracking Sheet, and copy over the performance figures using the same columns for each Mission as you roll your way through Set Up.
In the game, you represent a Sector Commander working in RAF Fighter Command. You direct RAF Squadrons across southern England to intercept incoming Luftwaffe raids. Luftwaffe Staffels (the German equivalent of a Squadron) move and engage based on dice rolls. This ensures that you cannot predict their movement with certainty. The goal of the Luftwaffe is to bomb and strafe various targets, including Airfields, Convoys, Radar Stations, and Cities. Your goal is to stop them. Depending on how successful you are, you accrue Victory Points – the totals of these determine whether you won or lost each Mission in Tally-Ho! To play, you need at least 5D6 and preferably 8D6.
Historians divide the Battle of Britain into three, four, or five phases. In Tally-Ho!, five Phases are represented. There are three Missions per Phase (not to be confused with Phases within the Round).
The basic unit of play is a Squadron (RAF), Staffel (Luftwaffe), or Stormo (Italian). Within these are sub-units – Vics for the RAF, Schwarms for the Luftwaffe, and Sciami for the Italians (singular: Sciame). A Vic is three aircraft. The hex scale for Sector Maps is approximately 7 miles or 10 km each. Each Round (the standard turn of play) represents approximately 5 minutes of "real time".
Astute researchers of history will note that the cruising speeds of aircraft do not align precisely with the number of hexes that each type moves in a Round. This was purposeful for reasons of playability. A Junkers Ju 87 Stuka has a Movement Allowance of one, so it moves one hex per Round, while a Spitfire has a Movement Allowance of three, so it moves three hexes per Round. Historically, the Spitfire wasn't three times faster than the Stuka. Their cruising speeds were 346 mph vs. 238 mph, respectively, when flying at around 13,500 to 15,000 feet of altitude. Presumably, the Spitfire would move three hexes and the Stuka should move two hexes. However, these numbers must be considered in context. If a Stuka tried to chase a Spitfire and line up its guns for a shot, it was nearly impossible – the relative speeds are what matter. It was the experiential equivalent of standing beside a highway and trying to run after a Formula 1 race car as it drives past at top speed. There is no way you will catch it, no matter how fast you run. Further, you have only a few seconds to aim your guns – the race car will be hundreds of meters down the road before you can even pull the trigger. Movement Allowances are adjusted to reflect that experience – not the actual physics.
1.2 Single Mission Play vs. Campaign Play
Missions may be played in any order you wish or sequentially as a Campaign Game by logging your results on the Campaign Tracking Sheet. Missions become progressively more challenging as you play from the first to the last. The first helps you master the game mechanics and develop experience that you will need later when the Luftwaffe raids become breathtaking in scale. In some Missions, victory may seem impossible, yet if you play well you can win. Remember that no single mission will win the Battle of Britain – or lose it.
1.3 Campaign Game Overview
The Campaign Game is a unique design feature that enables you to determine if you won or lost the Battle of Britain. As you play each of the fifteen Missions, you log your performance on the Campaign Tracking Sheet. At the end, your results are used to generate a War Report for the War Cabinet, which you can read. Then the War Cabinet makes a recommendation to Parliament for a vote to decide whether England will surrender or fight on. The future of England rests upon your shoulders.
In the Campaign Game, your performance in each Mission affects the Set Up of Missions that follow. For instance, if you fail to protect the Hawker works at Brooklands in Mission 9, you will have to discard one RAF Squadron of Hurricanes during the Set Up for Mission 10 as a reflection of the corresponding production losses. If you lose a Mission, it is never hopeless, however. Never underestimate the resiliency of the RAF. You can always reverse your fortunes.
1.4 Sector Map
Missions are played on the Sector Map with dice and by moving game counters (or other pieces of your choice) that represent RAF Squadrons and Luftwaffe Staffels. The Sector Map represents a defined area of the air battle over the south of England, the English Channel, and France. Mission 6 features an area in the North Sea. Hexagons (hexes) are overlaid on each Sector Map to enable precise relative movement. Ideally, you should color photocopy the Sector Maps. To facilitate printing them out, PDFs will be uploaded to BoardGameGeek for use by those with a color printer at home.
Sea hexes appear in blue/black. Land hexes are in green/brown. Target hexes are marked with white-outlined red wedges. Barrage Balloons and Convoys are marked accordingly with pictorial representations of each. Some Convoys may tow Barrage Balloons for their defense. Lettering on the Sector Map is in white, red, orange, blue, and yellow and is illustrative and for historical reference only with no effect on gameplay. The following graphic shows how to interpret the Sector Map:
[Graphic key: RAF Airfield; Luftwaffe Airfield; City; Radar Station; Barrage Balloon; Convoy; Target Hex.]
1.5 Game Counters
Artwork for game counters (the pieces you move on the Sector Map) is included in the final pages of this book. Although game counters feature only a single aircraft silhouette, they represent an entire RAF Squadron or Luftwaffe Staffel – or Italian Stormo in Mission 14, which represents when the Regia Aeronautica Italiana fought in the Battle of Britain. PDFs will be uploaded on BoardGameGeek.
For visual reference, silhouettes (top views) of the various types of aircraft that flew in the Battle of Britain are included on the game counters. Except on the Massed Formations game counters, these are rendered in exact relative scale size to one another. This enables you to visually compare the smaller size of aircraft like the Supermarine Spitfire and the Hurricane with the much larger Luftwaffe bombers like the Heinkel He 111 and others. Each game counter features the insignia of the air force it represents – the tricolor roundel of the RAF, the black cross of the Luftwaffe, and the three fasces of the Regia Aeronautica Italiana (from which the term fascism derives). The strip of color at the top of the game counters represents the direction of facing, which is critical for Movement. Close up views of sample game counters follow to show the colors that represent fighter and bomber aircraft (with different colors for facing stripes) of each nationality represented in Tally-Ho!
[Sample counters: RAF Fighter; Luftwaffe Fighter; Luftwaffe Bomber; Italian Fighter; Italian Bomber.]
I suggest you photocopy the game counters (in color) and mount them onto card stock. Use scissors or a sharp knife to cut them out for use in gameplay. Alternatively, you can employ small, numbered wooden blocks of different colors, just be sure they are marked with arrows to represent facing. Small coins of different types may also be used. Arrangements are being made to offer add-on, mounted and die-cut counter sheets to be sold separately through Amazon.com. For ease of printing, the game counters, Mission Tracking Sheets, Sector Maps, Massed Formation Tracking Sheets, and other support pages are to be made available on BoardGameGeek at this link: https://boardgamegeek.com/boardgame/374751/tally-ho If the link does not work, search for "Tally-Ho!" from the publisher, "Historic Wings".
Pro Tip: Just as in history, it is best to intercept the incoming Luftwaffe Bombers rather than the escorting Fighters. When you inflict a loss of one or more Schwarms in a Bomber Staffel, it Jettisons its Bombs and turns for home, thus reducing the number of potential Victory Points the Luftwaffe side may earn from Bombing. While both the RAF and Luftwaffe accrue roughly equal Victory Points for downing Bombers and Fighters, the Luftwaffe accrues more from Bombing.
1.6 RAF Squadrons
RAF Squadrons are comprised of Fighter Vics only. Some are led by aces. Some have special characteristics, such as Polish, Czech, Norwegian Squadrons, and other international Squadrons (see 2.3 International Squadrons), that bring added capabilities that affect gameplay.
1.7 Luftwaffe Staffels
Luftwaffe units are either Bomber Staffels and Fighter Staffels. Bomber Staffels are Junkers Ju 87 Stuka dive bombers (very slow and very accurate – but drop only one bomb), Heinkel He 111 twin-engine bombers (slow, level bombing with eight bombs), Junkers Ju 88 twin-engine bombers (slow, level bombing with six bombs) and Dornier Do 17 bombers (fast, level bombing with six bombs). Fighter Staffels are composed of Messerschmitt Bf 109E "Emil" types (fast, deadly, but at the extent of their range and unable to engage in more than two Dogfights) or Messerschmitt Bf 110C "Zerstörer" twin-engined fighters (less effective but with greater endurance to stay in the fight and escort the Bomber Staffels). Fighter Staffels may conduct Strafing attacks on Airfields and Radar Stations.
Late in the Battle of Britain, the Italians sent the Corpo Aereo Italiano (CAI) to support the Luftwaffe's attacks on England. The CAI was a special unit created from the ranks of the Regia Aeronautica Italiana (Italian Air Force). Italy's fighters were generally inferior to those flown by the RAF. Nonetheless, the Fiat CR.42 "Falco" fighters (slow, poorly armed, yet maneuverable) are very difficult to shoot down. The Fiat G.50 "Freccia" fighters (faster, under-armed, and without radios) are also no match for the RAF. The Fiat BR.20 "Cicogna" bombers (nearly as effective as the Luftwaffe's Junkers Ju 88s) cannot carry the heavier bomb loads of Germany's Heinkel He 111s despite their large size.
The Italian equivalent of a Luftwaffe Staffel is called a "Stormo". That term is used interchangeably with "Staffel" in this game. Likewise, the closest Italian equivalent to a Schwarm is a "Sciame", a term that is also used interchangeably in these rules. The plural of Stormo is Stormi.
1.8 Data on Game Counters
The game counters in Tally-Ho! provide data about aircraft performance in the game. The following diagram details the meanings of each illustration and notation on the game counters.
- The different color bar on the top of the counter indicates the unit's facing.
- Aircraft Silhouette (top view).
- Attack and Defend Values. 6/2 means a 6 on the dice to hit and a 1-2 on the dice to Defend.
- Strafing (s) or Bombing (b) with Attack and VP Values. s5/2 means "Strafing" and a 5-6 needed on the dice to hit and 2 VP/hit awarded when successful.
- National insignia (Luftwaffe shown).
- Type of aircraft.
- ID number for easy reference during gameplay.
2. Mission Set Up
2.1 Overview
Prior to gameplay, conduct the Set Up process by employing the Set Up Tables for the Mission you wish to play. Roll dice to determine the aircraft in each RAF Squadron and Luftwaffe Staffel, the number of Vics or Schwarms in each, and their starting positions on the Sector Map. RAF Squadrons begin on Airfields (except in Mission 6). Numbers printed on the Sector Maps correspond to the result of dice rolls for placement. Luftwaffe Staffels begin in columns and at positions based on altitude (see 2.2 Set Up Charts), also printed on the Sector Maps. Altitudes simulate that lower flying Luftwaffe aircraft typically approached closer to England before detection by Chain Home radar.
Additionally, altitudes affect how Combat from Barrage Balloons, Light AAA, and Heavy AAA is resolved (see 5 Combat). For later reference, record the altitude results from Set Up on the Mission Tracking Sheet. Additionally, fill in the performance information for each aircraft type, row by row, before placing the counters on the Sector Map. Once Set Up is completed, you are ready to play.
There is an online debate about whether Messerschmitt Bf 109E "Emil" fighter aircraft should be referred to as the Me 109 or Bf 109. This debate extends to whether the Messerschmitt Bf 110C "Zerstörer" should be called the Me 110 or Bf 110. For historic accuracy, in this game these two aircraft will be referred to by their correct German historic designations – Bf 109 and Bf 110.
The image below portrays how the game looks when Set Up is completed for a single Mission (Mission 1 is shown). This is but one example of how it might look – most likely each Set Up will be different because the positions and composition of each unit are determined by rolling dice. Note that depending on the Set Up, the challenges of gameplay in each Mission may vary considerably. This ensures a high degree of re-playability for each Mission.
[Figure: Mission 1 Set Up laid out on the Sector Map after a typical series of dice rolls and the Mission Tracking Sheet.]
Note that the starting locations of each unit are written on the Mission Tracking Sheet for later reference. This helps you remember at what altitudes each of the Luftwaffe Staffels started, information that is needed to resolve potential losses from Barrage Balloons, Light AAA, and Heavy AAA. In this example of use, a blank line is left between the RAF and Luftwaffe entries for visual separation – you could alternatively use a highlighter or leave no space at all. The same Mission Tracking Sheet can be used to play either one or two Missions.
2.2 Set Up Charts
For reference, the following are examples of the Set Up Charts for a Mission. The RAF Set Up chart is at left; the Luftwaffe Set Up Chart is at right.
RAF Squadron Set Up Chart – Roll 4x
| D6 | Aircraft Type |
|---|---|
| 1 | Boulton Paul Defiant Mk I "Daffy" |
| 2 | Hawker Hurricane Mk I |
| 3 | Hawker Hurricane Mk I (International) |
| 4 | Hawker Hurricane Mk I with Ace |
| 5 | Supermarine Spitfire Mk I |
| 6 | Supermarine Spitfire Mk I with Ace |
Squadron Strength – Roll 1D6 per Squadron: 1-3 = 4xVics, 4-5 = 3xVics, 6 = 2xVics. * If the Luftwaffe successfully bombed the Hawker Works at Brooklands during Mission 9, add +2 to the Squadron strength roll for each Hurricane squadron.
Luftwaffe Staffel Set Up Chart – Roll 6x
| D6 | Aircraft Type |
|---|---|
| 1 | Junkers Ju 87 Stuka |
| 2 | Heinkel He 111 |
| 3 | Dornier Do 17 "Flying Pencil" |
| 4 | Junkers Ju 88A-1 |
| 5 | Messerschmitt Bf 110C "Zerstörer" |
| 6 | Messerschmitt Bf 109E "Emil" with Ace |
Staffel Strength – Roll 1D6 per Staffel: 1-5 = 4xSchwarms, 6 = 3xSchwarms. * If four or more Schwarms of Bf 110C "Zerstörer" fighters were shot down in both Missions 8 and 9, remove all Bf 110C Staffels rolled during Set Up.
When playing the Campaign Game, your performance in previous Missions can result in changes to the Set Up (see blue text, above). Generally, this affects the number of Squadrons and Staffels you will roll during Set Up. These adjustments are ignored when not playing the Campaign Game. RAF Squadrons are more likely to be understrength than Luftwaffe Staffels. This reflects the historic challenges faced by the RAF during the Battle of Britain. Over time, the RAF's mounting losses from the Luftwaffe's relentless attacks will result in fewer and fewer Vics. This affects your decisions and tactics in gameplay.
To determine the starting position of each RAF Squadron, roll 1D6 and consult the Sector Map. Some Airfields are marked with adjacent number(s). Place your RAF Squadrons on the Airfield indicated by the number in the Airfield hex that matches the result on the die roll. For example, in Mission 1, Lympne (1), Hawkinge (2-4), and Manston (5-6) are listed as possible Airfields – roll 1D6 individually for each RAF Squadron and place them according to the outcome of each die roll.
For the starting position of each Luftwaffe Staffel, roll 1D6 for the column in which the Staffel will be placed on the Sector Map. Columns are numbered at the bottom edge of the Sector Map. Next, roll 1D6 for the altitude on the Starting Altitudes Set Up Table, an example of which appears below. Place Luftwaffe Staffels in the column and hex based on the resulting altitude (SL, LL, ML, and HL).
The terms SL, LL, ML, and HL refer to the Altitude Levels in this game. For reference, the Altitude Levels are: SL (Sea Level), LL (Low Level), ML (Medium Level), and HL (High Level). Staffels at SL will start farther north (toward the top). Those at HL will start farther south, with LL and ML in between.
An example of a Starting Altitudes Set Up Table follows below (these vary for each Mission):
Starting Altitudes Set Up Table for Luftwaffe Staffels (example)
| Luftwaffe Bomber Staffels | Altitude (D6) | Luftwaffe Fighter Staffels | Altitude (D6) |
|---|---|---|---|
| Stuka | 1=SL, 2=LL, 3-5=ML, 6=HL | Bf 109E | 1-2=SL, 3=LL, 4=ML, 5-6=HL |
| He 111 | 1=SL, 2=LL, 3-6=ML | Bf 110C | 1=SL, 2-3=LL, 3-5=ML, 6=HL |
| Ju 88 | 1=SL, 2-3=LL, 4-6=ML | ||
| Do 17 | 1=SL, 2=LL, 3-4=ML, 5-6=HL |
Some SL placements enable a Luftwaffe Staffel to engage an RAF Squadron before the RAF Squadron has its first opportunity to move. This simulates the Staffel Strafing or Bombing the airfield as the RAF planes line up to take off. In that case, special modifiers apply (see 5.2 Dogfights).
2.3 International Squadrons
On the RAF Squadron Set Up Chart, you will sometimes see the term "International" in parentheses. In those cases, roll an additional 1D6 and consult the RAF International Squadrons Table below to determine which International Squadron will be employed. Options include Poland, New Zealand, Czechoslovakia, Norway, Canada, and the United States of America (Eagle Squadrons). Each brings bonuses to Dogfights and/or Modifiers that apply during gameplay. Re-roll any duplicates.
RAF International Squadrons Table (Roll 1D6 per Squadron + Modifiers)
| D6 | Nationality | Additional D6 for Dogfights | Modifier to RAF Communications Chart |
|---|---|---|---|
| 1 | Poland | +3D6 | -3 Modifier |
| 2 | New Zealand | +1D6 | None |
| 3 | Czechoslovakia | +1D6 | -2 Modifier |
| 4 | Norway | +1D6 | +2 Modifier |
| 5 | Canada | +1D6 | None |
| 6 | Eagle Squadron (USA) | +1D6 | -1 Modifier |
Pro Tip: Norwegian Squadrons follow instructions extremely well and are very skilled at engaging Staffels. The best Squadron for Dogfights is Polish, yet they receive -3 on their rolls on the RAF Communications Chart to reflect language difficulties in radio communications. Historically, the Polish pilots were aggressive and exhibited great skill in aerial combat, closing in on the Luftwaffe to shoot from point-blank range. To overcome their communications difficulties, move your Polish Squadron into a Massed Formation with another RAF Squadron to help guide it to the enemy.
2.4 Aces
If a Squadron or Staffel has an Ace, it gains +1D6 in Dogfights. If multiple Aces are present in a Massed Formation, bonuses are cumulative. Likewise, bonuses from International Squadrons are cumulative (see 5.2 Dogfights). In some Missions you will have a Polish Squadron with an Ace in the lead. With four Vics, it will Attack and Defend with 8D6 in Dogfights! The Ace status of a Squadron remains until the last Vic or Schwarm is lost in Combat, i.e., the Ace is in the last Vic or Schwarm.
3. Sequence of Play
3.1 General Sequence
Gameplay is divided into Rounds. Each Round consists of four Phases, completed in order. Once all four Phases are completed, a new Round begins. There is no limit to the number of Rounds played.
The Phases in each Round are the following:
- Luftwaffe Actions
- RAF Actions
- Resolve Dogfights
- End of Round Bookkeeping
3.2 Phase 1: Luftwaffe Actions
In this Phase, dice rolls determine the movement of Luftwaffe Staffels. Roll 1D6 for each Staffel or Massed Formation (see 4.4 Massed Formations). For Movement Order, roll and move from top to bottom / left to right – i.e., those closest to the top of the Sector Map move first; if two or more Staffels are on the same hex row, move in order from leftmost to rightmost. Staffels in Massed Formations move together based on a single die roll. All Staffels must roll and move once each Round.
3.3 Phase 2: RAF Actions
RAF Squadrons are moved differently from Luftwaffe Staffels. Roll 1D6 for each RAF Squadron and add one for each Vic and Ace, plus any Modifiers from International Squadrons. Consult the RAF Communications Chart to determine what Actions you are allowed to take based on the sum result. If more than one RAF Squadron is in a hex, Massed Formations rules can apply to the die roll. Move the RAF Squadrons in any order you choose. All RAF Squadrons must roll in each Round.
3.4 Phase 3: Resolve Dogfights
Dogfights are resolved by simultaneous dice rolls, using Attack and Defend values to determine the outcome. The number of dice rolled in a Dogfight for RAF Squadrons and Luftwaffe Staffels is determined based on the number of Vics or Schwarms in the hex at the start of the Dogfight, plus Aces and Modifiers from International Squadrons. You may wish to use different colored sets of dice (D6) to differentiate opposing sides or even between the Squadrons and Staffels, since Attack and Defend values vary by aircraft type or roll the results for each separately and log the results on the Mission Tracking Sheet, and thereafter determine the outcome of the Dogfight (see 5.2 Dogfights).
3.5 Phase 4: End of Round Bookkeeping
At the end of each Round, doublecheck to ensure that all losses inflicted in Dogfights, losses to Barrage Balloons, Light AAA and Heavy AAA as well as Fuel/Ammo Points are correctly recorded on the Mission Tracking Sheet. Check that you recorded any results from Bombing and Strafing. If one or more Luftwaffe Staffels remains in play on the Sector Map, the next Round begins from Phase 1, even if all RAF Squadrons have no remaining Fuel/Ammo Points. The Mission ends either when all Luftwaffe Staffels have been shot down in Combat, when all Staffels have exited the bottom edge of the Sector Map, or when all are "RTB" with no way to earn more Victory Points (VPs). At the end of the game, VPs are tallied and logged on the Campaign Tracking Sheet. This records wins and losses.
4. Movement
4.1 Overview
Movement is conducted by moving the game counters on the Sector Map the number of hexes based on each Squadron's or Staffel's Movement Allowance. Generally, Luftwaffe Staffels must move the full number of hexes of their Movement Allowance unless they are in a Massed Formation, enter a Dogfight, or conduct Bombing or Strafing.
As the RAF Sector Commander, you may move your RAF Squadrons any number of hexes from zero (orbiting in place) to the number of hexes equal to the Movement Allowance for the type of aircraft in that Squadron (Spitfires, Hurricanes, or Defiants). Squadrons engaged in a Dogfight by the Luftwaffe's Movement in Phase 1 may not move away to escape the Dogfight in Phase 2. Squadrons and Staffels move only once in each Round.
4.2 Actions for Luftwaffe Staffels
To move Luftwaffe Staffels, roll 1D6 for each and consult the Luftwaffe Movement Chart for the Mission you are playing. This will determine each Staffel's movement in the Round. Each Luftwaffe Staffel is rolled separately unless it is in a Massed Formation (see 4.4 Massed Formations).
Staffels always move the number of hexes equal to their Movement Allowance (see Aircraft Performance Charts) unless entering a Dogfight, conducting Bombing, or conducting Strafing (see 5 Combat) or when in a Massed Formation with another Staffel that has a lower Movement Allowance. Luftwaffe Staffels in Massed Formations will always move based on the lowest Movement Allowance and will stay in the Massed Formation until Scattered in a Dogfight (see 5.4 Scattered Formations).
When moving into a hex that contains Barrage Balloons, Light AAA, or Heavy AAA, losses are resolved during this Phase (see 5 Combat). Likewise, Bombing and Strafing are resolved during this Phase (see 6.2 Bombing and 6.3 Strafing).
A sample of a Luftwaffe Movement Chart is included below with explanations of each potential outcome for reference.
Luftwaffe Movement Chart (sample)
| D6 | Ju 87 Stuka | He 111 | Do 17 | Junkers Ju 88 | Bf 109E | Bf 110C |
|---|---|---|---|---|---|---|
| 1 | TURN LEFT | MOVE STRAIGHT AHEAD | TURN LEFT/RIGHT | TURN LEFT/RIGHT | TURN LEFT/RIGHT | TURN LEFT/RIGHT |
| 2 | TURN RIGHT | TURN LEFT | TURN FROM RAF | TURN FROM RAF | TURN TO TARGET | TURN TO TARGET |
| 3 | TURN FROM RAF | TURN RIGHT | TURN FROM RAF | TURN TO TARGET | TURN TO ESCORT | TURN TO TARGET |
| 4 |
Explanations of each option in the above table are:
- TURN LEFT/RIGHT – Roll 1D6 – 1-3=left; 4-6=right. Based on the current facing of the Luftwaffe Staffel(s), first turn it 60 degrees to the left or right (based on the outcome of the die roll) and then move it the number of hexes equal to its Movement Allowance in that direction (ending movement with that facing). Movement ceases when a Staffel enters a Dogfight or conducts Bombing or Strafing. TURN LEFT and TURN RIGHT – change facing and move.
- MOVE STRAIGHT AHEAD – The Staffel moves in the direction of its facing the number of hexes equivalent to its Movement Allowance.
- TURN TO TARGET – If a Staffel has not yet completed Bombing, move it directly toward the nearest Target hex and end movement facing toward that hex. In cases where two or more Target hexes are equidistant, roll a D6 to randomly select the route taken. The Staffel does not "turn and then move", but takes the most direct path toward the Target. Staffels do not move toward Targets that are limited (e.g., "Stuka Only") unless the limitation applies to that Staffel.
- TURN TO RAF – The Staffel faces and moves directly toward the nearest RAF Squadron (any number of hexes distant from the Staffel). If two or more RAF Squadrons are equidistant, move it toward the Squadron with the lowest number of Vics. If two or more Squadrons are equidistant and have the same number of Vics, roll to randomly choose between them. The Staffel does not "turn, then move". It takes the most direct path and ends facing the Squadron.
- TURN TO ESCORT – The Staffel faces and moves directly toward the nearest Luftwaffe Bomber Staffel (i.e., it moves toward it with the intent of providing escort to protect it from RAF attacks). If two or more Bomber Staffels are equidistant, roll to randomly select between them. If there are no Bomber Staffels on the Sector Map, the Staffel moves instead as "TURN TO RAF". The Staffel does not "turn, then move", but takes the most direct path. Staffels that have bombed are ignored, i.e., they will not be escorted to the bottom of the Sector Map.
- TURN FROM RAF – The Staffel changes facing and moves directly away from the nearest RAF Squadron – but only if one is within three hexes, otherwise, TURN TO TARGET instead. If in the same hex as an RAF Squadron (such as in the Round after a Dogfight), TURN TO TARGET instead. If two or more RAF Squadrons are equidistant on the Sector Map, move away from the RAF Squadron with the highest number of Vics. If two or more of the RAF Squadrons are equidistant with the same number of Vics, roll to randomly choose between them. The Staffel does not "turn, then move", but takes the most direct path away and ends facing away from the Squadron. Note that there are potential circumstances when a Staffel may move away from the nearest RAF Squadron and inadvertently enter into a Dogfight with another RAF Squadron (such as when a second RAF Squadron was farther away).
Luftwaffe Staffels that have Jettisoned Bombs or have marked off their last Fuel/Ammo Point do not roll on the Luftwaffe Movement Chart but instead only Return to Base (see 5.12 Return to Base).
If reaching a side edge of the Sector Map, the Staffel will turn 60 degrees (one hex side) to face parallel to the side edge and will continue to move in that new direction. If facing an edge of the Sector Map where a 60 degree turn will not take it parallel to the edge (such as when facing into a corner hex or at to the top edge), the Staffel will reverse facing and continue its move in the opposite direction. If it moves off the bottom edge of the Sector Map, even if it is not performing a Return to Base, it is removed from play, even if it has not yet Bombed a target. While rare, this can happen based on two or three rolls of TURN LEFT/RIGHT at the start (consider this a "Mission Abort" situation).
[Figures: Example of Movement into a Sector Map edge; Example of movement into a corner hex of the Sector Map.]
4.3 Movement and Actions of RAF Squadrons
Movement and Actions of RAF Squadrons are somewhat restricted; the game simulates the challenges of radio communications prevalent in that era. For each hex containing one or more RAF Squadrons, roll 1D6 plus Modifiers (+1 per Vic in that hex, +1 per Ace, plus any additional Modifiers from International Squadrons in that hex), and sum the result. Consult the RAF Communications Chart to determine the potential Actions for each RAF Squadron in that hex.
Potential Actions are NO COMMS, MOVE / DO NOT ENGAGE, and MOVE & ENGAGE. Squadrons in the same hex have the option of becoming a Massed Formation, but are not required to do so. In Squadrons may roll and move together or separately. If a 1 is rolled (without applying Modifiers), the Squadron (or the entire Massed Formation when rolling together) is NO COMMS. Roll and move Massed Formations first. Otherwise, you may move your Squadrons in any order you choose.
RAF Communications Chart (Roll 1D6 per Squadron + Modifiers; a 1 is always NO COMMS, despite Modifiers)
| D6 + Mods | Spitfire | Hurricane | Defiant |
|---|---|---|---|
| 1-3 | NO COMMS | NO COMMS | MOVE / DO NOT ENGAGE |
| 4 | MOVE / DO NOT ENGAGE | MOVE / DO NOT ENGAGE | MOVE & ENGAGE |
| 5+ | MOVE & ENGAGE | MOVE & ENGAGE | MOVE & ENGAGE |
Explanations of each Action in the above Chart follows:
- NO COMMS – The worst result; move the Squadron its Movement Allowance in the direction of its current facing. If it moves into a hex containing a Luftwaffe Staffel, movement ceases and a Dogfight commences. If it reaches the edge of the Sector Map, turn 60 degrees or reverse directions, as described above, and move the remainder of its Movement Allowance. You may not voluntarily change facing after movement. RAF Squadrons do not exit at the map edges.
- MOVE / DO NOT ENGAGE – Move the Squadron any number of hexes in any direction from zero up to its Movement Allowance, however, you may not move to enter a Dogfight. For instance, a Squadron of Spitfires may move from zero hexes to three hexes. You may face the Squadron in any direction at any point during movement (even changing facing repeatedly and as often as you choose). You may orbit in place to move no hexes at all. The main restriction is that you may not move into a hex containing a Luftwaffe Staffel. If a Squadron is surrounded on all hex sides by Staffels, do not move (the Squadron will orbit in place).
- MOVE & ENGAGE – The best possible Action for the player; move the Squadron any number of hexes from zero hexes up to its Movement Allowance. You may engage in Dogfights.
Pro Tip: Carefully adjust the facing of each RAF Squadron at the end of its Movement to point toward any nearby Luftwaffe Staffels that you may wish to engage in future Dogfights. Then, if a NO COMMS result is rolled in the following Round, the Squadron will at least move in the direction of the Luftwaffe Staffel and, if cleverly faced, may end up in a Dogfight anyway.
Examples (based on the sample chart above):
- Using the sample chart provided above, an RAF Squadron of Hurricanes with one Vic and an Ace would roll 1D6+2 (one for the 1 Vic and one for the Ace) and consult the RAF Communications Chart to determine its Action for the current Round. If a 2 was rolled, then 2+2=4 – the RAF Squadron would have the result of MOVE / DO NOT ENGAGE.
- A hex that contains a Massed Formation of a Squadron of Hurricanes with two Vics and a Squadron of Spitfires with four Vics that is an International Squadron (Norwegian) and has an Ace, would roll 1D6+2+4+2+1 = 1D6+9. One roll is made for both Squadrons in the Massed Formation. A roll of a 2 (2+7=9) would always put the result in the 5+ row of the Chart, i.e., MOVE & ENGAGE. You must always roll the dice – a "natural" 1 results in NO COMMS for all.
- An RAF Squadron of Spitfires with one Vic in the same hex with an RAF Squadron of Defiants with one Vic has a combined Modifier of +2. If a 2 is rolled, consult the row pertaining to the result of 4. Based on the Movement Chart, the Spitfires would execute MOVE / DO NOT ENGAGE; however, the Defiants would execute MOVE & ENGAGE (note the difference in the above Chart between the two types of aircraft).
Remember: a) potential losses to RAF Squadrons from Barrage Balloons, Light AAA, and Heavy AAA are resolved during this Phase (see 5.10 Friendly Fire); b) when an RAF Squadron exhausts its final Fuel/Ammo Point, no dice rolls are needed (even to check to see if a 1 is rolled) as it will always face toward and move directly to the Airfield from which it started the Mission (see 5.6 Fuel/Ammo Points); and when it arrives in the Airfield hex, it is removed from gameplay (it has landed).
Note that any RAF Squadron(s) that has Modifiers of +4 or more (whether from Vics or Aces, etc.), will always MOVE & ENGAGE unless a 1 is rolled (since a 1 always results in NO COMMS). Even when you intend to orbit in place (move zero hexes), you must still roll for the possibility of NO COMMS, i.e., you order the Squadron to orbit, but they do not receive the radio message and fly onward instead.
Pro Tip: Join RAF Squadrons with fewer Modifiers (fewer Vics, no Aces, etc.) with other RAF Squadrons into Massed Formations to improve their potential options to move and engage based on the roll of the dice. This is particularly important for Polish Squadrons with fewer Vics.
4.4 Massed Formations
When a Luftwaffe Staffel enters a hex containing another Staffel, all movement ceases and they join together to become a Massed Formation. All Staffels in Massed Formations that include Bombers are changed to an altitude of HL, otherwise, the altitude changes to that of the highest altitude of any participating Fighter Staffel. The facing of the Staffel(s) originally occupying the hex (not the Staffel moving into the hex) is applied for all in the Massed Formation. Massed Formations remain together, unless Scattered after a Dogfight (see 5.4 Scattered Formations) or when RTB. If a Staffels moves into a hex containing a Staffel that has not moved yet, it will not subsequently move. Units that are RTB (Return to Base) cannot participate in Massed Formations and do not create Massed Formations. To avoid having a big stack of game counters in a hex, use the Massed Formation game counters that are included in the game counters images at the end of the book.
Once in a Massed Formation, Staffels roll and move the number of hexes based on the lowest Movement Allowance of any Staffel in the Massed Formation. Subsequent Movement is determined by reading the leftmost column of the Luftwaffe Movement Chart for those aircraft types in the Massed Formation. For example, if Staffels of Stukas, Do 17s, and Bf 110s join into a Massed Formation, the Movement Allowance would be one hex (from the Stukas) and their subsequent Movement would be determined based on the column pertaining to Stukas on the Luftwaffe Movement Chart, as Stukas are the leftmost column among the three types of aircraft in the Massed Formation of this example.
Likewise, RAF Squadrons also may join together in Massed Formations, but need never have the same facing. RAF Squadrons may roll together, but are not required to move together or remain in the Massed Formation for movement. Each Squadron moves at the player's discretion.
Pro Tip: While it is advantageous to ensure that Squadrons with few Vics aren't NO COMMS, think carefully about combining too many RAF Squadrons into a single, large Massed Formation. All of your Squadrons may end up rolling a NO COMMS result together. Likewise, it is possible to be caught in a Dogfight by a nearby Luftwaffe Fighter Staffel and held in place for several Rounds while the Luftwaffe Bomber Staffels you wish to intercept move past you to Bomb the Target.
5. Combat
5.1 Overview
There are four types of Combat – Dogfights, Light AAA, Heavy AAA, and Barrage Balloons. Combat between Squadrons and Staffels is considered a Dogfight. Barrage Balloons, Light AAA, Heavy AAA (Anti-Aircraft Artillery) are types of Combat that are resolved separately and individually against each Staffel in the hex. RAF Squadrons may be subjected to a "Friendly Fire" roll when entering a hex containing Light AAA or Heavy AAA. Barrage Balloons are Attacks against any Staffel that enters a hex when at SL or LL that contains Barrage Balloons, or Squadrons if in a Dogfight in that hex.
Dogfights only occur between Squadrons and Staffels located in the same hex, not in adjacent hexes. Combat from Light AAA, Heavy AAA, or Barrage Balloons occurs only in the hex that contains each and not in surrounding hexes. Each type of combat is detailed separately below. In these rules, the terms "shot down", lost, and "losses" are generally used interchangeably.
5.2 Dogfights
For RAF Squadrons, the number of Vics at the beginning of the Dogfight determines the number of dice to roll (D6), plus additional dice based on the presence of Aces and/or International Squadrons. Likewise, for each Luftwaffe Staffel, the number of Schwarms at the beginning of the Dogfight determines the number of dice to roll (plus Aces). Spitfires gain +1D6 when attacking Fighter Staffels.
The results of these dice rolls determine both whether a Squadron or Staffel has successfully inflicted hits and whether it successfully defended itself from any hits inflicted upon it or others in the Massed Formation. Consult the Aircraft Performance Tables to determine what dice results inflict hits or reduce them (Attack and Defend values) based on the specific type of aircraft in the Dogfight. For ease of reference, the Attack/Defend values appear on the game counters.
5.3 Example of a Dogfight
Two RAF Squadrons, one of Defiants with three Vics and the other of Hurricanes with four Vics (and lead by an Ace), engage a Luftwaffe Staffel of He 111 bombers that has four Schwarms.
- RAF Combat Dice:
- Defiants – 3 Vics = 3D6; on the roll of the dice, the results are: 3, 5, 6
- Hurricanes – 4 Vics +1 Ace = 5D6; on the roll of the dice, the results are: 1, 3, 2, 4, 5
- Luftwaffe Combat Dice:
- He 111s – 3 Schwarms = 4D6; on the roll of the dice, the results are: 2, 5, 6
- Based on the Aircraft Performance Tables, Attack/Defend values for each of these aircraft types are:
- Defiants – Attack 6; Defend 1-2
- Hurricanes – Attack 5-6; Defend 1
- He 111s – Attack 6; Defend 1-3
Interpreting Results – RAF:
- The Defiants rolled a 3, 5, and 6, resulting in one hit inflicted on the He 111s (based on the Attack value for Defiants, a 6 constitutes a hit).
- The Hurricanes rolled 1, 3, 2, 4, and 5, resulting in one hit inflicted on the He 111s (based on the Attack value for the Hurricanes of 5-6, thus a 5 or a 6 constitutes a hit).
- Thus, potentially up to two hits are inflicted on the Staffel.
- The Defiants rolled no 1s or 2s (their Defend value is 1-2).
- The Hurricanes rolled a single 1 (their Defend value is 1), so the number of any hits that might be inflicted by the He 111s on the RAF Squadrons will be reduced by one.
Interpreting Results – Luftwaffe:
- The Luftwaffe Staffel of He 111s rolled a 2, 4, 6, and 6, resulting in two hits (based on the Aircraft Performance Tables, a 6 constitutes a hit).
- The He 111s rolled a single 2 (the Defend value for He 111s is 1-3), so losses from the RAF Attack will be reduced by one hit.
Application:
- The RAF Squadrons inflicted two hits, but the He 111s reduced that by one, which results in the loss of one Schwarm of He 111s, which is marked off on the Mission Tracking Sheet from the four Schwarms in that Staffel. Having suffered a loss of at least one Schwarm in the Dogfight, the Staffel of He 111s will immediately Jettison Bombs (see 5.7 Jettisoning Bombs) and will be RTB – it moves only toward the bottom of the Sector Map in subsequent Rounds.
- The He 111s inflicted two hits on the RAF Squadrons, but the Hurricanes reduced that by one, so the RAF suffers the loss of one Vic. That loss is applied randomly by roll of the dice between the Defiants and the Hurricanes. A D6 is rolled (assigning 1-3 to the Defiants and 4-6 to the Hurricanes); a 2 is rolled so the loss of a Vic is attributed to the Defiants and is marked off on the Mission Tracking Sheet (note that this applies even though the Defiants didn't successfully roll a Defend result; the Hurricanes helped Defend them in this example).
Fuel/Ammo:
- One Fuel/Ammo Point is marked off on the Mission Tracking Sheet for each of the three units involved in the Dogfight – i.e., one each for: a) the RAF Squadron of Defiants, b) for the RAF Squadron of Hurricanes, and c) for the Luftwaffe Staffel of He 111s.
- If any of these units marked off their last Fuel/Ammo Point, in the subsequent Rounds, its Movement would be Return to Base, or RTB (see 5.6 Fuel/Ammo Points).
5.4 Scattered Formations
After a Dogfight, all Squadrons and Staffels involved are considered Scattered. In the subsequent Round, roll 1D6 each and consult the random facing chart at right to determine the facing of each Squadron and Staffel individually. The Squadrons and Staffels remain in the same hex where the Dogfight occurred but change facing and altitude to LL. In the next round, Staffels roll on the Luftwaffe Movement Chart and move separately. Subsequent Movement bring them into a new Massed Formation. Squadrons and Staffels that are RTB follow RTB rules.
[Random facing chart (hex diagram): 1 = top edge, 2 = upper right, 3 = lower right, 4 = bottom edge, 5 = lower left, 6 = upper left.]
5.5 Clarifications on Dogfight Rules
The RAF Player must declare which Staffel is being attacked by each Squadron before rolling any dice to determine if hits are inflicted. In other words, you cannot roll one Squadron at a time and see if you succeed and then have other Squadrons attack different Staffels. You must declare first for all Squadrons in a Dogfight which Luftwaffe Staffels they will engage with in that Round. You do not need to attack all Staffels in a hex. For instance, you could choose to focus all of your attacks on a Staffel of Bombers in hope that you get a hit and force them to Jettison their Bombs, rather than attacking the escorting Luftwaffe Fighters. Hits inflicted by the Luftwaffe against RAF Squadrons in Massed Formations are applied randomly to participating RAF Squadrons by a die roll (one roll for each hit).
When in Massed Formations, Squadrons and Staffels support one another's Defend rolls in Dogfights. Successful Defend rolls reduce the overall number of hits inflicted before the player determines which will suffer the losses – you cannot avoid a successful Luftwaffe Defend roll by assigning the hit to a different Staffel. For example, you may have chosen to attack a Staffel of Stukas defended by three Staffels of Bf 110s – the Defend rolls of the Bf 110s will reduce losses inflicted on the Stukas.
5.6 Fuel/Ammo Points
Each time a Squadron or Staffel participates in a Dogfight, at the end of the Dogfight, one Fuel/Ammo Point is marked off for it on the Mission Tracking Sheet (this applies to each Squadron and Staffel in the Dogfight). Consult the Aircraft Performance Chart for the number of Fuel/Ammo Points for each aircraft type during Set Up.
When a Squadron or Staffel has marked off its last Fuel/Ammo Point, it Returns to Base (see 5.12 Return to Base). When Luftwaffe Bomber Staffels mark off their last Fuel/Ammo Point, they will first Jettison Bombs and then Return to Base (see 5.7 Jettisoning Bombs).
5.7 Jettisoning Bombs
When a Luftwaffe Bomber Staffel loses one or more Schwarms in a Dogfight only (not from other forms of Combat such as Light AAA, Heavy AAA or Barrage Balloon), it Jettisons Bombs and Returns to Base (see 5.12 Return to Base). A Staffel that has Jettisoned Bombs can no longer Bomb.
Pro Tip: The RAF Player should engage as many different Bomber Staffels in Dogfights as possible to get them to Jettison Bombs before reaching the Target. Once a Bomber Staffel Jettisons its Bombs, it is best for the RAF Squadron to go after other Bomber Staffels that haven't Bombed.
5.8 Light AAA
Convoys, Radar Stations, and Airfield hexes contain Light AAA. If a Luftwaffe Staffel moves into any of these hexes, it suffers an Attack from Light AAA – a 1D6 Attack. If a 6 is rolled, you must roll again to resolve any potential losses based on the starting altitude that was determined during Set Up (see 2.2 Set Up Charts). Roll 1D6 – if a Staffel is at SL or LL, on a 4-6, it loses a Schwarm; if at ML, on a 5-6 it loses a Schwarm; and if at HL, on a 6, it loses a Schwarm. The RAF side accrues Victory Point(s) for each such loss. No Defend roll applies. Each Staffel entering the hex is attacked individually. Every RAF Squadron entering a hex containing Light AAA must roll for Friendly Fire (see 5.10 Friendly Fire). A table to resolve Light AAA is at the bottom of the Mission Tracking Sheet.
5.9 Heavy AAA
All Target and City hexes contain Heavy AAA. If a Luftwaffe Staffel moves into a City hex, it suffers a 2D6 attack from Heavy AAA (no defense roll applies for the Luftwaffe). For every 6 rolled, you must roll again to resolve any potential losses based on the starting altitude as determined in Set Up (see 2.2 Set Up Charts). Roll 2D6 – if a Staffel is at LL, on a 4-6, it loses a Schwarm; if at ML, on a 5-6 it loses a Schwarm; and if at HL, on a 6, it loses a Schwarm. The RAF side accrues Victory Points for each such loss. No Defend roll applies. Each Staffel entering the hex is attacked individually. Likewise, each RAF Squadron entering a hex containing Heavy AAA must roll for Friendly Fire (see 5.10 Friendly Fire). A table to resolve Heavy AAA is at the bottom of the Mission Tracking Sheet.
5.10 Friendly Fire
When an RAF Squadron (or an entire Massed Formation) enters a hex containing either Light AAA or Heavy AAA, except an Airfield hex, a Friendly Fire check is required. Roll 1D6; if a 6 results, the RAF Squadron (or entire Massed Formation) suffers an attack from Light AAA or Heavy AAA, as above. For any losses suffered, the Luftwaffe side accrues the related Victory Points. However, if a 1-5 is rolled, the Light AAA or Heavy AAA recognizes the RAF Squadron and does not fire upon it. When entering a Dogfight over a hex that contains either Light AAA or Heavy AAA, RAF Squadrons are always subjected to Friendly Fire (as if a 6 was rolled) – the Light AAA and Heavy AAA will attack all aircraft in the Dogfight. If already in a hex that contains either Light AAA or Heavy AAA (i.e., having moved into that hex in the previous Round), when a Luftwaffe Staffel also moves into the hex, a Dogfight commences and both the Luftwaffe Staffel and the RAF Squadron suffer an attack from Light AAA or Heavy AAA – i.e., the RAF Squadron will automatically suffer from Friendly Fire in that case.
5.11 Barrage Balloons
Barrage Balloons are in hexes where indicated on the Sector Map. Any Luftwaffe Staffels at SL or LL (as determined during Set Up) that move into a hex that contains a Barrage Balloon will suffer a 1D6 attack. If a 6 is rolled, roll an additional 1D6 – if a Staffel is at SL, on a roll of a 5-6, it loses a Schwarm; if a Staffel is LL, on a roll of a 6, it loses a Schwarm. No Defend roll applies. Any losses suffered are marked off on the Mission Tracking Sheet for the Squadron or Staffel; the opposing side then accrues the related Victory Points. RAF Squadrons are briefed daily on the locations of Barrage Balloons and know what altitudes to fly to avoid them. Thus, RAF Squadrons do not suffer losses to Barrage Balloons unless they engage in a Dogfight with a Luftwaffe Staffel that is at either SL or LL in a hex that contains Barrage Balloons – then potential RAF losses are resolved in the same manner.
5.12 Return to Base
A Return to Base (RTB) is possible for both Luftwaffe Staffels and RAF Squadrons, either after having expended its last Fuel/Ammo Point or, for Luftwaffe Staffels, additionally after having Bombed, Strafed, or Jettisoned Bombs. RTB Squadrons and Staffels may not enter Massed Formations.
For Luftwaffe Staffels, RTB means that in all subsequent Rounds, no dice are rolled to determine movement. The Staffel turns its facing to the bottom edge of the Sector Map and in all subsequent Rounds moves its full Movement Allowance only toward the bottom edge until it exits the bottom edge, whereupon it is removed from play. If only one Staffel is still in play (e.g., all others are either destroyed or RTB), it will automatically and immediately RTB so as not to be left alone over England. If the Sector Map includes land hexes of France (e.g., Mission 1, 2, 14), Luftwaffe Staffels execute a Return to Base by turning their facing and moving directly toward the nearest land hex in France. Once reaching a land hex in France, they turn facing to the bottom edge of the Sector Map and move in that direction until they exit the bottom edge and are removed from play.
For RAF Squadrons, RTB applies only when the Squadron marks off its last Fuel/Ammo Point. When RTB, it no longer rolls dice to determine options on the RAF Communications Chart and in all subsequent Rounds, faces and moves directly toward its originating airfield (as determined during Set Up and recorded on the Mission Tracking Sheet). It must avoid Dogfights unless all potential paths to its base are blocked by Luftwaffe Staffels. Otherwise it will take the shortest path without deviation (if two or more routes are equidistant, you may select the route). When the RAF Squadron arrives in the hex of its originating airfield, it is removed from play (it has landed).
Even when RTB, a Staffel may inadvertently enter a Dogfight by entering a hex that contains an RAF Squadron, even if the RAF Squadron is RTB. Squadrons and Staffels that have exhausted all Fuel/Ammo Points do not suffer any penalties in Dogfights, i.e., such Dogfights are resolved normally.
Pro Tip: If you rolled a MOVE / DO NOT ENGAGE and yet still wish to enter a Dogfight with a Luftwaffe Staffel that is RTB, move your RAF Squadron(s) into the path the Luftwaffe Staffel will take toward the bottom edge of the Sector Map. Then in the upcoming Round, the Staffel will move into your hex and enter a Dogfight anyway, though one Round later than you may have hoped.
6. Bombing and Strafing
6.1 Overview
Bombing and Strafing are conducted during Phase 1. When a Luftwaffe Bomber Staffel enters a Target hex (except when RTB), movement ceases and it conducts Bombing. Likewise, when a Luftwaffe Fighter Staffel (with at least one Fuel/Ammo Point remaining) enters a Target, Airfield, or Radar Station hex, all movement ceases and it will conduct Strafing. After conducting Bombing or Strafing, the Staffel will RTB (see 5.12 Return to Base). Before Bombing or Strafing, first resolve any losses from Light AAA, Heavy AAA, and Barrage Balloons.
6.2 Bombing
Bombing takes place only in designated Target hexes. Bombing is resolved during Phase 1 by rolling the number of D6 based on the number of Schwarms in the Staffel that is conducting Bombing, plus 1D6 for every Luftwaffe Ace present (consider these to be "ace bombers"). Consult the Aircraft Performance Chart to determine the Attack value on the dice needed to score a Bombing hit as well as the number of Victory Points awarded to the Luftwaffe side for each Bombing hit scored. No Defend roll applies. After Bombing, Luftwaffe Staffels Return to Base (see 5.12 Return to Base). When escorted by Fighter Staffels, the Fighters are not also RTB, but will move separately afterward.
After bombing, altitudes remain the same except for Stukas, which are changed to LL.
Example 1: A Luftwaffe Staffel of He 111s with four Schwarms rolls 4D6 to determine Bombing results. Based on the Aircraft Performance Chart, He 111s score Bombing hits on rolls of 4s, 5s, and 6s. Four (4) Victory Points are accrued by the Luftwaffe side for each successful Bombing hit from an He 111. Thus, on a roll of 2, 3, 5, and 6, the Target would suffer two successful Bombing hits, resulting in eight (8) Victory Points awarded to the Luftwaffe side. Results from Bombing and any Victory Points awarded are recorded immediately on the Mission Tracking Sheet.
Example 2: A Luftwaffe Staffel of Stukas with four Schwarms and an Ace would roll 5D6 to determine Bombing results. Based on the Aircraft Performance Chart, on the row pertaining to Stukas, results of 2s, 3s, 4s, 5s, and 6s are considered hits – however, the Stukas only earn one Victory Point per hit.
Note that Stukas in a Massed Formation with other Bombers that pass over a Target that is limited, "Stuka Target Only" will Bomb in that hex, while the Massed Formation continues to move onward.
Historically, Stukas were used in dive bombing, which was very accurate. However, Stukas only dropped one bomb each. Aircraft like Do 17s, Ju 88s, and He 111s dropped 6 to 8 bombs each on the target, so the number of Victory Points accrued per hit varies based on the type of aircraft. Note that while all Luftwaffe bombers were designed to perform dive bombing, in practice during the Battle of Britain, only the Stukas regularly did so; hence only Stukas enjoy this high hit probability.
6.3 Strafing
When a Luftwaffe Fighter Staffel enters an Airfield, Radar Station, or Target hex, movement ceases and it conducts Strafing. Strafing is resolved in Phase 1, similar to the rules of Bombing. This applies except when the Luftwaffe Fighter Staffel is in a Massed Formation with one or more Luftwaffe Bomber Staffels (see 4.4 Massed Formations), whereupon it will not Strafe, e.g., it continues onward as a Bomber escort. When Strafing, the Luftwaffe Fighter Staffel changes altitude to LL and remains at that altitude level thereafter – make note of this on the Mission Tracking Sheet.
When Strafing, the results are determined by rolling a number of D6 based on the number of Schwarms in the hex, plus 1D6 for every Luftwaffe Ace present. Consult the Aircraft Performance Chart to determine the Attack value on the dice required to roll a Strafing hit and the number of Victory Points awarded to the Luftwaffe side for each Strafing hit scored. No Defend roll applies. After a Strafing attack, Luftwaffe Staffels mark off all remaining Fuel/Ammo Points (see 5.6 Fuel/Ammo Points) and are RTB (see 5.12 Return to Base). They may only Strafe once per Mission.
7. Victory Conditions
7.1 Overview
Victory Points (VPs) are awarded to the RAF side for Schwarms shot down (lost to Luftwaffe) in Dogfights. For the Luftwaffe side, VPs are awarded for losses of Vics among RAF Squadrons, and for Bombing and/or Strafing. The number of VPs awarded is determined based on the chart below. Additional VPs may be awarded based on the Victory Conditions for each Mission.
Victory Points Awarded
| Type of Award | Luftwaffe Fighter Staffels |
|---|---|
| Bombing or Strafing | Consult Aircraft Performance Charts based on aircraft type |
| Shooting Down a Vic or Staffel | 2 VP/Loss of an opposing Vic or Staffel, if pilots are not rescued; 1 VP/Loss of a Vic or Staffel, if pilots are rescued |
7.2 Rescuing Pilots
If a Luftwaffe Schwarm is lost over England, the pilots are considered lost (not rescued). If an RAF Squadron is lost over England, the pilots are considered automatically to have been rescued. Conversely, if a Luftwaffe Schwarm is lost over France, the pilots are considered automatically to have been rescued. If an RAF Squadron is lost over France, the pilots are considered automatically to have been lost (not rescued). When Vics or Schwarms are lost over sea hexes, a die roll determines if its pilots are rescued. Each Vic or Schwarm lost is rolled separately.
For RAF Vics lost over sea hexes, roll 2D6 minus one for each hex counted from the nearest land hex of England (if any portion of the hex includes land, even the smallest bit, it is considered a land hex). If a 5+ is rolled, the RAF pilots are rescued. If Luftwaffe Schwarms are lost over sea hexes, to determine if the pilots are rescued, roll 1D6. A result of 1-3 means the pilots are rescued and 4-6 means the pilots are lost.
Example: An RAF Vic is lost three hexes from land – 2D6 are rolled with a modifier of -3 applied. A dice roll of 5 and 2 equals 7, minus 3, which sums to 4. Since the dice results are less than 5+, the pilots are lost and the Luftwaffe side would be awarded 2 Victory Points for the loss of that Vic.
Pro Tip: When engaging Luftwaffe Staffels over sea hexes, it is best to remain close to England to increase your chances of rescuing your pilots if shot down. The odds of rescuing pilots shot down more than three hexes from the shores of England are generally low.
7.3 Victory Conditions
Each Mission has unique Victory Conditions indicated on the Mission Tables page. Generally, Victory Point totals for each side determine whether the RAF or Luftwaffe has won the Mission. A few Missions have special requirements – e.g., "The RAF side wins if both Targets are not Bombed." The side with the most Victory Points may not necessarily win the Mission if the Victory Conditions specify otherwise. When playing the Campaign, log your results on the Campaign Tracking Sheet and apply any special modifications during the Set Up for the subsequent Mission(s).
7.4 Campaign Victory Conditions
After each Mission, record your results on the Campaign Tracking Sheet. Once you have completed all fifteen Missions, you can determine the outcome of the Battle of Britain by playing the Campaign Game. In general, in the Campaign Game your results in each Mission are tallied by checking off a series of checkboxes in the War Report section of the Campaign. The War Report affects the outcome of the Campaign.
To determine the outcome of the Campaign, a series of dice rolls are made based on the War Report to determine how the War Cabinet votes and then a second series of dice rolls are made to determine how Parliament votes. The results of the vote will determine whether England will fight on or surrender. Therefore, your performance in each Mission ultimately helps determine the victor of the Battle of Britain, the future of England, and ultimate outcome of the Second World War.
Be warned, as always in these matters, politics play a role! Though really hard to "achieve", you could conceivably win all fifteen Missions and yet roll so poorly during the voting that you still lose the Battle of Britain anyway. In other words, "It ain't over, 'til its over!"
Good luck, old chap! Piece of cake!
Example of Play
[Figure: Sector Map Overview of Southeast England – an overview of southern England and northern France and the English Channel, showing RAF and Luftwaffe airfields and notable cities in each. RAF Sectors are labeled in blue. Tangmere, Biggin Hill, Kenley, and Hornchurch were the most important sectors for the defence of England. A variation of this map overlaid with hexes will be available in the Adlertag! Megagame Expansion.]
Gameplay Example – Overview
A simplified Gameplay Example helps teach the rules. The Sector Map includes a single Target – a Convoy. Two Luftwaffe Staffels, one with Dornier Do 17Z "Flying Pencil" bombers and the other with Bf 109E "Emil" fighters, will attack the Target. A single RAF Squadron of Hawker Hurricane Mk I fighters will defend. Note that all three of these types of aircraft have a Movement Allowance of 3. Thus, each may move up to three hexes on the Sector Map.
Gameplay Example – Set Up
For this Example, the Luftwaffe Movement Chart and RAF Communications Chart are provided below.
Luftwaffe Movement Chart (example)
| D6 | Do 17 | Bf 109E |
|---|---|---|
| 1 | TURN LEFT/RIGHT | TURN LEFT/RIGHT |
| 2 | TURN FROM RAF | TURN TO TARGET |
| 3 | TURN FROM RAF | TURN TO ESCORT |
| 4 | TURN TO TARGET | TURN TO RAF |
| 5 | TURN TO TARGET | TURN TO RAF |
| 6 | TURN TO TARGET | TURN TO RAF |
RAF Communications Chart (example) (Roll 1D6 per Squadron + Modifiers; a 1 is always NO COMMS, despite Modifiers)
| D6 + Mods | Spitfire | Hurricane | Defiant |
|---|---|---|---|
| 1-3 | NO COMMS | NO COMMS | MOVE / DO NOT ENGAGE |
| 4 | MOVE / DO NOT ENGAGE | MOVE / DO NOT ENGAGE | MOVE & ENGAGE |
| 5+ | MOVE & ENGAGE | MOVE & ENGAGE | MOVE & ENGAGE |
The Set Up at the start of this Gameplay Example is:
- The Target, a Convoy, is marked in white-outlined red wedges in the hex corners.
- For purposes of this Gameplay Example, the RAF Squadron of Hurricanes has four (4) Vics and each of the two Luftwaffe Staffels has four (4) Schwarms as well.
- Tactically, the player would want to engage the Do 17s first in hopes of inflicting damage and causing them to Jettison Bombs before reaching the Target.
- To recap, the Sequence of Play is as follows:
- Luftwaffe Actions
- RAF Actions
- Resolve Dogfights
- End of Round Bookkeeping
Gameplay Example – Round 1
Round 1 begins; the first Phase is Luftwaffe movement:
Roll 1D6 for movement of the Do 17 Staffel – a 4 is rolled, which yields TURN TO TARGET. The Do 17 Staffel is already facing the Target, so it moves three hexes directly toward the Target.
Roll 1D6 for movement of Bf 109E Staffel – a 2 is rolled, which also yields TURN TO TARGET. The Bf 109E Staffel could move either straight ahead or ends in the same hex as the Do 17 Staffel after it finishes its move. As the two are equidistant from the Target, a die is rolled; on a 1-3, it moves straight ahead, on 4-6, it ends in the hex that contains the Do 17; a 3 is rolled so it moves straight ahead three hexes. Note that a Massed Formation would have formed had the Bf 109s moved into the hex of the Do 17s.
It appears the Do 17 Staffel is well-positioned to bomb the Target during the next Round. The RAF Hurricane Squadron, with a Movement Allowance of 3, cannot engage this Round.
The second Phase is RAF movement:
Roll 1D6 and consult the RAF Communications Chart – a roll of a 1 would automatically yield a NO COMMS, but a 4 is rolled. Since there are four Vics, this equates to 4+4=8, which yields MOVE & ENGAGE.
Since the Do 17 Staffel is more than three hexes away, all that can be done is to position the Squadron in the path of the Target so that in the next Round the Do 17 Staffel, if it rolls a TURN TO TARGET, will enter the hex with the Hurricane Squadron, stop, and enter a Dogfight.
Wisely, the facing of the Hurricane Squadron is changed to the bottom of the Sector Map so that if the Luftwaffe Do 17 Staffel rolls a TURN FROM RAF next Round and if the RAF player subsequently rolls a 1 and gets NO COMMS, at least the Hurricanes will chase the Do 17s.
The Third Phase is to Resolve Dogfights – there are none yet.
The Fourth Phase is the End of Round Bookkeeping. None required.
Gameplay Example – Round 2
Round 2 begins; the first Phase is Luftwaffe movement:
Roll 1D6 for movement of the Do 17 Staffel – a 1 is rolled, which yields TURN LEFT/RIGHT. A second die roll yields LEFT, so the Do 17 Staffel turns 60 degrees to the left and moves three hexes.
Roll 1D6 for movement of the Bf 109E Staffel – a 5 is rolled, which yields TURN TO RAF. Therefore, the Bf 109E Staffel turns its facing 60 degrees left and enters the hex containing the Hurricane Squadron. It stops there, despite having a Movement Allowance of three, because it has entered a Dogfight.
The second Phase is RAF movement:
The RAF Squadron is in a Dogfight, from which it cannot escape by simply moving away. Therefore, no roll is needed on the RAF Communications Chart; no movement is possible for the RAF Squadron.
The third Phase is to Resolve Dogfights.
Four Vics of Hurricanes are engaged with four Schwarms of Bf 109Es. There are no Aces. The Hurricane Squadron is not an International Squadron, so there are no Modifiers. Each rolls 4D6 to determine its Attack and Defend results.
The Hurricanes roll a 2, 5, 6, and 6. That type of aircraft has an Attack Value of 5, so there are three (3) hits scored. It has a Defend Value of 1, so it has no successful Defend rolls, therefore it will not reduce any hits the Bf 109Es inflict on it.
The Bf 109Es roll 1, 4, 4, and 6. That type of aircraft has an Attack Value of 5, so one hit is scored. It has a Defend Value of 1, so it has one successful Defend roll, reducing the number of hits inflicted on it by 1.
The Hurricanes mark off one Vic lost, leaving three Vics remaining; the Bf 109Es mark off two Schwarms lost, with two Schwarms remaining.
After the Dogfight, in the next Round, random facing rolls are made. We'll roll early – the Hurricanes roll a 4, toward the bottom of the Sector Map; the Bf 109Es roll a 5 to face to the bottom right.
The fourth Phase is End of Round Bookkeeping – the Hurricanes and Bf 109s each mark off one Fuel/Ammo Point as expended from the Dogfight. As well, VPs would be awarded and dice rolls would be made during gameplay to determine if any pilots were rescued.
Gameplay Example – Round 3
Round 3 begins; the first Phase is Luftwaffe movement:
The Do 17 Staffel rolls 1D6 and gets a 2, which on the Luftwaffe Movement Chart yields a TURN FROM RAF. The facing of the Staffel is already the best direction to move away from the closest RAF Squadron within three hexes, which is the Hurricanes, but it is on the edge of the Sector Map. Thus, it turns 60 degrees to the right, moves one hex, encounters another edge (it is not directly into the corner of the Sector Map in this case), so it turns 60 degrees to the right again, and moves one hex, encounters the edge of the Sector Map once more and turns 60 degrees and moves its third hex of movement.
The Bf 109E Staffel rolls a 4, which yields TURN TO RAF. Since it is already in the same hex with the Hurricanes, it engages immediately in another Dogfight, trapping it in place.
The second Phase is RAF movement, but once again, the RAF Squadron is engaged in a Dogfight and therefore cannot move. No movement roll is made.
The third Phase is to Resolve Dogfights. Note that while the Hurricanes and Bf 109Es are in a pitched fight, the Do 17 bombers are closing in on the Target.
Three Vics of Hurricanes engage two Schwarms of Bf 109Es with no Modifiers. The RAF rolls 3D6 and the Luftwaffe rolls 2D6 to determine its Attack and Defend results.
The Hurricanes roll 6, 3, and 2 – one hit, no successful Defend rolls.
The Bf 109Es roll 1 and 6 – one hit and one successful Defend roll.
Thus, the Hurricanes mark off one Vic lost, so it has two Vics remaining, while the Bf 109Es avoided any additional loss due to their successful Defend roll.
In the next Round, a Random Facing roll will be made for the RAF – 6 – but since the Bf 109s will mark off their second and last Fuel/Ammo Point, it will face the bottom of the Sector Map.
The fourth Phase is End of Round Bookkeeping – the Hurricanes and Bf 109Es each mark off one Fuel/Ammo Point as expended from the Dogfight. The Bf 109Es have no more Fuel/Ammo Points remaining and are RTB and must now move only toward the bottom of Sector Map until they exit the bottom edge and are removed from play. VPs are awarded to the Luftwaffe side based on the Vic shot down. Rolls are made to determine if the pilots were rescued.
Gameplay Example – Round 4
Round 4 begins; the first Phase is Luftwaffe movement:
The Do 17s roll a 5, which yields TURN TO TARGET. Thus, the Do 17 Staffel moves one hex in the direction of its facing, directly into the Target hex. All movement ceases and Bombing commences, which is resolved in this Phase.
First, however, the Convoy has Light AAA to resolve – a 6 is rolled! Another roll is required – yet another 6 (for altitude level)! The Do 17s take a hit; no Defend roll applies. Only three Schwarms will bomb. The additional Schwarm downed by AAA adds more VP to the RAF side.
The counter reads "b4/3", which means that it scores hits on a 4, 5, or 6 (note that unlike in Mission 1 of this game, in this Gameplay Example there is no Special Rule in force that reduces the Do 17 Convoy hits to a 6 only). A roll of a 2, 5, and 6 means that two hits are made! Since the Do 17s score 3 VPs/Hit, 6 VPs are awarded and logged for the Luftwaffe on the Mission Tracking Sheet.
The second Phase is RAF movement:
The Hurricanes roll a 3 – with two Vics left, that is 3+2=5, which yields MOVE & ENGAGE; note that if they had rolled a 2, they would have gotten a MOVE/DO NOT ENGAGE.
The Hurricanes move into the hex containing the Do 17s; a Dogfight commences. First, however, since they are entering into a Dogfight over a Convoy, they take an Attack from the Light AAA, which fires on everyone during Dogfights. A 4 is rolled, so no hits are scored on the Hurricanes by the Light AAA.
The third Phase of the Round is to Resolve Dogfights.
Two Vics of Hurricanes engage three Schwarms of Do 17s with no Modifiers. The RAF rolls 2D6 and the Luftwaffe rolls 3D6 to determine its Attack and Defend results.
The Hurricanes roll 6 and 5 – two hits and no successful Defend rolls.
The Do 17s roll 1, 5, and 5; since their Attack Value is 6, they score no hits; however, the 1 is a successful Defend roll. Thus, the Hurricanes lose no Vics and the Do 17s take one hit (the second hit is eliminated due to the successful Defend roll). Two Do 17 Schwarms remain.
After the Dogfight, a Random Facing roll would be made; however, the RAF has marked off its third and final Fuel/Ammo Point, so it will point toward its airfield. Likewise, the Do 17s have completed Bombing, so they are RTB and will face only toward the bottom of the Sector Map.
From this point onward, there is no reason to continue playing – had there been another RAF Squadron in play to intercept the bombers as they headed toward the bottom edge of the Sector Map, gameplay would have continued since the RAF might have scored additional hits on the Do 17s. All of the losses were suffered over sea hexes, so Pilot Rescue rolls would have been made. For simplicity, let's say that the RAF successfully rescued pilots from only one of the two Vics lost. Likewise, the Luftwaffe rescued pilots from only two of the Schwarms lost.
Thus, the following would be the end of Mission Victory Point tally:
Luftwaffe VP Totals:
- Luftwaffe Successful Bombing: 2 hits = 3 VPs x 2 = 6 VPs to Luftwaffe
- RAF Losses of Vics where Pilots were Not Rescued: 1 Vic lost = 2 VPs to Luftwaffe
- RAF Losses of Vics with Pilots Rescued: 1 Vic lost = 1 VP to Luftwaffe
- Total Luftwaffe VPs: 9
RAF VP Totals:
- Luftwaffe Losses of Schwarms where Pilots were Not Rescued: 2 VPs x 3 = 6 VPs to RAF
- Luftwaffe Losses of Schwarms with Pilots Rescued: 1 VPs x 2 = 2 VPs to RAF
- Total RAF VPs: 8
Results: Luftwaffe 9 vs. RAF 8 – thus, a Luftwaffe Victory.
Is this was being played as part of the Campaign Game, you would enter the results on the Campaign Tracking Sheet.
History and Missions
[Photo caption: An aircraft spotter with the Royal Observer Corps on the roof of a building in London during the height of the Battle of Britain, with St. Paul's Cathedral in the background. Spotters like this supplemented reports from the Chain Home radar network by providing accurate counts of the number of Luftwaffe aircraft in each raid. They were deployed across all of southern England.]
Missions – Phase 1
Overview
The Battle of Britain began on 10 July 1940 by order from Berlin. While historians divide the Battle into either three, four, or five phases, in this game, five phases are defined with date ranges varying slightly from the popular view (based on research conducted by Historic Wings). In this first phase, the Luftwaffe conducted heavy raids on Allied shipping convoys in the English Channel and Thames Estuary in hopes of reducing the amount of supplies coming into England in order to delay the re-equipping of the British Army after its calamitous withdrawal from Dunkirk. As the evacuation at Dunkirk took place from 26 May to 4 June, RAF Fighter Command had only a month to organize itself for the defense of Great Britain before the Battle of Britain began.
While historically there were battles almost every day during this period (weather permitting), only three missions are presented in each phase in Tally-Ho! These are representative of the most important events that took place in each phase. The history of the specific day of each Mission is detailed below for your reference and historic interest. This helps define the context of each Mission.
Phase 1 of the Battle of Britain spanned from 10 July to 11 August.
Mission 1 Summary – The Battle of Britain Begins!
Wednesday, 10 July 1940 – On 10 July 1940, at 1325 hours, the Battle of Britain began with a concentrated Luftwaffe attack on the Allied convoy CW3, codenamed "BREAD", which was comprised of 25 small steamer ships. At the time, the convoy was heading west after rounding North Foreland in the Channel. It was bound for the Dover Straits.
Historically, the convoy was spotted that morning by a single Do 17Z reconnaissance plane from Obst Johannes Fink's KG 2. The Luftwaffe attacked with I/KG 2 and III/KG 2, which put 27 Dornier Do 17Z "Flying Pencil" bombers into the air from two airfields near Cambrai. These were escorted by I/JG 3 and III/JG 51, equipped with Bf 109E "Emil" fighters. Two Staffels flew close escort to the sides of the bombers, while two more Staffels provided top cover. A formation of Bf 110C "Zerstörer" twin-engine fighters from III/ZG 26 flew ahead as a decoy to lure the RAF to commit its entire force there. In all, the Luftwaffe launched approximately 70 aircraft.
The Swingate Chain Home radar station near Dover detected the incoming Luftwaffe raid at 1320 hours when it was forming up over Calais. The interception was assigned to No. 11 Group, which scrambled Hurricanes from RAF No. 56 and RAF No. 111 Squadrons, and Spitfires from RAF No. 64 and RAF No. 74 Squadrons. In all, the RAF launched 32 fighters. The resulting air battle took place directly over the convoy. The Dornier Do-17s dropped 150 bombs on the ships but scored only one hit, which sank the Dutch steamer Bill S (466 gross tonnage weight).
The Kommandeur of III/KG 2, Obstlt Werner Kreipe, filed a report after the mission, stating: "The Channel was bathed in brilliant sunshine. A light haze hung over the English coast, and there, far below us, was the convoy like so many toy ships with wispy wakes fanning out behind. As soon as we were observed, the ships dispersed, the merchantmen manoeuvring [sic] violently and the escorting warships moving out at full speed. Flak shells peppered the sky. We made our first bomb run, and fountains leapt up around the ships. By now the fighter squadrons of the RAF had joined in, and the sky was a twisting, turning mêlée of fighters."
Both sides over-claimed success against the other that day, a common problem throughout the Second World War. That day for the Luftwaffe, Major Johann Schalk's Bf 110C "Zerstörer" fighters claimed 14 RAF planes shot down, while Luftwaffe ace Hptm Johannes 'Hannes' Trautloft's III./JG 51 claimed another seven Spitfires shot down. Actual losses for the RAF were none, though four Hurricanes and three Spitfires were damaged.
Meanwhile, the RAF claimed three Do 17Zs, six Bf 110Cs, and a single Bf 109E shot down. Actual Luftwaffe losses were just two Do 17Zs, plus another three Bf 110Cs. In addition, two Bf 109Es were damaged but returned to France and landed safely. The aircraft were repaired and returned to action.
Mission 2 Summary – Convoy Raid off the White Cliffs of Dover
Sunday, 14 July 1940 – In fair weather that afternoon, the Luftwaffe launched a raid against an Allied convoy that had been spotted by its morning reconnaissance flights off of Eastbourne. To achieve greater accuracy against the convoy, the Luftwaffe decided to employ Junkers Ju 87 Stuka dive bombers. The Allied convoy was codenamed "BOOTY".
Historically, the Luftwaffe's Stukas of IV/LG 1 were closely escorted by Messerschmitt Bf 109E "Emil" fighters of III/JG 3 and II/JG 51. As the Luftwaffe approached the convoy, Fighter Command scrambled Hurricanes from RAF No. 151 and RAF No. 615 Squadrons, as well as Spitfires from RAF No. 61 Squadron. Once again, the interception took place directly over the convoy. One ship in the convoy, SS Island Queen (779 gross tonnage weight), was sunk. Several others were damaged.
Losses for the Luftwaffe were one Stuka and one Bf 109E, plus one Bf 109E badly damaged, which crash-landed at Wissant on the northern French coast. The Luftwaffe pilot died as a result of his injuries. For the RAF, a single Hurricane was lost, that of P/O M.R. Mudie, who baled out and was rescued by the Royal Navy. Nonetheless, he died of his wounds the following day. Famously, the air battle off of the White Cliffs of Dover was reported live by the BBC's reporter Charles Gardner, whose epic running commentary is available on YouTube: https://youtu.be/0iSIIquqOWo
That evening on BBC Radio, Prime Minister Winston Churchill addressed the nation: "Here, girt about by the seas and oceans where the Navy reigns; shielded from above by the prowess and devotion of our airmen – we await undismayed the impending assault. Perhaps it will come tonight. Perhaps it will come next week. Perhaps it will never come. We must show ourselves equally capable of meeting a sudden violent shock or – what is perhaps a harder test – a prolonged vigil. But be the ordeal sharp or long, or both, we shall seek no terms, we shall tolerate no parley; we may show mercy – we shall ask for none."
Mission 3 Summary – Fighter Sweep off the Isle of Wight
Friday, 26 July 1940 – With heavy clouds and intermittent rain resulting in poor visibility, at around 0930 hours, the English Chain Home radar stations reported multiple incoming Luftwaffe formations off of the Isle of Wight and Portsmouth. The Luftwaffe was flying a fighter sweep.
The scramble order was issued at about 0945 hours. RAF No. 601 Squadron launched six Hurricanes to intercept the first inbound Luftwaffe planes. These turned out to be a formation of fighters, Bf 109E "Emil" fighters from III/JG 27. Despite poor visibility and rain, the RAF fighters were ably vectored to the Luftwaffe planes and engaged them off the coast of the Isle of Wight.
Later that morning, RAF No. 238 Squadron scrambled twelve Hurricanes to engage a larger force of incoming Messerschmitt Bf 109E "Emil" fighters from 2./JG 27. Once again, with guidance from the Chain Home radar network, Fighter Command was able to vector the Hawker Hurricanes into position to intercept the Luftwaffe fighters and engage them, this time off the coast of Portsmouth.
Actual German losses for the day were five aircraft and nine airmen lost. Meanwhile, the RAF lost only one aircraft, Hurricane P2753, of RAF No. 601 Squadron. Its pilot, P/O P. Chalenor Lindsay, was reported as missing. His squadron mates had observed him being shot down by a Bf 109E over the English Channel and had seen his plane crash into the sea. P/O Lindsay had been posted to RAF No. 601 Squadron only three months earlier (on 20 April) and had claimed a Bf 110C "Zerstörer" destroyed on 11 July. Research into Luftwaffe records shows that he was likely shot down by Obslt Dobislav of III/JG27 at a location approximately two miles south of St. Catherine's Point. P/O Lindsey's body was recovered six weeks later when it washed ashore on 21 September at Pointe de la Creche on the French coast. He was buried in Wimereux Communal Cemetery. At the time of his death, he was just 20 years old.
Mission 1 – The Battle of Britain Begins!
Wednesday, 10 July 1940
A concentrated Luftwaffe attack on an Allied convoy at sea (convoy codename "BREAD") as it rounds North Foreland in the English Channel; the Luftwaffe attempts convoy bombing with Do 17s.
[Sector Map for Mission 1 – image, not transcribed.]
Mission 1 Set Up Charts
RAF Squadron Set Up Chart – Roll 3x
| D6 | Aircraft Type |
|---|---|
| 1 | Boulton Paul Defiant Mk I "Daffy" |
| 2 | Hawker Hurricane Mk I |
| 3 | Hawker Hurricane Mk I |
| 4 | Hawker Hurricane Mk I |
| 5 | Supermarine Spitfire Mk I |
| 6 | Supermarine Spitfire Mk I |
Squadron Strength – Roll 1D6 per Squadron: 1-4 = 4xVics, 5 = 3xVics, 6 = 2xVics.
Luftwaffe Staffel Set Up Chart – Roll 4x
| D6 | Aircraft Type |
|---|---|
| 1 | Dornier Do 17 "Flying Pencil" |
| 2 | Dornier Do 17 "Flying Pencil" |
| 3 | Dornier Do 17 "Flying Pencil" |
| 4 | Messerschmitt Bf 109E "Emil" |
| 5 | Messerschmitt Bf 109E "Emil" |
| 6 | Messerschmitt Bf 109E "Emil" with Ace |
Staffel Strength – Roll 1D6 per Staffel: 1-5 = 4xSchwarms, 6 = 3xSchwarms.
Starting Altitudes Set Up Table for Luftwaffe Staffels
| Luftwaffe Bomber Staffels | Altitude (D6) | Luftwaffe Fighter Staffels | Altitude (D6) |
|---|---|---|---|
| Do 17 | 1=SL, 2=LL, 3-4=ML, 5-6=HL | Bf 109E | 1-2=SL, 3=LL, 4=ML, 5-6=HL |
Mission 1 Gameplay Charts
Luftwaffe Movement Chart
| D6 | Do 17 | Bf 109E |
|---|---|---|
| 1 | TURN LEFT/RIGHT | TURN LEFT/RIGHT |
| 2 | TURN FROM RAF | TURN TO TARGET |
| 3 | TURN FROM RAF | TURN TO ESCORT |
| 4 | TURN TO TARGET | TURN TO RAF |
| 5 | TURN TO TARGET | TURN TO RAF |
| 6 | TURN TO TARGET | TURN TO RAF |
RAF Communications Chart (Roll 1D6 per Squadron + Modifiers; a 1 is always NO COMMS, despite Modifiers)
| D6 + Mods | Spitfire | Hurricane | Defiant |
|---|---|---|---|
| 1-3 | NO COMMS | NO COMMS | MOVE / DO NOT ENGAGE |
| 4 | MOVE / DO NOT ENGAGE | MOVE / DO NOT ENGAGE | MOVE & ENGAGE |
| 5+ | MOVE & ENGAGE | MOVE & ENGAGE | MOVE & ENGAGE |
Special Rules: Do 17 that Bomb CONVOYS need a 6 on the Attack dice to score a hit.
Mission 1 Victory Conditions
The side that scores the most Victory Points wins.
- RAF Special Mission: Ensure ZERO (0) HITS are scored on CONVOYS (+5 VPs)
- Luftwaffe Special Mission: Score at least THREE (3) HITS on BOTH CONVOYS (+2 VPs)
Mission 2 – Convoy Raid off the White Cliffs of Dover
Sunday, 14 July 1940
The BBC reports live by radio from atop the White Cliffs of Dover as the Luftwaffe attacks a large Allied convoy (convoy codename "BOOTY") using Stuka dive bombers to achieve greater accuracy.
[Sector Map for Mission 2 – image, not transcribed.]
Mission 2 Set Up Charts
RAF Squadron Set Up Chart – Roll 4x
| D6 | Aircraft Type |
|---|---|
| 1 | Boulton Paul Defiant Mk I "Daffy" |
| 2 | Hawker Hurricane Mk I |
| 3 | Hawker Hurricane Mk I |
| 4 | Hawker Hurricane Mk I |
| 5 | Supermarine Spitfire Mk I |
| 6 | Supermarine Spitfire Mk I |
Squadron Strength – Roll 1D6 per Squadron: 1-4 = 4xVics, 5 = 3xVics, 6 = 2xVics. * If the Luftwaffe successfully downed more than four (4) Vics in Mission 1, reduce the number of Squadrons in Set Up by ONE (1).
Luftwaffe Staffel Set Up Chart – Roll 6x
| D6 | Aircraft Type |
|---|---|
| 1 | Junkers Ju 87 Stuka |
| 2 | Junkers Ju 87 Stuka |
| 3 | Junkers Ju 87 Stuka |
| 4 | Messerschmitt Bf 110C "Zerstörer" |
| 5 | Messerschmitt Bf 109E "Emil" |
| 6 | Messerschmitt Bf 109E "Emil" with Ace |
Staffel Strength – Roll 1D6 per Staffel: 1-5 = 4xSchwarms, 6 = 3xSchwarms. * If the RAF successfully downed more than six (6) Schwarms in Mission 1, reduce the number of Staffels in Set Up by ONE (1).
Starting Altitudes Set Up Table for Luftwaffe Staffels
| Luftwaffe Bomber Staffels | Altitude (D6) | Luftwaffe Fighter Staffels | Altitude (D6) |
|---|---|---|---|
| Stuka | 1-3=SL, 4-5=LL, 6=ML | Bf 109E | 1-3=SL, 4=LL, 5=ML, 6=HL |
| Bf 110C | 1-2=LL, 3-5=ML, 6=HL |
Mission 2 Gameplay Charts
Luftwaffe Movement Chart
| D6 | Stuka | Bf 110C | Bf 109E |
|---|---|---|---|
| 1 | TURN LEFT/RIGHT | TURN LEFT/RIGHT | TURN LEFT/RIGHT |
| 2 | TURN FROM RAF | TURN TO TARGET | TURN TO TARGET |
| 3 | TURN TO TARGET | TURN TO ESCORT | TURN TO ESCORT |
| 4 | TURN TO TARGET | TURN TO ESCORT | TURN TO RAF |
| 5 | TURN TO TARGET | TURN TO RAF | TURN TO RAF |
| 6 | TURN TO TARGET | TURN TO RAF | TURN TO RAF |
RAF Communications Chart (Roll 1D6 per Squadron + Modifiers; a 1 is always NO COMMS, despite Modifiers)
| D6 + Mods | Spitfire | Hurricane | Defiant |
|---|---|---|---|
| 1-3 | NO COMMS | NO COMMS | MOVE / DO NOT ENGAGE |
| 4 | MOVE / DO NOT ENGAGE | MOVE / DO NOT ENGAGE | MOVE & ENGAGE |
| 5+ | MOVE & ENGAGE | MOVE & ENGAGE | MOVE & ENGAGE |
Special Rule: RAF Squadrons starting at Lympne delay taking off and do not move until Round 3.
Mission 2 Victory Conditions
The side that scores the most Victory Points wins.
- RAF Special Mission: Ensure ZERO (0) HITS are scored on CONVOYS (+3 VPs)
- Luftwaffe Special Mission: Score at least THREE (3) HITS on CONVOYS (+2 VPs)
Mission 3 – Fighter Sweep off the Isle of Wight
Friday, 26 July 1940
Amidst heavy clouds and rain, in bad visibility, and hoping for a knock-out blow against the RAF, the Luftwaffe launches a fighter sweep with the second objective of strafing airfields and radar stations.
[Sector Map for Mission 3 – image, not transcribed.]
Mission 3 Set Up Charts
RAF Squadron Set Up Chart – Roll 5x
| D6 | Aircraft Type |
|---|---|
| 1 | Boulton Paul Defiant Mk I "Daffy" |
| 2 | Hawker Hurricane Mk I |
| 3 | Hawker Hurricane Mk I |
| 4 | Hawker Hurricane Mk I with Ace |
| 5 | Supermarine Spitfire Mk I |
| 6 | Supermarine Spitfire Mk I with Ace |
Squadron Strength – Roll 1D6 per Squadron: 1-3 = 4xVics, 4-5 = 3xVics, 6 = 2xVics. * If the Luftwaffe successfully downed more than six (6) Vics in Mission 2, reduce the number of Squadrons in Set Up by ONE (1).
Luftwaffe Staffel Set Up Chart – Roll 7x
| D6 | Aircraft Type |
|---|---|
| 1 | Messerschmitt Bf 110C "Zerstörer" |
| 2 | Messerschmitt Bf 110C "Zerstörer" |
| 3 | Messerschmitt Bf 110C "Zerstörer" with Ace |
| 4 | Messerschmitt Bf 109E "Emil" |
| 5 | Messerschmitt Bf 109E "Emil" with Ace |
| 6 | Messerschmitt Bf 109E "Emil" with Ace |
Staffel Strength – Roll 1D6 per Staffel: 1-4 = 4xSchwarms, 5-6 = 3xSchwarms. * If the RAF successfully downed more than seven (7) Schwarms in Mission 2, reduce the number of Staffels in Set Up by ONE (1).
Starting Altitudes Set Up Table for Luftwaffe Staffels
| Luftwaffe Bomber Staffels | Altitude (D6) | Luftwaffe Fighter Staffels | Altitude (D6) |
|---|---|---|---|
| None in Mission | – | Bf 109E | 1-2=SL, 3-5=LL, 6=ML |
| Bf 110C | 1=SL, 2-4=LL, 5=ML, 6=HL |
Mission 3 Gameplay Charts
Luftwaffe Movement Chart
| D6 | Bf 110C | Bf 109E |
|---|---|---|
| 1 | TURN LEFT | MOVE STRAIGHT AHEAD |
| 2 | TURN RIGHT | TURN LEFT |
| 3 | TURN TO RAF | TURN RIGHT |
| 4 | TURN TO RAF | TURN TO RAF |
| 5 | TURN TO RAF | TURN TO RAF |
| 6 | TURN TO RAF | TURN TO RAF |
RAF Communications Chart (Roll 1D6 per Squadron + Modifiers; a 1 is always NO COMMS, despite Modifiers)
| D6 + Mods | Spitfire | Hurricane | Defiant |
|---|---|---|---|
| 1-3 | NO COMMS | NO COMMS | MOVE / DO NOT ENGAGE |
| 4 | MOVE / DO NOT ENGAGE | MOVE / DO NOT ENGAGE | MOVE & ENGAGE |
| 5+ | MOVE & ENGAGE | MOVE & ENGAGE | MOVE & ENGAGE |
Special Rule: RAF Squadrons starting at Thorney Island delay taking off and do not move until Round 3.
Mission 3 Victory Conditions
The side that scores the most Victory Points wins.
- RAF Special Mission: Shoot down at least ONE (1) Luftwaffe Ace (if in gameplay) (+4 VPs)
- Luftwaffe Special Missions: 1. Shoot down at least FIVE (5) RAF VICS (+2 VPs); 2. Strafe at least TWO (2) AIRFIELDS/RADAR STATIONS (+2 VP)
Campaign Tracking Sheet
Each Mission has a row on the Campaign Tracking Sheet. Columns are: Mission; RAF VP; Luft VP; Schw Lost (Schwarms lost); Vics Lost; Notes & Special Mission Results; Win/Loss.
Phase 1
- The Battle of Britain Begins
- Convoy Raid Off the White Cliffs of Dover
- Fighter Sweep Off the Isle of Wight
Phase 2
- Attacks on Convoys, Airfields, and Radars
- Adlertag! - The Hardest Day
- Luftwaffe Raids on the Firth of Forth
Phase 3
- Airfield Raids in Essex and the London Area
- On the Ropes! - The Worst Day for the RAF
- Targeting Aircraft Production
[Source note: the printed sheet repeats the "Phase 3" block (Missions 7-9) a second time, immediately after the first, with no Phase 4 heading in between; this is a layout duplication in the source and is shown once here.]
Phase 4
- "Black Saturday" and Duxford's Big Wing
- A Coup de Grace and Battle of Britain Day
- The Final Daylight Bombing of London
Phase 5
- Night Interception Duty
- Debut of the Regia Aeronautica Italiana
- An Inglorious End to the Battle of Britain
The Campaign Game
Missions 4-15 and Campaign Steps B and C are not in the free version. The introduction and Step A (first phase only) follow.
When playing the fifteen Missions in this book in order (without replaying any Missions to ensure you win, etc.), you are invited to play the Campaign Game and determine whether you won or lost the Battle of Britain. In line with actual history, the matter is not solely quantitative, i.e., based solely on how many Victory Points were accrued by each side, but rather qualitative and deeply influenced by political factors. The research in this game enables you to determine the outcome based on political perception rather than on a simple accounting of losses in the air and on the ground. The background of the political structure, personalities, and views of the day are included for historic reference.
The resolution of the Campaign Game involves three Steps:
- STEP A: War Report – in which you create the formal submission from Fighter Command to the War Cabinet based on your performance over the fifteen Missions in Tally-Ho!
- STEP B: War Cabinet Endorsement – in which you determine the recommendation of the War Cabinet to Parliament on the matter of whether to surrender to Germany or fight on, a decision that is influenced by the contents of your War Report.
- STEP C: Parliament Vote – in which you resolve how each of the political parties in Parliament vote, which is influenced by the outcome of the War Cabinet Endorsement.
Background for the Resolution of the Campaign
Early in the Second World War, the British Government assumed sweeping powers over the economy and the life of its citizens, who willingly went along and recognized the imperative of defeating fascism. Nonetheless, public support was tempered by a deep distrust of the very authorities who had put Great Britain at risk by allowing the military to fall into disarray with an unprepared defense. Anger and resentment motivated political debate against the backdrop of England's difficult pre-war economic circumstances. The previous decade of high unemployment was still fresh in the memory of the people. While the war brought high employment and better salaries, much to the relief of the citizenry, it also challenged Britain's historic class system that was based on traditional titled elites and on family heritage rather than skill and merit. A growing movement for social change and social reform naturally resulted – indeed, what was Britain fighting for if not a better future for all?
The Prime Minister, Winston Churchill, enjoyed wide support. He positioned England as the last stand against tyranny in Europe. Yet people worried that the British Army was ill-equipped. Most of its heavy weapons, vehicles, and supplies had been left on the beaches at Dunkirk during the emergency evacuation. While 338,000 troops had been evacuated from France, frankly it was a miracle. The expectation had been that no more than 20,000 to 30,000 could be saved. Now that the soldiers were back in Great Britain, there weren't enough rifles to go around. If the Wehrmacht launched the invasion of Operation Seelöwe, the outcome would be certain defeat for Great Britain. Only the RAF held back the tide of tyranny. If the RAF lost in the air, it seemed the wisest course was to surrender rather than suffer a German Blitzkrieg invasion with a follow up occupation of London itself.
Winston Churchill's first speech as Prime Minister on 13 May 1940 announced the formation of his five-member War Cabinet. He sought political unity for Britain's defense. The major political leaders were invited to serve together in government and in posts of high executive office. These historic decisions, motivations, and characteristics are therefore represented in Tally-Ho! and drive the outcome of the Campaign. Ultimately, politics determines if you won the Battle of Britain.
Step A: War Report
The first step is to create Fighter Command's War Report in hopes of influencing the deliberations of the War Cabinet. In Tally-Ho!, you have the opportunity to read the report's text. To generate the War Report, check the boxes corresponding to your results from the Campaign Tracking Sheet. Your performance in the three Missions that comprise each of the five Phases of the Battle of Britain determines the contents of the War Report. There are four potential outcomes in each section of the War Report based on the number of Missions you won in each Phase. Check the box that corresponds to your performance in each Phase, then read the paragraph immediately beneath. Ignore the text for boxes not checked. The War Report is in the format and style of the actual Fighter Command reports from that era. British English spelling and phrasing are employed for realism.
War Report (sample – First Phase only)
CLASSIFIED. From: Headquarters, Fighter Command. To: War Cabinet, Westminster. Ref: 113/N.127. Date: 5th November, 1940. Outcome of German Air Attacks on England. - 10th Jul. - 31st Oct.
As directed by Parliament dated 1st November, 1940, I hereby submit the following report on Fighter Command's operations and performance since the German air offensive began on August 8th, 1940. As the battle still continues by night with increased intensity and determination on the part of the enemy, neither I nor any of my staff have opportunity to write a lengthy report.
FIRST PHASE – 10th July to 11th August, 1940:
Overview of Enemy Activity:
a) Convoy attacks on merchant shipping, naval bases, and civilian ports on the South-East and South coast, between North Foreland and Portland;
b) Fighter sweeps to draw our fighters and reduce the numbers of able pilots and available fighter aircraft with which to defend England.
Results of Air Combat:
[ ] If you won all THREE Missions in Phase 1, the following text is inserted:
At this early stage of the battle, 11 Group engaged the enemy with consistent advantage, though some losses of pilots were suffered. Many lessons were learned about Luftwaffe organization, tactics, and aircraft, all of which were put to excellent use. Shortcomings found in the Chain Home network were overcome with all due alacrity by able personnel at the Sector level.
[ ] If you won TWO of the Missions in Phase 1, the following text is inserted:
In the first phase of the battle, the challenges presented in countering Luftwaffe raids were not fully appreciated, despite the experiences of our squadrons in the Battle of France. Though air fights were often a matter of close circumstance, we were seen to prevail and had by this point preserved the bulk of our fighter forces within Fighter Command.
The Luftwaffe made some successful attacks on shipping, though with considerable losses. Overall, the passage of convoys carrying supplies and equipment from the Commonwealth and Lend Lease materiel from the United States of America continued unabated and have proven critical for the rearming of the returned British Expeditionary Force.
Issues were identified with the Chain Home radar network, yet our Sector Controllers rendered deficiencies moot through hard work and many hours spent at the task. Extensive support was received from the Home Guard and the Royal Observer Corps in visually identifying incoming aircraft threats.
[ ] If you won ONLY ONE of the Missions in Phase 1, the following text is inserted:
From the outset of the battle, despite the regular shining examples of bravery and courage from among our air crew, ground personnel, and administrative staff, the Luftwaffe consistently achieved its goals. Though it suffered losses in the process, those were at a sustainable level to their force, while losses of our planes and pilots had become already troubling and were clearly unsustainable. Convoys were attacked and significant losses were suffered, both among civilian merchant fleets and Royal Navy assets. The greatest Naval loss was a pair of destroyers and cruiser, while HMS Argus suffered extensive damage from bombing by Junkers Ju 87 Stuka types while en route to the port of Liverpool in her return from Malta as part of OPERATION HURRY. The inability of our squadrons to maintain an effective air umbrella during its approach in the Western Channel was a matter of grave concern.
Losses of aircraft and pilots in 11 Group were extensive, particularly among squadrons equipped with Boulton Paul Defiant types. Due to the lack of sufficient air defense fighters, all assets remained fully engaged in hopes of turning the tide to victory.
Significant problems were identified in the Chain Home radar network and our Sector Controllers suffered from faulty reports, poor communications, and the comparatively poor performance of our squadrons facing the Luftwaffe.
[ ] If you won NONE of the Missions in Phase 1, the following text is inserted:
At the start of the battle, front-line squadrons were found to be overwhelmed by superior Luftwaffe numbers, quality, and tactics. Defeat after defeat was experienced in the air. Critically needed supplies that were en route by convoy were attacked with regularity and impunity. Losses of many ships and men were suffered, which in turn disallowed the rearming of the British Expeditionary Force after its return from France.
The tragic sinking of HMS Argus as it returned from Malta after OPERATION HURRY by the concentrated attack of enemy Junkers Ju 87 Stuka dive bombers was the direct result of a failure by Fighter Command to provide adequate defense upon the high seas. The loss of this vessel and all but 22 men on board is expected to bring far-reaching consequences to the Royal Navy's ongoing efforts to supply and reinforce Malta. This loss marked an early low point and constituted one of the most grave failures of the RAF so far in the conduct of this war.
The consequences of RAF defeat in the skies over Britain were made evident at all levels of public and civil life. Rationing of food and other critical economic goods, medicines, and essential materiel were enacted as a result of the Luftwaffe's dominance over the waters of the English Channel. At the end of this phase of the air battle, the number of Luftwaffe bombers and fighters appeared to be increasing, despite the valiant and selfless efforts our personnel.
[End of War Report sample. Source note: the printed sample ends with "FOR FREE VERSION OF THE GAME – [FULL CONTENTS OF THE WAR REPORT ARE INCLUDED IN THE GAME]". The Phase 2-5 War Report sections are not in the free version.]
Gameplay Materials for Photocopying
Aircraft Counters
[Front and reverse of the printed game counters (including the reverse side with the RTB label) – artwork, not transcribed. See 1.5 and 1.8 for how to read them.]
Aircraft Performance Chart
The following are the unique performance capabilities of each aircraft type. Column headings are:
- Aircraft Type | RTB – the type of aircraft in the Squadron or Staffel; write RTB in the sub-column when the Squadron or Staffel is in Return to Base.
- ID# – the number corresponding to the game counter in use for that Squadron or Staffel.
- Vics/Schw – The number of Vics/Schwarms in each Squadron or Staffel rolled during Set Up.
- Intl/Ace – refers to any Aces or International as rolled during Set Up, write the modifiers here.
- Resc/Lost – As Vics/Schwarms are lost, fill in dots to log whether pilots were rescued or lost.
- Attack/Defend – the number needed on dice to inflict potential losses on the opposing side or reduce losses suffered – "5/1" is a 5-6 on the die to successfully Attack and a 1 to Defend.
- Fuel/Ammo – the number of Fuel/Ammo Points a Squadron or Staffel has before it must RTB.
- MA – the Movement Allowance as the maximum number of hexes moved per Round.
- Strafe/Bomb – the number needed on dice to Bomb or Strafe and number of VPs per hit scored – e.g., "b4/3" means "bomb" (b=bomb / s=strafe); 4-6 is a hit with 3 VP per hit scored.
- Dogfight Records – use this to log Dogfight results by sub-column; record successful Attack and Defend results in each – e.g., log "2 / 1" to show two successful Attacks and one Defend.
- Start Pos – the start position and altitude for each unit (as rolled during Set Up).
Luftwaffe Bombers
| Aircraft Type | Fuel/Ammo Points | Attack/Defend | MA | Strafe/Bomb |
|---|---|---|---|---|
| Ju 87 Stuka | 2 | 6/1 | 1 | b2/1 |
| He 111 | 4 | 6/3 | 2 | b4/4 |
| Do 17 | 4 | 6/1 | 3 | b4/3 |
| Ju 88 | 5 | 6/2 | 2 | b4/3 |
Luftwaffe Fighters
| Aircraft Type | Fuel/Ammo Points | Attack/Defend | MA | Strafe/Bomb |
|---|---|---|---|---|
| Bf 109E | 2 | 5/1 | 3 | s4/1 |
| Bf 110C | 4 | 6/2 | 3 | s5/2 |
Italian Bombers
| Aircraft Type | Fuel/Ammo Points | Attack/Defend | MA | Strafe/Bomb |
|---|---|---|---|---|
| Fiat BR.20M | 4 | 6/2 | 2 | b5/3 |
Italian Fighters
| Aircraft Type | Fuel/Ammo Points | Attack/Defend | MA | Strafe/Bomb |
|---|---|---|---|---|
| Fiat CR.42 | 1 | 6/3 | 2 | s5/1 |
| Fiat G.50 | 2 | 5/1 | 2 | s5/1 |
RAF Fighters
| Aircraft Type | Fuel/Ammo Points | Attack/Defend | MA | Strafe/Bomb |
|---|---|---|---|---|
| Spitfire | 3 | 5/1 | 3 | N/A |
| Hurricane | 3 | 5/1 | 3 | N/A |
| Defiant | 4 | 6/2 | 2 | N/A |
Source note: the Fuel/Ammo Points column is read from the printed empty-circle markings in the chart (for example, a row printed as a run of empty then filled circles has as many points as empty circles).
Spitfires receive +1D6 Attack against fighter Staffels (Bf 109E, Bf 110C, Fiat CR.42, & Fiat G.50).
The next page is a blank Mission Tracking Sheet for use in gameplay. During Set Up, copy the figures from the above chart onto the Mission Tracking Sheet for each Squadron or Staffel rolled (fill in squares when less than four Vics/Schwarms are rolled). For Fuel/Ammo, the number of empty circles (not filled in with black) is the number of Fuel/Ammo Points the Squadron or Staffel has – e.g., ○○●●● indicates two Fuel/Ammo Points. During Combat, X out the squares and circles to keep a running log.
Mission Tracking Sheet
[Blank printed form: columns for Aircraft Type | RTB, ID #, Vics/Schw (four squares), Resc/Lost, Intl/Ace, Fuel/Ammo (five circles), Attack/Defend, MA, Strafe/Bomb, Dogfight Records, Start. Approximately thirty blank rows. Not transcribed beyond its layout.]
The sheet carries the following AAA and Balloon reference at its foot:
- Heavy AAA (Targets & Cities): 2D6 Attack; on a 6, roll a D6 – hits on 4-6 at SL/LL, 5-6 at ML, 6 at HL.
- Light AAA (Convoys, Radar & Airfields): 1D6 Attack; roll a D6 – hits on 4-6 at SL/LL, 5-6 at ML, 6 at HL.
- Barrage Balloons: 1D6 Attack; on a 6, roll a D6 – hits on 5-6 at SL, 6 at LL.
Massed Formation Tracking Sheet
This chart is designed to help you manage which Squadrons/Staffels are in each Massed Formation. Photocopy this page for use during gameplay. When Squadrons and Staffels are in Massed Formations, use the Massed Formation game counters on the Sector Map rather than stacks of counters, which may be difficult to move around on the Sector Map. Place the Squadrons and Staffels in the box below that corresponds to each of the Massed Formation game counters that are in use.
- Luftwaffe A / Luftwaffe B
- Luftwaffe C / Luftwaffe D
- Royal Air Force 1 / Royal Air Force 2
- Corpo Aereo Italiano A / Corpo Aereo Italiano B
[Each heading is followed by a blank box on the printed sheet.]
Game Design Notes
Most air war games focus on combat between either individual aircraft or small groups of aircraft. The challenges of depicting three dimensions of flight on a flat gaming board are significant. It requires knowledge of physics, aerodynamics, acceleration, profile drag, induced drag, power-to-weight ratios, wing loading, aspect ratios, gravity and altitude effects, energy, g-loading, and many other concepts. To fully understand it, you have to have studied aerospace engineering. Without a computer, air war games tend to reduce these complex properties into simplified tables and charts – hence the popularity of narrative-style games like Target for Tonight from LEGION Wargames, the Air Leader series from DVG, and others.
However, many game designers get bogged down in the complexity of aerodynamics. As a result, it may take hours to play a single air combat engagement. Despite those challenges, several modern air war games have achieved that well, such as Birds of Prey. Yet despite all the attention paid to physics and flight modeling, those games fail to properly recreate the experience of air-to-air combat in one critical way – typically they set players against one another in tightly turning dogfights, two vs. two or four vs. four. Yes, you might say, that's where the fun is! However, those types of engagements were rare in history. In other words, despite all the work on realism in flight modeling and physics, realistic engagements are rarely modeled.
The standard metaphor in game design is that the opposing sides are balanced and fair. Each player should have a reasonable chance of defeating the other player (or players) and achieving victory. Nobody wants to play chess where one side has no knights, rooks, or queen. In war, however, the sides are seldom equally balanced.
Since the 1930s, aerial engagements haven't been like the dogfights of the Great War (1914 to 1918) when the famous "knights of the air" battled each other in tightly turning, close-range battles. Yet some of today's game designers work hard to recreate exactly that feeling and seek to apply that exciting model to later eras. By the start of the Second World War, however, aerial combat had evolved to a series of slashing, surprise attacks of only a few seconds or a few minutes at most. By the time of the Battle of Britain in 1940, most engagements involved a single, deadly firing pass made against an incoming enemy formation. RAF pilots didn't fly alone, but as part of three-plane formations called "Vics". Four Vics comprised a squadron at full strength. The squadron would attack as a single combat unit. Sometimes, though not always, the first pass was followed by a climbing reversal turn to make a second firing pass – but only if the circumstances allowed it. After one or two passes, most of the attacking aircraft would be low on ammunition. The best option was to break off. Their mission was to surprise the Luftwaffe with hit-and-run attacks, fly home without losses (if possible), hope they didn't get bounced by Messerschmitts on the way in or out – and live to fight again -- and again, day after day.
Another issue with most air war games today is that due to the complexities of modeling the physics and aerodynamics of maneuvering planes, it can take an entire afternoon at the game table to play through an engagement of four Spitfires vs. four Messerschmitts. If rendering the flight dynamics with such accuracy is so important, why isn't it equally important to depict air combat as it really was? Most of the time you didn't get into an extended, turning battle over the skies, yet that's how many air combat board games are designed. If you look closely at the famous photo taken at the height of the Battle of Britain showing contrails over London, you'll see that most of the planes made only a half circle turned – some even less than that.
The goals of the design process in Tally-Ho! were to overcome these issues and model air combat in a way that captures the experience of the "slashing attack" that was popular at the time. The vision was that the time spent at the game table should be roughly the same as the historic time it took in the real life engagement. From take-off to landing, a squadron of Spitfires might have been in the air for only twenty to thirty minutes. In Tally-Ho!, you can complete a Mission in about the same amount of time. You don't fly each individual airplane, but rather position whole squadrons to attack, though they may not always be at full strength. The basic unit that moves on the hex map is a squadron; the essential element for computing the results in aerial combat is the Vic. For the Luftwaffe, the terms used are staffels and schwarms.
Thus, aerial engagements are as fast and exciting as the real thing. Rather than a test of aerobatic maneuvering and planning moves on paper between opposing players, Tally-Ho! is designed as a solitaire air combat gaming experience. There is no delay before you're into the thick of it. You are thrown into the action almost immediately, sometimes from the first Round of play. You should be surprised if you make it to Round 3 without losses on one side or the other. To play the average mission in this game requires only twenty to thirty minutes.
Likewise, all the complexities of aerodynamics are secondary to that memorable and delightful moment in gameplay when you get to shoot down some Luftwaffe planes with your guns. Why spend hours agonizing over what AoA and g-loading are required to get a single plane into firing position? Why not just reduce each attack to a single set of dice rolls that depict one or more squadrons attacking a few Luftwaffe staffels? In other words, why not just model the decisive point in the game that is the most exciting and memorable anyway?
Of course, as a former search and rescue pilot (I have also commercial, multiengine, and instrument ratings) – and as the designer of this game – I find the physics and aerodynamics of flight interesting. However, as a pilot, I find that most of that happens naturally – or more accurately, based on training and by "feel". You can fling your plane around the sky. The matters of keeping an eye on the airspeed, watching the altitude, and periodically scanning the engine temps, etc., become second nature. In other words, you keep your eyes outside of the cockpit, not on the instruments.
When I fly, I don't think about how my hands hold the control stick and throttle or that my feet are on the rudder pedals. I don't think about how to make a coordinated climbing turn or how to perform a wingover – I just do it. The feeling is that I am part of the airplane – or, as spiritually-minded people might say, "you become one with the airplane". Mentally, my fingertips are the wingtips, even if they are on the stick and throttle. I'm not computing AoA or wing loading; I fly the plane and it all just happens. I know what pulling four Gs feels like even without looking at the meter. Usually, I spend more time thinking about communications and navigation than about how to fly the plane. The same was true for the pilots involved in the Battle of Britain.
Additionally, in Tally-Ho!, I've discarded the tradition of gaming equally balanced, opposing sides. This is a solitaire air war game, so there is only one side to keep happy – and that's you as the player. The Luftwaffe's movements are automated based on tables and dice rolls.
Your role is as an RAF sector controller in charge of multiple squadrons over different areas of southern England and the English Channel. Almost all the time, the squadrons you will order into the fight will face vastly superior odds. The Battle of Britain wasn't a question of who won in hundreds of individually fought two vs. two or four vs. four engagements, but rather what happened when a dozen RAF fighters attacked a formation of one hundred Luftwaffe bombers with fighter escort heading toward England on a raid.
To win, the RAF relied on tactical surprise. That's an advantage that the RAF's Chain Home radar provided – and that advantage is modeled into the game as well. In short, if you want to win, you should hit them hard and get away as fast as you can. As you play, you see how the Luftwaffe moves and then you move your squadrons to intercept them, prioritizing your targets based on which can do the most damage. Naturally, failures in radio communications can get in the way of your plans.
More often than not, most pilots were shot down by an enemy plane that they never saw – and that applied equally to both sides. You jumped them or you got jumped. Often the first indication of a "dogfight" was when the enemy's bullets flashed past or set your engine and fuel tank afire. Aerial combat was a desperate thing. If you survived the first few seconds, perhaps there was a hard turn to the left or right, pulling hard on the stick and nearly blacking out from the g-loads, and then one side or the other – or both – would break off and head for home.
Pilots of that era often talked about the strange experience of fighting for their lives in one moment, surrounded by planes, and then, just seconds later, they found themselves suddenly flying alone in an empty blue sky. The Messerschmitt Bf 109 didn't have the endurance to stay and fight. As well, the RAF's primary goal was to attack the bombers, not fight with the Messerschmitts. Even though Spitfire squadrons were tasked to go after the Luftwaffe's fighters, they did that as part of a wider plan of attack that focused on the Luftwaffe's bombers, which were being simultaneously attacked by one or more squadrons of Hurricanes. You didn't stay and fight it out to the death either – it was better to dive into the attack, shoot, survive the initial engagement, and then break off to return and land back at your airfield. On the ground, you debriefed while the ground crews rearmed and refueled the planes. Within an hour or two, your squadron was ready to fly again.
Finally, the Tally-Ho! solitaire air combat system is designed to be simple and flexible. It allows Historic Wings to create a series of deeply researched, historically accurate air combat games – both in book form and, once we have the right partner to work with, in a second series of boxed solitaire game titles as well. We plan on creating an Adlertag! Megagame Expansion that allows you to engage in multiplayer play and recreate an entire day of the Battle of Britain. Essentially, this transforms the solitaire experience of Tally-Ho! into a "megagame" with up to nine players at the game table.
In the Adlertag! Megagame Expansion, you fly a morning, afternoon, evening, and night mission – yet all four missions can be completed in just a single afternoon of gameplay with your friends. In that short time, vast numbers of airplanes are simulated on a full-size table map. The speed of play concept that works so well in Tally-Ho! can be applied to the whole of southern England.
The vision is to create an experience as exciting as it might have been to be there and experience the real thing as it unfolded from the vantage of a Sector Command bunker in Kent – or at the level of 11 Group, Fighter Command Headquarters, or in charge of an entire Luftflotte. The first play-test of the Adlertag! Megagame Expansion is being planned in Copenhagen, Denmark, early in 2023. Afterward, we will apply the lessons learned and prepare the game for formal publication and sale.
Player Guide & Advisory
During your first few plays of Tally-Ho!, you may find that you forget to log some of the results of Dogfights, losses inflicted, and other items on the Mission Tracking Sheet. The key to smooth gameplay is to remember which boxes to mark off on the Mission Tracking Sheet in each Round. In Missions that have over a dozen Squadrons and Staffels in play, logging can be burdensome if you are not used to the system and don't keep your record keeping organized.
The Mission Tracking Sheet is designed to minimize the potential for small mistakes and help you remember what to log and to visually enable double-checking logging. This is important because small errors in logging can dramatically affect the outcome of a Mission. For instance, if you forget to X out a Fuel/Ammo Point, a Staffel of Bf 109s might participate in one too many Dogfights before RTB.
Thus, knowing how to use the Mission Tracking Sheet is important. The following provides an example of one way to log results – it shows a partially completed Mission. There are other ways to log your progress – do what works for you. As you will note, the "Dogfight Records" column is divided into vertical sub-columns. In each, log the results of Dogfights separately, with the number of successful Attack and Defend rolls recorded by Squadron and Staffel. The number of Dogfights recorded in the "Dogfight Notes" column should match the number of Fuel/Ammo Points marked off for that Squadron or Staffel. Likewise, losses are logged. This allows you to double-check easily.
In this example, the number of successful Attacks are logged in the "Dogfight Records" column followed by the letter "A", as are successful Defend results, followed with the letter "D". Alternatively, you could simply write the values separated by a slash or write one number above the other. If your dice rolls for one of your Hurricane Squadrons resulted in 5, 6, 3, and 2, since a Hurricane's Attack/Defend is 5/1, you would log: "2A -D", i.e., two successful Attack rolls and no successful Defend rolls – or alternatively 2/0 or enter a 2 above a 0 (or above a dash).
This approach to using the "Dogfight Results" column also facilitates dice rolling. By using separate sub-columns for each Dogfight, you can easily track which Squadrons and Staffels were involved and review the results later on to double-check your results. Additionally, by using the sub-columns within the "Dogfight Results" column, you can roll each Squadron or Staffel individually and write those results one Squadron or Staffel at a time, then add them up and work out how to apply the resulting losses inflicted at the end of the Dogfight. Thus, you don't need a "bucket of dice" with perhaps 20D6 in different colors to represent each individual Squadron or Staffel in the fight. [Personally, as the game's designer, I use eight blue dice for the RAF side and five red dice for the Luftwaffe side.]
When first learning to play, the most common logging error is to forget marking off Fuel/Ammo Points. As well, new players may forget to log "RTB" when a Squadron or Staffel is RTB. The risk from that is that in subsequent Rounds you may move the Squadron or Staffel normally rather than as an RTB. To help with that, graphics are provided for two-sided game counters with RTB written on the reverse side. Thus, when a Squadron is RTB, you simply flip the game counter over to the other side, such as after it has Bombed, Strafed, or uses up its last Fuel/Ammo Point. This provides you with a visual aid in gameplay as to which are in action and which are RTB. This is particularly helpful in Missions where the Luftwaffe side has over a dozen Staffels in play. I find the RTB side of the counter to be a very handy visual aid in sorting out complex Missions where over twenty Squadrons or Staffels are in play.
Another helpful gameplay technique is to photocopy or print out the Massed Formation Tracking Sheet and use the Massed Formation game counters that are included in the graphics for the game counters. On the reverse sides of the Massed Formation game counters are the SCATTERED graphics, which helps so that when you've finished a Dogfight with a Massed Formation you can just flip the game counter over and it serves as a visual reminder in the next Round to roll the facing of each Staffel and Squadron that participated in the previous Round's Dogfight.