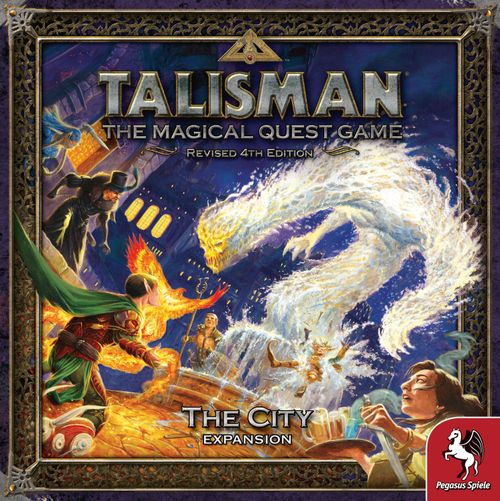
Talisman (Revised 4th Edition): The City Expansion
Talisman (Revised 4th Edition): The City Expansion Rulebook
Table of Contents
Table of Contents
- Object of the Game
- Components
- Component Overview
- Using Only Portions of This Expansion
- Expansion Rules
- Setup
- Entering the City Region
- Movement in the City
- City Board Breakdown
- Leaving the City Region
- Encounters in Shops
- Using City Cards
- Wanted Posters
- Alternative Ending Cards
- Moving Clockwise or Counterclockwise
- Thrown In Jail
- Shop Decks
- Other Rules
- Character Lore
- Quick Reference
Object of the Game
The object of the game remains the same as the Talisman Revised 4th Edition base game. Characters must reach the Crown of Command in the centre of the board and then, by casting Command Spells, force the other characters out of the game.
Components
The City expansion includes the following components:
- This Rulebook
- 1 City Board
- 168 Small-sized cards consisting of:
- 82 City Cards
- 12 Armoury Cards
- 12 Pet Cards
- 16 Magic Emporium Cards
- 16 Potion Cards
- 8 Stables Cards
- 18 Wanted Poster Cards
- 4 Neutral Alignment Cards
- 3 Alternative Ending Cards
- 6 Character Cards
- 6 Plastic Character Figures
Component Overview
Below is a brief description of each game component.
City Board — The City board (referred to as a “Region”) presents boundless opportunities for those clever enough to seize them and strong enough to hold them. Trade, commerce, employment – all of these, and many more can be found within the City.
City Cards — The City board (referred to as a “Region”) depicts a bustling metropolis that offering boundless opportunities for those clever enough to seize them and strong enough to hold them. Trade, wealth, and adventure await within its walls.
Armoury Cards — This deck of 12 cards features high-quality weapons and armour from the finest workshops in the land. Items from this deck can be purchased at the Armoury.
Pet Cards — This deck of 12 cards contains curious specimens that were collected from local and exotic lands. These creatures make wonderful pets and serve their masters with unique abilities. Pets can be purchased at the Menagerie.
Magic Emporium Cards — This deck of 16 cards features finely crafted artefacts of arcane power that can be purchased at the Magic Emporium. While these items are sold at a premium, they are invaluable to any aspiring wizard.
Potion Cards — This deck of 16 cards represents the strange and sometimes volatile concoctions that are brewed at the Apothecary. Some potions may cause unexpected side-effects and are only consumed by the most brave or foolhardy adventurer.
Stables Cards — This deck of eight cards details mounts and beasts of burden that characters may purchase at the Stables.
Wanted Poster Cards — These 18 cards offer characters lucrative rewards if they are able to claim the bounty. Wanted Posters can be obtained at the City Gate.
Neutral Alignment Cards — These four cards are used when a character has changed alignment (with respect to what’s printed on his character card).
Alternative Ending Cards — The three Alternative Ending Cards included in this expansion replace the base game’s victory conditions, offering players new ways to win the game.
Character Cards — The six new Character Cards work exactly like those in the base game and offer players an even larger selection of heroes to play.
Character Figures — Each character card corresponds to a plastic figure that is used to represent that character on the game board.
The City Icon — Cards in The City expansion are marked with an expansion symbol to differentiate them from the cards in the base game.
Using Only Portions of This Expansion
While The City expansion is intended to be used as a whole, players are welcome to play Talisman using only some of the elements of the expansion. Specifically, the new Character and Alternative Ending Cards may be used without including the other new cards or the City board.
Expansion Rules
When playing Talisman with The City expansion, the basic rules of Talisman are unchanged, and the game is still won by reaching the Crown of Command and eliminating all other players. The only new rules needed are for entering and exploring the City Region. These rules are found below.
Setup
When playing with The City expansion, add the following steps to the base game’s setup:
- Place Expansion Board: Take the new City board and place it next to the main Talisman board as shown in the diagram below.
- Set Up Shop Decks: Shuffle the Potion and Pet decks. Then, place the Potion (A), Magic Emporium (B), Armoury (C), Pet (D), and Stables (E) decks facedown beside their corresponding spaces on the City board as shown in the diagram below.
- Set Up Wanted List: Shuffle the Wanted Poster deck and place it facedown next to the City board. Draw three Wanted Poster cards and place them faceup on the City Gate space.
- Set Up City Deck: Shuffle the City deck and place it facedown next to the City board. Leave the Neutral Alignment Cards in the game box until they are needed.
- Set Up Alternative Endings (Optional): If players wish to use the optional Alternative Ending Cards, one player shuffles those cards, draws one at random, and places it on the Crown of Command (see “Alternative Ending Cards” on page 9).
Entering the City Region
The City Region is connected to the main Talisman board at the main board’s City space. A character may enter the City Region simply by moving directly from the City space on the main board to the City Gate space, if his movement die roll provides him with sufficient movement.
Entering the City Region through the City space is optional. Characters may choose not to enter the City Region and may travel around the Outer Region instead. When characters land directly on the City space in the Outer Region, they must encounter the space as normal.
Example of Entering the City
The Bounty Hunter begins his turn on the Woods and rolls a “5” for his move. He decides to move counterclockwise to the City and explore the City Region by moving to the City Gate.
The Bounty Hunter then continues his move in the City Region and finally lands on the Royal Lane.
Movement in the City
To move in the City, Characters roll one die as normal and move the indicated number of spaces. However, each street space on the City board is marked with an arrow which points in the direction characters must move in order to travel around the street spaces. Characters cannot move against an arrow on a street space unless an ability or effect forces them to do so.
Characters may enter a shop from the adjacent street space for one point of movement. Characters may enter a shop as long as they have sufficient movement to enter the shop; any remaining points of movement are lost.
If a character begins his turn in a shop, he must spend one movement point to move into the adjacent street space. A character in a shop cannot move directly to a neighbouring shop. He must first exit the shop he is in by moving into the adjacent street space, and then he may travel to the neighbouring shop if he has sufficient movement.
If a character begins his turn in a shop, he cannot re-enter that shop during that turn. However, the character may enter any other shop if he has sufficient movement.
Example of Moving in the City
The Tinkerer begins his turn on Noble Street and rolls a “2” for his move. The Tinkerer can end his movement in the Academy (A), the Apothecary (B), or Elemental Avenue (C).
Note that the Tinkerer cannot move to Sanctuary Square (D) because he cannot move against the arrow on the street space.
City Board Breakdown
The City board is comprised of street spaces and shop spaces as described below.
Street Spaces — Street spaces form a loop around the City. Each street space features an arrow that indicates which direction characters must move when they travel around the board.
Shop Spaces — Shop spaces are located around the outer edge of the board. Each of these spaces can only be entered from its adjacent street space. A street space is considered adjacent to a shop if it shares the same border.
Leaving the City Region
Some City encounters grant characters the opportunity to exit the City and return to the main game board. Other than these encounters, the only ways to leave the City are to either visit the Wharf space or to exit the City via the City Gate space. A character who wishes to leave the City does not have to land exactly on the City Gate. A character with sufficient movement to continue past the City Gate must choose between continuing his movement clockwise or counterclockwise from the City space of the Outer Region.
A character who begins his turn on the City Gate space may leave the City Region by moving to the City space on the main game board, or he may continue moving in the City Region by following the arrows on the space.
Example of Leaving the City
The Tavern Maid begins her turn on Speaker’s Corner and rolls a “4” for her move. She decides to leave the City Region by exiting via the City Gate and continues her move on the main game board.
The Tavern Maid decides to continue her move clockwise in the Outer Region, finally landing on the Hills.
Alternatively, the Tavern Maid could have decided to continue her move counterclockwise in the Outer Region, finally landing on the Woods.
Encounters in Shops
If a character enters a shop, he must either encounter the shop or a character in that space. If a character encounters the shop, he must follow the instructions on the space, such as purchasing a card or performing an action. Characters cannot enter a shop and “do nothing.”
Using City Cards
City Cards are similar to the Adventure Cards from the base game, but are encountered by characters exploring the City Region.
Drawing Cards in the City
When characters encounter street spaces and are instructed to draw cards, they must draw City Cards rather than Adventure Cards, even if cards or special abilities specifically instruct the player to draw one or more “Adventure Cards.”
When a card is encountered in the City Region and has instructions or effects that refer to Adventure Cards, the card affects City Cards instead.
Special Abilities Involving Adventure Cards in the City Region
Special abilities and effects that apply to Adventure Cards behave differently when characters are in the City Region rather than the Outer, Middle, or Inner Regions. When used within the City Region, these special abilities and effects apply to cards from the City deck instead.
Example: The Prophetess’s special ability states that whenever she draws Adventure Cards, she may discard one card of her choice and draw one more card to replace it. While the Prophetess is in the Outer, Middle, or Inner Region, her ability applies to cards from the Adventure deck. However, while she is in the City Region, her ability applies to cards from the City deck instead.
Wanted Posters
Wanted Posters are available to all characters who visit the City Gate, as described in the instructions on the space. Characters may either buy any Wanted Posters on the space for one gold each, or claim the bounty from Wanted Posters on the space (see “Claiming Bounties” below). If a character buys a Wanted Poster, he may claim the bounty any time during his turn.
Claiming Bounties
Each Wanted Poster Card lists a target in its title. A target can be either a type of Enemy (i.e. animal, monster, etc.) or a character of a certain alignment (i.e. good, neutral, or evil).
If a Wanted Poster Card lists a type of Enemy as its target, a character may claim the bounty by discarding any number of his trophies that match that type of Enemy at the end of his turn. The character gains an amount of gold equal to the discarded Enemy’s Strength or Craft. He then discards the Wanted Poster Card.
A character who owns a Wanted Poster card that lists a character of a certain alignment may claim the bounty on that card by defeating another character of the matching alignment in battle or psychic combat. The character claiming the bounty rolls a die and gains that amount of gold. He then discards the Wanted Poster Card.
If a character has two or more Wanted Poster cards that list the same target, he can only claim one bounty. For example, if a character has two Wanted Posters that target Animals and he discards one Animal trophy with a Strength of 3, he can only claim one bounty and gain three gold. He then discards one of those Wanted Poster Cards. The character cannot use both Wanted Posters for the same trophy to claim a bounty of six gold.
Example of Claiming a Bounty
The Tinkerer visits the City Gate, which has a Wanted Poster that lists an Animal as the target.
The Tinkerer has two Animal trophies: the Giant Rat which has a Strength of 3 and the Giant Fly which has a Strength of 2.
The Tinkerer chooses to claim the bounty with both of his Animal trophies for a total of five gold. He discards the trophies and Wanted Poster, then, at the end of his turn, draws a new Wanted Poster Card and places it on the City Gate space. Alternatively, the Tinkerer may choose to claim the bounty by discarding only one of his Animal trophies, although this would result in gaining less gold.
Region Lore
The walls of the City provide those who live within a chance to pursue their lives in safety and relative comfort. This safety and comfort does not come free, however. Whoever controls the City is able to collect a sizeable reward for the security its walls provide.
Many different factions are in a constant struggle to dominate the City’s streets. Ultimately, those with the most money wield the most influence. More than any appointed official or armed authority figure, the city’s guilds are the ones truly in charge. The three most powerful of these organizations are the Assassins’ Guild, the Thieves’ Guild, and the Merchants’ Guild.
These guilds are both wealthy and dangerous. They do not tolerate transgressions of their rules or threats to their livelihood. Typically, a troublemaker simply gets thrown in jail indefinitely.
If extremely provoked, a guild will place a bounty on the head of its target. The guilds have found that overlooking insults is not good business; not when there is a ready supply of deadly individuals willing to claim a reward for the guild’s business.
Alternative Ending Cards
The use of Alternative Ending Cards is optional, and players should agree whether or not to use them before starting the game. The Alternative Ending Cards included in The City expansion are usable with Alternative Ending Cards from other expansions.
Setup
Setup for Alternative Ending Cards is determined by which of the two game variants players decide to use. Players can start the game with the card either revealed or hidden.
Revealed Variant — The revealed variant has a greater impact on characters during the course of the game and offers players more strategy.
If players use the revealed variant, all Alternative Ending Cards with a hidden icon in their upper left corner must be removed from the game. Cards with a hidden icon can only be used when playing with the hidden variant.
Players must then shuffle the remaining Alternative Ending Cards at the start of the game, draw one card at random, and place it faceup on the Crown of Command at the centre of the game board.
Hidden Variant — The hidden variant adds more mystery to the game because players do not know what dangers await them at the Crown of Command until they reach the space.
If players use the hidden variant, all Alternative Ending Cards with a revealed icon in their upper left corner must be removed from the game. Cards with a revealed icon can only be used when playing with the revealed variant.
Players must then shuffle the remaining Alternative Ending Cards at the start of the game, draw one card at random, and place it facedown on the Crown of Command at the centre of the game board.
Encountering Alternative Endings
Alternative Ending Cards replace the base game’s victory conditions, offering players new ways to win the game. When using the Alternative Ending Cards, characters on the Crown of Command must encounter the Alternative Ending Card and follow the rules printed on the card – they cannot cast the Command Spell or encounter other characters on the Crown of Command unless the Alternative Ending Card specifically states otherwise.
All other rules regarding the Inner Region still apply when playing with Alternative Ending Cards:
- None of the creatures in the Inner Region (nor any of the Alternative Ending Cards) can be affected by any Spell. They also cannot be evaded.
- Characters on the Crown of Command cannot move and must remain on that space unless the Alternative Ending Card specifically states otherwise.
- Once any character has reached the Crown of Command, any character who is killed automatically loses the game.
Alternative Ending Cards generally only affect characters on the Crown of Command. However, instructions that have a star icon at the start of their text affect all characters, no matter what Region they are in, including characters on the Crown of Command.
Moving Clockwise or Counterclockwise
If a character or card on a street space is instructed to move clockwise, it must move to the next street space by following the direction indicated by the arrows on each street space.
If a character or card on a street space is instructed to move counterclockwise, it must move to the previous street space by moving against the direction indicated by the arrows on each street space.
Thrown In Jail
The Jail space is not a shop or street space and cannot be entered unless an effect or encounter throws a character in Jail. When a character is thrown in Jail, his turn immediately ends.
When a character starts his turn in Jail, he does not roll a die for his movement. Instead, the character must roll a die and consult the chart on the Jail space. If a character fails to escape the Jail, he must roll again on his next turn. Characters cannot use effects or special abilities to move out of the Jail; characters can only escape by following the instructions on the Jail space.
Characters in Jail cannot encounter each other. However, characters in Jail can still be targeted by Spells and are affected by Events as normal.
Shop Decks
The Armoury, Magic Emporium, Pet, Potion, Stables, Wanted Poster, and Purchase decks are also referred to as shop decks. Cards from shop decks are treated in all respects like Adventure Cards, except that when they are discarded, they are returned to the bottom of their appropriate deck and are available to other characters once more. Should there be no cards left of a particular item, then that item is not available at that time.
If an encounter allows a character to gain or take a card from the Potion, Pet, or Wanted Poster deck for free, he must draw the top card of the deck.
If an encounter allows a character gain or take a card from the Armoury, Magic Emporium, Stables, or Purchase deck for free, he chooses which card to receive.
Other Rules
This section clarifies rules regarding new cards, special abilities, and space instructions for the City Region.
Trinkets
Some Objects feature the Trinket keyword printed above the card’s special ability. Trinkets are treated in all respects like normal Objects, except they do not count towards a character’s carrying capacity. A character may have four normal Objects in addition to any number of Trinkets. Trinkets may be ditched, discarded, stolen, or sold like normal Objects.
Character Lore
Spy — A treacherous master of deception and a keen observer who will sell any secret for the right price.
Tinkerer — A sweet-natured mechanical genius whose mind is always buzzing and whose hands are always configuring gears and pulleys into a clockwork semblance of life.
Bounty Hunter — A cruel and merciless ruffian who will stop at nothing to track down his targets with no regard as to whether or not they deserve the price on their heads.
Cat Burglar — A clever and nimble rascal who would never steal from the needy but will happily purloin the valuables of an overindulged noble.
Tavern Maid — A delightful and exuberant lass with an uncanny knack for making sure that her patrons are never thirsty and are always in good spirits.
Elementalist — A disciplined adept who can control the fundamental forces within his own spirit and adapt his very nature to any situation.
Quick Reference
The Quick Reference card names, prices and card text are read from the card images on the final page of the official rulebook (the card text is not in the PDF's text layer).
Armoury Cards
Stiletto (1G) — Trinket, Weapon. Add 1 to your Strength during battle.
Bow (2G) — Object. At the start of battle, you may roll 1 die and add the result to your attack score. You may only do this once per battle. Whenever you use the Bow, you must either discard 1 gold or discard the Bow.
Greatsword (3G) — Weapon. Add 2 to your Strength during battle.
Battle Axe (4G) — Weapon. Add 3 to your Strength during battle. If you defeat another character in battle and force him to lose a life, the character cannot use Armour to prevent the loss of life.
Flail (5G) — Weapon. You may roll 2 dice during battle and add them together to determine your attack roll. If you roll doubles, your opponent cannot add his attack roll to his attack score.
Full Plate (6G) — Armour. Add 1 to your Strength during battle. If you are defeated in battle, roll 1 die: 1-3) You lose the attack as normal. 4-6) You do not lose the battle; it is considered a stand-off instead.
Stables Cards
Riding Horse (2G) — Followers. You may roll 2 dice and add them together to determine how far you move.
Mule (3G) — Followers. The Mule can carry an extra four Objects for you. If you lose the Mule, leave any surplus Objects of your choice in the space you are in.
Warhorse (4G) — Followers. Add your Craft value to your Strength during battle. If you lose a life during any battle or psychic combat, you must discard the Warhorse.
Horse and Cart (5G) — Followers. The Horse and Cart can carry an extra 8 Objects for you. If you lose the Horse and Cart, you must leave any surplus Objects of your choice in the space you are in.
Magic Emporium Cards
Scroll (1G) — Trinket, Magic Object. You may discard the Scroll at any time to gain 1 Spell, if your Craft allows.
Psychic Crystal (2G) — Magic Object. Add 1 to your Craft during psychic combat.
Mirror Shield (3G) — Magic Object, Armour. If you are defeated in psychic combat and just lost a life, roll 1 die. If you roll a 5 or 6, the Shield protected you and you did not lose that life, though you still lost the psychic combat.
Crystal Sceptre (4G) — Magic Object. When you attack another character, you may choose to make the attack psychic combat. You may not do this when you are attacked by another character.
Magic Ring (5G) — Trinket, Magic Object. Add 1 to your Strength and 1 to your Craft.
Spellbook (6G) — Magic Object. At the start of your turn, you may gain 1 Spell, if your Craft allows.