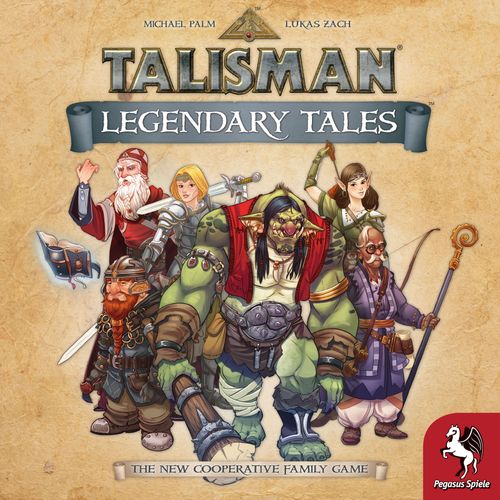
Talisman: Legendary Tales
Talisman: Legendary Tales Rulebook
Table of Contents
Table of Contents
Components
- 12 Locations (A)
- 6 Heroes, each with:
- 1 Hero figure (male and female versions, see assembly below) (B)
- 1 Hero tag (C) for the magic Hero bag
- 7 Hero start tokens in the Hero's color (D)
- 5 Adventures, consisting of:
- 5 Adventure scrolls (E)
- 102 Adventure tokens in total (22 in blue, 22 in red, 22 in green, 15 in purple, and 21 in gray) (F)
- 6 Toad tokens for Adventure 4 (G)
- 1 Time counter (H)
- 1 Travel die (J)
- 5 Health tokens (for some of the Enemies you will encounter) (K)
- 24 Reward tokens (L)
- 1 Reward tag (M) for the Reward bag
- 15 Talismans (N)
- Talisman scoreboard (consisting of three parts, see below)
- 7 cloth bags (6 magic Hero bags, 1 Reward bag; attach the Hero and the Reward tags to them, see below)
- this Rulebook, including the Book of Adventures
Object of the Game
The players must work together as an adventure party to recover the five legendary Talismans that have been lost. During each adventure the party will endeavour to recover one of the lost Talismans. The adventures are described on five different Adventure scrolls and must be played in order. You may repeat adventures and you may play 1 or more adventures in a game session.
Over the course of this story you will travel across a wondrous land and will have exciting adventures in which you must make important decisions and defend yourself against cruel Enemies.
As an adventure party, you will succeed in each adventure once you have completed the final task and have recovered the Talisman. Be careful: you have only a limited amount of time!
Each Adventure scroll has a limited Time track along which the Time counter steadily progresses. If the Time counter reaches the crescent moon at the end of the Time track, night falls and the evil forces become too strong for your party. If you have not obtained the Talisman by this time, your party has lost.
However, you may always try each adventure again until you recover the final Talisman.
Setup
Punch out all components from their punchboards. Fix the 6 Hero tags and 1 Reward tag to the seven bags, assemble the Hero figures, and put the three scoreboard elements into the game box as shown below.
A. Prepare Rewards: Place all 24 Reward tokens in the Reward bag. Place the bag within reach of all players.
B. Choose Heroes: Each player chooses 1 Hero. Take the matching Hero bag and decide whether you want to play with the male or female hero character. Take the matching Hero figure.
C. Fill the Hero bag with the 7 Hero start tokens in your Hero's color. Your Hero tag provides a list of these 7 start tokens.
All Heroes can fight and use magic; some are better with one and worse with the other. Heroes also have a special ability explained on their tag. Over the course of the game, your skills will improve as you gain new tokens to place in your bag.
Note: You are always allowed to look into your bag and check what's inside. However, when you draw tokens from a bag, you must first mix its contents and then draw without looking.
Read your Hero's ability aloud to the other players.
D. Place the Travel die somewhere where all players can reach it.
Choose Adventure: Open the Book of Adventures (it starts on page 7 of this rulebook).
You will play the adventures in order, so you must start with the first adventure. As you progress in ability, you will advance to the next adventure.
As an adventure party, you will jointly decide the difficulty level you want to play for the current adventure. You then take a Talisman with the appropriate number of stars as explained in the Book of Adventures. The greater the difficulty of the adventures you complete, the earlier you will be able to play the next adventure.
Once you have successfully completed an adventure, you will place the Talisman gently into the scoreboard (place it into the slots matching the adventure's number).
Follow the instructions regarding setup of locations and distribution of adventure tokens for each adventure as given in the Book of Adventures.
E. The book will also list the start location for your Heroes for each adventure.
F. Next, take the matching Adventure scroll and select one of the players to read the first segment of Chapter One aloud. This provides you with your first task and the game begins!
Gameplay
The youngest player starts. He or she carries out their complete turn, then the next player in clockwise order will carry out their complete turn and so on.
A turn consists of these three phases in order:
- Travel (Move from one location to another by the pathways or by "jumping" with the Magic Portal, see below).
- Encounter (Deal with any faceup tokens)
- Collect Rewards (If any – Rewards improve the contents of your Hero bag.)
Remember that your Hero has an ability that might be useful at any time during your turn.
1. Travel
First you must decide whether you want to travel or stay in your current location. It does not matter if there are faceup Adventure tokens in your location, you may always freely choose either option.
If you want to travel, roll the Travel die and move your Hero figure a number of steps equal to or less than the number rolled. You may also decide to stay where you are after the die roll.
Each step moves you from one location to another. You must follow the light-colored pathways connecting the locations. You may not use paths that do not lead to another location. You may move through or stop on locations with other Heroes.
You may move through locations with facedown Adventure tokens.
You must immediately stop if you enter a location with faceup Adventure tokens showing Enemies.
Example: The Dwarf rolls a 3. He may move to either A, B, or C and stop there. If he wants to move to E, he must stop on D, because there is a faceup Enemy in this location. He may not move in direction F, as this path doesn't lead to another location.
If you end your travel on a location with facedown Adventure tokens, you must flip them all faceup.
Note: If new Adventure tokens are placed in locations with Heroes, the tokens are immediately flipped faceup. They are never flipped facedown again, unless the Adventure scroll tells you to do so.
Special die faces
If the die shows 4 pips together with the hourglass icon, you must first advance the Time counter to the next space on the Time track on the Adventure scroll and then you may move your Hero figure up to 4 steps. Note: even if you decide to stay where you are, you have to advance the Time counter.
If the die shows the Magic Portal, you may "jump" with your Hero figure directly to any location of your choice – regardless of distance.
If you end your Portal move on a location with one or more facedown Adventure tokens, you must still flip all of them faceup.
Now proceed to the second phase: Encounter.
2. Encounter
If there are one or more faceup Adventure tokens in the same location as your Hero figure, you encounter them now.
Most Adventure tokens show Enemies that block and attack your adventure party. Some Adventure tokens depict Items or similar things that you may need in order to successfully complete the adventure.
Are there Enemies in the Location?
Enemies block your path and you must try to defeat them before you can proceed. They have icons that show you the damage you need to inflict in order to defeat and eliminate them: sword (damage by weapon combat) and wizard's hat (damage by magical combat).
Draw 3 random Hero tokens from your own Hero bag and compare the drawn icons with those shown on the Enemies. You may use all of the icons you have drawn in any order you want. If you manage to draw matches for all (or more) of the Enemy's icons, you defeat the Enemy and eliminate it by putting it back into the game box.
You may only use each icon you have drawn once. However, with a bit of luck, it is possible to defeat two or three Enemies simultaneously with your drawn icons. Ignore any leftover icons.
Example: The Dwarf encounters a goblin (sword + wizard's hat), a bat (wizard's hat), and rats (sword). He draws 3 random tokens from his bag with these icons: sword, sword, and wizard's hat. He may now choose to defeat the goblin and the rats OR the bat and the rats.
Ending the Encounter
Regardless of whether you defeated one or more Enemies, you must leave all of the tokens you have drawn on the table in front of you. If you drew tokens from other players (see below), place them on the table in front of these players.
Do not return them to your Hero bags at this time!
Returning tokens
You may only return tokens to your Hero bag when you or another player wants to draw tokens from your Hero bag. Before the draw, you MAY decide to return all of the tokens in front of you to your Hero bag first. You may only return ALL or NONE! You are not allowed to return tokens in front of you more than once in a given turn.
Summary List of basic icons
Sword or wizard's hat — These are used to fight Enemies with the matching icons. Sometimes you will also need them to finish tasks in an adventure.
Hourglass — If you draw an hourglass from a Hero bag it means some time has passed. You must advance the Time counter to the next space on the Time track on the Adventure scroll.
Fate and hourglass — First, you must advance the Time counter as described above. The fate icon allows you to draw another token from the same Hero bag from which you drew this token. It has no effect if the Hero bag is empty.
Magic bag icon — It is very exciting when you draw the magic bag icon. This allows you to get help from another player, if you want. Drawing a token from a Hero bag showing a magic bag icon allows you to draw an additional token from your own Hero bag, or from any other player's Hero bag.
Note: If the player who owns the Hero bag you want to draw from has tokens in front of them on the table, they may decide to return them to their Hero bag before you make your draw. If they decide to return the tokens, they must return ALL of these tokens to their Hero bag and may not keep any in front of them.
Now proceed to the third phase: Collect Rewards and Items.
3. Collect Rewards and Items
a) Rewards
If you have eliminated one or more Enemies this turn, you will be able to collect Rewards. Draw 1 random Reward token from the Reward bag for each Enemy you defeated. After you reveal each Reward token, you have to put it in any player's Hero bag (your choice).
Rewards improve the contents of a player's Hero bag.
There is an explanation of any special icons that may appear on these tokens on the back of this rulebook.
b) Items
If an Adventure token shows an item without any icons, you may take it, but only after defeating all Enemies (if any) in that location. Items are normally not put in a Heros' bag. Instead, when you take these items, place them on the Adventure scroll in the special area provided.
Your turn ends after completing phase 3. Now the player on your left begins their turn.
Have You Completed The Task?
As soon as you complete the current task for an adventure, you may read the next part of the story on the Adventure scroll. This may include adding new Adventure tokens to the locations. If there happen to be any Adventure tokens remaining on any locations, they are not removed unless there are instructions to remove them.
If you are instructed to turn over the Adventure scroll while reading you will need to take note of the number covered by the Time counter on the Time track. Then, after turning the Adventure scroll over, you will need to place the Time counter on the same number on the Time track on this side of the Scroll.
Detailed example for an Encounter
The Dwarf faces rats and a giant spider. He has an hourglass token in front of him from an earlier turn because the Prophetess tried to draw a sword from his bag but drew the hourglass instead. As the dwarf does not want to draw the hourglass again, he decides to not return the token into his bag, but leaves it in front of himself.
He draws 3 tokens from his Hero bag: a sword, a wizard's hat, and a magic bag icon. With the sword he defeats the rats. But he lacks another wizard's hat to defeat the giant spider. He knows that he does not have one in his bag, so he wants to use the magic bag icon to draw from the Wizard's Hero bag.
The Wizard has 3 tokens in front of her: wizard's hat, wizard's hat, and hourglass. To increase the chance for the Dwarf to draw a wizard's hat, she returns all 3 tokens into her Wizard's bag and mixes the tokens in the bag.
The Dwarf now draws 1 token from the Wizard's bag – and it's an hourglass-with-fate token! This is annoying because the Dwarf now must advance the Time counter 1 space on the Time track.
However, since he also drew a fate icon, he can draw again from the wizard's Hero bag. Success! He draws a wizard's hat and defeats the giant spider. The Dwarf returns the wizard's 2 tokens to the table in front of the Wizard and puts the 2 Enemies back in the box. He puts the 3 tokens from his bag on the table in front of him. Now he can reap his Rewards, which is always a special occasion for dwarves!
Ending an Adventure
You all win an adventure as a party when you fulfill its final task to complete the story and recover the legendary Talisman. Put the Talisman into the slot of the scoreboard in the game box matching the Adventure's number you just played. You will not lose this Talisman from now on (but you can of course try the adventure again, in order to win a Talisman with higher star count, which will then replace this Talisman).
You all lose the adventure if the Time counter reaches the final space on the Time track of the Adventure scroll. In this case too much time has passed, night has fallen, and the forces of evil are too strong.
Of course, you may always replay this adventure to try again! Also feel free to replay this adventure with an increased difficulty in order to win a Talisman with more stars.
Once you have collected enough stars (as shown on the Talismans already in the scoreboard), you may begin the next adventure. At the beginning of each adventure you will see the minimum number of stars you need to have collected before you can begin.
Finding All Talismans
Once you have completed all 5 adventures and have collected all 5 Talismans you may check the rank you have achieved. Congratulations on your successful completion of your quests!
What is your rank after completing all 5 adventures?
| Stars | Rank |
|---|---|
| 11–12 | Heroic |
| 13–14 | Renowned |
| 15 | Legendary |
Book of Adventures
Are you ready for your first adventure?
Adventure 1: The Curse of the Fairies
So far, you have gathered very little information about the location of the 5 Talismans. You did hear a rumor that the fairies of this region have stolen one. It is unimaginable that these friendly little creatures could commit such a crime, but nonetheless, you have decided to investigate. The first trail leads to the Alchemist…
Setup:
- First, place the locations as depicted in the diagram (Pool, Glade, Castle, Graveyard, Tavern, Forest, Temple, Cave, Runes, Valley, Hovel, Ruins).
- Place your Hero figures on the Hovel.
- Take Adventure scroll #1: The Curse of the Fairies and place it on the table.
Jointly decide the difficulty level (number of stars, the more, the higher the difficulty) you want to play for this Adventure and place the Time counter on the space with the same number of stars on the Time Track.
Then put a Talisman with the matching number of stars next to the Adventure scroll.
Select a teammate to read the first chapter from the Adventure scroll aloud (everything else is explained there).
Have you finished Adventure 1 with two or more stars? If you have, then you are now ready for the next adventure!
Adventure 2: Dragon Hunt
Exhausted from your search for the remaining Talismans, you arrive at a busy tavern. Inside the guests are all happily eating and drinking, although there are three shady characters sitting at a nearby table. Could these possibly be evil henchmen also seeking a Talisman?
Setup:
- First, place the locations as depicted in the diagram.
- Place your Hero figures on the Tavern.
- Take all 22 of the red Adventure tokens and sort them according to their fronts: 8 with smooth borders and 14 with jagged borders. Note that the latter include three round tokens as well.
Mix all of the Adventure tokens with smooth borders by shuffling them facedown and then place them on the locations as shown in the diagram. Set aside the other red Adventure tokens for now, you will need them later in the adventure.
- Take Adventure scroll 2: Dragon Hunt and place it on the table.
Jointly decide the difficulty level (number of stars, the more, the higher the difficulty) you want to play for this Adventure and place the Time counter on the space with the same number of stars on the Time track.
Then put a Talisman with the matching number of stars next to the Adventure scroll.
There are some special rules for this adventure. You should read them together now (they are on the final page of this rulebook): Stronger Enemies | Wealthy Enemies | Treasure Chests
Select a teammate to read the first chapter from the Adventure scroll aloud (everything else is explained there).
Have you finished Adventures 1 & 2 with a total of four or more stars? If you have, then you are now ready for the next adventure!
Adventure 3: Grabby Goblins
The search for the Talismans has brought you to a land teeming with goblins. Be careful: These green guys are small but there are a lot of them - and they are not unaccustomed to the use of magic!
Setup:
- First, place the locations as depicted in the diagram (Runes, Tavern, Castle, Pool, Ruins, Hovel, Cave, Valley, Glade, Graveyard, Temple, Forest).
- Place your Hero figures on the Forest.
- Take all 22 of the green Adventure tokens and sort them according to their fronts: 12 with smooth borders and 10 with jagged borders.
Mix all of the Adventure tokens with smooth borders by shuffling them facedown and then place them on the locations as shown in the diagram. Set aside the Adventure tokens with jagged borders for now, you will need them later in the adventure.
- Take Adventure scroll 3: Grabby Goblins and place it on the table.
Jointly decide the difficulty level (number of stars, the more, the higher the difficulty) you want to play for this Adventure and place the Time counter on the space with the same number of stars on the Time track.
Then put a Talisman with the matching number of stars next to the Adventure scroll.
There are some special rules for this adventure. You should read them together now (they are on the final page of this rulebook): Stronger Enemies | Treasure Chests
Select a teammate to read the first chapter from the Adventure scroll aloud (everything else is explained there).
Have you finished Adventures 1, 2, & 3 with a total of seven or more stars? If you have, then you are now ready for the next adventure!
Adventure 4: A Plague of Toads
After retrieving the third Talisman from the goblins, you have no idea where to look for the next one. Where else could a Talisman be hidden? It is bewitched! There are no clues, no hints, nothing! Dejected, you decide to stop at the next Tavern. After all, it was lucky for you the last time …
Setup:
- First, place the locations as depicted in the diagram.
- Place your Hero figures on the Tavern.
- Take all 15 of the purple Adventure tokens and set aside the Witch. Also take and set aside the six round Toad tokens. You will need the Witch and Toad tokens later in this adventure.
Place the purple token with the Prince on the Tavern. Mix the remaining Adventure tokens by shuffling them facedown and then place them on the locations as shown in the diagram.
- Take Adventure scroll 4: A Plague of Toads and place it on the table.
Jointly decide the difficulty level (number of stars, the more, the higher the difficulty) you want to play for this Adventure and place the Time counter on the space with the same number of stars on the Time track.
Then put a Talisman with the matching number of stars next to the Adventure scroll.
There are some special rules for this adventure. You should read them together now (they are on the final page of this rulebook): Stronger Enemies
Select a teammate to read the first chapter from the Adventure scroll aloud (everything else is explained there).
Have you finished Adventures 1, 2, 3, & 4 with a total of ten or more stars? If you have, then you are now ready for your final and most daring adventure!
Adventure 5: The Dark Lord
Now it is time to find the fifth, and last, Talisman. In your travels, you happen to encounter a wandering bard who tells you of a dark lord who is rumoured to have one of the lost Talismans. It is said he has taken control of many forces of evil so that he can seize the Crown of Command. You must hurry, because even a single Talisman in the dark lord's hands puts the Crown into danger . . .
Setup:
- First, place the locations as depicted in the diagram.
- Place your Hero figures on the Cursed Glade.
- Take all 21 of the gray Adventure tokens and sort them according to their backs: 12 with the shape of a villager and 9 with a regular back.
Remove the 4 tokens with speech bubbles on their fronts (each with 1 clue) from the villager tokens.
Mix these 4 tokens by shuffling them facedown, then remove one and place it back in the game box without looking at it.
Now mix the remaining 3 tokens together with all the other gray villager tokens by shuffling them all facedown and then place them on the locations as shown in the diagram.
Set aside the regular gray Adventure tokens for now, you will need them later in the adventure.
-
Now take all 8 of the red Adventure tokens with smooth borders on their fronts. Mix them by shuffling them facedown and place them on the locations as shown in the diagram. Note: you will not need the red Adventure tokens with jagged borders in this adventure.
-
Take Adventure scroll 5: The Dark Lord and place it on the table.
Jointly decide the difficulty level (number of stars, the more, the higher the difficulty) you want to play for this Adventure and place the Time counter on the space with the same number of stars on the Time track.
Then put a Talisman with the matching number of stars next to the Adventure scroll.
There are some special rules for this adventure. You should read them together now (they are on the final page of this rulebook): Stronger Enemies | Wealthy Enemies
Select a teammate to read the first chapter from the Adventure scroll aloud (everything else is explained there).
Do you want to invent your own adventures and tell your own story? Go to our website to download our guidelines explaining how to do this.
Icons Summary List
Note: when you draw a token from the Reward bag, its icons have no effect. Only tokens drawn from Hero bags have the described effects.
- Sword / wizard's hat — These are used to fight Enemies with the matching icons. Sometimes you will also need them to finish tasks in an adventure.
- Double sword / double wizard's hat — These are worth 2 swords or 2 wizard's hats respectively. You may also split the icons between two different Enemies.
- Hourglass — If you draw an hourglass from a Hero bag it means some time has passed. You must advance the Time counter to the next space on the Time track on the Adventure scroll.
- Hourglass with a green back-arrow (sometimes as an addition to another icon) — You win additional time for the adventure; move the Time counter one space back on the Time track.
- Crossed-out hourglass (as an addition to another icon) — You may ignore a regular hourglass drawn on your turn. Note: this does just help with hourglasses drawn from Hero bags, NOT with an hourglass you rolled with the die.
- Fate icon (sometimes as an addition to another icon) — You may draw another token from the same Hero bag from which you drew this token. It has no effect if the Hero bag is empty.
- Double fate icon — You may draw 2 tokens from the same Hero bag from which you drew this token. It has no effect if the Hero bag is empty.
- Magic bag icon (sometimes as an addition to another icon) — You may draw an additional token from your own Hero bag, or from any other player's Hero bag.
- Choice of icon — If two icons are separated by a slash [ / ], you may use this token for either one of the two icons (but not both). You may decide which one to use after you finish drawing your tokens.
- Two icons next to each other mean that you may use both of them. Example: a sword next to a fate icon counts as a sword and allows you to draw another token from the same Hero bag from which you drew this token.
Special Rules
Stronger Enemies
Some Enemies are stronger than others and must be damaged and defeated more than once before you can eliminate them. These Enemies will have 1 or more Health icons.
If you reveal an Enemy with one or more Health icons, place the indicated number of Health tokens next to it. This Enemy must be damaged in the usual way to defeat it, which means that you must draw all of the icons needed to match those shown on the Enemy. However, instead of eliminating an Enemy with any remaining Health tokens, you only remove 1 of its Health tokens instead. You may only eliminate an Enemy if it no longer has any Health tokens remaining when you defeat it. Once you have done this you may now discard it to the game box similar to weaker foes. With some luck it is possible to damage one of these stronger Enemies several times in a single turn and thereby eliminate it.
Wealthy Enemies
Some Enemies are rich and provide multiple Rewards when they are eliminated. These Enemies will have 2 Reward icons. If you eliminate an Enemy with Reward icons, draw a number of Reward tokens from the Reward bag equal to the number of Reward icons shown. You may then place each Reward token in any player's Hero bag.
Treasure Chests
Some Adventure tokens depict a treasure chest instead of an Enemy. You may only pick up (open) a treasure chest if there are no Enemies remaining on the location. When you open a treasure chest place it back into the game box and draw a number of Reward tokens from the Reward bag equal to the number on the treasure chest token. Each of these tokens may be placed in any player's Hero bag.
Some treasure chests are locked. In order to "open" them, you will need to draw icons to match those on the treasure chests during phase 2: Encounter, exactly the same as when you fight an Enemy. As usual, you may not use any of the icons you draw more than once.