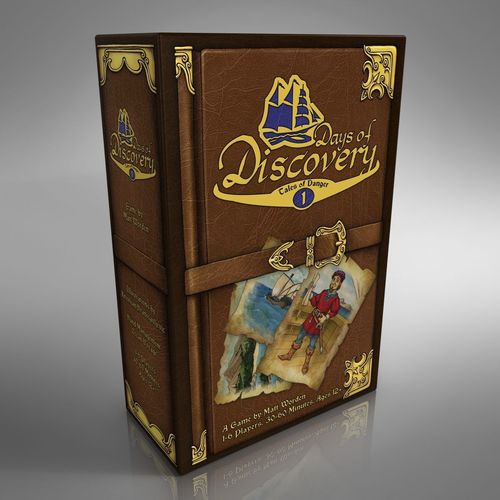
Tales of Danger #1: Days of Discovery
Tales of Danger #1: Days of Discovery Rulebook
Table of Contents
Table of Contents
- Contents
- Objective
- Setup for a New Game
- Playing the Game
- Act 1 - Secure a Sponsor
- Transitioning into Act 2
- Act 2 - Gather Crew & Supplies
- Transitioning into Act 3
- Act 3 - Voyage to the Land of Danger
- Complete Your Current Segment
- Forage
- Ending the Game & Scoring
- Appendix: Card Anatomy Details
- Appendix: Card Distributions
Contents
- 108 Poker-sized cards: 6 Sponsors, 102 People
- 6 Jumbo-sized Player Reference cards
NOTE: This rule book is written for playing with 2 or more players. Solo-play rules are given in a separate booklet.
Objective
The winner is the player that has the most points at the end of the game. Score points by completing Segments of an ocean Voyage to the Land of Danger. The ratings of the completed Segments, and the hidden Journals you store for each of them, determine the amount of points you score.
Along the way, this tale takes place in 3 Acts:
- Act 1: Recruit people who can provide evidence of the Land of Danger, and plans on how to get there, in order to secure a sponsor for your voyage.
- Act 2: Use the help provided by your sponsor to gather crew and supplies from the market.
- Act 3: Use your crew and supplies to complete the voyage to the Land of Danger.
The Land of Danger awaits ...
Setup for a New Game
1. Distribute Reference Cards
Give each player a Reference Card with the Act 1 & 2 side up.
2. Display Sponsors
When playing with 2 players, randomly select 3 Sponsor cards to use in the game. With 3 players, randomly select 4 Sponsors. With 4 or more players, use all 6 Sponsors.
Display the Sponsors in rank order in the middle of the table.
Figure: Sponsors displayed in rank order, numbered 1 to 6 from left to right.
3. Prepare Starting Hands, Deck & Pool
Shuffle all of the People cards and deal 3 face up cards to each player as their starting hand. Keep your hand of cards face up in front of you so that other players can see them.
Place the remainder of the deck face down near the Sponsors. Create a Pool by turning the top 5 cards face up next to the deck.
Discard Pile
During the game, place discarded cards into a face up pile next to the deck. If the deck becomes depleted, shuffle the discard pile and set it face down as the refreshed deck.
Figure: the Deck and Pool, with the Discard Pile beside them and the Sponsors below.
Playing the Game
The game is played in individual turns. When you complete your turn, the player to your left will take the next turn. This continues around the table until the game ends. Select a player to take the first turn.
Each of the 3 Acts in the game has its own set of actions and its own requirements to be completed. All players begin the game in Act 1, move into Act 2 individually, and move into Act 3 together as a group.
Act 1 - Secure a Sponsor
In Act 1 you will be recruiting People (adding cards to your hand). As soon as you have the People needed to secure a Sponsor, you may do so and then move on to Act 2.
Each People card shows one or more Evidence and/or Plans in the upper-left corner.
The Sponsors to whom a Person may present Evidence and/or Plans is determined by the Sponsor icons on their red ribbon.
Your objective is to recruit People that will work together to provide the Evidence and Plans needed to meet a Sponsor's requirements.
On your turn, do the following, in order (details follow):
- Recruit 2 People
- Check Hand Size (7 cards)
- Refill Pool
- Optional: Secure a Sponsor & Transition to Act 2
1. Recruit 2 People
Choose 2 People cards to add to your hand. Each card may come from either the Pool or the top of the deck.
Each time you draw a card from the deck, discard 1 card of your choice from the Pool.
2. Check Hand Size
You may not keep more than 7 cards in your hand. If you have more than 7 cards after recruiting, discard cards from your hand until you only have 7. (Remember to keep your hand face up in front of you so that other players can see them.)
3. Refill Pool
Flip the top 2 cards from the deck face up and place them in the open spaces in the Pool. The Pool should have 5 cards.
4. Secure a Sponsor
This step is optional*, and may only be taken if the cards in your hand meet both of the following requirements:
- You have at least 1 "Insider" for the Sponsor
- You have at least the minimum number of Evidence and Plans required by the Sponsor
*Note -- see the "Move the Story Along" rule on page 8 for when this step is not optional.
Insider: A Person is considered an Insider for a Sponsor if there are stars next to that Sponsor's icon on their red ribbon.
Figure: The Lady in Waiting on the right is an Insider for the Queen.
Evidence & Plans: Each Sponsor's card shows the minimum number of Evidence and Plans they need to be convinced to help you. Counting the Evidence & Plan icons on just the People that have an icon for the Sponsor, you must meet the minimum number of each to secure the Sponsor.
Figure: The 5 People that have an icon for the Knights Templar have a total of 3 Evidence and 5 Plans.
The "Move the Story Along" Rule: If you are the only player that has not secured a Sponsor, then securing a Sponsor is not optional. If you are unable to secure a Sponsor of your own choice, then you are given the lowest ranking remaining Sponsor as if you had secured them.
If there are 6 players, when the 5th player secures a Sponsor, the 6th player immediately secures the final Sponsor.
Transitioning into Act 2
When you secure a Sponsor, do the following, in order:
- Take the Sponsor Card from the middle of the table and place it in front of you. The Sponsor is not considered part of your hand. It is simply used as a reference.
- Discard cards from your hand until it is down to your Sponsor's "Start" hand size value as shown in the lower-right corner of the Sponsor's card.
If the Bishop is your Sponsor, you must discard from your hand until you have no more than 2 cards to start Act 2.
Act 2 - Gather Crew & Supplies
In Act 2 you will be gathering from the Market (adding cards to your hand). Act 2 is completed when all players are in Act 2 and each has a hand size equal to their Sponsor's "Max" hand size value.
Each People card shows either Crew and/or Supplies, or a special "cancel" ability in the market section on the bottom half of the card.
Your objective is to gather a varied mix of Crew, Supplies, and the special "cancel" abilities to have the best chance during your Voyage in Act 3.
On your turn, do the following, in order (details follow):
- Get Free Market Cards
- Gather from the Market
- Check Hand Size
- Refill Pool
- Check for Start of Act 3
1. Get Free Market Cards
At the bottom of some cards, the words "Free for" followed by a Sponsor's icon are shown. If any of the cards in the Pool are marked this way for your Sponsor, immediately add them to your hand, and refill the open spaces in the Pool.
2. Gather from the Market
Choose a number of cards, indicated by the "Market" value on your Sponsor's card, to add to your hand. Each card may come from either the Pool or the top of the deck. Each time you draw a card from the deck, discard 1 card of your choice from the Pool.
3. Check Hand Size
You may not keep more cards in your hand than indicated by the "Max" value on your Sponsor's card. If you have more than the max hand size, discard cards from your hand until it is down to the max hand size. (Continue to keep your hand of cards face up in front of you in Act 2 so that other players can see them.)
4. Refill Pool
Refill the open spaces in the Pool from the deck.
5. Check for the Start of Act 3
If all players are in Act 2 and have their max hand size, transition to Act 3. Otherwise, continue in Act 2 with the next player's turn.
Transitioning into Act 3
Do the following to prepare for Act 3:
- Remove any unclaimed Sponsors from the table. They will not be used in the rest of the game.
- All players pick up their hands. Hands will be kept private during Act 3.
- Shuffle all cards from the Pool and discard pile into the deck. Set the deck face down in the middle of the table. There will not be a Pool in Act 3, but there will be a discard pile.
Beginning with the player that secured the highest ranking Sponsor, and going to the left around the table, each player does the following:
- Flip your Reference Card to the Act 3 side.
- Prepare the first Segment of your Voyage.
Once all players have prepared their first Segment, the player with the highest ranking Sponsor takes the first turn in Act 3.
Preparing a New Segment of your Voyage
At the start of Act 3, and each time you complete a Segment of your Voyage, you must prepare a new Segment, as follows:
- Play a card from your hand or draw the top card from the deck to indicate the Segment Difficulty.
- Draw Segment Cost cards from the top of the deck based on the Segment Difficulty.
Segment Difficulty: Place the Segment Difficulty card face up in front of you so that it is clearly separate from Segments you have already completed in your Voyage.
Orient the card so that the ship icon is in the lower-left corner. The number inside the ship icon is the Difficulty rating.
Segment Costs: Draw a number of cards from the top of the deck equal to the Segment Difficulty rating.
Place these Segment Cost cards face up on top of the Segment Difficulty card, keeping its ship icon visible. Orient and overlap the Segment Cost cards so that each of their Segment Cost sections are visible.
Figure: Segment Costs are placed over the Segment Difficulty card, with the ship icon and difficulty number visible in the lower-left corner.
Act 3 - Voyage to the Land of Danger
In Act 3, you will be using the cards from your hand to complete individual Segments of your Voyage to the Land of Danger. Act 3, and the game, ends after one player has completed 5 Segments on their Voyage, and all other players have taken a final turn.
Each time you complete a Segment, you will add its Segment Difficulty card plus a face down Journal card from your hand to your Voyage tableau. If you have completed fewer than 5 Segments, you will immediately setup your next Segment.
Figure: the Completed Segments and Journals on the Voyage tableau, with the Next Segment to the side.
The Segment Difficulty ratings are scored as points at the end of the game. The Journal cards will be revealed at the end of the game, and the number values in their ship icons are also scored as points.
On your turn, you must do one of the following:
- Complete your Current Segment
- or, Forage for more Crew & Supplies
Complete Your Current Segment
To complete your current Segment, you must pay all of the Segment Costs by discarding cards from your hand. The Crew & Supplies shown in the Market section on the discards must match or exceed those shown on the Segment Costs cards.
In this example, the cards on the right are discarded to pay for the current Segment Costs: 1 Crew and 2 Supplies. While there is an additional Crew on the discards, it is wasted in this transaction.
Cancel Actions: The Priest, Doctor and Merchant cards have special "cancel" actions in their Market sections:
- Priests cancel "Bad Luck"
- Doctors cancel "Illness"
- Merchants cancel "Rough Seas"
Some Segment Costs show these same labels.
Discard a single Priest, Doctor, or Merchant to cancel all costs on all of the Segment Cost cards that have a matching label. You only need to pay the costs on any cards that are not cancelled in this manner.
In this example, the Doctor cancels the 2 Segment Cost cards labelled "Illness" ... leaving only a single Supply to be paid with another card.
Great Fishing: Some Segment Cost cards are labelled "Great Fishing!" These cards do not add any costs to the current Segment. Instead, when you have completed your Segment, you will gain a bonus card for your hand from the top of the deck.
If your current Segment only has "Great Fishing!" for Cost cards, there are no costs to pay to complete the Segment.
After paying Segment Costs, do the following, in order:
- Discard all payment cards and Segment Cost cards.
- Add bonus card(s) to your hand from the deck, only if you had any "Great Fishing!" cards on this Segment.
- Add the Segment Difficulty card to your Voyage tableau, by overlapping the edge of your Reference Card (with your first completed Segment) or the previous Segment's card. Be sure to leave the ship icons from all of the previous Segments visible.
- Add a face down Journal card from your hand to your Voyage tableau. The number in the ship icon on this card represents the quality of the Journal you wrote for this Segment of your Voyage. (If you have no cards left in your hand, you are unable to add a Journal.)
- If you have completed less than 5 Segments, prepare your next Segment. (see pages 11 & 12)
Continue with the next player's turn.
Forage
If you cannot or choose not to complete your current Segment then you must Forage, by doing the following, in order:
- Flip the top 4 cards from the deck face up.
- Add 1 of those 4 cards as an additional Segment Cost card on your current Segment.
- Add the other 3 cards to your hand.
Continue with the next player's turn.
Ending the Game & Scoring
When a player has completed their 5th Segment, the final round of turns is triggered. All other players take one final turn, and then the game is over and scoring takes place.
Figure: the completed Segments and Journals on a Voyage tableau.
To score, flip all of your Journal cards face up. Total your points by summing the numbers in the ship icons on all of your completed Segment Difficulty and Journal cards.
The player with the most points wins. On a tie, the player with the higher ranked Sponsor wins among the tied players.
Appendix: Card Anatomy Details
Sponsor Cards
Figure labels on a Sponsor card: Name, Title, Rank, Sponsor's Icon, Act 1 Evidence & Plans Needed, and Act 2 Card Management (the Start, Market and Max hand sizes).
People Cards
Figure labels on a People card: Card Count; Act 1: Plans & Evidence, and Sponsors Supported; Act 2: Crew & Supplies at the Market; Act 3: Segment Costs, and Segment Difficulty or Journal Quality.
Appendix: Card Distributions
All counts shown in number of cards (out of 102 total).
People Distribution (for Act 1 & Act 2)
The Market icons printed on each People card are shown in the figure in the printed rulebook and are not repeated here.
- Nun: 9
- Monk: 8
- Priest: 5 (cancels "Bad Luck")
- Minstrel: 8
- Innkeeper: 7
- Doctor: 4 (cancels "Illness")
- Sailor: 8
- Farmer: 7
- Merchant: 4 (cancels "Rough Seas")
- Royal Guard: 5
- King's Steward: 1
- Lady in Waiting: 5
- Queen's Confessor: 1
- Deacon: 5
- Vicar General: 2
- Captain: 5
- Guild Treasurer: 2
- Socialite: 5
- Business Man: 3
- Templar Chaplain: 5
- Templar Sergeant: 3
Act 3 Parts Distribution
- Segment Difficulty 1 (one ship): 17
- Segment Difficulty 2 (two ships): 51
- Segment Difficulty 3 (three ships): 34
Segment Cost cards (icons as printed; red X marks omitted from the description):
- 1 Supply: 16
- 2 Supplies: 16
- 1 Crew: 16
- "Bad Luck" (2 Crew and 3 Supplies): 8
- "Rough Seas" (4 Supplies): 8
- "Rough Seas" (1 Crew and 2 Supplies): 8
- "Illness" (3 Crew): 18
- "Great Fishing!" (bonus card): 12