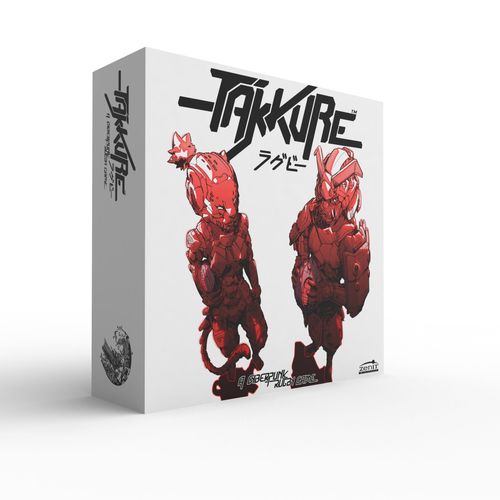
Takkure: A Cyberpunk Rugby Game
Takkure: A Cyberpunk Rugby Game Rulebook
Table of Contents
Table of Contents
00. First Contact
How to Use This Rulebook
The Takkure rulebook is divided into exercises. You can practice the exercises while you read the rules; this will help you assimilate the rules more easily.
In this rulebook you will find a tiny character who will help you at this task: Tackly. He will explain everything you need to know about this game.
In the exercises, rules and actions will be clearly marked. But if you don't remember where a certain rule or action is explained, you can check the glossary (section 7.02 below).
One important thing that you should always remember: this is a sport with a long tradition. After a match, shake hands with your opponent and enjoy the third half together.
How to Read This Rulebook
This rulebook is laid out as if it were a comic or manga, with the texts, actions and rules distributed in panels. So that's how you have to read it.
0.01 Introduction: The Rugby Rules
Hello and welcome, I'm Tackly. I've been programmed to make learning the rules of Takkure as easy as possible.
First, why do you want to become a coach? Do you think you have what it takes to coach one of the Neon First Series teams?
Having an attitude is a good start, but attitude alone won't be enough. It can be very complicated to coach a team of hypermotivated individuals with difficult personalities and body augmentations that aren't always of the highest quality.
We will start with the basics; I have to make sure you know the fundamentals of this sport. I will teach you step by step how to become a great coach in order to achieve glory. Because glory is what all of you come looking for... but only a few ever find it.
I know you are eager to step on the field, but before we start with the exercises, there are some things that I must explain. Nobody likes theory, but it will help you better digest the rest of the rules and exercises.
The first and most important thing is that you know where this sport comes from and the reasoning behind its core rules. Takkure is an evolution of rugby, a sport born almost 200 years ago, which gradually changed until it became the sport we know today, and which is played in all the major cities of the world.
There are 3 very important rules that Takkure inherited from Rugby:
- You cannot pass a ball to a player who is ahead of you.
- You can only tackle the player carrying the ball and the carrier is the only player who can have contact with the defenders.
- Once GROUNDED, you cannot stand up if you are carrying the ball.
0.02 Rules Priority
It is possible for a rule described in an ability, card, team, FAQ or expansion, to affect or contradict a rule described in this rulebook. A rule in an ability, card, team, FAQ, or expansion takes precedence over this rulebook.
Takkure is a game that's constantly evolving. It is possible that some rules in the future could be modified or clarified, so you need to keep in mind the rules priority.
Now, to more practical things. As I said, we start with the basics. So I have to make sure you know how to measure correctly. All the measurements and the materials in this set are in inches. If you normally use the metric system don't worry, it is very easy to get used to it.
0.03 How to Measure
In this game you CANNOT measure before declaring an action. You can only measure when required by a rule.
In Takkure all measurements are defined in inches. Indicated by (") after the value. One inch is about 2.5cm. But don't worry, you won't have to calculate it. Among the materials you have all the necessary rulers to play with the measurements in inches.
There are two different kinds of measurements:
- Checking a distance (Fig 1): To check a distance between two objects, usually miniatures, you measure from the closest point between those two objects.
- Moving or placing an object: We call this "Move TO" or "Place AT". In both cases you must choose the edge of the base that is in the direction where you are going to move or place that object and move until that edge reaches the inches that you can or want to move.
Example of movement (Fig 2): To measure a movement you must choose a spot on the miniature and move from that spot until it reaches the maximum inches allowed by your movement value.
Placement example (Fig 2): A rule or a skill can instruct you to place the ball or a player within X inches, let's say it is 2". This is how you measure it in that situation.
(Fig 1) Checking a distance: 2"
(Fig 2) Move up to 2" and place at 2"
0.04 Definitions
- Coach: That's you, the person moving the miniatures, rolling dice and having fun playing Takkure.
- Player: It is the miniature on the playing field. Represents a member of one of the two teams playing the match.
- Team: The 4 players that belong to the same Coach.
In Takkure there are some terms that in other sports or games might not have the same meaning, or are not used. So before we continue it's better to define them to make it clear.
Whenever you play a game and during exercises, there will be an attacking team and a defending team. This may seem very basic, almost unnecessary to explain. But at times during the game this may not be as clear. I'll explain it carefully, so when you have doubts you can come back for a reminder.
0.05 Attacking and Defending Teams
In Takkure there is always an attacking team and a defending team. Which one is the attacker and which is the defender is determined by the possession of the ball.
Possession of the ball: If a player on a team carries the ball, that player's team is the attacker. The other team is the defender.
At the start of the game, the team that receives the ball on their court, during the kick-off, is the attacking team.
There could be situations in which the ball is not in possession of any player. In those cases, keep in mind that the attacking team will only lose possession when a player from the defending team takes the ball in their hands.
When a player in the defending team catches the ball, its team then becomes the team possessing the ball, that is, the attacking team.
0.06 Components
- 4 Yamato figures and their cards
- 4 Teriomorph figures and their cards
- Play cards deck: 13 generic for each team, 8 for Yamato and 8 for Teriomorph
- Play field
- 2x Trainer boards
- Playtime board
- 6x 12-sided dice (D12): 3 red and 3 yellow
- Tokens
- Rulers and scatter template
If anything is missing, contact the publisher at [email protected].
Characteristics
Player card contains: Name, Position, Illustration, Base size, Skill by position, Player skills, and the line-up positions in which the player can be lined up (see Line-up, page 49).
- MOVEMENT (MOV): Determines how fast a player is. The first value is the movement when attacking (in inches) and the second value is the movement when defending (in inches).
- BALL CONTROL (BaC): Measures the skill of the player to handle the ball. The first value is for general use while the second one is used to SCORE A TRY.
- STRENGTH (STR): Measures how powerful and overwhelming the player is. It will be the reference value for TACKLING and BREAKING THROUGH.
- REFLEXES (REF): Indicates how nimble the player is. It is used for DODGE rolls and to avoid falling to the ground.
- INTELLIGENCE (INT): Used for some special skills from cards and players.
- PROTECTION (PRT): Represents the armor that the player is wearing and it helps prevent damage. It is added to BDY on endurance rolls.
- BODY (BDY): Represents the size and the bulk of the player. It is the maximum number of wounds that you can receive before getting injured.
- Player skills: Indicates if the skill is a skill by training. In such a case it is affected by the fatigue of the player (Fatigue, page 39).
- Base size: Indicates the size, in millimeters, of the player's base (shown as 40 on the card).
Pitch
The pitch has a central line and a kick-off line at each end, with an in-goal zone behind each. Measurements on the pitch are given in inches (the key measurements are marked on the field design: 4", 18" and 26").
On the B side of the board you can have an alternative pitch. The key measurements are exactly the same and are marked on the design.
Coach Board
The coach board has spaces for: the Activation token, the Ball token, the play decks, the player card of each position (one for each position), fatigue tokens, and the rest of the tokens.
01. First Steps
First things first. I'm going to teach you how to activate your players, to move them around the field, to defend, and how to score a try, which is the ultimate goal of the game: scoring more tries than the opposing coach.
Ask another coach to help you so you can practice together, it will be more fun. If you have no one available, you can control both players. It's not very complicated.
Since this is the first exercise, we will take it easy, I will explain it step by step. In the following exercises we will go a little faster.
Exercise Set Up
Sit down across each other and place the field with the short side facing you. Each coach takes a coach board, a player and his card. Don't take the player with the largest base for the moment.
Leave the rest of the components nearby.
Place the players as indicated in the diagram.
Place the ball token on the card of one of the players or attached to their base.
Choose which of the two players is the ball carrier. Or, if you are playing with another coach, randomize it or the owner of the box gets to decide. As explained before, that player is the attacking player.
Now, we are going to see how to activate a player to perform different actions. This is how you get the ball into the in-goal zone, which, remember, is what you have to do if you want to win a match.
The attacking coach takes the 4 activation tokens. Next, I'll explain how to use them.
1.01 Activation
The attacking team can use one of its activation tokens to activate one of its players. It doesn't have to be the player carrying the ball.
Place the token in the player's space for activation tokens on the coach board or on his card. Now that player becomes the ACTIVE PLAYER. The ACTIVE PLAYER has to follow a series of steps to complete the activation.
Activation token: Once the activation has been completed the attacking coach must use the remaining activation tokens.
1.02 Activation Steps
Once a player is activated, it must follow these steps in order:
- 1st Offensive Action
- Defense
- Movement Execution
- 2nd Offensive Action
- Measurements and Dice Rolls
- Token Removal
Once completed, the activation ends.
1.03 Attacker's First Action
The player can perform one action amongst the following:
- MOVE
- STAND UP
- PASS FROM THE GROUND
1.04 Move as 1st Action
Movement token: To MOVE as your 1st action, you must mark the movement you plan to make using either the movement token alone or both the movement and turn tokens.
Only the movement of the active player is marked: you don't have to mark the movement of another player other than the active player (as in a team move).
You can mark the movement in two ways:
- Using only the movement token: In this case, the player will make a totally straight movement until he/she enters in contact with the movement token. (See Figure 1)
- Using the Turn token: Place this token between the player and the movement token. During step 3, the player will make a STRAIGHT LINE move until he/she is placed on the Turn token and then they will make another STRAIGHT LINE move until they are in contact with the move token. (See Figure 2)
Turn token: Used as described above.
There is no distance limit to mark the movement, but you must bear in mind that the player will only move up to the maximum of inches indicated by the first value of his MOV (ATTACK MOVEMENT).
Movement symbol: Important: the player will ALWAYS try to move as much as possible. If you want to move less, you must place the movement token closer: the player's movement will stop only when it comes into contact with the movement token. (See Figure 3)
Remember: during this step you should only place the movement tokens, not move the player. The movement is performed during step 3 of the activation.
Figure 1 (Straight move): Mark the movement (Step 1); execute the movement (Step 3). Figure 2 (Move with turn): Mark the movement with the turn token and movement token (Step 1); execute the movement in two straight lines (Step 3). Figure 3 (Short move): Mark the movement (Step 1) and execute the movement (Step 3).
Exercise: Move as 1st Action
The active player marks a straight move towards the defending player. The coach is instructed to follow the indications the first time they practice this exercise; once they have practice, they can try to move as they wish.
Right now what you should do is PRESSURE. Why? Because it is an action that is used when you think you are not going to tackle.
1.05 Defense
Once the movement is indicated, it's time to defend. Now the defending coach must declare what his players will do.
At this point ALL players on the defending team can perform a defensive action. Each player action may be different. The actions available on defense are:
- PRESSURE
- BALL STEAL
- TACKLE
- STAND UP
- REST
1.06 Pressure
This action allows Defensive Movement. PRESSURE represents the player trying to annoy nearby rival players. Indicate that you are performing this action with the pressure token.
The attacking players are affected if there is a player within 2" performing the PRESSURE action at the exact point where the action is performed.
Attacking players affected by PRESSURE suffer a -1 modifier to the value of the characteristic associated with the second action they execute during this activation.
An attacking player can be affected by multiple defending players taking the PRESSURE action; pressure modifiers are stackable.
Pressure token: Indicates that the player is performing the PRESSURE action.
1.07 Defensive Move
A defensive move is a movement that some defensive actions allow you to perform.
On defense, some actions or abilities allow you to move. The player can move a maximum of inches equal to his second MOV value. The defensive movement is performed in activation step 2, regardless of the outcome of the action in activation step 5.
It is not necessary to mark defensive moves: you can move in any direction, and it doesn't need to be in a straight line. Declare the defensive action, measure and move the player. Keep in mind that other players will block your movement. The action will resolve after the movement.
Exercise: Defensive Move and Execution: Make a 2" defensive move directly toward the attacking player. Then, at movement execution (step 3), move 4" directly towards the movement token.
Figure: 2" defensive move; 4" movement execution.
1.08 Movement Execution
In this step the active player performs the movement he previously marked. You must mark with an active player token the place where the player starts his activation (before making the move).
Active player token: Marks the place where the active player starts his activation.
Remember that the movement is a straight line, following the shortest path possible, as far as its Attack Movement allows, until it either contacts the movement token or exhausts all the MOV value.
The active player always has priority to be placed on the game board and, during this step, it ignores all models on the game field. At the end of the movement, displace all players that prevent placing the active player at its final position.
He cannot move the players of his team in this way; if the movement falls on a player of the same team, reduce the movement until you can place him correctly.
If you have any doubts about this you can consult the Rules of Space Occupation, page 48.
1.09 Attacker's Second Action
As a second action, the active player can perform one of the following actions:
- MOVE AS 2nd ACTION
- PASS
- PICK UP THE BALL
- DODGE
- BREAK THROUGH
- SCORE A TRY
1.10 Move as Second Action
To perform a move as a second action you don't need to use the move tokens. You can simply move the player up to the maximum of his Attack Movement in the direction you want; this movement doesn't need to be straight.
During this movement, the rest of the players do block your movement.
If during the first movement a player has declared a TACKLE against this player, you must mark the start of the second move with the active player token. If the TACKLE is successful, the player will fall at the token's location.
Check Space Occupation, page 48.
Exercise: Move as Second Action: Move 4" as shown in the figure. It is not necessary to use the movement tokens when you move as a second action. Move the attacking player again to get as far away as possible from the defender while moving forward to score a TRY.
Since this is the first activation and there has been no contact between the two players, there is nothing to measure and no dice to roll; step 5 now has no application. It will be seen in the next activation.
1.11 Tokens Removal
Remove all the pressure, movement and active player tokens. Attacking team players who have not been activated can remove a GROUNDED token.
Note: A GROUNDED player who was carrying the ball at the start of its activation is considered active during this step.
Now you have seen the steps to follow during a player activation. It may seem tedious, but it's like training until you acquire muscle memory: with a bit of practice, it will come out on its own and you'll see that the game is very fast and fluid.
But we've only seen a very basic aspect: the steps to follow when executing an action and the movement. As you can see, the players are now very close and the defending player can try to TACKLE the attacking player. So let's get on with the exercise and see what happens.
Take another activation token, place it on the card of the player who carries the ball, who should now have two of them.
Let's go back to the activation order of a player:
- Defense: At this point the defender must choose what action to take. It is very close, so it is time to attempt a TACKLE.
1.12 Attacker's First Action (Second Activation)
Remember that you must mark the movement with the movement tokens, not perform it. If you want to make a change of direction during the move, use the Turn token to indicate it. Remember that you will always move the maximum inches trying to reach the move token.
Exercise: Move as First Action (second activation).
Tackle
Tackle token: Indicates that the defender has performed the TACKLE action.
Tackle (declaration): This action allows Defensive Movement. The main condition is that you can only TACKLE the player with the ball, WHETHER THEY ARE THE ACTIVE PLAYER OR NOT. You could tackle a player who hasn't activated, as long as it is the ball carrier.
You must declare which player and at what point you are going to try to tackle, before measuring the distance and making the defensive move.
You can choose to TACKLE the player's position or at any point along the path they've marked during step 1 of the activation. You cannot tackle a player on the ground.
Once the location has been decided, measure and get as close to it as possible.
Exercise: Defense: You are now close enough to the active player's path to TACKLE. The defending coach moves his player to the point marked on the diagram (2").
Movement Execution (Second Activation)
- Movement execution: Now the active player performs the movement he marked. Remember that the active player never sees his movement interrupted during this step. If you have any doubts about this, consult Space Occupation, page 48.
As you see, the active player passes over the defending player and will try to make contact with the movement token. But the defending player can try to tackle you, so you can decide what action to take now.
Exercise: Movement Execution: Move the active player 4" towards the direction of the move token.
- Attacker's 2nd action: Once the move has been made, the attacking player can face the TACKLE declared by the defending player.
- DODGE: This would allow you to make a small extra move if you are successful on the dice roll, and get away from the defender. It is very useful if the player has a high REF value.
- BREAK THROUGH: This action would provide no extra movement but would knock down the opposing player if successful. Use it with a player with a high STR value or when facing multiple defenders.
Choose one of the two, depending on the STR or REF of the player you chose for the exercise. Once you have chosen your second action, we need to decide who prevails. This is when the rolls are made in step 5; before that, the distances are checked to apply the modifiers.
1.13 Measuring During Step 5
During this step take all measurements not required by a moving action. For example: measure whether an attacking player is within 2" of a defending player who chose PRESSURE, or the distance between two players for a PASS.
Once you have checked all the distances to determine the modifiers to apply, you will make all the necessary rolls to determine which actions are successful.
1.14 Unopposed Roll
Unopposed rolls are used to determine if a player's action is successful. An unopposed roll is made when no player from the other team intervenes in the action. Therefore, you only need to succeed on your roll for the action to be successful.
To make an unopposed roll, roll a twelve-sided die (D12), apply all the modifiers and then check the result. If it is equal or lower, it is a successful roll. If it's higher, it's a fail and the action is not executed.
Example of unopposed rolls: Strength (STR) 7. Dice results: 5 = SUCCESS; 8 = FAIL.
1.15 Face-to-Face Roll
A face-to-face roll is used when several players fight for the success of an action in order to determine who prevails. In a face-to-face roll, each player involved makes a roll and compares it with the characteristic corresponding to that action. It's like an unopposed roll, but the success depends on the results of the rest of the players. Only one player can succeed on a face-to-face roll.
- If all fail: Exactly that, all fail. If the player's action has an adverse effect when failing, apply it.
- If only one is successful: That player is the winner of the roll, and his action is successful. The rest of the players have failed; apply any adverse effects of the actions they have taken.
- If several players are successful: In that case you must compare the dice results: the player that rolled the highest value is the winner, their action is a success and its effects are applied. The other players do not apply the adverse effects of their actions, and they are not considered to have failed. If they announced a defensive movement, they still move.
- Tie: Several players are successful and their dice results are the same. In that case no effect is applied as a result of the action. If they announced a defensive movement, they still move.
Examples of face-to-face rolls (each with Strength (STR) 7 for both players):
- All fail: 10 = FAIL; 8 = FAIL.
- Only one succeeds: 3 = SUCCESS; 8 = FAIL.
- Several players succeed: 5 = SUCCESS; 3 = CANCELLED.
- Tie: 4 = CANCELLED; 4 = CANCELLED.
1.16 Modifiers
A modifier is a number, positive or negative, that modifies the value of a characteristic, representing whether it is easier or more difficult to perform an action. These modifiers are applied to the characteristic associated with the action before rolling the dice. Modifiers are determined by rules, abilities, or actions.
Example of modifiers: The active player wants to throw a 3" pass but is being pressured by a defending player.
- Ball Control (BaC): 7
- Pass at 3", modifier: +2
- Pressure, modifier: -1
- Player's Ball Control total: 7 + 2 - 1 = 8
1.17 Critical and Fumble
If you roll a 1 on a die, it is considered a critical success. And if you roll a 12, it is considered a fumble.
- Critical: A critical roll always wins the roll regardless of whether the other rolls are higher. In addition, a critical can provide extra benefits for the player; these are noted in the action's description. If several players have critical successes it is considered a tie.
- Fumble: A 12 on a die is always a miss, regardless of the characteristic's value.
1.18 Endurance Roll and Wound
Whenever a player is tackled, it must make an ENDURANCE roll (END) to see if they take damage from the hit.
To calculate the ENDURANCE of a player you must add the values of BDY and PRO. (Source note: the printed rule says "PRO"; the card characteristic is PROTECTION (PRT), which is added to BDY on endurance rolls as stated in Characteristics above.)
This is an unopposed roll: roll a die and compare it to that value.
- If the result is equal or less: You are successful, the player takes no damage.
- If the result is higher: You have failed the roll, the player receives a WOUND token.
Dodge
(Printed in the rulebook as the attacker's second-action option; numbered 1.19 in the margin of the source page, with the tip below numbered 1.20.)
You can only DODGE if a defending player has declared a TACKLE action against this player.
Make a roll using the REFLEX (REF) attribute.
- If you are successful: Move 2" in any direction.
- If you fail: No adverse effect.
- If it is a critical success: Move 4" in any direction instead.
Once you've decided on the point, measure and get as close to it as possible.
Tip: Dodge is very useful if you think that extra movement will let you avoid other tackles during the next activation, especially if your player has a high REF value or a skill that allows it to roll more than one die.
Break Through
You can only BREAK THROUGH if a defending player has declared a TACKLE action against this player. Only the ball carrier can BREAK THROUGH.
Make a roll using the STR (STRENGTH) attribute.
- If successful: The tackling player is GROUNDED and makes an ENDURANCE roll.
- If you fail: No adverse effect.
- If success is critical: The tackling player is GROUNDED and receives a WOUND.
Tip: BREAKING THROUGH is a good way to get a defender out of the way. If you manage to knock it to the ground it will lose an action standing up, and that will be your chance to reach the scoring area. Obviously, the players with skills that improve BREAK THROUGH and those with a high STR are the ones who will often use this action. This is a contact game, so it should be no surprise if you take some hits.
At this point you should already know that this roll will be face-to-face because you are affecting the defending player with this action.
1.21 Tackle (Execution)
To TACKLE, use the STRENGTH (STR) attribute.
If you make contact with the player or with its trajectory (that is, the trajectory from the active player token to the active player position, after step 3 of the activation), make a roll using the STRENGTH (STR) attribute. This roll can be face-to-face or NOT, depending on the attacker's second action.
If during the defensive movement you do not make contact with the active player or its trajectory, you are considered to have failed the roll.
- If you are successful: The defending player is placed in contact with the active player following the shortest path possible (Fig 1). Both players are GROUNDED, and the player being tackled makes an ENDURANCE roll.
- If you fail: Roll REF. If you fail, the tackling player is GROUNDED and must make an ENDURANCE roll.
- If your roll is CANCELLED: The action is not performed, but you are not GROUNDED.
- If success is critical: Same as success, but the player being tackled takes a wound token without rolling ENDURANCE.
(Fig 1) Proper movement when TACKLING.
Tackling is the basis of the defense; in general it is the best way to stop the attack, and once the attacking player is GROUNDED, steal the ball. There are a number of things here that have not been explained yet: the stamina roll, the wounds, and the ground. Later we will see what effects they have. The only thing you need to know now is that if due to an action a player is GROUNDED, you must indicate it with a ground token.
Outcome of the exercise roll:
- If the defending player is hit by the attacking player, it will end up GROUNDED, execute step 6 of the activation and go to "Finish the exercise", since the attacking player will be able to SCORE A TRY at will.
- If the defending player manages to tackle the attacking player, it has managed to stop the attack; execute step 6 and go to "Finish the exercise".
- If the attacking player dodges the defending player and the defender is GROUNDED, the defense has lost the opportunity to stop the attack; execute step 6 and go to "Finish the exercise".
- If the attacking player dodges the defending player but the defender is still standing, go to step 6 and go to "The exercise continues".
6. Tokens removal: Remove the active player token, the movement tokens and the pressure token (if any). Then, based on the roll result, check what to do next.
Exercise Follow-up
- Finish the exercise: You can start over again, go to the beginning of the exercise and repeat it. It is recommended to follow everything explained step by step a couple of times, so that you understand well how the activation works and what the steps are. When you feel ready, you can place the movement token and perform the defensive movement any way you want, then go to Free Movement.
- The exercise continues: Place an activation token back on the carrier player. Mark the next move.
- Movement after an attempted tackle: Follow the activation steps. The defender will try to tackle directly on your player.
- Tackle on the player: Execute the rest of the activation steps as in the exercise, and check the result as before. Whatever the result, see "Finish the exercise".
- Free movement: Restart the exercise, place the players at their starting positions. This time perform the movements any way you want, experiment, and see how you can move to make it more difficult for the defender. Keep in mind:
- You must get to the opposite edge before you run out of activation tokens.
- You cannot step out of the lines or move backwards.
- If the defending player DOES NOT come into contact with the attacking player, you can MOVE again, as explained above. That way you can get away from the defender and get to the scoring area.
The first exercise ends here. As explained at the beginning, repetition is the key to success. You can start over as many times as you want and try all the action and movement options at your disposal. You can swap who is the attacker and who is the defender so that you can both try it. Whenever you feel ready, move on to exercise 2: passing the ball.
02. Pass and Team Play
Exercise Set Up
To practice passing we will do an asymmetrical exercise. Decide which coach will be the attacker and which one will be the defender. The attacker will have two players and the defender just one. Place the players as indicated in the figure.
(Fig 1) Example of how to perform the exercise.
The active player moves directly towards the defender (1). So the defender moves directly towards it, trying to TACKLE it. But it doesn't reach it, which forces him to make a REF roll for a failed TACKLE (2). Then the attacker makes a second movement to get past his partner and be able to make the pass during the next activation, and also stay out of range of the defender's TACKLE (3). In order for the defender to be close on the second activation, he must make a diagonal movement (4).
Passing the ball is the easiest way to break through the defense. The goal of passing is always to gain an advantage: either by creating a gap, by giving the ball to your highest STR player, by giving it to a player with a high REF paired with a defender with little STR, and so on. Either way, passing is essential to have a better chance at winning the game.
Once again the activation steps are followed as in exercise 1. But in this case the attacking coach will only be able to perform the "Pass" action. Try to beat the defender just by passing the ball. Having superiority in numbers it should be easy, but you may need some practice. Take the 4 activation tokens and use one to activate the player carrying the ball.
First, try to get the ball to the player who is now ahead of you. Then keep passing the ball between your players to overcome the defender.
2.01 Pass
In order for a player to perform a PASS, it must be the ball carrier. Keep in mind that you can't pass the ball to a player ahead of you.
The active player can throw the PASS at any point of his movement. You can decide to do it at one point or another depending on the actions of the defending players.
- By choosing a point where a defending player has not come into contact with the path of the active player, the roll will be unopposed (Fig 1).
- If the pass is at a point past the defender's action, the roll will be face-to-face (Fig 2).
Make a roll with the BaC attribute (Ball Control).
The PASS is always affected by modifiers. During step 5 of the activation, check the distance between the two models: the active player (passer) and the player who is going to receive the ball (receiver). Apply the modifier as shown on the table. Only one modifier is applied; in case the distance is just between 2 values, apply the best modifier.
Pass modifiers (distance between passer and receiver):
| Distance | Modifier |
|---|---|
| 0" to 2" | +4 |
| 2" to 4" | +2 |
| 4" to 8" | 0 |
| +8" | -2 |
Outcomes:
- If you are successful: The ball reaches the receiving player. Place the ball on the receiver's card.
- If you miss an unopposed roll: The receiving player makes a BALL RECEPTION roll.
- If you have a critical success: The ball reaches the receiving player. Place the ball on the receiver's card. The receiving player may then make a move of up to 2".
- If the roll is face-to-face and everyone fails: The receiver makes a BALL RECEPTION roll.
- If the roll is face-to-face and your roll is cancelled, or you fail and your opponent succeeds: The PASS won't be performed, and there is no RECEPTION roll. You suffer the effects of the defending player's action.
(Fig 1) Unopposed pass: the pass is thrown before the point where the defender performs the TACKLE. (Fig 2) Pass with face-to-face roll: the pass is thrown AFTER the point where the defender performs the TACKLE.
When you miss a pass, there is still a chance for the receiving player to catch the ball. To check if it is successful, make a BALL RECEPTION roll.
2.02 Ball Reception
When you miss a PASS, the receiving player still has an opportunity to catch the ball. Make an unopposed BaC roll, taking into consideration the modifiers of the reception table, according to the distance between the players involved.
Reception modifiers (distance between the players involved):
| Distance | Modifier |
|---|---|
| 0" to 2" | +2 |
| 2" to 4" | 0 |
| 4" to 8" | -2 |
| +8" | -4 |
Only one modifier is applied; in case the distance is just between 2 values, apply the best modifier.
- If you are successful: The pass succeeds. The pass receiver becomes the ball carrier. Place the ball on the receiver's card.
- If you miss: The ball falls to the ground and you must make a scatter roll off the pass target. Center the template on that player.
2.03 Scatter Roll
In some cases the game will ask you to make a scatter roll. Use the scatter template. This template is used to randomly determine where that object moves (like the ball, for example). To do this, place the template with the scattering object in the center, with the number 1 pointing in the direction of choice of the coach causing the scatter. Roll a die and check the result. Place the object in contact with the template and with the tip of the arrow that matches the number you have rolled.
If a rule tells you to make a scatter roll, follow this rule.
Exercise result:
- If the pass reaches the receiving player, keep playing and try to reach the goal line.
- If the ball falls to the ground, the exercise ends.
- If the carrier is tackled and the pass is not performed, the exercise ends.
Remember that you have a limit of 4 activation tokens; if you run out, restart the exercise. Repeat until one player reaches the line or you are comfortable with this exercise. Change the attacking coach so you can both practice the PASS.
By now you should have realized the importance of the pass to find or create a gap. Not everything is diving against the defense; good handwork can be much more effective, and less dangerous.
The following exercise throws more players into a limited space, and the game doesn't stop: play continues no matter what happens until the 4 activation tokens are used.
Scatter template and scatter roll example are shown as graphics in the printed rulebook.
03. Death Box
Exercise Set Up
We are going to even the teams: use 3 players each, and do not use the player with the large base yet. One team will be the attacker and the other the defender. The last defender in the previous exercise can be the attacker in this exercise.
Place the players of each team as indicated in the diagram. Note that in this case the playing space is smaller; the contact is unavoidable.
You should already have mastered individual play and passing. Now it's time to practice defense. Here you can experience what Takkure is for the first time: fighting for every ball and every inch of the field. This exercise is called the Death Box.
In this case, the attacking team will be able to use the three actions that have been seen so far: PASS, BREAK THROUGH, and DODGE. The exercise will not end when being tackled or missing a pass. Play continues until the defending team steals the ball or the attacking team reaches the line where the defenders started.
The attacking team takes all 4 activation tokens. If they use them up and still maintain possession, remove them from the coach board and use them normally again.
To continue the game some new rules are needed.
3.01 Grounded
When a player hits the ground, you must mark him with a ground token.
A player with this token cannot perform actions normally. You can only perform the STAND UP action. The exception is when the GROUNDED player is the ball carrier: it cannot STAND UP. Instead it can throw a PASS FROM THE GROUND.
3.02 Stand Up
If you perform the STAND UP action, you remove a GROUNDED token. This action can be done both during attack and defense. No dice roll is necessary.
- On Attack: As the first action of the active player (if it's not the ball carrier). If the player has no more ground tokens, it can perform a MOVE AS A 2nd ACTION.
- On Defense: Does not grant defensive movement.
3.03 Pass From the Ground
An attacking player carrying the ball who is GROUNDED may pass the ball. But passing the ball from the ground has a number of restrictions:
- Passes from the ground receive a -2 modifier to the BaC, in addition to any modifiers it may have for distance.
- You cannot throw a pass from the ground further than 8". When measuring the throw distance, if the receiving player is more than 8" away, his roll is considered to have been cancelled, with which there is no PASS or RECEPTION OF THE BALL.
- If you decide to do this, the player will not be able to perform a second action on this activation.
To resolve the pass, based on the dice results, follow the steps for a PASS as described on page 32.
3.04 Ball
The ball is a physical element; it can be in the hands of a player or on the ground. When a player catches the ball, it places it on its player card and becomes the ball carrier. When the ball is on the ground, it occupies that space as if it was an enemy player. See space occupation, page 48.
Remember the basic rule of rugby: "Once tackled you cannot get up while you have the ball in your hands." But if you are the carrier, and you are GROUNDED, you can try to pass the ball from the ground.
This is very useful, but it is susceptible to having the ball stolen by the opposing team. During this exercise, either a ball will fall to the ground or the player on the ground will have it in his hands.
3.05 Ball Pick Up
Picking up the ball is an action that can only be performed by an attacking player. This action allows a player to pick up a ball that is on the ground or in the hands of a player, even if that player is on the ground. To be able to perform this action you must be in contact with the ball or the player with the ball (in this case it must be behind the player carrier, as in a pass), at some point during your movement.
Make a BaC roll with a +4 modifier. Then that player becomes the ball carrier.
3.06 Ball Steal
This action allows Defensive Movement.
Stealing the ball is a defensive action that allows the defending team to take possession of the ball. You can steal the ball in three ways: when the ball is on the ground and is not in the possession of any player (loose ball), held by an attacking player who is GROUNDED, or in the air (pass interception). But you cannot try to steal the ball from an active player who is NOT GROUNDED.
- Loose ball: If you are in contact with the ball, make a BaC roll with a +4 modifier. (Fig 1: ball on the ground.)
- Held by an attacking player who is on the ground: If you are in contact with a GROUNDED ball carrier, make a BaC roll. (Fig 2: held by an attacking player on the ground. Roll BaC +4 is shown in the figure label.) A GROUNDED player cannot perform this action.
- In the air: If you are at a point in a pass trajectory. That is, if you draw a line from any point on the passer's base (from where the pass originated) to the receiver's base, and that line passes through any point on your base, make an uncontested BaC roll with a -2 modifier. If the roll is successful, this player becomes the ball carrier. If unsuccessful, the pass continues as normal. (Fig 3: the defending player steals the ball on the path between the two attacking players; make an unopposed roll of BaC -2.)
Remember that if the ball is STOLEN, at the end of the current activation, the attacking coach must discard any remaining activation tokens. Then that coach becomes the defending coach and vice versa.
You can use the ball steal token to indicate this action.
3.07 Multiple Face-to-Face Roll
These rules are simple, but often times there aren't only two players facing off; rather, multiple players can intervene. In that case, you have to make a multiple roll, which is a special type of face-to-face roll. There are two types of multiple rolls: the multiple roll and the melee roll.
When a roll is made in which more than two players intervene, it is considered a multiple face-to-face roll. It's like a face-to-face roll, but it is the active player who, before rolling, decides the order and against which player it will roll each of their dice. You must treat each roll as an independent roll.
On a multiple face-to-face roll, the active player may not have enough dice to face all the defending players. In that case, you must decide against which player you will use each of your dice. Players you don't assign a die to will each make an unopposed roll.
The order of the rolls is important, as the result of a roll may affect the next one. As soon as the active player is GROUNDED, no more rolls are made.
Multiple face-to-face example: Two players (STR 7) try to TACKLE a player who decides to DODGE (REF 7). Dice: 5 = SUCCESS; 3 = CANCELLED; 8 = FAIL. The active player decides to face the first defender. In this case, the second defender makes an unopposed roll. The second defender has failed, so the active player is not affected by its action.
Again, the two players (STR 7) try to TACKLE a player who decides to DODGE (REF 7). Dice: 6 = SUCCESS; 5 = CANCELLED; 2 = SUCCESS. In this case the second player has been successful. Once the attacker's action has been executed, which in this case is DODGING the first defender, the success of the second defender is resolved. Therefore, the active player is tackled by the second defender and both are GROUNDED.
Clarifications on multiple face-to-face rolls:
- DODGE: The active player will only make ONE extra move for having successfully dodged, regardless of successes.
- PASS: If the active player succeeds in a PASS, the rest of the rolls by the defenders will be UNOPPOSED.
3.08 Melee Roll
The melee roll is used in only two cases:
- When several players from both teams want to pick up a ball from the ground, or in the possession of a player ON THE GROUND.
- When a player performs the SCORE A TRY action and there are several defending players performing the TACKLE action against him.
In these cases all dice are rolled at the same time and all results are compared in a single competition. That is, the winner will be the player who succeeds in the roll and gets the highest value among the successes (or a critical).
In the event that several players tie for the best roll, make a new face-to-face roll between those players to determine who succeeds.
Melee roll example: Four players, one attacker and three defenders, try to pick up a ball that is on the ground and that no player has. The attacker tries PICK UP BALL and defenders STEAL BALL. They all have BaC 7. Dice (as labelled in the rulebook graphic): 3 = CANCELLED; 6 = CANCELLED; 7 = SUCCESS; 12 = FAIL.
As the example text explains, the player who has got the highest value among the successes (7) is the winner of the roll and would steal the ball.
Editor's note: the example's prose says three players succeed (the attacker's 3 and the defenders' 6 and 7), but the dice labels printed on the example show only the 7 as SUCCESS and the 3 and 6 as CANCELLED. The labelled dice are transcribed as printed; the outcome (the 7 wins and steals the ball) is the same either way.
In these rolls, unusual situations can happen. Following the basic rules will resolve them.
Now you have the tools to continue the game. This exercise is aimed at helping you understand things when the game feels clunky or confusing. Play until the defending team steals the ball or until the attacking team reaches the line where the defenders started.
As always, repeat as many times as necessary, switching the attacking team and the defender team. Now all the players are deployed on the field.
04. 4 vs 4
Exercise Set Up
You've already tasted dirt: when the match turns into a huge brawl of players on the ground and a close-quarters fight. Now let's play a bit. You are not yet ready to play a match at 100%, but this 4 vs 4 exercise will help you practice some important things that have not been seen yet, and you will start to feel what a real match is like.
In this exercise: how the players get tired and rest; how to score a try; skills by position; and individual plays.
Players not only get wounded, they also get tired if you push them too far. We call that FATIGUE.
Place the players as shown in the diagram. You can now use the 4 players on your team. Get both teams in contact with their kick-off line without passing it. For this exercise you must also take the basic play cards, the individual cards and the team cards. Distribute one deck of each to both coaches.
As in previous exercises, decide who will be the attacker and who will be the defender. The goal of this exercise is to SCORE A TRY in the opponent's scoring area.
4.01 Fatigue
Fatigue tokens represent the player's exhaustion. As a player becomes more fatigued, he receives adverse effects and may get injured.
There are several ways to receive fatigue tokens:
- When a player receives the third activation token (during the same time phase).
- Skill effects and plays.
When a fatigue token has to be given, place it (Active) on the player's card or in the space provided for it. If some effect of the game causes you to receive a fatigue token and you have an inactive token, instead of placing another token, flip it to activate it again.
Adverse effects: Fatigue produces adverse effects on players, and they are cumulative:
- 1 Fatigue: The player loses both its Position Skills and its Training skills.
- 2 Fatigue: The player can only perform one MOV action per activation.
- 3 Fatigue: The player has a -1 modifier to STR, BaC, REF and INT.
Remember that these effects are cumulative: a player with 3 fatigue has all the adverse effects of having 1, 2 AND 3 fatigue tokens.
When a token is deactivated, it continues to occupy a space, but the adverse effect is not applied.
Fatigue token (active) and fatigue token (inactive) are shown as graphics in the printed rulebook.
4.02 Max Fatigue
When the player receives the fourth token, he is injured. Remove it from the field and make a roll on the injury table that you'll find in the glossary on page 50. Follow the steps on 5.04 Injuries, which you'll find on page 45.
4.03 Rest
Now you know that players get tired, but they can also take a breath during the game to relieve fatigue. It's easy: they just need to REST.
This action, which can only be performed on defense, helps players take a breath and remove their fatigue tokens. When this action is performed, remove an inactive token from the player; if there are no inactive tokens, flip an active one to its inactive side.
That means you need to rest twice to completely remove a fatigue token.
4.05 Skills by Position
Players have various abilities that make them unique. Skills by position represent the specialty of the player within the team: a sharpshooter who passes the ball with incredible precision, a natural born defender, or a player very skilled at dodging defenders.
All players have an ability per position marked on their card. These abilities are not explained on the card, since they are common to many players:
- Side Step: The player rolls two dice when taking the DODGE action.
- Precise Pass: The player rolls two dice when performing the PASS action.
- Onslaught: The player rolls two dice when performing the BREAK THROUGH action.
- Defensive Insight: The player moves twice his defensive MOV.
- Expert Tackler: The player rolls two dice when performing the action TACKLE.
Remember that these skills are lost while you have a fatigue token.
4.04 Score a Try
Until now the players scored simply by reaching the opposite scoring area. But in a match you need to put the ball on the ground. It is the main objective of a match, and it is how you win. It may seem simple, but with the defense pressing or when the player is fatigued, trying is not easy.
A player carrying the ball whose base is partially within the in-goal zone may attempt to SCORE A TRY. Make a roll using the second BaC value.
Keep a few things in mind before making the roll:
- For each fatigue token, whether active or not, that the carrier player has, you have a -1 modifier to the BaC on a SCORE roll.
- The BaC is affected by a player PRESSURING you and any other applicable modifier.
- Remember that a 12 on a die is always a miss, regardless of the modified BaC you have.
Keep in mind that, like any action, this can be affected by the actions of the opposing players. For example, if a defender tries to tackle you during a try, you must make a face-to-face roll and follow the procedure for this kind of roll. If multiple players oppose the player attempting to SCORE, make a MELEE ROLL.
- If you pass the roll: Congratulations, you successfully scored.
- If you miss: Perform a Kick-off (see page 34 as printed).
4.06 Multiple Dice
Thanks to some plays and skills, it is possible for one player to roll more than one die per action. These extra dice have multiple uses:
- Increasing your chances to succeed: Add those dice to a roll. Roll them and choose one; ignore the rest.
- Facing multiple opponents: You can use the extra dice to roll face-to-face against more than one player. Choose against which player you want to use each die. Every roll is resolved independently.
If you have enough dice, you can combine both uses.
Multiple dice roll example: In this case, the attacking player rolls two dice for its SIDE STEP ability, and decides to assign one to each defender. Like the multiple face-to-face roll, the attacker decides the order in which they will be resolved (see the multiple rolls above).
Dice: 6 = SUCCESS (first roll; cancels the defender's roll, 2 = CANCELLED); 10 = FAIL (second roll); 3 = SUCCESS (defender's roll). In this example the attacking player succeeds in the first roll and cancels the roll of the defender. DODGE allows him to move an extra 2". Facing the second player, he fails his roll, while the defender succeeds. He receives a GROUNDED token because of the successful TACKLE.
We have already referred several times to the player cards, where their characteristics and abilities are determined. But they are not the only cards used in Takkure. There are also play cards. These are divided into two types: individual play and team play. They are a very important aid in the game and you will use them often.
4.07 Individual Play
These cards represent exceptional plays and contain a description of the effect and their requirements.
When you want to use one of these cards, you must show the opposing coach the card you are going to use and leave it on the table.
Each card indicates when it can be used. In case of a timing conflict, the attacking coach has priority and is the one who decides which card to resolve first. If a Coach gives up their chance to play a card when the timing requirements are met, they can't play any card until the conditions are met again.
Individual plays are discarded after use and form a pile of individual discarded plays.
As we have seen, these cards enhance actions and are single use. But the collective play cards are the cards that you will use the most, since they allow you to activate, with a single activation token, more than one player. Furthermore, these cards are not permanently discarded: you can retrieve them before a kick-off.
4.08 Team Play
These cards represent the coordination and the training received by the players to work together.
A team play allows you to activate more than one player spending a single activation token.
When to use them: Before spending the action token, the coach must declare that he is using a team play card, placing it face down on the table next to the game board. Plays can only be used if a player is carrying the ball and that player is the currently active player. The attacking coach may check the card at any moment.
How to use them: The cards indicate how many players are activated, the actions they will perform, and in which order they have to be performed. Once you have declared you are using a team play card, follow the standard order for an activation with the following exceptions:
- 1st part of the action: If the card indicates a movement, the coach will only need to mark the direction of the ball carrier's movement.
- After Step 2 (DEFENSE): The active coach will turn the card and show the rest of the actions to their opponent. Then follow the actions on the card in order. Players can only perform the actions listed on the card.
- If during the sequence of actions the attacking team has to make a roll and they fail, the sequence is interrupted and the rest of the actions won't be performed.
- Starting from step 4 of the activation, the attacking coach can interrupt the sequence of actions indicated as SECOND ACTION.
Once a TEAM PLAY is used, put it aside; it will be unavailable until the next Kick-off.
Summary of the use of a Team Play card:
- Declare you are using a TEAM PLAY and place it face down on the field.
- Place the activation token on the player who will be activating (the ball carrier).
- Announce which players will be participating.
- Step 1 of the activation: only the ball carrier's movement is marked.
- Step 2 of the activation: DEFENSE. Remember you can only TACKLE the ball carrier.
- Reveal the TEAM PLAY card being used.
- Step 3 of the activation: perform the movement.
- Step 4 of the activation: perform, in order, the actions listed as 2nd action on the card. You don't have to perform all the actions listed.
- Step 5 of the activation: make any measurements and rolls required.
- Step 6 of the activation: put aside the card; it won't be used again until there is a kick-off and you retrieve it.
It is recommended to shuffle the Team Play deck and the Individual Play deck every time you start the exercise, then draw new cards in order to test all the basic cards. Repeat the exercise as many times as you need before moving on to the next one.
05. Practice Match
5.01 Match Set Up
Before you start playing there are a few things you must do. Unfold the field with the in-goal zone in front of you; you must SCORE A TRY on the opposite one. Have the templates, tokens, and dice at hand. Place a coach dashboard on each short edge and the time dashboard on the side of the field, so both coaches can reach it.
- Choose your team, choose the 4 players who will play the game, grab their miniatures, their cards and the play cards.
- Assemble the play decks:
- Individual Plays: Shuffle your team's Individual Play cards with the basic ones, creating a deck with both; shuffle them well, and place the deck face down near your coach board. Now draw the top 4 cards of the deck.
- Team Plays: Gather the basic Team Play cards and your team's. Pick 4 amongst all of them. Those 4 Team Play cards will be available during the game, but you can switch them during half-time.
You have already learned the basics of this sport, now there are small things that will help you to be a better coach. It's time to use everything you've learned so far in a match. The only difference with a real game is that you will play without time, just until the game stops because either you score or your opponent steals the ball from you. As soon as a player reaches two tries, switch the attacker.
5.02 Referee
Referees don't exist in this game, at least not physically, but they have a presence in the rules. When you have to make a referee roll, follow the same procedure as when you flip a coin. You can use either an actual coin or the Ball token, since it has two different coloured sides. The players decide who wants heads and who wants tails, and one of them tosses the coin or the token.
It serves several purposes:
- Initial Kick-off: To decide who kicks and who receives the ball.
- Resolving conflicts: When a rule, a movement or something else generates some kind of conflict between the players, that is, when they are not able to resolve it following the rules, they can then make a referee roll to determine which of the two options applies. The result is final.
5.03 Kick Off
The kick-off is the way to put the ball in play. Kick-offs are performed at the start of the game, at the start of the second half, after a TRY, or when a TRY roll is failed.
When you have to perform a kick-off, you have to determine which team will be the one kicking:
- Start of the match: Make a referee roll. The winner DECIDES if they want their team or the opponent's to kick off.
- 2nd half: The team that did NOT kick off the ball in the first half.
- After scoring a try: The coach who received the TRY decides.
- After failing to score a try: The defending coach decides.
A kick-off is performed as follows:
- Before a kick-off, remove all activation tokens from the players, and both players recover the collective play cards that they would have used.
- The team that is going to kick off is placed in contact with its kick-off line, without crossing it. You can place the players however you like along the line.
- The receiving team's coach places his 4 players in his own half of the field. You can place them wherever you want within your own half of the field. (Fig 1: placing both teams example.)
- The coach of the kicking team places the scatter template anywhere between the opponent's kick-off line and the opponent's in-goal zone, but more than 1" away from either line and the field's edges.
- The ball is in the air: Once the template is in place, all players can make a move with their defensive MOV: first the players performing the kick-off, and then those receiving it.
- Once all the players have moved, the coach of the team that kicked off makes a BaC roll with a player of his choice.
- If the roll is successful: You can place the ball wherever you want along the scatter template's edge.
- If the roll fails: Place the ball in the center of the template and make a scatter roll.
- Catching the ball in the air: Once the ball is in place, the players have the opportunity to try to catch that ball in the air. If one or more players are within 2" of the ball, they can attempt to catch it; to do that, make a BaC roll with a -2 modifier. As soon as one player succeeds in the roll, you no longer roll for the rest of the players.
Once the kick-off has been completed, the coach who received the ball is now the attacker and must take the activation tokens as explained in "6.03: Time" on page 47.
5.04 Injuries
Players can receive WOUND tokens. When the player receives as many WOUND tokens as his BDY value, or suffers Max Fatigue, he is injured.
When a player is injured, follow these steps:
- Remove it from the playing field.
- Remove all wound tokens and fatigue tokens, and roll on the injury table.
- Apply the effects.
- Once the effects are applied, the player can (if the injury allows it) return to the game when a kick-off occurs.
The injury table can be found in the glossary, page 50.
5.05 Skills
Players have unique skills that differentiate them from others. These skills, and their effects, are described on the player's card. You can use a Special Skill token to indicate that the player has an active ability during the turn.
Some skills are considered training skills, and they are lost when the player becomes fatigued.
5.06 Team Skill
Like players, teams have skills that make them unique. These skills affect all the players of a single coach.
Future teams will have their skill's description included in the box. You can check them all on the publisher's website, takkure.com.
5.07 Core Teams Skills
Yamato: Unwavering Honor. When a Yamato player receives a Wound token, it also receives a Team Skill token. These tokens can be discarded to gain one of the following effects:
- Remove a GROUNDED token (remember you can't do that if the player is carrying the ball).
- Flip a FATIGUE token.
- Repeat an INTELLIGENCE (INT) roll.
These effects only apply to the player who has the token. Once discarded, they can't be used again.
Teriomorphs: Superstars. Every time a player successfully performs one of the following actions: SCORE A TRY, TACKLE or BREAK THROUGH, gain a Team Skill token.
Discard the noted amount of tokens to gain one of the following effects:
- 1x: Before making a roll, add +1 to the attribute you are using for the roll (up to a maximum of +3).
- 3x: Reroll a die (only once per roll).
- 5x: Retrieve an Individual Play card from your discard pile.
06. The Real Deal: Full Match
How was the match? If you feel comfortable, it is time to play a full match. Play a couple of games to learn the latest rules, and you can then sign up for local leagues and tournaments to start your coaching career.
Let's go over the last few rules that you need to know.
6.01 Full Match
A full match consists of two halves. Each half ends when the time runs out. Between the first and second half there is a break, during which you can reorganize the strategy and let your players rest.
The team achieving the most tries until the end of the second half is the winner of the match. In the event of a tie, the match ends in a draw.
6.02 Halftime
Halftime is the pause between the first and the second half. It is a time for the players to rest and the coach to rethink the game strategy. Three things happen during halftime:
- All players remove a fatigue token: Remove a token; you can choose whichever one you want, whether it is active or not.
- The coach changes the strategy: Choose 4 team play cards of the 8 team play cards you have available.
- New individual card draw: You can discard any undesired individual play cards. After that, draw until you have 4 cards in hand.
6.03 Time
Time in Takkure is represented in a special way. No clock is used. Instead we use the TIME DASHBOARD to manage the time tokens. The time tracker is what grants the activation tokens and determines when a half time ends.
Time dashboard: At the beginning of each half time, place a token representing each team on the box number 5 with the active side facing up. (Fig 1: place the time tokens on the box number 5.)
While you are the attacker, if you have used up all 4 activation tokens, do the following:
- If the active side of your Time token is facing up: Flip your time token so that it shows the inactive side, and take the activation tokens. (Fig 2: to get your 4 activation tokens, turn the time token to the non-active state.)
- If the inactive side of your Time token is facing up: Move both time tokens one slot downwards and flip them to the active side. (Fig 3: if it is already inactive, go down a box to get your 4 activation tokens and reactivate your token.) Now you can flip your time token so that its inactive face is up and take your activation tokens. (Fig 4: once on the next box, flip the token to inactive state to get your 4 activation tokens.)
Maintaining possession of the ball: If you spent all 4 activation tokens and you kept the ball, that is to say, the opposing team didn't steal the ball from you, then your team is still the attacker and you have to take the activation tokens once again as indicated above.
Time is up: If the coach needs to move the time tokens one box down and already was on box number 1, time is over and the activation tokens are not used again. The current halftime ends. If it was the second half, the match is over.
Kick the ball out of the field: When the token is in position #1, if the attacking team has the lower score, the coach can decide to kick the ball out of the field (figuratively speaking, just by declaring it) and end the current half immediately. In order to do so, they just need to inform the opponent.
Time tokens: active tokens and non-active tokens are shown as graphics in the printed rulebook.
6.04 Space Occupation
Players move across the field and occupy space on it. As a rule of thumb, two players cannot occupy the same space. But being a dynamic game with no grid, some conflicts might arise. To avoid these situations, here are the space occupation rules:
- The players occupy the space where they are. Another player cannot move through them or walk over them; they must move around them. A player on the ground occupies the same space as if it were standing.
- The one exception to the rule is the active player. An active player ignores the other players during its movement as first action. (Fig 1: the active player ignores the rest of players.)
- The active player occupies the space where it finishes its movement.
- The active player always has priority to be placed. If at the end of its movement there is an opponent, it will displace the other players in order to land on its place. (Fig 2: if there are players where it lands, displace them.) This rule doesn't apply to teammates.
- This displacement is always done from the landing spot of the active player and following the shortest route possible. (Fig 3: the defending players will take the shortest route to move away.)
- If in doubt because the active player landed right on top of the defending player (Fig 4), or it is impossible to determine the shortest route, the defending coach chooses where to place the defending player.
6.05 Repositioning
Sometimes a situation might come up when the ball or a player can't be placed after a scatter because there is an object preventing it. For example, when a ball scatter lands on a player and it can't be placed. (Fig 1: the ball can't be placed.)
In those situations you will use the scatter template you have already placed and follow these steps. Check whether the roll was odd or even:
- If the result is EVEN: Move the object you are trying to place following the numbers in ascending order. (Fig 2: even result.) If you reach number 12, keep counting from number 1.
- If the result is ODD: Move the object following the numbers in descending order until you are able to place it. (Fig 3: odd result.) If you reach number 1, keep counting from number 12.
If there is more than one obstacle preventing the object's placement, keep going until you can place it.
6.06 Line-Up
Teams must always be composed of one player for each position: Wing, Scrum-Half, Full-Back and Forward. The players' cards indicate in which position they can play. Players can have more than one position, but they only play one of them during the match; you must choose which player will fill each position before the referee roll at the start of the match.
- WING: Fast and agile player.
- SCRUM-HALF: Player with great passing ability and vision of the game.
- FULL-BACK: Defensive player with ability to tackle.
- FORWARD: Attacking player, big and strong.
07. Glossary and Tables
7.01 Injuries Table
Remember: you must follow the steps on page 45, Injuries section (5.04). When a player gets injured, use the Injury token.
Common Injuries Table (roll a D12):
- I'm just tired: Receive a FATIGUE token and a WOUND.
- Simple scratches: -1 BDY.
- Cut in the head: -2 INT.
- Damaged shoulder: -1 STR.
- Broken finger: -1 BaC and -1 STR.
- Broken toe: -1 REF and -1" Active MOV.
- Damaged eye: -2 BaC.
- Fractured rib: The player receives a permanent Fatigue token (it cannot be turned or withdrawn in any way).
- Cervical sprain: -1 STR, -1 BaC and -1 REF.
- Dislocated shoulder: -2 BaC and -2 STR.
- Sprained ankle: -2 REF and -2"/-1" MOV (down to a minimum of 1"/1" MOV).
- Grave injury: This result cannot be modified by abilities. Roll on the Grave Injuries table.
Grave Injuries Table (roll a D12):
- It's not as bad as it looks: Receive a FATIGUE token and roll on the common injuries again. (If you roll 12 again, apply the effect.)
- to 4. Broken arm: -3 BaC and -3 STR.
- to 7. Broken leg: -3 REF and -3"/-2" MOV (down to a minimum of 1"/1" MOV).
- to 10. Fractured vertebrae: -3 REF, -3 STR, -3 BaC, and you need to succeed on a BOD roll before performing any action.
- Broken skull: The player loses ALL skills, even innate skills. -3 INT, -3 REF and -2 BOD.
- Severely injured: Remove the player from the game.
If multiple injuries cause any attribute to reach 0 or less, remove that player from the game.
If the player carrying the ball is injured, place the scatter template centered on it, then roll to place the ball.
7.02 Glossary
The printed glossary indexes these topics to their page numbers in the rulebook:
Activation (19); Activation steps (19); Attacker's first action (19); Attacker's second action (23); Attacking and defending teams (15); Ball (35); Ball pick-up (35); Ball reception (33); Ball steal (36); Break through (28); Characteristics (16); Components (15); Coach board (17); Core teams skills (45); Critical and fumble (27); Defense (21); Defensive move (22); Definitions (14); Dodge (28); Endurance roll and wound (27); Face-to-face roll (26); Fatigue (39); Full match (46); Grounded (34); Halftime (46); How to measure (14); Individual play (41); Injuries (45); Injuries table (50); Kick-off (44); Line-up (49); Match set-up (43); Max fatigue (39); Measuring during step 5 (26); Melee roll (37); Modifiers (27); Movement execution (22); Moving as the 1st action (20); Moving as second action (23); Multiple dice (41); Multiple face-to-face roll (36); Pass (32); Pass from the ground (35); Pitch (17); Player card (16); Pressure (21); Referee (43); Repositioning (49); Rest (39); Rules priority (13); Scatter roll (33); Score a try (40); Skills (45); Skill by position (40); Space occupation (48); Stand up (35); Tackle (declaration) (24); Tackle (execution) (29); Team play (42); Team skill (45); The rugby rules (13); Third half (42); Time (47); Tokens removal (24); Unopposed roll (26).
7.03 Third Half
We call it a rugby tradition: the third half. According to it, once the match is over, both teams gather to have food and drinks (for the older ones usually plenty of beer, and for the younger ones a soda and a sandwich), to chat about the game, banter and sing, as an excuse to fraternize and smooth any possible resentment that could arise during the game.
You already know everything you need to play a game. Visit the publisher's website, takkure.com, to sign up for a league and find teams to challenge in your area or anywhere in the world.