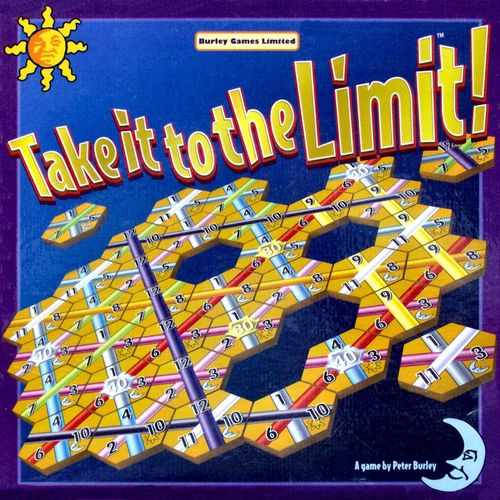
Take It to the Limit!
Take It to the Limit! Rulebook
Table of Contents
Table of Contents
Game Contents
- 6 double-sided game boards — one side with the main "Nexus" board, the other the special "Orchid" board for a shorter game with fewer tiles.
- 6 "Scrap Yard" boards in colors matching the main boards.
- 6 identical sets of hexagonal tiles — 32 marked with a "sun" symbol, and 32 with a "moon" symbol.
Playing with the Nexus Board
Setup
Before playing for the first time, carefully detach the hexagonal tiles from their sprues.
Each player takes a Nexus board, the matching Scrap Yard board, and the set of tiles in the same color.
Decide who will be the "caller." That player places their tiles face down and shuffles them thoroughly. All other players then place their tiles face up and arrange them into four groups by the number at the top of the tile (1, 4, 9 or 12), so they can easily find the tile the caller selects.
Playing the Game
The caller selects one of their tiles at random, turns it face up, and announces the three numbers on it.
All the other players look for the same tile among their own set. All players, including the caller, now place this tile on their board.
Once every player has placed their tile, the caller draws the next tile. Play continues this way until the boards are filled with tiles.
Any tile that does not fit well on a player's Nexus board may instead be placed in the Scrap Yard.
Play continues until every player has filled all the spaces on both their Nexus board and their Scrap Yard board. This happens once 44 tiles have been drawn (37 for each player's Nexus board, and 7 for each player's Scrap Yard).
Placement Rules
A tile must always be placed so that its numbers read upright (as if you were reading them off a page).
Tiles may be placed on any empty space, anywhere on the Nexus board or the Scrap Yard board. Only one tile may be placed on each space.
The Scrap Yard board lets you discard unwanted tiles at any point in the game (up to seven tiles), helping you achieve a higher score on the Nexus board. Once your Scrap Yard is full, all further tiles must be placed on the Nexus board. Conversely, once the Nexus board is full, all further tiles go onto the Scrap Yard board.
Once a tile has been placed, it can no longer be moved. As the game progresses, you will find that you cannot line up every tile's lines with the lines already on the board. Even so, every tile drawn by the caller must be placed by every player.
End of the Game
Once the 44th tile has been placed, and every player's boards (Nexus and Scrap Yard) are full, players tally their scores.
Scoring Lines
Players can score points for each row in each of the three directions on the Nexus board: vertically, diagonally from bottom-left to top-right, and diagonally from top-left to bottom-right.
Points are scored for a row containing lines of the same color. The lines in such a row must run continuously from one side of the board to the other with no change of color. These rows are called "scoring rows."
If even a single tile in a row has a line of a different color, the whole row is worth no points at all (that is, it is not a scoring row).
Bonus Tiles
Bonus tiles are used exactly like other tiles to build continuous rows of one color. In addition, if you complete all three scoring rows that cross a bonus tile, you may add the FULL BONUS to your score at the end of the game.
If you complete two scoring rows through a bonus tile (but not the third), you add HALF the bonus value to your score at the end of the game.
Note that you receive NO EXTRA POINTS if only one scoring row passes through the bonus tile. Two or three scoring rows must cross the bonus tile for the bonus to count.
Sunrays and Moonbeams
A sunray is completed wherever you form a continuous row of sun tiles on your Nexus board in any of the three directions. A moonbeam is formed in exactly the same way as a sunray, but using moon tiles instead of sun tiles.
Sunrays and moonbeams cannot be formed on your Scrap Yard board.
A sunray or moonbeam may be formed along a scoring row OR along a row that scores no points. The color of the lines within the ray does not matter.
You only score points for the longest sunray or moonbeam you create. If your longest moonbeam is the same length as your longest sunray, you only score points for one of the two.
If your longest sunray or moonbeam is formed along a scoring row, you receive the normal points for the scoring row AND for the sunray or moonbeam!
Scrap Yard Value
You must also try to achieve a score (called the Scrap Yard Value) on your Scrap Yard board. This score is NOT added to your Nexus board score, but if your Scrap Yard Value is below 60, a penalty of 60 points is subtracted from your Nexus board value.
Not all lines or bonuses are used to calculate the Scrap Yard Value. The Scrap Yard Value is calculated as the highest of the following:
- The total of your three best scoring rows in the Scrap Yard (add these three together and ignore the rest), OR
- The total score of your two best silver bonus tiles in the Scrap Yard (if there are more than two valid silver bonus tiles in the Scrap Yard, add the best two together and ignore the rest), OR
- The score of your best gold bonus tile in the Scrap Yard (you cannot add together the value of two different valid gold tiles)
Note on silver bonuses: if you have one full silver bonus and one half silver bonus in the Scrap Yard, this counts as 40 + 20 = 60 points (thereby avoiding the penalty). However, if you have three half silver bonuses in the Scrap Yard, only two may be counted, so you only get 20 + 20 = 40 points.
Note on the gold bonus: if you have one fully valid gold bonus tile on your Scrap Yard, it counts for 80 points (thereby avoiding the penalty). But if you have two valid half gold bonuses in the Scrap Yard, only one of the two may be counted, giving only 40 points.
Calculating Your Score
Follow this procedure:
- Calculate the value of all your scoring rows (see Step 1 below)
- Add the points scored for gold and silver bonus tiles (Step 2 below)
- Add any extra points scored for your longest sunray or moonbeam (Step 3 below)
- If your Scrap Yard Value is below 60 points, subtract 60 points from your total to calculate your final score (Step 4 below)
Step 1: Scoring rows
For each scoring row on your Nexus board, multiply the number of tiles in the row by the value of the colored line to get the score for that row.
Examples:
- Four tiles with a yellow line in a vertical row are worth 36 (4 x 9) points
- Seven tiles with a blue line in a vertical row are worth 28 (7 x 4) points
- Six tiles with an orange line diagonally are worth 48 (6 x 8) points
- Seven tiles with a white line diagonally are worth 77 (7 x 11) points
Add together the scores of all the rows to get the total for scoring rows.
Step 2: Bonus tiles
Any gold bonus tile on your Nexus board crossed by three scoring rows (that is, three complete lines of a single color) is worth 80 points (full gold bonus). Any gold bonus tile crossed by two scoring rows (but not a third) earns 40 points (half gold bonus).
Any silver bonus tile on your Nexus board crossed by three scoring rows (that is, three complete lines of a single color) is worth 40 points (full silver bonus). Any silver bonus tile crossed by two scoring rows (but not a third) earns 20 points (half silver bonus).
Add all the bonus tile scores to your scoring row total.
Example score on the Nexus board (scoring rows): total for scoring rows = 498 points.
Step 3: Sunrays and moonbeams
If you have completed a moonbeam or sunray, you score 10 points for each tile in the longest moonbeam OR sunray. It is only possible to score points for one of these rays (the other is ignored). You do not score points for the best sunray AND moonbeam, even if they are the same length.
Add any extra score for your best moonbeam or sunray to your total for scoring rows and bonus tiles.
Example score on the Nexus board (bonuses): 80 points — full gold bonus, all three rows crossing this tile are scoring rows. 40 points — full silver bonus, all three rows crossing this tile are scoring rows. 20 points — half silver bonus, two of the rows crossing this tile are scoring rows. 0 points — none of the rows crossing this tile is a scoring row. 0 points — only one row crossing this tile is a scoring row. 50 points — the longest sunray or moonbeam is a 5-tile moonbeam. Total for bonus tiles = 140. Total for the longest sunray or moonbeam = 50.
Step 4: Scrap Yard penalty!
Finally, calculate your Scrap Yard Value (see above).
If your Scrap Yard Value is below 60 points, subtract 60 points from the total calculated above to find your final score.
Example Scores
The illustrations in this booklet show the scoring of a Nexus board in a sample game, and a selection of different Scrap Yard Value examples:
- The illustration titled "Score on the Nexus board (scoring rows)" shows a player's points for completed rows.
- The illustration titled "Score on the Nexus board (bonuses)" shows the points earned from bonus tiles and sunrays or moonbeams.
- The illustration titled "Scrap Yard Value" shows the same player's Scrap Yard and how its value is calculated.
This player's final score is therefore:
498 (scoring rows) + 190 (bonuses) − 60 (Scrap Yard penalty) = 628 total
The illustrations titled "Other Scrap Yard examples" show different Scrap Yard Values:
- Scrap Yard Value: this player has a Scrap Yard Value of only 53 points, and must therefore pay the 60-point penalty.
- Other Scrap Yard examples: one player has a Scrap Yard Value of 89 and pays no penalty; another has a Scrap Yard Value of 80 and pays no penalty; another has a Scrap Yard Value of only 58 points and must pay a 60-point penalty; another has a Scrap Yard Value of only 42 points and must pay a 60-point penalty.
The Winner
The player with the highest final score wins the game!
The game can be played as a single round, or as a series of rounds where each player takes a turn being the caller, with the scores from the different rounds added together for a final total.
Playing with the Orchid Board
Setup
Each player takes an Orchid board (found on the back of the Nexus board). Scrap Yard boards are not used.
Each player then takes the matching tiles and separates the sun tiles from the moon tiles. Players agree on using either the moon tiles or the sun tiles. If sun tiles are chosen, all moon tiles are put back in the box. If moon tiles are chosen, all sun tiles are put back in the box. Each player now has 32 tiles.
Decide who will be the "caller." That player places their tiles face down and shuffles them thoroughly. All other players then place their tiles face up and arrange them into four groups by the number at the top of the tile (1, 4, 9 or 12), so they can easily find the tile the caller selects.
Playing the Game
The caller selects one of their tiles at random, turns it face up, and announces the three numbers on it.
All the other players look for the same tile among their own set. All players, including the caller, now place this tile on their Orchid board.
Once every player has placed their tile, the caller draws the next tile. Play continues this way until every player's Orchid board is filled with tiles.
Filling the Orchid board includes placing three tiles on the large Orchid symbol at the bottom left of the board.
At the end of the game, you will have the option to move one, two, or all three tiles from the large Orchid onto the small Orchid symbols in the middle of each "Orchid row" on the board. You are not required to move any, but you will likely want to in order to improve your final score (see below).
Placement Rules
A tile must always be placed so that its numbers read upright (as if you were reading them off a page).
Tiles may be placed on any empty hexagon, anywhere on the Orchid board or on the large Orchid symbol at the bottom left of the board. Only one tile may be placed on each space. By the end of the game, the large Orchid must contain exactly three tiles. They are placed loosely on the symbol — they do not need to be connected or aligned at this stage of the game.
There are 22 hexagonal spaces on each Orchid board. Over the course of the game, the caller draws 25 tiles. Of these, 22 are placed on the "standard" hexagons of the board, and the other 3 on the large Orchid symbol at the bottom left of the board.
Once you have three tiles on the large Orchid, all further tiles must be placed on the hexagonal spaces of the Orchid board. Conversely, once all the hexagons on the board are filled, the next three tiles must be placed on the large Orchid.
You may place tiles on the large Orchid if they do not fit well among those you have already placed on your Orchid board. You may also place tiles there for tactical reasons, allowing you to move them onto the three hexagons with small Orchids at the end of the game, to extend scoring rows you have already created.
Once a tile has been placed, it can no longer be moved (except during the special end-of-game "relocation" phase — see below). As the game progresses, you will find that you cannot line up every tile's lines with the lines already on the board. Even so, every tile drawn by the caller must be placed by every player.
End of the Game
Once the 25th tile has been placed, and every player's Orchid boards are full (including the three tiles on the large Orchid symbol), players tally their scores (after moving one or more tiles from the large Orchid onto hexagons with a small Orchid, if they wish).
Orchid Rows
You will notice that each of the outer rows of the Orchid board (marked Row A, Row B, and Row C on the illustration titled "The Orchid Board") contains a gap marked with a small Orchid.
Row A, Row B, and Row C are called "Orchid rows." Each row is considered complete once its four hexagonal spaces are covered with a line of the same color. To score points on these spaces, you must place tiles so that all four hexagons of these rows are covered by a line of the same color.
This then forms a row, interrupted only by the small Orchid symbol in the middle. You do not score points for forming small two-tile rows on one side or the other of an Orchid unless they match exactly the two other tiles in the other half of the Orchid row.
The Orchid Board
Example: to score points along Orchid Row B, the tiles at spaces B1, B2, B3, and B4 must all carry a line of the same color running in the direction of Row B. If all four tiles carry a green line, the row would be worth 28 (4 x 7) points.
However, if B1 and B2 both carry a green line while B3 and B4 carry a red line, then the score for Row B is 0 (so it is not a scoring row). The two short lines of the row do not count individually, and can never be scoring rows on their own.
Relocating Tiles from the Large Orchid
At the end of each game, you have the option of improving your score by moving one, two, or all three of the tiles on the large Orchid symbol onto the small Orchid symbols in the Orchid rows.
You are not required to do this, but it is often advantageous. If the lines on the tiles match those of rows already placed, you can increase your score by increasing the length of your rows.
If a tile carries a line matching the color of a "valid" Orchid row, placing the tile on the small Orchid symbol in that row increases its length from four to five tiles, which also increases the row's value. However, be careful not to "destroy" a line already existing in another direction, since you could lose more points than you gain from adding the tile at the Orchid.
Likewise, if you have a valid Orchid row — say, with four tiles in Row B carrying a green line — you would lose points if you place a tile with a line of a different color (red, for example) on the small Orchid.
It is important to carefully weigh the effects of moving one or more tiles from the large Orchid onto a space before moving them. Any tile you do not move does not score points (but does not count negatively either). It is sometimes better to leave them on the large Orchid rather than place them in a way that costs you points by breaking existing rows.
Examples of placement of tiles held in reserve this way can be seen in the illustration "Relocation on the Orchid Board."
Scoring Lines
Players score points for each row on their Orchid board in each of the three directions: vertically, diagonally from bottom-left to top-right, diagonally from top-left to bottom-right.
Points are earned for rows containing lines of the same continuous color. The line in such a row must run from one edge to the other without a change of color. These rows are called "scoring rows."
If even a single tile contains a line of a different color, the entire row is worth no points at all (that is, it will not be a scoring row).
Remember that an Orchid row may be four or five tiles long (depending on whether one of the large Orchid's tiles has or has not been moved onto a small Orchid). In either case, the lines on all the tiles in that row must be the same color for the Orchid row to be a scoring row.
Bonus Tiles
Bonus tiles are used exactly the same way as on the Nexus board.
You may certainly place bonus tiles on the large Orchid during the game, then move them onto the small Orchids at the end of the game. If, once moved, two or three scoring rows cross them, you receive the bonus points for them as normal.
Sunrays and Moonbeams
When playing on the Orchid board, you do not score points for a sunray or moonbeam, since you always use either ALL sun tiles or ALL moon tiles, so every row is a sunray or moonbeam.
Calculating Your Score
First, move whichever tiles you wish to use from the large Orchid. Be careful to use them optimally when doing so. Remember that adding these tiles may destroy existing scoring rows, although it may improve others.
Your score is then calculated as follows:
- Calculate the value of all your scoring rows (see Step 1 below)
- Add the points scored for gold and silver bonus tiles (Step 2 below)
Step 1: Scoring rows
For each scoring row on your Orchid board, multiply the number of tiles in the row by the value of the colored line to get the score for that row.
Examples:
- Four tiles with a grey line in a vertical row are worth 4 (4 x 1) points
- Five tiles with a blue line in a vertical row are worth 20 (5 x 4) points
- Six tiles with a turquoise line diagonally are worth 30 (6 x 5) points
- Six tiles with a green line diagonally are worth 42 (6 x 7) points
Add together the scores of all the rows to get the total for scoring rows.
Step 2: Bonus tiles
Any gold bonus tile on your Orchid board crossed by three scoring rows (that is, three complete lines of a single color) is worth 80 points (full gold bonus). Any gold bonus tile crossed by two scoring rows (but not a third) earns 40 points (half gold bonus).
Any silver bonus tile on your Orchid board crossed by three scoring rows (that is, three complete lines of a single color) is worth 40 points (full silver bonus). Any silver bonus tile crossed by two scoring rows (but not a third) earns 20 points (half silver bonus).
A bonus tile that has been moved into an Orchid row can earn you points the same way as other bonus tiles, following the rules above.
Add all the bonus tile scores to your scoring row total.
Example Scores
The following illustrations show the relocation of tiles and how to calculate the score of an Orchid board in a sample game:
- The illustration titled "Relocation of tiles on the Orchid board" shows a player's board immediately after the 25 tiles have been placed. It also indicates the possible relocations for this player.
- By moving the grey-white-black tile (1-11-10) onto the small Orchid B, the player increases the length of the grey row from 2 to 3 (one extra point) and the length of the black row from 2 to 4 (10 extra points), adding 11 points to the total.
- Likewise, the grey-pink-cherry tile (1-2-3) moved to C extends the pink, cherry, and grey rows by one tile, adding 6 points to the total. More importantly, tile 1-2-3 is a gold bonus tile, and by placing it there the player receives the full 80-point gold bonus, since all three scoring rows cross it. So the player has gained 86 points by relocating this tile!
- On the other hand, relocating the yellow-white-black tile (9-11-10) onto Orchid A does not help. Although it extends the yellow and black rows by one tile (potentially earning 19 points), it also destroys the pink row (losing 6 points). Since the pink row is no longer a scoring row, half of the gold bonus tile (40 points) is also lost, since only two scoring rows then cross the tile. So relocating this tile would cost the player 46 points and gain only 19 points (a net loss of 27 points). The player clearly does not want to attempt this move.
The illustration titled "Score on the Orchid board" shows the player's total for scoring rows and bonus tiles.
This player's final score is:
294 (scoring rows) + 140 (bonuses) = 434 total
Score on the Orchid board: total for scoring rows = 294 points. Total for bonus tiles = 140 points (one full gold bonus, one full silver bonus, and one half silver bonus). Final score = 434 points.
The Winner
The player with the highest final score wins the game!
The game can be played as a single round, or as a series of rounds where each player takes a turn being the caller, with the scores from the different rounds added together for a final total.
Game Variants
Scrap Yard Variant 1 (Lowest Scrap Yard)
Play the game exactly as described above, using the Nexus and Scrap Yard boards. When you reach the end of the scoring phase, calculate each player's Scrap Yard Value. The player with the LOWEST Scrap Yard Value loses 60 points as a penalty on their Nexus board score.
In this version, you do not lose 60 points just because your Scrap Yard Value is below 60 — that threshold no longer matters. Whether your Scrap Yard Value is high or low, you only lose the 60 points if (and only if) your Scrap Yard Value is lower than every other player's.
If two players share the same lowest total, each loses 30 points from their main score. If three players share the same lowest score, they each lose 20 points (and so on).
Scrap Yard Variant 2 (Pass the Scrap Yard)
At the start of the game, give your Scrap Yard board to the player on your left.
Whenever you want to place a tile in the Scrap Yard, give it to that player. They will place it on the Scrap Yard for you. At the end of the game, the player returns your Scrap Yard to you for scoring. In this version, the player with the HIGHEST Scrap Yard Value loses 60 points from their total (the same rules as above apply if several players share the same highest score).
So in this version of the game, it is better to try to discard tiles that do not match those already in your Scrap Yard, since your opponent will try to build the best possible score before handing it back to you.
If you play several games, at the start of the second (and every following) game, the player with the highest cumulative total passes their Scrap Yard to the player with the second-best total. That player passes their Scrap Yard to the player with the third-best total, and so on, until the player with the lowest total passes their Scrap Yard to the player in the lead.
At the end of each game, the Scrap Yards are returned to their owners, and the player(s) with the highest returned Scrap Yard Value pay the penalty points.
No Scrap Yard
In this version, use the Nexus boards without the Scrap Yard boards. All drawn tiles must be placed on the Nexus board. This version is much more demanding, and it is difficult to achieve high scores in it. Only 37 of the 64 tiles (57.8%) will be drawn. There is no option to discard an unwanted tile.
This also makes an excellent solitaire version (zero setup time — try to beat your own best score).
Orchid Board Variant 1 (Sun and Moon Tiles)
Play on the Orchid board as usual, but using all 64 tiles (sun and moon) instead of only sun tiles or only moon tiles.
This version does not have the quick setup and space-saving benefit associated with playing the Orchid board, and it makes tile selection far more random, with 25 tiles out of 64 (39.1%) used per game.
However, it makes the full range of line combinations possible, and it is another excellent solitaire version (since setup and the space taken by the tiles are negligible for a single player who is always the "caller").
You may also score sunrays and moonbeams in this version. Remember to apply the normal rules for Orchid rows when creating a sunray or moonbeam (that is, the four (or five) tiles in the Orchid row must be either ALL sun tiles or ALL moon tiles for the sunray or moonbeam to be valid).
Playing in Pairs
If there are many players, or not enough space to lay out all the boards and tiles, it is fun to play Take it to the Limit on the Nexus board in teams of two. Players share the task of finding the announced tile, then discuss (or sometimes argue) exactly how they are going to use it. This works especially well with the Lowest Scrap Yard variant.