Take it Easy!
Take it Easy! Rulebook
Table of Contents
Table of Contents
Game Contents
- 6 different colored game boards
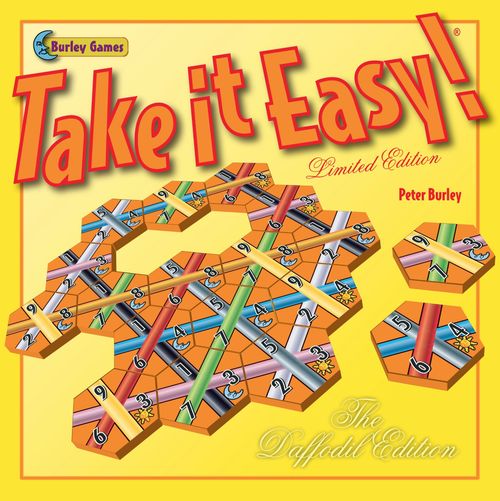
- 6 matching sets of 27 hexagonal tiles
Playing Take it Easy!
Preparation
Before playing for the first time, carefully push out the hexagonal tiles from the punched boards.
Each player takes one game board and the set of tiles in the matching color.
Decide which player will be 'caller'. This player turns his/her tiles face down and mixes them thoroughly.
All the other players then place their tiles face up and organize them into three groups according to the top number (1, 5, or 9) to make it easy to locate the tiles when they are selected by the caller.
Please note that the individual tiles are marked with either "suns" or "moons". These symbols have no significance when playing the 'standard' game of Take It Easy!, and can be regarded as being for decoration only. However, at the end of this rulebook, several game variants are suggested, in which the sun and moon symbols are used.
Playing the Game
The caller selects one of his/her tiles at random, turns it face up, and announces the three numbers on it.
All the other players locate the same tile from within their own set of tiles. Every player, including the caller, now places this tile on his/her own board.
After all players have placed this tile, the caller selects the next tile. Play continues in this way until the boards are all filled with tiles.
Placement Rules
The tiles must always be placed so that the numbers are upright (as though you were reading them from a page).
Tiles may be placed in any empty space anywhere on your playing board. Only one tile may be placed on any one space.
Once a tile has been placed, it cannot be moved. As the game progresses, you will find that you will not be able to match all the stripes on the tiles you are placing with those in existing rows. However, each tile drawn by the caller must be placed by every player.
End of the Game
After the 19th tile has been placed and all players' boards are full, players count their scores.
Scoring Rows
Players can score points for each row on their playing boards in each of the three directions: vertically, diagonally from the bottom left to top right, and diagonally from the top left to bottom right.
Points are scored for rows containing stripes of continuous color. The stripe within such a row must run from one edge of the board to the other without any change in color. These rows are referred to as 'Scoring Rows'.
If there is even one tile in a row containing a stripe of a different color, then that whole row will score no points (i.e. it will not be a Scoring Row).
Calculating Your Score
Calculate the total value of all your Scoring Rows as follows:
For each Scoring Row on your completed playing board, multiply the number of tiles in the row by the value of the stripe's color to get the score for that row. Please see the examples provided on the next page, just below the diagram in the section entitled "AN EXAMPLE GAME".
The Winner
The player who has the highest final score is the winner of the round!
Games can be played as a single round, or as a series of rounds where each player takes a turn as caller, and where the scores from each round are added together to make a cumulative running total.
An Example Game
The following illustration shows the scoring in an example game.
(diagram of a completed player board, showing every tile placed and each row's total)
| Row | Score |
|---|---|
| Three yellow-striped tiles in a vertical row scores | 3 x 9 = 27 |
| Four black-striped tiles in a vertical row scores | 4 x 1 = 4 |
| Five grey-striped tiles in a vertical row scores | 5 x 5 = 25 |
| Three black-striped tiles in a vertical row scores | 3 x 1 = 3 |
| Three white-striped tiles in a diagonal row scores | 3 x 2 = 6 |
| Four green-striped tiles in a diagonal row scores | 4 x 7 = 28 |
| Five red-striped tiles in a diagonal row scores | 5 x 6 = 30 |
| Three white-striped tiles in a diagonal row scores | 3 x 2 = 6 |
| Three pink-striped tiles in a diagonal row scores | 3 x 3 = 9 |
| Five orange-striped tiles in a diagonal row scores | 5 x 8 = 40 |
The total score (for all lines) for this player: 178
The maximum possible score when playing standard "Take It Easy!" is 307. There are sixteen different ways of doing this. One example is displayed on the back of your game box.
The Game for One Player
"Take It Easy!" is also fun for one player. Keep on trying until you beat your 'personal best' score!
Variants
The games rules provided above relate to the standard game of "Take It Easy!". There are also a number of variants of the standard game that you can play, which are described below. Some of these variants involve different rules for the placement of tiles; others suggest different methods of scoring for the rows you create. As a general rule, you can combine any of the tile placement variants suggested below with any of the scoring-method variants. It's up to you!
Tile Placement Variants
Adjacent Placement
In this variant, your first tile may be placed anywhere on your board. However, the second tile must be placed so that it touches the first tile along one edge (even where this forces you to 'break' a scoring row right from the start). All subsequent tiles must be placed so that they touch, along one edge, at least one other tile that is already on your playing board. This variant is more difficult than standard Take It Easy!, because your tile placement opportunities are restricted.
Sun/Moon Adjacent Placement
As in the variant above, your first tile may be placed anywhere on your board. The placement of the second (and subsequent) tiles depends on the sun/moon symbol present on each tile. If the symbol on the second tile is the same as on the first (e.g. if both tiles are sun tiles), then the second tile must be placed so that it touches the first, as in the first variant described above. If the two tiles are marked with opposing (i.e. different) sun/moon symbols, then the second tile can be placed anywhere on the board. Similarly, with all subsequent tiles, if the sun/moon symbol matches that of the previous tile, then the newly-drawn tile must be placed such that it touches at least one tile that is already on your board. If the symbols do not match, then the tile may be placed in any empty space on your board.
Scoring Variants
Sunrays and Moonbeams
A Sunray is completed whenever you form a continuous, straight row of sun tiles right across your playing board in any direction. A Moonbeam is formed in exactly the same way as a Sunray, but using all moon tiles instead of all sun tiles.
A Sunray or Moonbeam can be formed along a Scoring Row OR a non-scoring row. The color of the stripes contained within the row does not matter.
If a Sunray or Moonbeam is formed along the same row of tiles as a Scoring Row, you will score the normal points for the Scoring Row AND the points for the Sunray/Moonbeam!
For every Sunray you complete, score 7 points for each tile in that Sunray. For every Moonbeam you complete, score 6 points for each tile within it. These scores are added to the points you have obtained for normal Scoring Rows. The scoring in an example game of "Sunrays and Moonbeams" is shown below.
(diagram of a completed player board, showing the tile layout and the totals for each row, including the bonus Sunray and Moonbeam rows)
Total score = 228 + 24 (Moonbeam) + 28 (Sunray) + 21 (Sunray) + 18 (Moonbeam) = 319.
Best Sunray/Moonbeam
This variant is suitable for between two and six players. It involves a strong interactive element, as players are competing to have the 'best' Sunray, and the 'best' Moonbeam. For this game, Sunrays and Moonbeams only count if they are formed along Scoring Rows. A Sunray or Moonbeam along a non-scoring row is not valid in this version.
Sixty bonus points are awarded to the player with the 'best' Sunray. Players each compare their best Sunray with those of their opponents. A Sunray on a longer Scoring Row will always beat one which is on a shorter Scoring Row. If two or more players have constructed best Sunrays that are the same length, then the one that is on the higher-valued Scoring Row will be the one that scores the sixty-point bonus.
If two or more players have their best Sunrays on identical Scoring Rows (i.e. the rows are of exactly the same length and the same color) then these players share out the 60 points evenly between them. So if two players both have the same best Sunray, then they receive 30 bonus points each. If three players tie for the best Sunray, then they will receive 20 bonus points each (etc., etc.).
Exactly the same rules apply to Moonbeams. At the end of each round, the player who has the 'best' Moonbeam will receive 60 bonus points, while if two or more players tie for the best moonbeam, they divide the 60 points evenly between them.
In the example shown below, the player's best Moonbeam is four tiles long and is on a Black Scoring Row. This would beat any opponent's Moonbeam that was only three tiles long, even if this three-tile Moonbeam was along a valuable Scoring Row such as Yellow. However, the four-tile Moonbeam on the Black Scoring Row would be beaten by an opponent's four-tile Moonbeam on a higher-valued colour such as Orange.
If at the end of a round, none of the players has created a Sunray along a Scoring Row, then no bonus points are awarded for Sunrays for that round. Similarly, if no-one has made a Moonbeam along a Scoring Row, then no bonus points will be awarded for Moonbeams for the round.
The winner is the player who has the highest total after any bonus points have been added to each player's normal Scoring Row totals.
(diagrams showing an example "Best Sunray" board and an example "Best Moonbeam" board)
Original design & artwork by Steve Tolley: [email protected] Additional design by James M. Davis: [email protected]
© Peter Burley Burley Games Limited, 22 Fern Close, Frimley, Camberley, Surrey, GU16 9QU, United Kingdom Tel 01276 514307 [email protected]
Take It Easy is a Trademark of Burley Games Limited and Peter John Burley