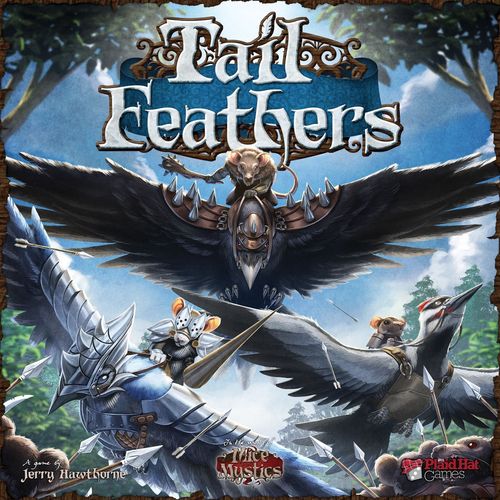
Tail Feathers
Tail Feathers Rulebook
Table of Contents
Table of Contents
Object of the Game
Tail Feathers is a skirmish battle game in which players wield armies of flying and ground troops in a fight for control of the forest trees. Each player's primary goal is to destroy her opponent's nest, and the first player to do so wins the game.
List of Components
- 1 Tail Feathers Rulebook
- 1 Scenario Book
- 10 Action Dice
- 10 Bird Unit Cards
- 2 Squad Unit Cards
- 2 Ballista Unit Cards
- 1 Hero Unit Card
- 10 Pilot Unit Cards
- 10 Mice and Mystics Compatible Unit Cards
- 21 Bird Action Cards
- 39 Hero or Pilot Action Cards
- 12 Objective Cards
- 2 Rat Alliance Bird Figures
- 3 Mouse Alliance Bird Figures
- 5 Bird Bases
- 2 Rat Pilot Figures
- 3 Mouse Pilot Figures
- 1 Rat Ground Hero Figure
- 6 Rat Ground Squad Figures
- 6 Mouse Ground Squad Figures
- 1 Plastic Range Finder
- 4 Tree Overlays
- 1 Sapling Overlay
- 8 Leaves
- 2 Nests
- 2 Nest Dials
- 2 Player Clipboards
- 3 Short Flight Templates
- 1 Short Flight End Template
Unit Card Anatomy
A unit in Tail Feathers can be a bird, a bird and its pilot, a hero, a creature, a squad, or a structure. The different types of unit cards are detailed below:
Bird Unit Card
- Name
- Type
- Alliance
- Bird Battle Value
- Defense Value
- Move Value
- Abilities
- Life Value
- Build Point Value
- Size (S=small, L=large)
Pilot Unit Card
- Name
- Type
- Rank
- Alliance
- Melee Attack Value
- Ranged Attack Value
- Pilot Value
- Abilities
- Proficiencies
- Bonus Life Value
- Build Point Value
- Size (S=small, L=large)
Ground Unit Card
- Name
- Type
- Alliance
- Squad Value
- Melee Attack Value
- Ranged Attack Value
- Defense Value
- Move Value
- Abilities
- Size (S=small, L=large)
- Build Point Value
Unit Card Backs
The back of a unit card shows which figure or token to use on the battlefield to represent that unit during gameplay (1), as well as which game set or expansion that figure or token is included in (2).
Player Clipboard Anatomy
Each player uses a clipboard to organize figures and battle information throughout the game.
The phase track shows:
- Mission Phase
- Tilt Phase
- Activation Phase
- Final Phase
The clipboard also holds:
- Cheese Wheel
- Reserves Box
- Mission Box
Components
Figures. Trees: tree overlays, sapling overlay. Leaves: green side, orange side. Nests, nest dial.
Flight Templates. Short template, long template, short end template, long end template.
Other. Death spiral templates. Tail feather tokens (front, notched back). Status effect markers (on fire, rattled). First player nut. Wound markers. Mission cards. Range finder. Action dice. Cheese tokens. Resource/objective tokens (objective, twigs, seeds and berries). Battlefield axis marker. ID rings and ID tags. Ballista tokens. Veteran markers. Grudge markers. Action cards.
Assembly
Bird Figure
Assemble each bird figure as shown.
The beak of each bird should always be facing in the same direction as the raised line on that bird's base. When turning a bird figure, move the figure and its base together. The ball and socket function where the bird connects to its base will be used for tilting the bird as you will discover later in these rules.
Also note that each bird should receive a colored ID ring around its base as shown. Each ID ring has a matching ID tag that is used to help players quickly identify which bird and pilot figure belongs to which set of unit cards.
Nest Dial
Assemble the two nest dials as shown.
Nest dials are used to track wounds inflicted to your nest.
Set the nest dial to the amount of nest wound points indicated in the starting setup of the chosen scenario.
Important Definitions
Units vs. Figures
A force in Tail Feathers is comprised of units (indicated by unit cards). Each unit has 1 or more figures (plastic miniatures) that belong to it. A bird and its corresponding pilot is considered a single unit/figure for all game purposes.
Available vs. Unavailable
An available figure is one that is on the battlefield. An available unit is one that has at least one available figure.
Note: Figures in a mission box, reserves box, casualty pile or on a unit card are not considered to be on the battlefield and are therefore unavailable.
When something is referred to as unavailable it means that the object in question cannot be interacted with at that moment.
Perched vs. Flying
Throughout a battle in Tail Feathers, birds will either be flying through the air or temporarily stationed on a space (perched). When a large bird is perched it is considered a large ground unit, but cannot go on missions.
Hits vs. Wounds
When a figure is hit, it always has the opportunity to defend normally. Each unblocked hit inflicts 1 wound on the target. A wound cannot be defended against or blocked.
Game Setup
To set up a game of Tail Feathers, do the following in order:
- Choose a Scenario: If this is your first time playing, we recommend starting with Scenario 1: Show of Force in the scenario book included with this set.
- Choose an Alliance: Each scenario will list which alliances are fighting in that scenario. Each player chooses an alliance to play. Gather the listed quick play units for your chosen alliance and the figures for those units.
- Squad units only have 1 unit card but may have multiple figures belonging to that unit.
- Pilot units have multiple possible cards; choose the correct card as indicated by the number of acorns in their rank (1 = rookie, 2 = standard, 3 = ace).
- Alternatively, you can build your own force using the custom force building rules (see page 12 of the scenario book for rules on customizing your games).
- Build the Battlefield: Each scenario describes how to build the battlefield. Place the trees, nests, battlefield axis marker (if applicable), and other elements. Then set each nest dial as instructed by the scenario rules. Each player should set aside space for a casualty pile for defeated figures and a refresh pile for used action cards.
- Deploy Forces: Place all of your figures on your home tree. Each tree space may either contain up to 4 small figures or up to 1 large figure, and the nest can contain any number of figures. All bird figures must be perched on tree spaces and set at center tilt. Place your unit cards face-up in front of you.
- Assign First Player: Give the first player nut to the youngest player.
Round Order
Tail Feathers is played over a series of rounds. Each round consists of 4 phases that must be resolved in order:
Mission Phase. In this phase players will send ground figures on various types of missions.
Tilt Phase. In this phase players will set the tilt of their bird figures, which will determine which direction those birds can fly when moving this round.
Activation Phase. During this phase players will bid for initiative before taking turns moving and attacking with their figures.
Final Phase. During this phase players will bring reinforcements onto the battlefield, resolve the missions they sent figures on during the missions phase, and get back some of their used action cards.
Mission Phase
Simultaneously, each player may select a mission card matching the type of mission she wishes to attempt during this round and place it face-down on the battlefield so it is within close range of the battlefield axis marker and does not touch any other object.
After all players have placed their mission cards, starting with the player to the left of the first player and continuing clockwise around the table, each player who selected a mission then assigns one or more ground figures she controls to her mission by removing them from her home tree and placing them in the mission box on her player clipboard. The mission box may either hold up to 4 small figures OR up to 1 large figure. Missions will resolve in the final phase of each round (see Resolve Missions on page 11 for details on how each mission will resolve).
Note: A player may choose not to select a mission!
Tilt Phase
One at a time, starting with the player to the left of the first player and continuing clockwise around the table, each player must set the tilt of each flying bird she controls and choose whether each perched bird she controls will take flight or remain perched for the round.
There are three tilt positions: Right, center, and left. Each bird's tilt may only be adjusted one position to the left or right, or it may remain in the same position as the previous round.
Example: A player's bird is at right tilt. That bird cannot be adjusted to left tilt this phase, as that would require moving the bird two tilt positions to the right. However, the bird can be adjusted to center tilt, or remain at left tilt.
If you wish to launch a perched bird, you must position that bird figure so that its beak is pointed up. Then you may pivot the launching figure in any direction and move it anywhere within its space. Upon its activation, a launching bird is considered to be at center tilt and in flight and must make a flight movement.
Activation Phase
Determine Initiative
Each player gathers 2 action dice. Players may add up to 3 additional dice at the cost of 1 cheese per die, keeping the total number of dice secret. When ready, players simultaneously reveal their dice and pay the cheese costs for each die beyond 2. Then each player rolls and totals their number results. The player with the highest total becomes the first player and receives the first player nut. If there is a tie for highest total, the tied players re-roll all of their allotted dice until the tie is broken.
Activate Units
Players will take turns activating units. The first player chooses a unit to activate, moving and attacking using the figure(s) associated with that card. After the player finishes activating that unit, play will proceed clockwise around the table with players activating units in turn order. This continues until every player has activated all of her available units. Once that happens, move on to the final phase of the round. On your turn, if you have no available and unactivated units, you must pass and then add one cheese to your cheese wheel if possible.
When activating a unit, turn its unit card 90 degrees to show it is activated. Once a unit is activated, it cannot be activated again that round.
Individual units (heroes, bird/pilots, etc.) include only one figure, while squad units contain multiple figures. If a squad unit is being activated, select a number of figures up to the squad value to become activated. Other figures in that squad unit will not be activated.
Perform the following steps in order for the activated unit:
- Move the activated figure(s)
- Scurry OR Attack with the activated figure(s)
- You may Revive defeated figures if you choose
Move
There are 2 kinds of movement in Tail Feathers: Tree movement and flight movement.
Tree Movement
When activating a ground unit, you may move it a number of spaces equal to its move value. If that unit is a squad, you may move each figure you activated from that squad. You must complete each figure's move separately.
Individual spaces are determined by noticeable differences in color and texture. Each space may either contain up to 4 small figures or up to 1 large figure. Figures cannot be placed on or move into or through a space that already contains the maximum number of figures. A small figure that moves into a space containing an opponent's figure must immediately end its movement in that space. A small figure cannot move out of a space if the number of opponents' figures outnumbers the number of friendly figures in that space. Figures cannot move onto the tree "trunk" portion of the tree as it is considered solid wood.
Nests are special area spaces. The entire nest is considered 1 space. A nest does not have the usual figure limit; instead it may hold as many figures as can fit within its borders.
Flight Movement
When activating a flying unit, you MUST move that figure, but first you may attempt to change the tilt of the figure by making a piloting check. If successful, you may adjust the tilt using the normal tilt rules (see Tilt Phase on page 7). If the check fails, you cannot adjust the tilt at this time. To make a piloting check, roll a number of action dice equal to the unit's pilot value. If at least 1 star symbol is rolled, the check is successful.
Next, build a flight path by gathering at least 2 flight templates and a number of flight templates up to the unit's move value. You may choose either short or long templates and must announce the order in which they will be used before building the flight path (Example: a player might announce "Short, long, long"). The first flight template is always aligned with the raised line on the bird's base. Each following template must be placed according to a bird's tilt. The last flight template to be laid must always be a flight end template.
When laying the flight templates, lay them on top of any cardboard board elements, like tail feathers and trees, and underneath any plastic elements, like figures. The round spots on a flight path where one flight template connects with another are the "maneuver points." The rounded cavity on the flight end template is the "end point."
Note: The end point is not a maneuver point.
After you have established a flight path, move your figure along that path, resolving any of the following crossing effects in the order they are encountered. The figure ends its movement when it reaches the end point unless a crossing effect ends it earlier. Make sure the blue notch on the back of the figure's ID ring is aligned with the flight line of the flight end template, and then carefully remove the flight templates from the board.
If you end a figure's movement completely out of the battlefield, place that figure in your casualty pile. If you end a figure's movement on top of a ground figure but do not perch, move the ground figures within their space to make room for the flying figure.
Flight movement example: With Aerijin's move value of 3, player one announces she will build a "long, short, long" flight path. She gathers 1 long flight template, 1 short flight template, and 1 long flight end template. Using the raised line on the bird's base as the starting point, she places the long template against the base. With Aerijin in a right tilt position, the next template is placed following the right flight line of the flight template. The long flight end template is then placed, also using the right flight line of the flight template laid before it. Player one then moves her unit to the end point of the established flight line, setting the figure's base into the rounded cavity. She aligns the blue notch on her figure's ID ring with the marked path on the flight end template. This ends that figure's movement.
Crossing
When any part of a flight template is touching any part of a space, token or figure's base, that flight path is considered to be crossing that space, token or figure.
If the flight path crosses a...
- tree trunk, end your figure's movement with its base touching the trunk and turn it 180 degrees away from the trunk. Your figure receives 2 wounds, and its pilot becomes rattled.
- space, you may end your figure's movement and become perched on the space or continue moving. When a figure becomes perched, set it to center tilt. A figure cannot perch if it began its turn perched.
- space containing 1 or more ground figures, a mission, or a nest, you may make a swoop attack on that space, mission or nest and then continue moving (See Swoop Attack on page 11 for details).
- flying figure, continue moving. If your figure moved through an enemy figure, your figure receives 1 wound. If your figure's movement would end on a flying figure, you must instead end your figure's movement when it reaches the last maneuver point on your flight path that would not result in ending on a flying figure. If the flying figure you would have ended on is an enemy, both that figure and your figure receive 1 wound.
Transporting a Ground Figure
If a large bird is within close range of a small friendly ground figure at the start of that bird's flight movement or at one of the maneuver points of its flight path, you may transport that figure by placing it on the moving bird's unit card. When a bird that is transporting a figure perches, you must place that figure on an adjacent space or place it in your casualty pile. When a bird that is transporting a figure crosses a space, you may drop that figure off on that space (if able).
Note: A bird can only transport 1 figure at a time. If a bird is placed in the casualty pile while transporting a figure, place that figure in the casualty pile as well. If you dropped off a figure during that activation, you may not transport a new one.
Scurry OR Attack
After you have completed moving all activated figures you wish to move, you may then scurry OR attack with each activated figure.
Scurry
To scurry with a figure, move it again following all of the normal movement rules. A scurry is not considered a move action for the purposes of action cards, abilities or effects.
Note: Flying figures cannot scurry!
Attack
There are 2 types of normal attacks: ranged attacks and melee attacks. There is also a special kind of attack that can happen during a bird's movement called a swoop attack.
Ranged Attack
A figure with a ranged attack value may target a figure (or nest) that is within range and clear sight. When targeting to or from a flying figure, place the range finder touching any point on the base of the figure. When targeting to or from ground figures on spaces (including nests and leaves), place the range finder at the nearest point on the space that figure occupies. If the range finder touches both points, then the target is in range. If the wrapped section of the range finder touches both points, then the target is in "close range."
Example 1: Player one announces an attack from Zure against the unit of Grizzard and Snag. The wrapped end of the range finder touches both the base of her unit, and the base of the target. The target is in close range, and Zure can attempt a melee attack.
Example 2: Player two announces an attack from Grizzard against an Oakguard figure on a tree space. The range finder touches both the space the target figure occupies and the base of his unit. The target is in range for a ranged attack.
If the range finder passes through 1 or more of the following, the target is NOT within clear sight:
- flying figure
- tail feather (see additional rules)
- tree trunk
- drifting leaf (see additional rules)
Units with extended range do not need to check range or clear sight with the range finder. Unless specified by a scenario or effect, extended range units can target enemies anywhere on the battlefield.
To make a ranged attack, announce which figure is attacking and which figure (or nest) will be the target of the attack. Then roll a number of action dice equal to the attacking figure's ranged attack value.
Each bow symbol rolled inflicts 1 hit on the target of the attack. If 1 or more hits are inflicted, your opponent must roll a number of action dice equal to the target figure's defense value. Each shield-and-sword symbol rolled blocks 1 hit. Each unblocked hit inflicts 1 wound on the target figure. Nests have a defense value of 0.
Note: When making a ranged attack with a figure that is sharing a space with 1 or more enemy figures, it can only target those figures it is sharing a space with.
When a squad figure you control receives any wounds, it is defeated. Place it in your casualty pile.
When a hero, bird or creature figure you control receives wounds, add 1 wound marker to that figure's unit card for each wound it received. When a unit card you control has a number of wound markers on it equal to or greater than that unit's life value, it is defeated. Place that unit's figure in your casualty pile and remove all wound markers from the unit card.
When a nest receives wounds, use the nest dial to reduce its remaining life points by the number of wounds it received. When a nest's dial reaches zero, it is destroyed. Remove it from play.
Melee Attack
A ground figure may make a melee attack against an enemy ground figure (or nest) it is adjacent to. A flying figure may make a melee attack against a flying figure that it is in close range of.
A melee attack is resolved in the same way as a ranged attack except the number of action dice rolled by the attacker is equal to the attacking figure's melee attack value and sword and shield-and-sword symbols inflict hits instead of bow symbols.
Rolling Cheese
If you roll 1 or more cheese symbols when attacking or defending, including special attacks, add 1 cheese to the cheese wheel on your player clipboard for each cheese rolled.
If your cheese wheel is or becomes full you may re-roll any excess cheese results, but must keep your second roll results. A player cannot have more than six cheese at a time.
Attacking and Defending with a Bird
A bird and its pilot are considered a single unit. That unit's melee attack value (1) and ranged attack value (2) are represented on the pilot's card. That unit's defense value (3) is represented on the bird's card. That unit's life points are equal to the bird's life value (4) plus the pilot's bonus life value (5). In the example above, this unit would have a total of 6 life points.
Swoop Attack
When your bird crosses a space containing ground enemy figures, a mission or a nest, you may target it for a swoop attack. When performing a swoop attack, make a group attack (see Group Attack on this page) against the target. The attack value for that group attack is equal to your bird's battle value plus its pilot's melee attack value.
If the target of the attack is a mission, flip that mission over. If it is a decoy, no swoop attack happens. All of the figures assigned to that decoy mission are immediately returned to their home nest. Otherwise, make a group attack against the figures assigned to that mission.
A bird unit can only make one swoop attack on its activation which replaces its normal attack for that activation. A bird unit cannot swoop attack a nest, mission, or space that is touching its base at the start of its activation.
Group Attack
Some rules (such as the swoop attack rules) and action cards instruct players to make a group attack against 1 or more figures. When you are making a group attack, roll a number of action dice equal to the attack value for that group attack. If it is a melee group attack, sword and shield-and-sword symbols hit. If it is a ranged group attack, bow symbols hit. Add up the number of hits you rolled and choose which figure each hit will be applied to. One at a time, your opponent(s) must roll defense separately for each hit figure.
When making a group attack against a nest (with or without figures in it) hits can be assigned to that nest. Nests have a defense value of 0.
Revive
After activating a unit, if you have a full cheese wheel, you may discard all of your cheese tokens and choose 1 hero or 1 creature or up to 3 squad figures from your casualty pile and move them to your reserves box.
Note: Birds/pilots cannot be chosen to be revived.
Final Phase
Resolve the following steps in order:
-
Reinforce: Move all figures from your reserves box to your home nest.
Note: If your home nest is no longer on the battlefield you cannot reinforce.
-
Resolve Missions: Any unrevealed mission cards on the battlefield are simultaneously revealed. All missions of 1 type are resolved before moving to missions of another type. Resolve each mission type in the order outlined below. If multiple missions of the same type were played, they are resolved in turn order:
- Decoy: If you played a decoy mission, move all figures in your mission box to your home nest.
- Intercept: If you played an intercept mission, target an opponent's mission box with a melee group attack. Your attack value for that group attack is based on the number of figures with melee attack value of 1+ currently in your mission box: 1 for each small figure or 3 for a large figure. Once all intercept missions are fully resolved, move any remaining figures in your mission box to your home nest.
- Siege: If you played a siege mission, move all figures in your mission box to any one tree (including the sapling) on the battlefield, and place them in a space or spaces adjacent to its trunk. If all the spaces adjacent to the trunk are full, place the figures in spaces as close to the trunk as possible.
- Patrol: If you played a patrol mission, target an opponent's flying figure or drifting leaf anywhere on the battlefield for a ranged group attack. Your attack value for that group attack is based on the number of figures with ranged attack of 1+ in your mission box: 1 for each small figure or 3 for a large figure. After resolving the attack, move all figures in your mission box to your home nest.
- Rescue: If you played a rescue mission, and there are at least 2 figures currently in your mission box, move a bird/pilot figure from your casualty pile to your home nest. Add a number of wounds to the bird's unit card equal to its pilot's bonus life value (it comes back into play partially wounded). After resolving the mission, move all figures in your mission box to your home nest.
Winning the Game
If at any time a player's nest is destroyed, unless otherwise specified by the scenario, that player is out of the game and must remove all of his figures from the battlefield. The last player that still has their nest in play wins. Victory conditions can also vary by scenario.
Status Effects
Rattled
When a pilot becomes rattled, place a rattled status marker on its card. A pilot becomes rattled when:
- Its flight path crosses a tail feather or tree trunk.
- It receives a number of wound markers greater than its pilot value from a single attack.
- It suffers an effect from an action card or ability that causes the pilot to become rattled.
While a pilot is rattled, it suffers the following negative effects:
- Its pilot value is 1.
- It cannot attack (though its corresponding bird may swoop attack)
- It cannot add its melee attack value to its corresponding bird for any reason (such as a swoop attack or death spiral).
- It cannot use any pilot action cards (unless that card is specifically designed to remove a status effect)
When a unit begins its activation with a rattled status marker, remove that marker at the end of that activation. A unit may only have 1 rattled status marker at a time.
Immobilized
When a small ground figure becomes immobilized, indicate this by placing it on its side. The next time that figure is activated, its entire activation must be used to stand up. While immobilized, a figure still defends normally. Large figures cannot be immobilized. A figure that is flying when it becomes immobilized is immediately placed in your casualty pile.
On Fire
When a figure is on fire, place an on fire marker next to that figure on the battlefield. A figure may only have 1 on fire marker at a time. When a figure ends its activation with an on fire marker next to it, roll an action die for that figure. If you roll a star, remove the on fire marker. If you do not roll a star, the figure immediately receives 1 wound and stays on fire. Even though it is not a figure, a nest can be set on fire as well, and can have more than 1 on fire marker. When a figure ends its activation on a nest that is on fire, it can attempt to put out 1 on fire marker using the same method. A nest will receive 1 wound at the start of the final phase for each on fire marker it has on it.
Additional Rules
The Tail Feathers team has written a number of rules that help make the game more strategic, thematic, and fun. We strongly suggest adding in these rules when you become comfortable with the above rules.
Action Cards
Action Card Anatomy
- Name
- Cost
- Requirements
- Timing
- Effect
When playing with this rule, players start the game with 7 unique action cards of their choosing in their hand. Each action card describes when it can be played and its effect on the game.
- When playing a bird action card, after resolving the card's effect, place it face-down next to the unit card of the bird that used it. That card will remain there until that bird perches or is defeated at which point any face-down action cards associated with that unit will be moved to your refresh pile. Unless otherwise specified, bird action cards require the bird using the action card to be in flight at the time of its use.
- When playing a hero or pilot action card, you must first pay its cheese cost by removing that number of tokens from your cheese wheel. After resolving the action card, place it in your refresh pile.
An action card's effect can only be granted to a unit that matches the requirements of that action card. Sometimes a requirement is a certain type of bird or hero and other times a requirement is a type of proficiency that the unit needs to have.
If 2 or more action cards would ever be played at the same time, the first player decides in which order they will resolve. You cannot play more than 1 action card on each player's turn.
Note: Some action cards take into account that you are playing with the additional rules. Keep this in mind when selecting your action cards if you are not playing with all of the additional rules yet.
Structures
Structures are immobile units that can be built on tree spaces, but not on leaves or nests. When a structure is built, add its unit card to your play area and turn it 90 degrees as it can't be activated on the round it is built. A structure that can be activated can only be activated if it shares its space with the required figures (listed on the unit card after Activate) and no enemy figures.
Structures provide certain special uses on the battlefield, and can be attacked just like any other unit. Unless stated otherwise, a structure cannot receive status effects. Refer to the structure's unit card for details on that structure's use.
Tail Feathers includes the ballista, a structure that must be built by using the Build Ballista action card.
Foraging
When playing with this rule, if you activate a ground unit, you can choose to do nothing with that unit and add 1 cheese to your wheel. You can still revive on an activation with a unit that forages. Structures and other immobile units cannot forage.
Tail Feathers
When playing with this rule, during game setup, create a supply of tail feather tokens in reach of all players. When a flying bird figure you control receives wounds, collect 1 tail feather from the supply for each wound received. One at a time, drop those feathers onto the battlefield from 2-3 inches above the rear portion of the wounded bird figure. Leave them where they land unless they land on any of the following, in which case remove them from play:
- another tail feather
- a space (tree, nest or leaf)
- a mission card
- a figure
Note: Tail feathers block clear sight.
If a flying figure crosses a tail feather, remove that feather and your figure's pilot becomes rattled. Then continue moving.
At the end of each round, flip over each tail feather token on the battlefield so that its 3-notch side is face-up. If the 3 notch side is already face-up, remove that tail feather from the battlefield.
Death Spirals
When playing with this rule, when your bird crosses an enemy bird in flight, the two birds will immediately enter a death spiral (this rule replaces the standard rule for crossing an enemy bird in flight). When your bird initiates a death spiral with an opponent's bird, resolve the following steps in order:
-
Place a death spiral template against the enemy bird. In this example, the death spiral template is placed against Wrunk.
-
Place your bird against the other side of the death spiral template as shown. In this example, Aerijin is placed on the other side of the template. The 2 birds are now considered to have entered a death spiral (if you cannot place your bird because of another flying figure, rotate the death spiral template around the enemy bird's base until you can place your bird).
-
Combine your bird's battle value and its pilot's melee attack value. Roll a number of action dice equal to this combined value and add up the number of sword and shield-and-sword results rolled. Your opponent must do the same. This is a death spiral battle.
a. If the result of the death spiral battle is a tie, both birds receive 1 wound and they remain entangled in the death spiral.
b. If the result of the death spiral battle is not a tie, the player with the higher result subtracts their opponent's result from their own and inflicts that many wounds on their opponent's bird. In example 3, Aerijin rolled a total of 3 and Wrunk rolled a total of 2. Aerijin inflicts 1 wound on Wrunk. Pivot both birds 180 degrees away from each other. If only 1 bird survived the death spiral, do not turn it 180 degrees. The death spiral is over. Set all surviving birds to center tilt and remove the death spiral template from the board.
-
If the last result was a tie and the birds are still engaged in the death spiral, the next time one of the spiraling birds is activated, roll to attack again as in step 3.
a. If the result is a tie again, the birds have spent too long in the death spiral and plummet out of the battle. Place both birds in their owners' casualty piles and remove the death spiral template from the board.
b. If the result is not a tie, resolve as in step 3b. If the activated bird survived, it may continue with its normal activation, but cannot make a normal attack.
A bird's movement ends when it enters a death spiral, and a bird cannot make a normal attack on a turn that it is engaged in a death spiral.
Note: a swoop attack is not a normal attack. A death spiral can still happen on a turn that a bird performed a swoop attack.
Figures in a death spiral cannot be targeted by the attacks, abilities or action cards of figures outside the death spiral. A bird engaged in a death spiral cannot enter another death spiral. If a flying bird crosses a bird or birds engaged in a death spiral, follow the standard rules for crossing flying figures but do not receive or inflict any wounds.
Leaves
When playing with this rule, attach leaves to tree branches while building the battlefield using the connecting points on the tree branches. Leaves attached to a tree this way are adjacent to the tree space the stem is attached to.
Leaves are special spaces that are like normal spaces with the following exceptions:
- Leaves can hold 3 small figures, instead of 4.
- Large figures, including bird figures, cannot move onto or perch on a leaf.
- Leaves can drift over the battlefield (see below).
- If a drifting leaf ever becomes unoccupied by figures, return it to the tree branch space where it came from.
- A drifting leaf blocks clear sight.
Figures on a drifting leaf can attack and be attacked. A bird unit can swoop attack figures on a leaf just like a normal space.
Leaf Drifting
For a leaf to drift, a ground figure on the leaf may, in place of its normal attack, cut the leaf loose. Then do the following:
- Disconnect the leaf from the tree branch it is attached to.
- Choose a destination tree overlay and point the front end of the leaf towards any part of it.
- Move the leaf as described below.
Moving a Drifting Leaf
- Determine the number of spins the leaf will make: Roll an action die, and add the number result to the number of figures on the drifting leaf.
- Place the tip of the range finger in the hole at the end pointing towards the destination tree and spin the leaf around so that the other end is now pointing toward the destination. That is considered 1 spin.
- Place the range finder tip in the opposite end, and rotate the leaf again. Repeat this until it has spun the correct number of spins, it reaches any space on its destination tree, or until it encounters an obstacle.
Example: 1. Adding the 1 rolled on the action die and the 1 Oakguard unit on the leaf, player one will move the leaf a total of 2 spins. 2. The range finder tip is placed in the hole at the end of the leaf facing the Vermin Raiders' home tree. The leaf is spun around so the opposite end is pointing towards that destination. This is 1 spin. 3. This same process is repeated for spin 2. This is the end of the leaf's drift.
If a drifting leaf encounters a:
- tail feather, remove that feather from the battlefield.
- flying bird, swing the leaf as far as you can without disrupting the bird figure, and continue the drifting leaf's movement, attempting to swing it toward the destination tree until it's again pointing toward the destination.
- mission card, stop the leaf movement. If it is an opponent's mission, reveal it.
- another drifting leaf, stop the leaf movement, with both leaves touching. They will remain adjacent spaces until the next final phase, when they will move again. When the leaf moves again, spin the leaf as far as you can without disrupting the other leaf, and continue the drifting leaf's movement, attempting to swing it toward the destination tree until it's again pointing toward the destination.
- tree, move the figures from the leaf onto the closest tree space. If there is not enough room on that space, any excess figures on the leaf are placed in your casualty pile. Then remove the leaf from the battlefield and re-attach it to the connecting point of its original branch.
Leaves that are still drifting are moved on each round during the final phase, after resolving missions. If multiple leaves are drifting, the drift movement is resolved in turn order.
Glossary
Activation: Taking a turn with a unit. An activated unit will typically move and then scurry or attack.
Adjacent: Spaces that share a border are considered adjacent. Figures in adjacent spaces or sharing the same space are considered adjacent.
Attack Value: Can be melee or ranged and is used when making normal attacks or as otherwise directed. Birds do not have an attack value and cannot make a normal attack without a pilot.
Available: An available figure is one that is on the battlefield. An available unit is one that has at least one available figure (figures in a mission box, reserves box, casualty pile or on a unit card are not considered to be on the battlefield and are unavailable).
Battle Value: Birds have a battle value instead of an attack value. It is used in swoop attacks and death spirals (additional rules), and not for normal attacks.
Battlefield: The entire play area within the borders created by the tree overlays.
Battlefield Surface: The parts of the battlefield that are not covered by tree overlays, i.e. the actual table or other flat surface that elements are placed upon.
Check: To make a check, roll a number of action dice equal to the designated skill value of the unit making that check. If at least 1 star symbol is rolled, the check is successful.
Clear Sight: A target is within clear sight of a figure if, when measuring range, the range finder does not pass through a flying figure, tree trunk, tail feather or drifting leaf. See also Range.
Close Range: See Range.
Cross: When any part of a flight template is touching a part of a space, token or figure's base, that flight path is considered to be crossing that space, token or figure.
Death Spiral (additional rules): A fight that occurs when your bird crosses an enemy bird in flight causing both units to attack each other. Figures in a death spiral cannot be targeted by the attacks, abilities or action cards of figures outside the death spiral. The death spiral battle is when you and your opponent roll dice against each other in a death spiral. See page 14 for details.
Defeated: When a squad figure receives any wounds or a unit card has a number of wound markers on it equal to or greater than that unit's life value, it is defeated. Place defeated figures in the casualty pile of the unit card's controller and remove all wound markers from the unit card. "Defeat" and "place in casualty pile" are equivalent terms.
End Point: The rounded cavity at the end of a flight path.
Extended Range: Unless specified by a scenario or effect, a unit with extended range can target objects anywhere on the battlefield, regardless of distance or clear sight.
Figure: A figure is an individual plastic sculpted playing piece used in the game. A bird and its pilot are considered a single figure.
Flying: A bird that is flying through the air is not perched. It must obey all rules of flight movement.
Forage (additional rules): Foraging with a ground unit is the act of activating that unit but doing nothing with it (choosing not to move, scurry or attack with that unit) in order to gain 1 cheese. You can still revive on an activation with a unit that forages. Structures and other immobile units cannot forage.
Ground Figure: A figure that cannot fly or a flying figure that is currently perched.
Group Attack: A special kind of attack that can affect multiple figures. See page 11 for details.
Grudge: When a bird unit with a grudge marker rolls dice for a death spiral battle, you may discard the marker and re-roll any or all dice used, but must keep the second result.
Hits: When hits are inflicted on a figure, that figure defends normally. Each unblocked hit inflicts 1 wound on that figure.
Immobilized: A status effect that can affect small ground figures and flying figures. A flying figure that is immobilized is defeated. See page 12 for details.
Maneuver Point: The round spots on a flight path where one flight template connects with another.
Move: A move action (tree or flight) and a scurry action are both kinds of movement. However, action cards, abilities, or effects that reference "before moving", "after moving", "when moving", or "instead of moving" always refer to a figure's move action during its activation and never a scurry or other special movement. A shift is not a move.
Normal Attack: The attack that each figure may perform during its normal activation. Normal attacks can be ranged or melee. See page 10 for details.
On Fire: A status effect that can affect figures and nests. See page 12 for details.
Perched: A bird that is perched is temporarily stationed on a space and is not flying. When a bird is perched it is considered a ground unit, but cannot go on missions.
Pilot Value: The number on a pilot unit card that represents how skilled the pilot is at flying.
Pilotless Bird: A pilotless bird can only use bird action cards, has a pilot value of 0, cannot be rattled, and cannot make normal attacks. A pilotless bird may swoop attack or initiate a death spiral.
Pivot: Rotate a bird and its base together without shifting the base away from its current position.
Range: When targeting to or from a flying figure, place the range finder touching any point on the base of the figure. When targeting to or from ground figures on spaces (including nests and leaves), place the range finder at the nearest point on the space that figure occupies. If the range finder touches both points then the target is in range. If the wrapped section of the range finder touches both points, then the target is in "close range."
Rattled: A status effect that can affect pilots. See page 12 for details.
Re-roll: During a game, players might have opportunities to re-roll certain dice roll results. In all cases, the player must accept the new result! A re-rolled die can never be re-rolled a second time.
Scurry: To scurry with a figure, move it again after its normal movement, following all of the normal movement rules. A figure cannot attack on a turn that it scurries. Flying figures cannot scurry!
Shift: Some action cards or effects can shift a flying bird. Place the flight template(s) as instructed by the effect and place the shifted bird at the end point without changing its facing. A shift is not considered a move, no crossing effects will occur, and the end point must not touch another flying figure's base. You may not shift through a tree trunk.
Squad: A squad is a group of figures sharing the same unit card. Each member of a squad only has 1 life point. A squad unit card has a squad value. When a squad unit card is activated, you can activate up to that number of available figures associated with that card.
Structure: Structures are immobile units that can be built on tree spaces. A structure that can be activated can only be activated if it shares its space with the required figures (listed on the unit card after Activate) and no enemy figures. See page 13 for details.
Swoop Attack: A specific type of group attack that can happen when your bird crosses a space containing ground enemy figures, a mission or a nest. See page 11 for details.
Turn: An activation of one unit. The activation phase typically consists of several turns.
Unavailable: An object that cannot be interacted with at that moment. A figure that is in a mission box, reserves box, casualty pile, or on a unit card is unavailable.
Unit: A unit can be a bird, a bird and its pilot, a hero, a creature, a squad, or a structure. A squad unit can have multiple figures. See also Squad.
Veteran: A squad figure with a veteran marker under it receives a +1 to its ranged attack, melee attack and defense values.
Wound: When any wounds are inflicted on a squad figure, it is defeated. When a hero, bird or creature figure receives wounds, add 1 wound marker to that figure's unit card for each wound it received. When a nest receives wounds use the nest dial to reduce its remaining life points by the number of wounds it received.