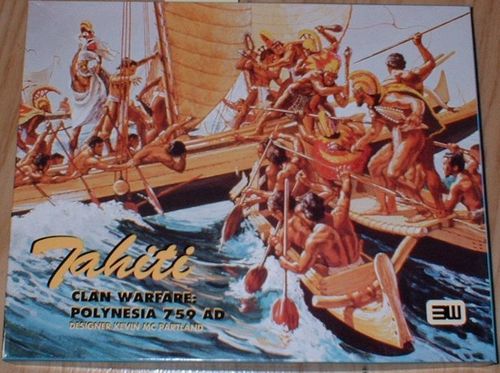
Tahiti: Clan Warfare, Polynesia 750 AD
Tahiti: Clan Warfare, Polynesia 750 AD Rulebook
Table of Contents
Table of Contents
- 1. Introduction
- 2. Components
- 3. Setup
- 4. Turn Sequence
- 5. Initiative Determination
- 6. Construction and Training
- 7. Land Movement
- 8. Sea Movement
- 9. Land Combat
- 10. Game Length
- 11. Area Control
- 12. Leader Units
- 13. Expeditions
- 14. Victory Determination
- 15. Advanced Rules
- 16. Solitaire Rules
- Players' Notes
- Terrain Effects Chart
- A Note on Pronunciation
- Build Chart
- Expedition Table
- Designer's Notes
1. Introduction
Tahiti is an historical simulation game for one to four players, depicting clan warfare typical in Polynesia before European colonization. Players build war canoes and train warriors to create a force to strike at their adversaries, while protecting their home village. Each player is represented on the board as a Chieftain unit— if this unit is killed, the player loses the game. If all seems hopeless, the player can quit Tahiti and lead his clan on an expedition over the high seas into the unknown. This desperate measure historically spread Polynesian culture to the far corners of the Pacific: Easter Island, New Zealand, and Hawaii.
Each turn of the game represents about two weeks of real time. Each hexagon on the game board (hereafter referred to as "hexes") spans about 60 statute miles of Tahiti. Each player controls one of the four sets of colored counters.
2. Components
Each copy of Tahiti should contain a map, 2 sheets of counters (246 counters in all), and a rules book. A 6-sided die is also needed for play.
2.1 Playing Pieces
See the page 3 for a description of the playing pieces' graphics.
Units: Population Units; Militia Unit (combat value 1); Slingers (combat value 2); Fighters (combat value 3); Heavy Troops (combat value 4). All of the preceding except Population units are Combat Units. The number on each unit represents its combat value.
Leader Units: Head Chieftain (combat value 1, leadership rating 3, movement allowance 4); Clan Elder (combat value 1, leadership rating 2, movement allowance 3); Shaman (combat value 1, leadership rating 0, movement allowance 0). The first number represents the unit's combat value; the second represents its leadership rating; the third represents its movement capability. The leadership rating indicates the number of units which the leader may move.
Movable Markers: War Canoe; Part-Built Canoe; Big Log.
Immovable Markers: Home Village; Village; Part-Built Village.
2.2 The Map
The map is divided into seventeen areas, each of which consists of two or more hexes. The seventeen areas on the map are historically correct for the time of first European contact. They are: Faaa, Punaauia, and Paea (encompassing the Oropaa region); Pare, Arue, Mahina, Papenoo, Tiarei, Mahaena, and Hitiaa (the Aharoa region); and Papara, Mataiea, Papeari, Vairao, Teahupoo, Tautira, and Pueu (the Teva region). Each is named on the map: These areas are in turn organized in three historical regions: TEVA, AHAROA, and OROPAA.
Counter Graphics
The graphics on the counters for Combat Units and Leader Units depict the following Polynesian items:
- Militia: "lei o mano," a wood dagger studded with sharks' teeth.
- Slingers: sling with specially shaped throwing stones. (In sea combat, they would be armed with "canoe breakers," large stones tied with a rope, and slung at the enemy.)
- Fighters: thrusting spear studded with sharks' teeth over a wicker shield.
- Heavy Troops: war club (the favorite weapon of the elite) over a spiked blow-fish helmet on twisted coconut-husk body armor.
- Head Chieftain: crossed war club and flywisk (symbol of authority).
- Clan Elder: staff of authority.
- Shaman: war-god mask made of colorful bird feathers.
3. Setup
3.1 Home Areas
The first step of the game is to determine each player's Home Area. In two and three-player games, each player's Home Area should be in a different region. In four-player games, two players will necessarily have to have Home Areas in a single region; nevertheless, Home Areas should be as well separated as possible. The standard Home Areas are as follows:
| Players | Home Areas |
|---|---|
| 2 players | Punaauia and Pueu |
| 3 players | Punaauia, Tiarei, and Vairao |
| 4 players | Arue, Paea, Hitiaa, and Teahupoo |
Alternatively, players may before play begins decide to designate some other combination of areas as Home Areas, within the general framework given above. If no agreement is possible, use the Standard Home Areas. Once it is decided which will be Home Areas, players dice to determine which player will begin in which Home Area. Each player controls only his Home Area at the start of the game; a control marker of the appropriate color is placed on the map alongside the name of each Home Area. Neutral markers are placed alongside the names of the remaining Areas.
3.2 Home Villages
Once each player has been allocated a Home Area, he places his Home Village in a specific hex within that Area. Home Villages must always be set up in a coastal hex with a river running through it. Next he places his Head Chief and his Shaman in his Home Village. Finally he sets up one Fighter and two population counters, anywhere in his Home Area.
4. Turn Sequence
Each game turn consists of the following steps, or "phases," played in this sequence:
- Initiative Determination Phase (see section 5).
- First Player Turn: A. Construction and Training Phase (see section 6). B. Movement Phase (see sections 7 and 8). C. Combat Phase (see section 9).
- Additional Player Turns: Repeat phases A, B, and C for each player in the game.
- Advance Game Turn Marker (see section 10).
5. Initiative Determination
The order in which players move will vary from turn to turn. In the Initiative Determination Phase of each game-turn (ie at the start of each game-turn), each player rolls a 6-sided die. High-roller gains the initiative for that turn, and places the "initiative" marker in front of him (In the event of a tie, those tied roll again until a winner emerges). The player with the initiative chooses which player moves first that turn, and whether play proceeds clockwise or counterclockwise. It is his responsibility to keep track of whose player-turn it is, and when the game-turn is completed (see also section 9).
From game-turn 2 onwards, of course, one player begins the turn with the initiative marker in front of him (from the previous turn). This player must subtract 2 from his initiative determination die-roll. The initiative marker passes to whichever player is high-roller, and they get to choose the order of play for the new turn. If the player who already has the initiative marker in his possession again wins possession (despite having subtracted 2 from his die-roll), he flips the initiative marker over to its "x2" side. When rolling the next turn, he must subtract 4 from his initiative die-roll.
Note that the "-2" or "-4" die-roll modifier is applied only once per game-turn. In the event of a tie, it is not applied when the players roll again.
6. Construction and Training
6.1 General
Villages and War Canoes may be constructed and Combat Units trained throughout the course of the game. Consult the Build Chart to determine the resources needed, the appropriate locations and the steps required to create the desired item. In most cases, one item is exchanged for another, using the facilities and talents inherent to a Village. (Exceptions to this pattern are the gathering of materials required for making a War Canoe, and the construction of Villages themselves.)
Such exchange occurs during the Construction and Training Phase. Any item that meets all the requirements listed on the Build Chart at the start of the Construction and Training Phase may be exchanged for the desired item. A Village can facilitate only one construction or training (not both) per turn. Each Jungle hex can supply only one Big Log per player-turn.
Note that there is no requirement to announce in advance what will be built. Players may change their minds, or even stack the resources to build more than one item on a Village, and decide what is built in the following Construction and Training Phase. Once an item is built, however, it cannot be undone. (Exceptions: all Combat Units may be converted to Population units at any time; and see Villages below.) The counter mix is not intended to be a limiting factor; players may make extra counters as required.
6.2 Villages
A player's Home Village is established during game setup. If a player's Home Village is captured by the enemy, he must designate another Village as his new Home Village (this must be a Coastal Village, if one is available to the player). If a player loses all of his Villages to the enemy, the next Village he constructs must be his new Home Village. A player may voluntarily designate a Village his new Home Village in only one situation: immediately after building a new Village on a Coastal hex, and his current Home Village is no longer on a Coastal hex.
Each village must be supported by an agricultural area around it; therefore, each Area can contain only one Village. A Village may only be built on a Clear Land hex with a River running through it, in an Area that the player controls (see 11. Area Control). A "Coastal Village" is simply a Village on a Coastal hex. Villages have one Population unit inherent within them (see Build Table). A Village may be exchanged for a Part-built Village and a Population unit during any Construction and Training phase in which it is not involved in any builds.
If Units attacked in a Village hex are forced to retreat, that Village is captured by the enemy. Replace it with a Part-built Village and a Population unit that retreats out of the hex with the Combat Units. A part-built village that is attacked is itself unaffected; nor does it yield an extra population unit to any retreating defenders. A Village is not captured if units defeated in another hex retreat through it. An undefended Village must be attacked to be captured; in this case, the Village's owner defends with no modifier to his die roll (see 9. Land Combat).
7. Land Movement
7.1 General
Leader Units are the only playing pieces in the game capable of independent movement. (Major Exception: see 7.4 Population Movement.) Head Chieftains and Clan Elders are capable of moving other Units. Their leadership rating indicates how many units they are capable of moving.
7.2 Leaders
The Head Chieftain can move himself, and up to 3 Units stacked with him, up to 4 movement points per turn. A Clan Elder can move himself and from 1 to 3 units (depending upon his leadership rating), from 2-4 movement points per turn (depending upon his movement allowance). Shamans can only be moved by the Head Chieftain. Clear Land costs one movement point to enter; Jungle costs two points. Movement is not allowed across Mountain hex sides. (See the Terrain Effects Chart.) A player may move all, some, or none of his Leaders in his turn, to the limit of their movement allowance. Movement points may not be transferred from one Leader to another, nor accumulated from turn to turn. The Head Chieftain may move any number of Clan Elders and the Shaman in addition to 3 units stacked with him; these Clan Elders, however, may not move on their own in the same turn, nor may they make use of their leadership rating (ie they cannot, if being moved by the Head Chieftain, simultaneously themselves move units). A player must complete all movement with one Leader before beginning movement with another. A Unit may only be moved by one leader in a turn. Leaders may pick up and drop off units in any hex as they pass through, as long as the above rules are always complied with.
7.3 Stacking
There is no limit to the number of Units and Movable Markers that may be stacked in one hex. There is a limit to the number of Units that may attack or defend in a hex (see 9. Land Combat).
7.4 Population Movement
Population units may move 3 movement points on land (on their own) or they may be moved by Leader Units (but never both in one turn). They may carry one Big Log or Part-built Canoe with them as they move, freely dropping them off or picking them up. Each of these markers may only be moved by one Population unit in a turn. Only Population units may carry these markers; combat units are too self-important for manual labor. Completed War Canoes cannot be carried; they may only move at sea by being paddled (see 8. Sea Movement).
7.5 Land Zones of Influence
The six hexes next to a Combat Unit are known as a Zone of Influence (hereafter referred to as a "ZI"). When a Leader enters a hex in an enemy ZI, it must stop and move no further that turn, unless it moves directly into the hex containing the enemy unit (providing, of course, that it has enough movement points remaining to get there). If a Leader begins its turn in an enemy ZI, it must move into the hex containing the enemy unit, or directly into a hex free of enemy ZI's. A player may never move any Leader directly from one enemy ZI to another. Note that any unit moving into a hex containing enemy Combat Units must attack those units (see 9. Land Combat).
Population units moving alone may not move into an enemy ZI (unless a friendly combat unit is in the hex). Leader Units, Population units, and all Markers (including Villages) do not have a Zone of Influence unless they are stacked with Combat Units. Enemy Units may freely move past them or even through the hex they occupy, if they are not stacked with Combat Units. Alternately, enemy Units may stop in their hex and attack them. Land Zones of Influence do not extend into hexes a Leader would not normally be able to move into (all-sea hexes or across Mountain hex sides).
8. Sea Movement
8.1 Canoes
A War Canoe can carry one or two Units (plus any number of Leader Units). In order to move, a War Canoe must either contain the Head Chieftain or a Clan Leader, or be part of a flotilla (stacked in a single hex) commanded by such a leader. There must be at least one Combat Unit in each canoe (paddling!) for a canoe to move. The leaders' movement allowance governs their movement. When a Leader is moving by canoe, All-Sea and Coastal hexes cost one-third (1/3) of a movement point to enter, except for reef hexes, which may cost 1 movement point to enter (see 8.3 Coral Reefs). A canoe may not end its turn at sea: you must reserve enough movement points to reach a coastal hex.
The Head Chieftain can command a flotilla of up to 3 War Canoes in one hex. Clan Elders can command a number equal to their leadership rating. It costs 1/3 of a movement point to embark a fleet (including Units moving with the leader and any Units already in the hex with the War Canoes). If all of the counters moving by sea begin the movement phase in the same coastal hex, then there is no cost to embark. Note that leaders can command up to twice as many Units in canoes as they can when they are on land. Canoes manned by one unit may embark another friendly Unit already on a coastal hex for an additional 1/3 movement point. Canoes manned by two units may disembark one unit on a coastal hex for no additional cost. The Leader commanding a sea expedition may disembark in a coastal hex, along with all Units in the canoes, at no cost. He may continue moving (if movement points remain) with as many Units as he can command on land. Any additional Units, and the War Canoes, remain beached in that hex.
8.2 Sea Zones of Influence
War Canoes manned with at least one Combat Unit and the Head Chieftain or a Clan Elder, based in a coastal hex, exert a ZI at sea similar to a land ZI. Enemy Canoes entering a sea or coastal hex adjacent to them (if they wish to continue moving) must then move into their hex and attack them.
If a canoe manned as above is based in a coastal hex containing a friendly Village, they exert a two-hex ZI at sea. Enemy canoes entering a hex two hexes from such canoes, if they wish to continue moving, must move adjacent to the hex, and then directly into the hex to attack them. (Assuming, of course, enough movement points are available.) Note that moving from the "outer zone" to the "inner zone" (or vice-versa) does not break the usual prohibition against moving directly from one enemy ZI to another.
8.3 Coral Reefs
Reef hexes in a coastal hex in an area the player controls (or an all-sea hex adjacent to a controlled area) cost only 1/3 of a movement point to enter. All other Coral Reef hexes cost 1 movement point to enter. This rule reflects the paddler's familiarity with the local waters; unfamiliar reefs must be negotiated slowly.
9. Land Combat
9.1 General
When a player moves into a hex containing enemy Units, he must attack those Units during his Combat Phase. Only two Units from each side may attack or defend (owner's choice); up to three may take part if at least one Unit is a Slinger unit. Any number of Leader units may be involved. All Units in a hex suffer the results of combat.
9.2 Procedure
The attacker totals the combat values of the Units and Leaders involved. The defender does the same, also adding 1 if the combat is in a Jungle hex. The player with the larger number subtracts the smaller number, and arrives at his Combat Modifier. This is added to his die-roll.
Each player rolls one six-sided die, with one player adding his Combat Modifier to his roll. The player rolling the higher number (as modified) wins the combat. If it is a tie, the defender is the winner. The loser must retreat from the combat hex. If the winner's modified roll is 0, 1, 2 or 3 greater than the loser's, the loser must retreat one hex. If the difference is 4 or more, divide this number by 2 and drop fractions. The result is the number of hexes the loser must retreat.
Example: A force of two Heavy Troops, one Slinger and a Head Chieftain (4+4+2+1=11) attacks a Jungle hex containing two Fighters and a Militia unit (only two Units can be counted, 3+3=6, +1 bonus in a Jungle hex, =7). The attacker adds a Combat Modifier of 4 to his die-roll (11-7=4). He rolls a 4 (+4=8), the defender rolls a 3. All three defenders must retreat two hexes (8-3=5, 5÷2=2, drop fractions).
The loser then determines how many units Panic. Each retreating Combat Unit rolls one die as it enters each hex that it must retreat to. If the die roll is even, the unit does not Panic. If the die roll is odd, the unit Panics. If Heavy Troops, Fighters, or Slingers panic, they are immediately converted to Militia units. If a Militia unit panics, it is converted to a Population unit. If a Population unit panics, it is captured by enemy units involved in the attack, Providing they are in an adjacent hex when the panic occurs. Move the captured Population unit back to the enemy units, and substitute a Population counter of the capturing player. Retreating leaders do not roll for panic.
The winner of a combat may pursue retreating enemy units; if they retreat more than one hex. He may advance into each vacated hex as the loser retreats, even if the advance would violate normal Zone of Influence rules. The winner must announce his decision whether or not to advance, before the loser rolls for possible panic of units retreating from that hex.
Example: Two Fighters and one Militia unit must retreat two hexes. On the first hex retreated to, the battle loser first rolls a 1; the Militia unit is converted to a Population unit. Then he rolls a 2 and a 3; one Fighter unit is converted to a Militia unit. The loser retreats another hex. The winner chooses to advance into the vacated hex. The loser rolls a 4 on the Fighter unit, a 6 on the Militia unit, but a 3 on the Population unit. The Population unit panics, and is moved back to and captured by the adjacent enemy units. If the enemy units had chosen not to advance, the Population unit would have suffered no ill effects from panicking.
If a retreating Leader finds himself alone (ie unaccompanied even by a Population Unit), next to pursuing enemy Units, he is captured by those Units. Move the captured Leader back into the attackers' hex. See Clan Elders and Head Chieftains for how to handle their capture.
Big Logs and Canoes (whether complete or part-built) remain in any hex vacated by a defender. They may subsequently be used by the victor, or even by another player who enters the hex.
9.3 Retreat Path
Retreating Units always follow the most direct path, measured in movement points, back toward their Home Village. If more than one route is of equal distance then the winner of the combat determines which way the units will retreat. Retreating units may not cross hex sides they are not normally able to move across, nor may they enter hexes occupied by enemy Combat Units. Retreating units may ignore all enemy Zones of Influence. If units retreat through a hex containing friendly Units or Leaders, they join in the retreat and are susceptible to Panics. Markers, including Villages, remain unaffected by Units retreating, and advancing, through them (unless the combat started in a Village hex; see 6.2 Villages). War Canoes never join units retreating or advancing after land combat.
If units forced to retreat have no Home Village or no legal hex to retreat to, they are all captured by the winning units in the attack. Convert all captured Combat Units to Population units of the victor's color. (This is not necessary if the loser chooses to leave on an Expedition.)
Retreating units stop when they enter their Home Village, even if the combat result indicated additional hexes to retreat. If the combat took place in their Home Village, the losing player must immediately designate a new Home Village (see 6.2 Villages) and retreat towards it. If he controls no other Villages, the units have no hex to retreat to, and they are captured as described above.
10. Game Length
10.1 General
The game ends the moment there is only one player's Head Chieftain on Tahiti, even if some areas are neutral. The game may end before this, when it becomes obvious that the resources left on Tahiti will not support further warfare. This requires the mutual agreement by all players still on Tahiti. Alternatively, players may agree to a limit before the game begins. This limit can be a specific number of seasons or a length of real time.
10.2 Game Turn Marker
After the completion of a game turn, advance the Game Turn marker one space on the Seasonal Game Turn Track. After six turns, return the Game Turn marker to the first space, and advance the Season marker one space. Four seasons represents a year of game time. Players should place defeated Shaman counters two spaces ahead of the Turn marker to indicate when this unit will return to play (see 12.2 Shamans).
11. Area Control
Most Areas are neutral at the start of the game; each player controls only his Home Area at this time. A player can take control of a neutral area by moving his Head Chieftain and at least one Combat Unit into the area. If these conditions are met at the start of his Construction and Training Phase, and no enemy Combat Units are in the Area, the player takes control of the neutral Area. After all other builds are complete, replace the Neutral marker with one of the player's control markers. In the same phase, place 3 of the player's Population units anywhere in the Area. Also place one Clan Elder unit in the area if the player rolls an even number on one die-roll. (Pick a Clan Elder of the appropriate color from the inverted Clan Elder: see 12.1.)
A player takes control of an area from an enemy player if, at the start of his Construction and Training Phase, he is the only player with Combat Units in the area and there is no (fully built) Village in the area. Replace the enemy control marker with one of the player's markers. No Clan Elder or Population units are received when taking control of an Area from another player.
Area control is important in tallying victory conditions, and helps facilitate sea movement. Also, Villages may only be built in controlled areas.
12. Leader Units
12.1 Clan Elders
These units represent the leadership inherent to each area. When they choose to join you in your quest to control Tahiti, a counter is placed in the area. If they are against you, your show of force is enough to commandeer the area's resources.
At the start of the game, each player should place all his Clan Leaders face down on the table, and move them around so that their values are unknown. When Clan Leaders are subsequently called for, the owning player picks them at random.
When a Clan Elder is captured in combat, the capturing player rolls one die; on an odd roll, the Clan Elder is removed from play (he was either killed in combat or, more likely, he simply got disheartened and went home). On an even die roll, the Clan Elder joins the capturing player's side (replace him with a randomly drawn Clan Leader of the capturing side).
12.2 Shamans
Each player begins the game with one Shaman (otherwise known as a witch doctor). The Polynesians believed that these men were able to direct the mana, or sacred power, of the clan's war god against their enemies. This gave a psychological boost to the warriors, represented by the Shaman's one-point combat value.
If the Shaman's efforts failed, however, he was obviously a fraud. Therefore, any time a Shaman is involved on the losing side of a battle, immediately remove his counter from play. It would take about a month for a new Shaman to establish his authenticity with the clan. Replace the Shaman counter on his Home Village in the combat phase two turns after it is eliminated in battle. This represents a new Shaman having risen to power in the clan.
12.3 Head Chieftains
You are represented on the board by the Head Chieftain Leader unit. The power of this unit is tremendous: leadership of an unsurpassed number of combat units, a combat bonus, and the critical political ability to convert neutral areas. The Shaman will follow no one else! Unfortunately, things can look desperate when the Head Chieftain is captured in combat. When this occurs, the capturing player rolls one die: on a roll of 1, the Head Chieftain was killed in battle. Remove all counters the player controls. (Everything: Units, Villages, War Canoes, Big Logs, etc.) All areas controlled by the player revert to neutral status. The player suffers a Total Defeat. On any other die roll, the Head Chieftain is captured, and the bargaining begins.
The captured Head Chieftain must embark on an Expedition. The number of Units and War Canoes he takes on his expedition is open to negotiation (the capturing player may even offer his own Units and War Canoes in the negotiations). If neither player has a War Canoe, then one "emergency canoe" can be created for the Expedition. All his other assets are either disbanded (removed from the map) or replaced with the capturing player's Units, depending on negotiations. Each area controlled by the captured Head Chieftain either switches control to the capturing player, or reverts to neutral status. (In the latter case, any Village in the area must disband, and any two Units must disband for each area switching to neutral status, if available.) If bargaining fails, the capturing player can execute the captured Head Chieftain. This has the same results as being killed in combat (see above). Executing your opponent is considered poor sportsmanship, even in a two-player game.
13. Expeditions
A player can embark on an Expedition voluntarily during his movement phase, or he may be forced to do so when captured by another player. The components of the Expedition are gathered from anywhere on the map, and placed on the title corner of the board, at no cost in movement points. If the Expedition is voluntary, the player can strike a deal with any player(s) remaining on Tahiti, as outlined above. If no deals are made, then all counters the player leaves behind are disbanded, and all areas he controls become Neutral.
The Head Chieftain must lead the Expedition, and for this, he can control an unlimited number of War Canoes. (It is assumed the canoes are hastily converted to high seas use, and packed with essential items and supplies.) There must be enough canoes present to carry the number of Units the player intends to bring; no more than two Units plus Leaders per canoe. At least one Unit in the Expedition must be a Population unit. The player then consults the Expedition Table, and continues to roll on it until a result is achieved. Note that with any result on Table A and some results on Table B, the player may choose to accept the result, or hazard another "First die roll."
In a three- or four-player game, it is possible to land in the same territory that a previous player landed in. If this occurs in "unoccupied territory," there is room for your clan to settle there also. However, reduce the victory level by one step, since your predecessor has grabbed the best land. If you land in the same "occupied territory," and your predecessor achieved less than a Total Victory there, you also battle the natives. Add 1 to your roll on the Occupied Territory Combat Table: your predecessor has softened them up. If your predecessor achieved a Total Victory, you "battle" him. Do not add one to your die roll; reduce his victory level to the opposite of what you achieve. (For example, if you achieve a Marginal Defeat, his result is reduced to a Marginal Victory.)
14. Victory Determination
Your objective in the game is to take full control of the island of Tahiti. If more than one player controls territory at the end of the game (or if some Areas remain neutral), the number of Areas a player controls determines his level of victory (or defeat):
| # of Areas Controlled | Level of Victory |
|---|---|
| 16-17 | Total Victory |
| 12-15 | Substantive Victory |
| 8-11 | Marginal Victory |
| 4-7 | Marginal Defeat |
| 1-3 | Substantive Defeat |
| 0 | Total Defeat |
Levels of victory can also be determined by the results of a player's Expedition. A player whose Head Chieftain is killed suffers a Total Defeat. The winning player is the player with the highest level of victory (or, the lowest level of defeat).
EXAMPLE: Historically, Tahiti ended up divided into three regions: Oropaa (with 3 Areas controlled, Substantive Defeat), Aharoa (7 Areas, Marginal Defeat), and Teva (7 Areas, Marginal Defeat). This leaves two players tied for first place, with the other in third place. If we assume a four-player game, the fourth player may have come in last place after dying in combat. If he left Tahiti on an Expedition any result is possible: discovering Hawaii would provide a stunning victory for the fourth player, while discovering Rapa Nui would create a three-way tie for first.
Ties can be broken when two players' victory level is determined by Area control: simply compare the precise number of Areas controlled. (This did not help in our example, however.) When a tie involves one or more players who succeeded on an Expedition, there is no way to break the tie.
15. Advanced Rules
The following rules add an extra degree of realism (and complexity) to this simulation. It is recommended that the basic game be played at least once before any Advanced Rules are added. Individual rules may be added as the players wish, except that the Swimming rule must be used when Sea Combat or Crashing Coral Reefs is used.
15.1 Crashing Coral Reefs
Crashing reefs is an option available if a player is in a hurry and is willing to take some risk by not carefully picking his way past unpredictably treacherous reefs. The player expends only 1/3 movement point to enter a reef hex that would otherwise cost 1 movement point to enter. He designates one War Canoe as his lead canoe, and rolls a die. If he rolls 1-4 that canoe successfully negotiates the reef. If he rolls a 5 or 6, that canoe strikes a reef. If this second die roll is a 5, the canoe crunches off the reef without serious damage; on a 6, the canoe sinks (see Swimming). The next canoe in the stack must roll a die only if the preceding canoe struck a reef (regardless of whether it sank or not). As soon as one canoe avoids striking the reef, each of the following canoes in the expedition safely negotiate the same passage without need of a die-roll. A player crashing a reef can call off the attempt, and end his movement next to the reef hex, if he suffers too many losses.
15.2 Sea Combat
When using this rule, players may end their sea movement in an all-sea hex. If a player moving by sea attacks enemy pieces in a coastal hex containing War Canoes, the attacker can decide whether to engage in Sea Combat or disembark for Land Combat.
Combat occurs at sea when canoes of opposing sides are in the same sea or coastal hex. Only three canoes from each side can attack or defend in a hex. The Combat Modifier is arrived at in a manner similar to land combat, except that the printed combat values on Combat Units are not used.
Instead, each player counts 2 points for each War Canoe involved in the combat that has a Combat Unit to man it. If the canoe has two Combat Units aboard, and at least one is a Slinger, Fighter, or Heavy Troops unit, add 1 extra point. Also add the combat value of all Leaders involved. Combat is then resolved just as it is in land combat. Both players, however, consult the Sinking Table before resolving retreats.
Example: Three War Canoes lead by a Head Chieftain, each with one Militia unit aboard, and two of the three also having a Fighter unit aboard (by canoe, 4+3+2=9) attacks one War Canoe with two Heavy Troops aboard (3). The attacker adds a Combat Modifier of 6 to his die roll (9-3=6). He rolls a 3 (+6=9), the defender rolls a 6. The defender loses and must retreat one hex (3÷2=1, drop fraction).
Retreats at sea are handled in the same manner as retreats on land (see Retreat Path), except that retreating units in War Canoes will not Panic. However, before retreating, the combatants must designate exactly which Units and Leaders are on which canoes, and then consult the Sinking Table below. Both combatants add the number of enemy War Canoes involved in the battle to a die-roll. The loser of the combat must also add the number of hexes he will retreat to his die-roll. The number of each player's War Canoes that sink are as follows:
SINKING TABLE
| Die-Roll | Result |
|---|---|
| 2-6 | No Loss |
| 7-9 | 1 War Canoe Sinks |
| 10-12 | 2 War Canoes Sink |
| 13 or more | 3 War Canoes Sink |
Note that in the above example, the winner would have to roll a 6 (+1=7) to lose one canoe, while the loser would have to roll a 2 (+3+1=6) or less for his sole canoe not to sink. Which canoe sinks, when there is a choice, is always determined randomly. When a canoe sinks, the War Canoe marker is removed from the map, and all units aboard must attempt to swim to safety (see 15.3 Swimming).
If a player's Home Village is no longer on a Coastal hex (or if he has no Home Village) and he loses a sea battle, all of his defending War Canoes (that don't sink) are captured. All Units aboard them are converted to Population Units and captured. Alternately, at the losing player's option, he may immediately emigrate (see 13. Expeditions).
15.3 Swimming
When a War Canoe sinks, the Units and Leaders aboard are not automatically eliminated. Roll one die for each counter: if a 6 is rolled, it is eliminated (sharks). Heavy Troops are eliminated on a 5 or 6 (due to the extra equipment they are encumbered with). Surviving Slingers, Fighters, and Heavy Troops are replaced with Population units, when the unit reaches safety. Swimming units can be picked up by canoes in the same hex, even canoes about to retreat in the current combat; regular loading limits must be observed, ie each canoe can hold 2 units plus any number of leaders. Or, swimmers may be placed on shore if they are in a coastal hex. If neither option is available, a swimming unit must head for the nearest friendly canoe with room for it, or the nearest coastal hex, whichever is closest (owner chooses on a tie). Each swimming unit rolls a die (as above) for each hex it swims into, adding one to the die-roll for each hex before reaching safety.
Example: A War Canoe containing two Heavy Troops is sunk in combat on an all-sea hex, two hexes from the nearest shore. Rolls of 4 and 5 means one Heavy troops unit survives. Two friendly canoes in an adjacent hex each have two units aboard, so the unit must attempt to swim to the nearest coastal hex (since no other friendly canoes are within two hexes). A roll of 3 (3+1=4, 4<5) gets him to the next hex. Entering the coastal hex, a roll of 3 now eliminates the unit (3+2=5). If the Combat Unit had not been Heavy Troops, or if the player had rolled lower, a Militia unit would have been placed in the coastal hex.
[Figure in the scan: a sea-hex diagram marked "DRM = +2", "DRM = +1", "NO DRM" and "CANOE SINKS", illustrating the swimming modifiers above.]
15.4 Jungle Depletion
Immediately after a player extracts a Big Log from a Jungle hex during his Construction and Training Phase, he must roll one die. If he rolls a 1, then that Jungle hex is permanently depleted. Place a Stump Marker in the hex; the Big Log that the player has just harvested is the last tree suitable for construction in this part of the island's Jungle. No more Big Logs can be extracted from this hex for the remainder of the game.
A depleted Jungle hex does not lose its other attributes. It still costs two movement points to enter such a hex, and combat units defending in the hex still add one to their combat value.
16. Solitaire Rules
The following rules generate and control the activities of hostile units. All normal rules apply, with these exceptions. Taking control of a neutral area is no longer automatic. Instead, roll on the following Table:
| Die-Roll | Result |
|---|---|
| 1 | Area is hostile, armed, and developed: place 1 Heavy troops, 1 Fighters and 1 Village in the area. |
| 2 | Area is friendly: place 3 Population units and a Clan Elder, as in the regular rules. |
| 3 | Area is hostile and armed: place 2 Fighters and 1 hostile Population unit in the area. |
| 4 | Area is friendly (same as 2 above). |
| 5 | Area is hostile but unarmed: place 3 hostile Population units in the area. |
| 6 | Area is friendly (same as 2 above). |
When five or fewer areas on Tahiti remain neutral, you must subtract 2 from your die-roll. Treat a "zero" the same as a "2." Treat a "negative 1" the same as a "1," except add a Slingers unit to the hostile forces listed.
Hostile Combat units are placed together in a randomly selected clear hex in the area. Hostile population units are placed separately, each in any randomly selected hex in the area, including Jungle hexes. (Exception: population units are not to be placed in the 3 jungle hexes which are not adjacent to clear terrain.) Hostile Villages are placed in any hex they could have been built on, randomly selected when more than one hex in the area is eligible.
Your Head Chieftain and his escort may move directly out of a hostile area in the immediately following movement phase (even if hostile Combat Units were placed in the same hex they occupy) to avoid activating the area. Inactive hostile units will not move from where they were placed. Inactive hostile Combat Units do have a ZI. If any of your Combat Units move into an inactive hostile area, it becomes activated.
Activated hostile Population units still remain in the hex where they were placed. Activated Combat Units take part in a Movement Phase and a Combat Phase immediately following each of your turns. In their Movement Phase, all activated Combat Units will move 3 movement points toward your Home Village. They use all 3 points whenever possible, taking the shortest route as measured in movement points (randomly select equal routes). They ignore your Population units and other Villages unless they end their movement there (and then they attack them). If they enter a ZI (or begin their turn in one) they will move in to attack those Combat Units. Hostile Combat Units always Pursue your retreating units as far as possible. If they reach your Home Village, they will attack it and any units in it. If they are successful, they will continue towards your newly designated Home Village. If you have no other Villages, you are vanquished, and must go off on an Expedition.
If hostile units are defeated in combat, all hostile Population units and Combat Units inside their Home area surrender; replace Combat Units with Population units. If hostile Combat Units are defeated in combat outside their Home area, they will retreat toward their Village or, if no Village was placed (or if you have destroyed it) toward the hex they were originally placed in.
The Solitaire Game ends after the completion of 4 seasons. Determine the total number of areas you control at that time; see the regular Victory Determination table to find out how well you did.
Players' Notes
When playing Tahiti, it is important to keep each phase rigidly separate from the others. Also, do not convert neutral areas until all builds are complete. I even subdivide the phases: collect all your Big Logs before you check each Village (or future Village) in a sequential, rational order. In the Movement phase, I move all my (independently moving) Population units before moving Combat units. Again, check each Village to make sure that it will have something useful to offer you in the next Production and Training Phase. This can get confusing if you don't keep things sequential, especially when the initiative roll lets you move twice in a row.
Always try to build a few War Canoes early in the game. This requires some advanced planning; other things always seem to have a higher priority for the resources. You'll be surprised how handy they can be—and your opponent will be even more surprised when you sail right around his frontier defenses and attack his Home Village. To defend against such a move, you must have a War Canoe manned in a Coastal Village near your frontier. War canoes also make valuable bargaining chips when trying to convince your less-successful neighbor to leave on an Expedition. Those spare canoes look mighty valuable when you trade them for control of his areas!
A very effective seaborne raiding force consists of a Clan Elder, two War Canoes, and three Combat units, including a Slingers unit. Quietly gather these units on a Village, and then unleash them on your unsuspecting victim. Prime targets are Coastal Villages in his rear area, often lightly defended and out of range of his major forces. Don't pursue retreating troops—your Clan Elder often cannot command all three units in land movement to return to the canoes. Their objective is to disrupt your enemy's production, and to disrupt combat training.
Try to keep two (or more) separate, sizable forces on the board. Disaster can happen suddenly, and without the reserve of an additional force, one disaster will be fatal. It's better to have two forces with a strength of 6 each than one force of 12. Slingers are gold—train at least two. Their stacking exemption is the tactical key to victory.
Avoid having a large force stationed close behind a small force or an undefended Village. If an enemy attacks the small force, he is likely to make it retreat 3 or 4 hexes. Since your enemy has some control over the path of that retreat, you can be sure he'll do his best to have your large force retreat, too! Don't put yourself in the position of hoping your Population units panic (and therefore join the enemy) before they reach your large force and trigger their retreat.
Always keep your Shaman with your Head Chieftain. It may seem tempting to have that extra combat point stationed with some troops on your flank, but you have to come back to get him with your Head Chieftain if things don't work out as planned. And they seldom do! (Muaa Fiaas Law.) Your Head Chieftain will end up in places far from where you had planned him to be just two turns earlier. Try to have him end each turn in a neutral area, especially early in the game. Your Head Chieftain is the key to the game. Even if you get totally discombobulated at the periphery, keep your attention focused on him. If you are able to maximize this unit's potential each turn, you are likely to win the game.
Terrain Effects Chart
| Terrain Type | Movement Costs | Combat Effects |
|---|---|---|
| All-Sea | 1/3 M.P.* | N.E. |
| Coral Reef | 1 M.P.*† | N.E. |
| Coastal | As Other Terrain | N.E. |
| River | As Other Terrain | N.E. |
| Clear Land | 1 M.P. | N.E. |
| Jungle | 2 M.P. | +1 Defender |
| Mountain Hex Side | Prohibited | – |
| Region Boundary | N.E. | – |
| Area Boundary |
M.P. = Movement Point(s)
N.E. = No Effect
– = Not Applicable
* = Only in properly manned War Canoes.
† = be 1/3 M.P.; see 8.3 Coral Reefs.
A Note on Pronunciation
Polynesian languages are based on a limited number of sounds, grouped in syllables, none of which are accented. English speakers have problems with this concept, and thus have changed the Polynesian word Hawaii from "ha-why-ee" to "ha-WHY-ee." Keep your stereotype of how native Hawaiians speak in mind when pronouncing place names in this game. Thus, Faaa is not "fa," but rather "fa-ah-ah." Teahupoo is not "tea-HU-poo," but rather "te-ah-hu-po-oh." Papenoo is "pa-pe-no-oh." Try it; it's fun.
Build Chart
Items marked "(must be present)" are not consumed by the build, but must be present. * A Coastal Village is a Village on a coastal hex.
| To Build | Use | On |
|---|---|---|
| Militia (combat value 1) | Population | Village |
| Slingers (combat value 2) | Militia (combat value 1) | Village |
| Fighters (combat value 3) | Militia (combat value 1) | Village |
| Heavy Troops (combat value 4) | Fighters (combat value 3) | Village |
| War Canoe | Part-Built Canoe | Coastal Village* |
| Part-Built Canoe | Big Log | Village |
| Big Log | Population (must be present) | Jungle Hex |
| Part-Built Village | Population (x3) (must be present) + Big Log |
Expedition Table
First Die Roll Table
| Die-Roll | Result |
|---|---|
| 1 | Expedition is lost at sea: Total Defeat. |
| 2 | Expedition is lost at sea: Total Defeat. |
| 3 | Storms wreck a canoe. Roll again after removing one canoe (chosen randomly) from your expedition. |
| 4 | Leaks develop in a canoe. Roll again after removing one canoe. Units may transfer to other canoes if room is available; otherwise, they are lost with the canoe. |
| 5 | Land in occupied territory: roll on Table B. |
| 6 | Discover unoccupied territory! Roll on Table A. |
Table A: Unoccupied Territory
| Die-Roll | Result |
|---|---|
| 1 | Sighted land is an uninhabitable atoll. Roll again on "First Die Roll." |
| 2 | Discover Palmyra Atoll: Substantive Defeat. |
| 3 | Discover Rapa Nui (Easter Island): Marginal Defeat. |
| 4 | Discover Tubuai (Austral Islands): Marginal Victory. |
| 5 | Discover Aotearoa (New Zealand): Substantive Victory. |
| 6 | Discover Hawaiian Islands: Total Victory. |
Table B: Occupied Territory
| Die-Roll | Result |
|---|---|
| 1 | Land on South American coast: subtract 2 from roll on Table C. |
| 2 | Land on Fiji: subtract 1 from roll on Table C. |
| 3 | Land in Samoan Islands: roll on Table C. |
| 4 | Land on Tonga: roll on Table C. |
| 5 | Land in the Marquesas Islands: add 1 to roll on Table C. |
| 6 | Land in Micronesia: add 2 to roll on Table C. But reduce victory by one level (this reflects the limited resources available in Micronesia). |
Table C: Occupied Territory Combat
Sea combat value of Expedition*: columns 3-5, 6-8, 9-11, 12+.
| Die-Roll | 3-5 | 6-8 | 9-11 | 12+ |
|---|---|---|---|---|
| -1 | T.D. | T.D. | T.D. | T.D. |
| 0 | T.D. | T.D. | T.D. | S.D. |
| 1 | T.D. | T.D. | S.D. | S.D. |
| 2 | T.D. | S.D. | S.D. | M.D. |
| 3 | T.D. | S.D. | M.D. | M.D. |
| 4 |
Results:
- T.D. (Total Defeat): Your expedition is wiped out by the natives. (No new expeditions are possible.)
- S.D. (Substantive Defeat): Your expedition is defeated, and your people are subjugated by the natives. (No new expeditions are possible.)
- M.D. (Marginal Defeat): Your expedition reaches hostile standoff with the natives. (A new expedition is possible after losing 2 canoes; units may transfer.)
- M.V. (Marginal Victory): Your people are assimilated into the native population. (Or, a new expedition is possible.)
- S.V. (Substantive Victory): After a period of independence, your people are assimilated into the native population. (Or, a new expedition is possible.)
- T.V. (Total Victory): Your victorious battle against the natives puts you in charge of the Islands.
* Sea combat value equals 2 points for each canoe manned by one combat unit (or 2 militia), 3 points for canoes manned by two combat units (unless they are both Militia), plus leader modifiers. See Sea Combat in the Advanced Rules for a complete explanation and examples.
NOTE: Whenever a result includes the alternative of a new expedition, the player who chooses this must roll again on the First Die-Roll Table, essentially beginning the Expedition process again.
Designer's Notes
THIS DESIGN BEGAN many years ago as an exercise in finding a format for a "production" game (where one builds the forces to fight with) that did not require any off-map charts and production schedules. The old SPI game Global War was infamous for these off-map charts and counters. Players would pay resource points for items, in full, up front, and receive them some turns later (depending on the item). Atom bombs could be purchased for a hefty sum—and then received 40 turns later! Avalon Hill's Hitler's War includes a marvelous system that better simulates the atom bomb program. Players must invest resources in a program that successfully attains higher levels of research before building their bomb. But that system also depends heavily on off-map charts and counters.
I wanted a system where one simply plucks the appropriate resources off the map and replaces them with the desired martial items. This could include a few intermediate steps. For example, building a battleship might take three turns: first a hull is laid, then the partially built ship, and finally the battleship is complete. Resources are added at each step; enemy attack on the dry-dock could disrupt the process at any point. The player could even change his mind, and build an aircraft carrier on a hull originally laid down with a battleship in mind.
A major problem became apparent early on: scale. Battleships can steam around the world dozens of times in the amount of time it takes to build one. Fighter planes can take part in many campaigns in the time it takes to build one. My game would need at least half-a-dozen combat phases for every production phase. The solution was to change the era being depicted. Close the gap between production scale and combat scale by simulating ships that were built faster and moved slower than battleships. At the opposite end of the spectrum is: war canoes!
I had always been fascinated by the exploits of the Polynesians—exploring and colonizing nearly the entire Pacific Ocean, an area of unimaginable vastness. The Maori of New Zealand showed their ability to thrive in a totally alien climate. The use of sweet potatoes throughout Polynesian culture proves early contact with South America. Their military abilities were... less famous. A trip to the Smithsonian Institution's Museum of Natural History, however, will reveal a wide array of intricately carved war clubs, and shark's teeth studding everything attest to the martial abilities of the Polynesians. I chose to simulate the situation on Tahiti partially because Capt. James Cook's expedition detailed the situation there so well, and partially for the obvious name recognition.
Tahiti is a struggle to control resources—people, land, and to a lesser extent, forest products. Losses in combat do not destroy these resources, but move their control to another player. Sometimes, if your defeat is minor (or if you're lucky) the loss is merely a loss of time you have invested in your resources: combat units must be retrained, villages rebuilt. Major losses will see your resources taken over by your opponent, and used against you later.
Some players might be disappointed by how bloodless combat is in Tahiti. Units are never destroyed in the basic game. (When using Advanced Rules, units can drown after sea combat.) Primitive combat is typically a battle of shock and morale, where after only a handful of warriors have been killed or wounded, one side breaks and runs. The panic rule represents a significant number of warriors throwing down their weapons and scattering. They must then be rallied at a Village, where replacement weapons can be made. Population panic and capture occurs when these people scatter so widely that they can be rounded up by the battle's victor, and put to use by their leader.
Note that Heavy troops break straight down to Militia when they panic, without stopping at the Fighters level it takes to build them. These units are brittle: they are comparatively well armed, but their combat tenacity is no better than anyone else's. Just like your Shaman, when they lose a battle, they realize they aren't as special as they thought they were. One cannot make Heavy troops from Slingers, because the latter require special training (using a sling) that does not transfer well to the combat techniques of Heavy troops.
The movement rules also reflect the nature of primitive warfare. Warriors will not go off on a mission without a recognized leader in charge. Even his leadership is limited: if his troops see enemy warriors, they will charge off and attack, no matter how hard he tries to convince them to go around and attack the village beyond them. Hence, the "Zone of Influence." The inability to cross mountain hexsides does not imply that these are humanly inaccessible. It means simply that any unit attempting to move through this difficult terrain would become hopelessly disorganized, and militarily useless on the other side. Also, population work parties would not cross this terrain in search of Big Logs, for they would be too difficult to drag back to the Village.
Perhaps the most controversial aspect of the game is the ability of a player to achieve total Victory simply by rolling a 6 twice on the Expedition Table. Complete, unmitigated luck leading to a Total Victory! There was, unfortunately, no other way to simulate this historic phenomena. Every habitable speck of land in the Pacific was populated in this manner; no one knows how many Expeditions were lost while searching in areas that proved to be open ocean. Discovering an island group as rich as Hawaii or New Zealand could be even more valuable than ending up in complete control of Tahiti. You and your descendants could control (and populate) a rich, unexploited area, crawling with tasty flightless birds that look at you trustingly while you club them for dinner. Land completely unspoiled by previous farming and erosion. Whether your Expedition found a paradise like this, or found nothing and perished, historically lay mostly in the hands of the gods. So it is in the game.