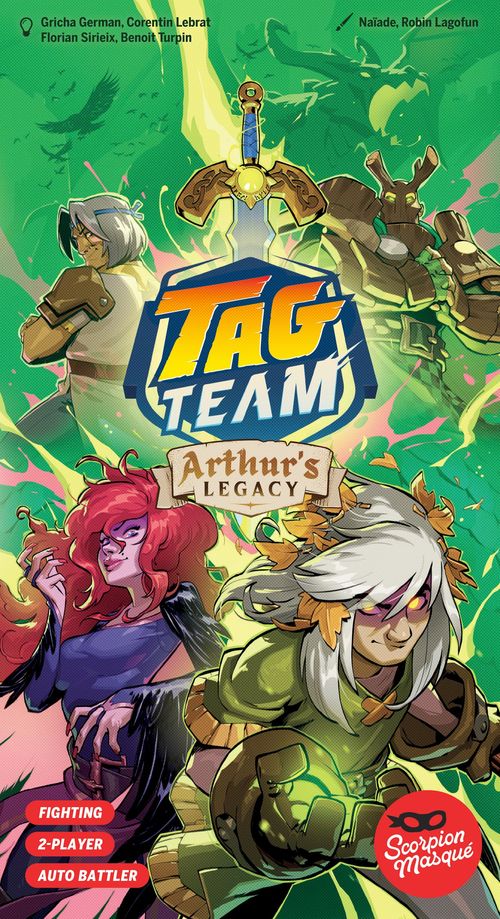
Tag Team: Arthur's Legacy
Tag Team: Arthur's Legacy Rulebook
Table of Contents
Table of Contents
- What Kind of Game Is This? A Deckbuilder... With a Twist!
- New Game Mechanisms
- Game Overview
- Goal
- Contents
- Pick Your Fighters!
- Setup
- Anatomy of a Fight Card
- Gameplay
- Fight! Step
- Build! Step
- End of Game
- Fighting! The Breakdown
- Health and Power
- Actions!
- Health Track Icons
- Card Keywords
- Resetting Your Decks
What Kind of Game Is This? A Deckbuilder... With a Twist!
Tag Team is an auto battler and a deckbuilder... with a twist!
What's an auto battler? An auto battler starts with a preparation phase full of choices, followed by a fight phase where players can no longer change anything. You just have to see how it plays out!
What's a deckbuilder? A deckbuilder allows you to add cards to your personal deck during the course of the game, making it stronger and more effective against your adversary.
What's the twist? In Tag Team, you'll never shuffle your deck. You'll strategically add cards to it without changing the order of the cards already there!
New Game Mechanisms
Tag Team is a series of boxes which can be combined or played individually, each containing a unique set of Fighters. Although the basic rules of the game remain the same, some Fighters will introduce new mechanisms that aren't found in other boxes. The new mechanisms introduced in Arthur's Legacy are identified by NEW, so if you have already played another Tag Team box, you will only need to familiarise yourself with these new elements!
Game Overview
In Tag Team, players will combine the unique decks of 2 Fighters to battle against their opponent over a series of Rounds. You'll start with a Fight deck composed of only 2 cards (one for each of your Fighters).
- It's time to Fight! Simultaneously reveal one card at a time, and follow the instructions on the cards. When your 2 cards have been played, it's the end of the Round.
- Now you Build! Draw 3 cards from your Build deck (composed of your 2 Fighters' decks) and add one of those cards to your Fight deck without changing the order of cards already there... Will your Attack card line up with your Opponent's Block, or avoid it?
- A new Round begins, you Fight again, but this time the Round will be 3 cards long. Fight and Build until one is KO!
Goal
To win the Fight by Knocking Out one or more of your adversary's Fighters by reducing their Health Points until they are KO'd!
Contents
- 60 Fight cards (10 per Fighter)
- 6 Draft cards
- 1 Tree Board
- 6 Fighter Boards
- 4 Special markers (yellow)
- 1 Crow token
- 40 Power cubes (purple)
- 1 Greenwood Mask marker (black)
- 5 Scale tokens
- 4 Health markers (green)
- 1 Fighters' Guide
Pick Your Fighters!
IMPORTANT: If this is your first time playing Tag Team, please skip the following paragraph and page, and move straight to Setup. You'll use this information for future Fights!
Team Building
A great fight starts with a great team. Before each Fight, both players use the Draft cards to assemble their Tag Team. Shuffle and deal half the Draft cards to each player, face down. Then use either of these methods to make your team:
Standard Draft
- Each player looks through their Draft cards and selects the card of 1 Fighter they want to play. They simultaneously place that card face up in front of them.
- They then pass the remaining cards to the other player and select a second Fighter from the new set of cards they've received, which they simultaneously place face up next to their other Fighter card.
Each player now places the Fighter boards of the Fighters they drafted in front of them. This is your Tag Team!
Return all Draft cards and unused Fighter boards to the box. These will not be used for the remainder of the game.
Competitive Draft
Only possible with multiple boxes - see below.
Follow the same steps as the Standard Draft, but after selecting your first Draft card (and before revealing it), discard another card, face down, before passing the remaining cards to the other player. The discarded card will not be available for the other player to select.
NEW: Drafting With Multiple Boxes
You can combine different Tag Team boxes for even more combinations! If you have more than 12 Fighters, simply shuffle all Draft cards and deal 12 face up in the middle of the table. Put the rest back in the box. Take a moment to analyse the available Fighters, shuffle and deal half to each player, then follow the rules for the Standard or Competitive Draft.
IMPORTANT: Do not combine multiple copies of the same box.
Setup
This section describes the Setup for any game of Tag Team, but also includes specific details on how to set up your first game. We suggest playing your first game with Excalibur and the Green Knight versus Perceval and The Dragon.
1. Positioning
Players should sit on opposite sides of the table from each other, if possible.
2. Fighter Boards
If this is not your first game, take the Fighter boards for the two Fighters you chose during the Team Building phase and place them on the table in front of you. The other player does the same for their two Fighters. At this point, if you used Draft cards to create your teams, you can return them all to the box.
FIRST GAME: Take the Fighter boards for Excalibur and the Green Knight, and the other player takes the boards for Perceval and The Dragon.
NOTE: Excalibur's Fighter board is double-sided. Make sure the Excalibur side is showing and not the Broken Blade.
3. Health
Take 2 Health markers each and place them on the Start space of your Fighters' Health tracks.
4. Power
Take as many Power cubes as each of your Fighters' Base Power indicates and place them in your Fighters' Power Supplies, above their boards.
FIRST GAME: You place 0 for Excalibur and 1 for the Green Knight and the other player places 0 for Perceval and 2 for The Dragon.
5. Special Markers and Tokens
Read the Setup section for each of your Fighters in the Fighters' Guide. This will tell you whether your Fighters have Special tracks or tokens, and how to set them up.
FIRST GAME: Place the Greenwood Mask on the space at the top of the Green Knight's board. The other player takes the 5 Scale tokens and places them in a supply next to The Dragon's board.
6. Fighter Decks
Each Fighter has a deck of 10 cards associated to them, indicated by the Fighter's Symbol. Take the decks of cards for your two Fighters, remove each Fighter's Starting Card (indicated by the black border, and the star at the top right) and place them aside. The other player does the same thing for their Fighters.
FIRST GAME: Excalibur's Starting Card is Sword of Destiny, and the Green Knight's is The Greenwood Sap, while Perceval's Starting Card is The Questing Knight and The Dragon's is Hide of Iron.
7. Fight Deck
Look at your two Starting Cards, and decide what order you'd like to play them in. Place these two cards in a face-down deck above your Fighter board, with the card you'd like to play first on top. This is your Fight Deck.
8. Build Deck
You now both shuffle your 2 remaining decks of 9 cards together to create an 18-card deck, called the Build Deck. Place this face-down deck beside your Fighter boards.
9. Get to Know Your Fighter
Finally, you should both take a moment to read through the Gameplay section for your Fighters in the Fighters' Guide. Don't bother reading the FAQ section; this is only a reference section for clarifying particular situations that may arise during a Fight.
Now you're ready to Fight!
Anatomy of a Fight Card
Fighter Symbol — The Fighter this card belongs to, as shown on their Fighter board.
Name — Name of the card.
Action — The Actions this card will perform (see Actions).
Frequency — How many times this card appears in the Fighter's Deck.
Star — This is the Fighter's Starting card.
Text — Describes the card's Actions in greater detail.
Gameplay
The game takes place over a series of Rounds. Each Round is made up of two Steps: the Fight! Step and the Build! Step.
These two Steps are repeated, Round after Round, until one of the Fighters is Knocked Out by having their Health Points (HP) reduced to the KO space.
Fight! Step
Playing Fight Cards
Step into the ring and test your mettle! The Fight! Step is where your team will go head-to-head against their opponents. This step is broken into Turns.
TIMING: All Actions are supposed to be considered simultaneous. It's a Fight, after all! There are certain situations where Timing is important, but those are clearly outlined either later in this rulebook or on the Action cards themselves.
Turns
A Turn consists of both players simultaneously flipping over the top card of their Fight Deck and performing the Action(s) indicated on their cards (again, simultaneously).
All Actions are described on the cards themselves - just read the card and you'll know what to do!
NOTE: Yes, your Fight Deck in the first Round of the game will only have 2 cards. But don't worry, things will heat up pretty fast!
The most common Actions are:
- Attack: Reduce your Opponent's Health Points (HP) by the amount of Power cubes you have.
- Block: Negate all Attacks performed by your Opponent or their Partner.
- Gain Power: Add the indicated number of Power cubes to your Power Supply.
- Heal: Gain the indicated number of HP.
For full details of these and all other Actions, see Actions!.
Players continue to play Turns, placing each new card on top of the previously-played card, until either:
- They have no cards left in their Fight Deck.
OR
- They have KO'd one of their Opponents (their Health marker reaches the KO space on their Health track).
If they have no cards left in their Fight Deck, the Fight! Step is over. DO NOT SHUFFLE YOUR FIGHT DECK. You now move on to the Build! Phase, to make your deck even more powerful!
If you have KO'd one of your Opponents, the Game is immediately over (see End of Game)!
Build! Step
During the Build! Step, you will add a card from your Build Deck (which you left next to your Fighter boards during setup) to your Fight Deck to make it stronger, and to better counter your adversary's deck.
1. Draw Cards
Draw the top 3 cards from your Build Deck.
2. Add a Card
Select one of the cards you drew. SECRETLY add it to your Fight Deck.
IMPORTANT: DO NOT rearrange the order of the other cards in your Fight Deck. You can add the new card to the top or the bottom, or between two cards of your Fight Deck.
3. Discard Cards
Discard the two other cards to the bottom of your Build Deck, in any order.
This is the End of the Round. Place your Fight Deck face down on the table in front of your Fighters, and begin a new Round with the Fight! Step.
Where Do I Add My Card?
Because your Fight Deck will always appear in the same order, you should try to place your new card so that it either counters your adversary's Attacks or exploits openings in their Fight Deck to do damage of your own!
End of Game
There are 3 ways your Fight can end:
Knocked Out!
If one Fighter gets Knocked Out by having their HP reduced to the KO space at the end of a Turn, the game is over and that player has lost. Once a Fighter's Health marker reaches the KO space, they can no longer be healed.
Double KO!
If at least two Fighters on opposing Teams get Knocked Out in the same turn, the fight is judged a Draw! Maybe it's time for a rematch...
Depleted Build Deck
In the extremely rare case that you cannot draw 3 cards from your Build Deck, the Fight is judged a Draw. Your Fighters are exhausted! Revisit your strategies and give it another go!
You now know the basic rules and gameplay! But before you start your first fight, let's go over some details.
Fighting! The Breakdown
Active Fighters and Partners
Here's where you'll learn about the structure of a Fight, your Fighters' Health and Power, and all the Actions and Icons you will come across on your Fighters' cards and Fighter boards.
Each time a card is revealed, it determines that team's Active Fighter and their Partner for that Turn. This means, of course, that your Active Fighter could change every Turn or remain the same for a number of Turns in a row.
Don't forget, a new Turn begins every time a card is revealed from the Fight Deck, and a Round is a full Fight! Step followed by a Build! Step.
Active Fighter
The Active Fighter is the Fighter whose card was revealed this turn. All Actions on the card are considered to be performed by that Fighter (unless otherwise stated). The Active Fighter is also the default target for their Opponent (the other player's Active Fighter).
Partner
The Partner is the other Fighter on the same team as the Active Fighter. Some Fight card Actions will apply to your Partner or your Opponent's Partner. When this happens, your Partner will be represented by an icon and your Opponent's Partner by an icon on the Action in question.
E.G. Amy's two Fighters are Perceval and the Green Knight. Because she revealed one of Perceval's cards, Perceval is the Active Fighter and the Green Knight is Perceval's Partner this turn.
Health and Power
Health Points (HP)
This is your Fighter's life. The Health marker tracks your Fighter's HP, moving up and down their Health Track as they sustain Attacks and as they Heal. But watch out! If the Health marker is on the KO space at the end of the Turn, your Fighter has been Knocked Out, and you've lost the Fight (see End of Game)!
A Fighter's Health marker can never go below the last space on their Health Track. If there are remaining HP losses to take once the Health marker has reached the last space, they are ignored.
Your Fighter can never have more than their Max HP, which is the highest number on their Health Track. Any extra HP left after they've reached their Max (when Healing, for instance) is ignored.
Stop icons that might appear on your Fighter's Health Track are explained in Health Track Icons.
Power
Your Fighter's Power determines how many HP their Opponent loses when your Fighter performs an Attack Action (see Attack). Certain Actions can cause a Fighter's Power to increase or decrease over the course of a Fight (see Power Gain/Loss), but Power cubes are not 'spent' when a Fighter Attacks.
NOTE: The Base Power icon is only used during Setup. Once these Power cubes have been assigned, that icon and its number have no other use for the rest of the Fight.
When a Fighter Attacks, the Power of their Attack is the number of cubes in their Power Supply at the beginning of that Turn (see Attack). Any cubes added or removed during that same Turn are not taken into account for the Attack.
E.G. Vincent is playing Merlin, who has 3 Power at the start of the Turn. He plays Word in the Forgotten Tongue, which requires he Lose 1 Power to Activate his Trees, which he does. His Trees allow him to Attack, which he does, with a Power of 3, because that was his Power at the start of the Turn.
- An Attack with a Power of 0 means you have still performed an Attack, even though your Opponent does not lose HP.
- Your Power can never be below 0.
- In the rare case that you run out of Power cubes, use other items as substitutes.
Actions!
All Actions on your Fight card are mandatory. You cannot choose to ignore any Action on a card you play, even if it doesn't benefit you or, worse, goes against you!
Attack
When you play an Attack, the other player's Active Fighter loses as many HP as your Fighter's Power at the beginning of the Turn (see Power), and moves their Health marker down that many spaces on their Health Track.
NOTE: If your Attack targets someone other than the opposing Active Fighter, it will be indicated on your card.
E.G. Zara's Active Fighter is The Dragon because she played the Tail Slash card. The other player is Amy, whose Active Fighter is Excalibur, because Amy played Sword of Destiny. The Dragon's Action is an Attack. The Dragon's Power is 3, so Amy moves Excalibur's Health marker down 3 spaces on its Health Track. The Dragon also gains a Scale (see Success).
Block
Negate all Attacks performed by your Opponent and/or their Partner this turn, whether they target individual or multiple Fighters. Blocks do not negate any other effects, including Direct Damage (see Direct Damage).
Bonus Action
Most Blocks provide a Bonus Action when they have successfully negated an Attack (see Success). The Bonus Action for a successful Block is indicated on the card, and is activated a maximum of once per Turn, regardless of the number of Attacks it blocks.
- As mentioned above, an Attack with a Power of 0 still counts as an Attack, activating the Bonus Action when successfully blocked.
DON'T FORGET: All card Actions are mandatory. You cannot choose to not perform an Action on a card you have played.
Heal
Gain the indicated number of HP and move your Health marker up your Health Track that many spaces.
If a Heal Action is played at the same time as the Fighter loses HP, simply move the Health marker the difference of the Heal value and the amount of HP lost. Once a Fighter's Health marker reaches the KO space, they can no longer be healed.
E.G. Zara plays Tail Slash with The Dragon, which Attacks with a Power of 1 against Amy's Merlin, who played Master of Order and Chaos, which Triggers his Trees, giving a +2 Heal. This means Amy Heals Merlin 1 HP (2 Heal - 1 Attack = 1 Heal).
IMPORTANT: Stops on the Health Track (see Stop) interrupt Health gains. This means if you receive a +3 Heal, but the following space is a Stop, you only gain 1 HP.
Partner Icon
When this icon is present, it means your Partner is somehow involved in the Action.
A Power Gain with a Partner icon means that your Partner gains 1 Power cube.
An Attack performed by your Partner will look like this. A Deflect (see Deflect) that makes your Partner the target of the Attack looks like this.
Opponent's Partner Icon
When this icon is present on an Action, its effect is on your Opponent's Partner.
An Attack against your Opponent's Partner will look like this.
Multiple Attacks
If a Fighter is targeted by Attacks from different sources (their Opponent and their Opponent's Partner, for example), this is considered a single Attack, with the total Power of the 2 Fighters combined into one value.
Direct Damage
Direct Damage is an HP loss whose value is indicated on the icon. This is not an Attack, and so is unaffected by a Block Action or any other effect that is triggered by an Attack. This HP loss is affected by Stops on the Health Track (see Stop).
If Direct Damage is done on the same Turn as an Attack, simply add the value of the Direct Damage to the Power of the Attack. The word SELF may appear alongside the Direct Damage icon. See Card Keywords for more information.
E.G. Emil's Active Fighter is Merlin, who plays Dark Ritual, taking 1 Direct Damage and Gaining 1 Power. On the same Turn, Daria plays The Might of the Greenwood with the Green Knight, and Attacks with a Power of 3. The Direct Damage is added to the Attack, resulting in an HP loss of 4 for Merlin!
If Direct Damage and an Attack are combined and it is Blocked, only the Attack is Blocked and the Direct Damage is still assigned.
Power Gain/Loss
Add or remove as many Power cubes to/from your Power Supply as indicated.
Don't Forget: Power added or removed on a turn does not affect Actions performed on that same turn.
Transfer
Transferring involves passing an item from one Fighter to another. A Transfer is considered a Gain, because one Partner Gains cubes.
In the example above, the Active Fighter is Transferring 1 Power to their Partner. This means the Active Fighter moves 1 Power cube from their Power Supply to their Partner's Power Supply.
You must always Transfer as much of the required amount as you can, but you cannot Transfer something you don't have. If, for example, you must Transfer 2 Power cubes and you only have 1, Transfer that 1.
Cancel
The Opposing Fighter's card is completely ignored and has no effect.
Success
This indicates a Bonus Action will be awarded if the card's main Action was completed successfully. This Bonus Action is considered to be performed simultaneously with the card's main Actions.
In this example, if this card Successfully Blocks an Attack, Morgan's Partner Gains 1 Power.
E.G. Here, if this Attack is Successful (it is not Blocked), The Dragon Gains 1 Scale.
NEW: Deflect
This is a Block, but instead of the Attack being negated, it is redirected back onto the opposing Active Fighter, who suffers the HP loss.
- Because the Attack was blocked, it is not considered Successful.
- This does not Block or redirect Direct Damage.
- If a Deflect redirects an Attack back onto a Deflect, each Deflect is activated once, and the Attack is considered Blocked (it doesn't keep Deflecting infinitely!).
- If a Deflect redirects an Attack targeting their Opponent AND their Opponent's Partner, both Attacks are Deflected back onto the Active Fighter (see Multiple Attacks).
NEW: Temporary Power
This indicates Power to be added to the Fighter's current Power when they Attack. This does not change the number of Power cubes a Fighter possesses. Simply add the number indicated on the icon to the Fighter's Power to determine the Fighter's Attack Power.
Temporary Power cannot be Transferred or duplicated.
DON'T FORGET! TURNS AND ROUNDS:
- A Turn starts each time the players reveal a new card.
- A Round begins when the players play the first card of their Fight Deck, and ends at the end of the Build step.
Health Track Icons
Stop
When a Fighter's Health marker lands on a space with a Stop icon, it immediately stops moving, regardless of whether it is moving up or down on the track. This icon interrupts Health marker movement from Attacks, Direct Damage, and Healing.
E.G. Merlin is at 8 HP on his Health Track and is Attacked with a Power of 3. He only loses 1 HP, moving down to the next space, which contains a Stop. On a following turn, he is Attacked again with a power of 1, which moves his Health marker down to the 6 space. The next turn, he Heals 2 HP, but only gains 1 HP, moving back up to the Stop space.
Don't Forget, Everything Happens at Once!
- All Actions are considered simultaneous, including Actions that are conditional to a Success.
- A Fighter's Power is always their Power at the beginning of their Turn.
- Direct Damage and Attack Power are added together, and any Healing is subtracted from that value and applied to the Fighter's Health Track.
Bear in mind that some cards will have special timing conditions written into them, such as A Blow for a Blow, which only allows the Green Knight to Attack after his Opponent Attacks him and he has taken the HP loss.
Golden Rule
Any effect on a card or a Fighter board overrules any rule in this rulebook!
Card Keywords
THEN: This keyword indicates the order in which card Actions must be performed: The Action after the word THEN must always be performed after any previous Actions, regardless of whether they are successful or not.
Opponent: This keyword always refers to the other player's Active Fighter, and 'Opponents' means the other player's Active Fighter and their Partner.
You: The keyword 'you' indicates your Active Fighter.
NEW: SELF: This keyword is used to indicate that Direct Damage is assigned to the Fighter who played the card, and not to their Opponent.
NOTE: Certain Fighters in the first Tag Team box assign Direct Damage to themselves despite the absence of the SELF keyword. Simply follow the instructions in the card's text to identify the target of the Direct Damage.
Resetting Your Decks
To play again, simply separate the Fight cards of each Fighter into their individual decks, with the Base card on top.