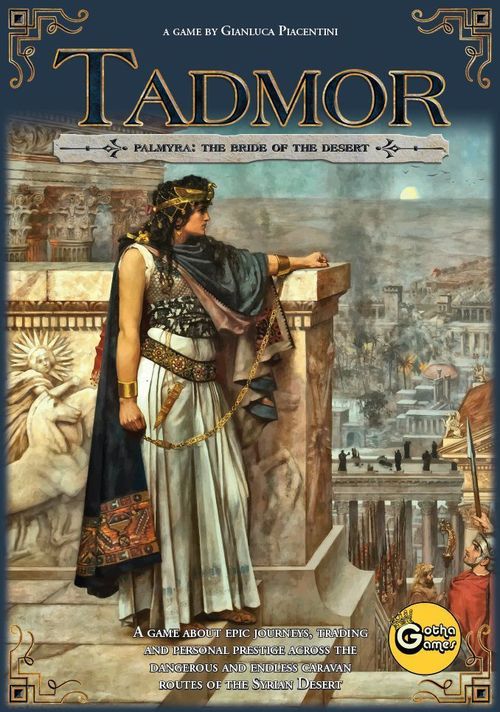
Tadmor
Tadmor Rulebook
Table of Contents
Table of Contents
- Game Basics
- Setup
- Game Turn Sequence
- Clarifications
- Two-Players Game
- Game End
- Strategy Tips
- Complete Game Turn Example
- Appendix - List of Improvements and Missions
- Improvements available at the game start
- Other trading Improvements
- Improvements that provide more resources
- Improvements based on the Tower
- Improvements based on the King's Missions
- Improvements based on Rare Goods
- Marauders Improvements
- Private actions Improvements
- Final scoring Improvements
- Miscellaneous Improvements
- King's Missions
Game Basics
In the game, a merchant's success is measured in Prestige Points (PP). The winning merchant is the one who has scored the most PP at the end.
Components
- 1 central board (double-sided)
- 4 Personal boards
- 48 Improvement tiles (18 Era I, 18 Era II and 12 Era III)
- 36 Rare Goods tiles
- 16 Temple cards
- 26 King's Mission cards
- 7 Marauders cards
- 20 Camels (in 4 colours) and 16 Ships (in 4 colours)
- 4 PP indicators (in 4 colours)
- 20 Tower cubes
- 20 Wood, 20 Stone, 20 Marble, 20 Gold
- 1 First player pawn
- 1 Turn Indicator pawn
- 1 Scoring note pad
Central board
The central board depicts a portion of modern Syria, Iraq and Turkey and is divided in seven different regions. Each region features a number of available actions to players. Additionally, the board features a turn tracker, a score tracker and a number of slots to accommodate Improvement tiles.
The game lasts 9 turns broken down in three Eras consisting of 3 turns each (Era I in yellow, Era II in green and Era III in brown colours).
Personal board
Personal boards are just for your convenience so that you can store your resources, Rare Goods, Temple cards, King's Missions and Tower levels in one place keeping an eye on your potential score. In case you have acquired more stuff than the board can accommodate, just place the additional parts nearby your board.
The Warehouse area of your personal board is where you keep all your resources. The Traded Goods area of your personal board is where you place all resources you have received for exchanges made in the Town Market, through trading Improvements or King's Missions cards.
The personal board has areas for: fulfilled Mission cards, acquired Rare Goods, Temple parts, Tower levels, acquired Improvements, the Warehouse and Traded Goods, and returned Mission cards.
Camels and ships
Camels and ships are placed on the board by players in order to take actions. Round slots accommodate camels, rectangular slots accommodate ships.
Each player starts with a set of 3 camels and 2 ships but more can be added as players develop their trading enterprises.
Resources
There are four types of resources in the game (also called goods in this rulebook): wood and stone (basic goods), marble and gold (advanced goods). Resources are a key ingredient of the game and are used to build the Temple and the Tower as well as to fulfil King's Missions, acquire Rare Goods and buy Improvements.
Unless specified differently, when you are required to pay one resource (or good) you can discard to the general reserve any resource of your choice.
Temple
When you build the Temple you are accumulating PP which will be scored at the end of the game. A Temple is built piece by piece in this order: basement, colonnade, roof and statues. The more you build the more PP you get at game end. Building the Temple is also a possible source of additional King's Missions cards as well as free Rare Goods.
Each Temple card shows its Prestige Points, the cost to build, and the benefit for the 1st and 2nd player to complete.
King's Missions
Each player starts with two King's Missions cards and more can be acquired during the game. King's Missions cards have multiple uses in the game.
A King's Mission card may be discarded at any time from your hand in exchange for one resource of your choice.
Alternatively, it can be fulfilled when resolving the King's Mission action on the board by paying the required cost in resources. A fulfilled Mission card is placed on your personal board and scores at game end the printed PP value.
During the game, a fulfilled mission can be returned to claim the one-off benefit printed on it. When this happens, flip the King's Mission card face down and place it in the Returned Missions area. At the end of the game, returned King's Missions will count half of the indicated PP.
Each Mission card shows its face value PP, the one-off benefit, the phase when the one-off benefit can be taken, the cost to fulfil, the card identifier, and the resource it is discarded for.
Tower
Building the Tower is an important element of the game as it allows scoring points both throughout and at the end of the game.
Players start with the 0 tower card to signify they have no tower levels built at this time. When they build new levels they will place one tower cube on the card for each level built. The cost for building is indicated on the card itself and depends on which of the two actions available on the board are used.
When the Tower reaches a height of 5 levels, a player will flip his tower card showing the 5 levels tower side and then resume adding cubes to the card until the new 10 levels tower card becomes available and so on.
There is no limit to the number of levels a Tower can reach although it is rare to exceed the 20 levels in any game.
The height of the Tower is given by its starting value plus the tower cubes placed on the card's slots. The build cost is indicated on the card based on the particular action taken.
Rare Goods
Rare Goods come in nine different types, depending on the region where you travel to fetch them: the South Sea (grey goods consisting of Glass bottles, Incense and Myrrh sourced from Egypt and the Roman Empire), the area North of the Euphrate valley (yellow goods consisting of Jade, Ivory and Porcelain sourced from Anatolia) and the area South of the Euphrate valley (red goods consisting of Silk, Perfume and Oils sourced via the Persian Gulf). Rare Goods are not considered resources and are not stored in the warehouse.
Improvements
Improvements represent trading and diplomatic skills, technologies, political influence and other unique elements that increase the value of the actions at your disposal during the game.
Initially only Era I Improvements are available on the board. After the first three game turns, all Era I unpurchased Improvements are replaced by a complete new set of Era II Improvements. Later, all remaining Era II Improvements are replaced with Era III Improvements.
Each Improvement tile shows its effect, the phase when the Improvement takes effect, its identifier and its Era.
Setup
-
Unfold the game board. Use the front side for a 3 or 4 player game. Use the back of the board for a 2 player game.
-
Stack the temple cards in different piles organised in this order from top to bottom: basement, colonnade, roof and statues.
-
Place the 7 Marauders card face down in the corresponding slot on the board.
-
Sort out the Rare Goods according to their colour and remove 2 Rare Goods of each type in a 2 player game or 1 Rare Good per type in a 3 player game. Then organise the Rare Goods in three separate stacks according to their colour. Shuffle and place each pile face up in the corresponding areas of the board. The resulting stacks should be:
- In a 2 player game: Each stack containing 6 Rare Goods with 2 of each type
- In a 3 player game: Each stack containing 9 Rare Goods with 3 of each type
- In a 4 player game: Each stack containing 12 Rare Goods with 4 of each type
-
Select the first player randomly and give him the First Player pawn.
-
Each player, in order, chooses a colour and takes 3 camels and 2 ships of that colour together with one personal board and the level 0 Tower card.
-
Each player receives an initial set of goods consisting of 2 woods, 2 stones, 1 marble and 1 gold. Players after the first, will get additional goods as follows:
- 2nd player: a choice of either one additional wood or stone
- 3rd player: a choice of either one additional marble or gold
- 4th player: a choice of either one additional wood or stone plus either one additional marble or gold
Now you are ready to play the first turn of the game.
Note: for experienced players, we recommend using a slightly different setup sequence. In step 8, in reverse order of position, each player takes one Era I Improvement of his choice without being limited to the four Improvements marked as game start. Then you shuffle the remaining Era I Improvement tiles and randomly place the required number of tiles face up in the assigned slots on the board (eventually these may include Improvements marked as game start). This modified setup provides more freedom and variety in the initial positioning of players.
Game Turn Sequence
Each game turn is composed of these four stages:
- Placement Stage
- Marauders Stage
- Resolution Stage
- Turn End Stage
Each player receives one play aid card which summarises the game turn sequence.
Placement Stage
Starting with the player with the First Player pawn and proceeding in clockwise order, each player must place one camel or one ship on one free action slot on the board (note: in the rest of this rulebook a camel or a ship is also called a piece or, collectively, pieces). Round slots accommodate camels, rectangular slots accommodate ships. Some locations present a round/rectangular slot meaning that this location can accommodate either a camel or a ship. In any case, each slot can accommodate only one piece of the corresponding type.
Players proceed this way, continuing with the placement of camels and ships until all available pieces have been placed. If at any point one player is left with no pieces to place, the play skips to the next player with available pieces.
Important note: When placing a camel or a ship you do not resolve the corresponding action. Actions are all resolved during the Resolution phase that takes place after all players have placed all their pieces. The Marauders action is resolved during the Marauders stage.
Marauders Stage
The player who selected a Marauders card in the previous game turn will now reveal that card. All camels and ships in the affected region are removed (unless they have some form of immunity).
Then the revealed Marauders card is moved to the region under attack slot on the board replacing the Marauders card previously placed there (if any) which is returned to the Marauders deck.
Finally, the player who currently has a camel on the Marauders action can return this piece to his personal reserve and secretly select one Marauders card from the deck placing it face down in front of him. The card in the region under attack slot cannot be chosen.
If no player has taken the Marauders action then Marauders will not be in play in the next turn. Marauders will only appear in the turn after the one when a player has selected the Marauders action.
Resolution Stage
You can now proceed to resolve all other actions. Immediately after you have resolved an action remove the camel/ship placed there and return it to the player's personal reserve.
As explained later, actions marked with the "Anytime" symbol can be resolved at any time during the Resolution stage. All other actions are resolved in this specific order:
- Improvement phase actions
- Construction phase actions
- Kingdom phase actions
Note: Experienced players tend to resolve most of the actions of the Resolution stage simultaneously and revert to the resolution order below only in case of disputes. We encourage your group of players to follow this best practice and resolve as many actions as you can simultaneously as this reduces the play time dramatically. Almost all actions can be played in parallel without any particular concern. For example, you can build a piece of the Temple without waiting for another player to build his Tower.
Improvements Phase
Players now resolve the four Improvements slots in the indicated order on the board. Starting with the 1st slot, a player can spend resources to acquire one Improvement from those available on the board. The cost depends on the current game Era (1 resource in Era I, 2 resources in Era II and 3 resources in Era III).
A player who has occupied more than one slot can acquire as many Improvements as the number of pieces he has placed, however the resolution order must always be respected.
Construction Phase
Now all players can use the actions for building the Temple, for building the Tower, fulfilling King's Missions and for acquiring Rare Goods. In case of controversy on the order how actions are resolved, follow the play order at the table.
Tower - There are two slots available for this action: in one you can build multiple tower levels by spending wood and stones for each level built; in the other you can build series of two tower levels by spending wood and marble. The exact cost for building depends on the height of your tower, the higher it gets the more expensive is to build additional layers. When building two tower levels passing from one cost band to the next, you always use the lowest cost.
Example: you are building the 9th, 10th and 11th level of your tower using the "build one tower level" action. This will cost you a total of 7 stones (2 each for levels 9 and 10 and 3 stones for level 11).
Example: you are building the 5th and 6th level of your tower using the "build two tower levels" action. This will cost you 1 wood and 2 marble.
Traitor - the player who takes this action can destroy tower levels of one of his opponents who has at this moment the same or more tower levels than he has. The number of levels destroyed depends on the current Era in the game (none in Era I, 1 level in Era II and 2 levels in Era III).
Temple - When you resolve this action you can build one and only one part of your Temple by paying the indicated cost in resources and replacing the current Temple card on your board (if any) with the next level one. The old card is returned to the general reserve. A Temple is composed of four parts and must be built in a well-defined order: basement, colonnade, roof and statues. After you have built a complete temple then you can start a new one.
Two Temple actions are available on the board. The one in Palmyra will provide you with a King's Mission card when building the Temple; the one in Ebla does not.
Rare Goods - Pay the required number and type of resources and take the Rare Good on the top of that pile. Acquiring a grey Rare Good in the South Sea costs 3 golds; acquiring a yellow Rare Good in the Euphrates costs 5 stones and acquiring a red Rare Good in the Euphrates costs 5 woods.
King's Missions - A player with a camel in a King's Missions slot can
- Either draw one new King's Mission card to his hand
- Or spend resources to fulfil one King's Mission from his hand
Kingdom Phase
During the Kingdom phase there are two actions that always take place without requiring players' pieces being placed on the board and independently from which region is under attack by Marauders. These are: Tower's Prestige and Taxman.
Tower's Prestige - This action is automatically triggered during the Kingdom phase. Identify the player with the tallest Tower at this point of the game and, in case he owns one or more of Improvements I16, I17, I35 and I36, award him any PP provided. In case two or more players can claim the tallest Tower then none of them receive the PP.
Taxman - The Taxman claims a payment in gold during Era II and III. Any player who has a piece placed on the Taxman action is exempt from paying taxes. All other players must pay the required number of gold or lose prestige points as indicated.
War Supplies - This is the only action on the board that can be taken by placing either a ship or a camel. The player who takes this action scores as many PP as the difference between the number of his tower levels and the number of tower levels of the lowest Tower in the game. If the player taking the War Supplies action has the lowest Tower, then he scores nothing.
Example: player A has a tower made of 15 levels, player B of 11 levels and player C of 7 levels. Player B has taken the War Supplies action and will score 4PP (11 levels minus 7 levels).
First to play - the player on this action receives the First to play pawn and, in addition, gets one basic resource of his choice.
Anytime
The following actions can be resolved at any time during the resolution phase.
Take resources - Collect as many resources of that type as indicated for the current game Era and place them in your warehouse. Resources are mostly located on the east and west sides of the board (North Sea, South Sea and Euphrates) and are more effectively collected by ships than camels.
Market - Two Town Market actions are available on the board. With the one in Palmyra you can exchange multiple times during the resolution phase of your turn
- 1 basic good (wood or stone) for 1 advanced good (marble or gold)
- 1 advanced good (marble or gold) for 2 basic goods (woods or stones in any combination)
With the one in Ebla you can exchange multiple times during the resolution phase of your turn
- 1 basic good (wood or stone) for 1 advanced good (marble or gold)
At Ebla, you cannot exchange advanced goods (marble or gold) into other goods.
Caravan - When resolving this space, you can add one more camel to your reserve. To be eligible to receive your fourth camel you must have either a Tower of at least 5 levels tall or 2 King's Missions on your board. To be eligible to receive your fifth camel you must have either a Tower at least 10 levels tall or 4 King's Missions on your board or a Tower of at least 5 levels tall plus 2 King's Missions on your board. For this purpose, King's Missions may be either fulfilled and face up or returned and face down.
Shipyard - With the shipyard action you can add one more boat to your reserve. To be eligible for receiving your third ship you must have collected a set of three different coloured types of Rare Goods (one grey, one yellow and one red). To be eligible for receiving your fourth ship you must have collected two such sets of Rare Goods (two grey, two yellow and two red). Which Rare Goods you have acquired is irrelevant, only the colour counts.
Peace Gifts - You immediately score as many PP as indicated on the board. The exact number of PP you score depends on the current Era.
Turn End Stage
Move all your goods from the Traded Goods area to your Warehouse.
Now, players must be left with no more than 8 resources in total or discard the excess.
Time advancement - advance the turn indicator by one step on the track.
When entering a new Era, each player scores 2 PP for each tower level he has built.
Then, all remaining Improvements on the board are discarded and new Improvements for the new Era are randomly drawn and placed on the board (6 Improvements in a 2 player game, 8 in a 3 player game and 10 in a 4 player game). Any Improvement left is returned to the box.
Clarifications
Markets
When trading resources by using the Town Market or trade Improvements, you exchange resources from your Warehouse for other type of resources, making as many exchanges as you like at different points during the Resolution stage. Remove your camel from the Town Market action only when you have finished with all your trades.
Example: if you have taken the Town Market action you may exchange some stones for marble in order to build the Tower during the Construction phase and then exchange some wood for gold to pay the taxman during the Kingdom phase.
The goods you receive in exchange are immediately spendable, however they are not tradable again in the current turn. You use the Traded Goods area in your personal board to temporarily distinguish all traded goods from the ones still available for trading. It is important that you keep all traded goods in this separate area as a reminder that you cannot trade them again in the current turn. In the Turn End stage you will be allowed to move the traded goods back into your Warehouse.
When you have to pay a cost in resources you can use goods either in your Warehouse or from the Traded Goods area or any combination of the two.
Example: you cannot use the Town Market to exchange 1 marble for 2 woods and then use the Town Market again to convert the just acquired woods into 2 marbles. The just acquired woods are in the Traded Goods area and are not available for further trading. However these woods will be available for paying costs.
When you exchange one advanced good for two basic ones you can choose two of the same type or one of each type:
for example you may trade 1 gold for 1 stone and 1 wood; or you may trade the same gold for 2 stones
You can never trade a basic good for another basic good or an advanced good for another advanced good.
for example you can never trade a gold for a marble.
King's Missions
Discarding a King's Mission from your hand for a resource of your choice is also considered a trading action. Therefore this action can be carried out at any point during the Resolution stage. The resource obtained in exchange, if not spent immediately, goes into the Traded Goods area and is not tradable in the current turn.
Example: you cannot discard a King's Mission for one gold and then trade this gold on the Town Market for 2 stones. You will have to keep the gold in the Traded Goods area.
Having a fulfilled mission on your board represents an obligation of the King to return a favour to you later in the game. During the indicated phase of the Resolution stage, you may decide to claim the one-off benefit indicated on the card: you take the benefit and move the King's Mission card face down to the return area of the board. Returned Mission will count half points at game end.
Temple
The first player to complete a Temple immediately acquires two Rare Goods for free, while the second player to complete a Temple acquires one free Rare Good.
These Rare Goods must be taken from the top of the Rare Goods stacks on the board i.e. they cannot be chosen at will. The first player completing the Temple may draw two Rare Goods on the top of the same stack if he is willing to do so.
Because more players may complete the Temple and/or acquire Rare Goods in the same turn, the order of how these actions are resolved may be particularly important. Remember that during the Construction phase, actions are resolved according to the play order at the table.
Example: the Red player has just built the temple statues; he is the first to complete a Temple and he chooses to pick one Silk tile from the top of the red Rare Goods stack and one Porcelain from the top of the yellow Rare Goods stack. The Green player is positioned on the yellow Rare Goods action and was hoping to acquire Porcelain too but he is now offered with the next yellow Rare Good tile underneath Porcelain. Had the Green player resolved his action before Red he would have acquired his chosen Rare Good.
Also note that a new part of a temple always replaces the old one which is returned to the general reserve.
Example: you have just built the Temple Roof replacing the 13PP Temple Colonnade card which is returned to the general reserve. The total PP value of your temple has now increased from 13 to 25 points.
Improvements
Improvements have effect immediately in the same turn when they have been acquired.
Example: if you have just acquired the Improvement that increases the number of woods you acquire with a ship (I10) and it just happens that you have a ship in the North Sea on a wood location, then you will receive one more wood when resolving that action.
However, Improvements that relate to the Marauders stage will have effect in the Marauders stage of the following game turn.
Example: you have just acquired Improvement I26. In the next game turn you will receive 1 gold and 1PP if you will be the one player revealing the Marauders card.
General
When paying a cost in resources, these are returned to the general reserve. When you are requested to destroy a tower level, then any destroyed tower cube is returned to the general reserve as well, and the tower card is exchanged, if needed.
When paying a cost in PP these are deducted by moving your player indicator backwards on the PP track. If you go negative on the PP track then make a separate note of how many negative points you have.
The number of camels, ships, and the content of your personal board should be made visible to all players at all times.
Resources and tower cubes are unlimited in number; if you run out of pieces just record on paper how much each player should have. All other game components are limited in number.
Discarded King's Mission cards are kept in a separate discard pile on the board. If the deck of King's Mission cards is depleted, shuffle the discarded cards and form a new deck.
Two-Players Game
In a two-player game there are a few different actions to take when setting up the game.
At setup you choose the back of the regular board showing a reduced number of actions and six slots for Improvements.
You discard the following Improvements which are not used in the two-player game as indicated by the "2-player exclusion" symbol printed on their back: I7, I12, I13, I15, I17, I22, I25, I26, I31, I32, I36, I45, I46, I48.
All other play rules remain the same.
Game End
At the end of the third turn of Era III, the game is over.
The final scoring is calculated for each player by adding the PP already scored on the board plus:
- 2 PP for each tower level you have built
- PP from fulfilled face up King's Mission cards
- Half PP from returned face down King's Mission cards
- PP from the Temple parts you have built
- as many PP from sets of Rare Goods as indicated below
- bonus PP given by bonus Improvements of Era III
There are 9 different types of Rare Goods in the game. Sets of different Rare Goods provide points at the end of the game as follows:
| 1 good | 2 goods | 3 goods | 4 goods | 5 goods | 6 goods | 7 goods | 8 goods | 9 goods |
|---|---|---|---|---|---|---|---|---|
| 5 PP | 10 PP | 15 PP | 25 PP | 35 PP | 45 PP | 60 PP | 75 PP | 90 PP |
Example: you have 6 Rare Goods in total. 5 different Rare Goods (35PP) and a duplicate (5PP). Rare Goods provide you with 40PP in total.
The winner of the game is the player with the most PP. In case of a tie, the tied player who has more Rare Goods is the winner. If there is still a tie then the game is a draw.
Strategy Tips
Development Lines
The Tower provides prestige points during the game and can boost your scoring significantly; however, building costs increase the more levels you build and it is a strategy open to opponents' attacks.
Acquiring Rare Goods is key to get additional ships but you must time your purchases very well to get the different sets of goods.
King's Missions are very versatile: they are worth a good number of prestige points at game end but also carry a one-off benefit that can result crucial at a certain time.
Finally, building the Temple is a slow way of adding prestige points but can give you a dramatic boost when you manage to complete its construction.
Improvements
Improvements are an efficient way to accelerate the development of your trading business and it will be almost impossible to build a winning strategy without accumulating a good number of them. As you explore the game you will learn how to use the many combinations together.
Some Era III Improvements can boost your final scoring if you satisfy the indicated conditions.
Trading
Trading is a critical element of this game because it allows you to be more versatile in using your resources as well as to boost their number.
Your starting Improvement will give you an initial skill in trading a basic good for an advanced one. During the game you will want to do more either by acquiring additional trading Improvements or by using the Town Market action.
Follow this example to see how trading could be useful: you have the initial Improvement that allows you to trade stones into gold 1:1; later you acquire the Improvement that allows you to trade gold into wood or stone at 1:2 rate. In one turn you collect 3 stones with your ship and convert them into 3 golds. In the following turn you trade the 3 golds into 6 stones. You have doubled the amount of stones in one turn. Cool, isn't it?
Marauders
Often is a good idea to place your pieces in the same region where the player who selected the Marauders in the prior turn is placing his pieces. Unless he is planning a trap, he is likely to place his camels and ships in "safe" regions.
Because the Marauders card in the region under attack slot cannot be chosen by the player who just took the Marauder action, it means that this Region is always "safe" in the current turn. In other words, it can never happen that Marauders attack the same region of the board in two consecutive game turns. So, at least one region is always "safe" to play.
Complete Game Turn Example
It is a 2 player game.
The blue player board: at the start he received the trading Improvement converting stones into gold (A). In his first turn blue acquired a grey Rare Good (B) and fulfilled one King's Mission (C). He is left with 1 marble and 2 woods (D) and 1 King's Mission (E).
The red player board: at the start he received the trading Improvement converting wood into marble (F). In his first turn red built 3 levels of the Tower (G) and acquired one Improvement (H) which allows him to receive any tower level which is a multiple of 5 for free. Red is left with 1 gold and 2 woods (I) and 2 King's Mission cards (J). He is the first to play (K) and has chosen the Marauders card (L).
Red and blue are now ready to play their second game turn.
Note: to help explaining how Marauders work we are assuming that Marauders attacked the Euphrates region during the first turn. In a real game the Marauders will not be in play in the first game turn (no player has a Marauders card to reveal).
Placement Stage (example)
-
Starting with red, players alternate placing pieces on the board until they run out of pieces: red places a camel on the "build two tower levels" action in the Damascus region. He is keen to raise his tower taking advantage of his tower Improvement. Remember that red knows where the Marauders will attack.
Blue is on a different strategy, he is focusing on Missions and Rare Goods. He starts by sending a ship in the South sea to collect stones. He has the ability to convert stones into gold, so this seems a sensible move.
-
Red places a camel on the "buy Improvement" action. He will be the first to choose an Improvement this turn.
At this point, blue knows that the Euphrates region is safe (the corresponding Marauders card is displayed face up in the region under attack space of the board) and that Damascus and Palmyra are probably safe (red has placed pieces there) and so he sends a ship to fetch a Rare Good in the Euphrates region.
-
Red sends a ship in the North sea to collect wood. He will need it to build the Tower and, also, his starting Improvement allows him to convert wood into marble.
Now blue suspects that the Marauders may attack the South sea and be left with no stones. He places a camel on the Town Market action to do trading if needed.
-
With wood secured, red is now sure he will build the Tower and selects the Caravan action to claim an additional camel when his tower will reach level 5.
Blue decides to take the "marauders" action in order to create trouble next turn for red.
-
Red sends his last piece to collect gold in the Euphrate region.
Finally blue places his camel on the "buy Improvement" action. The Placement stage is over.
Marauders Stage (example)
Red reveals his marauders card which is, in fact, South sea. The blue ship there is removed and returned to the blue player's reserve. The South Sea Marauders card is placed on the region under attack slot and the Euphrates Marauders card is returned to the Marauders deck.
Now blue can take the Marauders deck and choose one Marauders card for next turn. Blue cannot take the South sea card on the board and therefore the Marauders will not attack the South sea again.
Resolution Stage (example)
Now players start resolving actions in parallel. One possible sequence is (resources held after each step in brackets):
- Red takes 2 golds then he stops as he wants to buy an Improvement before taking wood. [Red: 2 wood, 3 gold]
- Red spends 1 wood to buy the Improvement I10 that provides one more wood when collecting wood with a ship. [Red: 1 wood, 3 gold]
- Red collects 4 woods. [Red: 5 wood, 3 gold]
- Blue spends 1 wood to buy the Improvement I5 that provides 2PP when fulfilling a mission. [Blue: 1 wood, 1 marble]
- Blue uses the Town Market to convert 1 wood into marble and 1 marble into 2 stones. Then he returns his King's Mission K16 to claim 3 stones and 2 marble. [Blue: 5 stones, 3 marble]
- Now Blue acquires the yellow Rare Good by paying 5 stones. [Blue: 3 marble]
- Red has other stuff to do. He uses his trading improvement to convert 2 woods into 2 marbles, then pays one wood and 2 marble to build the tower level 4 and 6 (level 5 is free thanks to his I14 tower Improvement). [Red: 2 wood, 3 gold]
- Red can now resolve the Caravan action and claim one additional camel.
No player has selected actions taking place in the Kingdom phase. The Tower prestige is not assigned as no player has tower prestige Improvements. Also the Taxman does not demand a payment in Era I.
The Resolution stage is over.
Turn End Stage (example)
Now blue moves his non-tradable marble into his warehouse. No player has more than 8 goods in the warehouse, so nothing is discarded.
The turn indicator moves to the third turn of the game.
Appendix - List of Improvements and Missions
Improvements available at the game start
I1, I2, I3, I4 - You can trade wood or stone in exchange for marble or gold as indicated. Similarly to the Town Market you can make as many trades as you wish and the goods you receive in exchange are not tradable again in the current turn.
Other trading Improvements
I6 - You can trade PP for goods as indicated, limited to receiving maximum one basic good and one advanced good in each game turn. The goods you receive in exchange are not tradable again in the current turn.
I23, I24 - You can trade gold or marble for wood or stone as indicated. Similarly to the Town Market you can make as many trades as you wish and the goods you receive in exchange are not tradable again in the current turn.
Improvements that provide more resources
I10, I11, I12, I13, I29, I30, I31, I32 - Each time you collect that type of resource with a ship, you get one more resource of that type. All bonuses are cumulative.
Improvements based on the Tower
I18 - You can build the Tower without spending wood (but you still have to pay any remaining cost left).
Example: you are building the 7th and 8th levels with the "build two levels" action which costs 2 wood and 2 marbles; you will pay 2 marbles only.
I14, I15 - You receive any tower level which is a multiple of 5 for free.
Example: your tower is level 3, you use the "build one level" action and spend 1 wood and 1 stone to get level 4, then you get level 5 for free, then spend 2 stones to get level 6.
Example: your tower is level 8, you use the "build two levels" action and spend 2 stones and 2 marbles to get level 9 and 11, level 10 is free.
Example: your tower is level 16 and one of your opponents use the Traitor action to destroy 2 levels, you go down to level 14 and then immediately receive level 15 for free.
I16, I17, I35, I36 - If you have the highest Tower during the Kingdom phase you score as many PP as indicated. All bonuses are cumulative.
Improvements based on the King's Missions
I5, I19 - You receive the indicated number of prestige points every time you fulfil a King's Mission. All bonuses are cumulative.
I20 - Every time you fulfil a King's Mission you spend two resources less for completing this action.
Improvements based on Rare Goods
I8, I27 - You receive the indicated number of prestige points every time you acquire a Rare Good using one of the actions on the board. When you receive a Rare Good for free per effect of the Temple or of a King's Mission, you receive 1 prestige point only. All bonuses are cumulative.
I9 - Once per turn, when one of your pieces is on an "acquire Rare Goods" action, you can complete this action spending 4 PP rather than paying in resources. You cannot go negative on the scoring track when doing this.
I28 - Every time you acquire a Rare Good you spend two resources less for completing this action.
I43 - Every time you acquire a Rare Good you can choose which one you want to buy from the corresponding stack. After you have acquired that Rare Good, reshuffle the tiles and form a new stack.
Marauders Improvements
I7 - If you are the player who revealed the Marauders card this turn, then your pieces placed in the region under attack are not removed.
I25 - If you are the player who revealed the Marauders card this turn, then you score 3 prestige points if there is at least one opponents' piece removed from the region under attack.
I26 - If you are the player who revealed the Marauders card this turn, then you receive 1 gold and 1 prestige point.
I45 - Your pieces are immune to the Marauders i.e. when the Marauders card is revealed, your pieces placed in the region under attack are not removed.
Private actions Improvements
Private actions represent actions that are only available to the player owning the corresponding Improvement and are unaffected by the Marauders. Private actions become immediately active after having been purchased. As indicated by the camel/ship symbol on the left side of the tile, you move the camel/ship used to acquire this Improvement from the board onto the tile. In the following Placement stages you can re-activate the private action by placing one of your pieces on the Improvement tile instead than on the board. During the Resolution stage, the owning player removes the camel or ship placed there to resolve the corresponding action.
I21, I22 - You can trade resources as in the Town Market. You can make as many trades as you wish and the goods you receive in exchange are not tradable again in the current turn. Remove the piece on this Improvement after you have completed all your trades.
I37 - You can perform the Temple action to build one part of the Temple and gain 3 prestige points for doing that. A player may take the normal "build temple" action on the board as well as his private temple action and by doing so, build two parts of the Temple in the same turn. This private action provides no King's Mission card.
I47 - You can take one of the actions available during the Construction phase (build the Tower, acquire a Rare Good, fulfil or draw a King's Mission, build the Temple or be the Traitor). You decide which action to complete at any time during the construction phase (this could be the same action you have already taken on the board).
Example: game is in Era III, you have taken the Traitor action on the board and decide to take the same action with your private action Improvement - you destroy 4 tower levels of one of your opponents or 2 tower levels to each of two different opponents.
I48 - You can take one of the actions available during the Kingdom phase (taxman, war supplies, first to play). You decide which action to complete at any time during the kingdom phase (this cannot be the same action you have already taken on the board). If another player has taken the "first to play" action on the board, these actions are resolved according to the order of play.
Example: you have taken the war supplies action on the board, you cannot take war supplies action again with your private action Improvement.
Example: your opponent has taken the "first to play" action on the board and you want to mirror that action with your private action Improvement. Because he is ahead of you in play order, he takes the first to play pawn together with a basic good; then you take the first to play pawn and a basic good.
Final scoring Improvements
I38, I39, I40, I41, I42 - You will score 12 prestige points at game end if you satisfy the indicated conditions. Ties do not provide points.
Example: with Improvement I41, if you have completed one Temple and another player has done the same, you score no points.
Remember that the score of King's Missions is given by the face value of fulfilled King's Missions plus half face value of returned King's Missions.
Miscellaneous Improvements
I33 - You can store 12 resources rather than 8 in your warehouse at the Turn End stage.
I34 - Every time you build a part of the Temple you spend three resources less for completing the action.
I44 - When you resolve a "peace gifts" action you collect double the number of prestige points.
Example: the game is in Era III and you have occupied with your pieces both "peace gifts" spots. You collect 14 points.
I46 - You are immune to the Taxman i.e. you are not required to pay 1 gold in Era II and 2 golds in Era III.
King's Missions
K1, K2 - Once fulfilled, this mission can be returned in the Construction phase to immediately fetch one Rare Good from the board. The player picks up a stack, takes the Rare Good he is interested in, reshuffles the pile and returns the stack to the board. Remember that in case of conflict between two players on who should get the Rare Good first, it is the play order that counts.
K3, K4 - Once fulfilled, this mission can be returned in the Construction phase to get the next level of the Temple. If you already have a completed temple, then you can get the basement of a new one.
K5, K6 - Once fulfilled, this mission can be returned at any point to get the next additional ship. Note that if you use this mission to get your 3rd ship, then, to get your 4th ship via the Shipyard action, you will still need 2 sets of different coloured types of Rare Goods.
K7, K8 - Once fulfilled, this mission can be returned in the Construction phase to immediately build the printed number of tower levels.
K9, K10 - Once fulfilled, this mission can be returned in the Marauders stage, after the Marauders card has been revealed, to change the region attacked by the Marauders. Now you choose another region among those available in the Marauders deck and place this one in the region under attack slot.
K11, K12 - Once fulfilled, this mission can be returned at any point to get the next additional camel. Note that if you use this mission to get your 4th camel, then you will still need to satisfy the highest pre-requisites to get your 5th camel.
K13 - Once fulfilled, this mission can be returned at any point during the resolution stage to use the Town Market action as if you had placed one of your pieces there.
K14 - Once fulfilled, this mission can be returned in the Marauders stage, after the Marauders card has been revealed and pieces in attacked region have been removed, to swap one of your camel or ship with one of your opponents. The swapped pieces must be the same type i.e. a camel for a camel or a ship for a ship.
K15 - Once fulfilled, this mission can be returned in the Improvements phase to get two Improvements from those available on the board at no cost. This action is performed after all the other players (including yourself) have acquired their Improvements in accordance with the order indicated on the board.
K16, K17, K18 - Once fulfilled, this mission can be returned at any point during the resolution stage to fetch five resources of any chosen type. These resources are not tradeable.
K19 - Once fulfilled, this mission can be returned in the Construction phase to get the basement of a new Temple. This Temple can be built in parallel to your other Temple still under construction (if any). Remember that normally you should complete a Temple before you can start constructing a new one.
K20 - Once fulfilled, this mission can be returned in the Construction phase to immediately destroy three tower levels of one of your opponents. Remember that in case of conflict between two players on who should build/destroy the Tower first, it is the play order that counts.
K21, K22 - Once fulfilled, this mission can be returned in the Construction phase to draw two new King's Missions from the corresponding deck. Remember that in case of conflict between two players on who should draw cards first, it is the play order that counts.
K23, K24 - Once fulfilled, this mission can be returned in any of your turns of the Placement stage to place up to three of your pieces on the board rather than one.
K25, K26 - Once fulfilled, this mission can be returned in the Improvements phase to get one of the Improvements of Era I or II not currently available on the board. If the game is in Era I you can choose one Era I Improvement among those not drawn at the start. If the game is in Era II or III you can choose one Era I or II Improvement among those not drawn.