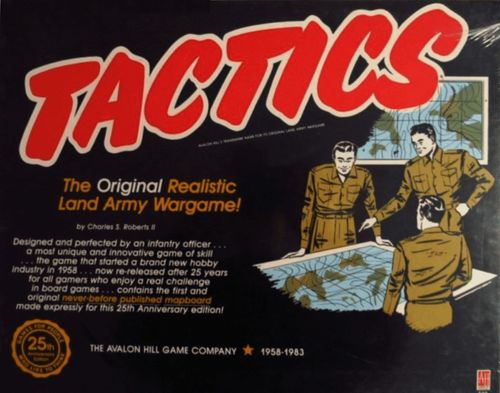
Tactics (25th Anniversary Edition)
Tactics (25th Anniversary Edition) Rulebook
Table of Contents
Table of Contents
A. Fundamentals and Purpose of the Game
Tactics is basically a battle of two complete armies, each beginning with equal forces and occupying one-half of the mapboard. Usually one person commands an army, making a total of two players, but the game can be played with two persons on a side, one of which must be designated as the commander. For identification reasons, one army is identified as BLUE ARMY and the other as RED ARMY. The game is won by one army (a) eliminating the army of the opponent or (b) by one army occupying all of the cities of the opponent for at least one complete turn. GENERAL NOTE: This game is organized to be as realistic as possible and is basically a contest of skill rather than chance. After reading the rules, you will see that they are designed to make the game a test of each player's common sense.
B. Organization of the Forces
Each army is made up of the following units, organized as shown:
- First Infantry Corps (IC)—consisting of Corps HQ marked IC, 1st armored division and 1st through 5th infantry division.
- Second Infantry Corps (IIC)—IIC Corps HQ, 2nd armored division and 6th through 10th infantry divisions.
- Third Infantry Corps (IIIC)—IIIC Corps, HQ, 3d armored division and 11th through 15th infantry divisions.
- Fourth Infantry Corps (IVC)—IVC Corps HQ, 4th armored division and 16th through 20th infantry divisions.
- First Army—consisting of the IC and IIC mentioned above, 1st Army HQ, 1st parachute division, 1st mountain division and 1st amphibious division.
- Second Army—IIIC and IVC, 2nd Army HQ, 2d parachute division, 2d mountain division and 2d amphibious division.
- Replacement Center—consisting of 5th and 6th armored divisions and 21st through 25th infantry divisions.
- First Army Group—consisting of 1st AG HQ and all of the above mentioned units.
TOTALS:
- 1 Army Group HQs
- 2 Army HQs
- 4 Corps HQs
- 2 Parachute divisions
- 2 amphibious divisions
- 6 armored divisions
- 25 infantry divisions
At the beginning of the game, each unit of the army is placed in the bivouac areas indicated on the mapboard. You will notice that these bivouac areas are identified by dotted lines and contain the designation of the units belonging there—IIIC meaning, for instance, the 3rd Infantry Corps. The make-up of each bivouac area is at the choice of the player insofar as the placement of units WITHIN THAT AREA is concerned and will be determined by the order in which the player wants to move the units in later stages of the game. However, IN THE BEGINNING STAGE OF THE GAME ONLY, the organization and components of each Corps and Army must be as indicated in the above notes.
As the game progresses, a player may at any time change the components of any units. For instance, a player may want to organize an armored corps by consolidating all of his armored divisions into one corps. Any combination is allowable, PROVIDING THAT SOME BASIC CORPS AND ARMY ORGANIZATION IS PRESERVED.
During the game, the Replacement Center units may be used with any corps or army or can be used as replacements, however the player wishes to use them.
The combat factor, or value, of each unit is as follows:
- Infantry, mountain, parachute and amphibious divisions each have a Combat Factor of one.
- Armored divisions each have a Combat Factor of two.
- All HQs units are WITHOUT Combat Factors.
C. Movement
You will notice that the mapboard is completely marked off in squares one-half inch in size. Each Unit representing a division or HQs fits a square. All movement is based on these squares.
The game begins by each player throwing the cubit supplied, the player with the highest number being the first to move. From then on, each player takes his turn in rotation.
For each turn, a player is allowed to move a total of 30 squares. This is his BASIC TURN ALLOWANCE. He can move one or more Units any combination of squares as long as total squares moved into does not exceed 30. For examples:
- a) move one Unit 30 squares, or
- b) move 30 Units 1 square each, or
- c) move 1 Unit 10 squares, a 2nd Unit 3 squares, a 3rd Unit 12 squares, a 4th Unit 5 squares: totalling 30 squares.
A player does not have to use up his full allotment of 30 squares in any turn; indeed he can choose not to move at all. Unused BTA's cannot, however, be accumulated and used in future turns.
BTA's can lessen or increase the actual number of squares moved through according to the following exceptions:
-
By following a Transportation Line (road or railroad; roads are red, railroads black) on the mapboard, a player may move a Unit a total of THREE SQUARES for each square allowed in his BASIC TURN ALLOWANCE. For instance, he can move an infantry division 9 squares along a Transportation Line and only lose three squares from his Basic Turn Allowance. Of course, UNITS CANNOT PASS THROUGH OTHER UNITS—for instance, if a division moving along a road meets another division on the road, one or the other must leave the road thus consuming a square from the Basic Turn Allowance.
-
Where roads and railroads parallel in the same square running diagonally, it is assumed that both enter and leave each square at the corners. For instance, travelling from RED CAPITAL to the first LUMBER CITY square equals 7 squares on both transportation lines.
Where roads and railroads parallel in the same square, Units may pass over other friendly Units (exception to Rule C, note 1).
-
Movement through city areas is computed the same as if the area were on a transportation line—in other words, a player can move three squares through a city and yet only lose one square from his Basic Turn Allowance.
-
Movement through Forest Areas, indicated in green on the mapboard, consume two squares from the BTA (Basic Turn Allowance) for each square moved on the board. See TERRITORIAL LIMITATIONS.
-
Movement across river lines, indicated in blue on the mapboard, OTHER THAN AT A BRIDGE, consume two squares from the BTA for each square moved on the board. Regular transportation line movements are not affected by river lines when the crossing is at a bridge.
-
Units must STOP as soon as they move adjacent to an enemy Unit and can move no further even if there are BTA's remaining.
-
Normal cross-country movement is computed at the cost of one square from the BTA for each square moved on the mapboard.
Sea and air movements are covered under the next listing, entitled TERRITORIAL LIMITATIONS.
D. Territorial Limitations
Specialized movements by sea and air are allowed under certain circumstances. Also, some Units have unusual movement characteristics. They follow under appropriate headings.
- MOUNTAIN AREAS. These areas are indicated on the mapboard by black shaded triangles. Only mountain divisions can move in mountain areas. NO OTHER TYPE UNIT CAN MOVE IN MOUNTAINS. Mountain Units move at the cost of one square from the BTA for each square moved on the mapboard.
- FOREST AREAS. As mentioned under Section C, note 4, movement through Forest areas is possible. However, armored divisions cannot move through forest areas. All other divisions may, at the BTA cost indicated.
- AIR MOVEMENT. Parachute divisions may be moved by air from any location to any location without any loss from the BTA. However, these divisions can only be moved ONCE during a player's turn.
- SEA MOVEMENT. Movement by sea is possible without any loss from the BTA. However, ANY UNIT that moves by sea must leave from a FRIENDLY port's dock area, indicated by lines in coastal city areas, and land in the dock area of a FRIENDLY port. Land moves to and from ports must be counted—however, the actual movement on the water is done at no cost from the BTA. Note the emphasis on "friendly port." It is possible to seize the port of an opponent, and after gaining undisputed control, to move in regular land units to continue an offensive. An enemy port may be seized by several methods. First, of course, it can be seized by land forces. Second, it can be seized by parachute divisions. Third, it can be seized by amphibious divisions THAT HAVE LANDED ON BEACHES—AND BEACHES ONLY—near the port in question and have occupied the port. If a port to be attacked is defended by a player, all opposition must be eliminated or pushed out before the port can be considered friendly and regular forces moved in through the dock areas. This is only logical. Amphibious divisions must leave from a friendly port and can only land on beaches—not in a port proper. Of course, if the beach is undefended, the divisions can move from there to the port and, if the port is undefended, seize it and begin to move in regular land forces. To repeat, parachute divisions may directly seize a port.
E. Combat
Units have closed for combat when they are on adjacent squares, either vertically, horizontally or diagonally or a combination thereof. In other words, a division controls a total of 9 squares, formed in a square . . . the square it is on and the square on each side in any direction. Its control of those squares is questioned when an attacking Unit moves into one of the 9 . . . and combat results. The first step is to compute the odds at which the opposing Units are fighting. For instance, if an armored division should attack an infantry division, the odds are two-to-one in favor of the armored division (Refer to Combat Factors under Section B, ORGANIZATION OF FORCES). The cubit is rolled by the attacker and the number rolled plus the odds ratio are compared on the COMBAT RESULTS TABLE (on the back cover of this rules manual) and a result given. An examination of the Combat Results Table is imperative. As this game attempts to be as realistic as possible, the Combat Results Table reflects the fact that an attacker must have a numerical advantage in order to be reasonably sure of success . . . and the degree of success is usually determined by the volume and weight of the attack. The more overwhelming the attacking force, the greater the chance for complete success. There are, however, quality-of-unit factors that cannot be reflected in any table. The only attempt to achieve this in part in the Combat Results Table is by giving at least one opportunity in odds up to three-to-one for the small Unit to achieve a measure of success. Please examine the Table very carefully.
A salient point to remember is that a Unit is in contact with an enemy when he reaches the first square that the enemy controls. In order to envelop an enemy, there must be room beyond the area that the enemy controls.
There are two exceptions to the rule that combat results when Units are adjacent. They follow:
- A river line can limit the number of squares that a Unit controls. Units on a river line do not control the squares across the river. For instance, two opposing Units can be facing each other over a river line without combat resulting. If one should attack the other, the attacking Unit that is crossing the river—OTHER than at a bridge—loses one-half of its combat factor. Units attacking across a bridge retain their combat factor, but only one Unit can cross a bridge at a time.
- Regular land Units next to a mountain area do not control the squares actually in the mountains, with the exception, of course, of mountain divisions. When a mountain division, in a mountain area, is adjacent to a regular land division which is in a normal position, the choice of attack is entirely that of the mountain division. Regular land Units cannot attack mountain divisions so long as they remain in mountain areas.
F. Determination of Odds
Mention of the Combat Results Table and a rough description of odds computation was made in the preceding section. This section goes into the determination of odds in greater detail.
Almost all of the great victories in military history were the result of one army pinpointing its strength at an enemy's weakest point. This game, being as realistic as possible, gives an attacker with overwhelming strength a definite advantage. It does not, however, shun the defensive. An organized defense, elastic and with ample reserves, can often turn the attack of an impudent enemy into a disaster.
Previous sections have explained the combat factors of various types of units, and emphasized that HQs Units have no combat factor. When Units have been engaged, the attack has the choice of application of odds—however, all enemy Units on adjacent squares must be engaged during the conflict. For instance, if RED attacks 2 BLUE infantry divisions with 3 armored divisions on a straight front, RED has a factor superiority of six-to-two. RED may divide up his factor superiority anyway he wants so long as he is dealing with all adjacent units. He could have 2 armored divisions attack 1 infantry division (odds of 4-1) and have 1 armored attack 1 infantry (odds of 2-1). He could attack each infantry division with 2 armored divisions (odds of 3-1 in both cases). It is easy to see how a major offensive involving perhaps twenty divisions could have several different ways of odds application possible.
All combat is done at the END of the attacker's turn. He cannot, for example, take half of his BTA, fight and then take the remainder.
Unusual odds—such as 3-2, 5-2, 7-2, etc.—that are not on the Combat Results Table can be handled by having each player throw the cubit once. The player with the highest number takes the advantage, such as converting 5-2 odds to 6-2, or 3-1.
HQs Units are eliminated when opposing forces are moved to their adjacent squares. No combat is necessary.
G. Reserve Units
Either side, at any time, can remove from the board the equivalent of an infantry corps for use as a maneuver element, reserve or secondary defense line. This is accomplished by asking the opposing player to step away from the board. The remaining player moves his corps to the location he desires, makes a side record of the location and removes the Units from the board. He can place these Units wherever he wants so long as they are in a location where he is positive there are no enemy Units. He cannot place them in front of the established front line. If, in the course of the game, an enemy Unit stumbles into contact with an "off the board" Unit the player must place it on the board and either force the enemy to fight or allow him to fall back—whichever he chooses. He can move his reserve force by the same means—asking the opponent to step away, etc.
H. Miscellaneous
- As clarification, all Units with a combat factor of one fight as infantry. Mountain, parachute and amphibious Units, although they have special movement characteristics, still engage in combat as infantry.
- Corps HQ Units must remain within five squares of the bulk of the Units of their corps at all times. There are times when this is somewhat impractical and there is no specific penalty for not observing the rule, but in the interest of fair play it should be observed. The primary purpose for the inclusion of HQs Units in the game was to give each side a simulated "supply, maintenance and division trains" burden. The weight of "dragging along" Units will be most heavily felt when a player finally achieves a breakout and is pouring Units through the gap in an attempt to achieve some distance objective.
- The rules and regulations of the game seem lengthy, yet looked at "from a distance" they are mostly a simple application of logic. For instance, the Forest area rules . . . infantry can certainly detruck and advance through a wooded area, but the advance would be more drawn out. Hence the penalty in movement. And it is certainly logical to prohibit the use of armored divisions in thick woods. Another example is the river line rule. Any well-equipped infantry division can provide its own bridging (to an extent, of course) but it is certainly more time consuming to erect a bridge than to simply cross one.
I. General Principles of Land Warfare
There have been numerous references throughout the rules and regulations to principles of warfare. They are, at best, very vague and indefinite. For example, the comment concerning "overwhelming superiority" and "quality of Units." We all remember how the 7th Armored Division, USA, and 101st Airborne Division, USA, held back division after division of picked panzer-grenadier and S.S. of the German Army in the Battle of the Bulge. We also remember, to illustrate the rule, how the German Army stunned the French Army in 1940 when they broke through the "impassable" Ardennes and roared to the Coast in a lightning move that rendered the Allies impotent.
Perhaps the best commentary on strategy and tactics is that strategy is simply the application of common sense to the conduct of war.
However, some general rules stand. For example, generally a flank attack is better than a frontal assault from the standpoint of losses, ground gain and general disturbance of the enemy line. However, a flank attack is hard to co-ordinate and actually exposes a flank of the attacker who is employing it.
A breakthrough, or breakout, can be attained generally by massing sufficient strength at one point and forcing an opening before the enemy can employ his reserves. Feints, or fake attacks intended to draw in an enemy's reserves, aid this maneuver. But, no matter how brilliant the breakout, it is of no avail unless there is enough force behind it to achieve its objective. A "long arm" of a breakout requires Units on both sides of the arm to protect it from enemy reserves, and that is a very Unit-consuming operation. Also, mop-up of surrounded Units is a serious Unit-consuming operation. One stubborn enemy division (witness the 7th and 101st, USA) can hold up many times its number in attacking Units for a surprising length of time.
To get away from the offensive, it is important to remember that a sensible, elastic defense not foolishly committed to defending geography can be a potent tool. More than one aggressive enemy has been drawn in and destroyed by a crafty defender . . . a defender who, after exhausting the attacker, immediately counterattacks and makes considerable gains.
All of these comments, and many that are not included here, can be applied in this game. The most important rule, for the beginner, is to determine a definite course of action . . . offensive, defensive or parts of both . . . and to carry through with the chosen course with determination. But, moderation is important. A course of action that looks profitable at one time may be useless later because of a change in the situation.
Accept these comments in the attitude of "common sense", apply them to the game and you will secure hours of enjoyable competition.
J. Optional Rules
For players who prefer, the following rules can be added to those already given. However, it is not essential that these optional rules be employed in the game. They are only supplied for the players who desire to make the competition even more realistic.
- Referring to the Combat Results Table, you will note that in several blocks the expression (1 Pris) appears. This indicates that, playing under the optional rule, the Unit has been captured rather than eliminated. "Prisoner Units" must be transported by the capturing army to any friendly bivouac area at the usual movement cost from that army's Basic Turn Allowance. The capturing army must supply one infantry division, or its equivalent, for each five captured divisions for use as guards. Less than five captured divisions require one "guard division" and more than five but less than ten require two "guard divisions" . . . and so on. The captured Unit must be under guard in a bivouac area within three complete turns after capture.
- Prisoner Units may be liberated. In order for the liberating army, however, to regain combat use of recaptured divisions, they must be returned to the Replacement Center bivouac area for "refitting" and remain there for one complete turn. Prisoner Units are considered recaptured when a friendly Unit reaches the prisoner's adjacent square.
- Army Group HQ, Army HQs and Corps HQs have a DEFENSE combat factor of one. They may not, however, attack.
- If Units of one army completely surround Units of the opponent for at least two complete turns without interruption, all of the surrounded Units are regarded as captured. It is essential that, in order to be regarded as genuinely surrounded, the isolated Units be cut off from all possible routes of reinforcement. For example, Units in a port that are encircled by an enemy are not surrounded under the meaning of this rule. They could receive reinforcements through the port. Also, if the surrounded Units are located in a friendly city they cannot be classed as isolated. Friendly city means a city on the half of the board from which the Units in question began the game.
The closing page of the original rules sheet (publisher product history, subscription and parts advertisements, registration card notice and designer credit) is not rules text and is not transcribed here.
Combat Results Table
Printed as the back cover of the rules sheet (marked W6717 3/83). The figure down the left side is the number thrown on the cubit; the figures across the top are the odds comparison.
| Cubit | 1-6 | 1-5 | 1-4 | 1-3 | 1-2 | 1-1 | 2-1 | 3-1 | 4-1 | 5-1 | 6-1 |
|---|---|---|---|---|---|---|---|---|---|---|---|
| 1 | 1 Elim | 1 Elim | 1 Elim | 1 Elim | 2 back 2 | Defender Elim | 1 Elim | 1 Elim | 1 Elim | 1 Elim (1 Pris) | 1 Elim (1 Pris) |
| 2 | 1 Elim | 1 Elim | 1 Elim | 1 back 3 | Exchange | Exchange |
The figures running vertically on the extreme left of the table represent the figure thrown on the cubit. The first top row of figures represent the odds comparison. THE ATTACKERS ODDS (COMBINED FACTOR VALUE) ARE ALWAYS FIRST—THE DEFENDER SECOND. For example, 3-1 means the attacker has 3 factors and the defender 1. Note that an attacker has little chance when the odds drop lower than at least 1-1 and that he has increasingly good chances as the odds build in his favor. Odds of more than 6-1 represent an "automatic elimination" of the defender. The defender cannot be removed until the end of the attacker's turn.
- "Elim" on the table means "eliminated from the board." "1 Elim" means of course that the player with the factor of 1 is eliminated.
- "1 Back 6" means that the player with the factor of 1 moves back 6 spaces on the board, the exact direction to be determined by the winner.
- "Exchange" means that each player loses by elimination 1 combat factor. In the case of an armored division involved in an "exchange" remove the armored division and replace it with a previously eliminated infantry division only.
- "(1 Pris)" means that the loser is captured under optional Rule J-1.