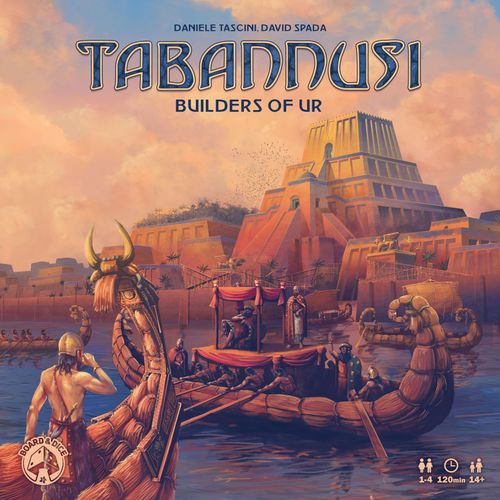
Tabannusi: Builders of Ur
Tabannusi: Builders of Ur Rulebook
Table of Contents
Table of Contents
Components
- 1 double-sided Main board
- 4 Player boards
- 5 Barge tiles (do not use the first time you play the game)
- 5 Property Cost tiles (do not use the first time you play the game)
- 6 Action tiles
- Ship tiles: 5 brown, 5 yellow, 5 white
- 9 Harbormaster tiles
- 16 Decree cards
- Project tiles: 20 white, 20 yellow, 20 brown
- 15 Urban cards
- 10 Ziggurat tiles
- 20 regular Water tiles, 10 special Water tiles
- Crate tiles (4 of each of the 5 resource colors)
- 25 Garden tiles
- Gold tokens (32+, considered unlimited)
- Claim markers (15 of each color)
- Mastery markers (3 of each color)
- Scoring markers
- Architects and Assistants (worker figures, 2 per player)
- 14 Houses of each color
- 25 Building pieces of each color (white, yellow, brown)
- 7 Resource dice of each color
- Starting Player token
Gold is considered unlimited; should you need additional Gold, use a suitable proxy. Project tiles and all other resources, however, are considered limited.
Overview
The game board depicts the Great City of Ur, divided into 5 Districts. Over a series of turns, players move their Architect and Assistant workers through the Districts, drafting Resource dice from Barges and performing Actions to place Project tiles, Construct Buildings, place Water and Garden tiles, claim Ships in the Port, and place Houses on the Ziggurats. Emptying a Barge triggers a District Scoring. The game ends when the last Gold is removed from the Time track. The player with the most Victory Points wins.
Setup
Before your first game of Tabannusi, carefully punch out all cardboard components, tiles, and tokens.
- Place the Main board in the middle of the table, choosing the appropriate side depending on the number of players.
- (If this is your first game, skip this step.) Shuffle the 5 Barge tiles, and place one at random on top of the printed Barge spaces on the Main board. Then, cover the printed Property Cost tile spaces of each District with the Property Cost tile that matches the color of the District's Barge. When placing the tile, make sure that you place it on the side that matches the image printed in that space. The color of the dice on the tile and on the Barge must match.
- Separately for each color, take 5/6/7 Resource dice for a game of 2/3/4 players, roll them, and place them on the Barge of the same color. Return all unused Resource dice to the box.
- Place 1 Gold on each space of the Time track. Place all remaining Gold tokens near the Main board.
- Shuffle all Ship tiles, and place one in each of the seven empty Ship spaces on the Main board. Place any unused Ship tiles near the Main board.
- Shuffle all Harbormaster tiles, and place one in each of the six spaces on the Main board. Place any unused Harbormaster tiles near the Main board.
- Shuffle all Crate tiles, and place one in each of the six Crate spaces on the Main board. Place the remaining Crate tiles near the Main board.
- Separate the Water tiles into two stacks: regular (blank on both sides) and special (with a "?" on one side). Shuffle all special Water tiles ("?" side up), and place them on their dedicated space on the Main board (1). Then, place three special Water tiles in the Water tile spaces on the Main board, and flip them to the bonus side (2). Create a stack of all regular Water tiles, and place them on their dedicated space on the Main board (3). Create a stack of all Garden tiles, and place them on their dedicated space on the Main board (4).
- Shuffle all 6 Action tiles, and randomly place them on their dedicated spaces on the Main board.
- Shuffle all Ziggurat tiles. Place 1 face up on each Ziggurat tile space on the Main board. Return any unused Ziggurat tiles to the game box.
- Place as many Decree cards as the number of players onto their dedicated spaces on the Main board. Choose them at random, ensuring that at least one card of each symbol type is present (in a 2-player game, two different types). Return the remaining Decree cards to the game box.
You are now ready to play Tabannusi: Builders of Ur!
Key Concepts
Before explaining the structure of each turn, a number of key concepts need to be explained.
Player Area
Your player area consists of your Player board and its immediate surroundings. Whenever you acquire Crate tiles, place them on the dedicated spaces on your Player board. (You may never have more than four Crate tiles.) Keep your Gold, Resource dice, Claim markers, and Garden and Water tiles in your player area.
Claim Markers
You start the game with 5 Claim markers in your player area. Over the course of the game, you will use them to mark ownership of Project tiles, Garden tiles, and Ship tiles on the Main board, as well as your position on the Ziggurat tiles. Some game effects allow you to gain Claim markers. Whenever this happens, take a Claim marker in your color from the supply, and place it in your player area.
The Claim marker supply is limited — if no more of your markers remain in the supply, you may not gain another Claim marker until one or more of your Claim markers is returned to it. You may never have a Claim marker of another player color in your player area.
If you have no Claim markers in your player area, you may not perform any actions that require you to place a Claim marker on the Main board.
Remember: Between the Main board and your player area, you are limited to only 15 Claim markers. If all of them are in use on the Main board, you must wait until some of them are returned to your player area or to the supply before you can gain them again.
Houses and Buildings
You have 14 Houses in your player color. Before the start of the game, 13 of them are on your Player board and the other is on one of the Districts on the Main board. A House in your color, no matter where it is placed, always belongs to you.
Buildings are plastic pieces that come in three colors (white, yellow, and brown). A Building always belongs to the player with a House on that Building, regardless of the Building's color.
Buildings consist of 1, 2, or 3 Building pieces that are connected together. (The maximum size of a Building is 3.) Regardless of its size (1, 2, or 3 pieces), a single Building's ownership is always marked with just 1 House, and it is always counted as one Building.
Anytime you must place a House on a brown/white/yellow Building or Ziggurat tile, you must use a House from the row of the corresponding color on your Player board. If none are available, you may use a House from the bottom (colorless) row. Always take the leftmost building from the row in question. As you place Houses, you may uncover bonuses on your Player board. Take that bonus as soon as your House leaves your Player board (except during Setup). When entire columns of colored Houses on your Player board are empty, you also unlock column bonuses, which you gain immediately.
Districts
The Main board is divided into 5 Districts (numbered from 1 to 5). Districts 1, 2, and 3 are common Districts, where players are allowed to Construct Buildings. Districts 4 and 5 have different functions: District 4 is a Port, where players may gain access to Ships and acquire Crate tiles, while District 5 is the Ziggurat District, where players gain access to scoring opportunities from the Ziggurat tiles.
Districts 4 and 5 do not have a building grid. No Buildings may be Constructed there, although players will be able to place their Claim markers and Houses to gain various bonuses.
Each District comes with its own set of 3 or 4 Actions, as well as a Barge holding the District's local Resource dice. Water spaces that create a border between two Districts may be accessed from either of the two adjacent Districts.
Grid Adjacency
Two spaces are adjacent on a building grid if they share a side. Spaces that share only a corner are not considered adjacent.
Architects, Assistants, and Presence
You have two workers at your disposal: an Architect (represented by the larger of two figures in your player color) and an Assistant (represented by the smaller of the two figures in your player color).
With the exception of the start of the game, the Architect and Assistant remain on the Main board, moving between Districts. These workers must always be placed in such a way that it is perfectly clear in which District a worker is present. On your turn, the position of the Assistant shows the District where you are present and may perform actions. The position of your Architect indicates the District you will move to for your next turn.
At no point during the game is your Architect or Assistant ever restricted from sharing any District with an Architect or Assistant belonging to another player.
Movement between Districts is covered in the Turn Structure section.
Dice as Resources
Dice represent Resources. Their values are important only for the purposes of movement between Districts. Once a Resource die is placed in your player area, its value no longer matters.
After spending a Resource, do not return it to the Main board. Instead, place it next to the Main board, forming a general Resource supply. Some game effects allow you to take a Resource from that supply.
Gold is Wild
Gold is considered a "wild" Resource in the game. You may pay 1 Gold in place of any other Resource. However, no other Resource may be paid in place of Gold.
Crate Tiles
Your Player board has spaces for Crate tiles. A Crate tile depicts one of the game's five Resources. Whenever paying any cost of a matching Resource depicted on a Crate tile, you may flip the Crate face down to pay the cost (instead of paying with one of your Resources). Even if you have no physical dice in your area, you can still pay a matching Resource cost using one or more Crates.
Any face-down Crate tile may be flipped face up once per player turn by expending any Resource (i.e. the Resource does not have to match the color of the Resource on the refreshed Crate tile).
Mastery Tracks
During setup, you place your Mastery markers at the bottom of each Mastery track. As the game progresses, different game effects allow you to move your Mastery markers up the tracks. Some movements come with specific bonuses.
Whenever you move your lowest Mastery marker up a space, you receive the bonus depicted on the right-hand side of the track (this may be Gold, Claim markers from the general supply, Victory Points, or nothing at all). Whenever any of your Mastery markers reaches a benefit printed inside a Mastery track space, gain that benefit immediately.
You gain the Victory Points printed on the left-hand side of the Mastery track during District scorings.
Gaining Resources
Any time a game effect instructs you to collect a Resource of a specific color, you must take the highest-value die available from the Barge of that color (not from the supply). While a Barge is empty, you may not take a Resource of that specific color.
When an effect allows you to gain a Resource of any color, it will specify to take a die of that color from the supply instead. You may not select a color that has no die present in the supply.
Turn Structure
The active player is the player currently taking their turn. The rest of the rules use "you" to refer to the active player.
On your turn, always perform the following steps:
- Take a Resource die and move your Architect.
- Perform up to 2 Actions in the District with your Assistant (and certain Free Actions).
- Check for scoring, then move your Assistant to your Architect's District.
Resource and Movement Step
On your first turn, place both your Architect and Assistant into a District of your choice.
During this step, you must take a single Resource die from the District where your Architect and Assistant are present. Upon taking a Resource, you must immediately move your Architect to the District with the same number as the value of the die.
If you take a die of a value equal to the number of your current District, your Architect does not move.
After taking a Resource die but before moving your Architect, you may pay 1 Gold to ignore the value of the die and move your Architect to any District.
If you take a die of value 6, you may move your Architect to any District that is not currently accessible with any other dice on the Barge.
Some game effects may change the position of your Architect after the Resource and Movement step of your turn. These are covered in the Appendix.
Perform Actions
During this step, you may perform zero, one, or two Actions, chosen from those available in your District (where your Assistant is located). All available Actions are always depicted in the District on the Main board. If you decide to perform two Actions, these may be different or the same.
Place a Project Tile in a Common District
Place a Project tile in the District where your Assistant is currently present (Districts 1, 2, or 3). Placing a Project tile follows a six-step procedure:
- Select a Project tile from the supply. You may choose freely, but you have to select a Project tile that you will be able to place (as per the next points).
- If there are already 3 Project tiles of your selected color in that District, you may not choose that color.
- If you selected a Project tile that shares a color with any Project tiles in your District, you must place the new Project tile adjacent to a Project tile of that color.
- You may not place the selected Project tile adjacent to a Building of the same color.
- You must place one of your Claim markers on the Project tile. If you do not have an available marker, you may not take this Action.
- You may gain the bonus (if any) printed on the square that you covered with your Project tile.
Note that there are spaces in the common Districts reserved only for games with 4 players. In games with 3 players, those spaces are not accessible and should be considered out of play. On the flip side of the board, common District spaces are numbered. These numbers are relevant only in solo games.
Construct a Building in a Common District
Construct a Building in the District where your Assistant is currently present (Districts 1, 2, or 3). Constructing a Building follows a seven-step procedure:
- Select all Project tiles of a single color in the District. If no Project tiles are present, you may not take this action.
- Pay 2 local Resources (a "local" Resource is a Resource that matches the color of the Barge in that District; this color is also depicted on the Property Cost action) plus, for each of your Claim markers present on the selected Project tiles, 1 Resource matching the color of the Project.
- Set aside all Claim markers from the chosen Project tiles.
- Replace the Project tiles with a Building (made of one or more Building pieces) matching the color and shape of the group of Project tiles. Return the Project tiles to the supply.
- Place one of your Houses from your Player board on the newly constructed Building: either the leftmost House from the row matching the color of the Building or, if this row is empty, the leftmost House from the bottom (colorless) row. If you uncover any bonus on your Player board, gain it immediately.
- Return your own set-aside Claim markers to the supply.
- Set-aside Claim markers belonging to other players are returned to their respective player areas. These players, as well as any players with Claim markers on adjacent Garden tiles, receive rewards as described below.
Other players whose Claim markers have been removed as a consequence of Constructing a Building move their Mastery markers up one space on the corresponding Mastery track for each of their Claim markers removed.
When you construct a Building adjacent to a Garden belonging to another player, that player moves up one space on a Mastery track of their choice (once per adjacent Garden tile).
Immediately after constructing a Building, you may spend 1 Gold to place one of your Claim markers on a Ship tile. The size of the Building determines the exact size of the Ship that you may claim. You may not place a Claim marker on a Ship smaller or bigger than the size of the Building. (Claiming your final Ship tile in a row or column this way provides Harbormaster tiles the same way it does when claiming a Ship tile via an Action.)
Gardening
Acquire and place Water and Garden tiles in the District with your Assistant. This action allows you to choose any or all of the following options in any order:
- Acquire tiles: You may purchase any number of Garden tiles and/or any number of regular Water tiles. A Garden tile costs 1 green Resource, and a Water tile costs 1 blue Resource. Garden and Water tiles are purchased from the supply.
- Place tiles: You may place any number of Water tiles adjacent to other Water tiles or Garden tiles in the District where your Assistant is currently present. You may also place up to 3 Garden tiles on top of Water tiles in the District where you are currently present. You must place a Claim marker on each Garden tile you place.
You may place a Water tile adjacent to an existing Water or Garden tile—either placed or printed on the board. When placing multiple Water tiles, you may place Water tiles next to ones you have already placed on your turn.
You may place a Garden tile only on a Water tile in the District in which your Assistant is present. This includes any border Water tiles printed on the board. When you place a Garden tile onto a Water tile with a printed bonus, gain that bonus. When you place a Water tile onto a space with a printed bonus, that bonus is ignored. To place a Garden tile, you must be able to place your Claim marker on it.
Place a House in the Port District
You may place a House in the Port District if your Assistant is present there. To place a House in the Port District (District 4), you must pay 2 local Resources and place one of the Houses from the bottom (colorless) row of your Player board onto one of the House spaces in the Port District.
Placing on a blue space (left of each pair) allows you to take one of specific bonuses: receiving your Claim markers from the supply, advance on a Mastery track, or gain a Resource from the supply. Every red space (right of each pair) allows you to take a specific Crate tile. You may not select a space already occupied by another House, and you cannot take a space with a Crate tile if you already have four Crate tiles on your Player board.
You are NOT allowed to have Houses in both House spaces of a single row or column.
Claim a Ship in the Port District
You may place one of your Claim markers on a Ship tile in the Port District, if your Assistant is present there. You may pay 2 Gold to place one of your Claim markers on any Ship in the Port District. You may place a Claim marker on a Ship tile that already has an opponent's Claim marker on it.
After placing a Claim marker on a Ship, if you have Claim markers on all 3 Ship tiles in a single row or column, immediately take the Harbormaster tile for that row or column (if still available). If placing a Claim marker completes both a row and a column, take a Harbormaster tile from both.
Every Ship tile with your Claim marker on it provides an ongoing ability, available to you starting your next turn. (Ship tiles are detailed in the Appendix.)
You can use a Harbormaster tile at any time during your turn. After you use it, return the Harbormaster tile back to the game box. Each Harbormaster tile that you do not use during the game will be worth 3 Victory Points during Final Scoring (as depicted on the back of the tile).
Place a House in the Ziggurat District
You may place a House in the Ziggurat District if your Assistant is present there. Placing a House in the Ziggurat District (District 5) follows a procedure:
- Select a space on the brown, white, or yellow section of the Ziggurat.
- Pay 2 local Resources.
- Take the leftmost House from the row on your Player board matching the Ziggurat section's color (or from the bottom row, if the color row is empty), and place it on one of the section's six spaces.
- If the House covers a bonus, gain that bonus immediately.
- Place a Claim marker in the leftmost claim space of the corresponding Ziggurat tile that does not have your Claim marker. (Multiple players can have markers on the same claim space of a Ziggurat tile.)
If you are unable to perform any of the steps above, then you may not perform this Action.
Other Actions
Each District also offers its own Action tiles, providing benefits such as:
- Move your Architect to any District, and gain 1 Resource of your choice from the supply.
- Refill (by flipping face up) up to 2 of your Crate tiles, and gain 1 Claim marker from the supply.
- Gain 2 Victory Points and 2 Claim markers from the supply.
- Gain 1 Gold and 1 Claim marker from the supply.
- Gain 1 special Water tile (selected from the offer, then replenish immediately), 1 Garden tile, and 1 Claim marker from the supply. If no special Water tiles are left, gain a regular Water tile.
- Lose 2 Victory Points, and move up 1 space on any Mastery track of your choice. (You can take this action even if you have fewer than 2 Victory Points, but you cannot go below "0.")
Free Actions
On your turn, you may perform additional free Actions:
- Refill (flip face up) a Crate tile (once per Crate tile per turn), and/or
- Score any number of Decree cards.
To refill a Crate tile, return to the supply any one of your Resources. This die does not have to match the Resource printed on the Crate tile. A Crate tile may not be used to refill another Crate tile.
To score one of the face-up Decree cards, you must demonstrate that you have met all the conditions depicted on that card. Then, take the card off the Main board and gain its bonuses immediately. Finally, place that card in your player area.
You can perform as many free Actions as you like (respecting their limits), in any combination, in any order, and at any point during your turn.
Scoring Check and Assistant Movement
If any Barge is empty, perform a District Scoring in that District. If more than one Barge becomes empty during your turn, you (the active player) choose the order in which those Districts are scored.
Finally, move your Assistant so that it joins your Architect. Turn now passes to the next player in clockwise order.
Scoring and Game End
Whenever you empty a Barge of its last Resource die, its District is scored at the end of your turn. Every District Scoring follows the same general structure, although Districts 4 and 5 (the Port and Ziggurat Districts, respectively) score differently from Districts 1, 2, and 3 (the common Districts).
General Scoring Structure
Always perform the following steps in order:
- You (the active player) receive 1 Gold.
- All players lose the District's local Resources from their player areas.
- Players score Victory Points.
- Local Resources return to the District.
1. Active Player Receives Gold
Take 1 Gold from the Time track. If this is the last Gold on the Time track, Game End triggers.
2. Losing Local Resources
All players must return all local Resources to the supply ("local" to the District being scored). However, losing Resources come with certain rewards:
- When losing one or more yellow Resources, move up 1 space on the yellow Mastery track.
- When losing one or more white Resources, move up 1 space on the white Mastery track.
- When losing one or more brown Resources, move up 1 space on the brown Mastery track.
- When losing one or more blue Resources, gain 1 regular Water tile.
- When losing one or more green Resources, gain 1 Garden tile.
Regardless of how many actual Resources you lose, you always receive only 1 advancement on a Mastery track or 1 Water or Garden tile.
3. Scoring the District
Common District (Districts 1, 2, or 3): Each player receives Victory Points for their Buildings. Each Building is worth a number of Victory Points equal to its size (1, 2, or 3 spaces) multiplied by the Victory Point value depicted on the left-hand side of the position of your Mastery marker on the Mastery track matching the color of the Building. Every Garden tile adjacent to the Building counts as another space occupied by that Building (regardless of who the Garden belongs to).
Port District (District 4): Each player receives 1 Victory Point for each of their Claim markers in the same row or column as one of their Houses. (A Claim marker that shares both a row and a column with one of their Houses is worth 2 Victory Points.)
Ziggurat District (District 5): Each player scores each Ziggurat tile containing one or more of their Claim markers. Each player scores the rightmost of their Claim markers on each tile. Each Ziggurat tile has its own scoring conditions found in the Appendix.
4. Returning Local Resources to the District
After the District has been scored, the active player gathers all local Resources from the supply, rolls them, and returns them to the respective Barge.
Triggering Game End
Game End is triggered when the last Gold is removed from the Time track. Once this happens, continue the game until all players have had an equal number of turns (until the player to the right of the starting player finishes their turn), and then play exactly one more round. After this final round:
- Each District (from 1 to 5) is scored one final time, following the regular rules.
- Each player reveals their Urban cards and scores points for the ones they were able to fulfill.
Once the Game End has been triggered, an empty Barge does not result in a complete District Scoring. Ignore steps "1. Active player receives Gold" and "3. Scoring the District" from the general scoring structure; simply perform step 2, followed by step 4.
The player with the most points is the winner. In case of a tie, the tied player with more Gold wins. In case of a further tie, players share victory.
Solo Mode
We strongly recommend that you familiarize yourself with the rules of the multiplayer game before attempting to play the solo mode. All of those rules still apply, and the solo rules simply outline the exceptions to them during solo play. Throughout the solo rules, "you" will refer to the single human player, while "the Bot" will refer to the Automa against whom you are competing.
Solo components: 4 King cards, 4 Automa Urban cards, 15 Automa cards, 3 Number tiles, 1 cotton bag.
Solo Setup
Choose a King card and take the corresponding Automa Urban card. For your first solo game, we recommend using Gilgabot as your King card. The King cards are Gilgabot, Sarbot, Botmuzi, and Bot-baba.
Set up the game for 2 players, following the normal rules but with the following modifications:
-
Do not give the Bot its starting Crate and give it the Gold instead (the Bot will start the game with 3 Gold).
-
Do not draw Decree cards at random; instead, choose one random Decree from those assigned to the chosen King card:
- Gilgabot: D04, D08
- Bot-baba: D05, D06, D07
- Sarbot: D13, D14, D15, D16
- Botmuzi: D09, D10, D11, D16
Then, randomly select one additional Decree from all remaining Decrees. Place both chosen cards in their designated spaces on the Main board.
Place the King card and the Automa Urban card face up at the top part of the solo area. On each of the five Districts depicted on the Automa Urban card is a circle with a number. Place that many Claim markers in the Bot's color on each District on the Automa Urban card.
Shuffle the 15 Automa cards and form a face-down Automa deck. Draw the first two cards, and place them face up next to each other, to the right of the Automa deck.
Look at each of the two Decree Cards displayed face up on the Main board, and compare the number of required Buildings in each color. Choose the greater number, and set aside that many Project tiles in the matching color. Place all those Project tiles in the cotton bag, and then add one more of each color. These will be referred to as the Automa Project tiles. Ignore any Garden and Ship requirements on the Decree cards.
Place the 3 Number tiles to the right of the Automa cards, and draw from the bag 3 random Project tiles, placing one next to each of the Number tiles.
The Bot is the starting player; therefore, you must place your starting Building first, following the normal rules. To determine the District in which the Bot places its first Building, look at the number on the rightmost face-up Automa card (if that is a "0", then treat it as a "3"). Place the Building following these rules:
- The Building's color is the one that matches the color of Project tile next to the Number tile that the arrow on the left Automa card is pointing to on the right Automa card.
- Check the arrow on the King card's C action: if the arrow points down, place the Building on the lowest-numbered empty spot in that District; if the arrow points up, choose the highest-numbered empty spot.
- Remove 1 Claim marker from the District on the Bot's Urban card where its Building was placed.
- Give the Bot the bonus depicted to the right of the King card's C action, regardless of what is depicted on the space on the Main board.
To determine the placement of the Bot's Architect and Assistant at the start of the game, sum up the numbers at the top of the two face-up Automa Cards. Then, starting from District 1, count counterclockwise that many Districts. The result determines the starting location for the Bot's Architect and Assistant.
General Automa Rules
The Bot plays according to the multiplayer rules, drafting dice every turn and spending resources when taking actions, but with the following modifications. Whenever the Bot picks a die, it does so according to the Die Value Preference rule.
- The Bot has an unlimited supply of Claim markers. Whenever it needs to place one, it places it from its supply and at no cost. If the Bot's markers ever run out, use additional markers of another color.
- Whenever the Bot must pay resources, it ignores the color of its Resource dice and focuses only on the amount of resources it needs to pay. Gold is still a wild resource, and the Bot pays with Gold only when it runs out of other resources or when Gold is specifically required. When it has to spend resources, it follows the Resource Color Preference rule.
Die Value Preference rule: The Bot's next District (determined by the sum of the numbers at the top of the two face-up Automa cards) > highest value.
Resource Color Preference rule: Color shared by the most of Bot's Resources > blue > green > at random.
Ship Preference rule: One that is both in a row and a column with at least one of its Houses > in a row with at least one of its Houses > in a column with at least one of its Houses > first available space (from top to bottom and right to left).
Current District rule: The Bot's current District is indicated by its Assistant, the same way as it would be for a human player.
Automa: Gaining Bonuses
Player board: Any time the Bot removes a House from its Player board: if the House reveals a Gold bonus, the Bot receives it; if the House reveals a Claim marker bonus, the bonus is ignored; and if the Bot unlocks a column bonus, the Bot receives it.
Common Districts: Any time the Bot would get a bonus from the Main board by covering a printed space in a common District with a Project tile or by covering a Water space with a Garden tile: if the Current Symbol is not the King symbol, the Bot gains the bonus printed at the bottom of the left Automa card; if the Current Symbol is the King symbol, the Bot gains the bonus in brackets printed to the right of the corresponding action (B for Projects, D for Gardens) on the King card. Whenever you construct a Building next to one of the Bot's Gardens, it moves up on a Mastery track picked at random. The Bot never takes Water tiles into its supply nor pays for Water tiles.
Port District: The Bot does not take nor use Crate tiles. Whenever it would gain a Crate tile, it instead gains a Gold and removes the Crate tile from the game. If the Bot places a House on a non-Crate space, it receives the bonus printed at the bottom of the left Automa card. The Bot ignores any abilities or benefits provided by Ships. Whenever the Bot would gain a Harbormaster tile, it immediately discards it and gains 3 VP.
Ziggurat District: When the Bot places a House, it receives the bonus covered on the Ziggurat space.
Mastery tracks: The Bot gains bonuses for moving its lowest Mastery marker up a space: if the bonus is Gold or VP, the Bot receives it; if the bonus is a Claim marker, it gains 1 VP instead; if the bonus is to receive a die from the supply, the Bot ignores the bonus.
Automa Turn Sequence
Move the left face-up Automa card on top of the right face-up Automa card. Reveal the next Automa card from the top of the Automa deck, and place it face up in the spot just emptied. Sum up the numbers at the top of each of the two face-up Automa cards, and move the Bot's Architect that many Districts counterclockwise among those depicted on the Automa Urban card that still have Claim markers. Take a die from the Bot's current District, following the Die Value Preference rule.
First action: The Bot performs the top action depicted on the left Automa card. If that action is not possible, continue to the next one, moving down in order, until the Bot can perform that action. If none are possible, the Bot performs an A action instead.
Second action: The arrow on the left Automa card points to an action on the right Automa card. The Bot attempts to perform that action, following the same procedure as for its first action and moving down to the next alternative action until it reaches the bottom of the card. If no action can be performed, the Bot performs an A action instead.
Check if the Bot meets the conditions for a Decree card. If it does, the Bot claims that Decree card, following the normal rules. If a Scoring is triggered, follow the normal scoring rules. After the first and third Scoring, reset the Automa deck and the Automa Project tiles. Move the Bot's Assistant to the District where its Architect is.
Resetting the Automa Deck and Automa Project Tiles
Whenever the Automa deck becomes empty, reset it: shuffle all the Automa cards together, and place them face down to the left of the Automa player area. Then, reveal the top two Automa cards, as in the initial setup.
Whenever the bag becomes empty, reset the Automa Project tiles: place all Automa Project tiles back in the bag, then draw 3 Project tiles, and place them next to the numbered tiles, as in the initial setup.
Placement and Color of Projects and Buildings
Anytime the Bot must place a Project or a Building, check the position of the large arrow on the left Automa card; it points to the Current Symbol and the Current Number on the right Automa card. The position is determined as follows:
- If the Current Symbol is an arrow pointing down, the Bot chooses the lowest-numbered legal spot in that District.
- If the Current Symbol is an arrow pointing up, the Bot chooses the highest-numbered legal spot in that District.
- If the Current Symbol is the King, follow the rules of the action with the corresponding letter on the King card.
The color is the color of the Automa Project tile next to the Current Number tile.
Automa Actions
Action A: Unless the Current Symbol is the King symbol, any A action taken by the Bot is ignored, and the Bot gains 4 Victory Points instead. Otherwise, the Bot takes the A action depicted on the King card.
Action B: If the Bot acts in a common District, a B action allows the Bot to place a Project tile, following normal rules with modifications based on the Current Number's color (cycling to the next Number tile if 3 tiles of that color are already present). The Bot places a Claim marker for free from its supply. If the Project tile covers a bonus, the Bot ignores it and claims the appropriate bonus. After the Bot places a Project, draw a new Automa Project tile from the bag, and place it on top of the one next to the Current Number. If the Bot acts in the Port District, it claims a Ship, paying the normal cost (2 Gold) and choosing according to the Ship Sequence rule. If the Bot acts in the Ziggurat District, it takes a C action instead.
Action C: If the Bot acts in a common District, it constructs a Building, following the normal rules and paying the cost. If there are multiple options and the Current Symbol is not the King symbol, the Bot chooses, in priority order: the largest Building; the Building matching the color of the Bot's most advanced Mastery marker; then the color of the Project tile next to the Current Number. After constructing, remove a Claim marker from the corresponding District on the Automa Urban card, then return a matching Project tile from the Automa Project tiles. If the Bot has the required Gold, it claims a Ship, following the Ship Preference rule. If the Bot acts in the Port District, it places a House. If the Bot acts in the Ziggurat District, it places a House in the Ziggurat.
Action D: If the Bot acts in a common District and it has no Garden tiles, it cannot perform this action. If it has at least 1 Garden tile, it may place up to 3 Garden tiles, placing the required Water tiles for free. If the Bot acts in the Port District or in the Ziggurat District, treat a D action as a C action.
Solo Scoring and Game End
Both scoring and triggering the end of the game occurs as normal, following the multiplayer rules. However, if there is a tie at the end of the game, the Bot wins.
King Cards Explanation
Gilgabot — Action A: gain 1 Gold and 2 Victory Points. Action B: place a Project tile adjacent to the largest cluster of Project tiles, of the color indicated by the Current Number, on the highest-numbered legal space; if a bonus is covered, advance the lowest Mastery track once. Action C: construct a Building following usual rules (during setup, highest-numbered space); if able to construct, advance the corresponding color Mastery track once. Action D: place Garden tiles following normal rules.
Sarbot — Action A: gain 2 Garden tiles. Action B: place a Project favoring the lowest-numbered legal space; if a bonus is covered, advance the corresponding color Mastery track once. Action C: construct a Building (during setup, lowest-numbered space); if able, also gain a Garden tile. Action D: place each Garden tile next to its own Building (using at most 3 Water tiles), then on the lowest-numbered space; builds as many Garden tiles as it can afford; if a Water bonus is covered, advance the lowest Mastery track once.
Botmuzi — Action A: advance the lowest Mastery track once. Action B: place a Project favoring the highest-numbered legal space; if a bonus is covered, gain 1 Gold. Action C: construct a Building (during setup, highest-numbered space); if able, also gain 1 Gold. Action D: place Garden tiles following normal rules.
Bot-baba — Action A: advance the highest Mastery track once. Action B: place a Project of the color shared by the most Automa Project tiles, of the color indicated by the Current Number, on the highest-numbered legal space; if a bonus is covered, advance the highest Mastery track once. Action C: construct a Building of the color shared by the most Automa Project tiles, the largest possible, then of the Current Number color (during setup, lowest-numbered space); advance the corresponding color Mastery track once. Action D: place each Garden tile next to its own Building (using at most 3 Water tiles), then on the lowest-numbered space; if a Water bonus is covered, gain 3 Victory Points.
Appendix
Section 1: Common District and Special Water Tile Bonuses
Received after placing a Project tile in a common District or a Garden tile on Water spaces (but never received after placing a Water tile).
- Receive a Resource of the depicted color from the Main board (from the Barge, not from the supply). You must choose the die with the highest value. Do not move your Architect.
- Receive a Resource of any available color from the general supply. If no Resources are in the supply, this bonus provides nothing.
- Receive 1 Gold.
- Receive a regular Water tile.
- Receive 1 special Water tile (selected from the display, then replenish immediately).
- Receive a Garden tile.
- Move your Architect to any District.
- Refill (flip face up) one of your Crate tiles.
- Receive the depicted number of Claim markers from the supply. If you have fewer remaining, receive what remains.
- Move up once on a Mastery track of your choice.
- Move up once on the Mastery track of the same color as the Project tile placed on this space.
- Immediately place another Project tile of the same color, and gain any bonus it might cover. You may only do this if you can still respect all of the Project tile placement requirements.
- Receive the printed number of Victory Points.
- Pay a white/yellow/brown Resource to move up once on the Mastery track of the same color.
Section 2: Port District Bonuses
Received after placing a House.
- Receive 2 Claim markers from the supply. If you have fewer than two remaining in the supply, receive what remains.
- Move up once on a Mastery track of your choice.
- Receive a Resource of any available color from the supply. If no Resources are in the supply, this bonus awards nothing.
- Take a Crate tile occupying this space and place it on your Player board face up. If you do not have enough space on your Player board, you may not place a House on this space.
Section 3: Ziggurat District Bonuses
Received after placing a House in one of the Ziggurat House spaces.
- Place 1 Claim marker on the tile in the Ziggurat section of the same color. The Claim marker is placed on the leftmost space without your Claim marker.
- (As above) plus: Move up once on the Mastery track matching the color of the arrow.
- (As above) plus: Receive 1 Gold.
Section 4: Ziggurat Tiles
When you score the Ziggurat District, you receive Victory Points for your rightmost marker on each Ziggurat tile, as follows:
- Z01: 2/3/4 Victory Points for each of your Houses in the common Districts (1, 2, and 3).
- Z02: 0/1/2 Victory Points for each of your Houses in the Ziggurat District.
- Z03: 0/1/2 Victory Points for each boundary passed by any of your Mastery markers (scored for each marker in its respective Mastery track).
- Z04: 1/2/3 Victory Points for each Ship with your marker on it.
- Z05: 1/2/3 Victory Points for each of your Buildings in the common Districts adjacent to at least one Garden tile.
- Z06: 1/1/2 Victory Points for each of your Garden tiles.
- Z07: 2/3/4 Victory Points for each of your Houses in the Port District.
- Z08: 0/5/10 Victory Points.
- Z09: 3/5/7 Victory Points for each Urban or Decree card you have completed.
- Z10: 3/5/7 Victory Points for each set of 3 Buildings in different colors with your House on them in the common Districts, and for each set of 3 Ships in different colors with your Claim marker.
Section 5: Ship Tiles
Ship tiles offer special abilities to players that claim them.
Size 1 Ships:
- S01: Whenever you place your Claim marker on a Ship, receive 2 Victory Points.
- S02: Whenever you place a House, receive 2 Victory Points.
- S03: Whenever you spend a Resource to refill (flip face up) a Crate tile, you may refill up to 2 Crate tiles instead.
- S04: Whenever you place a Project tile, receive one regular Water tile.
- S05: Whenever you place a House on the Ziggurat, receive 1 Garden tile or 1 Claim marker from the supply.
- S06: Whenever you construct a Building, receive 2 Victory Points for every Claim marker on the covered Project tile(s) belonging to an opponent.
Size 2 Ships:
- S07: Whenever you place a Garden tile, receive 2 Victory Points.
- S08: Whenever you place a House, you may (as a free Action) take a Gardening Action.
- S09: Whenever you place a House in the Port District, you may pay 1 blue Resource to take that House from one of the colored rows (instead of the bottom row) on your Player board.
- S10: Whenever one of your Mastery markers passes a boundary on its Mastery track, receive 3 Victory Points.
- S11: Whenever you place a Claim marker on a Ship in the Port District, you may (only once) pay a blue Resource instead of a Gold.
- S12: Whenever you place a Garden tile, you may place a Claim marker from the supply (not from your player area) on it.
Size 3 Ships:
- S13: After you place a Project, you may pay any 1 Resource to move up once on the Mastery track of the same color as the placed Project. It does not have to be the Resource in the same color as a Project.
- S14: Whenever you Construct a Building, for each Claim marker belonging to an opponent, you may pay any 1 Resource to move your Mastery marker once up the Mastery track of the same color as the Building.
- S15: Whenever you place a Claim marker on a Ship tile, move your Mastery marker once up the Mastery track of the same color as the Ship.
Ship tiles printed on the Main Board have no special ability; however, each of them counts as one Ship in the color of your choice.
Section 6: Urban Cards
When you score Urban cards, to gain the printed amount of Victory Points, you must meet the condition depicted on the card: a specific number of your Houses in each of 3 separate Districts. The color or size of the Buildings on which your Houses rest does not matter. In the case of the Port District, simply count your Houses there. Urban cards never require you to have Houses in the Ziggurat District.
If you have more than one Urban card in your hand, you may score any or all of them, but each House can only ever contribute to the requirements of a single Urban card. (This can be tracked however you like—we recommend turning the House onto its side.)
Example: Gain 10 Victory points if you have 3 Buildings in District 1, 1 Building in District 2, and 1 Building in District 3.
Section 7: Decree Cards
To score one of the face-up Decree cards, you must demonstrate that you have met the conditions depicted on the card. Then, take the card off the Main board, gain its bonuses, and place the card in your player area.
- D01: Have at least 3 white Buildings and 3 brown Buildings anywhere in the common Districts. Bonus: Immediately place a House in the Port District, paying no cost but gaining the bonus. Gain 8 Victory Points.
- D02: Have at least 3 white Buildings and 3 yellow Buildings anywhere in the common Districts. Bonus: Refresh up to 3 Crates. Receive 1 Claim marker. Gain 10 Victory Points.
- D03: Have at least 3 yellow Buildings and 3 brown Buildings anywhere in the common Districts. Bonus: Advance on a single Mastery track twice. Gain 8 Victory Points.
- D04: Have at least 2 white Buildings, 2 yellow Buildings, and 2 brown Buildings anywhere in the common Districts. Bonus: Gain 2 Gold. Gain 10 Victory Points.
- D05: Have at least 5 white Buildings and 1 brown Building anywhere in the common Districts or Houses (in the corresponding spaces) in the Ziggurat District. Bonus: Draw 2 Urban cards, keep 1, and place the other at the bottom of the deck. At the end of the game, you may ignore 1 required House from each Urban card you score. Gain 8 Victory Points.
- D06: Have at least 5 yellow Buildings and 1 white Building anywhere in the common Districts or Houses in the Ziggurat District. Bonus: Receive 1 Claim marker. Place a Claim marker on a Ziggurat tile of your choice (following the usual rules). Do not place a House. Gain 10 Victory Points.
- D07: Have at least 5 brown Buildings and 1 yellow Building anywhere in the common Districts or Houses in the Ziggurat District. Bonus: Receive 1 Claim marker. Place a Claim marker on any one Ship tile. Gain 10 Victory Points.
- D08: Have at least 1 white Building, 1 yellow Building, and 1 brown Building anywhere in the common Districts. Have a Claim marker on each Ziggurat tile. Bonus: Gain 12 Victory Points.
Section 8: Harbormaster Tiles
- B1: Move up on a single Mastery track twice or on two Mastery tracks once.
- B2: Receive 1 Special Water tile (selected from the display, then replenish immediately), 1 Garden tile, and 2 Claim markers.
- B3: Refill (flip face up) up to 3 Crate tiles, and receive 1 Claim marker.
- B4: Receive 2 Gold.
- B5: Perform any one action depicted on an Action tile.
- B6: Place a Claim marker on any Ship tile.
- B7: You may pay 1 Resource fewer when placing a House in a common District.
- B8: Place a Claim marker on a Ziggurat tile (on the leftmost space that does not yet have your Claim marker). Do not place a House.
- B9: Draw 2 Urban cards, keep 1, and place the other card at the bottom of the deck. At the end of the game, you may ignore 1 required House from each Urban card you score.