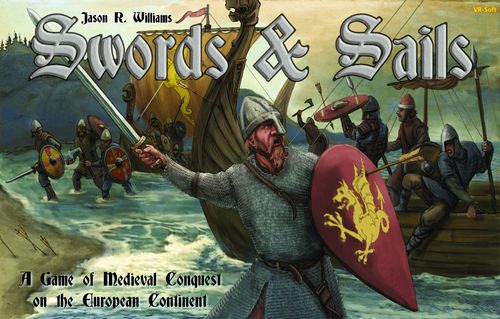
Swords & Sails
Swords & Sails Rulebook
Table of Contents
Table of Contents
- Overview
- Setup
- Turn Sequence
- 1. Collect Income and Pay Maintenance
- 2. Perform Espionage
- 3. Perform Diplomacy
- 4. Write Orders
- 5. Move Fleets and Armies
- 6. Resolve All Battles
- 7. Build New Armies and Fleets / Adjust Maintenance
- 8. Build Cities or Upgrade to Major Cities
- 9. Next Turn: Advance Season and Year
- Optional Advanced Rules
- References
Overview
Swords and Sails is a game of conquest for Europe around the time period of 1000 A.D. Each empire, kingdom, or faction of the period may interact, militarily and politically, with each other in their efforts to win. Each player will control one of the major factions of the period.
Game Contents
- West Map and East Map (a political map of Europe in the year 1000 AD, used together as the game board)
- 5 Army pieces x7 for each player
- 5 Fleet pieces x7 for each player
- 4 coin denominations: 30 x 250 GP, 30 x 50 GP, 30 x 10 GP, 40 x 1 GP
- 280 double-sided Army / Fleet unit discs, 40 per player in 7 colors. Army unit discs: Knight, Heavy Cavalry, Light Cavalry, Heavy Infantry, Light Infantry, Peasant. Fleet unit discs: Warship, Raider, Transport.
- 28 Faction Control Markers x7 per player
- 5 Army and 5 Navy cards per faction / player
- 7 Diplomat cards
- 7 First Turn / reference sheets (one per faction)
- 40 Major / Minor Cities
- 3 Minute Timer
- Year, Season, Income and Victory Control Sheet
- 3 Alliance Team Cubes
Game Board Maps
The game board is a political map of Europe in the year 1000 AD on which players move armies and fleets around based on territories and provinces. The map is divided into sea territories and land territories. Starting land territories are colour coded for player factions.
Components
Armies. Each player has 5 Armies to use during the game. Army units move only on land territories unless carried in fleets. Some factions do not have all armies in play at the start of the game. New armies can be purchased and filled by units during the build units phase. The cost of purchasing a new army is dependent on how many armies that player already has: the first Army costs 30 gold to create, the second Army 50 gold, the third 70 gold, the fourth 100 gold, and the fifth 150 gold. If a player loses an army, replacing an army costs the amount to purchase the next higher army, based on the number they currently have.
The armies are given Roman numerals to identify them: I, II, III, IV, and V. Armies are tracked on the Army Cards using wet erase markers to record the number of units in the army (it is suggested to use hash / tally marks). The number of initial units and starting location is shown on the front of the card, top right. On the top of the card, to the right, are the Total Size, Total Morale, and Total Maintenance boxes, which are used to keep track of the total values as units are added and removed from the Army. Size is equal to the total number of units. Morale is the total of the 3 units with the highest morale values. Maintenance can be shown here to aid in keeping track of current maintenance for the Army. On the bottom of the Army Card is where written orders are entered (see Write Orders).
Army Card, as printed:
- Number of Quick Combat dice per unit
- Arrow indicating Quick Combat ranged attack
- Quick Combat dice value to hit
- Quick Combat health points
- Quick Combat shield value
- Unit morale value
- Unit cost to maintain
- Unit cost to purchase
- Written Orders Area (destination territory)
- Value or less needed on 2d6 Regular Combat to destroy the target unit when attacking
- Load / Unload Fleet Orders (which fleet(s))
- Unit Orders check boxes
Fleets. Each player has 5 Fleets to use during the game. Factions will not start with all of these fleets, but during the course of the game more can be purchased in the same way as additional armies. Fleets are composed of ship units and only move on sea territories. Fleets can carry army units based on their total carrying capacity. Fleets can be placed into a port city such that they can't be attacked by other fleets in the same sea zone, but also then cannot attack or defend either. Fleets can only be built in a territory with at least 1 port city (a city in a territory adjacent to a sea zone). Fleets are tracked using the Fleet Cards, similar to how Armies are tracked on the Army Cards.
Fleet Card, as printed:
- Number of Quick Combat dice per unit
- Carry capacity for unit
- Quick Combat dice value to hit
- Unit cost to maintain
- Quick Combat health points
- Unit cost to purchase
- Quick Combat shield value
- Value required for capture
- Value or less needed on 2d6 to sink enemy ship in Regular Combat
- Target unit when attacking for above value needed in Regular Combat
- Load / Unload Fleet Orders (which fleet(s))
- Unit Orders check boxes
- Written Orders Area (destination sea zones and army numbers being carried)
Army units. Armies are composed of Army Units. Army units include Knights (KN), Heavy Cavalry (HC), Light Cavalry (LC), Heavy Infantry (HI), Light Infantry (LI), and Peasants (PS). Each unit in the army represents a group of men usually totalling around 100 troops per in-game unit. Army units are tracked on the Army Cards using hash (aka tally) marks to define the current quantity. The Army Unit discs are only used during combat and are in each faction's colour.
- Knights are considered a cavalry unit as they are usually on horseback. Knights usually represent the ruling class of a faction and are therefore very expensive to muster.
- Heavy Cavalry are heavily armoured fighting units on horseback, generally armed with lance and sword. Heavy Cavalry will generally charge in and break lines of infantry.
- Light Cavalry is a lightly armoured fighting unit on horseback, generally armed with ranged weapons. Light Cavalry can use the combination of range and mobility advantages to stand up to most units except Light Infantry or Knights. All cavalry units have a mobility advantage when it comes to battle (see combat rules).
- Heavy Infantry is a heavily armoured and armed unit on foot. Heavy Infantry use pikes or spears and are very good at repulsing cavalry charges.
- Light Infantry represent lightly armoured foot units which are used as skirmishers or for ranged combat. Light Infantry has an advantage with Light Cavalry over other foot units and a slight advantage over Heavy Infantry due to the ranged combat.
- Peasant units are basically quickly mustered local populace used as cannon fodder and untrained skirmishers. They are cheap to build and maintain and easy to replace.
Army units only exist in an army. If an army loses its last unit, it ceases to exist and is removed from the board.
Fleet units. Fleet units are what fleets are composed of. Fleet units come in three types: Warships (WS), Raiders (RD), and Transports (TR).
- Warships are large ships with heavy armaments. Warships can carry two Army units.
- Raiders are generally smaller ships with fewer armaments. Raiders can carry two Army units.
- Transports are usually civilian merchant ships which have been placed into service to move armies across sea territories. Transports cannot attack, but a transport loaded with troops has a slightly better defence when attacked, as well as making a fully loaded transport impossible to capture.
A fleet does not exist if there aren't any ship units contained in the fleet.
Minor and Major Cities. Minor and Major cities can be built in addition to what is already on the map; these two pieces represent when cities are built in a territory. Major cities can only be built by upgrading a player-built Minor city.
Alliance team cubes. There are 3 alliance team cubes. The first players to ally will use cube A (grey), the second group B (orange), and if there is a third group, they will use cube C (pink). See the Diplomacy phase for how to create and extend an alliance.
Faction control markers. Each player has 28 Faction Markers to be used for showing territory control on the map and as markers on the victory point score, income, and maintenance tracks.
Year / Season / Income / Victory sheet. The Year and Season are tracked and updated on this sheet. Each player's City (Trade) and Harvest income is tracked, maintenance costs for each player are updated, and victory points are tracked for each player or alliance team. A section of the sheet tracks which players are in an alliance and the victory point conversion rate based on the number of players in the team.
Coin denominations. The game's currency comes in 4 denominations: gold coins worth 250, silver coins worth 50, copper coins worth 10, and bronze coins worth 1. The coins are representations of Byzantine coins from the period which were accepted in international trade.
3 Minute Timer. The 3 minute timer is used for setting time limits in many of the phases of the game. The following phases are limited to 3 minutes or use the timer: Diplomacy, Write Orders, Build New Units, and Build Cities.
First Turn / Reference sheets. Each player has a two-sided sheet (one per faction). One side contains reference information and tables. The other side is used for the first learning game. This side shows how to play the game by following the example first turn. Each player will write the orders and resolve the combat as instructed on the first turn sheet.
Diplomat card. Each player has a diplomat card which has a blank side to use in passing messages secretly to other players. Any message can be written on the diplomat card as the player wants. The diplomat cards can also be used to take notes during espionage.
Goal of the Game
The player or alliance with the most victory points at the end of the game is the winner. The victory condition is achieved through capturing enemy and neutral territories to gain the riches of their lands. Additional victory points are granted when players form alliances.
Game length. Swords & Sails can be played as a short, medium, or long game. This is defined by how many Victory Points are required to declare victory: 40 victory points are required to win a short game, 60 victory points for the medium, and 100 points for the long game.
Players can also choose to play a "campaign style" game over a longer period of time and use total victory conditions (final player standing). The length of the game is chosen by the players before the start of the game. The Year, Season, Income & Victory Control Card is used to track the victory points for players and alliance teams. Once victory points are achieved, the player or allies must stay above the required points for 2 complete seasons to win.
Alliances. Two to four players can ally together. Once allied, the team of players earns victory points together. For each allied player in a team, 5 additional victory points are earned.
Scoring. 1 per territory, 1 per minor city, 3 per major city, 5 per dedicated ally, 10 per enemy capital captured.
Setup
Place the East and West Map together. Each player selects a faction to play:
- Byzantium Empire (purple)
- Fatimid Caliphate (green)
- Holy Roman Empire (yellow)
- Kingdom of England (red)
- Kingdom of France (blue)
- Kievan Rus' Empire (brown/white)
- North Sea Empire (black)
Each of these factions has special qualities which define the special historic theme for each faction. For example, historically the Byzantine Empire's armies were composed primarily of Heavy Phalanxes of pike and shield armed infantry. Therefore, the Byzantine Empire can purchase HI at a discount of 40 gold instead of the cost of 50 that other factions pay. The faction specials are listed below (the value modifications are already included on the faction specific Army Cards):
- Byzantium: Heavy Infantry (HI) units cost 40; Warship (WS) fleet units cost 80.
- Holy Roman Empire: 1 free espionage a turn; Light Infantry (LI) costs 25; 1 Minor City costs 30.
- England: Knight (KN) units cost 80; LI units have +1 combat attack rolls; 1 Minor City costs 30.
- Kingdom of France: Heavy Cavalry (HC) units cost 60; Cavalry units have -1 maintenance cost.
- Fatimid: Light Cavalry (LC) units cost 40; Heavy and Light Infantry units have +1 morale.
- Kievan Rus Empire: Peasant (PS) units cost 10; Peasants have +1 combat attack rolls; Peasants have +1 morale; 2/3 of the army may be Peasant (PS).
- North Sea Empire: Raider (RD) units cost 30; Raider (RD) units have lower maintenance cost; HI (Huscarl) add combat; x2 morale for all units.
For each faction, place four faction control markers on the starting income on the faction income chart. The income chart is divided by tens and hundreds: city trade income is separate from agricultural harvest income. Harvest income is set at the amount received in spring and autumn (not the winter or summer values). Place a faction marker on the current maintenance cost and one on the starting VP for each player. Also place the year marker at 1000 AD and the Season at Spring.
When Playing With Fewer Than Seven Players
When setting up games with fewer than 7 players, care should be taken to ensure the factions played will make sense. First, all players should be adjacent to at least two other players (except in the two player game). For example, in a 3 player game with the Byzantine Empire and the Fatimid Caliphate, the only valid combinations include the Kievan Rus' or the Holy Roman Empire, as those are the only combinations where all players are adjacent. In all cases where a faction is not being used, the starting territory for that faction can't be entered or conquered during the game. In addition, due to the starting troops being balanced for a full seven player game, the table below should be consulted to see what Army and Fleet units should be removed from the start of each faction's Armies and Fleets.
Units to remove when a faction is not played (as printed; row = faction not played, column = faction in play):
| If not played | Fatimid | Byzantium | HRE | Kievan | NSE | France | England |
|---|---|---|---|---|---|---|---|
| Fatimid | N/A | Army II, 2 | -- | -- | -- | -- | -- |
| Byzantium | N/A | N/A | Army IV | Army IV | -- | -- | -- |
| HRE | * | * | N/A | Army III | -- | Army III |
Notes as printed:
- * It is suggested that the Fatimid and Byzantium cannot ally in these games.
- Unused faction territory can't be entered.
- All used factions must be adjacent to at least 2 players, except in a 2 player game.
Recommended combinations as printed: 6 player (three lettered options, A to C, all listing the seven factions); 5 player (A to E); 4 player (A to E, plus F: West Map only, using partial territories on the map only, HRE, NSE, France, England); 3 player (A to F, plus G: East Map only, using partial territories only, Byzantium, Fatimid (no West territories), Kievan); 2 player (any 2 adjacent players).
Source note: the recommended-combination lists in the printed manual repeat the same faction list under each letter, so they are not reproduced further here.
Experienced players can feel free to modify the above game variants as they see fit, including changing starting Army / Fleet positions and units.
One method to speed up a game is for all players to select 100 points worth of additional territories. Place territory control markers after taking turns selecting territories adjacent to players' territory, before play begins. Use 10 faction control markers per player and each marker will reserve 10 income worth. For example, to control a territory with 1 minor city, 2 control markers need to be placed. If two or more players are bidding on the same territory, the player with the most markers will win the territory and the losing player can re-place the markers on that territory (still taking turns if other players also need to re-place markers).
Placing Starting Armies and Fleets
After each player chooses a faction, the Army Card, Fleet Cards, Army and Fleet tokens, Faction control markers and unit discs are handed out according to the faction each player has chosen. The initial income and initial score values are marked on the income and scoring card. Each player marks their starting Army units and Fleet units on the Army and Fleet cards as shown on the front top right of the cards. If there isn't anything listed on the top right, the faction does not start with that Army or Fleet.
First game. If this is the first game for the majority of the players, it is suggested that the introduction first turn example be used. Each player takes the first game, first turn reference card for their faction. Each player sets up their Armies and Navies as defined above (and on the reference cards) and marks the number of units on the Army and Navy cards. On the first turn each player receives their starting gold for the first phase of the turn sequence, Collect Income and Pay Maintenance (Phase 1). Maintenance is assumed to have already been paid and is not subtracted from the initial income. The second phase, Perform Espionage (Phase 2), is skipped on the first turn. Phase 3, Perform Diplomacy, allows groups of players to discuss plans or pass notes during a time-limited session; players can opt to discuss or communicate in up to a 3 minute session. It is normal to skip the first turn of diplomacy in the first game learning turn. Next, each player writes down the orders as defined on the first game, first turn reference cards for Write Orders (Phase 4). When all players have completed the order writing, all players Move Fleets and Armies (Phase 5). First, fleets are loaded (if loading before moving), then fleets are moved, and then armies are moved and unloaded (armies can also load and unload from fleets after the fleet moves). Once all fleets and armies have been moved, the next phase is Resolve all Battles (Phase 6). As new territories are captured and as territories are lost, the income level is adjusted on the faction income sheet. Also, as Army or Fleet units are lost, the maintenance track is adjusted for each player. Once all players have fought their battles, each player will Build and Place New Units (Phase 7), into any of the existing fleets and armies (write the new number of units on the Army or Fleet card), adjusting up for the additional maintenance for built units. Each player must turn in the amount of gold based on the amount they have purchased. In the next phase, Build Minor and Major Cities (Phase 8), each player can choose to build and place new cities. Minor cities cost 50 gold to build, and 100 gold can be spent to upgrade Minor cities to Major cities (player-built cities only). The Holy Roman Empire and Kingdom of England only need to spend 30 gold to build Minor cities. In the last phase, Phase 9, the Season marker is advanced, and the Year marker is advanced when moving to Spring.
Turn Sequence
Each turn represents one season: spring, summer, autumn, and winter. All players' turns take place simultaneously for each phase of the turn sequence. For instance, all players collect income and pay maintenance at the same time, then all players move fleets and armies. Next, all battles are resolved. After all battles have been resolved, all players place newly built armies and fleets. Lastly, if any player builds or upgrades major cities, they are placed on the map. After all turn sequences have been completed, the season advances.
The seasons advance as follows: Spring, Summer, Autumn, Winter. If the just-completed season was Winter, the year advances as well.
- Collect income and pay maintenance
- Perform Espionage
- Perform Diplomacy
- Write Orders
- Move Fleets and Armies
- Resolve all battles
- Build new units
- Build cities or major cities
- Next turn, advance season or season and year
1. Collect Income and Pay Maintenance
Each turn represents one season. The season's income is collected for each area controlled (see map). During each season, areas get an amount of income depending on the season:
| Season | Harvest income (as printed) |
|---|---|
| Spring | 10 |
| Summer | 20 |
| Autumn | 10 |
| Winter | 0 |
Besides this amount, an area gets 10 additional income if the area contains a trade or port city (marked by a small circle). If the area contains a Major city or port (marked by a + symbol), the area receives 30 extra income. A plus inside a circle is a capital, which is a Major city for income and other purposes. The additional income in the area is per city.
Year, Season, Income and Victory Control Sheet
The Year, Season, Income and Victory control sheet is used to keep track of the current income and maintenance levels for each player. The income is divided into City / Trade income and Agricultural / Harvest income, so that the x1, x2, and x0 Harvest income can quickly be calculated.
Faction markers are used to mark the current income level on each track for City Income, Harvest Income, and Total Maintenance. A separate marker is used to specify each digit, such that a marker on 30 and a marker on 200 would represent 230 income. For convenience, the starting incomes and victory point levels are marked on the board by faction symbols.
The sheet's scoring line reads: 1 per territory, 1 per minor city, 3 per major city, 5 per dedicated ally, 10 per enemy capital captured. The sheet also shows the Victory Points to win by game length: Short Game 40, Medium Game 60, Long Game 100.
Alliance scoring on the sheet, as printed:
| Alliance team | Players added | Additional points per ally | 1 / x = VP conversion rate |
|---|---|---|---|
| 1st Ally Team | 1 | 5 | 1/2 |
| 1st Ally Team | 2 | 10 | 1/3 |
| 1st Ally Team | 3 | 15 | 1/4 |
| 2nd Ally Team | 1 | 5 | 1/2 |
| 2nd Ally Team | 2 | 10 | 1/3 |
| 2nd Ally Team | 3 | 15 | 1/4 |
| 3rd Ally Team |
Source note: the printed sheet gives the alliance rows as "Additional points per Ally" and "1/x = VP conversion rate" for each team; the table above restates them. The "Players added" column is a reading aid added for this transcription, not printed text.
Maintenance and Unit Types
There are 6 types of Army units and 3 types of Navy units that all players can build and levy. The values below are the unmodified values; they are modified by faction specials.
| ID | Type | Description | Morale# | Maint | Cost |
|---|---|---|---|---|---|
| KN | Knight | A very heavily armed and armoured mounted troop, usually Nobility | 5 | 6 | 100 |
| HC | Heavy Cavalry | A heavily armoured mounted unit with a lance and sword | 4 | 5 | 80 |
| LC | Light Cavalry | A lightly armoured mounted unit with some range and sword | 2 | 4 | 60 |
| HI | Heavy Infantry | A heavily armoured unit armed with pikes and long sword | 3 | 3 |
Notes on the printed table:
- The source spells the two cavalry rows "Heavy Calvary" and "Light Calvary"; this transcription uses "Cavalry" as in the rest of the manual.
- The header reads "Morale# Maint Cost", and the source gives three numbers per row, transcribed here as printed. The middle column's values (6, 5, 4, 3, 2, 1) match the casualty points given under Siege Warfare (KN 6, HC 5, LC 4, HI 3, LI 2, PS 1), but the printed header does not say which the column is, so it is not relabelled here.
- Fleet units are not on this table. They are listed below as printed.
Fleet units, as printed (the source table header is the same "Morale# Maint Cost" row format; its first cell gives the carrying capacity):
| ID | Type | Description | Carry (as printed) | Morale | Maint | Cost |
|---|---|---|---|---|---|---|
| TR | Transport | Transports and boats for moving up to 5 troop units | 5 units | -- | 3 | 20 |
| RD | Raider | Long boats suitable for raiding attacks | 3 units | -- | 5 | 50 |
| WS | Warship | A heavily armed ship of war | 2 units | -- | 10 | 100 |
Source discrepancy, as printed: the Warship and Raider entries in the Fleet Units text say each "can carry two Army units", while the table above prints 2 units for WS and 3 units for RD. Both are transcribed as printed; the manual does not resolve this.
2. Perform Espionage
Players can choose to perform espionage at this time. Before espionage rolls are determined, players can choose to pay for counter espionage, which gives a modifier against other players being successful with espionage. Players secretly spend 30 gold per counter espionage attempt (they may buy up to any number of counter espionage attempts that they choose), but only one counter per espionage attempt is allowed. The gold used to purchase counter espionage must be held in a hand until it is used. Counter attempts are used up on each espionage attempt made against the player. That is, if two players perform espionage on the same player, and that player has paid for only one counter espionage, the player can use it against only the first attempt. If a player pays for more counter espionage attempts than espionage attempts are made against him, any gold left in his hand must be paid to the bank.
Once the counter agents are paid for, espionage is performed in the order defined below, always ending with the Holy Roman Empire deciding where and how much to spend (including its free espionage):
- North Sea Empire
- Kingdom of England
- Kingdom of France
- Kievan Rus Empire
- Byzantium
- Fatimid Caliphate
- Holy Roman Empire
To perform espionage, a player doing the espionage declares all opponent Armies or Fleets that he wishes to spy on and pays 30 gold each from his treasury. The player attempting the espionage then rolls two dice and adds +3 if counter espionage is being used, for each army or fleet being spied on. On a roll of 8 or less the espionage is successful, and the player controlling the Army or Fleet reveals the units on the card to the spying player and the spying player only. Only one spy attempt from a single player can be made on each Army or Fleet.
3. Perform Diplomacy
The Perform Diplomacy phase allows players an opportunity to make alliances, non-aggression pacts, territorial claims, or other deals between players. Players can pass messages or go off in private to discuss strategy, etc. Players can communicate to any of the other players they wish. The Diplomacy phase is limited to 3 minutes. The 3 minute sand timer is used to enforce this. The very first diplomacy during the game can be longer if ALL players vote to do so. Any diplomacy session can be extended another 3 minutes if ALL players in the game vote to do so.
Players can pass secret messages during other phases of the game, but this activity should not take time from the game or from any other players, and is limited to fast messages for information and short answers only.
Players make alliances in teams during this phase. Secret alliances can be made; however, players cannot declare any victory based on a secret alliance. If a team of players declares an alliance and forms a team, their individual VP are removed from the VP track based on the following formula:
- Add together all team members' current victory points (do not add in allied bonuses yet).
- Divide by the number of team members in the alliance.
- Add 5 x the number of players in the alliance.
- If any player has captured an enemy capital, that is added to the score after combining the VPs above.
This value is the new VP to be marked, now using the Ally team cube specific to the new team. Team cubes are used in order: Team A, then Team B, then Team C. Faction markers from the victory point track are moved to the alliance team boxes, which then represent the number of players in the alliance. No more than 4 players can enter into an alliance.
An alliance can add a player in later turns after it is formed, by:
- Subtracting additional VP earned from enemy capital captures.
- Subtracting 5 x the original number of team members.
- Multiplying the VP (which should be the VP for territories and cities only) by the number of players (or dividing by the VP multiplier from the cube).
- Adding the current victory points from the new player(s).
- Dividing by the new number of players, then adding 5 x the new number of allies.
- Adding back in any VP from enemy capital captures (this can't be from any current ally faction capital).
Source note: the printed alliance-extension procedure is a long run-on paragraph. The steps above follow its order; the printed text does not number them.
4. Write Orders
During the Write Orders phase, all players indicate orders for their armies and fleets separately. Orders can be written as Move, Attack, Defend, Support, Load, or Unload (armies load and unload onto fleets). Remember to check the load limit of the fleet by adding up the total carry ability of all fleet units in the fleet, as fleets can't carry more than their carry value. Multiple fleets can be used to carry one or more armies, as long as the carry limit is not exceeded across all units carried.
Fleets can also be given orders to dock in a port (becoming part of the land territory) to be immune to fleet attacks. Orders are defined by checking a box for a command, or multiple commands, and defining the ending territory to move to. Units can only be moved to adjacent territories, or if loaded onto fleets, onto an adjacent land area to where the fleet moves. The intent of the orders helps determine outcomes in battles. Attack orders can be written against only one faction if there happens to be more than one other faction moving into an area. Orders can also be written to merge or transfer units between armies and fleets. Armies can load and unload on the same turn, before or after fleets move.
It is important for orders to be specific about intent, as the army and fleet commanders will follow orders to the letter and players are not allowed to change the intent based on reacting to their opponents. This means that if player one has two armies moving into a territory intending to attack player two's single army, player one must write that the armies should move together to attack. Otherwise, the defending player may be able to battle each army separately, depending on whether the armies came together from adjacent territories or from opposite directions.
5. Move Fleets and Armies
Movement is made by each player executing the written movement orders for each army or fleet separately, for each entered territory or sea zone. An army or fleet can only move one territory area each turn. When attacking, an army may enter an unfriendly area but may not move through it. Armies must stop upon entering neutral territories. Movement orders are revealed by all players simultaneously.
First, fleets are loaded, then all fleets are moved based on the written orders. A fleet can move and then be loaded, or a fleet can be loaded and then moved. Next, any armies implement their written orders, including any loading and unloading, which occurs after fleet movement. A fleet essentially acts as a bridge across a sea territory after fleet movement. The order of movement, based on orders and unit types, is:
- Load fleets if loading before move
- Move all fleets (conduct fleet combat if required before landing)
- Load / unload fleets and move all army units
Movement halts whenever opposing armies or fleets occupy the same territory. If both players agree that they are allied, movement can continue through occupied territories; however, both players must have stated verbally to all other players in the game in the previous season that they are allied. If two fleets are in combat and either of them has orders to unload armies, that particular fleet combat is resolved before unloading, with any surviving units able to unload.
Straits. Normally sea areas can't be controlled, but ports and straits may be defended. A strait can't be passed through without combat if it is controlled. Armies may also move across straits without fleets if the strait is controlled by that player (to the load limit of the fleets).
6. Resolve All Battles
Land Combat
Land combat takes place when more than one player or faction ends a season with troops in the same territory and when one or both decide to fight. This depends on at least one player ordering an Attack command. Land combat also results from players entering the same neutral territories (the players must fight to see who will control the territory). If only one player enters a territory, or if only one player is left in an empty territory, siege warfare can be used to capture the empty territory (see Siege Warfare below).
Combat in each territory lasts until only one side has units left in the territory, either from losses or from retreat (remember to check morale). Combat is generally considered simultaneous, with both attacker and defender getting an attack each round for each unit.
Note: the quick combat rules are covered in a later section. Players should decide whether they will use quick combat or the more tactical normal combat rules before play begins. It is suggested that quick combat be used for first-time players.
Land Combat Procedure (Normal Combat)
- The attacking player (the player not defending their own territory, or the largest player if both are in a neutral territory) places a single unit on the combat line face up.
- The defender matches that unit with one of his or her own, and then places an additional unit adjacent to any placed unit already on the front line. Optionally, if there aren't any unmatched units on the front line, the player can place the unit in position behind a placed unit already matched by an opponent unit.
- The attacking player matches the uncommitted unit with one of his or her own, and then places an additional unit adjacent to any placed unit (on the front line). Optionally, if there aren't any unmatched units on the front line, the player can place the unit in position behind a placed unit already matched by an opponent unit.
- Steps 2 and 3 are repeated until one player runs out of units. The player which has units left can now place these reserve units as a second, third, or more row of units as desired.
- Combat now proceeds from the left side to the right side (or the reverse), based on agreement between the players.
- Each unit facing off makes an attack roll based on the land combat table below. Look up the attacking unit and defending unit to determine the roll needed on two six-sided dice. That value or less is required to destroy the unit. All units get to attack, but units in second and later rows are not at risk of attack during the current round while they are not in the front rank. Once the first player rolls his attack roll, the other player makes his attack roll for that position in the combat line. If the unit is not destroyed by the line unit, the later-row units targeting that unit have a chance to destroy it by making their own roll. Destroyed units are removed once all units in the combat line position have made their attack. When front line units are destroyed, the second row units, if any, are pushed into the front row position.
- Repeat step 6 for each position in the combat line.
- Once all units have attacked and the destroyed units have been removed, a new combat round starts. Pull back all un-destroyed units which no longer face an enemy for re-deployment. Also, any or all cavalry units can be pulled back to deploy due to their mobility advantage.
- Determine the rout condition. Add up the morale values for the three surviving units with the highest morale, subtract the number of casualties your army suffered this round, and add the number of casualties you did to your opponent(s) this round. Add any additional modifiers listed below. This is the morale total which must be rolled on 1d6 or your unit will rout. Both players must make the roll, and both players can be in a rout condition.
Morale: add the 3 highest morale values for your units; roll less than that on 1d6, modified by:
- Subtract opponent's casualties
- Add own casualties
Additional modifiers: Defending own territory -5; defending own capital -10; +1d6 for each round of combat.
Source note: the printed morale modifier table (headed "Diff in Num Killed" / "Change to Dice Result") is an image whose body rows are not legible in the source copy, so only the printed text modifiers are transcribed above.
If a rout is rolled, the attacker gets one free attack before following the retreat rules below. Only non-mobile (Infantry and Peasant) units still in combat will have an uncontested attack roll on them.
- Now both players can decide to retreat or continue fighting. This is completed by taking an unused faction marker in hand. In a closed fist, place the units in your hand to show you are retreating. Do not place the marker in your hand if you decide to stay and fight. Do this in a hidden fashion under the table or out of sight. On the count of 3, each player reveals their intention by opening their fist.
- If both players retreat, both players move their army to an adjacent controlled territory. If there isn't an adjacent controlled or allied territory, that army is removed.
- If only one player chooses to retreat, the player continuing to attack gets one parting shot against all front line (non-cavalry) units (units which had an undestroyed opposing unit). Cavalry and routed units which destroyed their opposing units do not get attacked.
- If both players decide to continue the attack, these steps are repeated starting with step 1. Where units are still facing off from the previous round, they are not re-deployed but continue to face off.
Land Combat Tables
Number in the chart is the number or less on two six-sided dice needed to destroy the unit. Rows are the attacking unit; columns are the defending unit.
| Att \ Def | KN Def | HC Def | LC Def | HI Def | LI Def | PS Def |
|---|---|---|---|---|---|---|
| KN Att | 6 | 9 | 7 | 7 | 9 | 11 |
| HC Att | 5 | 8 | 6 | 4 | 8 | 11 |
| LC Att | 4 | 7 | 7 | 6 | 5 | 10 |
| HI Att | 6 | 8 | 4 |
Morale and Retreat
The morale check, the retreat choice, and the rout consequences are described in step 9 and step 10 of the land combat procedure above.
Siege Warfare
When capturing neutral territories, or capturing a territory after defeating the opposing player's armies, the territory must be sieged to capture it. Siege combat is performed by rolling 1d6 for the actual territory and adding 1d6 for each Minor city in the territory and +3d6 for each Major city. Some additional modifiers are listed below based on other circumstances. Other modifiers printed as "+#" are added after rolling the dice. For example, when sieging Pomerania, 3d6 is rolled to determine the number of casualty points the army must suffer.
Before removing casualties, a player may pay for 1/2 of the casualty points, rounded down (13 casualty points would mean that 6 can be paid for, and 7 must come from the troops), at 15 gold per casualty point (so the 6 casualty points would cost 90 gold). The rest of the casualty points must come from reducing troops on the army(s) in the territory, based on the type of units. KN units count as 6, HC as 5, LC as 4, HI as 3, LI as 2, and PS as 1. Therefore, if the player had 3 LI, that would be reduced from his card to pay for 6 of the 7 casualty points, or the player could choose to remove 1 KN unit. Then 1 PS troop could be used for the last point. Whatever combination the player chooses can be used to pay for the casualties, but all casualty points must be taken, even if that means a larger unit must be used to absorb them. For example, if the player does not have any PS troops left and must take 1 casualty point, but does have a LI, then the player must lose the LI. Similarly, a single casualty point in an army of only Knights will kill a Knight.
Siege Battles (1d6 unit losses):
- Each Minor City +1d6
- Each Major City +3d6
- Kievan Rus', England territory +3
- North Sea Empire territory +5
- Byzantine capital territory +20
- Player capital territory +10 (not added to Byzantine)
Casualty points: KN 6, HC 5, LC 4, HI 3, LI 2, PS 1. (1/2 of casualty points, rounded down, can be removed for 15 gold per 1 point.)
Fleet Combat
Fleet combat follows all the same rules as army combat, except fleets do not have a morale check, and a fleet unit has a chance of capturing, instead of destroying, another fleet unit, with the exception of a loaded transport. Loaded transports cannot be captured. When a fleet unit is captured, the unit immediately goes to the opponent to use in the very next combat round. If combat ends with either side having only transports left, combat ends immediately, with the winning player automatically either capturing unloaded transports or destroying loaded transports. All army units carried on loaded fleet units will be destroyed. If only some units are destroyed, then at the end of battle the attacking player randomly selects enough army units (turned over to select) to get the total at the carrying limit of the damaged fleet.
Retreating fleets do not have to follow the own / allied territory rule to retreat, as sea territories are not controlled and there are no mobility rules with fleets (cavalry advantages). Also, a fleet can retreat to port if it is in a sea zone next to a friendly port (or allied).
Fleet combat table. First number is the number or less on two six-sided dice to destroy the unit; second number is the number or less to capture.
| Att \ Def | WS Def | RD Def | TR Def (Loaded) | TR Def (Unloaded) |
|---|---|---|---|---|
| WS Att | 7-2 | 9-3 | 10-0 | 10-4 |
| RD Att | 4-0 | 5-3 | 7-0 | 6-3 |
Alternative Quick Combat Method (Should Be Used for First Game)
Before the game begins, the players may choose to use an alternative quick combat method for a speedier game. It is estimated that quick combat can speed up a game substantially, perhaps to half or a third of the time the normal combat rules take. This system somewhat approximates the outcomes of the regular system but does not give players the same level of tactical depth. It is advised for very large combats between players when more than 50 units are involved in total. It is suggested that players try both systems to see which they prefer, and use the one which makes sense for the amount of time they have to play.
The players do not need to use the unit tokens, as that slows down combat; however, if they still wish to use them to track destroyed units and which units have already fired, they may, though it takes a little longer.
To begin, similar to normal combat, each player reveals their army or fleet cards in battle, as they need to remain face up during combat.
Calculate total army armour value: before combat begins, add up the total armour for the army by adding together the armour value of all units of each kind. For example, if the French player has 1 KN, 3 HC and 2 HI, his armour total would be 8. This total is used to subtract damage through the combat. Armour is not restored until a new combat for the army occurs.
Long ranged barrage: each player rolls the total number of quick combat dice indicated by the number in the blue square, for all ranged units. For example, for 2 LC and 2 LI, you would roll 6 dice: 2 for each LC and 1 per LI. Add up the total of all dice with a value less than the number in the red circle (the combat hit value), minus one (ranged attacks subtract one from their attacks). For most ranged units, they score damage only on a die roll of 1 or 2. If the Holy Roman Empire rolled the 6 dice for the units above and rolled a 2, 5, 4, 3, 2, and 6, the total damage is 4 points. This is the amount of damage points the opponent must take before the close combat round occurs. The opponent subtracts this damage from his current armour total and either notes the remaining armour or takes the remaining damage points after all armour is gone. Each player can decide which units to lose when taking casualty (damage) points. The green heart symbol denotes the amount of casualty points the unit will absorb to be destroyed. This is the same as when taking casualties when sieging. Just as when sieging, all casualty points must be used, and if the left-over points are less than the smallest unit requires to be destroyed, then a unit with larger health must be destroyed.
Each player must mark the number of unit casualties they have taken during the long ranged barrage phase. Each destroyed unit is marked with an "X" to show its state and to track the number of units destroyed. The long range barrage normally occurs only once during combat, unless one side either retreats or routs (see check for retreat / routing below).
Close combat round: each player rolls for all their units (including the ranged units, but this time using the normal quick combat value and not subtracting one). Find the total number of all the dice of the same required combat value and roll these together. Add up the resulting die values that are equal to or under the required combat hit value, found by referring to that unit's red circle number.
The resulting value is the amount of damage points the opponent must take, after subtracting any remaining armour from the total armour pool (once armour is used up it is gone for the current combat, no matter how many rounds are fought). If there are remaining casualty points after the armour is gone, the opponent decides which units to lose and expends the casualty (damage) points. The green heart symbol denotes the amount of casualty points the unit will absorb to be destroyed, as above. Each player must mark the number of unit casualties they have taken during the close combat round, marking each destroyed unit with an "X".
Check for retreat and / or routing (morale): check whether either side is retreating, or whether a rout condition exists. Remember to add one additional die for checking morale after each round of combat. If both sides retreat, combat ends immediately as in normal combat resolution, with both players retreating to the territory they came from or to an adjacent friendly territory if possible.
If one side routs but the other side continues to fight, a single long range barrage with surviving ranged units (non-retreating player only) takes place, which could eliminate some of the surviving units before they get away. Additionally, if the non-retreating player chooses, they can make one last close combat attack with only surviving cavalry troops against retreating / routing units, rolling one die per unit instead of the normal two. If one player is routing, they do not get an attack back; however, if retreating, the retreating player can decide to roll all remaining units (cavalry and infantry) with 1/2 the total number of dice, rounded. If the retreating / routing player wants to separately retreat his cavalry, he can withdraw all cavalry without the cavalry suffering any close combat attack (however they still take the last ranged volley in damage before the last close combat attempt).
Remain in close combat: if both sides are still fighting, additional close combat rounds are fought until one or both sides retreat or rout. Remember to add one additional die to each additional round of combat to check morale.
Quick fleet combat: quick fleet combat is similar to quick army combat, without the long range barrage and without checking morale. The other exception is in ship capturing and retreating.
Capturing enemy ships: during the rolls for damage, for every pair of ones rolled, the opponent player must choose a ship to give his opponent as a captured ship, to be used by him in the next combat round. The ones are then not added to total damage done. The captured ships are given to the opponent player before taking casualties, so they can be used to absorb the damage during the current round of combat; hence a player can capture a ship and get it sunk in the same combat round.
Retreating fleets: at the end of each round of quick fleet combat, either or both players determine whether they will retreat. Both players can secretly place a faction marker in their hand to show they are retreating, and then reveal on the count of three whether a marker is in hand or not (a marker indicates retreating). If both players retreat, both players must then retreat from the sea zone or into an adjacent port (adjacent land territory to the sea zone).
7. Build New Armies and Fleets / Adjust Maintenance
Players now purchase new Army units and Fleet units. Newly built units can be placed into any army or fleet (army units can only be placed into armies, and fleet units into fleets). Units can be built only in a territory under the player's control. Fleet units must be placed into a fleet adjacent to a player-controlled port city (adjacent sea area which the player controls). Another stipulation is that no more than 1/2 of army units can be Peasant (PS) troops (except Kievan Rus', which can have 2/3). The maintenance tracks are updated for each player to reflect the increase in maintenance for the newly purchased units.
8. Build Cities or Upgrade to Major Cities
It costs 50 gold (30 for HRE or KOE) to build a port or trade city in a territory without any cities. It costs 150 gold to upgrade a Minor city or port to a Major city (for the first Major city in a territory). Additionally, players can only build as many cities as 1 + 1/3 of the total number of controlled territories (round down). Cities beyond the first city in a territory become increasingly more expensive, as shown in the table below.
| Cities already in territory | Minor city cost | HRE / KOE minor city cost | Major city cost |
|---|---|---|---|
| 0 | 50 | 30 | 150 |
| 1 | 75 | 45 | 225 |
| 2 | 125 | 75 | 375 |
| 3 | 225 | 135 | 675 |
| 4 | 350 | 210 | 1050 |
| 5 | 500 | 300 | 1500 |
| 6+ | x1.5 last level |
Source note: the printed table's column headings are not printed; the headings above are reconstructed from the text ("50 (30 for HRE or KOE)" for a first city and "150" for a first Major city). Only player-built Minor cities can be upgraded (not pre-existing cities on the map). After building cities, adjust the trade / city income on the Income / Victory control sheet.
9. Next Turn: Advance Season and Year
Advance the Season and Year markers and check whether any player has achieved victory conditions. If any player or team has achieved equal to or greater than the Victory Points needed, mark the season and year with each player's marker. The player or team achieves victory if they can stay at or above the required Victory Points for two more seasons. This is checked during the advance season and year phase.
Additional Notes
Breaking and forming alliances occur during the Diplomacy phase, and two more seasons must pass before determining victory for either new condition. When breaking an alliance, the score is immediately recalculated to reflect the new situation. The previously allied players lose the additional VP from being allied. Any remaining allies are recalculated to reflect the new team. Points for capturing enemy capitals go to only the last controlling player, and these points are lost if the capital is retaken by the owning player. Players' armies that are now in enemy territory immediately siege the territory if they do not retreat (which they can choose to do).
Optional Advanced Rules
The printed manual lists the following optional advanced rules. Only their headings are printed in the source; no rules text follows them in this copy.
- Intrigue Cards
- Partial Siege
- Variant Diplomacy Rules
- Alternative Maintenance
- Advanced Movement Rule
References
- Abu Khalil, Shawqi. Atlas of the Arab-Islamic History. Al Qahira: ISBN 1-57547-009-8, 1996.
- BEREZNAY, et al. Atlas of European History. London: Times Books, 1994.
- Barford, P.M. The Early Slavs. Ithaca, New York: Cornell University Press, 2001.
- Carey, Brian Todd; Allfree, Joseph B.; Cairns, John. Warfare in the Medieval World. Yorkshire: Pen & Sword Military, 2006.