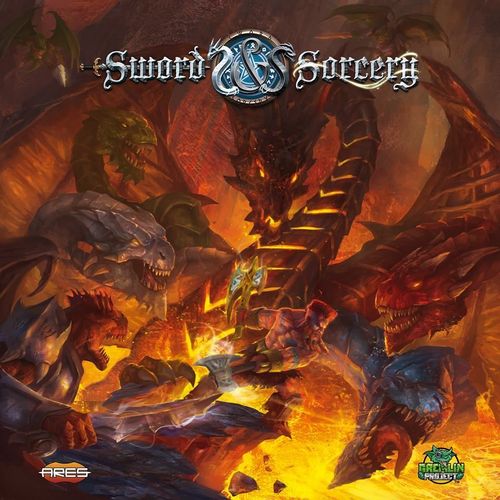
Sword & Sorcery: Vastaryous' Lair
Sword & Sorcery: Vastaryous' Lair Rulebook
Table of Contents
Table of Contents
Types of Terrain
Hindrance Overlays
Hindrances overlays must be treated like Hindrances printed directly on the map tiles. Like other tokens, they can be part of the initial map setup or come into play later due to a game effect. Unless noted, once placed on tiles they are permanent. Each area may contain any number of Hindrances, but is limited to one per type. Ignore any effect requiring a Hindrance to be placed in an area that already has one.
Hindrance Blind Side
The Blind side is identified by a Blue map scroll printed near the edge of an area on the map. It indicates non-flying heroes/enemies may not see the adjacent areas through that edge. The Blind side blocks the L.O.S. only in one direction, from the area where the Blue scroll is printed. This means heroes/enemies from the opposite area are able to see across it.
- The Blind side does not block movement.
- Areas separated by a Blind side are still considered to be adjacent for movement.
Lava Hindrance Token
The Lava Hindrance token represents the perpetually burning fires of a map tile's area. It can be part of the initial setup or be placed later on the map, but in either case, each area cannot have more than 1 Lava token.
Each non-flying character moving into an area with a Lava token immediately suffers a Fire effect (i.e. taking the appropriate Fire token) equal to the ACT of the Quest played. The Lava tokens on the map usually remain until the end of the Quest, unless a special game effect indicates differently.
Vastaryous Map Tiles
This expansion provides new map tiles. For a quick reference:
- The very large areas are designed to easily accommodate Vastaryous, but they count as standard areas in terms of game effects.
- The solid black volcanic rocks drawn on most tile edges block L.O.S.
- The thin volcanic lines help to visually identify each area.
Heroes
Soulrank Rules for Vastaryous' Lair
The minimum Soulrank required for Vastaryous' Lair Quests is V. No hero can go below it. This means heroes begin any Quest of this S&S expansion with a minimum Soulrank V and, even in case of death, the Soul Gem will never shift down to Soulrank IV (i.e. a dead Soulrank V hero remains V and must pay 5 Soul Points to resurrect using a Shrine).
Legendary Powers
Legendary Powers are incredible feats acquired as standard Powers when a hero reaches Soulrank VII (together with an additional Talent).
Legendary Powers can be easily identified by the Legendary icon in place of the cooldown icons. These powers can be used only once per Quest. When used, leave the card face up and rotate it upside down. This means a Legendary Power never flips and is not affected by the cooldown system.
Soulrank VII Talents
When each hero reaches Soulrank VII, together with a Legendary Power, he also gets an additional Talent. This new Talent can be chosen from the ones available in previous S&S expansions or one of the new Soulrank VII Talents included in this expansion. While there are 2 generic Talents, most of these new Talents are related to the 4 specific Fighting Styles (each shown by its own icon on the sheet). This means only heroes with at least one matching fighting style can choose them.
Note: No hero can have more than one Soulrank VII Talent, even using the Wizardry Tower Building of the Darkness Falls expansion.
Body Conditions
These new Body Conditions follow the same general rules detailed in the Immortal Souls Rulebook, with additions detailed below:
| Body Condition | Heroes | Enemies |
|---|---|---|
| Bleeding (front side) | A Bleeding hero suffers 1 HP before performing each of his Activities. Unless removed, the Bleeding condition lasts for two Rounds. When received, place the Bleeding token (front side) on the Hero Sheet. | A Bleeding enemy suffers 1 HP each time it is activated (before applying any behavior). When received, place the Bleeding token (front side) on the Enemy card. |
| Bleeding (back side) | Flip it (back side) in the next Time Phase, and then remove it during the subsequent Time Phase. | Flip it (back side) in the next Time Phase, and then remove it during the subsequent Time Phase. |
Enemies
This expansion introduces new enemies of the Talon Coast... The Drakonians and their queen Vastaryous!
Enemy Powers
Break
A hero suffering the Break effect must place the related token on the equipped Armor card. Each Break token reduces the Armor value by 1. If the Armor value is 0, because it is already broken or because the equipped armor offers no armor value at all, the hero suffers 1 HP instead of placing the token.
In Campaign Mode, any armor remains broken until repaired using the Blacksmith Building (available in the Darkness Falls expansion).
Airborne
When an enemy goes Airborne, place the related token on its enemy card. While in this state, it can only be targeted and/or damaged by ranged attacks or effects. Flying heroes ignore this limitation.
- Dragon Heads inherit, without exception, Vastaryous' Airborne status, but do not interrupt it.
- Vastaryous and all Dragon Heads ignore the AoE 0 effect of heroes' attacks. In these cases, only the chosen main target (Vastaryous or one of the Heads) is attacked. AoE 1 or other effects that may target multiple enemies work as usual; this means that an AoE 1 attack will target Vastaryous and all her Heads.
Note: The White Dragon Head is a colorless Rank, so it isn't activated by the main condition of the color-Rank based Encounter cards (A, B, C and D), and it is always considered the lowest Rank in play.
Enemies' A.I.
When an enemy behavior uses the expression "If charged:" it means: "if the enemy has at least 1 charge to use its charge-based power."
In the same way, the expression "If fully charged:" means: "if the enemy has reached its maximum amount of charges available."
Note: Enemies must always have at least 1 charge to use its charge-based power.
When an enemy behavior uses the word "them," it means the attack or power related to the phrase must be applied to all heroes referenced in the A.I. behavior.
For example: "If there are 2+ heroes in the victim's area: attack them with Sword." This means that if there is at least another hero in the Victim's area, the Sword attack must be resolved against all heroes in that area. When it happens, the attacker rolls the dice only once, while each defender defends separately, but simultaneously.
Note on icons: the sheet shows the charge icon and the Sword attack icon inline in the text above; the icon glyphs are not reproduced here.
Vastaryous!
The Black Queen is almost awakened, but there is still time to save the Talon Coast!
Setup
Vastaryous is a Dragon-Hydra with multiple heads, the most diverse Master Enemy ever created! She is formed by a Master Enemy Scroll card, representing the main body, and up to 4 additional Enemy Scroll cards, indicating the chromatic dragon heads. In game terms, she is based on a Purple Master Enemy Scroll (with a distinct combat stance on each side) referred to as Vastaryous enemy, plus a variable number of colored Enemy Scrolls and cards of different Ranks: Red, Blue, Green and Colorless, referred to as Dragon Heads enemies.
The number of Heads (Dragon Heads enemies) is based on the number of heroes initially facing Vastaryous' Quest: two randomly chosen Heads for 2-3 heroes, or all four Heads for 4-5 heroes.
When Vastaryous comes into play, place the Master Enemy Scroll card in a common spot for all players to see and assign the Dragon Heads Scrolls and their related Enemy cards to the heroes as for standard enemies.
Note: In a 2-3 heroes game, once the Heads are randomly chosen, return the unused heads to the game box, as they will not be used during the Quest.
Playing Vastaryous
Vastaryous' body and each Dragon Head count as different enemies, with their own fighting styles, preferred victims, HP, A.I., powers, and weapons, but, at the same time, all are bonded to a single giant Purple figure guided by standard Master Enemy rules, with these exceptions:
- Vastaryous' body is a Purple Master Enemy, so it always activates as if it is assigned to the current Active hero. The Heads are permanently (until death) assigned to the heroes and activated as standard enemies.
- The Menacing hero system is used only by the Purple Vastaryous Master Enemy. Any attack performed against her Heads will not affect the Menace token.
- Vastaryous and her Heads are always located in the same area but are different enemies, so they must be treated as such in terms of targeting and combat.
- All Dragon Heads belong to Vastaryous' body, so each behavior rule indicating movement always refers to Vastaryous' movement.
- Any effect interacting with enemy movement, such as the Laegon's Trap or Caltrops, will affect only Vastaryous, without impacting her Heads.
Fighting Vastaryous
Vastaryous' strength is heavily based on the number of Dragon Heads alive. In fact, each Head still alive (not killed or in the game box) provides Resistance to the body, subtracting 2 from each attack the body defends. This means initially, Vastaryous' body reduces -4 fighting 2-3 heroes and -8 fighting 4-5 heroes, unless the heroes' attacks ignore enemy resistances.
Vastaryous is killed when its Master Enemy Scroll card (the body) reaches 0 HP, regardless of the status of any other Dragon Head.
Each time any Dragon Head is killed, its "Color" Wyrm Head Power is triggered, with these effects:
- It drops Items and Soul Points.
- All its wounds, Body Conditions and other tokens are discarded.
- Vastaryous (Master Enemy Scroll card) gains 1 charge.
- The dead Dragon Head Scroll card is flipped and its Enemy card is placed, unassigned, beside that Scroll, waiting for possible regrowth in future Rounds.
- A dead Head is not considered an enemy in play.
During each Time Phase, if there is at least 1 dead Head, the active hero must roll 1 single die, regardless of the number of dead Heads present. If the die result matches one of the dead Heads, it regrows! Flip the Enemy Scroll to the front side and assign the related Enemy card normally. It returns with maximum HP (based on the number of heroes facing the Quest) and full Charges. The Dragon Head will act normally during future Enemy Turns.
Note: A dragon Head may regrow several times during the fight!
Note on icons: the sheet's charge, Resistance, attack and die icons are graphics; where the sheet shows them only as icons, this transcription gives the rule in words and does not guess the icon.
Vastaryous' Spells
The Blue and the White Dragon Heads are able to cast spells on the battlefield!
The two Spell tokens are used to keep track of which Power effects are active at the moment. "Toss the token" means: take the token shown by the Scroll card (from the map, terminating its current effect, or from the game box) and throw it in the air to decide between two choices. Apply the matching result from the face up side of the token, based on the related Enemy Scroll card.
Be prepared to fight the most epic challenge of the entire Sword & Sorcery saga!
Storybook Rules
The following is taken from the Vastaryous' Lair Storybook (ACT II). Its narrative introductions are omitted.
Expansion Components
- 1 Storybook ACT II
- 1 Book of Secrets ACT II
- 1 Rules Reference sheet
- 5 Enemy figures
- 1 Master Enemy figure
- 11 Double-sided map tiles
- 2 Master Enemy scrolls
- 7 Enemy scrolls
- 9 Enemy cards
- 3 Enemy Power cards
- 2 Trap cards
- 10 Talent Power cards
- 5 Legendary Power cards
- 10 Emporium cards
- 13 Treasure cards
- 5 Event cards
- 2 Quest cards
- Tokens & Markers: 2 Soul Points; 3 Crowns; 7 Wounds; 1 Bleeding; 9 Hindrance Overlays; 2 Break; 4 Charges; 1 Arcane Spell; 1 Divine Spell; 1 Flying; 2 Airborne; 2 Shadows; 4 Lava Hindrances
Playing Standalone Quests
Playing Vastaryous ACT II Quests as standalone uses all Immortal Souls and other expansion rules, but with a small change from previous ACT II Quests regarding the following Standalone Quest Value:
- Treasures. This value indicates how many Treasure cards the party must draw before the Quest begins. No power can alter the drawn cards. Usually, ACT II Quests differentiate how many cards must be drawn from the ACT I and ACT II Treasures, but this is not the case in this expansion. Since the number of ACT I and ACT II Treasure cards is now almost the same, there are no more reasons to differentiate the values; simply draw Treasure cards until the value indicated by the Quest is satisfied.
Soulrank in Vastaryous' Lair
Vastaryous' Lair represents the maximum expression of soul power for the heroes, and for this reason they will play from Soulrank V to VII. To speed up game setup, the storybook gives this Soulrank conversion table:
| Soulrank | Soul Points needed from Soulrank I |
|---|---|
| I | 0 |
| II | 4 |
| III | 13 |
| IV | 29 |
| V | 54 |
| VI | 90 |
| VII | 139 |
The minimum Soulrank is V and the maximum limit is VII. No hero can go beyond it. Once all heroes have reached this limit, additional soul points can be spent in any way except to enhance the Soulrank over the limit.
Quest 11 and the Whelp Variant
Attempting to prevail against Vastaryous is an epic experience that requires time (in rare cases, up to 1 hour per hero), strategy, and extremely sharp gameplay. If the party is not yet ready for this challenge, the storybook offers a "Whelp" version of Vastaryous.
Simply swap the Purple Vastaryous Master Enemy card with the Whelp version during Quest 11 - The Root Of All Evil, and the journey will be quicker and less dangerous.
Omitted: the storybook's section 5, "Fighting Vastaryous Example," is a worked example of one Round with five heroes, written with spoilers for the final Quest. It is not a rule and is not transcribed.
ACT II Quest Setups
Each quest below gives the Standalone Quest Values, the Enemy deck, the Event deck, the Special Locations, the Special Quest Rules, and the Quest Setup (map tiles, tokens, Shadow Reserve, and the Book of Secrets reference table). The map layouts are pictures in the storybook and are not reproduced; the printed map tile list identifies the tiles to use.
Gap: the Book of Secrets ACT II is the companion book that holds the story-event, waypoint and Quest Shadow text referenced by these paragraph numbers (for example §8.2 or §9.16). It is not available to the transcriber, so those paragraphs are not transcribed. The storybook's Event deck also prints shuffle and arrow markers beside some cards; their exact placement is graphical, so only the card order is given here.
Quest VIII: Smoke & Mirrors
Standalone Quest Values: Soul Points 90xHero; Crowns 500; Treasures 20; Soul Weapons 3.
Enemy Deck (card: number)
- Gremlin (blue): 2
- Gremlin (red): 1
- Orc Warrior: 2
- Orc Warrior: 1
- Orc Shaman: 2
- Orc Shaman: 1
- Orc Warrior (marked In Play): 1
- Orc Shaman (marked In Play): 1
Event Deck (in printed order): 4, 1, 9, 5, 16 (Shuffle), 34, 35, 18 (Shuffle), 20.
Special Locations
- Place Story Event 2 as indicated on the map.
- Shuffle Event 7, Event 32 and Event 17 and place them face down in Location A, Location B and Location C. Immediately discard each of them once resolved.
Special Quest Rules
- Starting Areas: Each hero must begin this Quest in one of the three starting areas. No hero may be placed in an occupied starting area until all three areas are occupied.
- Day (Event 4): No additional effects.
- Night (Event 5): When it enters play, see Paragraph §8.9.
- Quest Fail: The quest fails if the last Event card is discarded OR all heroes are Ghost Souls, see Paragraph §8.21.
Quest Setup
- Map Tiles: 1B, 2B, 5B, 6B, 7B, 8B, 13B, 14B, 15B, 16B, 17A, 19B, 37B, 38B, 39B, 40B, 42B, 43B.
- Wall Tiles: Inside 13B, Inside 14B.
- Tokens: 1x Open Spawn Gate; 1x Open Spawn Gate (second style); 1x Closed Spawn Gate; 1x Closed Spawn Gate (second style); 3x Search Area; 2x Chest; 1x Normal Door; 2x Locked Door; 5x Shadow (2+); 5x Shadow (4+); 1x Open Shrine; 1x Closed Shrine; 5x Waypoint (1, 2, 3, 4, 5); 1x Story Event (2).
- Shadow Reserve (Citizen / Enemy / 2 Enemies / Champion): 2-3 heroes: 1 / 1 / 2 / 2. 4-5 heroes: 1 / 4 / 2 / 4.
Book of Secrets
- Story Events: Story Event 1 §8.1; Story Event 2 §8.15; Night §8.9.
- Waypoints: Waypoint 1 §8.2; Waypoint 2 §8.5; Waypoint 3 §8.6; Waypoint 4 §8.11; Waypoint 5 §8.12; Waypoint X §8.10.
Quest IX: Enslaved
Standalone Quest Values: Soul Points 100xHero; Crowns 500; Treasures 21; Soul Weapons 3.
Enemy Deck (card: number)
- Gremlins Pack: 1
- Gremlins Pack: 1
- Orc Warrior: 2
- Orc Warrior: 2
- Orc Shaman: 2
- Orc Shaman: 2
Event Deck (in printed order): 16 (Shuffle), 31, 5, 7 (Shuffle), 14, 34, 4 (Shuffle), 19, 35.
Special Locations
- Shuffle Story Event 1, Story Event 2 and Story Event 3 and place them face down in Location D, Location E and Location F.
- Shuffle Waypoint 2, Waypoint 4 and Waypoint X and place them face down in Location A, Location B and Location C.
Special Quest Rules
- Day (Event 4): No additional effects.
- Night (Event 5): When it enters play, see Paragraph §9.4.
- Quest Shadow: If the Quest Shadow is revealed, go to §9.16.
- Quest Fail: The quest fails if the last Event card is discarded OR all heroes are Ghost Souls, see Paragraph §9.29.
Quest Setup
- Map Tiles: 7B, 9B, 10B, 11B, 12B, 17B, 18B, 19B, 35B, 36B, 37B, 38B, 39B, 40B, 42B, 43B.
- Tokens: 1x Open Spawn Gate; 3x Closed Spawn Gate (three different styles); 4x Search Area; 1x Open Shrine; 6x Shadow (2+); 6x Shadow (4+); 3x Story Event (1, 2, 3); 6x Waypoint (1, 2, 3, 4, 5, X).
- Shadow Reserve (Citizen / Enemy / 2 Enemies / Champion): 2-3 heroes: 1 / 1 / 2 / 3. 4-5 heroes: 1 / 4 / 2 / 6.
Book of Secrets
- Story Events: Story Event 1 §9.8; Story Event 2 §9.10; Story Event 3 §9.15; Night §9.4.
- Waypoints: Waypoint 1 §9.5; Waypoint 2 §9.1; Waypoint 3 §9.6; Waypoint 4 §9.2; Waypoint 5 §9.7; Waypoint X §9.3.
- Miscellaneous: Quest Shadow §9.16.
Quest X: Be Quick Or Be Dead
Standalone Quest Values: Soul Points 110xHero; Crowns 500; Treasures 22; Soul Weapons 3.
Enemy Deck (card: number)
- Gremlins Pack: 1
- Gremlin (red): 1
- Orc Warrior: 1
- Orc Warrior: 1
- Orc Shaman: 1
- Orc Shaman: 1
Event Deck (in printed order): 5, 19, 16, 32, 10, 34, 18, 33, 35.
Special Locations
- Shuffle Waypoint 1, Waypoint 2 and Waypoint X and place them face down in Location A, Location B and Location C.
Special Quest Rules
- Day (Event 4): When it enters play, see Paragraph §10.17.
- Night (Event 5): No additional effects.
- Magic Key: If acquired by a hero, the token must be treated as a standard Permanent Item, except it does not require an Inventory Slot to be carried or exchanged.
- Quest Fail: The quest fails if the last Event card is discarded OR all heroes are Ghost Souls, see Paragraph §10.25.
Quest Setup
- Map Tiles: 9B, 11B, 17B, 18B, 19B, 34B, 35A, 36A, 37A, 38A, 39A, 41A, 43A, 44A.
- Tokens: 1x Open Spawn Gate; 1x Closed Spawn Gate; 4x Search Area; 1x Open Shrine; 3x Difficult Overlay; 1x Blind Overlay; 2x Lava Hindrance; 4x Shadow (2+); 3x Shadow (4+); 5x Waypoint (1, 2, 3, 4, X).
- Shadow Reserve (Enemy / 2 Enemies / Champion): 2-3 heroes: 1 / 2 / 2. 4-5 heroes: 3 / 2 / 3.
Book of Secrets
- Story Events: Story Event 1 §10.8; Story Event 2 §10.12; Story Event 3 §10.23; Day §10.17.
- Waypoints: Waypoint 1 §10.1; Waypoint 2 §10.2; Waypoint 3 §10.3; Waypoint 4 §10.9; Waypoint 5 §10.14; Waypoint X §10.6.
Quest XI: The Root Of All Evil
Standalone Quest Values: Soul Points 132xHero; Crowns 500; Treasures 23; Soul Weapons 4.
Enemy Deck (card: number)
- Gremlins Pack: 1
- Gremlins Pack: 1
- Orc Warrior: 2
- Orc Shaman: 2
Event Deck (in printed order): 20, 1, 13, 2, 34, 35, 18, 33, 32.
Special Locations
- Place Story Event 3 as indicated on the map.
Special Quest Rules
- Emporium: At the beginning of this Quest, each hero can visit the Emporium to acquire any Emporium card for free (excluding Bounties and Hollywood Armory cards), up to his maximum Inventory capacity. Each hero can also use any Non-Tavern Building for free.
- Event Cards: Ignore the spawn effect of all Event cards.
- Waypoints 1, 2, 3 areas: These are considered Small Caves areas, the Purple Vastaryous can't move into or across these areas. In addition, there is no L.O.S. between Vastaryous (including all her Heads) and all heroes located into these three areas, so they can't target/attack each other.
- Day (Event 4): When it enters play, see Paragraph §11.26.
- Night (Event 5): When it enters play, see Paragraph §11.18.
- Quest Fail: The quest fails if the last Event card is discarded OR all heroes are Ghost Souls, see Paragraph §11.35.
Quest Setup
- Map Tiles: 17B, 18B, 19B, 34A, 35A, 36A, 37B, 38A, 39A, 40A, 41A, 42A, 43B, 44A.
- Wall Tiles: 36A-44A.
- Tokens: 1x Open Spawn Gate; 1x Open Spawn Gate (second style); 4x Search Area; 3x Chest; 2x Difficult Overlay; 1x Barrier Overlay; 1x Deadly Overlay; 2x Lava Hindrance; 2x Shadow (2+); 2x Shadow (4+); 1x Open Shrine; 1x Locked Door; 6x Waypoint (1, 2, 3, 4, 5, X); 1x Story Event (3); 1x Magic Lock.
- Shadow Reserve (2 Enemies / Champion): 2-3 heroes: 2 / 1. 4-5 heroes: 2 / 3.
Book of Secrets
- Story Events: Story Event 1 §11.7; Story Event 2 §11.21; Story Event 3 §11.23; Night §11.18; Day §11.26.
- Waypoints: Waypoint 1 §11.5; Waypoint 2 §11.12; Waypoint 3 §11.15; Waypoint 4 §11.4; Waypoint 5 §11.13; Waypoint X §11.17.
- Miscellaneous: Quest Enemy §11.27; Wyrm's Egg §11.24.