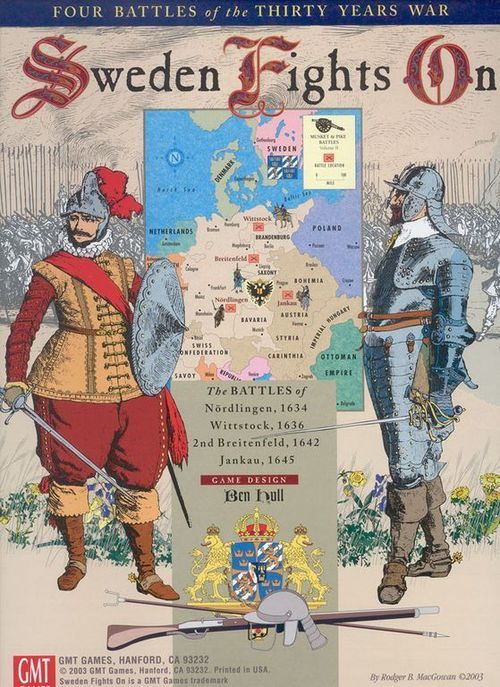
Sweden Fights On
Sweden Fights On Rulebook
Table of Contents
Table of Contents
- All Scenarios
- Nördlingen — September 6 (August 27), 1634
- General Situation
- The Campaign
- The Battle
- The Outcome
- Swedish Forces
- Imperial/Spanish Forces
- Special Rules for All Nördlingen Scenarios
- Scenario 1: September 5th — Clearing the Approach
- Scenario 2: September 6th (Early Morning Start) — The Approach March
- Scenario 3: September 6th (Late Morning Start) — The Historical Assault
- Wittstock — October 4 (September 24), 1636
- Second Breitenfeld (aka Leipzig) — November 2 (October 23), 1642
- Jankau (aka Jankowitz or Jankov) — March 6 (February 24), 1645
- Lion of the North Revision
- Historical Notes
- Game Tactics
- Designer Notes
- Reaction & Interception Zone Summary
All Scenarios
All scenarios throughout this Playbook use the following information.
Color Codes on Counters
Colors are top color on background color for units/leaders.
Swedish Forces and Allies:
- Swedish and German Allies: Light blue on white/light blue on dark blue (All battles)
- Scots Allies: Dark green on light green (Nördlingen, Wittstock)
Imperial Forces and Allies:
- Imperial Army (IMA): Red on tan/red on brown (All battles)
- Spanish (AoF): Red on light yellow/red on medium yellow (Nördlingen)
- Saxons (SX): Black on light gray/Black on medium gray (Wittstock, Second Breitenfeld, Jankau)
- Catholic League (Bavarian Army; CL): Blue on light gray/blue on medium gray (Nördlingen, Wittstock, Jankau)
Counter Notes
- There are six blue counters in Sweden Fights On. These are replacement counters for the first game in the Musket & Pike Battle System, This Accursed Civil War, and are not used in SFO.
- There are some leaders that do not appear in any of the SFO scenarios. These leaders are for use with the Lion of the North revision included later in this Playbook.
- Generic replacement leaders are called Överste (Swedes), Oberst (IMA, Saxon and CL), or Maestre de Campo (AoF).
- Most of the cavalry units have more than one counter with the same unit name. This was done so that players can more easily separate counters used in each battle. Use the cavalry unit that has the appropriate Wing and Battle designators.
- However, it was not possible to make separate counters for each battle for artillery units, infantry units, and leaders, which are still shared between battles. Each infantry unit has indicators of which battles it appears in, but not its Wing.
Wing Designations
| Wing Name | Counter Abbr | Battle |
|---|---|---|
| Left | L | All |
| Center | C | All |
| Right | R | All |
| Aalbuch Garrison | A | Nördlingen |
| Bernhard's Infantry | B | Nördlingen |
| Horn's Infantry | H | Nördlingen |
| Spanish | S | Nördlingen |
| Optional | O | Nördlingen |
| Vitzthum's Reserve |
Battle Designations
| Battle | Counter Abbr |
|---|---|
| Nördlingen | No or N |
| Wittstock | Wi or W |
| Second Breitenfeld | Br or B |
| Jankau | Ja or J |
Swedish Ranks and Abbreviations
| In Swedish | Abbr | Modern English |
|---|---|---|
| Fältmarskalk | Fältm. | Field Marshal |
| General | Gen. | General |
| Generallöjtant | GenLt. | Lieutenant General |
| Generalmajor | GenMaj. | Major General |
| Överste | Öfv. | Colonel |
| Överstelöjtnant | ÖfvLt. | Lieutenant Colonel |
Imperial Ranks and Abbreviations
| In German | Abbr | Modern English |
|---|---|---|
| General | Gen. | General |
| General-leutnant | GenLt. | Lieutenant General |
| Feldmarschall | FM. | Field Marshal |
| Feldmarshall-leutnant | FMLt. | Lieutenant Field Marshal |
| General-feldzeugmeister | GenFZM. | Field Quartermaster General |
| General-wachtmeister | GenWM. | Major General |
| Oberst | Obr. | Colonel |
| Oberstleutant | ObrLt. | Lieutenant Colonel |
Nobility
| In German/Swedish | Abbr | Modern English |
|---|---|---|
| Kurfürst/Kurfurste | K. | Prince Elector |
| Herzog/Hertig | H. | Duke |
| Graf/Greve | G. | Count |
| Rheingraf/Rhengreve | RG. | Count (Rhinegrave) |
| Pfalzgraf/Palsgreve | PG. | Count Palatine (Palsgrave) |
| Landgraf/Lantgreve | LG. | Count (Landgrave) |
| Markgraf/Markgreve | MG. | Marquis (Margrave) |
Other Abbreviations Used
- aka: Also known as
- Incl.: Includes
- KIA: Killed in Action
- WIA: Wounded in Action
Unit Types
- Arty: Artillery
- Arq.: Arquebussier
- Cuir.: Cuirassier
- HI Bde: Heavy Infantry Brigade
- HI Bde w/Arty: Heavy Infantry Brigade with Organic Artillery
- LI: Light Infantry
Nationalities
- AoF: Army of Flanders (Spanish)
- CL: Catholic League (Bavarian)
- IMA: Imperial Main Army
- Sax.: Saxon
- Swed.: Swedish
German/Swedish Glossary
- Gamla Blåa = Old Blue
- Gula = Yellow
- Gröna = Green
- Alt / Alte = Old or The Elder
- Neu = New
- Jung = The Younger
- finnar = Finns
- livländare = Livonians
- kurländare = Courlanders (a region of modern Livonia)
- åboländare = Finns from the region of Åbo, Finland
- nyländare = Finns from the Nyland region
Notes Applicable to All Scenarios
- Unless a specific setup location is indicated, Wing Commanders start stacked with any unit in their Wing as per 5.21, and Army Commanders start stacked with or adjacent to any unit of their army.
- The date in parentheses after each battle is the date it was fought under the old style (Julian) calendar. (While Catholic countries adopted the Gregorian calendar in the 1580s, Protestant areas of Germany didn't adopt it until about 1700, and Sweden not until 1753.)
Nördlingen — September 6 (August 27), 1634
Southwestern Germany (Bavaria)
General Situation
The battle of Lützen was a disaster for the seemingly unstoppable Swedish war machine, cutting down its leader, King Gustav Adolf, at the height of his power. Oxenstierna took the reins of government as Queen Christina was only six, and her mother was unfit to be regent. While Wallenstein (the leader of the opposing Imperial forces) retired with his army into Bohemia after the battle, the Swedes, though decapitated, continued their march into Germany. The Swedes split their forces, with Gustav Horn leading a Swedish army that ran the Imperials out of Alsace, while Oxenstierna led the main army into Leipzig, sweeping Wallenstein's garrisons from Saxony.
The Swedish momentum began to run out in the winter of 1632-33 as Swedish units, often owed many years worth of back pay, threatened to mutiny. The Swedes were overextended and facing a serious crisis in funding. Oxenstierna began to withdraw Swedish troops to the Baltic and worked with the Protestant German princes to conclude the Treaty of Heilbronn. The treaty, signed April 23, 1633, brought in hefty subsidies from the German princes that allowed the Swedes to keep campaigning. Even Richelieu, the effective ruler of France, contributed subsidies (though France was Catholic, like the Empire, France was opposed to Spain). However, the money still did not come in fast enough, forcing the Swedes to pay many officers in land. Bernhard of Saxe-Weimar, for instance, became Duke of Franconia. In addition, it became increasingly more common for garrison troops to exact contributions from the locals, a practice the late King would have frowned upon.
By 1633, Wallenstein had acquired enormous power because of the panic the defeat at Breitenfeld had caused. This was of concern to many in the Empire, including the Habsburg Emperor, Ferdinand II of Austria. During that year's campaign Wallenstein, in a surprise attack, captured 8000 Swedish troops under General Thurn in Silesia. In return, the main Swedish army, now under Horn and Weimar, struck into Bavaria, heading for Regensburg. Wallenstein tarried, allowing the city to fall to the Swedes. This was the last straw for Maximilian of Bavaria and the Emperor. Wallenstein was deposed and later assassinated in February 1634. Ferdinand, King of Hungary, took command of the Imperial Army, assisted by Gallas and Piccolomini. His cousin, Ferdinand Cardinal Infanta (the Governor of Lombardy), was given command of the Spanish army assembling for the coming campaign.
The Campaign
In 1634, Cardinal Infanta led a force of over 9000 Spanish and Italian infantry and 2000 cavalry from Alsace to join the Army of Flanders (AoF). The AoF was over 52,000 strong, but the nature of the war in Flanders (also called the Eighty Years War or the Dutch War of Independence) required that over half the army be tied down in garrison duties. The Spanish preferred to have the Walloons and Germans cover the garrisons, while using their Spanish, Italian, and Burgundian tercios as their strike force. For the 1634 campaign, Cardinal Infanta, joined by Duke Charles of Lorraine, had around 12 tercios and 10 cavalry "regiments." (The biggest Spanish weakness was in cavalry, and they did not have formal cavalry regiments as did other armies of the period). The Imperial Main Army (IMA) had 14 infantry regiments, 20 cavalry regiments, and nearly 150 guns (about 116 of these were light 3 lb guns after the Swedish model). The IMA also had the able assistance of the Bavarian army under General Aldringer. The basic plan of campaign for the combined Imperial/Spanish army was to roll back the Swedish gains in southern Germany, and if possible to reopen the "Spanish Road." This was the overland route of Habsburg-controlled territories from Northern Italy to Flanders, which troops had not been able to use since 1620.
On the other hand, the Swedes under Weimar and Horn were in a weakened state. They did not have a steady flow of reinforcements, and Oxenstierna had pulled back many Swedish national units. To make matters worse, a bizarre arrangement had been made to appease the ego of Weimar whereby Horn and Weimar alternated command daily (reminiscent of the Romans prior to Cannae). Horn and Weimar also had very different styles—Weimar was a rash cavalry officer, while Horn was a conservative infantry officer.
The campaigned opened with the IMA and the Bavarians acting in concert. They retook Regensburg on July 6, then moved west on either side of the Danube, taking Donauwörth in August. Weimar and Horn moved east to counter the threat, forcing the Bavarians into Aldshut. They took the town by storm and Gen. Aldringer was killed in the action. The IMA laid siege to the strongly held fortress of Nördlingen. The Swedes, hoping to destroy the enemy piecemeal and not wanting to lose the important fortress, advanced to the relief of Nördlingen and arrived in the vicinity August 23. Weimar wished to attack immediately, but Horn wanted to wait for 6000 reinforcements under Rhinegrave Otto Ludwig. While Horn and Weimar debated, the Spanish army arrived September 2.
The Battle
The situation that faced the Swedes south of Nördlingen was that time was on the Imperials' side. One avenue to the relief of the fortress was along the Ulm highway. Advancing along this route, however, would have meant moving across open, marshy ground with the Imperials entrenched on the high ground with plenty of artillery. A secondary route was a branch off the Ulm highway that led through the village of Ederheim and between the Ländle and the Hässelberg. An attack along this axis would be over better ground and there would be cover for the approach march. On the afternoon of September 5, the Swedes sought to secure this route, and the Imperial cavalry resisted strongly. A sharply fought engagement lasted into the night with the superior Swedish cavalry securing the wooded heights of both the Ländle and the Hässelberg. It became clear that in the coming fight the central position of the Schönefeld would hold the Imperial main battle line. Down the ridgeline from the Hässelberg was the bald hilltop of the Aalbuch. Horn knew that if he could seize that hill and place his guns there, he could enfilade the Imperial line and roll it up. The Swedes divided their forces and Horn turned south to do a flank march, at night, over the rugged Tannenberg. The wooded hill concealed the move from the enemy, but a narrow defile and an overturned cannon seriously delayed the maneuver. On the Imperial side, Generals Gallas and Piccolomini had perceived a weakness here and had Cardinal Infanta dispatch Gen. Serbelloni and 6 regiments (tercios—3 German, 1 Imperial, and 2 Spanish) to secure the position.
Since Serbelloni occupied the Aalbuch, Horn crossed the Retzenbach at Hirnheim and deployed for an assault. Weimar's battle line was on the saddle between the Ländle and the Hässelberg with his right anchored on the Hässelberg and his left anchored on the village of Herkheim. Weimar's force was clearly outmatched by entrenched main line on the Schönefeld, but his job was only to fix the enemy in place so Horn could initiate his assault without interference from the Schönefeld force. At first light Horn launched his assault and the Spaniards put up a desperate defense. The far right infantry brigade from Weimar's force was stripped off to assist Horn. The Imperials drew off the Swedish cavalry, keeping them from provided help to the infantry charging up the steep hillside. The Swedes, though, finally evicted the Spaniards, but losses were heavy on both sides. Weimar's force was insufficient to prevent a massive counterattack against Horn by Leganes, Gallas and Piccolomini that sent the exhausted Swedes reeling back off the Aalbuch. Horn had enough and called it quits, with most of his infantry regiments having over 50% casualties already. Weimar's force had launch probing attacks and had turned back a flank attempt near the village of Erdlingen from three of De Werth's squadrons, but as a whole was not decisively engaged.
When Horn's infantry was seen retreating across the Swedish rear a general panic broke out. The Imperial/Spanish forces realized that the Swedes were attempting to disengage, and so attacked with their entire line. This, coupled with the panic caused by Horn's retreat, caused the Swedish army to completely collapse. Horn was captured and the entire infantry contingent was lost. Much of the cavalry escaped with Weimar to fight another day. Imperial/Spanish losses were about 2500, but the Swedes had as many as 10,000 killed and wounded and between 3000 and 4000 taken prisoner.
The Outcome
The most important result of the crushing Swedish defeat at Nördlingen was the entry of France as a "full" participant in the Thirty Years War. Granting subsidies was no longer enough, and Richelieu did not want the Spanish Road to be reopened. He was successful in preventing this, so in many respects the Spanish got the least out of the deal. The entry of France all but guaranteed the Dutch would triumph, as the Spanish had to pull their scarce resources to fight the French. It would take the Swedes, under Banér, two years to recover militarily. The Thirty Years War for the Emperor would break into two fronts: the East Front from Pomerania, Brandenburg, Saxony, Silesia, to Bohemia where he was opposed by a succession of talented Swedish generals, and the West Front from Flanders to Bavaria where Turenne and the Condé would rise. Never again would the Emperor have a triumph on the field like Nördlingen, though the hope of one sustained him and his son through another fourteen years of war.
Special Rule: All slopes hexsides are steep for purposes of 10.9.3.
Swedish Forces
ARMY COMMANDERS: H. Bernhard of Saxe-Weimar (–2) and Fältm. Horn (–2)
Note: The Swedish Army has 2 Army Commanders. Weimar is activated when either of the Left Wings is Activated; Horn is activated when either of the Right Wings is activated.
Right (Horn's) Cavalry Wing — WING COMMANDER: GenMaj. Schawelitzki (0) (Czech, aka Schaffelitzky, Captured)
| Army | Unit | Ratings | Type | Historical Notes | Scen. 2 | Scen. 3 |
|---|---|---|---|---|---|---|
| Swed. | Horn | 5-8 | Cuir. | Öfv. Witzleben commanding | 2623 | 2320 |
| Swed. | Oxenstierna | 3-6 | Cuir. | Öfv. Oxenstierna KIA (not THE Oxenstierna); incl. Rhinegraf? | Off map, in Column | 2424 |
| Swed. | Goldstein | 3-8 | Cuir. | Off map, in Column | 2524 | |
| Swed. | Hoffkirchen |
Right (Horn's) Infantry Wing — WING COMMANDER: GenMaj. Vitzthum (0)
| Army | Unit | Ratings | Type | Historical Notes | Scen. 2 | Scen. 3 |
|---|---|---|---|---|---|---|
| Swed. | Horn | 2 hex, 12-8 | HI Bde w/Arty | 5 regts, 50% casualties; Regiments incl. Horn, Wurmbrand, Haubald, Schneidwinds (Öfv captured), Schawelitzki (Öfv captured) | 2425-2525 Open order | 2722-2823 |
| Swed. | Rantzau | 2 hex, 20-7 | HI Bde w/Arty | 8 regts, 73% casualties; Regiments incl. Rantzow, Cratz, Freytag, Muffel, Tiesenhausen, Quadt, Isenburg, Paul | 2426-2526 Open order | 2521-2622 |
| Scots | Scots | 2 hex, 17-8 | HI Bde w/Arty | 7 regts, 30% casualties; Regiments incl. Munro, Muschamp, Ruthven, Leslie, King, Forbes, Ramsay. Leslie and Ramsay were newly raised. | Off map, in Column |
Left (Bernhard's) Infantry Wing — WING COMMANDER: GenMaj. Rothstein (0) (aka Rostein, captured)
| Army | Unit | Ratings | Type | Historical Notes | Scen. 2 | Scen. 3 |
|---|---|---|---|---|---|---|
| Swed. | H. Bernhard | 2 hex, 12-8 | HI Bde w/Arty | aka Green, but not Gustav Adolf's Green Brigade—see Pfuel. 3 regts, 60% casualties, Regts incl. Bernhard Leib, Hodiagawa, Limback (Öfv. KIA) | 1414-1415 | 2213-2214 |
| Swed. | Gula | 2 Hex, 14-8 | HI Bde w/Arty | Yellow regt under ÖfvLt. Schonbeck and another regt, 75% casualties | 1515-1516 | 2417-2418 |
| Swed. | Thurn | 2 Hex, 12-7 | HI Bde w/Arty | Thurn-Black regt, Mitzlaff, Rosen regts. 66% casualties | 1416-1417 | 2215-2216 |
Optional for this Wing:
| Army | Unit | Ratings | Type | Historical Notes | Scen. 2 | Scen. 3 |
|---|---|---|---|---|---|---|
| Swed. | RG. Otto Ludwig | 2 hex, 12-7 | HI Bde w/Arty | 1314-1315 | 2014-2015 | |
| Swed. | Nassau | 2 hex, 14-6 | HI Bde | Nassau at this battle | 1316-1317 | 1812-1813 |
Left (Bernhard's) Cavalry Wing — WING COMMANDER: Fältm. Kratz (0)
| Army | Unit | Ratings | Type | Historical Notes | Scen. 2 | Scen. 3 |
|---|---|---|---|---|---|---|
| Swed. | H. Bernhard | 5-8 | Cuir. | Öfv. Bouillon captured | 1613 | 1714 |
| Swed. | H. Ernst | 5-7 | Cuir. | Incl. GenLt. Johann auf Hesse-Darmstadt, Brandenstein | 1810 | 2207 |
| Swed. | Courville | 4-7 | Cuir. | Courville KIA Aug 24 1634 | 1910 | 2208 |
| Swed. | Öhm |
Optional for this Wing:
| Army | Unit | Ratings | Type | Historical Notes | Scen. 2 | Scen. 3 |
|---|---|---|---|---|---|---|
| Swed. | Rhinegraf | 5-7 | Cuir. | RG. Otto Ludwig | 1612 | 1809 |
| Swed. | Zulow | 5-7 | Cuir. | 1512 | 1810 | |
| Swed. | Hillebrand | 5-7 | Cuir. | 1413 | 1811 |
Swedish Option for All Scenarios: As mentioned in the historical notes, Horn wanted to wait for Ludwig's forces to arrive before attacking. Historically, they arrived two days late. To help balance the scenario, the players may wish to delay the battle by two days. If so, all rules remain the same except that the Swedish player receives the five units marked optional, above.
Imperial/Spanish Forces
Units are identified as being part of the Imperial Main Army (IMA), Bavarian Catholic League (CL), or the Spanish Army of Flanders (AoF).
ARMY COMMANDERS: King Ferdinand of Hungary (0) and Ferdinand Cardinal Infanta (–1)
Note: The Imperial/Spanish Forces have 2 Army Commanders. When a Wing Commander is activated, roll to see which AC is activated that phase. On a roll of 0 to 4, King Ferdinand is activated; 5 to 9, Cardinal Infanta is activated. King Ferdinand may only assist Imperial and Bavarian units and leaders, and Cardinal Infanta may only assist Spanish units and leaders.
Imperial/Leaguer Cavalry Left Wing — WING COMMANDER: GenLt. Gallas (0)
| Army | Unit | Ratings | Type | Historical Notes | Scenarios 2 and 3 |
|---|---|---|---|---|---|
| IMA | Aldobrandini | 5-7 | Cuir. | 3419 | |
| IMA | Nicola | 5-7 | Cuir. | Montard or Neu-Florentine | 3519 |
| IMA | Alt-Piccolomini | 5-7 | Cuir. | 3620 | |
| IMA | Neu-Piccolomini | 5-6 | Cuir. | 3517 |
Imperial/Leaguer Infantry Right Wing — WING COMMANDER: Duke Charles of Lorraine (–1). REPLACEMENT: Gen de Werth (–2)
| Army | Unit | Ratings | Type | Historical Notes | Scenarios 2 and 3 |
|---|---|---|---|---|---|
| IMA | Grana | 2 Hex, 10-7 | HI Bde w/Arty | aka Marquis de Caretto | 2903-2904 |
| IMA | Alt-Breuner | 2 Hex, 10-7 | HI Bde w/Arty | 3106-3107 | |
| CL | Billehe | 5-7 | Cuir. | Alt-Schonberg | 2808 |
| CL | Fürstenberg | 5-7 | Cuir. | 2807 |
Infantry Right Wing Continued:
| Army | Unit | Ratings | Type | Historical Notes | Scenarios 2 and 3 |
|---|---|---|---|---|---|
| IMA | Vitzthum | 5-6 | Cuir. | 2805 | |
| IMA | Mühlheim | 5-6 | Cuir. | 2603 | |
| IMA | Strozzi | 5-7 | Cuir. | 2604 | |
| IMA | Gonzaga | 5-7 | Cuir. | 2605 |
Spanish Cavalry Wing — WING COMMANDER: Gen. Leganes (0)
| Army | Unit | Ratings | Type | Historical Notes | Scenarios 2 and 3 |
|---|---|---|---|---|---|
| AoF | Oraní | 5-7 | Cuir. | Incl. Cardinal Infanta Leibregiment | 3117 |
| AoF | Arberg | 5-7 | Cuir. | Burgundy. Burgundians were known for producing fine cavalry. | 3118 |
| AoF | La Tour | 5-6 | Cuir. | Walloon | 3119 |
| AoF | Ayala | 5-6 | Cuir. | Naples | 3317 |
Center Infantry Wing — WING COMMANDER: Gen. Piccolomini (–2)
| Army | Unit | Ratings | Type | Historical Notes | Scenarios 2 and 3 |
|---|---|---|---|---|---|
| AoF | Toralto | 1 Hex, 7-7 | HI Bde | Naples; Tercio de Don Gaspar de Torralto | 2815 |
| AoF | Lunato | 2 Hex, 13-7 | HI Bde | Lombard; Tercio del Marques de Lunato | 3010-3011 |
| AoF | St Severo | 2 Hex, 19-7 | HI Bde | Principe de St Severo; Naples; aka San Severo, Regimiento napolitano del Príncipe San Severo | 3012-3013 |
| AoF | Alagón | 2 Hex, 14-8 | HI Bde | aka Tercio Napoles, Spanish—see special rule below; Tercio de Don Enrique de Alagón |
Center Infantry Wing Continued:
| Army | Unit | Ratings | Type | Historical Notes | Scenarios 2 and 3 |
|---|---|---|---|---|---|
| IMA | Artillery batteries | 2 x 4-8lb | Arty | The Imperial player may place these units at his discretion in the following hexes: 2606, 2607, 2808, 2809, 2810, 2811, 2713 | |
| IMA | Artillery batteries | 2 x Dbl 4-8lb | Arty | (as above) | |
| IMA | Artillery batteries | 2 x 12-24lb | Arty | (as above) | |
| IMA | Artillery batteries | 1 x Dbl 12-24lb | Arty |
Aalbuch Infantry Garrison — WING COMMANDER: Gen Serbelloni (0)
| Army | Unit | Ratings | Type | Historical Notes | Scenarios 2 and 3 |
|---|---|---|---|---|---|
| AoF | Wurmser | 1 Hex, 7-6 | HI Bde | German | 2822 |
| AoF | Salm | 1 Hex, 7-6 | HI Bde | German | 2721 |
| IMA | Leslie | 1 Hex, 6-7 | HI Bde w/Arty | 2621 |
Special Rules for All Nördlingen Scenarios
- No AoF unit may use Salvo fire.
- The two Spanish tercios had practiced a special drill to limit the impact of the Swedish Salvo. When a Swedish unit Salvo fires against one of these units, the Imperial player rolls a die and consults the following table:
| Die Roll | Result |
|---|---|
| 0-1 | No change |
| 2-3 | –1 DRM to the Swedish fire |
| 4-5 | –2 DRM to the Swedish fire |
| 6-7 | –3 DRM to the Swedish fire, no Salvo morale check |
| 8-9 | –4 DRM to the Swedish fire, no Salvo morale check |
Scenario 1: September 5th — Clearing the Approach
Overview: This scenario covers the cavalry battle to clear the approaches to the Imperial siege lines (just off the north-east map edge). It is a good learning scenario for those not familiar with the system as it only includes part of the forces involved in the general engagement of the following day. Historically it was a sharply fought action that lasted until dark.
Start Time: 3:00 PM
Maximum Duration: 10 turns (through the end of the 6:00 PM turn, when it became dark)
Swedish Set Up: No forces start on map. Wing Commanders may enter under Charge or Make Ready orders.
Imperial/Spanish Set Up: No Army Commander is present for the Imperials.
The Cavalry Screen is composed of the following units and leader:
- The six CL cavalry units of the Imperial/Spanish Right Infantry Wing.
- 2 x 2-6 CL Dragoons. (These units appear only in this scenario. In later scenarios, they are off-map masking the garrison in Nördlingen.)
- Leader De Werth, who is the Wing Commander for those units. (In later scenarios, he appears only as a replacement leader for Duke Charles.)
Set up the Cavalry Screen anywhere in a box bounded by 1200 to 1218 to 2018 to 2000, under Make Ready orders. This Wing is considered a Cavalry Wing in this scenario.
Gen. Lt. Gallas' IMA Cavalry Wing (The Cavalry Reserve) within 3 hexes of 2713 (southernmost entrenchments on the Schönefeld) under Receive Charge orders.
Imperial Option — Variable Reinforcements: On Turn 6 or later the Imperial/Spanish player may bring in at hex 2400:
a) GenLt. Leganes and all 6 AoF cavalry units of his Wing and/or b) The Duke of Lorraine and his 6 IMA cavalry units.
For each group that enters, the Swedish player receives 20 VPs.
Victory Points: In addition to the standard victory points, at the end of the scenario players receive 5 VPs for each of the following hexes under their control. Thus, a side that controls all 3 hexes of the Aalbuch gets 15 VPs. All hexes start under Imperial control, so a Swedish unit must have been the last unit to occupy a hex for the Swedish player to get VPs for that hex.
- Ländle (1111)
- Hässelberg (1818)
- Ederheim (1218, 1318)
- Herkheim (2007)
- Road Junction (1812)
- Aalbuch (2619, 2719, 2820) (overlooking the Imperial/Spanish Line)
Victory Conditions:
| VPs | Type of Victory |
|---|---|
| 100+ | Decisive Swedish Victory |
| 30–99 | Historical Swedish Victory |
| 0–30 | Draw |
| <0 | Decisive Imperial/Spanish Victory |
Scenario 2: September 6th (Early Morning Start) — The Approach March
Start Time: 7:00 AM
Maximum Duration: 30 turns (through the end of the 4:40 turn)
Swedish Set Up: All Wing Commanders are under Make Ready orders. See the charts above for setup hexes. The off-map units of the Swedish Right Wings may move onto the map from hex 2526 when those wings are activated.
Turn 1: Fältm. Kratz's Cavalry Wing and H. Bernhard of Saxe-Weimar enter on any road hex on the west map edge.
Turn 5: GenMaj. Schawelitzki's Cavalry Wing enters on any road hex on the west map edge.
Turn 8: GenMaj. Rothstein's Infantry Wing enters on any road hex on the west map edge.
Swedish Options:
A. Variable Entry (Roll at beginning of turn)
| Turn | Wing to enter on any road hex on west edge | Die Roll Needed |
|---|---|---|
| Turn 4 | Gen. Maj. Schawelitzki's Cavalry Wing | 0 |
| Turn 5 | Gen. Maj. Schawelitzki's Cavalry Wing | 0-3 |
| Turn 6 | Gen. Maj. Schawelitzki's Cavalry Wing | 0-5 |
| Turn 7 | Gen. Maj. Schawelitzki's Cavalry Wing / Gen. Maj. Rothstein's Infantry Wing | 0-7 / 0-1 |
| Turn 8 | Gen. Maj. Schawelitzki's Cavalry Wing / Gen. Maj. Rothstein's Infantry Wing | Automatic / 0-3 |
| Turn 9 | Gen. Maj. Rothstein's Infantry Wing | 0-6 |
| Turn 10 | Gen. Maj. Rothstein's Infantry Wing | Automatic |
B. Use the historical entry hex of 1017. Note, however, that the crossroads for the Ulm-Nördlingen highway (which enters the map at 1007), is just off board behind the Ländle.
Imperial/Spanish Set Up: All Wing Commanders are under Receive Charge orders. See the charts above for setup hexes.
Victory Conditions:
| VPs | Type of Victory |
|---|---|
| 120+ | Decisive Swedish Victory |
| 80–119 | Marginal Swedish Victory |
| 60–79 | Draw |
| 40–59 | Marginal Imperial/Spanish Victory |
| ≤ 39 | Decisive Imperial/Spanish Victory |
(Starting earlier gives the Swede more maneuver room and the opportunity to use 300 years hindsight, so he has to do more to win.)
Basic Victory Levels
| Swedish points in play | with Rhinegraf Otto Ludwig option | Imperial-Spanish points in play | |
|---|---|---|---|
| Horse | 250 | 280 | 240 |
| Foot | 90 | 120 | 165 |
| Artillery | 75 | 75 | 85 |
| Total | 415 | 475 | 490 |
Historical Outcome: A decisive Imperial Spanish victory with a VP differential of –135.
LOSSES: Swedish: 285; Imperial-Spanish: 150
RESULT: 150–285 = –135
Scenario 3: September 6th (Late Morning Start) — The Historical Assault
Start Time: 10:00 AM
Maximum Duration: 21 turns (through the end of the 4:40 turn)
Swedish Set Up: See the charts above for setup hexes.
- Left Cavalry Wing Orders: Charge
- Left Infantry Wing Orders: Make Ready
- Right Cavalry Wing Orders: Make Ready
- Right Center Wing Orders: Charge
Imperial/Spanish Setup: All Wing Commanders are under Receive Charge orders. See the charts above for setup hexes.
Victory Conditions:
| VPs | Type of Victory |
|---|---|
| 100+ | Decisive Swedish Victory |
| 60–99 | Marginal Swedish Victory |
| 40–59 | Draw |
| 20–39 | Marginal Imperial/Spanish Victory |
| ≤ 19 | Decisive Imperial/Spanish Victory |
Historical Outcome: Same as Scenario 2.
Wittstock — October 4 (September 24), 1636
Northwest of Berlin
After the death of Gustav Adolph, the command of the Swedish forces fell to General Gustav Horn and Duke Bernhard of Saxe-Weimar. In 1634, the disaster at Nördlingen saw Horn fall into enemy hands and the veteran core of the Swedish infantry destroyed. As a result of the defeat, the Swedish position in Germany became tenuous. Saxony defected to the Emperor and several other German princes threw in the towel. Of Gustav Adolph's pupils, only Banér and Torstensson remained. The large, hard-drinking, and colorful Johan Banér took the helm and rushed to rebuild the army, now with the aid of the French, English and Scots.
While Sweden's political and military fortunes needed a victory, the campaign of 1636 did not start well for the Swedes. By this time, the Saxon army, under Elector Johann Georg, had combined with the Imperial army, now under General Hatzfeld. Banér wished to push into Saxony, but Hatzfeld set the pace by pushing north to take back the Swedish controlled towns one by one. After a long siege, Magdeburg fell into Imperial hands. The Swedes languished north of the city at Werben as they felt too weak to relieve it. Both armies marched and counter-marched in an attempt to seek an advantage over the other. The combined Imperial-Saxon army forced Banér into Mecklenburg, denying Saxony to the Swedes. As the season wore on the pressure to give battle to secure winter quarters increased. Banér marched around the Imperial-Saxon forces and approached them from the south, causing them to dig in on high ground astride the road running from Dosse to Wittstock.
Banér decided to give battle. What started as a typical course of events leading to a major engagement, changed when Banér divided his already smaller force to attempt a double envelopment. Banér had noted that the Imperial position's flanks were open and counted on the woods to his front to help hide his deployments. The audacity of his plan is notable for his day and age, as not even Gustav Adolph had ever attempted such a maneuver.
On the Imperial left was a hill, the Scharfenberg, or Vineyard Hill. The main Swedish force with Torstensson, Banér, and Leslie struck toward this position, and Torstensson with 17 squadrons of cavalry seized the hill unopposed. This turned the Imperial position and a desperate battle for the control of Vineyard Hill ensued. Hatzfeld launched his entire cavalry force against the hill, and their greater numbers forced the Swedes back.
Unfortunately, the Swedish reserve and the second pincer where both late getting into position. King, who was leading the second column, had a long, circuitous route to cover (about 7 miles) to gain the open Imperial right, while Vitzthum, commanding the Reserve, was just slow in moving. Heroic action by Leslie and the Scots bought time for Vitzthum and King's arrival near the end of the day. King's force was not large but the Imperial-Saxon army was exhausted, and when King appeared in their rear, they broke. The victorious Swedes pursued hotly.
The Imperial-Saxon army lost all 33 of their guns, and had over 5,000 men killed, wounded, and taken prisoner. The Swedes and their allies suffered 3,133 killed and wounded, with some regiments loosing of 60% of their strength. Wittstock was a major reversal of flagging Swedish fortunes and in its tactical brilliance puts it in the annals of great victories by outnumbered forces, such as Cannae.
Start Time: 3:00 PM
Maximum Duration: 12 turns (through the end of the 6:40 turn, nightfall)
Historical Starting Orders:
- Swedes: Make Ready
- Imperials: Receive Charge
Special Rules:
- All slopes hexsides are steep for purposes of 10.9.3.
- Treat any marsh hex containing a river as a river hex (i.e., impassible).
Swedish Set Up
ARMY COMMANDER: Fältm Banér (–2)
Vanguard Cavalry Wing — WING COMMANDER: Gen Torstensson (–2)
These units have a Wing Designation of "R."
| Army | Unit | Ratings | Type | Historical Notes | Setup |
|---|---|---|---|---|---|
| Swed. | Svenska | 4-7 | Cuir. | Upplands under Gadau, Östgöta under Klingspor | 1905 |
| Swed. | Bjelke | 2 x 3-7 | Cuir. | Finns - åboländare | 2006, 2106 |
| Swed. | Wittenberg | 2 x 3-8 | Cuir. | Finns - åboländare | 2207, 2307 |
| Swed. | Wachtmeister | 2 x 3-7 | Cuir. | Commanded by Hans Wachtmeister | 2408, 2508 |
Center Infantry Wing — WING COMMANDER: FM Leslie (–1)
(Served the Dutch and Swedes for nearly 30 years, then returned to Scotland and was created Lord Leven as a bribe attempt by Charles I. It didn't work and he led the Covenanter army against England—see the Marston Moor scenario in This Accursed Civil War.)
| Army | Unit | Ratings | Type | Historical Notes | Setup |
|---|---|---|---|---|---|
| Swed. | Svenska | 2 Hex, 9-8 | HI Bde w/Arty | Drake-Ermes-Sal. Adam 892. Swedish Brigade - Kronobergs, Jönköpings, finnar; took 50-60% Casualties | 2605-2504 |
| Swed. | Scots | 2 Hex, 8-8 | HI Bde w/Arty | Lindsey-Kunigam-Karr 800. Scots Brigade took 50-60% Casualties | 2806-2705 |
| Swed. | Gamla Blåa | 2 Hex, 8-8 | HI Bde w/Arty | Abel Moda-Banér 856 | 3007-2906 |
| Swed. | Goltz | 2 Hex, 9-7 | HI Bde w/Arty |
Vitzthum's Reserve Infantry Wing — WING COMMANDER: GenMaj Vitzthum (0)
| Army | Unit | Ratings | Type | Historical Notes | Setup |
|---|---|---|---|---|---|
| Swed. | Thomasson | 1 Hex, 4-7 | HI Bde | Thomas Thomasson 438 | See below |
| Swed. | Jeschwitzki | 2 Hex, 7-7 | HI Bde | Jeschwitzki-Wrangel-Gun 738 | See below |
| Swed. | Hansson | 2 Hex, 7-7 | HI Bde | Magn. Hansson-Ruthwen-Bengtson 698 | See below |
| Swed. | Linde | 2 Hex, 10-7 | HI Bde | Peter Linde-Herderstein-Kriegbaum-Forbus-Banér-Strahlendorf 1012 |
Flanking Cavalry Wing — WING COMMANDER: GenLt King (–1)
(James King, later Lord Eythin, was also at Marston Moor opposite Leslie, then Lord Leven.)
REPLACEMENT: GenMaj Stålhandske (–1)
These units have a Wing Designation of "L."
| Army | Unit | Ratings | Type | Historical Notes | Setup |
|---|---|---|---|---|---|
| Swed. | King | 3-7 | Cuir. | See below | |
| Swed. | Hoditz | 3-7 | Cuir. | See below | |
| Swed. | Birckenfeld | 3-7 | Cuir. | Incl. Glaubitz regiment | See below |
| Swed. | Beckerman | 4-7 | Cuir. | Incl. Boj / Boy Regiment | See below |
Other:
| Army | Unit | Ratings | Type | Historical Notes | Setup |
|---|---|---|---|---|---|
| Swed. | Dragoons | 2 x 2-6 | LI | Stacked with or adjacent to any unit in either Cavalry Wing |
Entry of Reserve Infantry and Flanking Cavalry Wings: At the end of any turn starting with turn 4 that either of these Wings is not yet on the map, roll once for each and cross-reference the roll by the current turn on the table below. If the roll is within the range the Wing enters the next turn.
| Turn | Roll to enter |
|---|---|
| 4 | 0 |
| 5 | 0–1 |
| 6 | 0–3 |
| 7 | 0–5 |
| 8 | 0–7 |
| 9 | Automatic |
The Flanking Cavalry Wing under King enters anywhere on the west map edge. The Reserve Infantry Wing under Vitzthum enters anywhere on the south map edge, and may enter in Open Order if desired.
Imperial/Saxon Set Up
ARMY COMMANDER: The Imperial/Saxon player has no AC at this battle.
The exact positioning of the regiments in the lines of battle is not known so the Imperial/Saxon player may place each unit within the lines as indicated. Note that the "Left" Cavalry Wing starts on the right of the line, and the "Right" Cavalry Wing on the left. When the Imperial forces realized that their left flank was in danger of being turned, they moved the Wing that started on their right around behind the rest of their army to form a new left wing. Sources tend to refer to units in this later position, which is used here, too.
Left Cavalry Wing — WING COMMANDER: Gen. Melchior, Graf von Hatzfeld (–1). REPLACEMENT: GenWM. Winz (0)
| Army | Unit | Ratings | Type | Historical Notes | Setup |
|---|---|---|---|---|---|
| IMA | Wiltberg | 4-7 | Cuir. | Setup in two lines: 6 cavalry units in each line. | |
| IMA | Berfinger | 4-6 | Cuir. | ||
| IMA | Schenck | 3-6 | Cuir. | ||
| IMA | Hatzfeld | 4-7 | Cuir. |
Center Infantry Wing — WING COMMANDER: GenWM. Morzin (0)
(aka GenWM Rudolf v Marazzino, in Swedish sources Marazini. An Italian Condottierri who adopted the Germanized name Morzin)
REPLACEMENT: GenWM Vitzthum (0) (Actually 2 different Vitzthums in Imperial service, as well as one in Swedish service, all unrelated. aka Vitzthumb)
| Army | Unit | Ratings | Type | Historical Notes | Setup |
|---|---|---|---|---|---|
| IMA | Morzin | 4-7 | Cuir. | Deployed in two lines. | |
| IMA | Winz | 4-7 | Cuir. | 1st Line: 3431, 3429, 3427, 3424 | |
| IMA | Marradas | 4-7 | Cuir. | Spanish Cuirassiers | 2nd Line: 3233, 3231, 3229, 3227, 3225 |
| IMA | Zaradetzky | A4-6 | Arq. |
Right Cavalry Wing — WING COMMANDER: K. Johann Georg (0). REPLACEMENT: Oberst (0)
(Sources vary on who backed up the Elector Johann Georg, Dr. Dost of the Wittstock Musuem names von Daun [aka von Dahlin in Swedish sources], though Karl Bose and Taube both fielded large contingents and most likely were senior to von Daun).
| Army | Unit | Ratings | Type | Historical Notes | Setup |
|---|---|---|---|---|---|
| Sax. | Gersdorf | 3-6 | Cuir. | Deploy in two lines. Eight cavalry units in first line: 3221, 3120, 3020, 2920, 2820, 2719, 2619, 2518 | |
| Sax. | Schleinitz | 3-6 | Cuir. | ||
| Sax. | GenLt's | 4-7 | Cuir. | Seven cavalry units in second line: 3223, 3122, 3022, 2822, 2721, 2621, 2520 | |
| Sax. | Alt-Taube | 4-7 | Cuir. |
Victory Conditions:
| VPs | Type of Victory |
|---|---|
| 220+ | Swedish Decisive Victory |
| 120–219 | Swedish Marginal Victory |
| 100–119 | Draw |
| 60–99 | Imperial Marginal Victory |
| ≤ 59 | Imperial Decisive Victory |
Basic Victory Levels
| Swedish points in play | Imperial-Saxon points in play | |
|---|---|---|
| Horse | 330 | 380 |
| Foot | 85 | 130 |
| Artillery | 60 | 50 |
| Total | 475 | 560 |
Historical Outcome: A decisive Swedish victory with a VP differential of 220.
LOSSES: Swedish = 150; Imperial-Saxon Losses = 370
RESULT: 370 – 150 = 220
Second Breitenfeld (aka Leipzig) — November 2 (October 23), 1642
Just North of Leipzig in Eastern Germany
After Banér's death from a dissolute life in 1641, Lennart Torstensson took command of the Swedish army. He had returned to Sweden due to ill health (gout exacerbated by the Spartan conditions of being on campaign), but the condition of the army at Banér's death compelled his immediate recall and promotion to Field Marshal in June of 1641. He had to deal with some serious discipline and morale problems and get the army back into action.
Torstensson's campaign of 1642 threw the Imperial forces on the defensive. General Wrangel had returned to Sweden to raise reinforcements and the army moved down the Oder River and put pressure on several Imperial garrisons. The Imperial army, operating in two columns (one commanded by Piccolomini and the other by Archduke Leopold), sought unsuccessfully to draw Torstensson into a battle. Torstensson changed direction after uniting with Wrangel and Königsmark, crossing the Elbe at Torgau. He laid siege to the critical Imperial stronghold of Leipzig on the October 20. The Imperialist columns moved by forced march to give battle. On the 22nd Torstensson broke camp and spun around to meet the Imperial army on nearly the same ground as first battle of Breitenfeld 11 years before.
The armies arrayed themselves parallel to each other, with cavalry on the left and right and infantry in the center. The Imperial line was longer than the Swedish. The distance separating the lines of just over 2 miles was greater than normal. The lines ran north to south, with the Imperials to the east just south of Seehausen. The Swedes were on the west in front of the villages of Lindenthal and Breitenfeld. The Imperials had the longer line, and tried to turn the Swedish northern flank by moving obliquely to the north. The Swedes also moved to the north in an attempt to deny the Imperials their flank.
A stream, the Rietzsche, cut across the southern third of the field. The Swedish right with Torstensson and Wittenberg moved ahead of the main line and crossed the Rietzsche before the Imperials could defend its banks. As the longer Imperial line began to turn the northern flank, the Swedes struck in the south. The Imperial left wing cavalry under General Feldzeugmeister Borneval had not fully deployed and was swept away by the charge. In the center the Swedish infantry attacked into the face of one of the heaviest concentrations of artillery seen in the war. The Swedish infantry suffered very heavy casualties and a desperate battle was joined with pikes and musket butts.
Under pressure from the Imperial right under General Feldzeugmeister Hanibal Gonzaga, the Swedish left wing was at the point of collapse. After its commander, General Major Erich-Slange, was killed his replacement, General Liljehök, led a counter charge but he, too, fell. Quick action by Königsmark and Pfalzgreven Karl Gustav prevented a general collapse. Liljehök died in Karl Gustav's arms.
After dispatching Borneval and regaining order, Torstensson and Wrangel fell on the flank and rear of the Imperial infantry. Archduke Leopold and Piccolomini led their regiments in a furious rearguard action that allowed only precious few to escape. Besides losing all their guns and baggage, the Imperial lost about 5,000 killed and wounded and about as many captured. The Swedes suffered about 3,000 casualties.
Wedgewood's famous quote, "The Imperials were hoping for another Nördlingen, but instead got another Breitenfeld," says it all.
Both Leopold and Piccolomini left Austrian service and the army (what was left) changed commanders. The decisive defeat was compounded by the surrender of Leipzig not long after. The Swedes could have forced an earlier peace had not the Danes renewed their conflict with the Swedes, forcing Torstensson to switch to another front and lose much of what he had gained. The victory at Rocroi the next year should have brought the war to a close, but it would take another one-two, east-west punch, Zusmarshausen-Lens in 1648 to close the deal.
Start Time: 1:00 PM
Maximum Duration: 12 turns (through the end of the 4:40 turn)
Historical Starting Orders:
Imperials: Right: Charge. Center: Receive Charge. Left and Reserve: Make Ready.
Swedes: Center and Right: Charge. Left: Receive Charge. Reserve: Make Ready.
Special Rule: All slopes hexsides are gentle for purposes of 10.9.3.
Swedish Set Up
ARMY COMMANDER: Fältm. Torstensson (–2)
Right Cavalry Wing — WING COMMANDER: GenMaj. Wittenberg (–1; commanded 1st line). REPLACEMENT: GenMaj. Stålhandske (–1; commanded 2nd line)
1st Line:
| Army | Unit | Ratings | Type | Historical Notes | Setup |
|---|---|---|---|---|---|
| Swed. | Fältm. Livregt | 2 x 3-8 | Cuir. | 2434, 2435 | |
| Swed. | Landgraf | 2 x 3-7 | Cuir. | Landgraf Johann von Hesse-Darmstadt | 2432, 2433 |
| Swed. | Duwall | 2 x 3-7 | Cuir. | aka de Wahl | 2330, 2331 |
| Swed. | Höking | 2 x 3-7 | Cuir. | 2328, 2329 |
2nd Line:
| Army | Unit | Ratings | Type | Historical Notes | Setup |
|---|---|---|---|---|---|
| Swed. | Dörfflinger | 2 x 3-7 | Cuir. | 2233, 2234 | |
| Swed. | Wittkopff | 3-7 | Cuir. | 2232 | |
| Swed. | Wrangel | 2 x 3-7 | Cuir. | 2130, 2131 | |
| Swed. | Polacker | 3-7 | Cuir. | Poles | 2030 |
Center Infantry Wing — WING COMMANDER: GenMaj. Liljehök (0; commanded 1st line)
(Liljehök is the archaic spelling; the modern spelling is Lilliehöök; KIA. He may have functioned as a figurehead with Mortaigne and Wrangel, the more experienced officers handling the details.)
REPLACEMENTS: GenMaj. Mortaigne (–1; commanded 2nd line)
1st Line:
| Army | Unit | Ratings | Type | Historical Notes | Setup |
|---|---|---|---|---|---|
| Swed. | Wrangel | 2 hex, 10-8 | HI Bde w/Arty | 1822-1823 | |
| Swed. | Mortaigne | 2 hex, 10-8 | HI Bde w/Arty | 1820-1821 | |
| Swed. | Liljehök | 2 hex, 10-8 | HI Bde w/Arty | 1818-1819 | |
| Swed. | Banér | 2 hex, 10-8 | HI Bde w/Arty | 1816-1817 |
2nd Line:
| Army | Unit | Ratings | Type | Historical Notes | Setup |
|---|---|---|---|---|---|
| Swed. | Lillie | 2 hex, 8-8 | HI Bde | 1622-1623 | |
| Swed. | Schlieben | 2 hex, 8-7 | HI Bde | 1620-1621 | |
| Swed. | Pfuel | 2 hex, 8-7 | HI Bde | 1618-1619 | |
| Swed. | Jeschwitzki | 2 hex, 7-7 | HI Bde | 1616-1617 |
Left Cavalry Wing — WING COMMANDER: GenMaj. Erich Slange (0; commanded 1st line; aka Schlange; KIA). REPLACEMENT: GenMaj. Königsmark (–1; commanded 2nd line)
1st Line:
| Army | Unit | Ratings | Type | Historical Notes | Setup |
|---|---|---|---|---|---|
| Swed. | Stålhandske | 2 x 3-8 | Cuir. | Finns - nyländare | 1814, 1815 |
| Swed. | Wittenberg | 2 x 3-8 | Cuir. | Finns - åboländare | 1813, 1812 |
| Swed. | Cratzenstein | 4-6 | Cuir. | 1811 | |
| Swed. | Douglas | 3-8 | Cuir. | 1810 |
2nd Line:
| Army | Unit | Ratings | Type | Historical Notes | Setup |
|---|---|---|---|---|---|
| Swed. | Tideman | 4-7 | Cuir. | 1613 | |
| Swed. | Liljehök | 3-7 | Cuir. | 1614 |
Reserve Infantry Wing — WING COMMANDER: Palsgreve Karl Gustav (–2). REPLACEMENT: GenMaj. Lillie (–1)
| Army | Unit | Ratings | Type | Historical Notes | Setup |
|---|---|---|---|---|---|
| Swed. | Maul | 2 Hex, 10-6 | HI Bde | 1421-1422 | |
| Swed. | Plettenberg | 2 Hex, 10-6 | HI Bde | 1419-1420 | |
| Swed. | Gamla Blåa | 2 Hex, 8-8 | HI Bde w/Arty | 1417-1418 | |
| Swed. | Composite | 2 x 3-6 | Cuir. | 1219, 1220 |
Other:
| Army | Unit | Ratings | Type | Historical Notes | Setup |
|---|---|---|---|---|---|
| Swed. | Dragoons | 2 x 2-6 | LI | Stacked with or adjacent to any unit in either Cavalry Wing |
Imperial Set Up
ARMY COMMANDER: Archduke Leopold (0). REPLACEMENT: FM. Piccolomini (–2)
Right Cavalry Wing — WING COMMANDER: GenFZM. H. Gonzaga (–1; commanded 1st line). REPLACEMENT: GenWM. Bruay (0; commanded 2nd line)
1st Line:
| Army | Unit | Ratings | Type | Historical Notes | Setup |
|---|---|---|---|---|---|
| IMA | Croats | 3 x A3-6 | Arq. | 2002, 2102, 2203 | |
| IMA | Jung-Piccolomini | 3-7 | Cuir. | 2405 | |
| IMA | Sperreuter | 4-6 | Cuir. | Incl. Curonnada aka Lacorvo | 2506 |
| IMA | Montecuccoli | 4-7 | Cuir. | 2507 |
2nd Line:
| Army | Unit | Ratings | Type | Historical Notes | Setup |
|---|---|---|---|---|---|
| IMA | Borneval | 4-6 | Cuir. | Incl. Münster regiment | 2706 |
| IMA | Nassau | 4-7 | Cuir. | aka Hanau | 2707 |
| IMA | Capaun | 4-6 | Cuir. | aka Kapaun | 2708 |
| IMA | Lüttich | 4-6 | Cuir. | Incl. Ramsdorf regiment | 2709 |
Center Infantry Wing — WING COMMANDER: GenFZM. de Suys (0). REPLACEMENTS: GenWM. Fernamond (–1) and then GenWM. Enckevoort (–1)
Note: Line Commanders listed below are for historical reference only, and are not used in play (unless as a replacement for de Suys).
Note: There is some disagreement in sources what regiments made up which lines, but we have general agreement of the regiments present. This is based on Mankell's map of the battle.
1st Line, commanded by GenWM Webel and GenWM C. (Camillo) Gonzaga:
| Army | Unit | Ratings | Type | Historical Notes | Setup |
|---|---|---|---|---|---|
| IMA | Wolckenstein / Ranfft | 2 Hex, 10-6 | HI Bde w/Arty | Ranfft at 2nd Breitenfeld | 2512-2513 |
| IMA | Gonzaga | 2 Hex, 10-7 | HI Bde w/Arty | GenWM C. (Camillo) Gonzaga | 2514-2515 |
| IMA | de Suys | 2 Hex, 10-6 | HI Bde w/Arty | 2516-2517 | |
| IMA | Bourre / Zaradetsky | 2 Hex, 10-6 | HI Bde w/Arty | GenWM. Don Felix de Zuniga y Zaradetsky |
2nd Line, commanded by GenWM. Enkevoort and GenWM. Fernamond:
| Army | Unit | Ratings | Type | Historical Notes | Setup |
|---|---|---|---|---|---|
| IMA | Wachenheim | 2 Hex, 10-6 | HI Bde | 2713-2714 | |
| IMA | Fernamond | 2 Hex, 10-7 | HI Bde | 2715-2716 | |
| IMA | Lifregemente | 2 Hex, 10-7 | HI Bde | 2717-2718 | |
| IMA | Moncada | 2 Hex, 10-6 | HI Bde | 2719-2720 |
3rd Line—All Cavalry, commanded by GenWM. de Soys:
| Army | Unit | Ratings | Type | Historical Notes | Setup |
|---|---|---|---|---|---|
| IMA | Garde | 4-8 | Cuir. | Piccolomini and Archduke Leopolds Livgarde troops | 2919 |
| IMA | Giesenburg | 3-6 | Cuir. | 2920 | |
| IMA | Nicola | 3-7 | Cuir. | Incl. Isenburg's regiment | 3119 |
| IMA | Desfours | 4-7 | Cuir. | 3120 |
Left Cavalry Wing — WING COMMANDER: GenFM. Borneval (0; commanded 1st line). REPLACEMENT: GenWM. Punchheim (0; commanded 2nd line) (aka Buchhain, Buchheimb, or Buchhain)
Note: The low hills (2627, 2632, 2636) and the village of Kleinwiederitzsch screened the advance of the Swedish right from observation. Wittenberg and Torstensson fell upon the Imperial left wing before it could fully deploy. All units historically of this Wing should start Formation Shaken. You may optionally wish to have them start in normal formation for greater play balance.
1st Line, commanded by GenWM. de Soys:
| Army | Unit | Ratings | Type | Historical Notes | Setup |
|---|---|---|---|---|---|
| IMA | Alt-Heister | 2 x 3-6 | Cuir. | 2824, 2924 | |
| IMA | Krafft | 3-6 | Cuir. | 3025 | |
| IMA | Winz | 4-7 | Cuir. | Incl. Vorhauer regiment | 3026 |
| IMA | Gonzaga | 2 x 3-7 | Cuir. | 3126, 3127 |
2nd Line:
| Army | Unit | Ratings | Type | Historical Notes | Setup |
|---|---|---|---|---|---|
| Sax. | Schleinitz | 3-6 | Cuir. | 3123 | |
| Sax. | Gall | 4-6 | Cuir. | 3224 | |
| Sax. | Kracht | 3-6 | Cuir. | 3225 | |
| Sax. | Warlowski | 4-6 | Cuir. | 3325 | |
| Sax. |
Imperial Option: Make the third line of the Center Wing (4 cavalry units) a separate Wing under Fältm. Piccolomini (–2). Historically, these units performed as a separate rear guard, but still managed to lose all their guns and infantry.
Victory Conditions:
| VPs | Type of Victory |
|---|---|
| 190+ | Swedish Decisive Victory |
| 150–189 | Swedish Marginal Victory |
| 120–149 | Draw |
| 80–119 | Imperial Marginal Victory |
| ≤ 79 | Imperial Decisive Victory |
Basic Victory Levels
| Swedish points in play | Imperial-Saxon points in play | |
|---|---|---|
| Horse | 290 | 380 |
| Foot | 110 | 110 |
| Artillery | 60 | 70 |
| Total | 460 | 560 |
Historical Outcome: A decisive Swedish victory with VP differential of 190.
LOSSES: Swedish = 190; Imperial-Saxon = 380
RESULT: 380 – 190 = 190
Jankau (aka Jankowitz or Jankov) — March 6 (February 24), 1645
Southeast of Praha (Prague), The Czech Republic (Bohemia)
Piccolomini and Archduke Leopold quit Germany after the defeat at Second Breitenfeld, and the Emperor placed Gallas in command. Given a respite by Denmark and Sweden going to war, Gallas wasted the Imperial army in a fruitless campaign as Torstensson outfought the Danes and outmaneuvered the hapless Imperial army in a hard marching drive from Torgau to Holstein.
While peace negotiations dragged on in Münster and Osnabrück, Torstensson, weary of waiting (or, more likely, unable to continue to support his army in his encampment on the Elbe), launched a winter campaign. The Swedish army had dwindled to little more than 16,000 troops. Moving south through Saxony, he crossed into Bohemia at Přísečnice on the 25th of January, directly threatening the heart of Hapsburg lands. The Emperor, Ferdinand III, who was in Prague at the time, called Melchior, Count Hatzfeld, back into service to command the army. In addition, he called on the Saxons and Bavarians to help check Torstensson's drive on Prague.
The Imperial army came together between 21 and 23, February. This Allied army sought to contain the threat and prevent the Swedes from devastating southern Bohemia, Moravia and Austria. The key was to prevent their crossing the Vltava River. The Swedes outmaneuvered Hatzfeld by leaving Kadaň on February 18th, moving around Pilsen (Plzeň) to Horaždovice. Hatzfeld did not seek to engage the Swedes at this point, thinking that they might be retreating. The Emperor continued to press for an engagement. The Swedes moved up the Otava River, then crossed on the 2nd of March with the intention of linking up with the Swedish garrison at Olomouc, a holdout from the 1642 campaign. Hatzfeld figured out Torstensson's intention, and crossed the Vltava at Podolí and the two armies met at the small village of Jankau (Jankov), about 35 miles southeast of Prague.
Hatzfeld occupied a terraced hill known as the Habrovka. Col. Sporck of the Bavarian contingent warned of the Swedes' approach, and the Swedes occupied the opposite ridge, Chrastak. Hatzfeld arrayed the army with Götz on the left with the Imperial cavalry. De Suys was in the center with the Imperial and Bavarian infantry. On the right was the Bavarian cavalry under De Werth. Torstensson, despite his ill health, sometimes on horseback, sometimes in a litter, moved about the army and prepared the army for battle. He kept the army in motion through the night, especially the artillery, to cause confusion among the enemy. Several times the movement caused "Buttasella" (Boots and Saddles!) to be sounded.
Torstensson had spied a commanding piece of ground on his right, crowned with a mountain chapel, that was advantageous terrain. Early on the 6th, the Swedish right captured the mountain chapel unopposed and emplaced artillery there. Götz saw his failure to occupy the high ground and launched an immediate attack. Snarled in marshy ground and thickets, Götz's attack failed, the whole of his wing was lost, and he was killed. The Imperial army then moved east forming a new line anchored on the town of Jankau on a hill opposite the Habrovka. The Swedes swept over the Habrovka and formed a line on it facing the Imperials.
As the Swedes began forming to attack the hill, the Saxon and Bavarian cavalry attacked and nearly turned the tide. Some did break through and ravaged the Swedish camp, capturing Torstensson's wife and carrying her to Hatzfeld's tent. With the cavalry actions concluded, the Swedes formed up their infantry and stormed the hill. The Imperial and Bavarian infantry were crushed and Hatzfeld captured. On hearing the news, the Emperor fled Prague in fear of his safety. Torstensson had also captured General Mercy and some 2,000 men, over 100 standards, and all the artillery and baggage. Some 4,000 Imperials were dead and about 2,000 Swedes were killed.
Without an army to oppose him, Torstensson campaigned in Moravia and Lower Austria, but he did not have the strength to take Vienna or Brno. Jankau, coupled with the action of the French, helped convince Bavaria and Saxony to sue for peace, weakening the Emperor's bargaining position. The Hapsburgs had deep pockets, and Jankau served to wear down their resources and help bring an end to this brutal war. The victory also allowed Torstensson to return home in good favor and nurse his poor health, ending the command of the last of Gustav Adolf's pupils. Mercy was ransomed in time to return to Bavaria and be killed at Allerheim in August at the hand of the French Generals d'Enghien and Turenne.
Special Rules for all Scenarios:
- The ground was frozen which helped the mobility of the guns significantly. When limbered guns may move 4 movement points instead of 2.
- All slopes hexsides are steep for purposes of 10.9.3.
- If a hex contains any part of a pond, it is considered a pond hex. For instance, hexes 2522 and 2523 are pond hexes.
- Note that all streams on this map flow through the middle of the hexes. Use the stream row under the Hex Terrain section of the Terrain Effects Chart for this battle.
Swedish Set Up
ARMY COMMANDER: Fältm. L. Torstensson (–2)
Right Cavalry Wing — WING COMMANDER: GenMaj. Wittenberg (–1, commanded 1st line). REPLACEMENT: GenMaj. Goldstein (–1, commanded 2nd line)
1st Line:
| Army | Unit | Ratings | Type | Historical Notes | Scen. 1 | Scen. 2 |
|---|---|---|---|---|---|---|
| Swed. | Fältm Livreg | 2 x 3-8 | Cuir. | 5213, 5113 | 2600, 2601 | |
| Swed. | Wittenberg | 3-8 | Cuir. | 5014 | 2602 | |
| Swed. | livländare | 3-8 | Cuir. | Öfv Reinhold Jordan commanding | 4914 | 2603 |
| Swed. | kurländare |
2nd Line:
| Army | Unit | Ratings | Type | Historical Notes | Scen. 1 | Scen. 2 |
|---|---|---|---|---|---|---|
| Swed. | Dörfflinger | 3-7 | Cuir. | 5016 | 2804 | |
| Swed. | Goldstein | 3-8 | Cuir. | 4916 | 2805 | |
| Swed. | Lillie | 4-7 | Cuir. | Incl. Galbrecht Regt | 4817 | 2806 |
| Swed. | Rochow | 4-6 |
Center Infantry Wing — WING COMMANDER: GenMaj. Mortaigne (–1)
1st Line:
| Army | Unit | Ratings | Type | Historical Notes | Scen. 2 | Scen. 3 |
|---|---|---|---|---|---|---|
| Swed. | Svenska | 1 Hex, 5-8 | HI Bde w/Arty | Västgötar (Swedes) - Björneborgare (Finns) | 5218 | 2608 |
| Swed. | Gamla Blåa | 2 Hex, 8-8 | HI Bde w/Arty | 5118-5019 | 2609-2610 | |
| Swed. | Wrangel | 2 Hex, 8-8 | HI Bde w/Arty | and Linde | 4919-4820 | 2611-2612 |
| Swed. | Mortaigne |
Artillery:
| Army | Unit | Ratings | Type | Historical Notes | Scen. 1 | Scen. 2 |
|---|---|---|---|---|---|---|
| Swed. | Artillery batteries | 4 x 12-24lb | Arty | 4918, 4819, 4719, 4620 limbered | 2811, 2813, 2815, 2817 |
Left Cavalry Wing — WING COMMANDER: GenMaj. Douglas (–1)
1st Line:
| Army | Unit | Ratings | Type | Historical Notes | Scen. 1 | Scen. 2 |
|---|---|---|---|---|---|---|
| Swed. | Tideman | 4-7 | Cuir. | 5024 | 2814 | |
| Swed. | d'Avaugours | 3-7 | Cuir. | 4924 | 2815 | |
| Swed. | Douglas | 3-8 | Cuir. | 4825 | 2816 | |
| Swed. | Horn | 3-8 |
Historical note: There were two Landgrafs, one for Hesse-Darmstadt and one for Hesse-Cassel, and the two feuded through out the 30YW. The alliance of Hesse-Darmstadt with the Swedes kept Hesse-Cassel neutral. Hesse-Cassel joined with the French in 1645 when the Landgravine Amelie came to the assistance of her nephew, Vicomte de Turenne, after his reversal at Mergentheim in 1645.
2nd Line:
| Army | Unit | Ratings | Type | Historical Notes | Scen. 1 | Scen. 2 |
|---|---|---|---|---|---|---|
| Swed. | Reichart | 4-6 | Cuir. | 5125 | 3014 | |
| Swed. | Dannenberg | 3-6 | Cuir. | 5026 | 3015 | |
| Swed. | Riesengrün | 4-6 | Cuir. | Incl. Buttler "Dreisbuttler" Regt | 4926 | 3016 |
| Swed. | Reuschel |
Other:
| Army | Unit | Ratings | Type | Historical Notes | Scen. 1 and 2 |
|---|---|---|---|---|---|
| Swed. | Dragoons | 2 x 2-6 | LI | Stacked with or adjacent to any unit in either Cavalry Wing |
Imperial Set Up
ARMY COMMANDER: Gen. Hatzfeld (–1)
Left Infantry/Cavalry Wing — WING COMMANDER: FM. v Götz (0; commanded 1st line). REPLACEMENT: GenWM. Bruay (0; commanded 2nd line)
1st Line:
| Army | Unit | Ratings | Type | Historical Notes | Scen. 1 | Scen. 2 |
|---|---|---|---|---|---|---|
| IMA | Pompeji | 3-7 | Cuir. | 3106 | 1918 | |
| IMA | Alt-Piccolomini | 2 x 3-7 | Cuir. | 3206, 3305 | 1920, 1919 | |
| IMA | Jung-Piccolomini | 2 x 3-7 | Cuir. | 3405, 3504 | 2121, 1921 | |
| IMA | Hennet |
Note to Fernamond: Though technically part of the center, this brigade was detached to assist in Götz's attack. It attacked up the draw hoping to gain surprise by appearing on the flank of the Swedes already engaged south of Zwistow. The Swedish foot stopped them trying to emerge from the draw around 3811-3812. Remember, because Fernamond is attached to this Wing for scenario 1, the Wing is considered an Infantry, not Cavalry, Wing for that scenario.
2nd Line:
| Army | Unit | Ratings | Type | Historical Notes | Scen. 1 | Scen. 2 |
|---|---|---|---|---|---|---|
| IMA | Salm | 4-6 | Cuir. | 3204 | 1720 | |
| IMA | Gonzaga | 2 x 3-7 | Cuir. | 3303, 3403 | 1718, 1719 | |
| IMA | Bruay | 4-7 | Cuir. | 3502 | 1717 | |
| IMA | Tapp | 4-6 |
Center Infantry Wing — WING COMMANDER: GenFZM. de Suys (0). REPLACEMENT: GenWM. Don Felix de Zuniga y Zaradetzky (0)
(Note the command structure for the center was very convoluted as forces from three armies were posted there. Don Felix held a lesser rank than the Bavarian Ruischenberg, but the numbers gave a greater role to the Imperial officers)
1st Line:
| Army | Unit | Ratings | Type | Historical Notes | Scen. 1 | Scen. 2 |
|---|---|---|---|---|---|---|
| CL | Holtz | 1 Hex, 5-7 | HI Bde | 2208 | 2117 | |
| CL | Ruischenberg | 1 Hex, 5-7 | HI Bde | 2307 | 2116 | |
| CL | Mercy | 1 Hex, 5-8 | HI Bde | 2407 | 2115 | |
| IMA | Colloredo | 2 Hex, 10-7 |
Note: Most sources show 7 Bavarian regiments of Foot: Mercy, Ruischenberg, Gold, Holtz, Winterscheid, Fugger and Gil de Haes. The Bavarian archives only show 6 regiments: the ones preceding less Gil de Haes, which takes them down to just over 500 men per battalion. On 2 Jan. 1645 Mercy stipulated the following troops for service in Bohemia: Foot: Mercy, 251 men; Holtz, 308; Fugger, 231; Rauschenberg, 223; Winterscheidt, 232; Gold, 321; for a total of 1566 infantry from 6 regts. Ruischenberg would command them. They apparently took quite a severe beating at Jankau. Only 500 of them got back in time for Mergentheim in May.
Reserve—All Saxon Cavalry, commanded by Oberst Kahlenberg (not a separate Wing):
| Army | Unit | Ratings | Type | Historical Notes | Scen. 1 | Scen. 2 |
|---|---|---|---|---|---|---|
| Sax. | Hanau | 3-6 | Cuir. | 2206 | 1911 | |
| Sax. | Kahlenberg | 3-6 | Cuir. | 2305 | 1912 | |
| Sax. | Schleinitz | 3-6 | Cuir. | 2405 | 1913 | |
| Sax. | Rucker | 3-6 |
Right Cavalry Wing — WING COMMANDER: Gen. de Werth (–2). REPLACEMENTS: FMLt. v Mercy (–2)
1st Line (Bavarians):
| Army | Unit | Ratings | Type | Historical Notes | Scen. 1 | Scen. 2 |
|---|---|---|---|---|---|---|
| CL | Sporck | A3-7 | Arq. | Sporck's half regiment of 250 men was destroyed and Obr. Sporck captured; 1 squadron of arquebusiers | 1409 | 2109 |
| CL | de Werth | 3 x A3-8 | Arq. | de Werth's very large regiment of 920, with other detachments not present; 3 squadrons of arquebusiers | 1508, 1608, 1707 | 2108, 2107, 2106 |
| CL | Gayling | 4-7 | Cuir. | 372; 2 squadrons of cuirassiers | 1807 | 2105 |
Note: The Bavarian horse here would fight two more major engagements in 1645: Mergentheim and Allerheim. They had fought at Freiburg the previous year. The numbers above were taken from a late January muster. Many sources show Geleen with the Bavarian contingent, but this is a result of a general confusion between the names Gayling and Geleen. Geleen would not enter Bavarian service for another year. At the time of Jankau, Geleen was in Imperial service as a GenFZM in Westphalia and also had a regiment of foot.
1st Line Reserve (Imperial):
| Army | Unit | Ratings | Type | Historical Notes | Scen. 1 | Scen. 2 |
|---|---|---|---|---|---|---|
| IMA | Trauditsch | 4-6 | Cuir. | 1904 | 1902 | |
| IMA | Pompeji | 3-7 | Cuir. | 2004 | 1903 |
2nd Line (Imperial):
| Army | Unit | Ratings | Type | Historical Notes | Scen. 1 | Scen. 2 |
|---|---|---|---|---|---|---|
| IMA | Hatzfeld | 4-7 | Cuir. | 1604 | 1705 | |
| IMA | Beck | 4-6 | Cuir. | 1703 | 1704 | |
| IMA | Waldeck | 4-6 | Cuir. | 1803 | 1703 | |
| IMA | Nassau | 4-7 |
Other:
| Army | Unit | Ratings | Type | Historical Notes | Scen. 1 and 2 |
|---|---|---|---|---|---|
| CL | Dragoons | 2 x 2-6 | LI | Still called Wolff's regiment, though Wolff had been killed. Now under the command of Creutz, the regiment would soon be called after its new commander. | Stacked with or adjacent to any unit in the Right Wing |
| IMA | Dragoons | 2 x 2-6 | LI | Stacked with or adjacent to any unit in the Left Wing |
Scenario 1: Fight for the Mountain Chapel
Start Time: 8:00 AM
Maximum Duration: 15 turns (through the end of the 12:40 turn)
Historical Starting Orders: Swedish: Make Ready. Imperials: Make Ready.
Scenario 1 Victory Conditions:
| VPs | Type of Victory |
|---|---|
| 80+ | Swedish Decisive Victory |
| 60–79 | Swedish Marginal Victory |
| 50–59 | Draw |
| 30–49 | Imperial Marginal Victory |
| ≤ 29 | Imperial Decisive Victory |
Sudden Victory: The Imperials win a victory and the scenario automatically ends if at the end of any turn the Imperials have a heavy infantry or cavalry unit occupying the mountain chapel (hex 4320).
Historical Outcome: The Imperial left attacked through Zwistow and up the draw 4007 to 3812. Both attacks were repulsed with heavy losses.
Basic Victory Levels
| Swedish points in play | Imperial-Saxon points in play | |
|---|---|---|
| Horse | 280 | 310 |
| Foot | 75 | 60 |
| Artillery | 60 | 20 |
| Total | 415 | 390 |
Historical Outcome: A marginal Swedish victory with VP differential of 60.
LOSSES: Swedish = 40; Imperial-Saxon = 100
RESULT: 100 – 40 = 60
Note: The morning victory was clear, but marginal in that they had not destroyed the Imperial army and had essentially fought a defensive action.
Scenario 2: Afternoon Assault
Start Time: 3:00 PM
Maximum Duration: 12 turns (through the end of the 6:40 turn.)
Historical Starting Orders: Imperial Wings: Make Ready. Swedish Wings: Make Ready.
The set ups for this scenario are shown in the charts above. In addition, use the following modifications:
Swedish Set Up Changes:
- Remove 12 Strength Points from any non-Dragoon units (player's choice as to which units to take the losses from, and how many from each). Setup per the instructions then remove the strength points and adjust the lines to fill gaps left by any units removed.
- Set up 10 Wagons in hexes in 3109, 3209, 3308, 3408, 3507, 3607, 3706, 3806, 3905, and 3906.
Imperial Set Up Changes:
- FM. Götz was killed in the morning action. GenWM. Bruay is now the Wing Commander for what is listed as the "Left Cavalry Wing" (see next).
- The cavalry wings switched sides during the day. This was due to the losses suffered by the Left Wing in the morning, and to give the fresh, full-strength horse under de Werth more room to maneuver. Thus, the former Left Cavalry Wing, now under GenWM. Bruay, deploys on the Imperial right.
- Remove Fernamond's Infantry unit.
- Remove 20 Strength Points from any non-Dragoon units of the Left Wing (player's choice as to which units to take the losses from, and how many from each). Setup per the instructions then remove the strength points and adjust the lines to fill gaps left by any units removed.
Scenario 2 Victory Conditions:
| VPs | Type of Victory |
|---|---|
| 100+ | Swedish Decisive Victory |
| 60–99 | Swedish Marginal Victory |
| 40–59 | Draw |
| 10–39 | Imperial Marginal Victory |
| ≤9 | Imperial Decisive Victory |
Basic Victory Levels
| Swedish points in play | Imperial-Saxon points in play | |
|---|---|---|
| Horse | 280 | 310 |
| Foot | 75 | 60 |
| Artillery | 60 | 20 |
| Total | 415 | 390 |
Historical Outcome: A decisive Swedish victory with VP differential of 110.
LOSSES: Swedish = 120; Imperial-Saxon = 230
RESULT: 230 – 120 = 110
Scenario 3: Full Battle
Start Time: 8:00 AM
Maximum Duration: 33 turns (through the end of the 6:40 turn)
Historical Starting Orders: Swedish: Make Ready. Imperials: Make Ready.
Swedish Set Up: Same as Scenario 1.
Imperial Set Up: Same as Scenario 1.
Special Rules:
- The battle started early in the morning and lasted all day. If no units are adjacent and no Wings have a Charge order, then either player may declare a Break. A Break is 4 turns and all units on both sides revert to Receive Charge orders automatically. All units on the map are returned to Morale Normal and Formation Normal or Open Order, and Cavalry may reload both pistols. This does not change the effects of Casualty Threshold.
- The Swedish player has 10 wagon units that start off map, and which he may move in this scenario only. The Swedish player must move them on to the map on game turn 3 (the 8:40 turn) from anywhere on the south edge, and attempt to keep them in command of the Center Wing thereafter.
Scenario 3 Victory Conditions:
| VPs | Type of Victory |
|---|---|
| 130+ | Swedish Decisive Victory |
| 100–129 | Swedish Marginal Victory |
| 80–99 | Draw |
| 60–89 | Imperial Marginal Victory |
| ≤ 59 | Imperial Decisive Victory |
Basic Victory Levels
| Swedish points in play | Imperial-Saxon points in play | |
|---|---|---|
| Horse | 280 | 310 |
| Foot | 75 | 60 |
| Artillery | 60 | 20 |
| Total | 415 | 390 |
Historical Outcome: A decisive Swedish victory with VP differential of 140.
LOSSES: Swedish = 160; Imperial-Saxon = 300
RESULT: 300 – 160 = 140
Lion of the North Revision
In 1992, GMT Games published Lion of the North (LotN), a game in the Great Battles of History series on (first) Breitenfeld and Lützen, designed by Richard Berg and Mark Herman. The scale of LotN is identical to that used in the MPBS, so with a few modifications owners of that game can play those two battles using the MPBS rules. This section contains those modifications. If you don't own Lion of the North you can ignore this whole section.
Counters
Make the following changes to the LotN counters.
Unit Types:
| LotN | MPBS |
|---|---|
| HI Heavy Inf | CR Cuirassier |
| TE Heavy Inf | DG Not used |
| LI Light Inf | DR Dragoons |
| HC Cuirassier | Heavy Arty 12 lb |
| LC Arquebusier | Field Arty 4-8 lb |
| LCrt Arquebusier | Regiment Arty Not used |
Unit Values:
- Ignore the Weapon (Color)/Fire Rate number and circle.
- Use the LotN TQ as the MPBS Morale Rating, with the following exceptions:
- Treat the three Swedish cuirassier units with a TQ of 9 as having a Morale Rating of 8.
- Treat any non-Saxon heavy infantry, cuirassier, or arquebusier with a TQ of 5 or less as having a Morale Rating of 6. (That's five Imperialist HI, two Imperialist LC, and one Imperialist CR.)
- Combine all the LotN Unit Strengths into one number and use it as the MPBS Strength Points.
- Use the MPBS Movement Allowances based on unit type.
- For artillery units, ignore the printed Range and use the values on comparable MPBS units for Grazing Range and Maximum Range (4-8 lb: 4-14; 12 lb: 6-17).
- Treat the backs of the LotN non-arty counters as being MPBS Formation Shaken, with the same values as on the front; this means on the back of each counter you must add 1 to the LotN TQ and the MA should be half the MPBS Movement Allowance.
- Treat the backs of the LotN arty counters as MPBS Fired. Ignore the "Captured" and the other values.
- All Swedish Heavy Infantry units are considered to contain regimental artillery.
Leaders:
- Leaders have a Movement Allowance of 8 as in MPBS (except: see the Wallenstein special rule in Lützen, below).
- Ignore all information on the leaders except nationality and name. Treat all leaders as having an MPBS Leadership Rating of 0 except as follows:
| Leader | Rating |
|---|---|
| Gustavus | –2 |
| Stålhandske | –1 |
| H. Bernard (Weimar) | –2 |
| Knyphausen | –1 |
| Anhalt | –1 |
| Piccolomini | –2 |
| Pappenheim | –1 |
| Wallenstein | 0/–2* |
| Tilly | –2 |
| Banér | –2 |
| Horn | –2 |
* = See the Wallenstein special rule in Lützen, below.
Note: Counters for all leaders with the new ratings that are not 0 are included in the SFO countermix.
Charts
Always use the MPBS charts for all purposes with the following additions.
Terrain Effects Chart: Use the MPBS Terrain Effects chart. Terrain features that appear only on the Lion of the North maps have been added to that TEC and are italicized. Treat a LotN Shallow Stream hexside as an MPBS Stream hexside. Slopes on both maps are considered to be gentle for purposes of 10.9.3.
Light Infantry and Cavalry Fire Table: Add to the bottom of the Firer is or has column: +1 Swedish LI at Lützen. Add a note at the bottom: If a Swedish LI at Lützen gets a result of 9 or more, treat the result as 1 casualty + 1 Formation Hit.
Scenario Special Rules
Both Battles:
Fog, Dusk, Dark: As in LotN, the effects of Fog and Dusk are the same. Similarly, the effects of Heavy Fog and Dark are the same.
Fog Effects:
- Any unit that moves more than half its current Movement Allowance incurs a Formation Hit.
- When finding the Range Modifier on the Artillery Range Chart, double the actual distance the artillery is shooting. For instance, if an artillery unit is firing at a range of 5 hexes, use the 10 hex row to find the modifier.
Heavy Fog Effects:
- Any unit that moves at all incurs a Formation Hit. Halve leader movement allowances.
- Artillery units may only fire at adjacent targets, and then consider it as being fire at 2 hexes on the Artillery Range Chart.
Leaders:
- All Wing Commanders must start a scenario stacked with a unit of its Wing.
- Leaders can start with any Orders the players wish. (For historical purposes, the Saxons at Breitenfeld should start with Receive Charge orders.)
Victory Points: Use the Victory Point listing at the beginning of the SFO Playbook.
Breitenfeld:
- Use the set up hexes as listed in the LotN Scenario Booklet, except for the MPBS version of the battle do not deploy any of the regimental artillery units.
- As in LotN, the game starts at 1400, and ends at the end of the 1900 turn. Use the half-hour turns as in LotN.
- One hex heavy infantry units (those with the LotN TE designation) cannot salvo.
Swedes/Saxons:
- The Swedes have 3 wings, consisting of and commanded as follows:
- Left Wing: Includes all units on or east of W2610. Wing is commanded by Horn. (Unstack the two cavalry units in 2610 at the earliest opportunity.)
- Right Wing: Includes all units on or west of W2623. Wing is commanded by Baner.
- The dragoons guarding the baggage trains are not a part of any line, and basically just sit there and defend. Only Gustavus as AC can Rally or Reform them.
- Center: Includes all other units. Wing is commanded by Teuffel (Hepburne is his replacement).
- The Saxons have an additional 3 wings, consisting of and commanded as follows:
- Left Wing: Includes all cavalry units on or east of E2536. Wing is commanded by Bindauf.
- Right Wing: Includes all cavalry units on or west of E2442. Wing is commanded by von Arnim.
- Center Wing: Includes all other units (including the artillery in front of the cavalry wings). Wing is commanded by Johann Georg.
- Torstensson: Add 1 to the Artillery Fire Table roll for any Swedish artillery unit stacked with or adjacent to Torstensson.
- Swedish and Saxon units retreat to the north.
- Because the Imperialist Wagons are not on the map, the Swedish player receives Victory Points for one captured Wagon for each Swedish cavalry unit that pursues off map, up to a maximum of 4.
- While Gustavus is AC for the Swedes, the Saxons don't have one. If a Saxon WC is activated, there is no AC activation that phase. Gustavus can affect only Swedish units.
Saxon Special Rules:
- Saxon Command Problems: Saxon units can trace command from unit to unit per MPBS 5.4.2 only if the units are adjacent to each other. Any unit not adjacent to an In Command unit of its Wing and outside its WC's Command Range is Out of Command.
- Saxon Flight: Saxon leaders can never Rally Saxon units "for free"—they must always pass a Rally Attempt, even if stacked with a leader. In addition, even when its WC is under Rally Orders, a Saxon unit can make a Rally Attempt only if it is adjacent to or stacked with a leader.
Imperialists:
- The Imperialists have 4 wings, consisting of and commanded as follows:
- Left: Includes all cavalry units west of W3619 and Holstein's TE (see rule below). Wing is commanded by Pappenheim.
- Right: Includes all cavalry units east of E3740 and Wangler's TE (see rule below). Wing is commanded by Fürstenberg.
- Center cavalry wing: Includes all cavalry units between W3904 and W3910. Wing is commanded by Colloredo (Wahl is his replacement).
- Center infantry wing: Includes all other infantry and all artillery units. Wing is commanded by Tilly. (Sachsen-Altenburg is his replacement.) For the first 2 turns, the artillery on the right is considered in command if within 3 hexes of another unit of this Wing.
- The Imperialist have no AC. (While Tilly was nominally AC, he took direct command of the center and was unable to provide overall leadership. In addition, because the combined Imperial-League army Tilly commanded had note been together long, there were still kinks in the command relationships which hurt them in the battle.)
- Wangler's heavy infantry (TE) starts with Fürstenburg's wing. Holstein's heavy infantry (TE) starts with Pappenheim's wing. In any turn, those leaders may say they are leaving the heavy infantry behind so as to have cavalry-only wings. When left behind, the infantry units have no wing commander, and cannot perform any action unless the AC performs the action.
- Imperialist units retreat to the south.
Lützen:
- Berm/Ditch/Sunken Road: Treat berm hexsides as hedges for units moving or firing across a berm. Exception: Artillery units can see across both berms, the road, and any units in the road, and fire at units not in the road with no penalty.
- Use the set up hexes as listed in the LotN Scenario Booklet.
- Exception: Do not deploy the regimental artillery units. Instead, make the following changes for each Swedish LI unit in this battle:
- Its Movement Allowance is 4,
- On the Light Infantry and Cavalry Fire Table, it gets an additional +1 die roll modifier, and
- A result of 9 or greater on that table causes a Formation Hit on the target unit (in addition to the casualty).
- As in LotN, the game starts at 1000, and ends at the end of the 1700 turn. Use the half-hour turns as in LotN.
- No unit may enter any hex of Lützen. In addition, treat all hexes between any Lützen hex and the west side of the map as being under Heavy Fog at all times.
Swedes:
- The Swedes have 4 wings, consisting of and commanded as follows:
- Left Wing: Includes all units on or west of 3326 & 3726. Wing is commanded by von Weimar (von Anhalt is his replacement).
- Right Wing: Includes all units on or east of 3317 & 3717. Wing is commanded by Stalhandske (Bulach is his replacement).
- Center Wing: Includes all infantry from 3318 to 3325 as well as Henderson and all the artillery. Wing is commanded by Brahe.
- Reserve Wing: Includes all infantry from 3718 to 3725 as well as Ohm. Wing is commanded by Knijphausen.
- Gustavus is AC.
- Swedish units retreat to the south.
- Per Lützen scenario notes C and D, place 3 casualties on the Gula HI, and 1 casualty on the Ostergotland HC.
Imperialists:
- The Imperialists have 4 wings, consisting of and commanded as follows:
- Left Wing: Includes all unit that are part of the line that curves back from 2118 eastwards. Wing is commanded by Piccolomini (Holck is his replacment).
- Right Wing: Includes all units from 2132 to 2138. Wing is commanded by Colleredo.
- Center Wing: Includes all other units, including all artillery and all the commanded muskets lining the road and in the garden outside of Lützen. Wing is commanded by Waldstein.
- Pappenheim's Wing: This wing includes all units listed in the Lützen scenario book as being part of Group A. Wing is commanded by Pappenheim. See more about this Wing below.
- Wallenstein is AC.
- Imperialist units retreat to the north.
- Per Lützen scenario note C, deploy Loyers and Drost at start, and have the two Hartzfield units arrive with reinforcement group B.
- Per Lützen scenario note H, place 2 casualties on one of the Isolano units.
- It is up to the players to decide whether to deploy the Commanded Muskets covered by Lützen scenario note K, and whether to allow the Imperialist artillery to move as per scenario note F.
- Reinforcements: See the Lützen scenario book for which units are in which group.
- Group A: Use the historical arrival time of 1200. Units may arrive at any two adjacent hexes on the north edge of the map. Note that the dragoons in this group arrive dismounted (use the DR counters.)
- Group B: Use the historical arrival time of 1700 and arrival hex of 1035. The two Hartzfield units arrive with this group, too. These units are part of Pappenheim's Wing.
- Wallenstein special rule: Normally, Wallenstein has only 4 MPs per turn and a Leadership Rating of 0. On any one turn, the Imperial player can say that Wallenstein is mounted, and for that turn only Wallenstein has a Movement Allowance of 8 and a Leadership Rating of –2.
Historical Notes
I. Organization
A. Command Structure
An army of the Thirty Years War (30YW) was commanded by a Field Marshal or a General officer. If he was a person of status rather than ability he was assisted by a Lieutenant General to provide council. Each arm (horse, foot and artillery) had its own Major General to advise the Field Marshal on the training, equipping and employment of that arm. There was also a Quarter Master General to oversee the supplies.
A typical army, counting all independent commands and garrisons, could number well over 100,000 men, and was usually spread over large areas. Due to logistical and command and control constraints, maneuver armies usually contained more along the lines of 15,000 to 35,000 troops. For the march, a maneuver army was typically divided into three bodies, or wings, which were called the Vanguard (or Van), the main body (or Corps de Bataille) and the Rear Guard. The Van and Rear were naturally horse, while the foot and guns were with the main body. For battles, the Van covered the deployment of the other wings into battle line. The Van would be positioned on the right and be commanded by the senior officer of horse. (The right was the traditional position of honor.) The main body formed the center and the Rear assumed the left. This meant that opposing lines were asymmetrical as both armies positioned their senior (and best) cavalry on their right, so that each left was facing a generally superior force. As the armies gained experience and attempted more sophisticated deployments, a separate reserve was formed. Cavalry was often pulled into this reserve to be able to support the action in either direction.
Each wing typically consisted of two lines so that each wing maintained its own reserve. On narrow fronts, three lines were sometimes formed and conversely when faced with a broad front or lack of manpower sometimes only one line could be found. The Field Marshal developed a general plan of battle prior to an engagement, with each wing commander having fairly broad latitude. Orders were rarely written (many officers were poor readers according to Gustav Adolf), which meant that control by the Field Marshal usually involved personal intervention. Because of the latitude given to the wing commanders and the nature of the wing deployments, engagements often appeared to be three separate battles between opposing sets of wings. Victory usually went to the army that could successfully coordinate the actions of at least two wings. Wing commanders led from the front, usually at the head of their own regiment, in the first line. This led to a high casualty rate among wing commanders, exacerbating the command and control problems.
Battles were not the normal activity of military units. While battles tend to garner much attention due to their inherent risk and drama, good generals deliberately avoided open battles for these very same reasons. Combat activities can be classified into three categories: battles, sieges, and actions. Actions are those small unit engagements that occur frequently in a campaign, especially with the cavalry. Sieges were typically short in duration (one to three weeks) and involved the digging of circumvallations and assault trenches. Once the assault trenches advanced close enough to the enemy stronghold, the foot would assault, supported by mortars and petards. These assaults could be very costly to the foot regiments, and proved to be a much greater drain on manpower than major field battles. Sieges were usually short, with Stralsund, Breisach, Brünn, and Prague being the notable exceptions. Often a deal or ransom was paid to avoid an assault. In an average campaign, an army would fight one battle, but be involved in three to six sieges and dozens of actions.
It is important to differentiate the administrative organization of units from their battlefield tactical organizations. Confusion between the two has led to some misunderstandings of how armies were organized and how they fought.
B. Administrative Organizations
For administrative purposes (recruitment, training, payment, etc.), all general officers were also captains of their own companies. The senior captain was also the colonel of the regiment.
1. Company or Troop: The company, or troop as cavalry companies were sometimes called, was the basic organization of all 17th century armies. A company consisted of between 30 and 120 men. The company officers were a captain, a lieutenant, an ensign, three or four sergeants, and three or four corporals. There was no formal distinction between commissioned and non-commissioned officers. Officer slots were always filled first, so in under strength units the ratio of officers to men could be unusually high.
The captain and lieutenant were responsible for setting an example by leading the company in action. The ensign, also called a cornet in some cavalry organizations, carried the unit's colors. The sergeants were responsible for keeping the men in formation. To pass signals over the din of battle the infantry used drummers while the cavalry used trumpets. The company had informal sub-divisions built around the corporals, with each corporalcy divided into files corresponding to the files in a battlefield formation. Corporals and below took positions in the ranks, while officers and sergeants stood outside the ranks. Because officers carried half-pikes, halberds, or partisans (the Swedes used only partisans) and were positioned outside the main body, they took the brunt of any close combat.
2. Regiment: A regiment was an organization of eight to ten companies, and was the largest formal organization. A regiment was commanded by a colonel and assisted by a lieutenant colonel. It was common for regiments to be commanded in the field by their lieutenant colonel as the colonel was either an honorary post, did not wish to take the risk, or was serving in another capacity. Regiments consisted of either foot, horse, or dragoons. (The terms infantry and cavalry would not come into vogue until the 1670s.) The Swedes organized a regiment of artillery in an attempt to bring more military efficiency to an otherwise quasi-military arm. Regiments of horse had several varieties (horse, aka Reiters or Rytarre, Cuirassiers, Arquebusiers, and Croats). The regiments of dragoons used horses for mobility and typically dismounted to fight. Dragoons did fight mounted when the need arose, however, and often were converted to regiments of horse when the means became available to equipment them that way (Douglas' Regiment with the Swedes is a good example of this).
C. Tactical Organizations
These are the formations used by regiments for battle.
1. Battalion: This was the basic battlefield organization for infantry. It consisted of pikes in the center and the muskets divided on either flank. It could be formed 6, 8, 10, or 12 ranks deep. There were two basic battalion styles: German and Dutch. The German style battalion contained approximately 800 to 1200 men, while the Dutch style battalion had only 400 to 500 men. Gustav Adolf introduced a hybrid of the two styles that consisted of three or four Dutch style battalions formed into one large battalion that he called a brigade. This hybrid was complex and required a great deal of training to execute and was subsequently dropped soon after his death in 1632. It was common practice to combine several smaller regiments into one battalion so that it would be close to the ideal size. In game terms both double and single hex heavy infantry units represent one battalion.
2. Squadron: This was the basic battlefield organization for cavalry. It consisted of two to three companies in a line, with a strength of 180 to 300 men. Generally the Imperial army preferred larger squadrons, while the Swedes' manpower limitations forced them to use smaller squadrons. A full strength regiment could field two squadrons, but there were wide variations based on the strengths of the individual regiments. In game terms most cavalry units represent two squadrons. The exception is Nördlingen, where the Imperial-Spanish army fielded unusually large squadrons. This was most likely as a result of the terrain, which did not favor the use of broad cavalry formations.
3. Brigade: This term had several meanings during this period. The most common usage described the practice of putting together smaller regiments into one battalion or squadron. For cavalry, it also meant a group of several regiments that formed a wing in battle and that consisted of many squadrons (this is closest to the modern usage). It also described Gustav Adolf's hybrid infantry battalion.
II. The Armies
A. The Swedish Army
1. Intro: Gustav Adolf built the Swedish juggernaut, but it was his lieutenants that sailed it to eventual victory. This army was the product of gearing the small Swedish state for war, the efficient use of French subsidies, the mobilization of the anti-Habsburg German nobles, and strong leadership. An important point to note is that the vast majority of the army was not Swedish—Germans comprised the largest contingent. From 1631 to 1638 Scots and English formed a very large part of the infantry, but troubles at home soon called them away. The Swedes themselves formed a strong core under Gustav Adolf, but heavy losses on their limited manpower pool caused the native Swedish regiments to take a less active role. The height of Swedish national troops was 1631-1632; by 1645 Swedish troops in service with the field army had dwindled to merely two small regiments of foot and the artillery. (The other Swedish regiments were in garrison.) The Swedish constitution of 1634 codified the army structure.
2. Cavalry: The Swedish horse consisted of:
- 5, then 4 native Swedish Regiments: Smålands, Östgöta, Västgöta, Upplands, and Södermanlands (disbanded in 1636). Three of these served at Wittstock.
- 3 native Finnish Regiments: Nyländ-Tavastehaus, Åboländ-Björneborg, Viborg-Nyslott. These were all referred to mostly as Finns, so identifying individual regiment is difficult. It appears the GenMaj. Torsten Stålhandske commanded the åboländare and GenMaj. Arvid Wittenberg the nyländare.
- 2 native Livonian Regiments: The Courland and Livonian regiments (kurländare and livländare).
- A body (about 12 regiments) of long-term German mercenary horse that went to French service under Duke Bernhard of Saxe-Weimar in 1635.
- Short-term mercenary and allied German horse (e.g., Landgraf of Hesse-Darmstadt).
3. Infantry: The Swedish foot consisted of:
- 14 native Swedish regiments.
- 7 native Finnish regiments (these were often brigaded into one "Swedish" or Svenska brigade as they were under strength).
- 4 long-term mercenary regiments: There was Yellow (Gula), which passed to the French in 1635; Blue (Blåa aka Gamla Bläa or "Old Blue"), which then became the senior regiment; Red, which stayed in Garrison, and Green (Gröna).
- Major General's Regiments: These took the place of the "colored" regiments as the core of the infantry, and included Wrangel's, Lillie's, and Mortaigne's. All were long-term mercenary regiments.
- Scots and English: In service from 1631 to 1638, peaking at 13 Scottish and 5 English regiments.
- Short-term mercenary and allied German foot. (e.g., Württemburg).
In battle, without fail, the Swedish army was engaged aggressively, and they employed a strong combined arms attack. Cavalry was supported by platoons of musketeers to supplement their firepower against the larger Imperial squadrons. The philosophy was that fewer, higher quality troops moving fast could overcome a larger force. Lack of aggression would tip the scale to the larger force who would be able to use firepower to bleed you white.
B. The Imperial Army
A polyglot of nationalities with inconsistent leadership made for an army that fought on the defensive even with superior numbers and position. The Habsburg armies enjoyed many material advantages and showed great resourcefulness in fielding large numbers of troops. Despite larger squadrons and battalions, bigger horses and armor, the Imperial army was outfought again and again. With the right leadership it could have been as vaunted it was under Wallenstein, but it was Wallenstein's hubris and the Emperor's genuine fear of an overly strong commander that led to Wallenstein's sacking and a resulting crisis in leadership.
C. The Bavarians (Catholic League)
The Bavarians fielded the best cavalry on the Habsburg side, under Gen. Jean de Werth. They delivered the few victories the Habsburgs enjoyed in the later war. Their conduct in 1645 was particularly noteworthy. After a tough campaign in 1644 with a bloody engagement at Freiburg, they went on to fight three major engagements in 1645: Jankau, Mergentheim and Alerheim.
D. The Saxons
The Saxons were consistently mediocre. Their changing sides and religious ambivalence made them an inconsistent Imperial ally, though punitive campaigns did solidify their resolve against the Swedes.
III. Period Equipment
A. Firearms
The musket was the primary firearm for infantry units. It came into popular use in the late 16th Century, with the Spanish leading the way. A heavy matchlock weapon, 13-16 pounds (5.9 Kg to 7.3 Kg), supplanted the lighter arquebus. The musket was generally a 12 gauge (.69 to .72 caliber or 17.5mm to 18.3mm), meaning a pound of lead would produce 12 bullets. Thus a bullet would be about 37.8g or 583 grains—somewhat more weighty than modern bullets that weigh 62 to 115 grains. These weapons were smoothbore and had an effective rate of fire of 2 shots per minute. Though deadly for over a hundred yards, the ideal range at which a volley was delivered was about 25 paces. Soldiers carried 12 to 14 pre-measured powder charges in small wood or metal flasks suspended from a bandolier worn over their left shoulder. They also carried a bullet bag, a powder flask used to fill the primer pan, and an extra slow-burning match. The slow burning match was normally lit at both ends (in case one should go out), with the free end clamped between the third and fourth fingers of the left hand and the primary end clamped for firing in the serpentine. The serpentine was a small arm that cocked towards the muzzle and on pulling the trigger snapped back towards the stock, thus placing the burning end of the match in the primer pan. The pan had a hinged cover that the shooter manually opened and closed with the thumb of his right hand. Some soldiers had early versions of flintlock muskets, but these were usually reserved for duties where the burning match was hazardous, like guarding powder, patrolling, or sentry duty. The cavalry troops carried a least two pistols. These were normally 18 to 24 gauge and were transitioning from very long barrels (14 to 24 in) to shorter barrels (8 to 12 in). Many cavalrymen also carried a carbine, a shortened arquebus, suspended from a carrying strap over the left shoulder. The firearms for the cavalry were either flintlock or wheellock. While wheellocks were considered "better" than flintlocks, they were also more expensive. A wheellock was cocked with a spanner (a wrench to Americans) that tightened a spring. When the trigger was pulled, the spring was released, snapping an arm with a pyrite against a serrated wheel producing the necessary spark.
B. Swords
Swords for the cavalry had about 30 in (76 cm) blades, and included straight, cut and thrust swords. Swept hilts and "Pappenheimer" hilt styles were popular. Some rapiers may have been floating about, but they were unsuitable for the rigors of combat. Some cavalry from the Balkans (very popular light cavalry for the Imperials and the French—generally referred to as Croats) and Eastern Europe carried curved sabers. Mainstream cavalry would not begin to adopt the saber until later, starting in 1679 with the French. The infantry carried simple swords, not any different from the cavalry swords in size. The difference was mostly qualitative and hilts were simpler. The infantry often carried daggers and small axes for close-in work. Some cuirassiers were also equipped with battleaxes and warhammers, both of which were good at close-in work with heavily armored opponents. As the amount of armor decreased so did the need for such archaic weaponry.
C. Pikes
The distinctive weapon of the period, the pike was a hopefully sturdy pole about an inch in diameter and 16 feet long (4.9 m). The point was a simple socket spearhead. The pikes of some, especially those in the front ranks, were reinforced with iron cheeks to prevent spearhead being cut off. When "charged" the pike was held chest high, left hand under the chin and right arm extended backwards, with the right hand holding the base of the shaft. In a typical formation the pike heads from the fifth rank would extend past the front rank. When "charging for horse" the front rank would place the base of the shaft on the ground and brace it with the instep of the right foot, leaning forward to have the pike head poised at an angle about chest high to a horse. Pikes were on the decline, but would linger on as the main weapon for a third of the troops in regiments of foot.
D. Artillery
Artillery in this period was still very heavy and cumbersome. Basically, guns were very expensive and often crewed by quasi-civilian specialists. The Swedes were innovators in creating an artillery corps in the army. Because of the cost, folks did not like to do away with any, and this led to a logistical nightmare due to the wide variety of gun calibers and sizes in use. The three classes of artillery in MPBS would be crewed and towed as follows:
- 3lb: crew of 4, towed by 2 horses/oxen, but made to be manhandled easily
- 5-8lb: crew of 6, towed by 5 horses/oxen
- 12-24lb: crew of 6 to 10, towed by 10-17 horses/oxen
The Swedes developed a light 3lb brass cannon (saving a lot of weight on a lighter carriage) and its style was quickly copied by all.
E. Armor
Cavalry mostly wore a cuirass (breast and back plate), a gorget (neck protector) and a helmet. The helmets were of two main types: open or closed. An open helmet was the more popular and more "modern." Also called a "Hungarian" helmet, it had a round cap with a bill, cheek pieces, neck protector and one to three bars to make a face mask to protect from slashes. The closed helmet is what we normally associate with a knight, fitting over the head and neck and having a sliding visor. Some had additional armor on their thighs and arms. A buff coat was a very popular ersatz armor, though very expensive. In the infantry, only the pikemen wore armor, and then it was not universal. By the late war little armor was to found at all among the foot. In the Spanish army the pikemen were classified as corselets (soldiers with corselets [breast plates] and attached thigh plates [tassets]) or piqueros secos (pikemen without armor). The Spanish prescribed a 2 to 1 armored to unarmored pikemen ratio. Given the financial resources and professionalism of the Spanish, that condition could be considered indicative of the state of pike armed troops in general. The Swedes stopped issuing armor in the mid 1630s, so while it safe to assume the number of armored pikemen was low, the regimental commanders always had great influence on the equipment used in their regiments. The armored troops would form the front and rear ranks, the rear being armored to allow the battalion to face to the rear in an emergency. The pikeman would also wear a helmet. The two most popular were the cabasset and the morion, both simpler and less expensive than cavalry helmets. Armor was generally rated to be "pistol-proof," but the range, caliber and powder charge that allowed such a rating was unclear. However, there are several accounts of pistol shots being stopped by armor. The Condé at Rocroi was said to have a least two shots deflected off his breastplate. The armor was also blackened to reduce rusting.
F. Clothing
Soldiers were very fashion conscious. Uniforms were the purview of a regimental commander. The Spanish specifically rejected the idea of uniforms as they felt that it would lessen the fighting spirit of a soldier if he could not express his individuality in his dress. Some Swedish infantry regiments wore gray uniforms (jackets and pants) and some cavalry may have worn blue jackets, but that was the extent of it. A wide brim felt hat was nearly universal headgear, as it was simple and practical. A jacket was always worn and lace collars (aka falling bands) were all the rage until the 1640s when the simple cravat caught on. The lace collars were larger and more extravagant the higher the rank or social standing of the wearer. The jackets were often finely embroidered and had vented sleeves (a real life saver in warm weather). The trousers came to the knee. Foot soldiers wore single buckle leather shoes and stockings there were held in place by garters. Cavalry wore knee or thigh high riding boots with spurs. Since uniforms were virtually non-existent, field signs and passwords were used to tell friend from foe. These could take the form of sprigs of greenery in the hatband (Breitenfeld), white paper in the hatband (Marston Moor), or various color sashes (like White for the French). Passwords tended to be religious in nature.
Game Tactics
Here, in game terms, is how to carry out the two major types of assaults.
I. The Text Book Assault of Heavy Infantry vs. Heavy Infantry
Step 1: APPROACH MARCH. Move the attacking unit to two hexes from the target. The biggest danger here is enemy artillery. If possible, leave gaps between some battalions for your artillery to fire through. A timely Formation Hit from your artillery can make a big difference.
Step 2: ADVANCING FIRE. Perform an Advancing Fire action and move adjacent. The defender will typically fire a salvo and then, with what is left, resolve the attacking unit's fire.
Step 3: SALVO. Assuming the defender chose not to reaction close combat (which can be risky if defending in a decent position), then on a continuation or during the next turn, have the attacking unit fire a salvo and hope it causes the target to fail its morale check. This step can have three possibilities:
- (OPTION 1) SALVO ON A CONTINUATION: This is ideal, especially if your target has already fired their salvo as they have to take your salvo then return fire with the -1 DRM for having fired Salvo this turn.
- (OPTION 2) SALVO AS A REACTION TO THE DEFENDER'S FIRE: Generally the defender goes (is activated) closer to the end of the turn (order precedence and all that) so the defender may fire again hoping to weaken the attacking wing. If so, have your unit fire its Salvo as defensive fire. (While this is not the best tactic, if the defender has little hope of a preemption it is their only chance to get a volley in before the attacker can Salvo.)
- (OPTION 3) SALVO IN THE NEXT TURN: This is common as infantry doesn't continue as easily as cavalry. The downside is the defender has recovered his Salvo capability so he will fire it back.
Step 4: ASSAULT. Engage the enemy in Close Combat with a +1 for having just fired a Salvo.
There are variations on this theme:
- Variation 1, QUICK ASSAULT: After the Advancing Fire and enemy reaction fire (most likely a Salvo), go right into the Close Combat without a +1 for having fired a Salvo. Try this if you feel you have sufficient morale to carry the assault or insufficient men to wait any longer.
- Variation 2, CHARGE: Rush the enemy, get the +1 for momentum, but take the defensive fire without getting a shot in.
These are the same basic decisions the commanders had to face on tempo of attack and the most efficient application of firepower, the wildcards being the relative morale and strength of both units and the defender's position.
II. The Text Book Assault of Cavalry vs. Cavalry
STEP 1: APPROACH MARCH. Move well-formed units in two lines, keeping the first line five hexes away from the enemy line, thus avoiding interception. The key here is to be well formed; if you are not well formed and enemy units are, they can charge you and you cannot intercept. If you have commanded muskets, the trade off for the additional firepower is the slower speed.
STEP 2: CHARGE. Advance a squadron from the center of your line first. If an interception goes against you it does not open a flank. Against an aggressive opponent (one who seeks to intercept all the time), attempt to draw him out first. Then use the other units to exploit the remains of the interception scrum. Try not to commit the second line on an initial attack; leave it as a reserve. A more conservative opponent will let you come on and use his firepower to inflict casualties. The one with the bigger squadrons has an advantage here in firepower. If you have lower morale and larger squadrons, do not be hasty in engaging in Close Combat. Use your size and arquebusiers to inflict casualties, and let the smaller high morale squadrons make the risky Close Combats. Formation can be recovered, but casualties cannot. The Imperial player must not be afraid to use a one-two tactic, attacking with one squadron knowing it will likely be destroyed, but it leaving the enemy vulnerable to a second squadron attacking. Against Formation Shaken or Broken units, use your speed advantage if you have well-formed squadrons to go for a flanking attack. A major difference between TACW and SFO is that cavalry pursuit is much less of an issue in SFO, so your cavalry is more likely to stick around.
STEP 3: THE SECOND LINE. The second line can be used to exploit the success of the first line, intercept any penetrations, or fall upon a poorly formed enemy en masse.
STEP 4: REFORM. Cavalry will use Close Combat as its primary weapon, and that means even the winner will be disorganized. The tough part is getting reformed. Sounding a Rally is easy and everyone can reform but be careful, because Rally Orders are tough to get out of and you loose the ability to continue, preempt, or intercept. If you have defeated the closest enemy wing and have terrain or friendly forces to screen you, go for a Rally, but otherwise Make Ready is the way to go. You can reform a core group of squadrons around the Wing Commander. It may take more activations to reform via Make Ready, but it maintains some flexibility. If you are really shot up, try going for Receive Charge from Make Ready unless you have a -2 Commander. Generally a cavalry wing that can charge, reform and charge again will do well.
Designer Notes
English Civil War and Thirty Years War Differences
The first game in the MPBS was This Accursed Civil War, covering battles of the English Civil War. Players of that game may be interested in the differences between the armies that fought in the ECW and those that fought in the Thirty Years War. Typically, the 30YW armies were 1.5 to 3 times as large as the ECW armies. (The ECW was picked as the starting point for the MPBS because the battles were smaller, providing a good way to learn the system.) The larger, more professional, 30YW armies fought larger battles of destruction that led to more casualties as a percentage of troops involved. Artillery was used in much greater concentrations than in the ECW, with the 30YW armies having two to five times as many pieces as their ECW counterparts. The 30YW artillery was also better organized and more mobile during engagements. Control of cavalry units was a huge problem in the ECW, much more so than with the mercenary cavalry of the 30YW armies, costing victory in several instances. Many of the English and Scots officers saw extensive service with the Swedish army, and adopted some of its methods in the ECW.
Maps
Players might see differences between place names on the game maps and names for the same locations in recent maps or books. The place names on the game maps are taken from the Swedish source maps, and even these maps may be different from modern Swedish because the maps were drawn before the revision of Swedish spelling around the turn of the 20th Century. Many of the place names were then and are now different in the local languages (German and Czech), so for consistency I went with the Swedish. There is one exception: Jankau was called Jankowitz on the Swedish maps, but is known in most sources in its German form of Jankau. (Modern historians have started using modern place names, like Jankov.) I'd also like to say that the maps and information I received from Stefan Andersson in Uppsala, Sweden, were invaluable.
Unit Ratings
Units have two ratings: Size and Morale. Unit sizes are basically 80 to 120 men per point. Having a range allows for rounding, which is used to help with balance. The size of cavalry units in the battles are either (2 or 3), (3 or 4), or (4 or 5). Each cavalry unit represents 2 squadrons, which is a typical regiment. While squadrons were typically 2 troops or companies, the problem is that companies could range from 30 to 80 men.
The morale scale is based on the percentage outcomes of a given combat. The scale is green/poor = 6, line/good = 7 and elite/strong performance = 8. Morale is a combination of actual morale (as evidenced by historical performance), equipment (all cavalry is not equally equipped—better mounts or armor may swing the morale for example) and to offset some rounding of strength. I rate the morale higher on regiments that appear over long periods in multiple battles as they are veterans.
"A Circle of Three Rings"
The system is based on the concept of triplets:
- Formation state triplet: Normal, Shaken, Broken
- Morale state triplet: Normal, Shaken, Broken
- Leadership rating triplet: Exceptional Leaders (–2), Good Leaders (–1), Other Leaders (0)
- Morale rating triplet: Elite or Veterans (8), Line (7), Green or Poor (6)
I find this intuitive, as most of us tend to categorize things as good, better, and best, or bad, worse, and worst. These triplets can be indexed to produce a matrix of values and interactions, and that is basic mathematical model underneath the hood of the MPBS. This is based on a model I used originally for workload analysis of customer service personnel, where it worked well at helping to determine staffing levels.
Cohesion versus Casualties, Formation and Morale
Other systems use Cohesion to express the effects of casualties, formation and morale quite well. I could have easily covered this period in the same manner. However, given the popularity of some of these other systems, the MPBS would not have seemed any different. Since the battles in this era were smaller than ancients and later periods, I saw an opportunity to split these factors out and deal with them individually, thus adding a distinctive period feel.
Splitting formation and morale out also dovetailed into the Orders sub-system. That sub-system was borrowed from Rob Markham's excellent works, but I reduced the number of Orders and tied them into the formation and morale states. This forces the player to change Orders during the battle and highlights the differences in leader quality. It also adds to the tension and uncertainty, providing a feeling of the risk involved. It also forces players to plan in depth with room for contingencies.
Fire Combat
Because fire by volley is asynchronous, there is a real incentive to attempt preemption so as to gain a volley at the right time. Historically, given the formations used and the techniques of fire, ranged musketry was indeed very deadly, and was the real killer of the 17th Century battlefield. At Marston Moor over 4,000 men were killed in less than two hours of fighting, and the Thirty Years War battles have similar heavy loss rates. Keep in mind that these musketeers only carried a dozen charges into a battle, and most didn't fire more than a few shots. Remember also that these weapons had the same caliber and hitting power of 18th Century muskets while the formations were much deeper and more tightly packed. Together, the result was that the to-hit ratio was better than in later periods.
Close Combat
Close Combat is always decisive in the system, as it was historically. No soldier could stand toe to toe, parrying and thrusting, for more than 20 minutes. It just didn't happen that way. There is a tendency in some other games of similar periods to slow down as the main engagement is joined, with the lines locked in melee for unrealistic periods of time. I wanted to keep the games in this system moving. I believe the results not only do that, but also reward the player who maintains a reserve. Note that, though decisive, Close Combat does not produce casualties. Yes, men did become casualties from musket butts, pikes and swords, but not in the same numbers that musket fire caused. A Casualty Point represents 25 to 50 men actually killed or seriously wounded and the attending loss of manpower to deal with the wounded.
Formation Effects
The formation effects cover two seemingly opposite problems: crowding and dispersion. Generally, foot units under stress would experience crowding, while mounted troops would disperse. A mounted unit in reality would be scattered across a seven hex area, so in the game the counter represents the center of mass and the colors. While it may seem odd to some, this is why a Formation Broken cavalry unit cannot move. For simplicity, all of this is simulated by Formation Shaken and Broken as they are caused by similar factors and their combat and movement effects are similar.
Reaction & Interception Zone Summary
An otherwise eligible unit can React according to the following:
| Reaction Type | Enemy Action Triggering | Where Trigger Occurs | Distance |
|---|---|---|---|
| Artillery Reaction Fire | Fire | In frontal arc | Up to max fire range |
| Artillery Reaction Fire | All other triggers | In frontal arc | Up to grazing fire range |
| Non-Arty Reaction Fire | All triggers | Front or Flank | Adjacent hex |
| Facing Change | Movement | Flank or rear | Adjacent hex |
| Hedgehog (voluntary) | Cavalry movement | Front or flank | Within 2 hexes |
| Hedgehog (mandatory) | Cavalry movement | Rear |