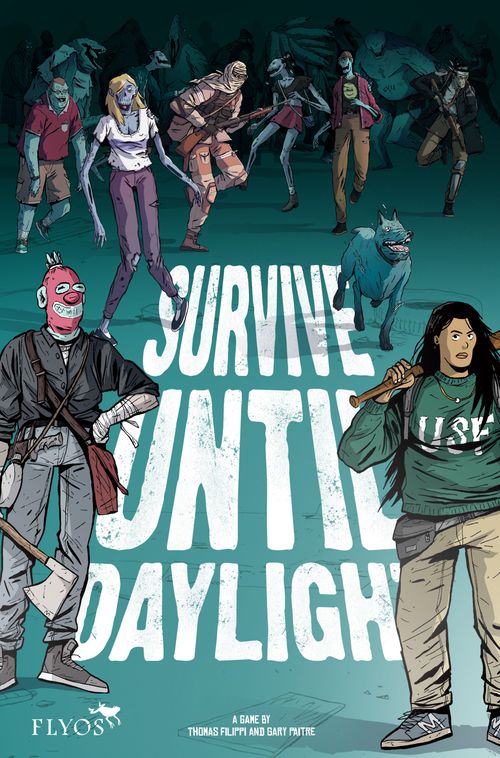
Survive Until Daylight
Survive Until Daylight Rulebook
Table of Contents
Table of Contents
What's in the Box?
- 1 Rulebook
- 6 Character boards
- 138 Rubble cards
- 35 Combat cards
- 58 Horde cards
- 6 Assault cards
- Tokens: 20 Skulls, 1 First Player token, 6 Barricades, 6 Grenades, 6 Traps, 3 Spears
Your Goal
Survive 6 Rounds of methodic chaos, with 1 to 6 players cooperating to save your collective bacon.
If a character dies, it's game over. You could argue it's one less mouth to feed, but I could argue it's two less arms to fight these things in a crucial moment, so... let's just agree you're pretty much toast if that happens, yeah?
Overview
The game is divided into 3 phases: Search, Trade, and Combat.
Search
Starting with the player with the First Player token, players take turns rummaging through the ruins of the Old World, drawing 1 Rubble card each turn. These Rubble cards may contain useful items like food, drink and Ammo—but they might also be Bad Luck cards, or the dreaded WaVe! card. When a player draws this card, they must also draw an Assault card, giving the group a glimpse of the approaching enemies. At this point, your looting is done—unless the player who drew the WaVe! card takes 1 Damage point to delay the buggers a bit longer (see page 14).
Trade
Before the Combat phase, each player can toss 1 of their cards to another player. But be careful—the other player doesn't have to chuck you something in return.
Combat
It's On! Starting with the First Player, each player chooses either to attack or craft. Once everyone is done, the baddies get to do the same (attack that is, they're too dumb to craft)! The first enemy will attack the player that drew the WaVe! card. Any remaining enemies attack the rest of the group in a clockwise direction, then remain on the board until they're dealt with. Enemies and player characters are defeated when their Health trackers are empty, meaning: when the Skull token reaches the skull symbol.
Setup
- Each player chooses a character and takes their corresponding character board.
- Each player takes their character's unique weapon (marked with the unique-weapon icon) and chooses 1 common weapon with which to start the game.
- Gather the Rubble cards based on the number of players for this game. For example, if you have 3 Players at your table, take the cards numbered 1, 2 and 3.
- Shuffle the Rubble cards into a Rubble pile and set them aside.
- Take a number of Rubble cards from the Rubble pile to create the Active Rubble pile for the Round (see page 11). Shuffle the WaVe! card into the pile.
- Shuffle the Assault cards together and set them aside, face down.
- Do the same with the Combat cards.
Characters
When starting a new game, every player must choose a character and take their corresponding character board. Available characters are the Pillar, Psycho, Trigger, Drifter, Haggler, and Hipster.
Each character starts the game with 2 weapons: a unique weapon, which could be anything from a favorite kitchen utensil to a military-issued firearm; and a second, more common weapon of their player's choice. Unique weapons have the name of their owner on the card, while common weapons do not.
Note: If you are playing solo, your character starts with a third weapon: an additional common weapon of your choice.
Character Board
On a character board, you will find:
- The character's Perks.
- The character's Health tracker.
- Their tragic backstory! Backstories are, of course, on the back of the character board.
Note: Since some characters can take more Damage than others, different characters' Health trackers have different lengths. When the Skull token reaches the skull on the Health tracker, the character is dead. When that happens, it's game over for everyone. And before you ask, no, you can't play as the ghost of your character; don't even try!
Perks
Each character has two unique Perks on their character board: their Main Perk, which is always active; and a First Player Perk, which you can use only when you have the First Player token. Perks may be used when the situation calls for it, but some Perks (e.g., the Psycho's Main Perk) must be used every time you attack.
All characters' Main Perks may only be used during their own turn in the Combat phase. This is true of most First Player Perks as well. Unless specified otherwise, Perks may be used only once per Round.
The Hipster's Perks, as printed on the Hipster board, are:
- Main Perk: Once during your Combat turn, you can draw 1 extra Combat card.
- First Player Perk: Once during your Combat turn, if you kill at least 1 enemy with your Bow, you gain 1 more attack this turn.
Tracker Marker
Use these Skull tokens to track the Health of characters and enemies. Characters begin the game with a Skull token placed on the empty slot at the top of their Health tracker.
First Player
The First Player token designates which player takes their turn first, and unlocks their character's First Player Perk for the current Round.
At the start of the game, the First Player token goes to the last player who saw a zombie. Whether they read a book, watched a movie, or played a game with zombies in it, it all counts! If two or more players both saw a zombie at the same time, I suggest a combat to the death engaging in some friendly discourse, throwing a die, or playing a rousing game of rock-paper-scissors to choose who goes first.
After every Combat phase, the First Player token must be given to the next player to the left.
Enemies
The world sure went to hell in a handbasket, huh? Governments bailing on their people, military forces devolving into rogue merc groups robbing folks of their hard-earned supplies... Just goes to show you can only count on yourself nowadays.
I've written down a list of creatures I've encountered that you should watch out for. Keep an eye out for them, have contingency plans for your contingency plans, and maybe, just maybe, you'll get to live a few more days.
Enemies come in different types, each with different Horde cards and thus, different Health trackers and different attacks.
Horde Cards
- Fixed Damage dealt to the target (the burst icon on the card).
- Number of Combat cards to draw (the card-stack icon on the card). NB: Not all enemies of the same type have the same attack method! What a fun and terrifying surprise!
- Special (the bag icon, or other icon, on the card). Example: If this creature damages a character with an attack, that character's player must lose 1 random Rubble card.
- Health trackers. Each enemy starts without a Skull token on its Health tracker. When it takes Damage, add a Skull token to the tracker on the highest number for the first damage taken, and move it to the right for each additional damage taken. When the token reaches the skull symbol, the enemy has been defeated.
Wanderer
Dumb as a rock, and slow as one, too. You should have no problem handling these shambling idiots. Just don't allow them to band together!
- Horde card: Fixed Damage 1; Combat cards 1; Health tracker: 1, then skull.
- Discard if they suffer 2+ Damage.
Raider
Now, problem with Raiders is, I get it. We're all desperate, and sometimes we have to do some dumb things to survive. Listen well, Rookie, because it's the hardest lesson to learn: The apocalypse has no place for empathy. In the end, it's you or them.
- Horde card: Fixed Damage 1; Combat cards 1; Health tracker: 2, 1, then skull.
- Discard if they suffer 3+ Damage.
- Special: If a character suffers Damage from a Raider's attack, that character's player must lose 1 random Rubble card. Shuffle your inventory (including your ammo) and discard a card randomly—except weapons.
Brute
I've seen one of these rip open a friend like he was a can of Kewl-Dew energy drink. Stay focused, take out the big guns, and for the sake of everything that's still holy, DON'T LET THEM GET CLOSE!
- Horde card: Fixed Damage 2; Combat cards 1; Health tracker: 3, 2, 1, then skull.
- Discard if they suffer 4+ Damage.
- Special (Barricade icon): These guys don't care about Barricades, and will Damage the character directly. Your Barricade will still be standing afterward... but will you?
Monster
Everything I've said about the Brute goes double—scratch that, triple for these! I figure a tank could stop them, but I don't have one on me to even try. If you ever manage to bring one down, come find me. I need to buy you a drink.
- Horde card: Fixed Damage 3; Combat cards 2; Health tracker: 7, 6, 5, 4, 3, 2, 1, then skull.
- Discard if they suffer 8+ Damage.
- Special (+1 Damage icon): Monsters bolster all other enemies' attack by +1 Damage. This effect is cumulative if there is more than 1 Monster on the table. However, Monsters don't bolster other Monsters. They're insecure like that.
Survivor
Some of us are prepared, methodical, and careful... but sometimes you'll encounter someone who survived through sheer luck! They're not "enemies," per se, so I do suggest trying to save them—if only to throw them at another problem later.
- Horde card: no Fixed Damage and no Combat cards; Health tracker: skull only.
- Discard if they suffer 1+ Damage.
- Special: Survivors are targeted by enemies one by one from left to right before the player with the WaVe! card is targeted. If they survive the Round, they must stay on the table for the following Rounds. Of course, nothing prevents you from killing them yourself if you're feeling a bit murdery.
Search Phase
When a Search phase begins, take the designated number of Rubble cards from the Rubble pile, as indicated by the Rubble count table below. Add the WaVe! card, shuffle the pile, and set it face down in the center of the table. This is the Active Rubble pile.
Next, one by one, all players take turns drawing a card from the pile, starting with the player with the First Player token and moving in a clockwise direction. If the card they've drawn isn't a Bad Luck card (red background), the player can choose to add it to their inventory, or discard it immediately. If a player's inventory is already full (8 item slots max), they can discard a card from their inventory and replace it with the drawn card.
When a player draws the WaVe! card, their character has made enough noise to attract the next WaVe! of enemies. First, the player must draw the next Assault card if it has not yet been revealed. Then that player can choose to accept their fate and let 'em come, setting up the enemies; or suffer 1 Damage to delay their arrival, immediately draw another Rubble card, and then shuffle the WaVe! card back into the Active Rubble pile.
The more items the players have, the more prepared you will be for the incoming WaVe! of enemies. However, delaying the WaVe! multiple times will have a hefty cost, as you will suffer Damage every time.
Any cards left in the Active Rubble pile when the WaVe! card is drawn remain there for the subsequent Rounds. New cards are added to the Active Rubble pile as normal every Round, whether it has been emptied or not. This means the pile can get truly massive if you've been unlucky in the first few Rounds. Remember: The thicker the pile of Rubble, the safer it is to search!
Rubble Count
The number of cards drawn from the Rubble pile to form the Active Rubble pile each Round depends on the number of players:
| Players | Rubble cards |
|---|---|
| 1 | 7 |
| 2 | 10 |
| 3 | 12 |
| 4 | 16 |
| 5 | 20 |
| 6 | 20 |
Rubble
Rubble cards can feature junk, healing items, Special actions, weapons, Ammo, crafting ingredients, or Bad Luck cards. Rubble cards that can be used must be discarded after use.
Inventory Limit
A character may carry up to 8 items, including their starting weapons. However, Ammo and crafting ingredients may be stacked (e.g., 3 Arrows only occupy 1 slot of your inventory, and 2 Planks occupy only 1 slot as well). Only items with the stacking icon may be stacked together. You cannot stack items of different type together (e.g., stacking Arrows and Planks together is impossible). A player may discard some of their item cards to make more space for other items whenever they like.
Note: When playing solo, your character's inventory limit is 10 slots, rather than 8. I guess when you don't rely on others to carry heavy things for you, you get pretty good at carrying them yourself.
Ammo
Some weapons, such as Guns and Bows, require Ammo of the right type to be used. More than 1 Ammo can be used at once to increase the chances of getting a better hit. Don't worry, no one's going to judge if you want to stuff that gun to the brim with bullets before pressing that trigger—it's the apocalypse, after all!
For each Ammo card used in an attack, the player must draw a Combat card. These cards can increase the Damage dealt by the attack—sometimes by a lot. Once an Ammo has been used, it must be discarded.
The more Ammo a player uses, the more Combat cards they get to draw. Choose 1 of these Combat cards to apply to your attack, and discard the rest. You must use only 1 of the Combat cards you've drawn, regardless of the amount of Ammo used or cards drawn—so choose wisely.
Weapons
During the Combat phase, a character may use their action to attack. When they do, they must choose 1 of their weapons and a target enemy to which to deal Damage, potentially eliminating the threat. Different weapons deal Damage differently: some do a fixed amount of Damage, while others may deal a variable amount of Damage through the use of Combat cards. Others may also hit more than 1 enemy at a time, dealing Splash Damage. Some weapons, such as guns, require at least 1 Gun Ammo card to be used, and bows need at least 1 Arrow card to be used. More than 1 Gun Ammo or Arrow card may be used for a single attack to increase the number of Combat cards drawn for this attack.
You cannot stack weapons.
Each player begins the game with 2 weapons. (We recommend everyone chooses 1 melee and 1 ranged weapon; but hey, you do you.) One of these weapons is determined by the character they chose (e.g., if you chose to play the Hipster, you will start the game with Hipster's Bow in your inventory). When playing solo, you can start the game with a third weapon: an additional common weapon of your choice. While a player can't lose the weapons they start the game with, they may give them away during the Trade phase if desired.
Special Cards
These cards have various effects, and can be used at different key moments of the game (e.g., the Bloodlust card adds 1 Splash Damage to your attack and can be used during your turn in the Combat Phase only, whereas the Lucky card can be used whenever a Combat card is drawn, to discard it and draw a new one instead). Be careful, though—some of these cards may cost you some Health to play, so make sure you don't die drinking an energy drink in the middle of a fight—that would be super embarrassing!
Using these cards does not count as an action—you can attack or craft before or after using such a card—these cards cannot be stacked and, despite some of them being non-physical in nature (like Cheer and Focus for example) they still take up space in your inventory. What can I say, some emotions can be burdensome!
Bad Luck Cards
Useful stuff isn't all you can find in the ruins of the Old World. Unlucky survivors may draw Bad Luck cards from the Rubble pile. These cards, specially branded with the color that means "Yikes!", have a red background and confer penalties that the player who draws them suffers immediately. And before you ask: No, you can't keep that horde of rodents in your inventory! Ever heard of rabies?! (Bad Luck cards must be discarded once their effect has been applied.)
Junk
The most plentiful of Old World treasures. These cards don't have any effect, and don't stack together. However, they may come in handy if you must discard a random card, and certain clever characters may find a special use for them.
Healing Items
These items can be used during the Trade phase only, to make some space in your inventory and recover some lost Health. The amount of Health recovered equals the number of hearts shown on the top right corner of the card. These items cannot be stacked.
Crafting Ingredients
Don't want to attack the baddies? Maybe you're out of Ammo after stuffing your gun to the brim with bullets? Believe me, I get that. It happens! During the Combat phase, you can use your action to discard matching crafting ingredients to craft 1 of these nifty things:
- Planks + Nails = Barricade token
- Planks + Shards = Spear token
- Wires + Explosives = Trap token
- Nails + Explosives = Grenade token
Note: Unless a Rubble card has an infinity symbol, it must be discarded after use.
Crafted Items
- Barricade token: Place next to your character when crafted. Protects you against all Damage from the next attack that deals Damage to you. (Except for Brutes, who tend to skip these barricades and go straight for your tender bits!). Unless the attack deals 0 Damage to its target, the Barricade then breaks, and the Barricade token must be discarded. Barricades do not protect against Splash Damage or the effects of Bad Luck cards, and are not discarded after taking Splash Damage.
- Trap token: Place next to your character when crafted. Deals 4 Damage to an enemy immediately before they attack that character. If this kills the enemy, the character doesn't suffer any effect or Damage from the defeated enemy's attack. Otherwise, the character suffers Damage from the enemy's attack as normal. After use, the Trap token must be discarded.
- Spear token: Place on an enemy when crafted to deal 3 Damage to that enemy. In addition, every subsequent attack on that enemy will deal +1 Damage. When the enemy dies, discard the Spear token.
- Grenade token: Place on an enemy when crafted. The target and any adjacent enemies are temporarily removed from the combat. They cannot attack; cannot be targeted by any other attacks, abilities, or tokens; and can't take any Damage. At the end of the Combat phase, this effect ends, and the Grenade token must be discarded.
You cannot craft Barricades and Traps for a player other than yourself, nor trade them during the Trade phase, as they are not items.
WaVe!
Hear that roar behind that collapsed gas station? You're seconds away from a fight! When you draw the WaVe! card, bad things are coming. If it has not been revealed, draw the top Assault card from its deck and reveal it to the group. Next, you can do one of two things:
- Put on your game face and let them come! Take the WaVe! card and place it next to your character board. Unless something real clever happens, the first baddy is going to take a swing at you for having disturbed them, so I hope that you either have big, loaded guns—or that you've made your peace.
- Buy yourself some time: Grab a sharp thing nearby, stab yourself a bit, and chuck that now-bloodsoaked thing in the direction of the roars. They should be drawn to the smell of blood, distracting the horde long enough for you to get ready and search for more useful items. Take 1 Damage and draw 1 card from the Active Rubble pile before shuffling the WaVe! card back into it. Then resume the Search phase as normal until the WaVe! card turns up again.
The WaVe! card must be added to every Active Rubble pile before it is shuffled, at the beginning of every Search phase.
The WaVe! card does not take an item slot of your inventory. It's not an item, after all—just a reminder that you're the noisiest person around. Or maybe the tastiest . . .
Assault
When each WaVe! of bad guys approaches, you can generally get a glimpse of them.
Assault cards show how many of each type of enemy will attack during the next phase (e.g., 2 Brutes, 2 Raiders, etc.). This knowledge can help you prepare for the Combat phase, and choose whether you feel ready to face them, or try to buy more time to search the Rubble for useful stuff.
When you reveal this card, draw a corresponding number of Horde cards for each enemy shown on the Assault card based on the number of players, shuffle them together, and place them in a line from left to right in the center of the table. If enemies from the last WaVe! are still on the table, add the new cards to the right of them, so as to always have one line of enemies. The position of each enemy on this line will determine the order in which they attack—from left to right.
The Assault card tables are printed on the cards themselves, not in the text. They are transcribed below as they appear on the cards; "-" marks an empty box. Each row gives the number of that enemy to draw for 1 to 6 players.
Vanguard
| Enemy | 1 | 2 | 3 | 4 | 5 | 6 |
|---|---|---|---|---|---|---|
| Wanderer | 1 | 1 | 1 | 3 | 3 | 3 |
| Raider | 1 | 1 | 2 | 2 | 2 | 3 |
| Brute | - | 1 | 2 | 2 | 3 | 3 |
| Monster | - | - | - |
Looters
| Enemy | 1 | 2 | 3 | 4 | 5 | 6 |
|---|---|---|---|---|---|---|
| Wanderer | - | 1 | - | 1 | 2 | 2 |
| Raider | 2 | 3 | 4 | 4 | 5 | 6 |
| Brute | - | - | 1 | 2 | 1 | 1 |
| Monster | - | - | - |
Brutal
| Enemy | 1 | 2 | 3 | 4 | 5 | 6 |
|---|---|---|---|---|---|---|
| Wanderer | 1 | - | 1 | 1 | 2 | 2 |
| Raider | - | 1 | 1 | 1 | 2 | 1 |
| Brute | 1 | 2 | 3 | 4 | 4 | 5 |
| Monster | - | - | - |
Over the Top
| Enemy | 1 | 2 | 3 | 4 | 5 | 6 |
|---|---|---|---|---|---|---|
| Wanderer | - | 1 | 2 | 2 | 1 | 2 |
| Raider | 1 | 2 | - | 1 | 1 | 1 |
| Brute | 1 | 1 | 2 | 2 | 2 | 2 |
| Monster | - | - | 1 |
Trade Phase
Before the oncoming carnage, you have a few moments to do a bit of on-the-spot bartering. I suggest trying to trade that empty bag of Sofa-Spud brand chips you found in a dumpster to one of your gullible friends for an ammo clip if they have one.
During this phase, players, in no particular order, can give one of their items to another player of their choice. A player may only give 1 item during this phase. The player to whom they give the item is free to refuse the trade—in which case you may find someone more grateful to give something to. Any Rubble card can be traded, regardless of its type. Crafted tokens, such as Barricades, cannot be traded.
A player can give away only 1 card during the Trade phase—never a whole stack of cards. However, if a player gives the Backpack card to another player, any items in the Backpack are also given to the other player. Loophole!
The Trade phase is the only time where a player may use healing items, like food, by using the appropriate cards. There is no limit to the amount of healing you can get through eating in a round though! Ain't no feast in the apocalypse, but ain't no rule saying you can't enjoy what little you have, either!
You may choose to not give any item during trading—ain't nobody forcing you to! Also, as long as you still haven't traded an item this turn, you can absolutely regift an item you just received to someone else. They probably won't mind.
When all players are done trading, the Trade phase ends and the Combat phase begins.
Combat Phase
During this phase, each player takes a turn to act before the enemies at the center of the table, starting with the First Player. During their turn, a player can take only 1 action, which may be either:
- Attack: Make 1 attack with one of their weapons; or
- Craft: Craft 1 new item using the appropriate crafting ingredients (see Crafting Ingredients).
You can also do nothing and skip your turn.
Attacks
Weapons may inflict Damage in 3 different ways:
- Fixed Damage: The target takes the fixed number of Damage indicated on the weapon card.
- Splash Damage: Enemies and players adjacent to the target each take 1 Damage per Splash Damage indicated on the weapon card and Special cards. Splash Damage dealt to enemies only applies to other enemies (and Survivors) on the line, not player characters. Similarly, Splash Damage dealt to players only applies to adjacent players, and not enemies or Survivors. When playing solo, Splash Damage targeting the player is ignored. When playing as a duo, Splash Damage does not apply to the other player twice.
- Combat cards: Depending on the weapon and Ammo with which they are attacking, the player draws one or more Combat cards, and chooses one of them to use in the attack. Some Combat cards may deal Fixed Damage, Splash Damage, or a combination of both.
Combat Cards
Some attacks are less reliable than others, but can be devastating if they land. Such attacks are represented by Combat cards, which will often yield amazing bonuses, like the fabled +3 Damage—but may also impose penalties, such as the dreaded -2 Damage.
Some weapons, some enemies and all Ammo used will add one or more Combat cards to the attack. Both players and enemies draw from the same pile, which must be reshuffled when empty, using any discarded Combat cards. Special effects on Combat cards apply for both players and enemies—except the "Loose Rubble" effect, which does not apply when used by an enemy.
When multiple Combat cards are drawn for an attack, 1 of them must be applied. When an enemy draws multiple Combat cards, players must keep the one that deals the greatest total Damage to the enemy's target only, ignoring any other special effect, such as Splash Damage.
In certain situations, Combat cards may reduce the Damage dealt by an attack below 0, resulting in negative Damage (-1, -2). In such cases, the attack deals 0 Damage to its target, and despite any argument to the contrary, will not heal the target. You can't substitute a hospital visit with a slap from an unlucky wanderer, no matter how weak it was!
Once all players have taken their turn, any remaining enemies attack the group one by one. The first enemy attacks the player with the WaVe! card. (Don't worry, they definitely deserve it.) Then the remaining baddies attack players in clockwise order—meaning the second attack goes to the player left of the one with the WaVe! card, the third attack goes to the one left of the last attacked player, and so on.
Protections
When an enemy attacks a player, any Trap tokens that player has activate first. Then, if the player has Barricade tokens, they take effect. Whether or not any Damage is inflicted or Traps and Barricades are activated, the remaining enemies then continue targeting players clockwise as normal.
If a Survivor is on the line with the enemies, they suffer the Damage before the player with the WaVe! card. Thanks, chump! If there are no Survivors left on the table, any following attacks will target the players as normal.
Once all remaining enemies, if any, are done attacking, the next Search phase can begin. If Survivors remain, they stay at the center of the table, where they belong—after all, as far as you know, they could be infected too! Can't take any risk! The next WaVe! of enemies will join them during the next Round.
Last Round
Almost . . . there. . . . After Round 6 is completed, there are no more enemies lurking in the background. But don't think any baddies still standing will let you leave that easily!
If you didn't kill all the enemies on Round 6, here's how you can fix this oversight:
- Step 1: Shuffle the WaVe! card back on what's left of the Rubble pile.
- Step 2: Once someone draws the WaVe! card, don't draw an Assault card.
- Step 3: Trade as normal.
- Step 4: Go through the Combat phase as normal.
If after all this there's still zombies standing, repeat from Step 1 until the baddies are all dead, or one of you dies! It's possible that the only card left in the Active Rubble pile is the WaVe! card, which means the First Player can either accept the WaVe!, or take 1 Damage and pass it on to the next player.
Ending the Game
You getting tired, Rookie? Your killing arm getting sore? Just fill out this handy checklist to see if you've won:
- Has Round 6 ended?
- Are all the baddies dead? (NB: Survivors aren't really baddies. Deep down, they're all quite warm and fuzzy.)
- Are all of you still alive?
If you checked all the boxes, it looks like you Rookies made it! Look, you can even see the first rays of the sun over the skyline! Seems you get to live another day!
If you're missing a few checks on that list, no worries. You're not worm food just yet! Keep playing until all the boxes are checked. And if one of you meets an unfortunate end before that happens . . . well, can't win 'em all. It was nice knowing you, though.
Playing Solo
Not all characters are equal when playing as a lone wolf. Some will survive alone more easily than others. It's up to you to learn which character works best in which situation.
When playing solo, your inventory limit is 10 item slots, and you start with 3 weapons: your character's unique weapon, and 2 common weapons of your choice.
Story Mode
Not all stories are just about surviving the night. The world's still turning, despite how dysfunctional it's become. There are opportunities aplenty in the end times—and there's no telling where you might find yourself tomorrow.
Each story offers a new way to play the game, with unique rules and situations available through the STORIES + MODS expansion pack.
Symbols and Card Reference
Symbols
- Health Tracker: tracks the Damage inflicted to you or enemies. When the skull is reached, the character or enemy is dead.
- Combat card icons (1, 2, 3): Number of Combat cards to draw.
- Damage-type icon (1, 2, 3): Damage suffered by the character or enemy that drew the card (1, 2, 3). Barricades, Survivors, and any other protection do not prevent or affect this Damage type.
- Damage icon (0, 1, 2, 3): Damage dealt to the target (0, 1, 2, 3).
- Splash Damage icon (1, 2, 3): Splash Damage to add to your attack. If not an X, the large number is Fixed Damage to also add to your attack.
- Random discard icon: Discard 1 random card from your inventory.
- Optional discard icon: Unless you choose to do so, this item may not be discarded.
- Crafting icon: Crafting ingredient.
- Infinity icon: Do not discard after use.
- Barricade-crossed icon: Ignores Barricades.
- +1 icon: All enemies on the line deal +1 Damage when they attack. This effect is cumulative.
- Lightning icon: This card may be played at any time. Playing it does not count as an action.
Special Cards
- Energy Drink: Tastes like guava. Play during your turn in the Combat phase. You take 1 Damage immediately, and can either attack (Red) or craft (Green) 1 more time during your turn.
- Focus: Play during your attack. You may distribute the Damage of your attack to enemies adjacent to your target. Splash Damage cannot be distributed with this card, but still applies.
- Cheer: You can only play this card during another player's turn. They may take 1 additional action (attack or craft) during their turn. However, you must take the WaVe! card from the player who currently has it.
- Blood Lust: Play during your attack. When played, you take 1 Damage, and your attack deals 1 additional Splash Damage.
- Vitality Pills: Play during your attack. Draw 2 additional Combat cards. You can use this card even if your attack doesn't require you to draw Combat cards.
- Lucky: You can play this card any time a Combat card is drawn, whether by a player or an enemy. Discard that Combat card and draw another to replace it.
- Backpack: This card occupies 1 item slot in your inventory. However, it can contain 2 item cards. (Place them on top of this card.) The Backpack and the item(s) it contains cannot be stolen by a Raider, nor lost because of a Bad Luck card. When traded, any items stored in the Backpack are also given to the other player. You can change the items in the Backpack at any time. When the Backpack is discarded, the items stored in the Backpack are also discarded.
Bad Luck Cards
- Rodent Attack: Take 1 Damage, then discard.
- Crow Attack: Discard 1 random Rubble card from your inventory, then discard.
- Broken Bone: Take 2 Damage, then discard.