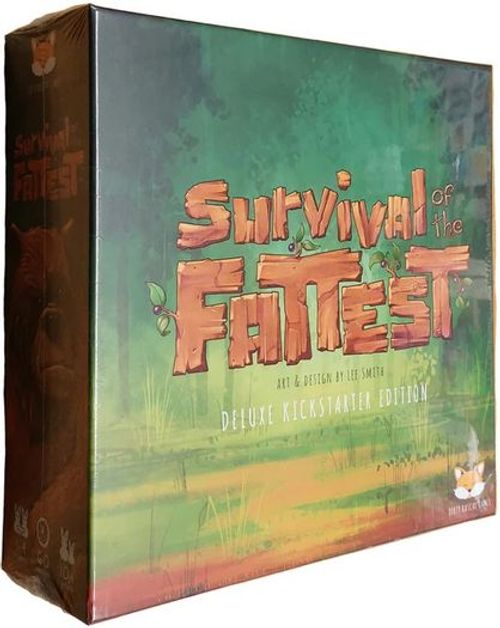
Survival of the Fattest
Survival of the Fattest Rulebook
Table of Contents
Table of Contents
Components
- 78 x Food Cards (13 x Carrot, Berry, Fish, Acorn, Leaf & Honey)
- 24 x Special Cards (12 x Wild Fruit & Traps)
- 44 x Recipe Cards
- 4 x Player Boards
- 6 x Critter Decks (Each with 1 x Critter, 3 x Trick & 7 x Forage cards)
- 4 x Player Reference Cards
- 7 x Critter Standees
- 1 x Round Marker
- 7 x Plastic Stands
- 1 x Game Board
Board Setup
- Shuffle the Food and Special cards together and then split into 4 stacks of approximately equal size.
- Place a stack face-down at Pinecrest Ridge, Greenvale & Pebblebrook. Place the remaining stack at the Trading Post to form the Trading Post Deck.
- Reveal 4 cards from the top of the Trading Post Deck and place them face-up on the available spaces.
- Place the round marker on the first space of the Season Track.
- Shuffle the Recipe cards and deal 2 cards to each player. Place the remaining cards at the Market to form the Market Deck. Do not reveal any cards for the Market yet.
Note: Light outlines on card spaces indicate the cards are placed face-up, dark outlines indicate cards are placed face-down.
Player Setup
Each player takes a Player Board and then selects a Critter Deck and the matching standee.
Your Player Board is used to keep your cards organised and provides an important location only you can visit during the game. You will visit the Stash location on your Player Board to save Food cards from your hand. You can then use these cards at the end of each season to feed your Critter or complete Recipes.
Up to 5 Recipe cards may be tucked above your Player Board (Reserved slots) to reserve them. Recipe cards completed directly from the Market are tucked below the Player Board (Bonus slots) and provide a Market Bonus (see Scoring).
- Tuck 1 of your Recipes above your Player Board to reserve it. Place the other Recipe face-up on one of the available spaces (light border) at the Market. Fill any remaining Market spaces with cards from the Market Deck.
- Place your selected Critter standee on the Stash location on your Player Board.
- Place your Critter card on the indicated space on your player board with the Food icons face-up. These icons show the Food cards required to feed your Critter at the end of a season. Once your Critter is fed, flip this card over to reveal your bonus ability!
- Shuffle your Critter Deck and place it face-down on the indicated space on your Player Board. Each Critter Deck includes 7 Forage cards and 3 Trick cards unique to your critter. Draw 5 cards from your Critter Deck to form your starting hand and you're ready to play!
How to Play
In Survival of the Fattest, each player takes the role of a woodland Critter. You will spend 3 seasons preparing for the coming winter by foraging for and stashing food. Each season is comprised of 4 rounds and each round is made up of 4 phases played in the following order;
- Determine Turn Order
- Actions
- Foraging
- Discard & Draw
Following spring and summer, a Reset phase shall occur;
- Reset
Following autumn, players skip the Reset phase and instead check for survival and calculate scores to determine the winner; if you don't survive, you can't win!
- Scoring
1. Determine Turn Order
In this phase, players will determine the starting player for the round.
Each player must reveal the highest numbered Forage card in their hand (or declare that they have no Forage cards). The player with the highest numbered Forage card shall be the starting player for the round.
If 2 or more players tie for the highest Forage card, those players shall then reveal the next highest Forage card in their hand. This shall continue until a starting player is decided.
If after all Forage cards have been announced the starting player can still not be determined, the player with the largest Critter shall be the starting player for the round (see Critter Size Guide).
Example: Chris and Mim both declare they have a 7 Forage card, Mick has a 6 and Sara has no Forage cards in her hand. Chris and Mim must now declare their second highest Forage card. Chris only has a 3, Mim has a 6. Mim is the starting player this round!
2. Actions
Beginning with the starting player and then proceeding clockwise, each player may perform the following actions in order;
A) Recycle B) Play Trick Cards C) Visit A Location
A) Recycle
You may place 2 or more cards from your hand face-up onto your Discard stack on your Player Board, then draw 1 fewer replacement cards from your Critter Deck and add them to your hand.
Example: It's Jamie's Actions phase. First she must decide if she wants to Recycle any cards in her hand. Jamie plans to visit the Market this turn and use her Trick card to help complete a Recipe. The Trap and Forage cards in her hand are of no use for that task so she places those 3 cards into her Discard and draws 2 replacement cards.
B) Play Trick Cards
You may play any number of Trick cards from your hand. If you choose not to play a Trick card this turn you may save the card for a later round when it may be more effective, or discard it at the end of the round.
Resolve the effects of each Trick card completely and then place the card face-up onto your Discard stack on your Player Board before playing any further Tricks or visiting a location this turn. If a Trick card has an effect that isn't immediately resolved or affects a later phase in the game, keep the card in front of you as a reminder until its effect is resolved and then place it on your Discard stack.
Example: Much better! Now Jamie plays her 'Lyre Bird' Trick card so that she can use 1 of her Food cards as a Wild Fruit this turn. The Trick card stays in play until its effect is resolved and then is placed in Jamie's Discard. Jamie moves her critter to the Market and uses the Food cards from her hand to complete an available Recipe, placing it in a Bonus slot.
C) Visit a Location
You must Select 1 of 6 possible locations to visit each round and place your Critter standee near it (see the next section for an explanation of each location). You must move to a new location each round. If you visit the Trading Post, Market or Stash locations resolve the associated action immediately. If you visit Pinecrest Ridge, Greenvale or Pebblebrook you must wait until the Foraging phase to resolve that action.
At the end of your Actions phase, refill any empty spaces at the Market or Trading Post with new cards from their respective Decks. If there are not enough cards to refill all spaces, refill as many as you are able.
Note: The Stash location is on your Player Board!
If you chose to visit the Market you may perform 1 of the 2 following actions;
- Reserve 1 of the 4 face-up Recipe cards by tucking it above your Player Board in 1 of the 5 available Reserved slots (these Recipes may be completed at the end of the season). If there are no free Reserve slots then you must return an existing reserved Recipe to the bottom of the Market Deck to make room for the new card.
or
- Complete 1 of the 4 face-up Recipe cards by spending the required Food cards (indicated on the Recipe card) from your hand. Place the spent food on the bottom of the Trading Post Deck and tuck the completed Recipe card below your player board in 1 of the 5 available Bonus slots (the bonus ability on this card will now be active). If there are no free Bonus slots then you must put an existing Bonus Recipe face-down in your completed Recipes stack on your Player Board to make room for the new card.
If you chose to visit the Trading Post you may perform 1 of the 2 following actions;
- Take the top card from the Trading Post deck and place it face-up onto your Discard stack on your Player Board.
or
- Swap 1 Food card (not a Trap) from your hand with 1 of the 4 face-up cards at the Trading Post.
If you chose to visit your Stash you may place any number of Food or Trap cards from your hand face-down into your Stash. Beware, Trap cards in your Stash will be -1 point each at the end of the game! Try to remember what you have stashed, you may not look at these cards again until the end of the season (unless a Trick or Ability allows it)! These stashed cards can be spent at the end of each season to complete any reserved Recipe cards or feed your critter.
If you visit one of the 3 foraging locations below, you must wait until the Foraging phase to resolve the action.
3. Foraging
In this phase, players that visited Pinecrest Ridge, Greenvale or Pebblebrook will compete for Food and try to avoid Traps!
For each location where Critters are foraging, follow these steps in order;
A) Play Forage cards B) Determine Priority C) Reveal Cards D) Draft Cards
A) Play Forage Cards
In turn order each player at the location may play any number of Forage cards from their hand, placing them face up in front of their Player Board. You do not need to play all your Forage cards, however priority shall be awarded to the player who plays the most.
B) Determine Priority
Priority is determined by the number of Forage cards played. The player who plays the most Forage cards is awarded the highest priority, followed by the player who played the second most Forage cards, etc. Any ties for priority shall be resolved by Critter size with the larger Critter awarded the higher priority (see Critter Size Guide).
Example: Chris, Mim and Sara have all chosen to forage at Pebblebrook this round. Chris plays 3 Forage cards, Mim and Sara both play 2 Forage cards. Chris played the most Forage cards and therefore has the highest priority. Mim (playing as Flit) and Sara (playing as Lottie) played an equal number of cards, therefore second priority is awarded to Sara as she is playing as the larger Critter.
C) Reveal Cards
Reveal a number of cards from the top of the location deck equal to the total number of Forage cards played by all players at that location. Place these revealed cards where all the players involved can clearly see them. If there are not enough cards at the location, reveal as many as you are able. When Food becomes scarce, some critters may have to miss out!
Example: There were a total of 7 Forage cards played at this location. 7 cards are revealed from the top of the location deck. Not too bad! Our Critters managed to find a variety of Food cards and only 1 Trap!
D) Draft Cards
Starting with the player awarded the highest priority, each player will take 1 card from the revealed cards and place it face-up on the Discard stack on their Player Board. If a Trap card is available, you must take it unless there is a lower priority player who has not yet taken a Trap card.
Card drafting continues in order from highest to lowest priority until all players have taken a number of cards equal to the number of Forage cards they played. If a critter forages alone, they will take all of the revealed cards.
Once foraging is complete each player places all of their played Forage cards face-up onto their Discard stack.
Example: Chris, being the highest priority gets first pick of the cards. There is a Trap available but Chris does not need to take it as there are 2 lower priority critters who haven't yet taken one. Chris wisely takes the Wild Fruit! Sara now looks at the remaining cards, like Chris she does not need to take the Trap as there is still a lower priority critter yet to pick. Sara decides the Berry would be most useful. With a sigh, Mim takes the Trap card and puts it face-up onto her Discard. As there are no lower priority critters at this location she doesn't have a choice, poor Mim! Chris now selects his second card, he takes the Acorn as it will help complete a Recipe he has Reserved. Sara decides on a Carrot and Mim takes the Leaf. The last Carrot goes to Chris.
4. Discard & Draw
Commence this phase by moving the round marker 1 space to the right on the season track. If the round marker moves from one season to the next, then skip the rest of this phase and complete a Reset phase instead.
If there are no more spaces available on the season track, then skip this phase and complete a Scoring phase to determine the winner!
If the round marker moves from one round to another within the same season, players may prepare for the next round by discarding any unwanted cards from their hand, except for Traps. Trap cards may never be discarded, though they may be Recycled during a player's Actions phase.
After discarding any unwanted cards, players then draw cards from their Critter Deck up to their hand size. The starting hand size is 5 cards. Some cards or abilities increase your hand size. If there are not enough cards in a player's Critter Deck, they draw as many as possible, then shuffle their Discard stack to form a new Critter Deck. They may now continue to draw as many cards as required to reach their hand size.
5. Reset
During a Reset phase each player must complete the following steps;
A) Reset your Deck — Combine your Hand, Critter Deck and Discard together and shuffle to form a new Deck. Move your Critter back to your Stash location.
B) Spend your Stash — Look through your Stash. You may use any of the Food cards there to complete Reserved Recipes or feed your critter. Recipes completed this way are placed face down in the Recipes stack on your player board. If you feed your Critter, flip your Critter card to reveal your bonus ability. Critters may only be fed once per game. Food cards used in this phase are placed on the Trading Post Deck. Unused Food cards remain in your Stash for next season.
C) Reset your Hand — Draw cards up to your hand size ready to start the next season.
Next, reset the board by completing the following steps;
A) Reset the Market — Shuffle the face-up Recipe cards and the Market Deck together, then deal 2 cards to each player. The remaining cards form a new Market Deck. Each player reserves 1 of their new Recipe cards and places the other face up in the Market. Fill any remaining Market spaces with cards from the Market Deck.
B) Reset the Trading Post and Foraging Locations — Shuffle all of the Trading Post and foraging location cards together and then split into 4 stacks of approximately equal size. Place a stack on Pinecrest Ridge, Greenvale & Pebblebrook; the remaining stack forms the new Trading Post Deck. Reveal 4 cards from the top of the Trading Post Deck.
You are now ready to commence the first round of the new season.
6. Scoring
After the final round of autumn, each player will spend Food cards from their Stash and then calculate their scores to determine the winner. To finalise scores, complete the following steps;
A) Discard your Hand and Deck — Place the cards in your hand and your Deck into your Discard. Cards that did not make it into your Stash are of no value for scoring.
B) Spend your Stash — Look through your Stash. You may use any of the Food cards there to complete reserved Recipes or feed your critter if you have not already done so. If you feed your Critter, flip your Critter card to reveal your bonus ability. Used Food cards are placed on the Trading Post Deck. Unused Food cards remain in your Stash as they may be worth bonus points depending on your completed Bonus Recipes.
C) Survival Check — To win, your Critter must first survive. Any Critters that have not been fed are eliminated from the game!
D) Score your Completed Recipes — Look through your Completed Recipes stack (not the reserved or bonus Recipes tucked under your player mat), and add the basic value of each card indicated in the top right corner.
E) Score your Bonus Recipes — Next add the bonus points from any Recipes tucked under the bottom of your player mat (not Recipes still in your reserved slots), and add the bonus value of each card indicated in the bottom left corner. (Cards with an * in their value provide bonus points based on the conditions specified).
F) Final Score — Add the points from step D) and step E) together to make your final score. The surviving player with the highest score wins!
*Example: Jamie has placed her Hand and Critter Deck into her Discard, and spent everything she can in her Stash. She now confirms that her Critter survived; luckily she was able to feed Flit after Summer so she proceeds to calculate her score. First she adds the points of the 6 Recipes in her Completed Recipes stack by adding the basic values (top right score): 3 + 5 + 2 + 3 + 2 + 2 = 17. Next Jamie adds the value of her Bonus Recipes by adding the bonus values (bottom left score), including bonus points indicated by an : 2 (2 unspent Carrots) + (1+2) + (-3+8) (8 other Recipes) = 10. Jamie's final score is the value of her completed Recipes plus the value of her Bonus Recipes: 17 + 10 = 27.
Critter Size Guide
In Survival of the Fattest ties are decided by Critter size; the larger Critter wins! The critters, from largest to smallest, are:
- Ol' Grizz (largest)
- Bucky
- Lottie
- Huni & Bunz
- Oakley
- Flit (smallest)
Critters
Ol' Grizz — Ol' Grizz is the undisputed boss of the woodland. The other critters are best to stay clear as he doesn't like to share!
- Ability: When foraging you are always granted the highest priority regardless of how many Forage cards you played.
- Bonus: You may use Wild Fruit as any Food type.
Bucky — Bucky can be a little shy. He performs best when he doesn't have to compete with the other woodland critters.
- Ability: When foraging alone, put all of the revealed cards onto your Stash instead of your Discard.
- Bonus: You may wait to choose your location by deferring your turn until last each round.
Lottie — Lottie thrives in the water. She doesn't like to stray too far from Pebblebrook. She knows all of the best foraging spots along the river bank.
- Ability: When you visit Pebblebrook, look at the top 3 cards. Put 1 back, 1 into your hand and the other on another location.
- Bonus: When completing a Recipe at the Market, put the spent Food onto your Stash.
Huni & Bunz — Huni & Bunz are the dynamic duo of the woodland. They work together in harmony or can split up to cover more territory.
- Ability: When foraging you may forage in 2 separate locations. The Forage cards you play apply to both locations.
- Bonus: When visiting the Trading Post or Market, you may take that action twice.
Oakley — Oakley loves company; the more the merrier! Sometimes his sticky fingers gets him in trouble but he's always willing to share the spoils with friends!
- Ability: Before playing any cards when foraging, draw 2 cards from your Critter Deck for each other critter at the same foraging location.
- Bonus: +2 Food cards.
Flit — Flit is the master marketeer; she always finds the best recipes! Who needs to stash all that food for winter when there's tasty treats to eat right now?
- Ability: Each season, keep both of your starting Recipes. You may complete reserved Recipes as though they were in the Market (and claim the Market Bonus).
- Bonus: +1 Food card. You may spend this bonus at the end of each season.