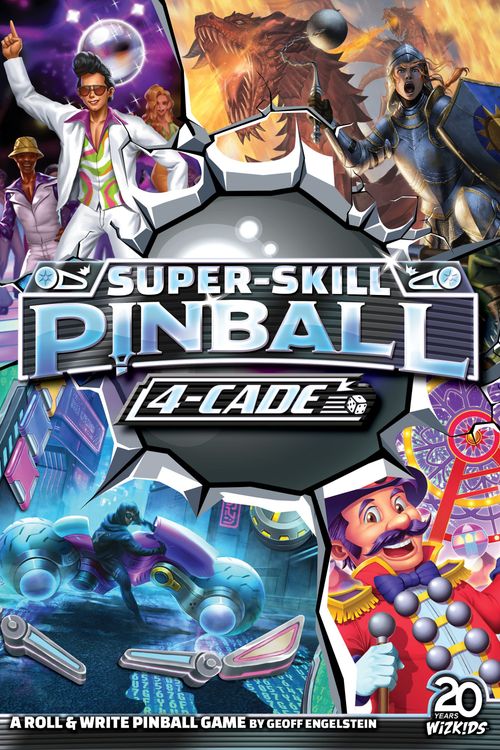
Super-Skill Pinball: 4-Cade
Super-Skill Pinball: 4-Cade Rulebook
Table of Contents
Table of Contents
Overview
Use strategy, skill, timing—and a little bit of luck—to get the highest score!
Two dice are rolled every turn. Each player chooses a die to use, moves their ball token, and fills a box showing what their ball hit.
They then collect stars (star) and trigger bonuses. When all players have moved their ball, a new turn starts.
If you cannot fill a box, the ball is lost, the round ends, and you start your next round. Finish three rounds and it's Game Over!
After all players have completed their third round, the player with the most stars is the winner!
Components
- Sixteen Pinball Table and Backglass cards
- Carniball (Easy Difficulty)
- Cyberhack (Moderate Difficulty)
- Dragonslayer (Moderate Difficulty)
- Dance Fever (Advanced Difficulty)
- Two six-sided dice
- Eight ball tokens
- Four dry-erase markers
Setup
Each player takes the following:
- A matching Table and Backglass. Make sure all players have their own copies of the same Table and Backglass.
- Two ball tokens
- A dry-erase marker
IF YOU HAVE NEW PLAYERS IN YOUR GROUP, START WITH CARNIBALL.
Keep the dice in the center of the play area.
Fill the Round 1 circle on the Round track, located above the Plunger on the bottom right corner. This is a reminder that you are in the first Round.
Place one of your ball tokens on the Start Arrow.
Keep your second ball token nearby. It will be used during the game under special conditions.
Anatomy of Pins
Super-Skill Pinball: 4-Cade comes with four "Pins," short for Pinball Tables. Each consists of two sheets: the Table and the Backglass. While each Pin is unique, they do have some common features:
Score Track: Each Backglass has a score track. Points are represented by star symbols.
Nudge: This modifies your dice rolls. (p. 7)
Zones: Each Table is divided into sections, or Zones, separated by distinct lines.
Start Arrow: An arrow labeled "Start" leading into the top Zone.
Die faces: 1, 2, 3, 4, 5, 6. Die faces are usually colored red, yellow, or white.
Sets: Many features are grouped into Sets, like a Set of Bumpers or Drop Targets. Common Sets are explained on p. 13. Each Pin also has its own unique Sets.
Boxes: Each Pin has boxes with solid, dashed, or double lines, showing when they get erased. (p. 12)
Flippers: Each Pin has a Yellow Flipper and Red Flipper.
Outlanes: The outermost dashed boxes in the bottom zone, labeled 1 and 6. (p. 12)
Inlanes: Dashed boxes in the bottom zone labeled 2 and 5. Each also has an arrow leading to its Flipper. (p. 12)
Round Track: Notes the current Round.
Indicators: Note temporary game effects.
The Carniball Table is labeled with a Score Tracker and Nudge boxes on the Backglass, and on the Table: the Start Arrow, a Set of 3 Bumpers, a Set of 3 Drop Targets, a Set of 4 Drop Targets, 3 Indicators, the Round Track, four Zones, and — across the bottom Zone — Outlane, Inlane, Red Flipper, Yellow Flipper, Inlane, Outlane.
The other three Pins each have their own Backglass and Table: Cyberhack, Dragonslayer, and Dance Fever.
Details of Play
Rounds and Turns
Your Round begins with one ball token in play, starting at the Start arrow.
A Round is a series of turns. Players take their turns at the same time, sharing the same dice roll.
Each turn is divided into three steps:
Step 1: Roll the Dice — Roll two dice. Choose a die to use.
Step 2: Move Your Ball — Move the ball token to the feature you want to hit.
Step 3: Fill a Box — Use your marker to fill a box on that feature. Then score any stars and/or collect any bonuses you earn by doing so.
Your Round ends when you have no ball tokens in play. Rounds may end at different times for each player.
Scoring Points
Whenever you earn a star, fill a star space on the Backglass, from left to right, filling the track from 1 to 100.
Note: star = one star; star-2 = two stars; star-3 = three stars, etc.
If you score one hundred stars, fill the next hundreds space and erase all the other stars.
Some Pins feature blue stars (blue star). These usually represent bonuses that accumulate over time, but only actually score on certain conditions unique to that Pin.
End of Game
The game lasts a total of three Rounds.
Because players take their turns at the same time, but make their own choices, some players will have more turns than others.
Some players may even be in different Rounds at the same time, depending on how they utilize the results of the dice.
Victory
At the end of the game, the player with the most stars is the winner!
Step 1: Roll the Dice
To start a turn, one player rolls the two dice. Each player will simultaneously assign one of the dice to their ball token. Players do not need to use the same die as the others: each chooses which die they use.
Tip: Choosing a designated roller helps keep the game moving at a nice pace.
Nudging
Nudging allows you to change one of the dice results to a different number. This Nudge only affects your results: the die is NOT actually turned or changed for other players.
To Nudge, fill one of the double-line boxes on the Backglass and write the difference between the original number and the number you want in the large Nudge box.
If you've used all your double-line Nudge boxes, you can no longer Nudge for the rest of the game. Small Nudge boxes are never erased.
You MAY NOT Nudge a ball if Nudging would make you lose the ball, but you may Nudge to AVOID losing a ball.
You may not Nudge to AVOID a Tilt.
Tip: Be careful! If you Nudge, you risk Tilting (see the following section).
Tilting
If you Nudge, you might Tilt on the next roll.
- If the difference between the two dice results is equal to or greater than the Nudge amount, you are OK.
- If the difference is less than the Nudge amount, you Tilt! The Round immediately ends for you. You lose all your ball tokens from play.
Example: The roll is 1 and 3, but you really want a 4. You Nudge the 3 into a 4, fill a Nudge box, and write 1 as the Nudge amount. Since you wrote a 1 as the Nudge amount, you will only Tilt if the next roll is doubles (1-1, 2-2, 3-3, 4-4, 5-5, or 6-6).
Erase your Nudge amount after this roll, regardless of whether or not you Tilt.
Step 2: Move Your Ball
Move your ball token to a feature containing an unfilled box that has your chosen die value.
Normally, you must move your ball token to a lower Zone.
Some arrows allow you to move the ball token in the arrow's direction instead, under certain restrictions.
Note: You may voluntarily skip Zones and move your ball farther down the Table.
Some features are only accessible on certain conditions, noted in that Pin's special rules.
Example: At the start of Carniball, the dice results are 1 and 4. Your ball token is on the start arrow. From here, you could move your ball token to any of the highlighted features shown below.
If you use the 1, you can move your ball token to any of the features highlighted in purple.
If you use the 4, you can move your ball token to any of the features highlighted in blue.
Flippers
If your ball token starts a turn on a Flipper, you may move it up to any higher Zone.
- The Yellow Flipper sends your ball back up to any feature that contains a yellow or white die face.
Example: On Carniball, the Yellow Flipper leads to the Duckies Drop Targets, the Ferris Wheel boxes, and the Bumpers.
- The Red Flipper sends your ball back up to any feature that contains a red or white die face.
Example: On Carniball, the Red Flipper leads to the Balloons Drop Targets, the Feat of Strength feature, and the Bumpers.
When you move from a Flipper, you are not required to move the ball to the highest Zone — you can hit any feature of the correct color.
Moving to the Same or Between Flippers
After moving from a Flipper, it is possible that you may not be able to hit any features (or choose not to hit any other feature), so the ball falls back to an empty Flipper box.
Example: The roll is 1 and 3. Your ball token is on the Red Flipper. Unfortunately, all of the accessible Red features already have both die results filled, so the ball token falls back down to the Flipper zone. There is an unfilled box available on the Yellow Flipper. You choose to place the ball token on the Yellow Flipper.
Note: You can choose to have the ball token return to the same Flipper if there is an appropriate box available.
Step 3: Fill a Box
You MUST fill an empty box in your ball token's new Zone. If you cannot, your ball token may not stay in that Zone.
You may only fill an empty box showing your chosen die result. (The feature color does not matter unless it came off a Flipper.) After you fill a box, place the ball token near that box as a reminder of your ball token's current location at the start of the next turn.
After all players have taken their turn, go back to Step 1 and roll the dice again.
Combination Boxes
Some boxes can be hit with more than one face of a die. For these boxes, any of the dice faces shown in the box may be used to fill the entire box. You may use either result, but must fill the entire box.
Example: The Ferris Wheel Cars in Carniball are combination boxes. The left box can be filled if you rolled either a 1 or 2. The middle box can be filled if you rolled either a 3 or 4. The right box can be filled if you rolled a 5 or 6.
The first and fourth Red Drop Targets in Carniball are also combination boxes. The first box can be filled if you rolled a 1 or 2. The fourth box can be filled if you rolled a 5 or 6.
The Flippers' middle boxes are also combination boxes. The Red Flipper's middle box can be filled if you rolled a 4 or 5. The Yellow Flipper's middle box can be filled if you rolled a 3 or 2.
Earning Rewards
Filling some boxes earns you stars or other benefits specific to that Pin.
Sets
Many features are grouped into Sets. If all the boxes in a Set are filled in, it is considered complete and you may get a bonus or something special may happen. In addition, you can erase the marks from the entire Set, so they are ready to be filled again.
For more details, see Common features of Pins on page 12.
Example Turns
Example Turn 1: The first roll of a new Carniball game is 1 and 3. You can fill a box in any Zone containing a 1 or 3, but you decide to start in the Ferris Wheel Cars Zone. You choose the 3 and fill the 3/4 Ferris Wheel Car box and move the ball token there. Other players are not affected by your choice to use the 3. They may select either the 1 or the 3.
Example Turn 2: The roll is 4 and 5. Your Ball token must move down to a lower Zone. You choose the 5 and move the ball token to the bottom Bumper and fill a 5. You also score a star, since all Bumper boxes are worth one star. Fill the first star on the Backglass to show this.
Example Turn 3: The roll is 1 and 6. You may never stay on the same feature, so if you choose the 6 you would have to move down to a lower Zone. Instead you choose the 1 and follow the purple arrow to move to the upper left Bumper, marking the corresponding box and scoring one more star.
Example Turn 4: The roll is 1 and 2. You can't follow the purple arrow to the 3/4 Bumper and fill a box, so you must move down to a lower Zone. You can choose to hit a Duckies Target or a Balloons Target. You could also choose to move further down and land on a Flipper.
You choose to move to the Balloons Targets. You can use either the 1 or 2 to fill the 1/2 box. You also score another star.
Common Features of Pins
These are more detailed descriptions of common features found on many Pins.
Flipper Zone
This is the lowest Zone at the bottom of your Table. It containes Flippers, Inlanes, and Outlanes. You use Flippers to keep your ball token in play as described on p. 9.
On either side of the Flippers are Inlanes and Outlanes.
Inlanes
You may move the ball through one of these lanes, score two stars, then immediately move your ball token onto the Flipper below it without filling another Flipper box. The arrow leading from each Inlane box to its respective Flipper serves as a reminder.
Outlanes
If you fill one of these, you score two stars for each of the three Red or Yellow Flipper boxes that are filled, then that ball is lost. If you have no ball tokens in play, you start a new Round. (See p. 15)
Round Track
This notes your current Round of play. Remember, because each player plays independently and simultaneously, you might find yourself in a different Round than your opponents.
Indicators
These are brightly colored glowing circles. You will fill these indicators as a reminder of ongoing bonuses or other special game modes. (For example: Flipper Pass Active, Next Spinner Bonus Active, Outlane Bonus Active.)
Solid, Dash, and Double-Lines
The outline of a Box or Indicator represents when you should erase any marks on those features.
Solid Line: These boxes are usually in a Set. (See p. 13) Erase these boxes when all the boxes in the Set have been filled.
Dashed Line: Erase the box when the Round is complete.
Double Line: Do not erase this box for the rest of the game.
Multiball
Some Pins allow you to unlock your second ball token, letting you use both ball tokens at the same time.
When you start Multiball, place your second ball token on the Start Arrow. On the next roll, you must assign one die result to one ball and the other to the second ball. You may not use the same die result for both.
You move and get any bonuses from one ball token before you do so with the second token.
For example, you may move one ball token to gain a Skill Shot (explained on p. 14) and then immediately use that Skill Shot for the second ball.
Both balls may be on the same feature – on the same Flipper or Bumper, for example. However, you must fill different boxes to get there.
Multiball ends when you start a turn with zero or one active ball. You still get any special Multiball bonuses on the turn you lose one (or both) balls.
If Multiball is already active, you may not gain it again until you lose one of your active ball tokens.
Sets
After you complete a Set, you erase the boxes in that Set. That makes the boxes accessible again! The rules for each Pin will explain their unique Sets. Always read the Pin rules before starting a new Pin! If there is a conflict between these rules and the special rules for the Pin, the special rules take precedence.
Bumper Sets
Bumpers commonly let you move your ball token from one Bumper to another. This allows you to keep your ball token in the same zone in consecutive turns, which you are normally not allowed to do.
Drop Target Sets
These are features that appear in Sets of three or four. When you completely fill every drop target in the Set, you get your choice of several bonuses, like extra points, new abilities, or the Multiball mode.
Most bonuses can only be taken once per game. However, the infinity symbol means that option can be taken any number of times during the game.
Skill Shot Set
Completing certain Sets gives you a Skill Shot. When you unlock a Skill Shot, circle one of the six numbers in the Skill Shot area on the Table.
You may have multiple Skill Shots circled, but you may not circle a number that is already circled.
Using the Skill Shot allows you to use any circled number instead of a die result. After using a Skill Shot, erase that number's circle.
Example of a Skill Shot: You completed the Ferris Wheel Cars Set in Carniball. In doing so, you unlocked a Skill Shot!
You cannot circle the 1 or 5 because they are already circled. You decide to circle the 3 instead.
The next roll is 6 and 1, but you really wanted a 3. You erase the circle around 3 from your Skill Shot area.
Now, you can fill a 3 feature.
Later, you can choose that number again if you unlock another Skill Shot. Skill Shots are not erased until used.
Using a Skill Shot does not affect the roll for any other player: you do not physically change any die faces.
You can also use a Nudge and a Skill Shot together to optimize your choices.
Example of Nudging a Skill Shot: The roll is 1 and 1, but you really want a 4. You do not want to risk a Nudge of 3, so you first use a Skill Shot of 5. You change a 1 to a 5. Then you Nudge that down to a 4. You write 1 as the Nudge amount.
You cannot use Skill Shots to avoid a Tilt.
Spinner Sets
Spinners are unusual features because the ball token never stops in a Spinner space. It always proceeds up to the next Zone. You may only move through Spinners when coming up from a Flipper.
As your ball token passes through, you may fill the Spinner box corresponding to the die that you did NOT choose this turn. You then score that number of stars. You may not fill a box that is already filled.
Example: You roll 3 and 5 and move through the Spinner shown on the right. You choose to use 3. That means 5 is your unused die. Because the 5 box is empty, you may fill it and score five stars.
If the 5 had already been filled, the ball token could still move through the Spinner, but no bonus stars would be scored.
If all six Spinner boxes are filled in, the Set is erased.
Losing a Ball and Ending a Round
If you move to the Flipper Zone and cannot fill a box using a result from one of the dice, the ball is lost. You also lose the ball if you fill one of the Outlane boxes in the Flipper Zone or Tilt after a Nudge. If you have no more ball tokens in play, that ends the Round for you.
- Erase all the dashed-line boxes.
- Fill the next circle of the Round track.
- Place one ball token back on the Start Arrow.
Note: In Multiball, if you lose a ball, you just continue with one ball token. You only follow this end of Round procedure if you have no ball tokens in play.
You are now ready to start your next Round with the next roll of the dice.
Ending the Game
At the end of your third Round, your game is over. If other players are still going, wait until they are finished with their third Round, and then compare scores to determine the winner of the game.
If players are tied, the player who completed their third Round earliest is the winner. If multiple players tied and also completed their last Round on the same turn, the victory is shared.
If you set a high score, record it and try to beat it next time! Page 32 has space to record your high score on specific Pins.
Carniball
What better way to spend a fun filled afternoon than at the local fair! Ride the ferris wheel, test your skill at carney games like knocking down ducks, throwing darts at balloons, and testing your strength! Who will go home with the biggest prize?
The Carniball Table contains: the Start Arrow, Ferris Wheel Cars (Set of 3), Feat of Strength Targets (Set of 6), Bumpers (Set of 12), Duckies Drop Targets (Set of 3), and Balloons Drop Targets (Set of 4).
Carniball Special Rules
Ferris Wheel Cars: The Start Arrow launches the ball into the Ferris Wheel Cars. Filling in all three of these boxes allows you to circle a Skill Shot number. Like all Sets, remember to erase all the Ferris Wheel Cars when the Set is complete. The Yellow Flipper can shoot the ball back into the Ferris Wheel Cars.
Bumpers: Each Bumper box is worth one star. You may use the purple arrows to move between the Bumpers, so you can move from the 1/2 Bumper to the 3/4 Bumper, but not the other way to the 5/6 Bumper. You erase the Bumpers when all 12 boxes are filled.
Either Flipper can hit a Bumper.
(See Bumpers x2 bonus for rules about the translucent arrows.)
Feat of Strength Targets: The Feat of Strength Targets are located in the same Zone as the Bumpers but can only be reached from the Red Flipper.
These boxes must be hit in sequence.
Example: The roll is 1 and 3. Your ball token is on the Red Flipper. The first box is already filled, so you cannot use your 1 to access this feature again. The third box is empty, but you cannot fill it because the second box has not been filled yet.
Each Target has a different star value, ranging from zero to twenty. Like most Sets, all six are erased when the Set is complete.
On the turn after a Feat of Strength Target is hit, the ball must move down to either the Drop Target Zone or the Flipper Zone.
Drop Targets: There are two Sets of Drop Targets—Yellow Duckies Targets and Red Balloons Targets. Each target is worth one star. When either Set is completed, you may select one of the bonuses. The Drop Target bonuses may only be taken once per game, as shown by the double lines.
Infinity Exception: star-2 or star-3 bonuses may be taken any number of times.
Duckies Bonuses
Fill 2 Feat of Strength Spaces: Fill the next two Feat of Strength Targets in the sequence. Score the stars shown.
Multiball: Start Multiball. While active, all stars you score are doubled.
Flipper Pass: Both the Red and Yellow Flippers can hit any feature, regardless of color, until the end of the Round.
star-2: Score two stars. You may take this instead of another Duckies bonus. Do not fill this box.
Balloons Bonuses
Bumpers x2: Bumper scores are doubled. This stacks with Multiball (so stars would be quadrupled). In addition, the translucent Bumper arrows are now active. You can move both clockwise and counterclockwise using the Bumper arrows. This lasts until the end of the Round.
Multiball: Start Multiball. While active, all stars you score are doubled.
Outlanes x2: Outlanes are worth four stars per filled Flipper box (instead of two stars). This stacks with Multiball. This lasts until the end of the Round.
star-3: Score three stars. You may take this instead of another Balloons bonus. Do not fill this box.
Cyberhack
Corporations run the world. You are an elite hacker, opposed to their data monopoly. Trawl the alleys to stockpile hacks, clear your cache, then RUN for the data to override their systems! But the Corporations are tracing you – so don't overstay your welcome or you may crash!
The Cyberhack Table contains: the Start Arrow, R•U•N Mini-Bumpers (Set of 3), CACHE Spinner (Set of 6), Alleys (Set of 3), Main Bumpers (Set of 3), Hacker Drop Targets (Set of 3), and Backdoor Drop Targets (Set of 4). The Cyberhack Backglass contains the R•U•N Minigame with its Data track, Trace track, and Hacks.
Cyberhack Special Rules
Alleys: The Start Arrow launches the ball into the ALLEYS. Filling in all three of these boxes allows you to circle a Skill Shot number. The Red Flipper can shoot the ball back into the Alleys.
Main Bumpers: These operate the same as on Carniball, except that if you complete a single Bumper (all four boxes), you gain a Hack. You still only erase the Bumpers when all twelve boxes are filled. Either Flipper can hit a Bumper.
CACHE Spinner: Your ball token can move from the Red Flipper through the CACHE Spinner up to the ALLEYS. The ball never stops in the CACHE. It always proceeds up to the ALLEYS. Spinners are further explained on p. 15.
Drop Targets: There are two Sets of Drop Targets—Yellow HACKER Targets and Red BACKDOOR Targets. Each Target is worth one star. When either Set is completed, you get to select one of the bonuses.
The Drop Target bonuses with double lines may only be taken once per game.
Infinity Exception: star-2 or star-3 bonuses may be taken any number of times.
Hacker Bonuses
Erase RUN & Hack Hack: Erase all three R•U•N mini-Bumpers and gain two Hacks.
Flipper Pass: Both the Red and Yellow Flippers can be used to hit any feature, regardless of color, until the end of the Round.
Next CACHE x3: Next CACHE Spinner score is tripled. This lasts until used. If you move through CACHE and can fill in a box based on your die selection, you must.
Next RUN x2: The blue stars for the next RUN are doubled. This lasts until used.
star-2: Score two stars. You may take this instead of another HACKER bonus. Do not fill this box.
Backdoor Bonuses
Bumpers x2: Bumper scores are doubled. In addition, the translucent Bumper arrows are now active. You can move both clockwise and counterclockwise on the Bumper arrows. This lasts until the end of the Round.
Outlanes x2: Outlanes are worth four stars per filled Flipper box instead of two stars. This lasts until the end of the Round.
Erase CACHE: All CACHE Spinner boxes are erased.
Hack Hack Hack: Gain three Hacks.
star-3: Score three stars. You may take this instead of another BACKDOOR bonus. Do not fill this box.
R•U•N Mini-Bumpers
The Yellow Flipper can be used to access the R•U•N mini-Bumpers. The three R•U•N mini-Bumpers work just like regular Bumpers, except that you can always move both ways along the arrows and there is only one box on each.
If all three boxes are filled, the RUN minigame begins.
If you cannot move to a new R•U•N mini-Bumper, the roll must be used to move the ball to the Main Bumpers (or lower).
The RUN mini-Bumper boxes are dashed. They are only cleared at the end of each Round, unless you select the Erase RUN & Hack Hack Bonus on the HACKER Targets.
Starting a RUN
If you fill all three R•U•N mini-Bumpers, the RUN minigame begins on the Backglass. Your goal is to hack into the corporation's data to score as many points as you can before being found out!
While your RUN is in progress:
- Your ball token remains in the RUN mini-bumper area.
- You share the same dice rolls with the other players as normal.
- You may not use Skill Shots or Nudges.
After the dice are rolled:
- Fill a number of boxes on your RUN Data track equal to the sum of the two dice. Fill from left to right, top to bottom.
- Fill Trace boxes (from top to bottom) equal to the difference between the two dice.
Example: The roll is 5 and 2. You fill seven boxes on the Data track and fill three boxes on the Trace track.
Ending a RUN
There are three ways a RUN can end: Crash, Escape, or Override.
Crash: If the bottom box on the Trace track (the Skull) is filled in, you have been discovered by the corporation. You lose the minigame, score no blue stars, and end the RUN.
Escape: After each roll, you may decide to end the RUN. If you do, score blue stars equal to the row with highest score that you fully completed.
Override: If you complete the 100 blue star row, you must end the RUN.
Note: The stars are blue to remind you to only score when you Escape or Override.
Hacks
Hacks help you during a RUN.
Before the RUN, you may earn Hacks in several ways:
- Fill in all four boxes on a Main Bumper
- Select the Hack Hack Hack bonus after completing the BACKDOOR Drop Targets Set
- Select the Erase RUN & Hack Hack bonus for completing the HACKER Targets Set
When you gain a Hack, fill the Hack on the Backglass. During a RUN, you can use a Hack to ignore a roll:
- Don't fill anything on the Data or Trace tracks.
- Then, erase the Hack. This is the only way to erase a Hack.
Example: You only have three empty boxes remaining in the Trace track. The next roll is 4 and 1, meaning that the difference between the dice is three. Under normal circumstances, you would Crash! Luckily, you have a Hack available. You erase one of your Hacks and ignore this result.
After a RUN
After the RUN ends, erase all the Data and Trace boxes on the Backglass.
On the next roll, you must move your ball token to the Main Bumpers. If you can't (or don't want to) fill in a box there, move down to the next Zone as normal.
Example RUN
You are in the middle of a RUN, shown below. At the start of the turn the black circles are filled.
You decide to continue the RUN.
The next roll is 2 and 4. You fill six Data boxes (4+2) and two Trace boxes (4-2), shown in red.
You decide to Escape. You score 12 points, as that is the last full row you completed.
Dragonslayer
You are a wizard starting out on your adventure, with just a single spell in your spell book. Fight rats and goblins, and learn new spells as you gain experience. Eventually, you will be able to defeat the dragon terrorizing the village and capture its hoard!
The Dragonslayer Table contains: the Start Arrow, Yellow Bumpers (Set of 12), Dragon Drop Targets (Set of 3), EXP Drop Targets (Set of 3), Scroll (Set of 6), Rat Drop Target (Set of 1), Goblin Drop Targets (Set of 2), Rest Drop Targets (Set of 4), Cast Drop Targets (Set of 2), and the Hoard track. The Dragonslayer Backglass contains the Spell Book, with a Levels column and a Spells Learned and Spells Cast box for each Spell.
Dragonslayer Special Rules
Start of Game: At the start of the game, each player learns one Level 1 Spell of their choice. (See p. 25 for details on Spells.)
Hoard Track: The "Coin" is a special reward in this pin. Any time you gain a Coin, fill one box on the HOARD track in the center of the Table, filling in from left to right and top to bottom. Each box is worth two stars.
You score stars equal to the current HOARD value by completing the DRAGON Drop Targets Set or casting the INVISIBILITY Spell.
When you earn the HOARD bonus, it does not reset to zero. You can try to earn it again (perhaps even increasing it first) during that Round.
The HOARD uses blue stars as a reminder that you do not score the bonus right away.
When your Round ends, in addition to erasing the dashed boxes, reset the HOARD to zero.
Bumpers: The Start Arrow launches the ball into either of the two Yellow Bumpers in front of the EXP Targets.
The Bumpers give either one star or one Coin when the ball token moves onto them, as shown on the Table. The Bumpers are erased when all twelve boxes are filled in.
The Yellow Flipper can hit either of these Bumpers.
Scroll Bonus: If all six SCROLL boxes are filled in:
- Gain a Coin on the HOARD track.
- Learn a new Spell from your current level or lower.
Erase all 6 SCROLL boxes when the Set is complete. The SCROLL Targets are accessible from either Flipper.
Inlanes: When filling an Inlane box you have a choice of scoring two stars or gaining two Coins on the HOARD track.
Dragonslayer Drop Targets
RAT Bonus: When the RAT Drop Target is hit, score one star. Since the RAT Drop Target is a Set of 1, you needn't fill in the box every time you hit it to score the one star.
GOBLIN Bonus: When both of the GOBLIN Drop Targets are filled, score three stars.
REST Bonus: When a Target is filled, score one star. When all four Targets are filled, gain three Coins and erase all the Cast Spell boxes. Those Spells may now be cast again.
CAST Bonus: When both Targets are filled, gain two Coins and you may cast a Purple Spell. If you have not learned a Purple Spell or don't have one available to cast, you still get the two Coins.
DRAGON Bonus: When all three DRAGON Targets are filled, you score the current value of the HOARD. Do not double that value if Multiball is active.
Example of scoring HOARD: You filled all of the DRAGON Drop Targets, completing that set and gaining its bonus. You have seven Coins. You score fourteen stars.
EXP Bonus: The EXP Targets can only be accessed by moving from one of the Yellow Bumpers. The arrows from the EXP Targets to the Bumpers are always accessible in both directions.
When all three are filled, you gain a Level.
- Immediately score the stars shown for that Level.
- Learn a new Spell from that Level.
- If you reach Level 6 or higher, you earn five stars and can learn any Spell. If you gain a Level and have already learned all the Spells, you still gain those five stars.
Example of Gaining a Level: You filled all of the EXP Drop Targets, completing that set and gaining its bonus. You gain a level, reaching Level 2. This also earns you one star. You choose to learn the Fear spell.
Remember to erase all Drop Target boxes when its Set is filled.
Spells
Spells are tracked on the Backglass. Each Spell has two boxes next to it.
- The left box is filled in when you learn that Spell. Once you learn a Spell, it is yours for the rest of the game. You never have to learn it again.
- The right box is filled in when you cast that Spell. When a Spell is cast, you cannot cast it again until you complete the REST Targets.
There are two types of Spells.
- Black Spells may be cast at any time.
- Purple Spells may only be cast when you complete the CAST Targets.
Many Spells change dice results. These changes only affect you. They do not affect the other players in any way.
Spells may not be used to avoid a Tilt.
You can use multiple black spells to affect the same die.
Example: The dice result is 4 and 5. You cast GROW to change a die from a 5 to a 6. You fill the Cast box next to that spell. Then you cast DARK TENDRILS to flip that die to a 1. You fill the Cast box next to that spell.
Spell Book
Cast Black Spell: Any time. Cast Purple Spell: Fill CAST Drop Targets.
Level 1
- Toad Familiar (black): Skill Shot 1
- Cat Familiar (black): Skill Shot 3
- Imp Familiar (black): Skill Shot 5
Level 2
- Grow (black): Increase a die +1
- Shrink (black): Decrease a die -1
- Fear (purple): RAT/GOBLIN x3 stars until end of Round
Level 3
- Dark Tendrils (black): Flip a Die
- Transmogrify (black): +/- 1 a Die
- Raise Dead (purple): 2 Ball Saves
Level 4
- Phantasm (purple): Multiball x2 stars and Coins
- Command (black): Change a Die number
- Summon Dragon (purple): 8 Coins
Level 5
- Invisibility (purple): Score Hoard
- Fireball (purple): Fill and Score any 2 boxes
- Radiant Blast (purple): Erase Bumpers
Spell Notes
FAMILIARS: Each of these spells may be cast to change a die to the number shown, like a Skill Shot.
GROW, SHRINK, TRANSMOGRIFY, and DARK TENDRILS: Each of these Spells change one die result.
FEAR: The RAT and GOBLIN Drop Targets are worth triple stars for the rest of the Round.
RAISE DEAD: Fill the two Ball Save circles.
If any Ball Save circles are still filled from a previous time you cast Raise Dead, you may still cast it. Only fill any blank Ball Save circles.
Instead of using one of the Flipper boxes, you may erase a Ball Save and place the ball token on either Flipper.
PHANTASM: Start Multiball. Double all stars scored and all Coins gained.
EXCEPTION: HOARD bonus (blue stars) is not doubled during Multiball.
COMMAND: Change a die to any number.
SUMMON DRAGON: Gain eight Coins. If you cast during a Multiball, you gain sixteen Coins instead.
FIREBALL: You may fill up to two boxes that may be hit by a ball (so not Ball Save, for example). Score stars, Coins, and effects for those boxes as normal. If you fill an Outlane, you lose the ball.
Dance Fever
It's the '70s and disco music fills the clubs. Dance and spin on the floor as the light from disco balls spotlight your moves. You're the main attraction on the Disco Pinferno dance floor!
The Dance Fever Table contains: the Start Arrows, Disco Ball Bumpers (Set of 6), Yellow Spinner (Set of 6), Red Spinner (Set of 6), the Start Disco Pinferno spaces, Hot Stuff Drop Targets (Set of 2), Groove Drop Targets (Set of 3), Boogie Drop Targets (Set of 3), and the Boogie Bonus track. The Dance Fever Backglass contains the Disco Pinferno mini-playfield: Start Arrows, Left Pinferno Drop Targets (Set of 3), Right Pinferno Drop Targets (Set of 3), the Hot Stuff Indicator, and the Fever Bonus Stars.
Dance Fever Special Rules
Start of Game: At the start of the game, fill the Hokey Pokey space on the Boogie Bonus track.
Boogie Bonus Track: "Doubles" are two identical dice results: 1-1, 2-2, 3-3, 4-4, 5-5, or 6-6.
Each time doubles are rolled, erase the currently filled Boogie Bonus space and fill the next higher space. You cannot Nudge or Skill Shot to make doubles. They must be natural, unmodified rolls.
If The Hustle is already filled and doubles are rolled, your Boogie Bonus resets back to Hokey Pokey.
Disco Ball Bumpers: The Start Arrows send the ball to the Disco Ball Bumpers. You may choose to send it to either the Red or Yellow Disco Ball.
The Disco Ball Bumpers act like normal Bumpers. Filling a box is worth one star.
When you fill all the boxes on the Disco Ball Bumpers, you get a Skill Shot.
The ball token may move back and forth between them.
However, if the ball token is not moved to a Disco Ball, it must follow the down arrow to the correct Start Disco Pinferno space.
- A ball token on the Yellow Disco Ball moves to the 2/3 Start Disco Pinferno space.
- A ball token on the Red Disco Ball moves to the 4/5 Start Disco Pinferno space.
If the ball token is using a die result that matches the Start Disco Pinferno space, you may choose to stop there. Otherwise the ball moves to the corresponding Hot Stuff Zone (or lower) as normal.
The Yellow Flipper can hit the Yellow Disco Ball and the Red Flipper can hit the Red Disco Ball.
Example: You just started a new game and the ball is placed on the Start Arrows. The roll is 1 and 4. You choose the 4 and move the ball to the Yellow Disco Ball.
The next roll is 3 and 5. If you choose the 3 you can move to the Red Disco Ball, or the left Start Disco Pinferno space.
If you choose the 5, you can move to the Red Disco Ball. You cannot move to the left Start Disco Pinferno space. You would need to move to a lower Zone.
Starting Disco Pinferno
Disco Pinferno Multiball is a minigame played on the Backglass.
If you stop the ball token on a Start Disco Pinferno space, and you are not already in Disco Pinferno Multiball, then Disco Pinferno Multiball begins. The two Start Disco Pinferno spaces on the Table's playfield are never filled. The ball can always land there with the correct die result, as shown by the infinity symbol.
You can only move to these spaces from the Disco Ball Bumpers. The arrows serve as a reminder.
Playing Disco Pinferno
When Disco Pinferno Multiball starts, erase all boxes on the Backglass's mini-playfield, including the Hot Stuff circle indicator and the Fever bonus stars.
Place your second ball token on the Start Arrow on the Disco Pinferno mini-playfield.
On your next roll, use the normal Multiball rules, except that each ball stays on their own playfield (one on the Table's playfield and one on the Backglass's mini-playfield). In addition, scores are NOT doubled.
From the Start space on the Disco Pinferno mini-playfield, the ball may hit any of the six drop targets.
Filling a Target gives you one star.
If you complete either the left or right set of three targets, you also gain the next Fever bonus. Fill the lowest unfilled section of the thermometer and gain the stars noted beside it. Your first Set is worth four stars, the second is five stars, the third is seven stars, the fourth is ten stars, and the fifth is fifteen stars.
Each set beyond the fifth is worth fifteen stars again.
Erase a Set when it is complete.
If the ball in the Table's playfield lands on one of the Start Disco Pinferno spaces while Disco Pinferno Multiball is already in progress, you erase all filled Red or Yellow Flipper boxes on the Backglass's mini-playfield. (You can never erase Flipper boxes on the Table's playfield this way.)
If you lose the main ball on the Table while Disco Pinferno Multiball is active, the minigame continues. Your Round will end when the Disco Pinferno ball is also lost.
Example: Disco Pinferno Multiball has started while a ball is still active on the Table. The roll is 5 and 6.
One of those dice must be used for the ball token on the mini-playfield and the other for the ball token on the Table.
You choose the 6 for the Disco Pinferno mini-playfield. You hit the 6 Drop Target, scoring one star.
The 5 is used to hit a Boogie Drop Target on the Table, scoring one star.
Hot Stuff Zone
This Zone only contains just the two Hot Stuff Targets. If you fill both, you get the Hot Stuff bonus.
If not filled, fill the Hot Stuff circle indicator on the Backglass's mini-playfield.
All Disco Pinferno stars scored are now doubled, including Fever bonuses. Do not double any stars scored on the Table.
From a Start Disco Pinferno space, you may only move to the Hot Stuff Target shown by that space's arrow.
Either Hot Stuff Target can be hit by both Flippers.
Example: The roll is 1 and 5. You use the 5 to hit the Hot Drop Target. This completes the set and activates the Hot Stuff bonus on the mini-playfield. Your mini-playfield bonuses will be doubled.
You use the 1 to finish the Drop Target Set on the left, scoring two stars for the Target and ten stars from the second Fever bonus.
Outlanes
The Outlane bonus counts the boxes on both the Table's main playfield and the Backglass's Disco Pinferno mini-playfield.
Remember that you don't erase the boxes on the Pinferno mini-playfield when you lose that ball. You only erase them at the end of the Round or when you start your next Pinferno Multiball.
Dance Fever Drop Targets
Aside from the Hot Stuff Targets (described above), there are two other Sets of Drop Targets on the Table: three Yellow Groove Targets and three Red Boogie Targets. When all the boxes of a Set are filled in, gain the bonus for that Set.
Groove Bonuses
Next Spinner x2: Next Spinner score is doubled; fill the bonus circle indicator to show it is available.
The next time you score a Spinner, you score double the stars and erase the bonus circle indicator to show it has been used.
You must take the Spinner stars if possible. This bonus does not expire at the end of the Round. It remains until used.
Outlanes x2: Outlanes are worth four stars per filled Flipper box (on the Table and on the Backglass) instead of two stars. This lasts until the end of the Round.
Erase Both Spinners: All Spinner boxes are erased.
star-2: Score two stars. You may take this instead of another GROOVE bonus. Do not fill this box.
Boogie Bonus
If all the boxes of the Red Boogie Targets are filled in, you MUST score the currently filled Boogie Bonus space.
The Hokey Pokey is worth zero stars, Funky Chicken is one star, Electric Slide is three stars, The Bump is eight stars, and The Hustle is fifteen stars.
After scoring the bonus, reset the Boogie Bonus track by erasing the currently filled space and filling the Hokey Pokey space.
Spinners
There are two Spinners that head back to the Disco Ball Bumpers.
The two Sets of six boxes are each erased separately when all six are filled.
The Yellow Flipper goes through the Yellow Spinners and the Red Flipper through the Red Spinners.
IMPORTANT: If you move up through a Spinner, you must then go to the matching color Disco Ball Bumper. If you cannot fill a box on that Disco Ball, you must follow the down arrow to the Start Disco Pinferno space directly below. You cannot move to the opposite Disco Ball.
Example: You are on the Yellow Flipper and roll 4 and 5.
You use 5. Your unused die is 4.
You choose to move your ball token through the Yellow Spinner.
You fill the 4 box, and gain four stars. The ball token then continues up to the Yellow Disco Ball.
There is no 5 on the Yellow Disco Ball, so you can't stop there. Even though the 5 is empty on the Red Disco Ball, you can't go there since you must follow the down arrow from the Yellow Disco Ball.
You continue moving your ball token down to the left Start Disco Pinferno space.
Again, you cannot stay there with a 5 and must keep moving.
You move down to the left Hot Stuff Target, which is not filled, and decide to end your turn there. You fill in that box.
Score Board
The Score Board page provides a score track (rows of stars, with 100-star spaces) for each of the four Pins, along with an Achievements checklist for each.
Carniball Achievements
- Complete Feat of Strength during Multiball
- Complete Feat of Strength twice in one game
- Complete 10 bumper boxes without leaving the zone
- Complete all 12 bumper boxes without leaving the zone
Cyberhack Achievements
- Override a RUN
- Override a RUN with 2x Modifier
- Erase the CACHE spinner
- Earn 12 Hacks during a game
Dragonslayer Achievements
- Rest when at least five spells have been Cast
- Score the Hoard three times in one Round
- Reach Level 10 (get level 6 five times)
- Learn all 15 spells
Dance Fever Achievements
- Get the Hustle Bonus
- Get the 10 star Fever Bonus
- Get the 15 star Fever Bonus
- Complete both Yellow and Red Spinners