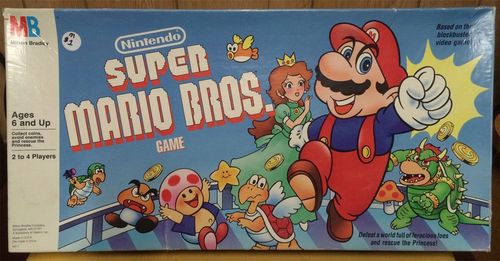
Super Mario Bros.
Super Mario Bros. Rulebook
Table of Contents
Table of Contents
Contents
- 4-part gameboard
- Mario playing piece with stand
- 36 playing cards
- 1 die with label sheet
- 18 hazard tokens
- 36 coin tokens
Object
Be the player who moves Mario onto the Princess space on the World 4 gameboard.
Initial Assembly
Carefully separate the 4 gameboards along the perforations.
Carefully separate the Mario playing piece, hazard tokens and coin tokens from the cardboard platform.
ASSEMBLE MARIO: Fold Mario along the 4 crease lines as shown in Figure 1, then fit him into the plastic stand.
LABEL THE DIE: Carefully apply 1 label to each side of the die, in any order. Apply each label as shown in Figure 2.
Game Setup
-
The gameboards are labeled World 1, World 2, World 3 and World 4. Place the World 1 board where all players can reach it. For now, set the other 3 boards aside.
-
Place Mario on the World 1 board START space. During the game, all players will take turns moving Mario.
-
Place all hazard tokens and coins to one side of the board.
-
Shuffle the playing cards, then deal three cards facedown to each player. Place the remaining cards in a facedown drawpile to one side of the board.
Look at your cards, but don't show them to anyone else! All players do the same.
Game Play
The youngest player goes first. Play then continues clockwise.
The 4 Worlds
To get to the Princess space at the end of World 4, Mario must first move through World 1, World 2, and World 3, in that order. Mario's movement from one world to the next is described under MOVING TO THE NEXT WORLD, on page 4.
Moving Mario
Start your turn by rolling the die. Then move Mario ahead on the path (in the direction of the big arrow) according to your die roll, as follows:
- If you roll red: Move Mario ahead to the next red space, then roll again.
- If you roll yellow: Move Mario ahead to the next yellow space, then roll again.
- If you roll red/yellow: Move Mario ahead to either the next red space or the next yellow space, then roll again.
- If you roll STOP: Don't move Mario at all—your turn is over!
Keep rolling the die and moving Mario until you roll STOP, or Mario loses a life. (See LOSING A LIFE, on page 6.) This ends your turn. Now the player to your left takes a turn moving Mario.
The Different Path Levels: All red and yellow spaces are considered path spaces. This means you can move Mario up onto pipes, blocks, cannons, etc., and down from them, as long as you're moving ahead to the next space of the color you rolled. You cannot move Mario through a block. See Figures 3 and 4 for movement examples.
FIGURE 3: On a red die roll, move ahead to either red space (see solid arrows). On a yellow die roll, move ahead to either yellow space (see broken arrows). On a red/yellow die roll, move ahead to either red space or yellow space!
FIGURE 4: On a red die roll, move ahead to either red space (see solid arrows). On a yellow die roll, move ahead to the yellow space (see broken arrow). On a red/yellow die roll, move ahead to either red space, or to the yellow space!
Moving to the Next World
The last two spaces on Worlds 1, 2 and 3 link to the next World board. When Mario reaches a link space, move him directly to the START space on the next board. Now continue your turn. Figure 5 shows how to move from board to board (link spaces are shaded).
FIGURE 5: Move from either link space to World 4. Move from either link space to World 3. Move from either link space to World 2.
Collecting Coins
You can collect coins from mushroom spaces and coin spaces. Place the coins you collect in front of you. Four coins equal an "extra life." See BUYING AN EXTRA LIFE, on page 6.
There's no limit to the number of coins you can have. Here's how to collect them:
Mushroom Spaces: Whenever you move Mario onto a space with a mushroom on it, collect 4 coins.
Coin Spaces: There are coins inside some path spaces, and on top of others. Figures 6 and 7 explain how to collect coins from both kinds of coin spaces.
FIGURE 6: If you land under a space with coins inside, collect two coins.
FIGURE 7: If you land on a space with a coin on top of it, collect one coin.
Collecting Cards
Whenever Mario stops under a ? block, draw a card from the drawpile and add it to your hand. There's no limit to the number of cards you can have.
If the drawpile has run out, just shuffle the discard pile next to it, then turn it facedown to start a new drawpile.
Playing Your Cards
On any player's turn, one or more opponents can play hazard cards to place enemies on the path. The 6 hazard cards are shown in Figure 8. (Note that 2 of them can be played only on certain World boards.) Here's how to play a hazard card on an opponent:
- Wait until your opponent has rolled the die and moved at least once. Then announce that you're playing a card.
Card play limit: Each player may play one card per roll. This means that two or more players can play cards against the same opponent!
- Place a hazard card from your hand faceup on a discard pile beside the drawpile. Then place the matching hazard token on any path space, except for the following spaces:
- The space Mario is on;
- A space with a hazard token already on it;
- A link space or start space;
- The Princess space or the King Bowser space on World 4.
Any player (including you) who lands on a space occupied by a hazard token loses a life. See LOSING A LIFE, on page 6. Return the hazard token to the pile. Your turn is over. No player can collect coins or cards on that space.
FIGURE 8: THE HAZARD CARDS
- Bullet Bill: play only on World 3 board.
- Bowser's Fire: play only on World 4 board.
- Spiny, Koopa Troopa, Little Goomba, Hammer Brother: play these cards to place hazard tokens on any world board.
Fireball card: see Escaping Hazards below.
Escaping Hazards
There are two ways you can avoid landing on a hazard token:
-
By passing over the token. With a lucky die roll, you can move Mario to a safe space ahead of a hazard token. Return the hazard token you jumped over to the pile, then continue your turn. You escaped!
-
By playing a Fireball card. Play it before rolling the die on your turn. Then remove one hazard token from the path. If there is more than one hazard token on the path, remove the token of your choice. You can play more than one Fireball card per turn; but you may only play one per die roll. NOTE: Fireballs have no effect on the King Bowser Space.
Losing a Life
You lose a life whenever you land on any space shown in Figure 9. Whenever you lose a life, your turn ends. Keep Mario on the space he landed on. The next player's turn begins on that space.
FIGURE 9: You lose a life whenever you land on one of these spaces.
- Any hazard token space.
- Any water space (on World 2 and World 3 boards).
- Any fire-bar space (on World 4 board).
- The King Bowser space (on World 4 board).
Buying an Extra Life
After rolling STOP or losing a life, you can buy an "extra life" by trading in 4 of your coins. First, return your 4 coins to the coin pile. Then continue your turn by rolling the die again. If you have enough coins, you can trade them in for two or more "extra lives" on the same turn!
Saving the Princess to Win the Game
To win the game, you must be the player to move Mario onto the yellow Princess space at the end of World 4. You may be lucky enough to jump over the red King Bowser space to do this. However, if you land on the King Bowser space, you lose a life.
When this happens, each player in turn rolls the die. (Remember, you can trade in 4 coins to extend your turn!) The first player to roll yellow or red/yellow moves Mario onto the Princess space and wins the game!