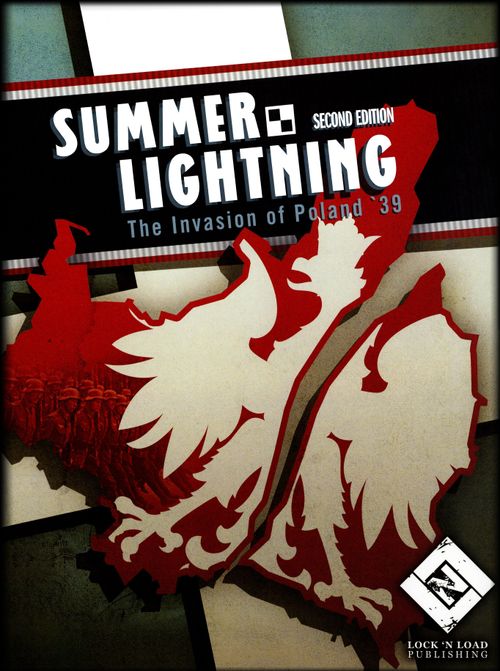
Summer Lightning: The Invasion of Poland 1939
Summer Lightning: The Invasion of Poland 1939 Rulebook
Table of Contents
Table of Contents
- 1.0 Introduction
- 2.0 Components and Concepts
- 3.0 Sequence of Play
- 4.0 Initial Phase
- 5.0 Operations Phase
- 6.0 Movement
- 7.0 Combat
- 8.0 Supply Rules
- 9.0 Special Rules, Clarifications, and Exceptions
- 10.0 Victory
- 11.0 Historical Scenario
- 12.0 Game Options
1.0 Introduction
Summer Lightning is a military-simulation game of the invasion of Poland in September 1939, the first campaign of World War II in Europe.
2.0 Components and Concepts
The game includes the following: a set of 280 counters, one 17" x 22" map, a player-aid card, and this rules book, which contains the Historical Scenario and Game Options Guide. Players will also need one ten-sided die (1d10); a "0" on the die always means ten, not zero.
2.1 Counters
Most of the counters in the game represent military units. See the Unit Identification Chart (UIC). Each unit's counter has the following features:
Combat Factor (CF): the leftmost of the two large numbers at the bottom of the counter, denoting its relative power in battle. A "p" in between the two numbers denotes that it is a Poor-quality unit.
Movement Factor (MF): the rightmost of the two large numbers at the bottom of the counter, denoting the number of movement factors it can expend in a turn.
Combat Unit: any unit with a non-parenthesized CF.
Non-combat Unit: a unit with its CF in parentheses; it cannot attack by itself.
Unit Symbol: a box containing a special symbol in the center of the counter tells you what type of unit the counter represents, and what type of troops predominate in the formation.
Unit Identification Numbers: most units are also marked with identification numbers to the left or right of the Unit Symbol. A number or abbreviation to the left of the symbol means that the unit is a corps-sized unit, a headquarters (HQ) unit, or a grouping of artillery assets attached to a corps or army. A number or abbreviation to the right of the symbol denotes a division or independent sub-divisional unit (brigade or regiment).
Full- or Reduced-strength: a division- or corps-size unit will be at either full strength (still fresh and able to attack with full effectiveness) or reduced strength (after the unit has taken significant casualties or has suffered disruption). To denote the reduced-strength status of a division, flip it over to show the lower CF (notice also that the two factor ratings are printed in outline style text, and there is a white stripe on the counter). Sub-divisional units do not have a reduced-strength side.
Activation Chits: correspond to HQ units that are on the map.
Color: troops from four different countries are present in the game, denoted by the following color key:
- Gray = Germany
- Blue = Slovakia
- Gold = Soviet Union
- Red = Poland
Information Markers: these counters are white and denote actions or status, e.g., Exploit, Move, Out of Supply, Improved Position (IP), Turn Now, Weather.
Other Counters: these include counters for tracking German or Soviet Air Support Points and the four attack and six defense mission chits used during combat.
2.2 Map
The game is played on a simplified map of Poland and sections of its neighboring countries. A hexagonal (hex) grid has been superimposed on the map to regulate movement and positioning of the playing pieces. One hex on the map equals 30 kilometers (or about 20 miles) in area.
"To Latvia" Zone: a small area of northeastern Poland is not included on the map; instead, there is a zone on the map edge marked "To Latvia." Polish units moving or retreating via the north edge of the map within this zone are assumed to enter Latvia, where they will be interned (see rule 6.54). Axis units cannot move or retreat off of the map.
Greater Germany: the territories marked on the map as Austria, East Prussia, the Danzig Free State, and the Protectorates of Bohemia and Moravia are considered part of Greater Germany for all purposes. Slovakia is an independent country through which German troops can freely move.
2.3 Concepts and Definitions
Sides: The game is for two players, playing as the Polish side or the Axis side. The Polish player controls all Polish units. The Axis player controls all German and Slovakian units. At some point in the game the Soviet Union will invade eastern Poland, to occupy that portion of the country agreed to by Germany and the Soviet Union in the Molotov-Ribbentrop Pact; on the map it's marked by a Demarcation Line. Though the Soviet Union is not part of the Axis, the Axis player controls these units.
Control: There are numerous references to towns and cities being controlled by one side or the other. At the beginning of the game, both sides control all towns and cities in the respective countries in which they set up (e.g., the Polish player controls all towns and cities in Poland). During the game the side that last moved a unit (combat or not) through a town or city controls it.
2.4 Starting the Game
Once player sides are determined, both players set up their starting forces on the map as directed by the Scenario Set-up Guide (see 11.1). Both players then take the activation chits corresponding to the headquarters (HQ) units on the map and place them in a Dunnigan Ceramaceous Randomizer (e.g., a dry, clean coffee cup—or an upended steel helmet for verisimilitude).
2.41 Game Options
Before starting the game, players can decide to take one or more options that may alter the initial force composition/deployment and reinforcement entry, or change other parameters of the game. Each option favors one player or the other and is paid for by spotting the other player a certain number of Victory Points. It is recommended that the players complete the historical scenario once before using any options. The game options are listed in section 12.0.
3.0 Sequence of Play
Each turn represents two days. During each turn, use the following sequence of play:
3.1 Initial Phase
- The Axis player rolls 1d10 to determine the weather (see 4.1), which affects his number of Air Support Points (see 9.21).
- The Polish player rolls 1d10 to determine whether his government surrenders this turn (see 9.5).
- Reinforcement units can enter the game (4.3).
- Certain reduced-strength divisions can be returned to full strength with Replacement Points (4.4).
3.2 Operations Phase
One player (it doesn't matter who) draws one chit from the Randomizer (cup). The corresponding HQ unit on the map can then put a certain number of units (usually six divisions) under command, enabling them to move and conduct combat. When the player who controls the forces commanded by the chosen HQ unit has finished his operations, the activation chit is placed aside and another chit is drawn. This continues until all chits have been drawn or both players agree they no longer want to perform any operations.
3.3 Turn End Phase
All activation chits, including those of HQ units that were eliminated during the turn, are returned to the Randomizer. Remove all Move, Exploit, and Out of Supply markers from units on the map. Replace on the map all HQ units that were eliminated during the turn. Move the Turn Now counter on the Turn Record Chart to note the passage of one turn.
The next turn then begins with the Initial Phase.
4.0 Initial Phase
4.1 Weather
Weather affects the number of Air Support Points the Axis player receives on that turn. In Clear weather, the Axis player receives 8 Air Support Points; in Poor weather, 4 Air Support Points are received. The weather on Turn One is always Clear. Each Initial Phase thereafter, the Axis player rolls 1d10 and deducts 1 if the weather in the previous turn was Poor, and adds 1 if the weather was Clear. The weather gets worse (Clear becomes Poor) on a result of 1–3, better (Poor becomes Clear) on a result of 8–10, and stays the same on a result of 4–7.
4.2 Polish Surrender
This is not a concern until Warszawa (Warsaw) is under Axis control. Then see section 9.5.
4.3 Reinforcements
See the Reinforcement Schedule (11.2) to determine which units are available to each side on the current turn in the Historical Scenario. The choice of some game options before play may affect this schedule.
4.4 Replacement Points
When a unit is eliminated, its remnants can be regrouped and reorganized to bring other reduced-strength divisions still on the board back to full strength (completely eliminated divisions and sub-divisional units cannot be rebuilt). In each Initial Phase, do the following:
- Examine the units that have been eliminated during play (those in the dead pile).
- Calculate 10% of the total full-strength CF in the dead pile (cumulative, not per turn) for each nationality. This number is the number of Replacement Points (RPs) available to divisions, for that nationality. Fractions of RPs are not retained or rounded up. RPs can be accumulated from turn to turn (keep track of them on scrap paper). Once a RP has been spent, it is gone.
Example: The Polish player examines his dead pile and the units there have a total of 34 CF. Ten percent of this yields 3 RPs (the 0.4 fraction is discarded); he spends 2 RPs to bring one division from its 1-3 reduced-strength side to its 3-3 full-strength side; he saves the third RP for a later turn, noting on his piece of scrap paper that he has 1 RP.
In order to receive replacements, a reduced-strength division must be in supply (in command by an in-supply HQ). The owning player must expend RPs equal to the difference between the full-strength and reduced-strength Combat Factor of the division.
4.41 Exceptions
Soviet and Slovakian units do not get Replacement Points. The German player cannot return reduced-strength motorized divisions to full strength.
5.0 Operations Phase
5.1 Activating Units
During the Operations Phase, one player draws one activation chit from the Randomizer. The chit will indicate a specific HQ unit. First, check to see if the selected HQ is in supply (see 8.2); mark the HQ with an Out of Supply marker if necessary, and be aware of the effect this has on the combat units under that HQ's command (see 8.3). Whether the HQ is in supply or not, it can then undertake operations with up to SIX divisions—and any number of sub-divisional units—within its command range that have not already conducted operations. Any friendly non-HQ unit that can trace a line of hexes free of enemy units no longer than THREE tactical MF (ignoring the effect of rivers) from the HQ can be brought under command by that HQ and used to move and/or conduct combat.
Note: there are differences in procedure depending on the nationality and level of the HQ unit picked, to reflect differences in organization and doctrine (see 5.2).
The units brought under command by a given HQ now conduct operations in the following order (see the appropriate rules sections following for exact procedures and exceptions):
- Designate units for exploitation or strategic movement by placing Exploit or Move markers respectively.
- Conduct tactical movement and strategic movement (6.2, 6.3) (the HQ unit itself can also conduct tactical or strategic movement (Note: HQ units can only move along roads).
- Conduct combat with units that did not move or have only conducted tactical movement (7.0).
- Conduct exploitation (a second round of tactical movement and combat) with previously designated units (6.4).
(As a memory aid, it's useful to turn all friendly units that have just finished conducting operations 90 degrees so they are not used twice in the same turn, and to flip the HQ unit over to its Ops Comp side.)
When the player who controls the units activated by the chosen HQ unit has finished his operations, that HQ unit's activation chit is placed aside and another chit is drawn. This continues until all chits have been drawn or both players agree they no longer want to perform operations with any units on the map.
5.2 Army-level HQ Units
5.21 German Army-level HQ Units
If a German army-level (XXXX) HQ chit is drawn, the Axis player can immediately move, by tactical or strategic movement, that army HQ unit and any German units that have both (1) not yet moved and (2) cannot be brought under command by any corps HQ. He can then immediately activate one corps-level (XXX) HQ that has not yet been activated and could hypothetically draw supply from the corresponding army HQ (a line of hexes free of enemy units up to SIX tactical MFs long, along connected road hexes). Either remove that activated corps-HQ chit from the Randomizer (to be replaced in the Turn End Phase) or just remember, when it is drawn later, that that corps has already been activated.
Note: though German army HQ units can command reinforcement units and out-of-command units to move, they cannot command units to conduct combat or exploitation.
5.22 Polish Supreme HQ Unit
All Polish HQ units are depicted as army-level units. However, when the Polish Supreme HQ (SHQ) activation chit is picked, this unit can—in addition to bringing units under command like any other Polish HQ unit—also exercise the powers of a German army-level HQ unit (see 5.21).
5.3 Limits of Command
Units can only be commanded and supplied by HQ units of their own nationality. A given HQ unit can command no more than SIX divisions (reduced strength or not) at the same time (no limit on non-divisional units). Soviet Front-level (XXXXX) HQ units are exempt from this six-division limit.
6.0 Movement
6.1 Stacking
In most cases, more than one friendly unit can be located in a hex (see the Terrain Effects Chart (TEC)). HQ units do not count for stacking.
6.11 Stacking and Movement
Units can move through a friendly hex that is already at its stacking limit.
6.12 Soviet Combat Units
Soviet combat units are represented at corps level, which reflects a grouping of their smaller-size divisions. Two such units cannot stack.
6.2 Tactical Movement
In this form of movement, units move from hex to hex on the map, expending movement factors, as indicated by the TEC, up to their total MF.
Note: there are restrictions on motorized units, and mountain units expend fewer MFs to traverse rough and mountain terrain. Units cannot enter hexes containing enemy units.
6.21 HQ Units
HQ units can only move along roads.
6.3 Strategic Movement
Units moving by strategic movement can only travel on road hexes, at the faster rate (1/2 MF per hex) indicated on the TEC. Place a Move marker on top of such a unit (it will be removed in the Turn End Phase). However, units using strategic movement cannot start, end or move adjacent to an enemy unit.
6.31 Axis Air Interdiction
Due to general Axis air superiority during the campaign, the Polish player cannot use strategic movement during clear-weather turns.
6.4 Exploitation
This is a special class of tactical maneuver that takes place after combat. When a given HQ unit has been activated, it places an Exploit marker on top of any eligible unit or units before conducting any regular movement (tactical or strategic) or combat. After combat has been conducted by units that either did not move or conducted tactical movement before combat, and all resulting advances or retreats have been resolved, units designated for exploitation can now conduct tactical movement and combat.
6.41 Exploitation-eligible Units
Only motorized and cavalry combat units (of all nationalities) capable of being placed under command by that HQ unit can be designated for exploitation.
6.5 Special Cases of Ground Movement
6.51 HQ Units
HQ units can use tactical or strategic movement as they wish, but can travel only on road hexes.
6.52 Motorized Units
Motorized units cannot move or attack into mountain hexes without a road.
6.53 Geographical Movement Restrictions
There are restrictions on where units can move, depending on the unit nationality:
- German or Slovakian: cannot enter the Soviet Union, Hungary, Romania, Lithuania or move off the map in the To Latvia zone.
- Soviet Union: can only enter hexes in Poland to the east of the Demarcation Line marked on the map. Cannot move off the map into the To Latvia zone.
6.54 Polish Evacuation and Internment
Immediately after Warszawa has been occupied by Axis combat units, Polish units can retreat or move into Hungary, Lithuania, Romania or off the north map edge within the To Latvia zone. Units that do so are interned—the units are removed from the game, but do not count as units eliminated by the Axis player, for calculating Replacement Points and Victory Points. (As many as 120,000 Polish troops may have escaped via Romania and Hungary, while another 20,000 or so escaped via Lithuania and Latvia; within months, they formed an army in exile in the West.) Before this happens, these countries are off limits.
7.0 Combat
7.1 Combat Procedure
After all tactical and strategic movement of units activated the HQ has been completed, the controlling player can conduct combat with those active units that are adjacent to enemy units. Combat is voluntary between units. Units can attack only once, but units can be attacked several times in separate battles over the course of a turn.
To conduct combat, the active player declares which of his units are attacking and which enemy unit—or units—is the target of his attack. Not all units in a given hex need attack as one combined attack; individual units cannot split their CF in order to attack units in more than one hex; but all units in a given hex under attack must defend as one combined force. The Axis player can now allocate one or more Air Support Points to the battle. The attacking player now secretly chooses one of the four red Attack Mission chits and the defending player secretly chooses one of the six blue Defend Mission chits. The two chits are then revealed and matched on the Mission Matrix Table, which will indicate any advances or retreats for the units involved and whether one or both sides has to check for casualties, and if so with what modifiers. Both players then conduct Casualty Checks, and then conduct advances or retreats with any units that are left.
7.2 Combat Limitations and Modifiers
See the Mission Matrix Table.
Note: Terrain Modifiers are cumulative (so the TM for a unit attacking across a river into a town in a rough-terrain hex would be +5!).
7.21 Mission Limitations
- To choose the Blitzkrieg attack mission, at least one armor or light-armor division or corps (full or reduced strength) must be attacking.
- Clarification: the Counterattack mission is a defense mission but does not reverse the roles of the two players. However, the TM for the terrain in the defender's hex does not affect either side when conducting Casualty Checks in a Counterattack.
7.22 Casualty Check Modifier Definitions and Clarifications
- Outflanked: two or more combat units are attacking the defending unit or units through opposite hex sides. If a defending unit is surrounded (enemies on all six hex sides) the modifier would be +3.
- Artillery units that are out of supply do not yield a DRM for Casualty Checks.
7.3 Combat Results
7.31 Casualty Checks
As a result of combat, the units of one or both sides in a battle may have to conduct Casualty Checks. Units on one side must conduct as many Casualty Checks as there are FULL-STRENGTH divisions on the other side.
Note: a full-strength Soviet corps counts as three full-strength divisions, a reduced-strength Corps counts as one full-strength division.
There is always a minimum of one Casualty Check when indicated, even if there are no full-strength divisions involved in the battle. The checking player chooses which of his units involved in the battle must conduct the Casualty Check.
Exception: in a Blitzkrieg attack, the attacking player must choose to make at least one Casualty Check on at least one of his armor/light-armor units that were involved in the attack.
Each unit conducting a Casualty Check rolls 1d10 and compares the result to the modified Casualty Check Total (CCT). The CCT is comprised of:
- the total enemy CF involved in the battle,
- plus or minus any modifiers as required by the Mission Matrix Table and
- the other modifiers listed in the charts.
If the die roll is equal to or less than the CCT, the unit must take a step loss. A full-strength division that takes a step loss is flipped over to its reduced-strength side (with the lower CF). A reduced-strength division or a sub-divisional unit that is required to take a step loss is placed in the dead pile.
HQ and artillery units (in supply or not) add their CF to any other defending units in their hex, but only for the defense. These units are not subject to Casualty Checks but are automatically eliminated if all combat units in their hex are eliminated. A stack made up only of HQ and/or artillery units does have the total CF of the units (again, for defense only) but the entire stack is automatically eliminated if it must make a Casualty Check.
When an HQ unit is eliminated in combat, the counter and its activation chit are temporarily removed from the game, to be replaced in the Turn End Phase (see 3.3) of the current turn. An HQ unit returning to play is placed with any HQ of the same nationality; however, the Slovakian HQ is placed in Presov.
7.32 Advances and Retreats
Advances and retreats are indicated on the Mission Matrix Table: "a" for advance, "r" for retreat. Retreats are mandatory, advances are optional.
The defender conducts all his retreats or advances before the attacker. In retreating or advancing, the units involved must move to hexes that are not occupied by enemy units or adjacent to the enemy-occupied hex from which they are retreating; and they must retreat to a hex in which they could move in the course of tactical movement (though retreats are conducted in number of hexes, not Movement Factors). A unit that cannot retreat the full distance indicated for any reason (impassable terrain, stacking limits, enemy units) takes a step loss instead. If the unit is supposed to retreat two hexes but can only retreat one hex, it retreats the one hex and takes a step loss.
There is no requirement for the attacker to advance into the defender's newly vacated hex; the unit can advance into any hex it could move into during the course of tactical movement. At the owning player's choice, HQ units can advance or retreat with the units they were stacked with at the moment of combat as long as they remain on road hexes; if forced to retreat and the only option is to a non-road hex, the HQ is eliminated.
7.4 Exploitation
As noted in 6.4, after all combat conducted by activated units that were not designated for exploitation has been resolved, any activated units that were designated for exploitation can now conduct tactical movement and combat, using the same procedures.
7.5 Operations Phase Example
The German 14th Motorized Corps activation chit is picked. There are five units that it can bring under command (i.e., are within 3 tactical MF): the 18th Infantry Division (CF=4), reduced-strength 19th Infantry Division (CF=2), 13th Motorized Infantry Division (CF=3), reduced-strength 4th Panzer Division, (CF=2), and the 31st Artillery Brigade (no offensive CF but it will add a +1 modifier in any subsequent enemy Casualty Checks). A stack consisting of the reduced-strength Polish 17th Infantry Division (CF=2) and a Cavalry Brigade (CF=2) is in a forest hex blocking the road to Czechostowa. The Axis player places Exploit markers on the 13th Motorized and 4th Panzer. He uses tactical movement to move the 18th Infantry into contact; the 19th Infantry and 31st Artillery are already adjacent. The Axis player does not add an Air Support Point to the battle.
The Axis player chooses Balanced Attack and the Polish player chooses Defense in Depth. The result is 0/+1, a1/ r2. This means both sides must conduct Casualty Checks (with no modifier for the attacker, and +1 for the defender, due to the missions chosen) and when the Casualty Checks are done, all remaining defending units must retreat two hexes and the attacking units can advance one hex.
Both players must make one Casualty Check. The Casualty Check Total (CCT) for the Axis player for either division is 5 (4 total enemy CF with a +1 modifier for the forest terrain in the defender's hex). The player chooses the 18th Infantry and rolls: it will lose one step on a roll of 5 or less on 1d10. The Polish player's CCT is 7 for either unit (6 total enemy CF, +1 for the combat-mission result, +1 for the enemy artillery and –1 for the terrain). He checks the cavalry brigade. Now assume the brigade was eliminated and the only unit left in the hex is the reduced-strength infantry division. This unit must retreat two hexes and the German units can now advance one hex in any direction (subject to terrain restrictions).
Now the Axis player can conduct Exploitation with his motorized units. The 13th Motorized and 4th Panzer move adjacent to the reduced-strength Polish division and attack. The Axis player chooses Blitzkrieg and the desperate Polish player chooses Counterattack. The result is +2/+2, a1/r2. Both sides must now make one Casualty Check with a +2 modifier; because the Polish player chose Counterattack, the Terrain Modifier in his hex is ignored. The Axis CCT is 4 (2 enemy CF +2 for the combat-mission result), and he must check the 4th Panzer because he chose Blitzkrieg. The Polish CCT is 7 (5 enemy CF +2 for the combat-mission result). Both sides roll less than their CCT, thus the Polish unit and the German Panzer unit are eliminated. There are no defenders left to retreat, and the attackers, the 13th Motorized, can advance one hex, if desired; they are not required to advance.
8.0 Supply Rules
8.1 Combat Unit Supply
Players should note that being in command and being in supply are two different things, though the method used to establish them is the same. In order for a given combat unit to be brought under command by an HQ and/or for it to be considered in supply, it must have a supply line to the HQ. A supply line consists of a chain of hexes not occupied by enemy units that costs up to THREE tactical movement factors (MFs) to traverse (however, ignore the effect of rivers).
8.2 HQ Unit Supply
Combat units trace supply lines to HQ units, which must in turn be in supply. The supply status of an HQ unit is established when its activation chit is drawn, and its supply status remains the same while the units under its command are conducting operations (moving, attacking, or exploiting). In order for the HQ unit to be in supply (and therefore provide supply to the units it commands), it must fulfill certain conditions, depending on its nationality.
- German: a corps-level (XXX) HQ unit must trace a supply line of up to SIX tactical MFs to a German army-level (XXXX) HQ unit. This supply line can only be traced along connected road hexes and cannot pass through enemy units. Finally, the army HQ unit must be in supply as well. An army HQ is in supply if it can trace a line of connected road hexes of ANY LENGTH, free of enemy units, to any hex on any map edge that is within the borders of Greater Germany, or to the city of Konigsberg.
- Slovakian: The Slovakian corps HQ unit must trace a supply line of up to SIX tactical MFs of road hexes to a notional Slovakian army-level HQ unit that is assumed to exist in Presov.
- Polish: a Polish HQ must trace a supply line of ANY LENGTH, free of enemy units, along connected road hexes to a CITY hex in Poland that is controlled by the Polish player.
- Soviet: a Soviet HQ unit must trace a supply line of ANY LENGTH, free of enemy units, along connected road hexes to any hex on the east map edge that is within the borders of the Soviet Union.
8.3 Out of Supply
Units and HQ units that are out of supply have several disadvantages:
- Such units cannot receive replacements (4.4).
- Out-of-supply Artillery units do not contribute a DRM to Casualty Checks (their CF of 1 still counts in defense, though).
- When attacked by out-of-supply units, the defending units have a –1 DRM on their Casualty Checks (7.31).
- All out-of-supply motorized units have a Movement Factor of 3.
9.0 Special Rules, Clarifications, and Exceptions
9.1 Improved Positions
There are two kinds of Improved Positions (IPs) in the game: permanent and temporary. An IP provides an additional +1 modifier to the Terrain Modifier of the defender's hex.
9.11 Permanent IPs
These represent fortifications left over from World War One or defensive positions prepared during the 1930s. They are printed on the map. Permanent IPs cannot be destroyed in the context of the game. Because of their original orientation these IPs benefit only their original owners (hence German units could not use Polish permanent IPs, and vice versa).
9.12 Temporary IPs
These represent temporary earthworks built by engineer and construction units that are attached to HQ units. Any activated HQ unit that does not move during the Operations Phase can place one IP marker on top of one combat unit or stack of units that it could put under command. The units so protected cannot move, and the marker is removed if any of them exit the hex or attack (the IP marker is not removed if the player chooses a Counterattack defend mission, though he does temporarily lose its benefit).
9.2 Axis Air Superiority
The German Air Force quickly established control of the air during the Polish campaign.
9.21 Air Support Points
Only the Axis player has Air Support Points, representing his general superiority in air power. The amount available depends on the weather during the current Turn: 8 if Clear weather; 4 if Poor weather. These points can be added to any attack or defense by German (or Soviet) units. As few or as many as available can be used during an attack. Each point can only be used once per Operations Phase. Air Support Points function like artillery units in combat (e.g., they give a +1 DRM on enemy Casualty Checks). They cannot be shot down or eliminated in any way. Track Air Support Points with the corresponding marker on the Air Support Points Track on the map.
9.22 Air Interdiction
Because of aerial interdiction of transportation routes, Polish units cannot use strategic movement during clear-weather turns.
9.3 The Soviet and Slovakian Armies
The Soviet Union and Slovakia are co-belligerents with Germany. Combat units of these nations are controlled by the Axis player, but they cannot stack with German units, nor can they participate in joint attacks with them.
9.31 Soviet Intervention and the Soviet Army
In the historical scenario, the Soviet Union is assumed to intervene on Turn 8 (September 17th). In the Initial Phase of this turn, the two Soviet Front-level (XXXXX) HQ units (the Belorussian and Ukrainian), activation chits are added to the Randomizer. A Soviet Front HQ unit is exempt from the Command Limit rule (5.3) and can command any number of Soviet combat units. Soviet combat units are represented at corps level; they cannot stack with each other. For Casualty Checks, a full-strength unit counts as three divisions and a reduced-strength unit counts as one division. When the Soviet Union intervenes, Air Support Points also become available (6 points in Clear weather; 3 in Poor weather) to support Soviet combat units (only). Track Soviet Air Support Points with the corresponding marker on the Air Support Points Track on the map.
9.4 First Turn Surprise
There is no Initial Phase on Turn One. The weather is automatically Clear. At the Axis player's choice, all German HQ units can be automatically activated by him, one by one in the sequence he chooses, before any Polish (or the Slovak) activation chits are drawn from the Randomizer. Also, in any situation during where the Polish player is attacked, his Defend Mission marker is chosen at random.
On Turns One and Two, all German units are considered to be in supply no matter their circumstances. However, they must be under command to conduct movement and combat.
9.5 Polish Surrender and Game End
It is quite likely that Warszawa will be occupied by Axis combat units during the game. The occupation of Warszawa will trigger the surrender of Poland.
After Warszawa is occupied by Axis combat units, Polish units can move or retreat into the neutral countries of Hungary, Latvia (off the map-edge zone so marked), Lithuania and Romania to be interned (see rule 6.54).
Beginning in the first Initial Phase after Warszawa is occupied by the Axis player, and for as long as this condition holds, the Polish player rolls 1d10 to determine if his government evacuates Poland to establish a government in exile. If the 1d10 result is equal to or less than the turn number MINUS the number of cities still controlled by the Polish player, then Poland surrenders and the game ends—victory will be judged at the end of the Operations Phase of that turn.
Example: It is Turn 7 and Warsaw has fallen, but the Polish player still controls Lvov and Wilno. Poland would surrender on a roll of 5 or less.
All full-strength Polish divisions left on the map at the end of this Operations Phase are considered eliminated for Victory Point purposes (so once the capital falls, it's time to start thinking about evacuating to deny the Axis player Victory Points).
10.0 Victory
Play stops at the end of the Operations Phase of the turn in which Poland surrenders, and Victory is judged. Each player scores Victory Points (VPs) as follows:
Axis Player
- +1 for each eliminated Polish division (reduced-strength divisions still on the map don't count)
- +2 for each enemy HQ unit eliminated during the game (2 VPs each time)
- +? for each game-balance option taken during the game (see 12.0 Game Option Guide)
Polish Player
- +1 for each eliminated enemy infantry division or artillery unit (reduced-strength infantry divisions still on the map at game end do not count)
- +1 for each enemy armored division or Soviet combat unit flipped to reduced strength during the game (1 point each time a unit is reduced)
- +2 for each eliminated enemy armored division or Soviet combat unit, or HQ unit eliminated during the game (2 points each time a HQ unit is eliminated)
- +? for each game-balance option taken during the game (see 12.0 Game Option Guide)
If one player has more Victory Points than the other player, but less than 2 times as many, the game is a Draw. If he has 2 times as many but less than 3 times as many VPs, he wins a Tactical Victory. If he has 3 times as many VPs, or more, he wins a Smashing Victory.
The following paragraphs describe the speculative implications of the various degrees of player victory (let us stress the word speculative).
Axis Smashing Victory: Germany and the Soviet Union comprehensively destroy the Polish military on the battlefield and manage to capture or kill most of the significant Polish political and military leaders. Few Polish troops escape to fight on other fronts, and while there is still Polish resistance to Nazi occupation, it is much more manageable than was the case historically.
Axis Tactical Victory: This is an approximation of the historical outcome. Poland's political and military leadership escapes and establishes a government in exile that refuses to surrender or negotiate with the Germans. Many Polish troops escape German and Soviet prison camps by either going underground or evacuating through neighboring countries. Polish troops in significant numbers fight the Germans in North Africa, Italy, and France. Meanwhile, the German Wehrmacht has taken significant losses (historically, they lost over 16,000 dead during the five-week campaign).
Draw: The Polish government goes into exile but the invasion of Poland has proven very costly for the Germans. Several generals are fired for bungling the Polish invasion. The German High Command has begun to doubt the theory of Blitzkrieg and rethinks the method, or even the desirability, of invading France in 1940. As both sides prepare for a Sitzkrieg in the west, Stalin senses German weakness and considers invading Germany.
Polish Tactical or Smashing Victory: (Frankly, these are less likely outcomes, barring the choice of the more extreme scenario variations). The German and Soviet invasions gain ground but are very costly. It is even possible the Polish player has retained control over a significant amount of Polish territory. All sides settle down in their controlled territories. The German High Command, greatly embarrassed by its operational failure, loses confidence in Hitler's timetable for the conquest of Europe. Extreme elements attempt a coup to depose Hitler and establish military government under a figurehead Kaiser Wilhelm; the result is chaos. In the confusion, the Western Allies decide to honor their treaty obligations with Poland and make significant gains in the Rhineland. With a three-way Wehrmacht-Nazi Party-SS civil war about to erupt, the military junta ruling Germany offers a negotiated peace that includes a partitioned Poland. The Soviet Union sits on the sidelines but looks on with interest. World War II in Europe stops before it really gets started.
11.0 Historical Scenario
11.1 Historical Scenario Set-up
The following army-level HQ units set up in the towns or cities listed. The subordinate units listed against each HQ unit must set up in their home countries, such that they would be capable of being taken under command by the HQ unit, obeying stacking limits. The Polish player sets up first.
Polish
| HQ | Location | Subordinate Units |
|---|---|---|
| Pomorze (Pm) | Grudziadz | Inf XX: 3-3 x 3, 3p3 x 2 (4, 9, 16, 15, 27); Cav X: 2-5 x 1 |
| Poznan (Pz) | Poznan | Inf XX: 3-3 x 3, 3p3 x 1 (14, 17, 25, 26); Cav X: 2-5 x 2 |
| Lodz (Lo) | Lodz | Inf XX: 3-3 x 4 (2, 10, 28, 30); Cav X: 2-5 x 2 |
| Krakow (Kr) | Krakow | Inf XX: 3p3 x 3 (6, 7, 23); Mtn XX: 3-3 x 2 (21, 22); Mtn X: 1-3 x 1 (1); Cav X: 2-5 x 1; Lt Arm X: 1-6 x 1 (10) |
| Karpaty (Ka) | Przemysl | Inf XX: 3p3 x 2 (11, 24); Mtn X: 1-3 x 2 (2, 3) |
| Modlin (Mo) | Mlawa | Inf XX: 3-3 x 3 (1, 8, 20); Cav X: 2-5 x 2 |
| Prusy (Pr) | Radom | Inf XX: 3-3 x 1, 3p3 x 4 (3, 12, 13, 19, 29); Cav X: 2-5 x 1 |
Axis (M = Motorized)
| HQ | Location | Subordinate Units |
|---|---|---|
| German | ||
| 3rd Army | Allenstein | HQ XXX: (1)-3 x 2 (1, 21); Inf XX: 4-3 x 4, 3-3 x 1, 3p3 x 3, 2p3 x 1 (1, 11, 12, 21, 61, 206, 217, 228, Br); Arm XX: 2-6 x 1 (K); Cav X: 2-5 x 1 (1) |
| 4th Army | Neustettin | HQ XXX: (1)-3 x 2, (1)-5 x 1 (2, 3, 19m); Inf XX: 4-3 x 3, 3-3 x 2, 3p3 x 2 (3, 23, 32, 50, 73, 207, 208, 218); Mot Inf XX: 4-6 x 1, 3-6 x 1 (2, 20); Arm XX: 5-6 x 1, 2-6 x 1 (3, 10); Inf X: 1-3 x 1 (Ne) |
| 8th Army | Breslau | HQ XXX: (1)-3 x 2 (10, 13); Inf XX: 4-3 x 4, 3p3 x 2 (10, 17, 24, 30, 213, 221); Mot Inf III: 1-6 x 1 (AH) |
| 10th Army | Neisse | HQ XXX: (1)-3 x 3, (1)-5 x 3 (4, 7, 11, 14m, 15m, 16m); Inf XX: 4-3 x 7, 3-3 x 4 (4, 14, 18, 19, 27, 31, 46, 56, 57, 62, 68); Mot Inf XX: 3-6 x 1, 2-6 x 1 (13, 29); Arm XX: 5-6 x 1, 4-6 x 1 (1, 4); Lt Arm XX: 3-6 x 1, 2-6 x 2 (1, 2, 3); Arty X: (1)-3 x 3 (AG, 24, 31) |
| 14th Army | Neutitschein | HQ XXX: (1)-3 x 4 (8, 17, 18, 22); Inf XX: 4-3 x 5, 3p3 x 1 (7, 8, 28, 44, 45, 239); Mtn Inf XX: 4-4 x 1 (3); Arm XX: 4-6 x 2 (2, 5); Lt Arm XX: 2-6 x 1 (4); Mot Inf III: 1-6 x 1 (Ge); Arty X: (1)-3 x 1 (18) |
11.2 Reinforcement Schedule
Axis reinforcements enter at any in-supply German army-level HQ unit. Polish reinforcements appear at the named town or city: if the hex has been occupied by Axis combat units, the reinforcement is lost; if the hex is at its stacking limit, the reinforcements appear in an adjacent hex of the Polish player's choice.
| Turn | Axis | Polish |
|---|---|---|
| 2 | Inf XX: 3p3 x 3 (252, 257, 258) | Lodz: Inf XX: 2p3 x 1 (44r); Krakau: Inf XX: 2p3 x 2 (45r, 55r); Grodno: Inf XX: 3p3 x 1 (33r); Rovno: Inf XX: 2p3 x 1 (39r); Wilno: Inf XX: 2p3 x 1 (35r); Przemysl: Inf XX: 3p3 x 1, 2p3 x1 (36r, 38r); Lvov: Cav X: 2-5 x 1 |
| 3 | Mtn XX: 4-4 x 2 (1, 2) | Warszawa: Inf XX: 2p3 x 1 (41r) |
| 4 | Warszawa: Inf XX: 2p3 x 1 (31r) | |
| 8 | Soviet Union intervenes – place the two Soviet Front HQ activation chits in the Randomizer | Baranowicze: Inf XX: 2p3 x 1 (60r); Warszawa: Inf XX: 2p3 x 1 (50r) |
12.0 Game Options
12.1 Different Polish Deployments
Players can experiment with the opening Polish set-up to vary play.
12.11 Defend Everything
Set up as for the historical scenario, but every hex of the border between Germany and Poland must contain or be adjacent to a Polish combat unit.
Effect: slightly favors Axis player; +4 Polish VPs.
12.12 Free Deployment
The Polish player can deploy his forces as he wishes, anywhere within Poland (however, every city in Poland must be occupied by at least one combat unit).
Effect: slightly favors Polish player; +6 Axis VPs.
12.13 Faster Mobilization
The players set up per the directions for the historical scenario. Then the Polish player can take up to all 13 of his reinforcement units and deploy them anywhere with his initial forces.
Effect: slightly favors Polish player; +1 Axis VP per unit taken early.
12.14 Slower Mobilization
The players set up per the directions for the historical scenario. Then the Polish player rolls 1d10 and takes that number of divisions from his initial forces. He can enter them as reinforcements, beginning in Turn 2 at the rate of no more than three per turn.
Effect: slightly favors Axis player; +1 Polish VP per division so delayed.
12.15 Complete Surprise
This set-up assumes that the Polish Army is caught at its peace-time establishment strength, in its peace-time garrison locations. Use the following set-up chart:
| HQ | Location | Subordinate Units |
|---|---|---|
| Pomorze (Pm) | Torun | Inf XX: 3-3 x 3, (4, 15, 16); Cav X: 2-5 x 1 |
| Poznan (Pz) | Poznan | Inf XX: 3-3 x 3 (14, 17, 25); Cav X: 2-5 x 1 |
| Lodz (Lo) | Lodz | Inf XX: 3-3 x 1, 3p3 x 2 (7, 10, 26) |
| Krakow (Kr) | Krakow | Inf XX: 3p3 x 2 (6, 23); Mtn XX: 3-3 x 1 (21); Cav X: 2-5 x 1 |
| Karpaty (Ka) | Lvov | Inf XX: 3-3 x 1, 3p3 x 4 (2, 5, 11, 12, 24); Mtn XX: 3-3 x 1 (22); Cav X: 2-5 x 2; Mtn X: 1-3 x 3 (1, 2, 3) |
| Modlin (Mo) | Brzesc | Inf XX: 3-3 x 2, 3p3 x 1 (9, 20, 30); Cav X: 2-5 x 1 |
| Prusy (Pr) | Lublin | Inf XX: 3-3 x 1, 3p3 x 4 (3, 13, 27); Cav X: 2-5 x 2; Lt Arm X: 1-6 x 1 (10) |
All divisions set up on their reduced side. On Turn 1, the Polish player has a choice of moving a division (getting the troops already present to defensive positions) or flipping it to its full-strength side (waiting for mobilized reservists to reinforce the unit).
Effect: strongly favors Axis player: +15 Polish VPs.
12.2 No Soviet Invasion
The Soviet Union is preoccupied with events in Siberia and Mongolia, or Germany has made promises of territorial concessions in southeastern Europe to buy them off. There is no Soviet intervention; rule 9.31 is cancelled. Ignore all references to Soviet units or their entry into the game. The territory of the Soviet Union is off-limits to all players.
Effect: strongly favors Polish player; +15 Axis VPs.
12.3 Unfriendly Neutrals
Hungary, Latvia, Lithuania and Romania are forced to close their borders to Polish evacuees. Rule 6.54 is suspended.
Effect: moderately favors Axis player; +8 Polish VPs.
12.4 More Energetic French Reaction
France and Britain had signed a pact with Poland saying they would go to war with Germany in case of an invasion. Historically, the two countries declared war all right, but the adjacent and best-armed power, France, did little or nothing to threaten Germany. They could have done more. In the Initial Phase of each even-numbered turn, the Polish player rolls 1d10 and consults the following table:
- 1 – 3 = French return to their barracks; stop rolling for the rest of the game; Axis player does not receive VP bonus listed below.
- 4 – 8 = Desultory French attacks stalled; do not remove any German forces, but roll again on the next even-numbered turn.
- 9 = French attacks gaining ground. Roll 1d10 again and remove German infantry divisions totalling the CF of the result—a full-strength unit cannot be reduced, e.g., a 4-3 down to a 2-3 to count as 2 CF. Roll again on next even-numbered turn.
- 0 = On les aura! Major French effort. Roll 1d10 again and remove a matching number of German infantry divisions (full-strength or reduced). Roll again on next even-numbered turn.
The Axis player chooses which units to remove, and removed units are not counted towards VPs or added to the Dead Pile.
Effect: slightly favors Polish player; +6 Axis VPs.
12.5 Czechoslovakia Survives
Hitler decides to settle the Polish question before the Czechoslovakian. Under this option, Czechoslovakia is intact but remains neutral (and Poland does not seize part of the country, as it did historically in 1938: treat the hex labelled Teschen near Krakow as Czechoslovakian territory, not Polish). There are no Slovakian military units. Also, the modest numbers of Czech tanks taken into the German armored divisions in 1938 are not present: the game begins with the 1st and 3rd Light Armored Divisions depleted (the captured tanks were concentrated in these two divisions). Slovakia, Hungary and the Protectorates of Bohemia and Moravia are off-limits to all nationalities. (The portion of northern Hungary shown as bordering on Poland is actually Carpathian Ruthenia, sometimes known as Subcarpathian Rus. Part of this province of Czechoslovakia was ceded to Hungary in November 1938 as part of the First Vienna Award under the Munich Agreement, while the northern portion bordering on Poland was given autonomy. The region declared itself the as the Republic of Carpatho-Ukraine in March 1939, whereupon it was almost immediately invaded and occupied by Hungary, which went on to fight a brief border war with Slovakia.)
Effect: slightly favors Polish player; +6 Axis VPs.
12.6 More Polish Mechanization
Add up to three 1-6 armor brigades (marked "O" for Optional) to the initial Polish forces, deployed anywhere.
Effect: slightly favors Polish player; +1 Axis VP for each brigade.
12.7 More German Forces
Add up to four 3p3 infantry divisions (marked "O" for optional) to the initial German forces, deployed anywhere.
Effect: slightly favors Axis player; +1 Polish VP for each division.
12.8 Romanian Bridgehead Strategy (Plan Zachod)
Poland and Romania had a series of treaties in place extending back to 1921 in which they pledged a defensive alliance. Polish Marshal Rydz-Smigly expected to make a fighting withdrawal to the southeast corner of Poland, put his back to the Carpathians and a neutral Soviet Union, and receive supplies and material assistance from the Western Allies that would flow through a rail line from the Romanian port of Constanta. Meanwhile, France and Britain would carry the war to Germany itself. Obviously, he did not get any of these things.
If this option is taken, the following rules changes occur:
- 6.54 is cancelled – Polish units cannot evacuate or be interned;
- 8.2 is changed – Polish HQ units can use the Romanian city of Cernauti as a source of supply;
- 9.31 is cancelled – the Soviet Union does not intervene;
- 9.5 is cancelled – Poland does not surrender after Warsaw falls;
- 10.0 is changed – play a 20-Turn game and count Victory Points as detailed in the schedule.
Effect: strongly favors Polish player; +20 Axis VPs.
12.9 Wings Over Poland
The planes and crews of the Polish Air Force are not as scattered, and their command and control more effective. The Polish player has 3 Air Support Points available in Clear weather and 1 in Poor weather (use any spare counter to track these along with the German and Soviet Air Support Points). Also, rule 6.31/9.22 is cancelled; Polish units can use Strategic Movement in any weather condition.
Effect: slightly favors Polish player: +4 Axis VPs.
12.10 Blitzwhat? Whatkrieg?
At the beginning of World War Two, the German Army was still tentatively feeling its way towards the optimum combined-arms configuration that, adequately commanded, could crush all enemies. The historical campaign in Poland revealed both the potential power and the defects in the organization and tactics of the mechanized formations. For example, the hybrid light-division organization was found to be ineffective and the four divisions so configured were quickly converted into standard armored divisions. Intensive training between the end of this campaign and the invasion of France in the spring of 1940 addressed many other tactical and logistic problems.
To use this option, the Axis player rolls 1d10 the first time any of the individual circumstances listed in the table below apply, to determine how effective the tactic will be during the game and what VP benefit, if any, a player receives (note that the general effect of this table is to make the German forces less effective). Make a note of what advantages or limits may be in effect (note: changes apply to German units only).
| Circumstance | 1d10 | Effect | VP |
|---|---|---|---|
| First time Axis player uses an Air Support Point | 1 – 2 | Air-ground liaison trouble. Each time during the game when the Axis player uses an Air Support Point, he must roll 1d10 to see if it is effective. Odd number it is and has its CCT effect; even number it isn't and doesn't. | +2 Axis |
| 3 – 4 | Bombing and reconnaissance tactics ineffective. Halve Axis ASP to 4 in Clear weather, 2 in Poor. Rule 6.31/9.22 is cancelled; Polish units can use Strategic Movement in any weather condition. | +4 Axis | |
| 5 – 0 | No change from standard rules. | None | |
| First time Axis player designates a unit for exploitation | 1 – 2 | Eligible for exploitation: armor units only. | +4 Axis |
| 3 – 4 | Eligible for exploitation: armor and light-armor units only. | +2 Axis |
12.11 Solitaire Play Optional Rule
(Editor's note: the printed rulebook numbers both "Defend Everything" and this option as 12.11; the numbering is kept as printed.)
In practice, many war games are played solo, and the process of resolving combat is not heavily affected by the fact that you are playing it alone. However, the combat-resolution system in this game requires both players to exercise some judgment in choosing their respective attack and defend missions.
The simplest thing to do is to have the defender's mission chit chosen at random in every attack. This mechanic is used in the first turn of the game to show the initial confusion and uncertainty among the Polish forces (rule 9.4), but you could do it for both sides throughout the game whenever a unit or units defend as a way of putting both sides at a slight disadvantage.
Alternatively, you could use the following sub-system in all cases where a unit or units defend (except for Polish forces on Turn 1 – rule 9.4 still applies): Roll 1d10 to determine what the posture of the defending force will be (or you could decide this in advance), and then roll 1d10 a second time to determine which Defend Mission will be used.
| First Posture Roll | Posture | Second Roll | Defend Mission |
|---|---|---|---|
| 1 – 3 | AGGRESSIVE (hooah!) | 1 – 3 | Counterattack |
| 4 – 5 | Defense in Depth | ||
| 6 – 7 | Standfast | ||
| 8 | Balanced Defense | ||
| 9 | Delay | ||
| 0 | Withdraw | ||
| 4 – 6 |