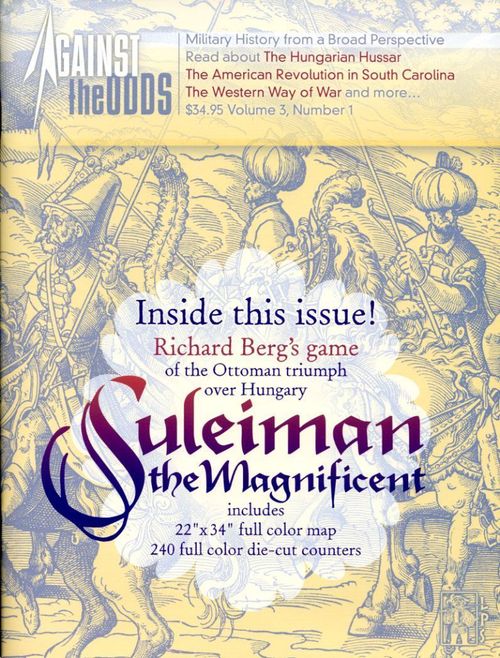
Suleiman the Magnificent
Suleiman the Magnificent Rulebook
Table of Contents
Table of Contents
- 1.0 Introduction
- 2.0 Game Components
- 3.0 Important Concepts Before You Begin
- 4.0 The Sequence of Play
- 5.0 Activation & Continuity
- 6.0 Movement
- 7.0 Missile Fire Combat
- 8.0 Shock Combat
- 9.0 Charging
- 10.0 Combat Results
- 11.0 Rallying Units
- 12.0 Leaders
- 13.0 Standards
- 14.0 Initial Deployments
- 15.0 Reinforcements
- 16.0 Victory Determination
- Appendix: Official Addenda (Errata) as of Feb. 1, 2024
1.0 Introduction
Suleiman the Magnificent is an accessible, fast-playing, fun game of low complexity. To that end, much detail has been either omitted or factored in to the overall mechanics. We have tried to provide as much period flavor and historical accuracy as possible, within that stated focus. The game should take about three hours to play to a conclusion, about 50% more the first time through.
We suggest you read the accompanying historical article to get a feel for what is about to occur on your gaming table.
1.0.1 Game Scale: The map scale is about 225 yards per hex. Each combat unit contains about 750 men. Within those parameters, the Hungarians number around 35,000 (including artillerists), the Ottomans, about 60,000. The Ottoman army may have been, en toto, larger, but included large numbers of non-combatants and totally useless semi-military types. The frontage (in yards/meters) of the Hungarian front line corresponds with the figures given in all available sources, and was the basis of much of the above calculations.
Historical Note: There is much disagreement about the numbers at this battle. However, all sources agree that the Ottomans did outnumber the Hungarians significantly. The Hungarian front line was stretched rather thin to try to match the possible frontage presented by the Ottomans.
There is no time scale, as there are no Turns, in the usual historical game sense. The actual battle, which started at around 3:00 PM, lasted but a few hours, maybe less. It was a short affair.
Read This First
We've organized the overall structure of the rules of this LPS simulation game to follow this game's sequence of play in introducing concepts. The rules themselves are written in a format known as the Case System. This approach divides the rules into Modules (each of which deals with a major important aspect of play). Modules are numbered sequentially as well as possessing a title. Each Module is divided into Sections that deal with a major sub-topic inside the Module which are also numbered sequentially. Modules and Sections are introduced by some text that briefly describes the subject covered by that particular Module or Section. Finally, the majority of each Section consists of Cases. These are the specific, detailed rules that govern play. Each Case is also numbered sequentially. The numbering follows a logical progression based upon the number of the Module of which the Cases are a part. A Case with the number 7.51, for example, is the first Case of the fifth Section of the seventh Module of the rules. Each Module can have as many as ninety-nine Sections and each Section can have as many as ninety-nine Cases. The numbering system is designed as an organizational aid. Using it, players can always determine where a Case is located in the rules.
How the Numbers Work: 3.1.4 -- the first number (3) is the Module Number, the second (1) the Section Number, the third (4) the Case Number. The example is the number of the fourth Case of the first Section of the third Module of the rules.
Learning to Play the Game
Begin by familiarizing yourself with all of the components listed for this game. Then skim through the charts and rules, reading all the titles of the Modules and Sections. Set up a game scenario or portion of a scenario (after reading the applicable Module) and play a trial game against yourself. During this trial game, try referring to the rules only when you have a question and remember the numbering system we employ makes it easy to look up rules when you do. While a trial game may take you an hour or two, it is the quickest and most pleasant way to learn (short of having an experienced friend teach you). We also don't recommend attempting to learn the rules word-for-word. Memorizing all the details is an effort that few can do. We've written these rules to be as comprehensive as possible -- but they are not designed to be memorized. Taking in the rules in this way (as you play along) is the best approach to mastering this game. Last, we're always open to suggestions on how to improve the comprehension of our rules. Write us at any of the above addresses if you have an idea on how we can communicate better with you.
2.0 Game Components
Your copy of Suleiman the Magnificent should contain the following components below:
- One 23" x 34" mapsheet depicting the terrain the battle was fought over along with charts and tables, the Unit Eliminated and Retired Boxes, and Terrain Key.
- One set of 280 die cut 1/2" playing pieces.
- Two 8 1/2" x 11" double-sided pages with charts and tables printed in the center of the rules book.
- One 12 page rulebook.
Not supplied with this game but needed for play is a ten-sided die.
If any of these parts are missing or damaged, write to: Against the Odds Magazine, PO Box 165, Southeastern, PA 19399-0165 USA, Attn: Suleiman the Magnificent, or e-mail [email protected].
Should you have any difficulty interpreting the rules, please write to us at the above postal address, or send an e-mail to [email protected] phrasing your questions so that a simple sentence, word, or number can answer them. If you send a letter by mail, you must enclose a stamped, self-addressed envelope to receive a reply. We recommend e-mail as the best way to resolve a query. Although we welcome comments and suggestions about the game's interpretation of events, we cannot promise to respond to questions on theory or design intent. We also suggest that you check the game's folder on www.consimworld.com.
2.1 The Game Map
The game is played on a stylized map divided into hexagons (hexes). The map portrays the area slightly south of Mohacs (in modern day Hungary), over which a hexagonal grid has been superimposed to regulate the movement and positioning of pieces. The hexes facilitate positioning and movement of the playing pieces. Each hex contains a terrain type that is referenced on the Terrain Effects Chart. A hex is also individually designated with a four-digit number, which is used in set-up. Fractional hexes without numbers are unplayable and may not be entered.
2.1.1 Map Features: Various types of terrain and certain features are denoted on the game map, and are defined and their effects explained on the Terrain Effects Chart. Some of these terrain types and features are: Clear, Elevations, Swamps, and Villages. In addition, Roads run through many of the terrain features above.
Terrain Notes: Most of the battlefield of Mohacs is flat and, because of the proximity of the oft-overflowing Danube, somewhat soft and slippery. Much of the field was wet, as this is a drainage area for The Danube (just off-map to the east), but this applied to the entire battlefield. The area immediately adjacent to The Danube is treacherous marsh. Several low-lying hills -- terraces, flow westward from The Danube, broken up by small streams. The streams were not wide or deep, but they had fairly steep, slippery banks. The slopes of these terraces could be somewhat difficult to navigate, and this gave much thought to the Ottomans as to where to deploy their army. Exactly how difficult is hard to say, as the Ottoman commentators talked about their difficulty before the battle, and then there is little mention was made after the battle commenced. The Hungarians had, as was the practice for the last 200 years in European warfare, dug a trench in front of their front line infantry and artillery to give them a defense advantage. The main road, running north to Mohacs, had no effect on the battle.
2.1.2 Map Charts and Tables: Also printed on the mapboard is a Turn Record Track to assist in recording the game turn, the Unit Availability Boxes, and the Terrain Effects Key.
2.2 The Playing Pieces
The cardboard playing pieces (or counters) in the game should be carefully separated before trying to play. The pieces are of different types depending on the information that appears on each. In general the pieces represent one of four types of counters: combat units, leaders, standards, and informational markers (Retired, etc.). Combat units represent the actual historical units that fought, or could have fought, in such an operation. The front side of each combat unit shows the combat unit at "Normal" (full strength) while the back of the counter (usually) represents the same combat unit in its "Disordered" side. If there is no reverse side, the unit cannot be Disordered. Each face of a combat unit presents information that determines its capabilities in the game. Combat unit counters are illustrated below.
Sample Infantry Unit and Sample Cavalry Unit: the front (Normal) shows the Unit Type Symbol, Shock Defense DRM, Missile Type, Movement Allowance and Command; the reverse (Disordered) carries a Disordered Indicator. Sample Artillery Unit: the front (Normal) shows the Unit Type Symbol, Artillery Weight, Command and Movement Allowance; the reverse is Eliminated.
The various information appearing on the counters is explained in the notes following.
2.2.1 Nationality: Unit counters, referred to as units in the rules, are printed with various background color patterns for national identification:
- Ottoman Turks and allies -- horizontal stripes
- Hungarians and allies -- checkerboard or two tone
2.2.2 Combat Unit Type Symbol: There are seven different types of combat units: Heavy, Medium and Light Cavalry, Akincis, Regular and Levy Infantry, and Artillery. The Unit Type Symbol is printed in the center of the counter and identifies both the kind of unit the piece represents, its principal role and its degree of mobility (foot-sloggers or cavalry) as follows:
- Leg Units: Levy Infantry (LvI), Regular Infantry (RI), Artillery (Art)
- Mounted Units: Light Cavalry (LC), Medium Cavalry (MC), Heavy Cavalry (HC), Akincis (AK)
Levy Infantry: Line filler and cannon fodder, hastily raised and poorly armored amateurs. Usually equipped only with pikes. They were used mostly as a last line, reserve force.
Regular Infantry: Pike-armed, deploying in linear fashion in much the same manner as the old phalanxes, but with much firepower -- mostly muskets -- thrown in. This linear formation had not yet developed into the tercios of the future. The Ottomans also had some archers. The units tended to be "regulars" in that they were trained, and often part of the standing, or readily available, forces. The Hungarian army was cavalry based, with a shortage of good infantry. Most of their better infantry were mercenaries.
Janissaries: Usually slave-born, or captured Christians, these troops were regular infantry, although only the Janissaries of the Porte (the Royal Guard, so to speak) were of any major worth. Musket armed, combined with pikes.
Historical Note: Ottoman Turkey was sometimes known as The Sublime Porte.
Historical Note: The Hungarian and Ottoman Regular Infantry formations, containing much pike and some muskets, are not the four-sided Tercio-like squares one soon sees in Western Europe. They are more linear, phalanx-like units.
Heavy Cavalry: Hungarian heavy cavalry was a very effective, feared force. It was still much like the knights and mounted men-at-arms of the previous, medieval centuries. The Ottoman heavy cavalry was not quite as fully armored. They all fought mounted.
Spahis: Sometimes also spelled "sipahis," the term for most regular Ottoman cavalry. The spahis were usually in one of two "wings", the Anatolian Wing (home or right) and Rumelian (left) Wing. The latter was formed from non-Ottoman men, at least in theory, probably Moldavian, Wallachian, and Tartar. The cavalry of these two wings was what we have termed Medium Cavalry, in that they were shock-oriented units but not as heavily armored as their counterparts of the Sultan's Guard, the Porte Spahis.
Akincis: These are Ottoman mounted archers, used mostly as advance scouts and frontier troops, but sometimes as a sort of an ersatz-skirmisher, as they are here, at Mohacs.
2.2.3 Missile Type: This value if present is printed underneath the Unit Type Symbol. This indicates whether the unit is armed with bows and arrows (A) or muskets (M).
2.2.4 Command: The military designation or the name of the commander the combat unit belongs to printed at the bottom of the counter. During the game, combat units are activated (allowing to move and fight) by command. Commands are led by (you guessed it), Leaders.
2.2.5 Shock Defense Rating (SDR): This value is printed in the lower left-hand corner of the unit counter. This is the unit's strength when attacking or defending, expressed numerically. Black numbers represent positive values, red numbers indicate negative values. Abstractly, it represents the unit's present troop strength and equipment when compared to enemy units. An SDR of zero or a negative number does not mean the unit cannot attack.
2.2.6 Movement Allowance: Printed in the lower right-hand corner of the counter, a unit's Movement Allowance is the maximum number of Movement Points (MPs) a unit may expend in a single Activation Phase as it moves from hex to hex. A clear terrain hex generally costs 1 MP to enter, for example.
2.2.7 Weapons Range: Not printed on the counter, but a characteristic of all combat units is its range, or how far it may attack. All non-missile combat units and musket armed combat units have a range of one, they can only attack units that are adjacent. Bow and arrow armed combat units, and all artillery combat units, can use their weapons to fire at hexes that are not adjacent, up to the range listed on the Fire Chart. When counting hexes to determine range, include the target hex but not the hex where the firing missile unit is located.
Sample Leader Unit: the front (Leader) shows the Unit Type Symbol, Command Range, Activation Rating, Movement Allowance and Name; the reverse is Replacement.
The various bits of information appearing on a leader counter is explained in the notes following.
2.2.7 Command Range (CR): (numbered 2.2.7 in the rulebook, a second time) This large number is printed on the left and is the range in hexes from which a leader can normally activate units for movement and combat (see rule 12.1).
2.2.8 Activation Rating (AR): This small number is printed in the center of the unit counter, under the Unit Type Symbol. Basically, it represents the unit's present level of training and morale, expressed numerically. Comparison between opposing side's AR can provide a benefit in combat (see Case 8.9.1).
A Note on Spellings: Both Hungarian and Ottoman military terms, and names, are subject to multiple modern-day spellings. Names, in Hungary are given in an order reverse from what we in Western Europe are used to. Thus, the man we would call Laszlo Hunyadi would be, in Hungary, Hunyadi Laszlo (and have a rather good opera named after him). We have gone with the Western European version. Most Ottomans seem to have had only one name, if you don't include such grandiloquent cognomens as "the All-Wise, the Truly Ubiquitous, and The Often Humpadacious". The Ottomans were big on that sort of self-spin. We have gone with the Hungarian versions in our Hungarian sources, and, for the Ottomans, whatever we wrote down first.
2.3 Markers
Markers are special pieces used to record various game functions, such as who is charging, who is retired, or the current Turn. Markers generally contain only a symbol or notation for their use.
2.4 The Die
The game uses a ten-sided die to resolve combat and other factors for which performance will vary. A '0' is a "zero", not a "ten". Unfortunately, you will have to provide your own die, as they are very difficult to staple into the magazine. Throughout these rules, the abbreviations DR, DRM are used to stand for Die Roll and Die Roll Modifier, the latter being a plus or minus number used to adjust the DR.
2.5 Game Charts and Tables
Various charts and tables simplify and illustrate the game and furnish results for certain game actions. These include the Turn Record Track and the Terrain Key, both printed on the map board as well as the Terrain Effects Chart, the Combat Results Table, the Overrun Calculation Table along with other charts and tables, which are printed in the rules.
3.0 Important Concepts Before You Begin
Before getting on with the main body of the rules, there are several important concepts with which players should familiarize themselves. These are presented here and include the rules on Stacking, Zones of Control and Facing.
3.1 Stacking
Stacking is the act of having one or more friendly units in the same hex during and after movement.
3.1.1 General Rule: Unlike many other war games, combat units may not stack (be together in the same hex) at any time - even during movement.
Exceptions: Combat units may move through friendly Artillery units. They may not stop in that hex. Also, leaders may stack freely with any combat unit. Combat units may also move through hexes solely occupied by enemy leaders. If the leader is not totally surrounded by enemy units, move the leader to the nearest friendly combat unit in command, otherwise eliminate him.
3.1.2 Stacking and Retreats: The rule against stacking does not apply to Retreats (which have a separate application; see Section 10.2).
3.2 Zones of Control (ZOCs)
Most combat units project a Zone of Control into their two frontal hexes (see Section 3.3 Facing). These frontal hexes are considered "controlled" hexes in that they inhibit enemy combat unit movement and the tracing of retreat paths through them.
Design Note: ZOCs represent a unit's ability to exert its presence - either through firepower or mobility - into the space to its front.
3.2.1 Who Projects a ZOC: All combat units, except for Levy Infantry and Artillery, project a Zone of Control into their two frontal hexes (see Section 3.3). Leaders (and markers) do not project a ZOC. Disordered combat units do not project a ZOC.
3.2.2 Mutual ZOCs: There is no additional effect when one or more friendly combat units each project a ZOC into the same hex. If both enemy and friendly ZOCs project into the same hex, they coexist mutually and both sides exert control on that hex. In certain circumstances a friendly ZOC negates the effects of an enemy ZOC. Unless specified, the negative effects of an enemy ZOC are not cancelled by a mutual ZOC situation. A friendly combat unit occupying a hex in an enemy ZOC does negate that enemy ZOC for movement or retreat before combat by other friendly combat units. Combat units are unaffected by the ZOCs of other friendly combat units.
3.2.3 Terrain and ZOCs: Combat units project their ZOCs into all terrain hex types but not across a Trench or Stream hex side.
Exception: Missile armed combat units (Archers or Musket armed units) do project a ZOC across Trench and Stream hex sides.
3.2.4 ZOC Effects on Movement: ZOCs affect movement in a number of ways as follows:
- A friendly unit must stop when it enters an enemy ZOC; it may not move any further that activation. It may change facing (one vertex) in that ZOC, when it must stop.
- It costs any unit +0 MPs (free) to leave any enemy Foot unit's ZOC at the start of its turn to move into another hex. If that hex is another ZOC it must stop. It may not return to a ZOC of the enemy unit it just left. It costs any unit +1 MP to leave any enemy Mounted unit's ZOC.
- Ottoman Akincis and any other Mounted units with Missile Capability may enter and leave an enemy ZOC, regardless of the unit type, in the same turn by paying a +1 MP cost to leave; see Case 7.3.1.
- Units that do not start their Activation within the Command Range of their Commander may not leave an enemy ZOC.
3.2.5 Combat Effects of ZOCs: Combat is voluntary but if unit elects to Shock an enemy unit in its ZOC, it must Shock attack all the enemy units in its ZOC.
3.3 Facing
Facing refers to how a unit sits within a hex. The two hexes to each side of the vertex the unit is facing are Frontal, the two at the other end, the Rear; the side, Flank. Facing determines where a unit's Zone of Control is projected into, at whom missile units may fire, and in what direction mounted men-at-arms may charge. In general, this applies to only their (two) frontal hex/hex sides.
3.3.1 General Rule: A unit must be faced so that the top of the unit faces one of the hex's vertices, not the side of the hex. A unit may ignore this facing when moving, but once it stops movement it must be faced in a specific direction.
3.3.2 Changing Facing: Facing does not matter when determining movement direction (except for Charging Men-at-Arms), and units are free to change Facing as much as they want during movement, at no cost, unless they are in an enemy ZOC (see Case 3.2.4). However, they may do so only when activated.
Exception: Units in an enemy ZOC can only change facing one vertex, if they stay in the hex. If they are moving out of that hex, they can change facing any number of vertices.
Changing facing is not considered movement for the purposes of "Fire or Movement", as it does not expend Movement Points (see Section 6.2).
3.4 Supply
As the actual battle of Mohacs started well into the afternoon and over by supper, and as no chronicler remarks that anyone was particularly hungry or short on arrows, there are no supply rules.
3.5 The Fog of War
With most units in plain sight out on the map, there's not too much opportunity for deception. Never the less, neither player may examine the other's stacks at any time other than during combat resolution (so no peeking to see if it's Suleiman or merely Achmed under a combat unit.
4.0 The Sequence of Play
There are no game-turns in Suleiman. The game simply starts and keeps going until one player wins. To do this, the system uses a Continuation Activation mechanic; see Module 5.0.
4.1 First Activation
When activated, a Command's units may Move and/or Fire, and, after all movement/Fire is completed, they may Shock Attack. Play continues in this manner until one player reaches his Flight Level, which means his opponent has won.
4.2 Subsequent Activations
When a Command has finished, that player selects another of his Commands (but not the one that just went) and rolls the die:
- If the DR is the same as or lower than the selected Command Leader's Activation Rating, that Command goes.
- If the DR is higher than that rating, or the opponent has Seized Continuity (see Section 5.3), "play" passes to his opponent, who now has a Free Activation in that he may now activate any one Command he wishes (or the one chosen when attempting the Seizure), no DR necessary.
4.3 Commands
Commands for each battle are identified by the leader's name printed at the bottom of each counter top, corresponding to that of the leader.
5.0 Activation & Continuity
Activation and continuity are the mechanics used to determine which player "goes" (takes a turn).
5.1 Activation
When a Command is activated, all units in that Command may Move and/or Fire. After that has been completed, units eligible to do so may Shock Attack.
5.1.1 Procedure: When the player designates a Command for activation, the player may use some or all of that Command's units, regardless where they are on the map. However, units that start the activation outside the Command Range of their Leader:
- May not move adjacent to an enemy unit. (They may counter-charge, though!)
- And if in an enemy ZOC, they may not leave that ZOC.
A Player may always "Pass", instead of activating a Command. If he does that, it is treated as if he failed an Activation DR.
5.2 Continuity
After the player has undertaken actions with his chosen Command, he may attempt to continue his "turn" by selecting another (different) of his Commands to go.
5.2.2 Procedure: To attempt Continuity, the Player notes the Activation Rating of his Command's leader and rolls the die:
- If the DR is the same as or lower than the selected Command Leader's Activation Rating, that Command goes.
- If the DR is higher than that rating, or the opponent has Seized Continuity (see, below), "play" passes to his opponent, who may now activate any one Command he wishes (or the one chosen when attempting the Seizure), no DR necessary.
5.3 Seizing Continuity
If a Player is about to make the die roll for Continuity, his opponent may attempt to Seize the Continuity before the former rolls the die.
5.3.1 Procedure: The non-phasing player announces with which of his Commands he will attempt the Seizure, rolls the die, and consults the Leader's Rating:
- If the DR is the same as or lower than that rating, that Command may undertake actions, and that Player is now the Active player.
- If the DR is higher, there is no Seizure. In addition, the originally phasing Player gets to select any one Command -- even the one that just went! -- to activate without rolling the die.
Example: The Hungarian Player goes. He selects Tomori's command to activate. After that Activation, he selects Bathyani's command for an attempt at continuity. The Ottoman, however, decides it would be better if that didn't happen and announces, before the DR, that he is going to attempt to Seize Continuity with Bali's Flank Command. He rolls the die, getting a '6', though, which is higher than Bali's Command Rating. The Hungarian, with a free choice, now decides to activate Tomori's command once again. If Bali had rolled a '1', he would have Seized Continuity.
6.0 Movement
Each unit has a Movement Allowance, representing the number of Movement Points (MP) a unit may expend in any one Activation.
6.1 General Rule
Units move (and/or fire) in the Move/Fire Segment. Individual units from the same command may do either/both, in whatever order the player wishes. See Module 7.0 for when missile units may Fire.
6.1.1 Procedure: Combat units and leaders move from one hex to another, contiguous hex. The costs to enter the various types of hexes and cross certain types of hex sides are listed on the TEC.
6.1.2 Command Range Restrictions: Combat units that start their Activation outside the Command Range of their Leader (see Section 12.1) may move, but they may not move adjacent to an enemy unit. If they start adjacent, they may not move away.
6.1.3 Other Restrictions: Combat units usually cannot move into a hex occupied by another combat unit, enemy or friendly (see Case 3.1.1 for the exceptions). Combat units have to stop when they enter an enemy ZOC. Both side's units may not move off the map. (If they do, they're eliminated.)
Exception: Ottoman units forced to Retire must do so off-map (to the main Ottoman Camp, not represented). See the rules on Rally and Standards.
6.2 What is Movement; What is Not
There is a difference between maneuvering counters around the map, and the game mechanic of Movement. Movement, as a mechanic, is any action that requires the expenditure of MPs. Actions that move a unit -- e.g., Retreat, a change of face, Charge, etc. -- but do not require an expenditure of MPs are not Movement in terms of a game mechanic.
7.0 Missile Fire Combat
Missile combat represents the relatively safe discharge of projectiles against the enemy (hopefully they are unable to reply).
7.1 Range and Missile Fire
The Range, printed on the Fire DRM Table, is the maximum number of hexes over which that unit may fire. You count the target hex, but not the firing hex.
7.2 Facing and Lines of Sight
Archer units may fire through their frontal and flank hex sides (see Section 3.3), although when using Reaction fire, that is limited to Frontal hex fire. Musket-firing infantry may fire only through their Frontal hex sides.
7.2.1 Line of Sight (LOS): A unit must be able to see a unit to fire at it. To do so, the player must be able to trace an unblocked LOS from the center of the firing hex to the center of the target hex. LOS is blocked:
- By Village hexes. You may fire into these hexes, but not through one.
- If any intervening hex is higher - of greater elevation - than both the firing and target hex.
- Artillery may not fire through other units. (They're actually firing over them.) Archers may. (They're actually firing over them.)
Play Note: Muskets have a range of only one hex, so LOS is not an issue.
7.3 Who May Fire
Missile units -- Archers, both on foot and mounted, and Regular Infantry (armed with muskets) - are capable of firing at enemy units.
Historical Note: The musket and pike formations of both armies show the effect of the German Landsknechts and Swiss pike formations, although they are a very haphazard version of these. And while many of the soldiers had muskets, some still used bow-and-arrow.
7.3.1 Mounted Archers: Mounted Archers (e.g., Akincis) may fire as part of (during) Movement. It costs +1 MP to do so if these units are in an enemy ZOC when they do (no MPs if not in a ZOC), and such fire may draw Counter-Charge (which takes place after the mounted units have finished their movement). However, Akincis may leave a ZOC they have entered in the same turn, paying a 1MP cost to do so.
7.3.2 Missile Infantry: Missile infantry may fire at any time during Movement. However, once they fire, their movement for that activation is finished. There are three opportunities for Missile Fire, each one available depending on the unit type: Phasing Fire, Return Fire and Reaction Fire. Options are as follows:
A. Archers: Archers (mounted or on foot) may fire:
- Phasing Fire: When it is their phase. A unit may fire once when its command is activated.
- Return Fire: When fired at by an enemy Missile unit, if the latter is within Range. The Return Fire and the Phasing Fire are resolved simultaneously, before any results are applied.
- Reaction Fire: When any enemy unit moves or Charges into its ZOC/frontal hexes. This applies to each enemy unit that does so.
B. Musket (Regular Infantry): These units may fire:
- Phasing Fire: When it is their phase. A unit may fire once when its command is activated.
- Reaction Fire: When any enemy unit moves or Charges into its ZOC/frontal hexes. This applies to only one enemy unit that does so in a given activation, and it is resolved the instant such movement takes place.
- Muskets may not use Return Fire.
Historical Note: The muskets used in the 16th century were nowhere near the efficient weapon they became by the end of the next century. Armies were still developing the best tactics in which to use them. Here, they are almost exclusively a defense-oriented weapon, as are the pike formations that included them.
7.4 Fire Procedure
Each unit fires individually, and each unit may fire at only one target (within its Weapons Range and with a Line of Sight to it - see above) at a time. Non-phasing units using Reaction or Return Fire may fire at each enemy unit that becomes "eligible", as per above.
7.4.1 Range Effects: To Fire, check the range and consult the Fire Range Chart. The Chart gives any DRM for that status at that Range.
Example: An Archer firing at a range of 1 hex gets a DRM of +1.
7.4.3 Angle of Fire: Missile Fire aimed at Mounted units through the latter's Flank hexsides earns the firing unit a +1 DRM.
Historical Note: This reflects firing at the easier-to-hit, unprotected flanks of the horses. While there was some cavalry with armored mount, most were not.
7.4.2 Other Modifiers: Now roll one die, noting whether the target is Disordered or in normal status. The Fire Table lists all of the circumstances that provide additions to or subtractions from the DR (DRM). Compare the adjusted DR to the Fire Table to get the result, as defined in Module 10.0.
7.5 Artillery
Both sides have artillery, none of which was particularly effective as a field battle weapon. ("Much sound and fury, signifying nothing.") The Hungarian artillery is even worse than normal.
7.5.1 Commands: The Hungarian Artillery is under the Command of Hannibal of Cyprus. Approximately half the Ottoman Artillery is in the Rumelian Wing, with the remainder under Suleiman.
7.5.2 Artillery Unit Movement: Ottoman artillery units may move, although with some difficulty. However, if they move they may not Fire (during that activation), and vice-versa. Place a marker on them as a reminder. Artillery may not cross a stream, or enter a marsh or village hex (except by Road). The Hungarian guns may not move; they have been "emplaced".
7.5.3 Artillery Fire: Artillery may fire when activated, even if Out of Command range.
7.5.3 Artillery in Shock Combat: If an Artillery unit is the only unit Shocked it is automatically eliminated, without any DR. If it is so attacked along with another, non-artillery unit, the artillery is eliminated only if the other unit suffers any Negative Result. Artillery never affects "Strength" Advantage (see Case 8.3.1, number 1). Artillery is not affected by Missile Fire.
8.0 Shock Combat
Shock combat is the clash (or immediate threat) of armed men against each other.
8.1 General Rule
In the Shock Phase, all (eligible) phasing, all units listed as Attacker on the Weapon System Matrix may (not must) Shock Attack. However, if they choose to do so, they must Shock any/all enemy units that are in their frontal hexes, unless some of those units are being so attacked by other, friendly units. Units not listed in the Attacker Row may never Shock Attack (or Charge). They do defend, though.
Design Note: Units' weapon systems, armor and morale are represented by a combination of the System Matrix and the unit Defensive DRM.
8.2 Retreat Before Shock Combat
Mounted units that are not Disordered, if attacked by dismounted units, may Retreat Before Shock, by moving one hex away from the attacking unit. It may not enter an enemy ZOC, or an occupied hex, but it may change facing at will. The attacker may advance into the vacated hex, if the player so wishes, but may not then Shock or change Facing.
8.2.1 Akincis Retreat Before Shock: Akincis that are not Disordered, if attacked by Cavalry, may Retreat Before Shock, by moving one hex away from the attacking unit and rolling the die, adjusting that DR by the unit's Defensive DRM rating as follows:
- If the adjusted DR is 5 or less, the Retreat has no effect.
- If the adjusted DR is 6 or more, the Akinci unit retreats, but is Disordered.
8.3 Shock Combat Resolution
Shock Attacking is voluntary, but if a unit does attack it must Shock all enemy units in its Frontal hexes. It does not have to do so against enemy units being Shocked by other, friendly units.
8.3.1 Shock Modifiers: To resolve Shock, which may be done in any order the Attacker wishes, roll the die, then apply any DRM attained from the following situations:
-
Strength Advantage: The player with the higher number of units receives the differential between the number of units as a DRM.
Example: One HC unit attacks two Regular infantry units. There is a -1 strength (dis-) Advantage DRM to the Shock resolution.
-
Position Advantage: There are two types of position advantage based on the angle of attack and the terrain as follows:
- A. Angle of Attack: This reflects the advantage of attacking from an angle other than (only) frontally:
- If any Shock/Charge attacking units are attacking through a defender's Flank, there is a +2 DRM
- If any Shock/Charge attacking units are attacking through a Defender's Rear, there is a +3 DRM
- If the attackers are attacking through any combination of front + flank, front + rear, flank + rear, there is a +4 DRM
- B. Terrain: See the Terrain Chart for the effects of Terrain on combat. If more than one unit is being attacked, and they each could take advantage of different terrain, because the attacker is rolling the die for each defender, he applies the terrain that that unit is in for that resolution.
- A. Angle of Attack: This reflects the advantage of attacking from an angle other than (only) frontally:
-
Shock Defense Rating: the defending unit's - not the attacker's - individual Shock Defense DRM Rating is added (or subtracted).
Example: HC are attacking a Levy Infantry unit with a Defense DRM of +3. Add three to the DR.
- Charge: If a Medium or Heavy Cavalry unit is successfully charging (see Module 9.0), add two (+2) to the Shock resolution DR. Charging cavalry receives a +2 DRM when resolving combat, and it is resolved on the Charge Table (not the Shock Table).
- Leader Presence: If a leader is stacked with an attacking Heavy Cavalry unit there is a +1 DRM
- Weapons/Armor Comparison: The Attacker uses the Weapons System Matrix to compare his Attacking unit Type to that of the Defender. The matrix provides the appropriate DRM. If an attacker is doing so with two units, each of a different type, he may use the best DRM of the type.
- Attacker Disorder: If the Attacker is Disordered, there is a -2 DRM. (The defender's Disorder status is covered by the chart, itself.)
- Retire Status: If Defender is Retired, add two (+2) to the Attacker's DR.
All of the above are cumulative; "+" DRMs favor the Attacker; "-" the Defender.
8.3.2 Final Resolution: To resolve the Shock, which may be done in any order the Attacker wishes, roll the die for each defending unit, apply the DRMs and consult the Combat Results Table for the type of unit that is Attacking: either non-Charge Shock or Charging Men-at-Arms. Look under the column appropriate to the defending unit's status (Normal or Disordered) to see what happened.
Play Note: If one unit is attacking two units, the attacker will roll twice, each with a -1 DRM ... and undergo possible adverse results twice.
Example: A Heavy Cavalry (HC) unit Charges two Light Cavalry units. In resolving each defender separately, the HC gets a Continue Attack against the first, but is Disordered in the second combat. The HC must then Continue Attacking, but Disordered.
8.4 Advancing After Shock Combat
If a defender vacates a hex as a result on the Shock or Charge Table, the attacker must advance at least one of his attacking units into that hex. The advance is undertaken after the victorious unit has finished all of any multiple attacks, and advances only if it is not Disordered in one of those attacks. The advancing unit may change its facing, as it wishes, after such advance.
9.0 Charging
For Heavy (HC) and Medium (MC) Cavalry to be truly effective they must Charge. Charge is not Movement; it is part of Combat. Cavalry that starts adjacent to an enemy unit may Shock that unit, but it is not charging.
9.1 Who May Not Charge
The following conditions prevent units from charging:
- Disordered cavalry may not Charge; they may Shock without a charge.
- Cavalry may not Charge an enemy unit being Shock attacked by another friendly unit in the same Activation.
- Cavalry may not Charge across a Trench or Stream hexside, nor may they Charge an enemy unit in a Village hex; they may Shock attack without a Charge.
9.2 Charge Procedure
To Charge, a Cavalry unit must start the Combat part of its Activation either two or three hexes distant from the target unit. All Charges are designated prior to actually resolving any one Charge. Place a Charge marker on the unit. Charges are resolved, in the Combat Phase, by moving the Charging unit adjacent to the target. When so moving, Charging cavalry may change facing only one vertex during its entire path of movement.
9.3 Charge Reluctance
Horses do not like to "charge" a heavily defended line of infantry (showing much more common sense than their riders). To reflect this, whenever HC or MC are Charging through the frontal hex of a Regular Infantry unit, the charging player rolls the die.
- If the DR is a 0-4, the attacking unit successfully charges
- If the DR is a 5-9, the charge is blunted by the reluctance of the horses to close, and the unit must attack/Shock without the benefit of the Charge DRM.
When rolling for Medium cavalry, add one (+1) to this DR.
Exception: Counter-Charging units (see Section 9.4 below) do not roll for Reluctance; they automatically attack.
A unit that has Charged and attained a "Continue Attack" result is no longer Charging. The "Continue Attack" is resolved as regular Shock Combat.
Historical Note: The horses used by both the Hungarians and the Ottomans were not as big as the ones one saw in the classic armies of the Western Europe Middle Ages.
9.4 Counter-Charge
Counter-Charge is the ability of HC and MC to negate the inertia of any enemy attack, or the sting of its missiles, by launching its own charge.
9.4.1 Who May Counter-Charge: Only HC and MC combat units that are neither Disordered nor in the ZOC of another enemy unit may attempt to Counter-Charge.
9.4.2 When Counter-Charges Occur: HC and MC combat units may Counter-Charge when about to be fired upon, or Shocked or Charged, through its frontal or its flank hex sides. When the attempt is being made because of Fire, it is done so before the Fire is resolved.
9.4.3 Counter-Charge Procedure: To Counter-Charge, the defender rolls the die before the Fire/Shock that is affecting this action is resolved;
- Add/subtract the Counter-Charging unit's Defense DRM;
- If being attacked through the flank, add one (+1) to the DR.
9.4.4 Counter-Charge Success: If the adjusted DR is 0-3, the unit has successfully initiated a Counter-Charge. Place a Charge marker on the unit:
- If it is against attacking HC/MC units, it negates the +2 Charge DRM (but you still use the Charge part of the Table). The original Attacker is still the Attacker, and no units are moved.
- If it is against any other unit, the originally defending HC/MC unit is now the attacker (even if it not his turn). It must be moved up to its printed Movement Allowance, until it moves adjacent to an enemy unit, but without changing Facing. It must then Charge that unit. Such a Counter-Charge attack is resolved immediately.
A Counter-Charge is resolved (complete with +2 DRM) as if it were a normal Charge. If the successfully Counter-Charging unit was Disordered by the fire which initiated the Counter-Charge, the Counter-Charge is still undertaken, but is resolved as a normal Shock Attack.
Note: The -2 DRM for disruption still applies in this case. This is war. Deal with it!
If the target of a Counter-Charge is being attacked by another unit, and that has not yet been resolved, the latter must be resolved before the counter-charge is.
9.4.4 Counter Charge Restrictions: However, while a Counter-Charge is not considered "Movement" -- it is a reaction to the efforts of an enemy Activation - the Counter-Charging unit may not exceed its printed Movement Allowance; it can move only as far as that rating allows. In addition, a defending HC/MC unit may change Facing once per Phase in order to initiate a Counter-Charge (unless it is attacked from the Rear).
Play Note: It may change Facing to start a Counter-Charge but, as per above, once it starts its Counter-Charge it may not change facing.
9.4.5 Counter-Charge Failure: On a roll of 4-9 the unit has failed to initiate a Counter-Charge and must stand to receive the enemy Charge attack.
9.4.6 Counter Counter-Charging: A player cannot Counter-Charge against a Counter-Charge. Only one Counter-charge is permitted per combat.
10.0 Combat Results
Look at the Fire, Shock, and Charge Combat Results Tables while reading this section. Charging HC/MC use the Charge Table. All other Shock attacks use the Shock Table. Shock and Charge combat results depend on whether the defending unit is Normal or Disordered. Missile Fire results depend on whether the target is mounted or infantry.
10.1 Disordered Result
When a unit is Disordered, flip the counter to its "Disordered" side. The effects of being Disordered are:
- The changes to the combat unit's ratings as noted on the reverse of the counter.
- Units incur a -2 to the DR if Shock Attacking while Disordered.
- A Disordered unit may not Charge or Counter-Charge
10.2 Retreat Result
A unit that must Retreat moves one hex away from the unit inflicting the result (owning player's choice). It may not stack with friendly units, and it may not move into an hex occupied by an enemy combat unit. It may move into an enemy ZOC, and it may change facing.
10.2.1 Trampling Friendlies: If its retreat is blocked by a friendly Archer unit, a combat unit may retreat through that unit an extra hex. If it does so, the Archer unit becomes Disordered. If the unit is already disordered, it is Retired.
10.2.2 Unable to Retreat: If a combat unit cannot retreat, it is eliminated. See Section 8.4 on Advancing After Combat.
10.3 Retire Result
This has different effects upon the two sides as follows:
- Ottomans: Pick up the unit and place it in the Ottoman Retired Box (see Case 11.0.2 below). These units may not return to the map until Rallied.
- Hungarians: Pick up the unit and place it as close to its Banner (Standard) as you can. Place a "Retired" marker on top of it. Retired units have a Movement Allowance of 1 hex per activation, and it may (if it needs to) move only towards its Banner. If a Retired unit is attacked, treat as Disordered, but add two (+2) to the Shock Resolution DR.
10.4 Eliminated Result
The unit is no longer effective as a fighting force and is finished for the day. Remove it from the board.
10.5 Continued Attack
When this result is obtained, the attacking unit must move (advance) one hex, without changing Facing, and charge (again) any (all) units in its ZOC. Resolve using the standard rules. If there is no one to move adjacent to, simply Advance. When resolving a Continued Attack, subtract one (-1) from the Resolution DR for each previous Attack undertaken in that Activation.
Play Note: Thus, a Continued Attack will automatically incur at least a -1 DRM. The DRM reflects the ongoing loss of formation and impetus such attacks are subject to.
11.0 Rallying Units
Units may recover from Disorder or Retired status by rallying during their activation.
11.0.1 Rallying Disordered Units: Disordered units may cure their Disorder status by spending their entire activation doing nothing. If they are not adjacent to an enemy unit, and they do nothing, flip the disordered counter to its normal side.
11.0.2 Rallying Retired Units: Both sides may rally retired units but have different conditions as follows:
- Retired Hungarian units that are in or within one hex of their Banner (Standard) may be Rallied if that Banner is activated; see Case 12.0.2. When activated, remove the Retired marker and make sure the unit is now in Disorder status.
- Retired Ottoman units in the Ottoman Retired Box are eligible to be Rallied. When Rallied, they are flipped to their Disordered side and may return to the map through any hex between 4210-4222, inclusive. Or, you may wait another activation and Rally them from Disorder while they are in the Ottoman Box, using normal Rally procedures.
12.0 Leaders
Every unit in the game belongs to a Command, as noted above, and as listed specifically in the Deployment instructions. When a Command is chosen to activate, all units in that Command may move and fight.
12.1 Command Range
A leader's Command Range is traced in hexes, not Movement Points, from the Commander to the combat unit. Players cannot trace Command Range through an enemy unit or ZOC. Command status is determined at the start of Activation and stays with the unit throughout that Activation.
12.1.1 Command Range Extension: A combat unit not actually within its leader's Command Range but adjacent to a combat unit that is (or one that is considered in Command by virtue of this, specific rule), is considered to be in Command (in a sort of chain effect).
12.2 Command Abilities and Restrictions
A combat unit that is within its leader's Command Range may do anything and everything allowed by the rules.
Note: The Turkish Center has two leaders, Suleiman and his second-in-command, Achmed. Suleiman can command any and all of the Center formation units. While he is in play Achmed can command only the Levy Infantry unit of the Center. Achmed assumes full command of all Center units if Suleiman is eliminated (see Case 12.4.1).
12.2.1 Out of Command: Units that start activation outside their leader's Command Range may not move adjacent to an enemy unit, and, if they start in an enemy ZOC they may not move out. Mark such units with an Out of Command marker.
12.3 Leader Benefits
Hungarian Heavy Cavalry stacked with their Leader gain a positive DRM when such unit is Charging, but at no other time. No other units gain such a Leader benefit. See the DRM for Shock information on the charts.
12.4 Eliminating Leaders
While there is no Personal/Individual Combat between leaders, they can get killed. (In game terms, that encompasses being Captured and other no-so-hot events).
- By Fire: Anytime an adjusted DR of 9 or more occurs on the FCRT, and there is a leader in the target hex, roll the die again. If this second DR is '8' or '9' the leader is killed. Otherwise, there is no effect.
- By Shock or Charge: Any time a leader is stacked with a unit that receives a Disordered, Retired or Eliminated result, roll the die for the leader, subtracting his Activation Rating. If the adjusted DR is 3 or higher that leader has been "killed". If he survives, but the combat unit does not, place him with the nearest unit from his Command. If he is surrounded - by enemy units and/or their ZOCs - he is, instead captured, no DR is necessary.
12.4.1 Replacement Leaders: When a leader is killed, at the start of that player's next activation -- but after the Command for that Activation has been chosen - put a Replacement Leader with any combat unit from that Battle. Dead Leaders count towards victory.
Exception: If Suleiman is eliminated Achmed assumes full command of the Turkish Center (see rule 12.2). There is no other replacement leader for Suleiman. If Achmed is eliminated he is replaced normally per this rule.
Play Note: Normally, a command that loses a Leader will be unable to be activated for one "turn".
13.0 Standards
The Standards of both armies were the rallying point for shattered or demoralized units.
13.0.1 General Rule: Any unit that is Retired and is within one hex of its Standard when the Standard is activated has its status changed from Retired to Disordered.
13.0.2 Activating Standards: Standards may be activated only in a Free Activation; they may not be activated by a DR. When a Standard is activated, the only thing that may happen is Rally.
13.0.3 Ottoman Standard: The Ottoman Standard is in the Ottoman Retired Box and, thus, has no counter.
13.0.4 Hungarian Banner: The Hungarian Banner (Standard) is that of their King, Lajos II. Once placed, (see the set-up below) the Hungarian Banner may never be moved. If an enemy unit enters a hex with the Banner, the Banner is permanently eliminated, and all of its units that are Retired are also eliminated.
14.0 Initial Deployments
Both sides begin the game with fairly fixed deployments although some minor choice of positioning is permitted.
14.1 The Army of the Kingdom of Hungary
Under (nominal) Command of King Lajos II
Deployment Notes: All units start facing south. The Hungarian player may place units from a specific group -- e.g., LC -- as he wishes, unless specifically noted. In addition, use the unit types that correspond to the commander listed.
Historical Note: The Hungarian camp is some distance to the north, just south of the town of Mohacs, to which that road is leading.
| Hexes | Units |
|---|---|
| 1810-11, 1817-18 | 4 Artillery units |
| 1803-09 | Perenyi; 7 LC units |
| 1819-25 | Bathyani; 7 LC units |
| 1812-16 | Hannibal; 5 Regular Infantry |
| 1618-1626 | Tomori [a]; 9 HC [b] |
| 1414 | King Lajos II; 1 HC |
| 1421-22 | 2 LC (Archers) |
| 1418-20 | 3 Levy Infantry |
| 1415-17 | 3 HC |
| In any hex above |
Place the Banner (Standard) of the Kingdom of Hungary within two hexes of King Lajos.
[a] Archbishop Pal Tomori, along with Giorgi Szapolyai, Count of Slepolz, was chosen as overall commander (in a not uncontested election by the councilors of the King. King Lajos, in his early 20's, had no experience and was at the battle to provide inspiration. Fat lot of good it did him). Szapolyai, brother of the formidable Johann Szapolyai, Voivode of Transylvania (more of which see the article and below), does not seem to have exercised any field command. In addition, Stefan Bathori, Count Palatine and a high-ranked military figure, was present but not active as a field commander.
[b] We have deployed these units not as they stood before the Ottomans approached -- which would be more in the center -- but in reaction to the execution of Tomori's plan to attack the Ottomans while setting up camp, and before the rest of the army could show up. Doing so allows us to avoid writing some rather clunky rules exceptions.
Hungarian Leaders:
- Lajos: King Lajos (Louis) II
- Bathyani: Ferenc Bathyani, Ban of Croatia
- Perenyi: Peter Perenyi, Ban of Temesvar
- Tomori: Pal Tomori, Archbishop of Calocza
- G. Szapolyai: Giorgi Szapolyai, Count of Szepolz
- Hannibal: Hannibal of Cyprus (A condotierri! And that's his name!)
- Zalkan: Ladislas Zalkan, Archbishop of Gran
- Raab: Bishop of Raab (whose name we could not find)
Historical Note: "Ban" is Hungarian for what amounts to a Duke. Gaspar Raskay shows up in most of the sources as commanding a contingent of archer cavalry of the Right Wing of the third line that may, or may not, have gone out to keep an eye on Bali's flanking force. Raskay is reported to have refused to do so, as his "job" was to protect the King. Some sources do note he did ride out, took a look, and then rode back to his place in line. For these reasons, we have left him out of the Leader mix.
14.2 The Army of the Ottoman Empire
Under the command of Sultan Suleiman I the Magnificent
Deployment Notes: All units start facing north. The Ottoman player may place units from a specific group -- e.g., LC -- unless specifically noted. In addition, use the unit types that correspond to the commander listed.
| Hexes | Units |
|---|---|
| Within 1 hex of 2334 | 4 MC; Bali |
| Within 2 hexes of 2729 | The Rumelian Wing [a]: 9 MC; Khosrev |
| Within 2 hexes of 3029 | 7 Artillery units |
| 2710-19 | 10 Akinci LC |
| 3011, 13, 15, 17, 19 | 5 Janissaries (Regular Infantry) |
| Within 1 of any above hex | Grand Vizier Ibrahim |
| 3307, 3309, 3311, 3313, 3315, 3317, 3319, 3321 | 8 Artillery units |
| 3406-11, 3418-23 | 12 Heavy Cavalry |
| 3415 | Suleiman, Achmed |
[a] See the rules on Starting the Game (Section 14.3) below.
Ottoman Leaders: Information on the Ottoman leaders is sparse and incomplete. At least it is in the sources we used.
14.3 Who Starts the Game?
The Hungarians go first (Free Activation), but there are some restrictions.
But first, to digress by way of explanation for the following rules. The Hungarian Army, informed of the approach of the Ottoman columns, had deployed, as you see, since early on the morning of the 29th. They had chosen not to use the Borza (the stream to their rear) as a defensive help because Archbishop Tomori had convinced King Lajos and his fellow commanders that the only way they could defeat the much larger Ottoman army was to attack, which would have made the Borza a detriment.
However, it placed the hill to their front directly in their Line of Sight to the approaching Ottomans. All they could see - and this is based on some very confusing descriptions - was the Rumelian left wing, with about half of the Ottoman artillery, moving in first, to their right, and starting to set up camp. (The Ottomans were somehow convinced that the battle would occur the next day.) They could not see the Ottoman front line, of akincis and janissaries, approaching until the tips of their spears started to appear just to the rear of the top of the hill.
By that time, Tomori had convinced the king that the encamping Rumelians gave them a marvelous opportunity to attack the Ottomans and defeat them in detail.
To that end, the following rules are in effect:
- The Hungarians may not move within two hexes of any unit they cannot "see" -- to which they cannot trace a LOS. (In effect, the Level 4 Ridge blocks LOS to the main Ottoman forces; it has no other effect on the game.)
- The entire Rumelian wing -- but not Bali's Flanking Force, which was detached from there nor the artillery -- starts the game Disordered (to reflect their setting up camp). They cannot move until Rallied.
- The Ottomans may not attempt Continuity Seizure until after their first, non-DR Activation.
- The Hungarians may attempt to Continue with the same command twice (or more) in a row, until they fail such attempt, at which point this ability is negated.
15.0 Reinforcements
Only the Ottoman player receives reinforcements during play of the standard acenario. Hungarian reinforcements are possible for players wishing to explore other possibilities.
15.1 Ottoman Reinforcements
The Ottomans have two "waves" of Reinforcements, units that enter the game after it has started. Each wave enters in its entirety, using the hexes for such entry. If more than one unit uses the same hex to enter the map, it must pay 1 MP in addition to the terrain cost for each such previously entering unit. Units not brought on during a given activation may be brought in during the next activation for that command.
15.1.1 Suleiman's Center: The remaining units of Suleiman's Center that are not yet on the map enter any time Suleiman is activated. The Center (remaining units) consists of 5 Regular Infantry and 15 Levy Infantry. These units enter through any hex between 3412-17, inclusive. You will have to make room for them. All of the Center of the Ottoman Army must enter before the Anatolian Wing.
Designer's Note: Yes, Suleiman has a huge contingent of troops/counters. This is purposeful. While the Sultan's Household cavalry, the Spahis of the Porte, was very active, the reserve infantry and artillery was assigned a purely defensive mode, if, alone, to guard the immense Ottoman camp to the rear. Command Control is needed only (well, mostly) for offensive purposes with this system, but we do give you Achmed in case things get interesting.
15.1.2 The Anatolian Wing: The Anatolian Wing may be activated to enter only on a free (no DR) Ottoman activation. Once at least one unit from that wave has entered, this activation restriction is lifted. The Anatolian Wing consists of 13 MC plus the Begler Beg of Anatolia. These units enter through any hex between 3400-4, inclusive. Unfortunately, we could not find the name of the Begler Beg of Anatolia.
15.2 "What If?" Hungarian Reinforcements
In what has been a politically charged issue that has reverberated down over the centuries, many of the contingents of allies called in by King Lajos did not arrive in time for the battle. Some were never going to do so; some were held back - specifically the charge leveled at Johann Szapolyai, Voivode of Transylvania because of his ambitions for the Hungarian throne (which he did get after Lajos' death and some deals were reached with Suleiman). We have included some of these groups as "optional, what-if?" reinforcements for players looking for some difference in play and better numerical balance. The use of this rule/possibility is optional, but the arrival of additional troops will help the Hungarians.
15.2.1 The Translyvanians: This contingent consists of: 8 HC; Johann Szapolyai, Voivode of Transylvania
15.2.2 The Slavonians [a]: This contingent consists of: 2 HC, 2 MC; Count of Slavonia (actual name unknown)
15.2.3 The Mixed Bag: Croatians, Czechs, Moravians and Silesians: This contingent consists of: 2 HC, 4 MC; Ct. Kristof Frangepane
a = A large (4500+) contingent of Slavonians and Croatians, under Bathyani, has already arrived and is part of the Hungarian army.
15.2.4 Procedure: In any turn after the Ottomans have first been activated, the Hungarian Player may attempt to bring in one of these groups. He may do so only in (and as) a Free (no DR) Activation. If he wishes to do so, he rolls one die:
| Die Roll | Result |
|---|---|
| 0-5 | Nothing happens, no one shows up |
| 6-7 | The Slavonic Contingent enters through any hex(es) 3236-3436 inclusive** |
| 8 | The Mixed Contingent enters through any hex(es) 1436-1836, inclusive** |
| 9 | The Transylvanian Contingent enters through hex 1406-1800** |
** = Once a contingent has entered, its subsequent DR is treated instead as a 0-5.
16.0 Victory Determination
Victory is determined by having each side total his eliminated units and leaders, and rolling the die. If the DR plus the Flight Level Points total is greater than the Flight Level of that Player, his opponent wins. If he does, the other player wins.
16.0.1 Flight Levels: The Flight Level is determined each time after a Command has undergone a Free (no DR) action. For much of early parts the game this will not be necessary. The following Flight Level Points are added to the DR:
- 3 Flight Level Points for each eliminated HC or MC unit, or for a eliminated King/Sultan.
- 2 Flight Level Points for each other type unit and/or Leader who is not a King/Sultan and is eliminated.
- 1 Flight Level Point for each Retired unit, regardless of types. If a unit is rallied out of Retire status, adjust the Flight Point Track accordingly.
- Artillery has no Flight Level Point value.
Note: No Flight Level Points are given for standards or occupying any specific hex.
Design Note: The DR adds uncertainty to an army's Breaking Point, something that, while it probably will annoy some player, somewhere, does add some tension and flavor to the contretemps.
16.0.2 Tracking Flight Level Points: You may keep track of an army's Flight Points on the Flight Point Track, on the map.
Example: The Hungarians have accumulated 40 Flight points at the end of an Activation. The Hungarian player rolls the die, getting a '3'. He has not exceeded his FP Level and lives to fight another Activation.
16.0.3 Hungarian Flight Level: The Hungarian Flight Level is 45.
- Add 10 if the Transylvanians show up
- Add 5 if the Slavonians show up
- Add 7 if the Mixed Contingent shows up.
16.0.4 Ottoman Flight Level: The Ottoman Flight Level is 65.
Note: In the unlikely event both sides should reach their flight level at the same time, both players lose. Life is tough, deal with it!
A Chance to Shill a Product: Those of you who have enjoyed this game's system might want to look into GMT's MEN OF IRON series, which uses the same general mechanics, but for the medieval era.
Appendix: Official Addenda (Errata) as of Feb. 1, 2024
The following is transcribed from the publisher's errata document "Suleiman the Magnificent -- Addenda as of Feb. 1, 2024" (Against the Odds). The rules above are printed as in the rulebook; apply these corrections to them.
The Rules
2.2.5 Shock Defense Rating (correction): This states that a unit's rating is used "when attacking" or defending...delete the attacking notation since SDR is used only in defense.
3.2.4 ZOC Effects (addition): This states that an out of command unit can't leave a ZOC...add that it may not also move adjacent to an enemy unit (per 12.2.1).
5.3.1 Seize Procedure (correction): This states in the example that the roll is higher than Bali's "Command" Rating...change to his Activation Rating.
7.3.1 Mounted Archers (clarification): This states that Akincis can pay +1 MP to leave a ZOC that they have entered in the same turn...add that this still does not allow them to move from one ZOC to another (represents their hit-and-run ability).
7.3.2 A. Archers (addition): This states under Return Fire archers may simultaneously engage the phasing firing unit...add that this applies against each enemy unit that does so (per 7.4), just like Reaction Fire.
7.5.3 (correction): This rule number is listed for both Artillery Fire and also for Artillery in Shock Combat...change the latter to 7.5.4.
8.2 Retreat before Shock Combat (addition): Add the word "solely" before "by dismounted units" in the first sentence (thus if attacked by both shocking cavalry and dismounted units, Cavalry cannot retreat before Shock).
8.3.1 Shock Modifiers (clarification): Strength Advantage (subsection 1) and Weapons/Armor Comparison (subsection 6) are lumped together as the "Weapon System Matrix Strength Advantage" on the Shock/Charge DRM Summary chart...for clarity these are two different modifiers (one for number of units, the other for the matrix).
8.3.1 Leader Presence (clarification): Add to subsection 5 that this modifier only applies to Hungarian HC (per the chart and 12.3).
8.3.2, Example (deletion): Delete the last sentence, "The HC must then continue attacking, but disordered." Disordered units do not participate in Continued Attacks.
9.3 Charge Reluctance (correction): States only roll when Charging into the "frontal hex of Regular Infantry", but the Charge Reluctance Die Roll table states "any unit attempting to Charge"...change the table notation to "any unit attempting to Charge into the frontal hex of Regular Infantry".
10.2.1 Trampling Friendlies (clarification): States a retreating unit can go through "a friendly Archer unit" and this applies to both mounted and dismounted Archer units per case 10.2. So for example, archer infantry can retreat through Akincis cavalry archer units.
10.5 Continued Attack (correction): States that a continuing attacking unit must "charge (again)" which seemingly contradicts the last line in 9.3 that a Continued Attack is resolved as a "regular Shock" (not a charge). Change the wording in 10.5 to read "shock (again)". Also, see the optional play balance rule below.
11.0.2, Step 2 Retired Ottomans (correction): Retired Ottoman units that are rallied re-enter the game at hexes 3412-3217 inclusive, not 4210-4222.
12.1 (clarification): States that Command Range can't be traced through an enemy unit or its ZOC. The presence of a friendly unit in a hex does negate any enemy ZOCs there and allows command to be traced (3.2.2 mentions "certain circumstances" and talks about movement and retreat before combat)?
12.4 Leaders (clarification): A leader that no longer has any subordinate units left in play is removed from the game (he isn't considered eliminated, however, but rather has fled the field of battle).
The Charts
CRT (clarification): Already Disrupted units suffer no further ill-effects if Disrupted again.
Weapons/Armor Comparison (clarifications): "Archer Infantry" are delineated on the chart but Musket Infantry is not...add a note to clarify that Musket Infantry attacks and defends as indicated by the unit's icon (RI or LI).
(deletion): Also, on the Matrix the 2nd postscript refers to Light Cavalry "Archers" may not Charge...delete the confusing "Archer" reference since no LC is allowed to charge (per 9.0).
Shock Table (clarification): There are two modifiers on the shock table that essentially mean the same thing; -1 if all attackers at a lower level attacking units at an higher level, and, also -1 attacking into a higher level.
(omission): The -1 DRM for each continued attack isn't mentioned on the Shock/Charge DRM Summary table...add "-1 Each Continued Attack" to the table.
9.3.1 Optional Play Balance Rule
Use this rule when 2 players of disparate abilities are playing.
Ignore the last sentence in Section 9.3 that reads, "A unit that has Charged and attained a "Continue Attack" result is no longer Charging. The "Continue Attack" is resolved as regular Shock." Charging cavalry keep the Charge marker and DRM until the end of their combat, including any/all continuation attacks. Apply the -1 DRM for each subsequent continuation combat as per the rule.
This will aid the Hungarian player at the beginning of the game, especially should he choose Tomori's Battle with which to use for the initial set of activations. This may, however, backfire when the Turk's Anatolian Wing shows up. Enjoy!
Optional Cavalry Counter-Charge Rule (from RHB himself)
Here is the slightly rewritten counter-charge rule.
Counter-Charge is the ability of HC and MC to negate the inertia of any enemy attack, or HC, MC and Hungarian LC, to react to the sting of its missiles, by launching its own charge. Only HC and MC (and Hungarian LC against missile fire) that are neither Disordered nor in the ZOC of another enemy unit may attempt to Counter-Charge.
HC and MC may counter-charge when about to be fired upon, or Shocked or Charged, through its frontal or its flank hex sides. When the attempt is being made because of Fire (and this would include Hungarian LC), it is done so before the Fire is resolved.
To counter-charge, the defender rolls the die before the Fire/Shock that is affecting this action is resolved:
- add/subtract the counter-charging unit's Defense DRM;
- if being attacked through the flank, add one (+1) to the die roll.
If the adjusted DR is 0-3, the unit has successfully counter charged.
- If it is against attacking HC/MC, it negates the +2 Charge DRM (but you still use the Charge part of the Table). The original Attacker is still the Attacker, and no units are moved.
- If it is against any other unit, the originally defending HC/MC or Hungarian LC is now the attacker (even if it not his turn). It must be moved up to its printed movement Allowance, until it moves adjacent to an enemy unit, but without changing Facing. It must then Charge that unit. Such Counter-Charge attack is resolved immediately.
A Counter-Charge is resolved (complete with +2 DRM) as if it were a normal Charge. If the successfully counter-charging unit was Disordered by the fire which initiated the Counter-Charge, the Counter-Charge is still undertaken, but is resolved as a normal Shock Attack. If the target of a Counter-Charge is targeted for being attacked by another unit and that has not yet been resolved, the latter must be resolved before the counter-charge is.
However, while it is not considered "Movement" -- it is a reaction to the efforts of an enemy Activation - the counter-charging unit may not exceed its printed Movement Allowance; it can move only as far as that rating allows.
Otherwise (4-9) it has not, and stands to receive the Charge attack.
A defending HC/MC unit may change facing once per Phase in order to effect counter-charge (unless it is attacked from the Rear).
Play Note: It may change Facing to start a counter-Charge but, as per above, once it starts its Counter-Charge it may not change facing.
And you cannot Counter-Charge against a Counter-Charge. Only one Counter-charge is permitted per combat.