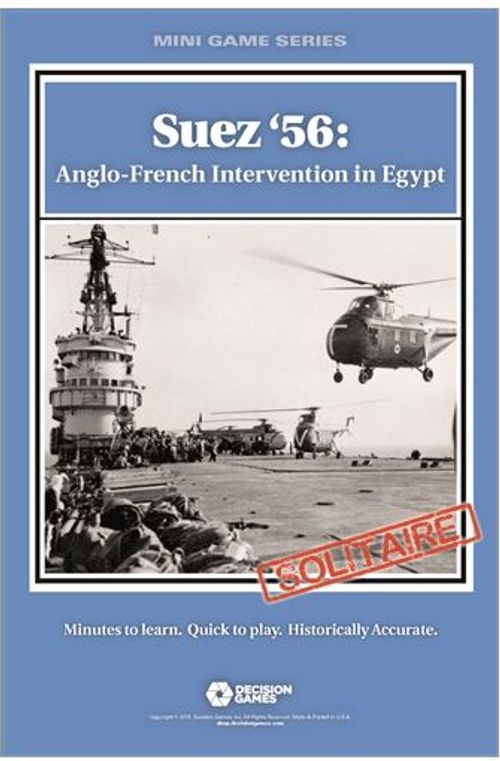
Suez '56: Anglo-French Intervention in Egypt
Suez '56: Anglo-French Intervention in Egypt Rulebook
Table of Contents
Table of Contents
COLD WAR BLITZ — MINI GAME SYSTEM RULES
1.0 Introduction
Cold War Blitz is a solitaire game system in which the player takes command of a military operation during the era of 1946–1990. The forces the player controls are generally termed "Allied." Their performance is enhanced using a set of cards. The Opposition Force (OPFOR) is the enemy, whose units are controlled by the game system using a second set of cards.
2.0 Components
A complete Cold War Blitz mini game includes: these rules (2.1), one scenario sheet (2.2), one 11×17 inch map (2.3), 18 cards (2.4), and 40 playing pieces (see 2.5 and 2.6).
Players must provide at least one six-sided die; more would be useful.
2.1 Standard Rules
There are two levels of rules, Standard and Advanced (any rule with an "A" after the rule header). The standard rules include all the basic mechanics needed to play the game. The Advanced Rules give more realism at the expense of more complexity. Players new to wargaming should read just the Standard Rules and play a game or two using them before trying the Advanced Rules.
2.2 Scenario Rules
The scenario sheet provides the information needed to set up a game, and the objectives to be reached by the player to win. Each scenario also may have special rules added to the game or modifying a standard rule.
2.3 The Map
The map in each scenario displays the area over which operations are conducted and other game information using the following.
- Spaces: Locations in which you place units. Types of spaces are described on the Terrain Effects Chart, also on the map.
- Routes: The lines connecting spaces. Players move their units via routes.
- Air Box: A holding area for airstrikes and helicopters.
- Reinforcement Box: A convenient place to put units which are not yet in play.
- Units Eliminated Box: A convenient place for units that have been destroyed by combat or other game actions.
- Turn Track: Used to keep track of the remaining number of turns.
- Charts & Tables: Summarize key game information or used to resolve events and actions. The actual charts and tables included will vary with the scenario.
2.4 Cards
There are nine action cards used by the player to affect operations. Unless specified otherwise by the scenario instructions, all nine are available to the player and may be chosen freely. The nine OPFOR cards direct the action of OPFOR units and will be drawn randomly by the player.
2.5 Playing Pieces
The square cardboard pieces are called units. Scenario rules provide more information about the specific units in that scenario. In all scenarios, the units controlled by the player are friendly units, generally called "Allied" units. The game system controls the OPFOR units.
Ground unit (front) shows: unit type symbol, unit size, unit ID, firepower, elite unit marking, and movement factor.
- Unit identification: Historical name or number of the unit.
- Unit type: The general type of troops. Explained in the Scenario sheet.
- Firepower: The amount of combat power of the unit.
- Movement: The basic number of spaces the unit can move in a turn.
- Elite Units: The arrow "Elite" symbol behind their firepower and movement values.
- Air Unit type: Airstrikes and helicopters. Unit types and sizes are explained in the Scenario rules.
Air unit (front) shows: unit type symbol, unit ID, and firepower.
2.6 Backprinting & Two-Step Units
Units with combat and movement factors printed on only one side are one-step units; when eliminated in combat they are removed from play. Units with factors on both sides are two-step units. If a two-step unit is eliminated in combat, flip it to show its reverse (weaker) side. When it is eliminated again, it is removed from play.
3.0 Playing the Game
3.1 Setting Up
Shuffle all OPFOR cards into a deck and place it face down near the map. Place the Action cards face up. The Scenario rules will state the placement of the turn marker and of friendly and OPFOR units. OPFOR units are placed face down, and are revealed only:
- the instant that a friendly ground unit enters their space.
- whenever an air unit is placed in their space to conduct a mission.
- via certain cards.
Once an OPFOR unit is revealed, it remains revealed for the rest of the game, unless a scenario instruction indicates otherwise. The player always may examine friendly units.
3.2 Turns & Game Length
Cold War Blitz is played in turns, each representing an indeterminate period of operational activity. The turn marker is placed on the turn track (on the map) to indicate the number of turns remaining in the game. The starting number of turns is given in the scenario instructions. Each turn, the player will play one action card (3.3.1) and draw and implement one OPFOR card (3.3.8). In the admin phase (3.3.12), total the numbers in the upper right corner (plus any result from the card instructions/die rolls) and add/subtract the result from the current remaining turns. If the result is 0 or less, the game ends—check victory conditions.
3.3 Turn Sequence
Each turn goes through the following phases.
- Friendly Action Card Phase: You must select one Action Card and play it.
- Friendly Reinforcement Phase: Place friendly units designated as Reinforcements by the card onto the map. Also check to recycle friendly air units from the Used box.
- Friendly Ground Movement Phase: You may move all friendly ground units according to the rules of movement. Also, conduct any naval moves.
- Friendly Air Movement Phase: You may place available air units on the map to conduct missions. Also, conduct any airborne moves.
- OPFOR AAA Phase: You must fire any OPFOR anti-aircraft at friendly air units and against ground units making airborne moves in the OPFOR units' spaces.
- Friendly Air Attack Phase: You may now use friendly air units to attack OPFOR units on the ground. At the conclusion of this phase, place all air units which were used into the Used box.
- Friendly Ground Combat Phase: You must use friendly units to attack OPFOR units in the same space (if any). See the Combat Procedure.
- OPFOR Card Phase: You must draw one OPFOR card and implement its effects.
- OPFOR Reinforcement Phase: If a card calls for OPFOR reinforcements, you must place them.
- OPFOR Movement Phase: If an OPFOR card calls for OPFOR units to move, you must move all specified units.
- OPFOR Combat Phase: If OPFOR units are now in any spaces also containing friendly units, you must use them to attack.
4.0 Card Play
4.1 Card Selection
The player selects one Action card and one OPFOR card each turn in the appropriate phases. Action cards are drawn from the pool of cards in front of the player. OPFOR cards are selected by drawing the top card from the OPFOR deck. Action cards may direct certain action be taken by friendly units that turn. OPFOR cards may direct action by OPFOR units.
Card play may increase or decrease the number of turns remaining, as indicated by the number in the upper right of each card. A zero has no effect; a question mark "?" means the card will have a variable effect. Some card events also affect the remaining number of turns.
4.2 Disposition
Each card specifies what is to be done with it in the admin phase after adjusting the turns remaining.
- Discard: Place the OPFOR card in a separate discard pile, face up.
- Remains in Effect: The card is set aside and its effects apply for the rest of the scenario. Any turn loss or gain applies only on the turn in which it was played.
- Remove from play: Set it aside; it may not be used again in the game.
- Reshuffle: If all OPFOR cards have been picked, then reshuffle all discards and start the OPFOR deck anew. Some card instructions may also generate a reshuffle.
- Reuse: Return it to the available card pool for use in a future turn.
5.0 Reinforcements
5.1 Allied Reinforcement Availability
Allied units listed as "reinforcements" in the scenario are initially placed in the Reinforcement Box. They are introduced onto the game map via Action cards by removing them from the box and placing them according to the Scenario rules.
5.2 OPFOR Reinforcement Availability
OPFOR units listed as "reinforcements" in the scenario are initially placed face down in the OPFOR Reinforcement Pool. They are introduced onto the game map via OPFOR cards, usually by picking a specified number of units indicated at random and placing them on the map according to the Scenario rules.
5.3 Reinforcement Arrival
Reinforcements are placed during the respective Allied and OPFOR reinforcement phases. They can move and conduct other game actions normally in the turn of placement. If there are no units in a Reinforcement Box or Pool (owing to prior picks), then no units are received.
6.0 Ground Movement
During the friendly movement phase, you may move some, none, or all friendly units. OPFOR units are moved only as a result of combat or through reaction movement as directed by an OPFOR card.
6.1 Movement Procedure
Units are moved one at a time. Each unit moves a number of spaces up to but not exceeding its movement value. Unused movement cannot be saved for a future turn or given to another unit. Example: a unit with a movement of 2 can move two, one or no spaces in a turn.
6.2 Terrain Effects on Movement
The Terrain Effects Chart describes the effects of terrain on movement. If a Terrain type says STOP, then when a unit enters that space, it must cease movement even if it has not used its entire movement value. It may continue moving on a following turn.
- Water Barriers: take all of a unit's movement for a turn to cross. The unit must start its movement on one side, then moves to the other side, ending its movement there.
- Prohibited terrain: may not be entered by any units at any time unless they have special abilities granted by the scenario rules.
6.3 Enemy-Occupied Spaces
A unit must stop when it enters a space containing an enemy unit. It can move no further that phase. In a subsequent phase, it can move out. A unit can move directly from one enemy occupied space to another.
6.4 Stacking
The scenario rules specify how many units may end a phase in the same space. If more than that number of units ends up in a space at the end of a phase, excess units are eliminated (see 7.3).
- Opposing units in the same space do not count against one another's stacking limits.
- Moving through a space does not count toward the stacking limit of that space; only units ending a phase in a space are counted.
7.0 Ground Combat
Combat is triggered whenever a space is occupied by opposing units at the beginning of either ground combat phase. The player is the attacker during the friendly ground combat phase, the OPFOR units are the attackers during the OPFOR ground combat phase.
7.1 Ground Combat Procedure
Resolve each combat using the following steps in this order:
- Tactical Superiority Determination
- a) Roll one die for the Friendly side, and a second for the OPFOR.
- b) If a side has any Elite units in the engaged force, add 1 to its die roll. If not, use the face value of the die roll.
- c) The side with the higher total gets Tactical Superiority. In the event of ties, the Terrain Effects Chart indicates who wins depending on the type of space.
- First Round
- a) Line up OPFOR units in order of strongest firepower to weakest. If more than one unit has the same firepower, place those in any order desired.
- b) Line up Friendly units in any order desired.
- c) The side with Tactical Superiority fires its first unit in line (see 7.2) and inflicts any losses or retreats on the enemy.
- d) Then the side without Tactical Superiority fires its first unit in line and inflicts any losses or retreats on the first enemy unit.
- e) Continue alternating back and forth until both sides have fired all units. If one side has fewer units than the other, the side with more units continues until all of its units have fired.
- Second & Subsequent Rounds: Repeat the procedure from the Tactical Superiority and First Round of Battle until only one side has units remaining in the space.
- Determine the Winner: The side with at least one remaining unit is the winner, the other side the loser.
7.2 Firing Procedure
To fire a unit, the player rolls a number of dice equal to its firepower strength. The target for each firing unit must be the first enemy unit in line; a unit down the line may be targeted only if each unit before it is eliminated or retreated. Consult the Battle Results Table (BRT) to determine the results (7.3). Apply the results immediately. Since firing is non-sequential, a firing unit may be eliminated, retreated, or reduced before its turn to fire.
7.3 Battle Results
Each scenario has its own BRT to accommodate different factors in play for that scenario. Use the column for the type of unit firing. Cross index each die roll with the column to determine the result to be applied, as directed below. It is possible for more than one retreat result to be applied to a single unit. All eliminations are inflicted before retreats. If the targeted unit is eliminated or retreated before all results have been applied, leftover results are not applied to the next unit in line.
- Elimination: Remove a one-step unit or a reduced two-step unit from the map and place it in the Eliminated box (7.4). Flip a two-step unit to its reduced side.
- Retreat: The targeted unit is moved one space for each retreat result inflicted. Retreat may not be made into a sea space, across a water barrier, into a space containing an enemy unit, or into a space otherwise prohibited to the retreating unit's movement. If no such space exists, the unit is eliminated instead. The player always chooses the direction of retreat, but cannot move units into a prohibited space if other spaces are open. A unit with a printed zero movement is eliminated. Retreated units are out of the battle and cannot fire.
- No effect: Nothing happens.
Example 1: A Friendly unit is firing on an OPFOR force. The Friendly unit inflicts one elimination and two retreats. You would eliminate the first OPFOR unit. The retreat results are not applied.
Example 2: A unit receiving two retreat results must retreat two spaces. A two-step unit receiving one elimination and one retreat would be flipped to its reduced side, then retreated one space.
7.4 Replacements
Units that are eliminated may be returned to play via card play or scenario instructions.
7.5 Pursuit (A)
If friendly forces (not OPFOR forces) win a battle, the player may order a pursuit. Only friendly units with an armor symbol of any type can conduct a pursuit. Some, none, or all qualified units in the winning force may move one land space. All pursuing units must move together. If the pursuit enters a space containing enemy units, the pursuing force must attack them; if there are other friendly units in that space, they join the attack.
8.0 Air Operations
Only one side will have air units in most scenarios. There are two types of air units: airstrikes, representing fixed-wing aircraft, and helicopters, representing rotary-wing aircraft (see also 10.1). Both types operate in the same manner unless another rule states otherwise.
8.1 Air Unit Availability & Use
Air units in play are placed in the Air Available box. To use them, place them on the map in whatever spaces they are to conduct a mission. They may be used in any space on the map unless specified otherwise in the scenario rules.
8.2 Air Unit Turnaround
Each air unit may be used only once per turn. At the end of each air attack phase, return all air units on the map to the Air Used box. During each Administrative phase, roll one die for each air unit in the Air Used box. Compare the die roll to the range of numbers for that aircraft type, printed in the Used box. If a six is rolled, place the aircraft in the Eliminated box; it is eligible for replacement. If the roll is within that range, place it back in the Available box. If not, then it remains in the Used box and may be checked the next turn.
8.3 Antiaircraft Fire
An air unit may be fired at during the anti-aircraft fire phase by all enemy anti-aircraft artillery (AAA) unit in the same space. Roll a number of dice equal to the total AAA strength of all AAA units in the space. If AAA inflicts a result, the player may choose which air units are hit. AAA losses are extracted prior to bombardment or completion of air moves. The possible results are elimination and abort. All eliminations must be applied before any units are aborted. Certain results affect only certain types of air units.
- Elimination. Reduce a two-step air unit to its reduced side. A one-step unit or a reduced two-step unit is eliminated and removed from play (7.3). If a helicopter transporting a ground unit is eliminated (but not reduced), the ground unit also is eliminated.
- Abort: The Air unit is placed immediately in the Used box without completing its mission; it does not bombard in the following air attack phase. If a helicopter transporting a ground unit is aborted, return the transported unit to the space from which it started its move.
8.4 Air Attacks
Airstrikes and helicopters with a bombardment value may attack enemy ground units during the air attack phase. Reveal all face down enemy units and line them up in order of weakest firepower first. Use the Bombardment column of the Battle Results Table (BRT). Total the number of air bombardment values and roll that number of dice. The possible results are elimination and retreat (7.3). All eliminations must be applied before any units are retreated. No target unit may be eliminated if a weaker target unit remains. Friendly units in the space do not affect and are not affected by air attacks.
Important: Unlike Ground Combat, there is no determination of tactical superiority, and there is only one round of bombardments.
9.0 OPFOR Reaction
Reaction movement takes place if directed by the OPFOR card picked that turn. Reaction combat takes place if opposing units are in the same space at the beginning of the reaction combat phase.
9.1 Reaction Movement
When the OPFOR card calls for movement, each OPFOR unit must be moved, one at a time, in any order the player desires, according to instructions on the card. OPFOR units generally move only by ground, not by sea or air unless specified by card instructions or scenario rules. If more than one possible movement path exists for an OPFOR unit, pick one path at random (by rolling a die). OPFOR units are bound by all rules of movement (6.0).
9.2 Reaction Combat
If opposing units are in the same space at the beginning of a reaction combat phase (3.3.11), conduct combat as directed in 7.0, but with the OPFOR units as the attacker.
10.0 Special Units
10.1 Helicopter Types
There are three types of helicopter units, not all of which will be present in every game. The special functions of each are detailed below.
- Gunships: Have a firepower value use it in the same manner as Airstrikes.
- Recon helicopters: Treated as gunships with one additional function. If present in the same space as friendly ground units conducting combat, the friendly units gain an additional +1 to the Tactical Superiority die roll (leave the recon unit in the space until the beginning of the combat phase as a reminder).
- Transports: Can pick up one eligible friendly ground unit (as listed in the scenario rules) and move it to any space on the map. Either the starting or the ending space (or both) must have an air base. Transport takes places during the friendly air movement phase. The transported ground unit may not move by ground in that turn. If the transport unit has a firepower value, and it moves a ground unit into a space containing an enemy unit, it may attack during the following air attack phase.
10.2 Airborne Units
A unit identified as airborne-qualified by the scenario rules may make an airborne insertion. It must start in an air base space and may not conduct ground movement. During the movement phase, it may be moved to any space on the map. No air unit is required. Roll one die for each airborne unit and consult the Airborne Insertion Table. Outcomes are on the chart. Airborne units are subject to enemy AAA fire in the landing space. If a ground unit making an airborne move receives an elimination, it is eliminated. If an abort, it returns to its start space.
10.3 Elite Units
Certain units are indicated as "Elite." If a side has an elite unit in a battle, it gains a plus one (+1) to its Tactical Superiority die roll. Only one elite unit may apply this modifier per side in a single battle round.
Elite Unit Resiliency (A). Elite units may ignore the first retreat result each time they are fired at (the result is deemed applied but has no effect). Eliminations and additional retreats are applied normally.
10.4 Special Forces & Guerrillas (A)
Special Forces and Guerrilla units may move through enemy units without stopping. Any face down enemy units in that space are revealed. Exception: Guerrillas must stop in a space containing enemy special forces, but not vice versa.
10.5 Engineers (A)
If an engineer unit is in a space adjacent to a water barrier, friendly units may cross the barrier without stopping (but are affected normally by the terrain in the space entered). The engineer may be in the space entered or exited. The engineer unit may move in the same phase, before or after any crossings are made (but must be in a water adjacent space in order to support the crossings). Retreating units may use the engineer to cross the barrier during a retreat.
SCENARIO: SUEZ '56
11.0 Scenario Introduction
This game of Cold War Blitz is Suez '56, in which you the player take command of the Anglo-French-Israeli forces in Operation Musketeer, the invasion of Egypt. The historical objective was to regain control of the Suez Canal and hopefully remove Egypt's President Nasser. While militarily successful, the operation was a political debacle. But can you do better? The player commands the Allies. The game system runs the OPFOR Egyptians.
12.0 Units in Scenario
Ground unit types: Paratrooper, Marine, Infantry, Armor, Special Forces, Engineers, Antiaircraft (AAA), Guerrillas.
Markers: Airstrike, Helicopter transport, Naval Bombardment.
Unit sizes: XX = division; [x] = task force; X = brigade; | | | = regiment.
Abbreviations:
- C: Cairo
- D: Delta
- Fdyn: Fedayeen (Palestinian guerrillas)
- GHQ: General Headquarters Reserve
- LE: Foreign Legion
- MC: Marine Commando
- MFF: Mobile Frontier Force
- NG: National Guard
- PLA: Palestinian Liberation Army
- RAP: French Special Forces
- RCP: Parachute Light Infantry Regiment
- Res: Reserve
- RMC: Royal Marine Commando
- RPC: Colonial Parachute Regiment
- SC: Suez Canal
Note: French paratrooper task forces each represent two regiments.
13.0 Set Up
Egyptian units are set up first (13.1) followed by Allied units (13.2).
13.1 Egyptian Set Up
Place all Egyptian units (green) face down and mix them up. Place as follows.
- Two units each in: Cairo East, Ismailia.
- One unit each in: Alexandria, Cairo West, Cairo Airport, Mansura, Port Said, Suez City, Rafah, Abu Ageila, Quntilla, Gaza.
13.2 Allied Set Up
Place all units in the Reinforcement Pool (see 15.0).
- Israelis (white): 38, 77, GHQR divisions; 202 brigade; 1 x airstrike.
- British (tan): 16 para, RMC, 19/3, 29/3 brigades; 10 division; RE engineers; 4 x airstrike.
- French (blue): 1 REP, 2 RCP para, RAP task forces; MC, 7th division; Col brigade; 2 x airstrikes.
- Allied (dark blue): 1 x helicopter, 1 x naval bombardment.
13.3 Turn Marker
Place the marker in the "9" box of the turn track. It may never go higher than 14.
14.0 Victory & Debacle
The Allies (the player) wins if, at the end of any Administrative Phase, Allied units occupy four or more victory spaces and there are no Egyptian units in the Sinai (east of the Suez Canal). Any other outcome is an Allied Debacle.
15.0 Allied Reinforcements
15.1 Reinforcement Arrival
Units brought in as reinforcements can move and attack in the same turn.
15.2 Israeli Units
All Israeli units are brought into play by the Operation Kadesh card. Place ground units in Israel and air units in the Available box.
15.3 British & French Units
British and French units are brought into play via action cards. Ground units are deployed to the staging area (15.4), air units to the Air Available box. From there they can enter the playing area.
15.4 Allied Staging Area
The staging area has a port and airbase. These are always Allied controlled (garrisoned by units not shown in the game). British and French units in the staging area can move to Egypt or from Egypt to the staging area by:
- airborne move if airborne qualified.
- helicopter movement.
- naval and air transfer movement (see below).
Note. Getting Allied ground units into action is, therefore, a two step process: moving them from the reinforcement box to the staging area, then from the staging area into Egypt.
16.0 Replacements
16.1 Allied Replacements
Certain cards allow for replacement of reduced or eliminated units. A reduced two-step unit on the map is restored to full strength. An eliminated one-step unit returns at full strength, and eliminated two-step unit returns at reduced strength. Replaced ground units are placed in the staging area, replaced air units in the Air Available box.
16.2 Egyptian Replacements
For each replacement, mix up the units in the Egyptian deadpile and pick at random the number designated by the card. Roll one die for each and consult the Egyptian Placement Table; place the unit in the indicated space. Units can be placed in spaces containing Allied units; this will trigger Reaction combat. If placement causes over-stacking, re-roll for the unit.
17.0 Special Rules
17.1 Israeli Movement Restrictions
Israeli ground and air units may not enter any space west of the Stop Line.
17.2 Stacking
The Allies may have up to six regiments, brigades or task forces in a single space; divisions count as two regiments. Up to three air units may be placed in one space in addition to any ground units. Israeli units (ground or air) may not stack with British or French units. British and French may stack together. The units marked "Allied" units are British-French. An unlimited number of Egyptian units may stack in a space.
17.3 Air Transfer
One British or French regiment, brigade or task force may be air transferred during each air phase. A unit to be air transferred must start in an airbase free of enemy units. Pick up the unit and move it to an airbase which is occupied by other friendly units and with no Egyptian units in it. Air transfer does not require air units (it uses transports not shown in the game).
17.4 Amphibious Movement
One British or French division or two regiments/brigades/task forces in a port or the staging area may be moved to another port or the staging area, regardless of presence of enemy or friendly units. Units must end their move in a port; they can not remain at sea. Once per game, an amphibious move may be to or from a port on the Red Sea.
17.5 Allied Naval Bombardment
The Allied player uses this marker exactly as an airstrike, but it can only be used against ports and is not affected by AAA fire.
17.6 Allied Airborne Units
All Allied paratrooper and special forces units are airborne qualified. One or two airborne units may make airborne landings per turn.
17.7 Helicopter Transport
The helicopter transport can carry one paratrooper, special forces, or marine unit per move.
Terrain Effects Chart
| Type | Effect on Movement | Tactical Superiority Tie-Breaker | Effect on Combat |
|---|---|---|---|
| Open | None | Allies | None |
| Town | None | Egyptians | None |
| City | Stop | Egyptians | Defending Egyptians ignore retreats |
| Pass | Stop | Allies | None |
| Air Base | None (but see 8.0) | Allies | None |
| Fortification | Stop | Egyptians | Defending Egyptians +1 combat strength, ignore retreats |
Battle Results Table
| Die Roll | Firing Unit: Allied Ground | Firing Unit: Egyptian Ground | Air at Ground | AAA at Air or Airborne |
|---|---|---|---|---|
| 1-3 | - | - | - | - |
| 4 | R | - | - | |
| 5 | R | R | R | A |
| 6 | EU | ES | EU | ES |
- ES = eliminate one step
- EU = eliminate one unit
- R = Retreat one unit
- A = Abort one airstrike, helicopter, or airborne landing unit.