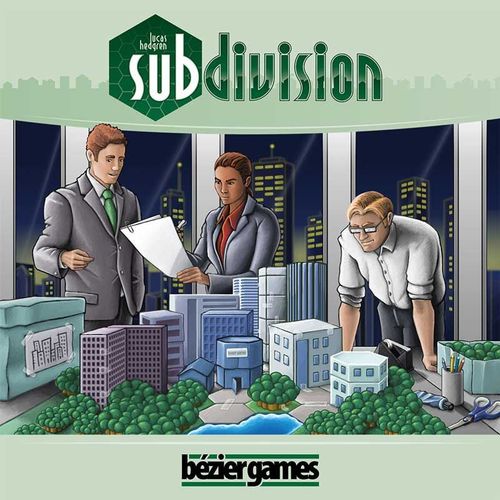
Subdivision
Subdivision Rulebook
Table of Contents
Table of Contents
Contents
- 4 Double-sided Subdivision Boards
- 16 Industrial Zone Tiles
- 16 Civic Zone Tiles
- 16 Luxury Zone Tiles
- 16 Commercial Zone Tiles
- 16 Residential Zone Tiles
- 8 2nd Stack Bonus Tiles
- 9 3rd Stack Bonus Tiles
- 8 4th Stack Bonus Tiles
- 47 Park Tiles
- 47 School Tiles
- 47 Lake Tiles (Park, School, and Lake Tiles have Road Tiles on their backs.)
- 64 Sidewalks
- 12 $5 Coins
- 48 $1 Coins
- 1 Parcel Die
- 1 Scorepad
- 4 Player Aids
Setup
- Shuffle all the Zone tiles face down and create four even 20-tile stacks.*
- Shuffle the Bonus tiles, and place one 2nd Stack Bonus on a stack, one 3rd Stack Bonus on a Stack, and one 4th Stack Bonus on a stack. Place the rest of the Bonus tiles in the box.
- Place all the Improvement tiles (Parks, Schools, and Lakes) in face-up stacks within easy reach of all players. Place all the Sidewalks, coins, and the Parcel Die within reach of all players. Road Improvements are on the back side of the Park, School, and Lake tiles.
- Each player takes 1 Subdivision board (and may choose either side to play on), $2 and 1 player aid.
*for a 3 player game, first remove 4 of each Zone type, resulting in 4 even 15 tile stacks. For a 2 player game, first remove 8 of each Zone type, resulting in 4 even 10-tile stacks.
Overview
The game is played over 4 rounds. Each round consists of 4 turns. Points are scored at the end of the game, and the player with the most points wins.
Rounds
At the beginning of each round each player takes five tiles from the current Zone tile stack into their hand (take the stack with no Bonus tile on it on the first round). Over four turns in each round, one Zone tile is placed each turn, and may activate other already-placed Zone tiles (See Turns, below), until four of the five Zone tiles have been placed. The remaining tile is discarded face down to the center of the table.
At the beginning of the 2nd, 3rd, and 4th rounds, the Bonus tile on each of those stacks is evaluated for all players (see Bonuses, below).
Turns
Roll the Parcel Die at the beginning of a turn; any player may do this. Each player (simultaneously with the other players) places one Zone tile from his hand on an empty parcel (hex) with the same color and shape that was rolled on the Parcel die in his subdivision, or onto the center +2 parcel (if it does not have a tile on it). Alternatively, each player can spend $2 to place a Zone tile on any parcel.
Zone tiles should always be placed in an orientation that matches the player board, with the icon on the left edge.
After placing this Zone tile, all Zone tiles adjacent to the placed Zone tile may be activated (See Activating Zone tiles & Placing Improvement tiles, below).
If a player cannot or chooses not to place a Zone tile on a turn, they may take $2 instead, and discard one Zone tile from their hand face down.
Once all players have chosen and placed a tile, they pass their remaining tiles to the player next to them (pass to the left on rounds 1 and 3, and pass to the right on rounds 2 and 4).
Activating Zone Tiles & Placing Improvement Tiles
When a Zone tile is placed adjacent to one or more existing Zone tiles, all existing Zone tiles next to the new Zone tile may be activated, resulting the in the placement of specific Improvement tiles. Later, when multiple Zone tiles are activated simultaneously, the player chooses the order of the Zone tiles to be activated. Activating Zone tiles is always optional. Improvement tiles and Sidewalks are not limited by the number of tiles available. If you run out of a tile type, use any suitable replacement, and remember that Roads are on the back side of all Parks, Lakes, and Schools.
The tiles on either side of the Highway on side 2 of the Subdivision player boards are adjacent.
Civic Zone tile → Park Improvement tile
When a Civic Zone tile is activated, place a Park Improvement tile onto an empty parcel in one of the directions indicated on the Civic Zone tile. Parks do not have to be placed adjacent to the activated Civic Zone tile. A Park will score 1 point for each adjacent Zone tile (of any type), each School (a stack of 1, 2 or 3 Schools results in just 1 point), Road and Lake Improvement tile.
Example: a Commercial Zone tile is placed adjacent to a Civic tile, activating it. A Park Improvement tile may be placed on any of the 9 highlighted parcels.
Luxury Zone tile → Lake Improvement tile
When a Luxury Zone tile is activated, place a Lake Improvement tile onto an empty parcel in one of the directions indicated on the Luxury Zone tile. Lakes do not have to be placed adjacent to the activated Luxury Zone tile. When a Lake Improvement tile is placed, immediately receive $1 for each adjacent Zone tile (of any type), each Park, Road and School. In addition, if any Zone tile, Park, Road, or School Improvement tiles are placed adjacent to an existing Lake Improvement tile, immediately receive $1.
Example: a Luxury Zone tile is placed adjacent to another Luxury Zone tile, activating the Luxury Zone tile in the center of the board. A Lake Improvement tile may be placed on any of the 9 highlighted parcels.
Industrial Zone tile → Road Improvement tile
When an Industrial Zone tile is activated, you may place a Road Improvement tile on 0, 1, or 2 different empty parcels that are within two parcels of the activated Industrial Zone tile. Parcels may be counted through other tiles and the +2 Parcel. When determining whether Zone tiles have Highway access, Road Improvement tiles do not block access to adjacent parcels of your subdivision, as all other tiles do. (See Highway Access, below.)
Example: a Residential Zone tile is placed adjacent to an Industrial Zone tile, activating it. Up to two Road Improvement tiles may be placed on any of the 17 highlighted parcels.
Commercial Zone tile → Sidewalks
When a Commercial Zone tile is activated, place up to three contiguous Sidewalks along the edges between parcels. The initial Sidewalk must be placed adjacent to the activated Commercial Zone tile, and all Sidewalks created by that Commercial Zone tile must be connected in some way. If a second Commercial Zone tile is activated, a new Sidewalk segment may be created (unless an existing Sidewalk already is adjacent to the newly-activated Commercial Zone tile, in which case you may continue to place Sidewalks connected to that Sidewalk). Only one Sidewalk segment will score at the end of the game (if you connect two or more Sidewalk segments, they become a single Sidewalk segment for scoring). The score for a Sidewalk segment is the number of unique Zone tile types (up to 5) multiplied times the number of unique Improvement tile types (up to 4) adjacent to that Sidewalk segment.
Example: an Industrial Zone tile is placed adjacent to a Commercial Zone tile, activating it. Up to three Sidewalks may be placed between parcels on any of the 24 highlighted spots, as long as one of those segments is adjacent to the Commercial Zone tile, and the others are connected to it.
Example: a Luxury Zone is placed adjacent to a Commercial Zone, activating it. The yellow spots show all of the available places that Sidewalks may be placed. If the first two Sidewalks are placed so that they connect to the existing string of sidewalks, then the third Sidewalk may be placed in any of the red spots as well, as it all becomes one big Sidewalk segment.
Residential Zone tile → School Improvement tile
When a Residential Zone tile is activated, place one School Improvement tile onto a parcel adjacent to the activated tile (either empty or containing one or two other School Improvement tiles already). Schools may never be more than three stories tall. A School stack of 1 or 2 tiles scores 0 points. A School stack of 3 tiles scores 8 points. You may place a School Improvement tile on a single parcel from two or more Residential Zone tiles if they are adjacent to that parcel.
Example: a Luxury Zone tile is placed adjacent to a Residential Zone tile, activating it. A School Improvement tile may be placed on any of the 5 highlighted parcels, including the parcel where there is a School Improvement tile in place already.
Highway Access
Zone tiles should have access to the Highway which runs around or through your Subdivision. To see if a Zone tile has access, trace a line (with your finger, if that helps) from the Zone tile, through empty parcels and/or Road tiles to the Highway. You may pass over Sidewalks. Generally, it is a good idea to check whether each Zone tile has access when you place it and other tiles. Zone tiles that have access to the Highway will score 5 points per tile.
The +2 Parcel
The +2 parcel in each player's subdivision has special qualities:
- If uncovered, Zone tiles may not use this Parcel to gain access to the Highway.
- It is worth +2 points if it is uncovered at the end of the game.
- Any Zone tile can be placed on it, regardless of the die roll (you do not pay $2 to place it).
- Any Improvement tile can be placed on it when the appropriate Zone tile is activated.
- If a Road tile is placed on it, Zone tiles may use this Parcel to trace access to the Highway like any other Road tile.
Bonuses
At the beginning of the 2nd, 3rd, and 4th rounds, the Bonus tile on the next available stack is evaluated. All players who meet the criteria in the center of the tile receive the bonus at the bottom of the tile.
To activate earned Bonus tiles, you must have the corresponding Zone tile on your board. A complete list of Bonus tiles is on the back page.
Game End
After 4 rounds (16 turns), the game ends.
Scoring
Designate one player to tally the scores for each player. Give that player the scorepad and a pen.
Each player should tell that player his scores for each of the lines on the scorepad:
- Park: +1 point for each parcel adjacent to a Park that contains a Zone tile, Lake, Road, or School (regardless of the number of tiles in the stack).
- Sidewalk: The number of unique Zone tile types adjacent to one of your sidewalks multiplied times the number of unique Improvement tile types adjacent to that same sidewalk. Only score one sidewalk segment (20 points maximum) per player.
- School: 0 points for School Improvement tile stacks that are one or two tiles (stacked on each other). +8 points for each School Improvement tile stack of 3 tiles in one parcel.
- Money: +1 point for every $2, rounded down.
- Highway: +5 points for each Zone tile that has access to the Highway through empty parcels or Road tiles or a combination of both.
- Uncovered parcels: -1/-2/-3 points for each uncovered parcel (as designated on the parcel), and +2 for an uncovered +2 parcel.
The scorekeeper adds the points for each player. The player with the highest total score wins. In case of a tie, the player with the fewest negative points from uncovered parcels wins.
Solo Game
Subdivision can be played as a solo activity. The object is to score as many points as you can.
Set up the game as you would for a 3 player game. (15 tiles in each stack).
In the first turn, draw 5 tiles from the first stack, roll the die, play a tile. Discard the unplayed tiles. In the second turn, draw 4 tiles, roll the die, place a tile. Discard the unplayed tiles. In the third turn, draw 3 tiles, roll the die, place a tile. Discard the unplayed tiles. In the fourth turn, draw 2 tiles, roll the die, place a tile. Discard the unplayed tile. At the end of the round, there will be one undrawn tile in the stack; this is also discarded.
Score the bonus tile at the top of the next stack, and continue through all 4 stacks in the manner.
Score normally, using the following to determine your rank: 140+ : Master Planner, 120-139: Planner, 100-119: Junior Planner, 80-99: Assistant to the Junior Planner, <80: Assistant to the Junior Planner in Training.
You can also play the solo game using the Scenarios (see back page). Each scenario has a target score for solo games.
Scenarios
You can also play Subdivision using scenarios. Each scenario has its own board setup. All normal rules are in effect, except where noted. Many of these scenarios can be played competitively, and all can be played with the solo game rules. When played competitively, the player with the highest score (that meets the scenario criteria) wins. If playing solo, a target score must be achieved to be successful.
A River Runs Through your Board
Place Lakes across the board as shown. Remove all Luxury Zone tiles from the Zone tile stacks, and then create four stacks that are 16/12/8 tiles each for 4/3/2 players. Start with a hand of 4 tiles, placing only 3 over the course of each round. (In solo, draw 5, then 4, then 3 in each round, from stacks of 12). Solo Target Score: 100
Central Parks
Place Parks on the board as shown. Remove all Civic Zone tiles from the Zone tile stacks, and then create four stacks that are 16/12/8 tiles each for 4/3/2 players. Start with a hand of 4 tiles, placing only 3 over the course of each round. (In solo, draw 5, then 4, then 3 in each round, from stacks of 12). Solo Target Score: 100
School District
Place Schools on the board as shown. Remove all Residential Zone tiles from the Zone tile stacks, and then create four stacks that are 16/12/8 tiles each for 4/3/2 players. Start with a hand of 4 tiles, placing only 3 over the course of each round. (In solo, draw 5, then 4, then 3 in each round, from stacks of 12). Solo Target Score: 100
Walk the Sidewalk
Place Sidewalks on the board as shown. Remove all Commercial Zone tiles from the Zone tile stacks, and then create four stacks that are 16/12/8 tiles each for 4/3/2 players. Start with a hand of 4 tiles, placing only 3 over the course of each round. (In solo, draw 5, then 4, then 3 in each round, from stacks of 12). Solo Target Score: 100
Road Runner
Place Roads on the board as shown. Remove all Industrial Zone tiles from the Zone tile stacks, and then create four stacks that are 16/12/8 tiles each for 4/3/2 players. Start with a hand of 4 tiles, placing only 3 over the course of each round. (In solo, draw 5, then 4, then 3 in each round, from stacks of 12). Solo Target Score: 100
Highway Construction (1-3 players)
Flip over extra Zone tiles over and place them on the board as shown. The covered spaces may not be played on. Access to the Highway is limited to the five spots available. Solo Target Score: 120
Historical Sites
Place 3 $5 coins on the spots as shown. These Parcels are treated like the +2 Parcel: you can place a tile on them, removing the $5 (and placing it back in the supply), but they interrupt access to the highway (unless a Road is placed on them). At the end of the game, each $5 coin still on the board is worth 5 points. Solo Target Score: 120
Bonus Tile List
- If you have at least two Parks, you get $2.
- If you have at least two Schools (stacked or on separate parcels), you get $2.
- If you cover parcels in the pattern shown (in any orientation), you get $2.
- If you cover parcels in the pattern shown (in any orientation), you get $2.
- If you cover parcels in the pattern shown (in any orientation), activate one of your Luxury or Commercial Zone tiles.
- If you cover parcels in the pattern shown (in any orientation), activate one of your Luxury or Commercial Zone tiles.
- If you have at least three Lakes, activate one of your Luxury or Commercial Zone tiles.
- If you have at least one stack of two Schools, activate one of your Luxury or Commercial Zone tiles.
- If you have at least six Roads, activate one of your Luxury or Commercial Zone tiles.
- If you have at least twelve Sidewalks, activate one of your Industrial, Civic, or Residential Zone tiles.
- If you have at least four Parks, activate one of your Industrial, Civic, or Residential Zone tiles.
- If you cover parcels in the pattern shown, activate one of your Industrial, Civic, or Residential Zone tiles. The center tile does not have to be empty.
- If you have covered all of your -1 parcels, activate one of your Industrial, Civic, or Residential Zone tiles.
- If you have at least two Lakes, you get $2.
- If you have at least six Sidewalks, you get $2.
- If you cover parcels in the pattern shown (in any orientation), you get $2.
- If you have at least four Roads, you get $2.
- If you cover parcels in the pattern shown (in any orientation), activate one of your Luxury or Commercial Zone tiles.