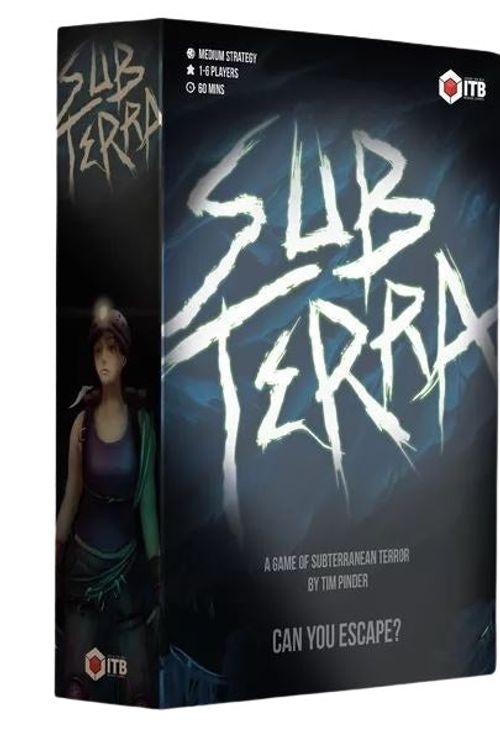
Sub Terra
Sub Terra Rulebook
Table of Contents
Table of Contents
Components
- 64 cave tiles
- 1 Start Tile
- 1 Exit Tile
- 30 Hazard Cards
- 1 'Out Of Time' Card
- 8 Caver Boards
- 1 Starting Caver Marker
- 12 Cave-In Markers
- 8 Flood Markers
- 1 Horror Marker
- 1 Gas Marker
- 6 Rope Tokens
- 3 Explosives Tokens
- 1 Six-Sided Die (D6)
- 8 Caver Pieces
- 3 Horror Pieces
- 20 Health Markers
Setup
-
Players each choose a caver board and the corresponding caver piece. Cover each health space on the caver boards with a health point token (usually three). Return the unused boards, pieces and health tokens to the box.
-
Place the start tile face-up in the centre of the table, and place all the chosen caver pieces onto it.
-
Set aside the exit tile, then shuffle and stack the remaining 64 cave tiles face-down. Randomly shuffle the exit tile into the bottom six tiles of the stack.
-
Choose a difficulty setting - Normal, Advanced or Expert. Go through the hazard cards and remove the cards that aren't used with your chosen difficulty.
Several cards have icons indicating that they should be removed from the game at certain difficulties:
- Remove for Normal
- Remove for Advanced/Expert
- Remove for Expert
-
Shuffle the remaining hazard cards, then deal the following number of cards into a face-down hazard deck:
Cavers Normal Advanced Expert 4 Cavers 22 cards 20 cards 18 cards 5 Cavers 19 cards
If this is your first game, we recommend you start on Normal. If after a couple of games you're still finding this too difficult, you may want to deal 3 additional cards to the hazard deck in step 5.
One hazard card will be revealed and resolved every round, so the number of cards left in the deck is how long you have left to escape the cave.
Number of players
If there are only two or three players, each player chooses two boards/pieces, and the rules for four or six cavers are used. If you are the only player, you should choose four to six boards/pieces and use the rules for that number of cavers.
How to Play
Objective
Your shared objective is to get as many cavers to the exit tile as possible before you run out of time.
The game takes place over around twenty rounds, as controlled by the hazard deck, and each round consists of four phases:
- Action Phase — Cavers take turns in a clockwise order, performing actions.
- Horror Phase — All horrors on cave tiles move one step towards their closest victim.
- Hazard Phase — The top card of the hazard deck is resolved, causing bad things to happen.
- End Phase — The starting caver marker is passed one caver to the left (clockwise).
Game End
Rounds are taken until either:
- All surviving cavers are on the exit tile
- OR: There are no conscious cavers left in the cave
At this point, all players with a caver on the exit tile can score. Count the number of cavers that didn't make it out:
- Gold — 0 Cavers left behind
- Silver — 1 Caver left behind
- Bronze — 2 Cavers left behind
- Defeat — 3+ Cavers left behind
Unconscious Cavers
Cavers with no health points left have fallen unconscious. Represent this by lying the caver piece on its side.
Unconscious cavers cannot perform actions, and any passive abilities on their caver boards stop working. If a caver falls unconscious during their own turn, they cannot take further actions and must pass.
When an unconscious caver recovers one or more health points, they immediately become conscious again. Stand the caver piece back upright.
Skill Checks
Some actions and events will require cavers to make a skill check. This means: "Roll the die. If you rolled a 4 or higher, you succeed. Otherwise, you fail."
The consequences of succeeding or failing a skill check will be specified in the action or event.
1. Action Phase
Beginning with the starting caver and proceeding clockwise, every caver is given two action points to spend on one or more actions.
Some actions cost one action point, while others cost two. The base actions available to all cavers are given below. Certain cavers may be able to perform other, special actions - these are specified on their unique caver boards.
Actions are performed sequentially, and a caver can choose their next action after seeing the results of the last. The same action can be used multiple times in a turn unless otherwise specified.
Exerting (+1 action point)
At any point during their turn, a caver may choose to exert themselves to gain a third and final action point. They can spend this on whatever action they wish, including as part of a two-point action with a remaining "normal" action point.
If they choose to do so, at the end of their turn they must make a skill check. If they fail, they lose one health point.
Basic Actions
Reveal (1 action point) Choose an open side of your current tile that doesn't yet have a tile connecting to it. Take the top cave tile from the stack and place it face-up in that gap, so that it connects to your current tile. (You can choose any rotation, as long as a connection is made)
Move (1 action point) Move from your current tile to an adjacent connected tile. Some tiles (squeeze, water tiles with flood marker, cave-in tiles with rubble marker) cannot always be entered in this way. (see Cave Tiles)
Explore (1 action point) (Reveal + Move) Reveal a tile, then you must immediately Move onto it as a single combined action. This is a much faster way of placing tiles than the previous two actions, but it's much riskier if you're far away from your friends. Choose wisely.
Run (2 action points) Repeat the above Move action up to three times.
Heal (2 action points) Either regain one lost health point, or choose another caver on your tile to regain one lost health point. (You cannot exceed your starting number of health points)
Hazard Actions
These actions interact with specific tiles or hazards.
Swim (2 action points) Move from your current tile onto an adjacent connected tile containing a flood marker. This is the only way to enter flooded tiles.
Squeeze (2 action points) Move from your current tile onto an adjacent connected squeeze tile. This is the only way to enter squeeze tiles after they've been placed.
Dig (2 action points) Remove a rubble marker from this tile or an adjacent connected tile. This unblocks the tile and allows it to be entered again.
Place Rope (2 action points + skill check) Make a skill check. If you succeed, place a rope token on the current ledge tile or slide tile.
Hide (2 action points + skill check) Make a skill check. If you succeed, you cannot be chosen as the closest victim for any horror this round (see Horrors).
2. Horror Phase
If there are any horrors on cave tiles, they move one step towards their closest victim: the closest conscious caver within seven steps of the horror. Horrors can't move through solid walls, but they can move through floods, rubble, squeezes, ledges and slides without penalty.
If there is no closest victim within seven tile steps, the horror is instead removed from the cave.
If a horror ever occupies the same tile as a caver, that caver immediately loses all health points and falls unconscious. Be careful!
(See the Horrors section for more details. If horrors are present in the cave, the horror marker should be placed on top of the hazard deck to remind you to move them every round)
3. Hazard Phase
Reveal the top card of the hazard deck, do what it says on the card, then place the card in the hazard deck discard pile.
Hazard cards come in five types:
Tremor All conscious cavers must make a skill check. All cavers that fail lose a health point.
Flood Place a flood marker on all water tiles that don't already have one. Then all cavers on flooded tiles lose a health point.
Water tiles containing flood markers cannot be entered except by using the Swim action.
Gas All cavers on gas tiles lose two health points.
Additionally, until the next hazard phase, any caver who enters a gas tile will immediately lose two health points.
After triggering a gas hazard, losing health when entering a gas tile applies even when exploring new tiles, so be careful! You can place the gas reminder marker on or near the cave tile stack to remind you of this.
Cave-in Roll the die. Place a rubble marker on all cave-in tiles that match the number rolled and don't already have a rubble marker on them. All cavers on these new tiles lose three health points.
Cavers cannot enter tiles with rubble markers on them. Rubble markers can be removed from tiles by using the Dig action.
Horror All horrors on cave tiles move another step towards their closest victim (see Horror Phase, above).
Then, if there are less than three horrors on all cave tiles, place a horror on the closest horror tile to a conscious caver.
Sharing a tile with a horror will cause a caver to lose all health points. Watch out!
While horrors are in the cave, place the horror reminder marker on top of the hazard deck to remind you to move them during the horror phase.
Severe hazards
On Advanced and Expert difficulty, there will also be five "severe" versions of the above hazard types present in the hazard deck. These have a significantly worse effect than usual, so don't get caught out!
Out of Time
The last card in the hazard deck is always the "Out Of Time" card. When this is revealed, your flashlights are now out of power, the darkness is closing in, and the game is nearly over.
At this point, and during all future hazard phases, all cavers not on the exit tile (conscious or unconscious) must make a skill check. If they fail, they are devoured by horrors and removed from the cave.
The game ends when all remaining cavers are on the exit tile, or there are no cavers left in the cave.
(Out Of Time card text: Now and all future hazard phases: All conscious cavers not on the exit tile must make a skill check. If they fail, they lose all health and fall unconscious. Then remove all unconscious cavers from the cave.)
4. End Phase
Finally, the starting caver marker is passed to the next caver on the left.
Survival Tips
Falling unconscious isn't the end of the world, but it will require another caver to reach you and Heal you. It therefore costs the group a lot of time that could have been spent exploring. BE CAREFUL!
- Don't linger on dangerous tiles
- Don't exert yourself without good reason
- Heal yourself proactively as necessary (you're very fragile on one health point)
- Don't stray too far from other cavers
- State your intentions clearly – don't get left behind!
It's also worth keeping an eye on how many cards are left in the Hazard deck, as well as how close you are to the bottom of the cave tile stack (and the exit tile). Remember, you're trying to get as many cavers out as possible.
- You have some control over where the exit tile is placed, as you know it's in the bottom six tiles of the stack
- Don't leave it too late to start regrouping
- Sometimes it's correct to sacrifice yourself to save your friends
Good luck!
Cave Tiles
There are many different types of tile in Sub Terra. Some are harmless, some are dangerous, and some are difficult to traverse. Tiles are placed on the board as a result of Reveal or Explore actions, and must be placed such that they connect to the tile of the revealing/exploring player.
Tiles are considered connected if they share an open side (i.e. there is no wall separating them on either tile). Tiles are never connected diagonally.
Start This tile is where the cavers start the game. It has no special features other than this.
Exit This tile is how the cavers escape the cave and win the game. Cavers on this tile cannot lose health points for any reason, and cannot be chosen as the closest victim for horror movement and spawning.
Unmarked/Normal Tiles (x16) These tiles are intentionally left blank.
Water (x8) These tiles start in an unflooded state, and are treated like any other unmarked tile. When a Flood hazard card is resolved, flood markers are placed on all unflooded water tiles, then each caver on a water tile loses a health point.
Cavers cannot enter tiles with flood markers on them except by using the Swim action.
Gas (x8) When a Gas hazard card is resolved, all cavers on these tiles lose two health points.
Additionally, until the following hazard phase, any caver entering a gas tile will immediately lose two health points. This includes any new tiles placed that round, making Explore actions riskier.
During these turns, you can place the gas marker on or near the cave tile stack to remind you of this.
Cave-in (x12) When a Cave-In hazard card is resolved, these tiles have a one-in-three chance of caving in. This places a rubble marker on the tile, and all cavers on these tiles lose three health points.
Cavers cannot enter tiles with a rubble marker on them, though they can leave them. Rubble markers can be cleared using the Dig action.
Horror (x8) When a Horror hazard card is resolved, a horror is spawned on the horror tile that is closest to a conscious caver. Watch out! Sharing a tile with a horror immediately causes a caver to lose all health points. It's very risky to end your turn on one of these tiles.
Squeeze (x3) Cavers cannot enter these tiles using the Move action. Instead, they must use the Squeeze action.
If a squeeze tile is placed as part of an Explore action, the exploring caver still moves onto the tile as normal.
Ledge (x3) Ledge tiles must be placed such that the arrow points away from the revealing caver's tile. Cavers can enter this tile normally from either side, but they cannot Reveal, Move or Explore across the ledge unless the tile has had a rope token placed on it. (This can be done by using the Place Rope action)
Slide (x3) Like ledge tiles, slide tiles must be placed such that the arrow points away from the revealing caver's tile. Cavers can enter this tile normally from either side, but they cannot Move back across the slide unless the tile has had a rope token placed on it. (This can be done by using the Place Rope action)
Rough Terrain (x3) When entering this tile, cavers must make a skill check. If they fail, they immediately lose a health point.
In the very unlikely event that a tile placement would result in a cave with no open sides through which to reveal/explore, discard that tile and use the next tile from the stack instead.
Explosives Tokens
The Engineer has a special action that can place explosives tokens on the board to remove adjacent walls. These tokens are placed over the shared side of two neighbouring tiles, turning sides that are walls into sides that are open and thus connecting the tiles. Alternatively, they can be placed over an adjacent wall that faces a gap, to allow that gap to be subsequently revealed/explored.
Once placed, explosives tokens remain in place for the rest of the game.
Horrors
Horrors are spawned onto horror tiles by the Horror hazard card. Once in the cave, they'll move by chasing their closest victim during the horror phase.
If a horror ever occupies the same tile as a caver, that caver immediately loses all remaining health points and falls unconscious.
There can be at most three horrors in the cave at any one time.
Finding the Closest Victim
Horrors move one tile at a time, and cannot move through solid walls. However, they can move through floods, rubble, ledges, slides, and squeezes unimpeded.
The closest victim to a horror/tile is the conscious caver with the fewest number of steps between them and the horror/tile in question, using the above movement rules. This will usually be obvious!
In the case of a tie, the closest victim will be the caver with the lowest rank, as indicated on their caver board.
A caver cannot be chosen as the closest victim if:
- They are unconscious
- They have successfully used the Hide action this round
- They are on the exit tile
Spawning a Horror
When a Horror hazard card is resolved, if there are less than three horrors on cave tiles:
- Find the horror tile that:
- doesn't yet contain a horror, and
- is the fewest steps away from its closest victim.
- If there is such a tile within seven steps from its closest victim, place a horror onto it. Otherwise, the horror does not spawn.
Moving Horrors
When a Horror hazard card is resolved and during the Horror Phase, for every horror on a cave tile:
- Find the closest victim to that horror.
- If the closest victim is more than seven steps away, remove the horror from the cave.
- Otherwise, move the horror one tile towards the closest victim along the shortest path. (If there is more than one such tile, the closest victim picks which one)
Usually, the order horrors move in won't matter. In the cases where it does, the starting player chooses which horrors move first.