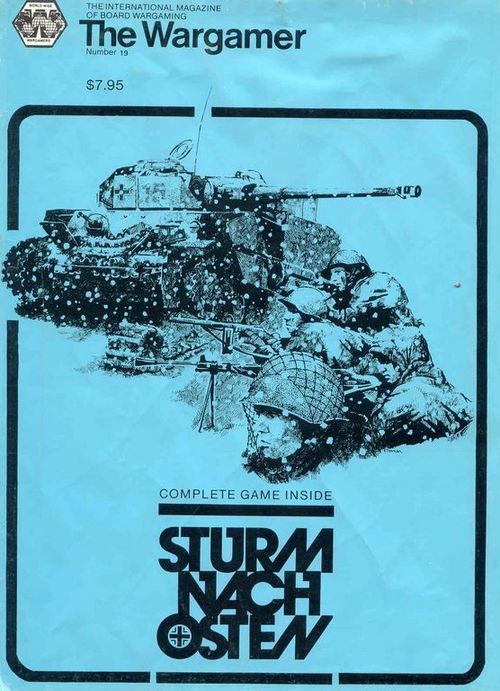
Sturm Nach Osten
Sturm Nach Osten Rulebook
Table of Contents
Table of Contents
- 1.0 GAME COMPONENTS
- 1.0 SEQUENCE OF PLAY
- 3.0 GAME TERMS AND DEFINITIONS
- 4.0 STACKING
- 5.0 MOVEMENT IN THE OPERATIONAL MOVEMENT PHASE
- 6.0 WEATHER
- 7.0 COMBAT
- 8.0 DISBANDMENT AND BREAKOUT
- 9.0 SUPPLY
- 10.0 SPECIAL UNITS AND CAPABILITIES
- 11.0 REPLACEMENTS AND REINFORCEMENTS
- 12.0 THE SCENARIOS
- 13.0 OPTIONAL LENINGRAD RULE
- 14.0 STRATEGIC OPTIONS
- 15.0 VICTORY CONDITIONS
- APPENDIX I VICTORY CITIES
- APPENDIX II SOVIET SETUP; JUNE 1941
- APPENDIX III OPTIONAL RULES
- Transcriber's Notes
1.0 GAME COMPONENTS
1.1 The Map Board
The map board is a diagrammatic representation of the area over which the campaign was fought. Superimposed on the map is a grid of hexagons, which regulates the movement and combat of the playing pieces. The hexagons are referred to as "hexes" and their sides as "hex sides". Each hex contains a number which uniquely identities it. Hexes are either blank, or contain some symbol representing the various types of terrain of the region. The key to these symbols is given on the Terrain Effects Chart, together with their effects on movement and combat. (Note that these rules will only be considering the "Advanced Game".)
1.2 The Playing Pieces
1.2.1 The 1/2" die-cut counters represent the actual military units which took part in the campaign, and are hereafter simply referred to as "units".
1.2.2 The Advanced Game combat units are printed black on a darker shade of gray (Axis) or red (Soviet). In addition the two German SS Corps are printed white on dark gray (for aesthetic effect only!). Some Advanced units are printed on the back of Basic game counters.
1.2.3 All Advanced Game combat units, except garrison units, are double sided, with the reverse side of the counter representing the same unit either in fortified status or in an alternative mode. The back of most Basic Unit counters are used as markers (fortified, HAB, dispersed, Blitz, etc.) in the Advanced game.
1.0 SEQUENCE OF PLAY
A. Weather Determination. The weather for the month may be predetermined, but if not, one die is rolled to decide it.
B. Axis Player-Turn
- REPLACEMENT/REINFORCEMENT PHASE (RRP). The Axis player takes any replacements and reinforcements to which he is entitled and places them on the map board. Replacements (not reinforcements) have a "dispersed" marker placed on them.
- OPERATIONAL MOVEMENT PHASE (OMP). The Axis player moves as many of his undispersed units as he wishes, indicating any overrun attacks as he does so. No Soviet movement is allowed.
- RECOVERY PHASE. The Axis player removes "dispersed" markers from all of his units.
- COMBAT PHASE. The Axis player specifies all his attacks, and resolves them one by one, beginning with overrun attacks. Following each attack Tactical Movement (retreat and advance after combat) may take place. No Soviet attacks are allowed.
C. Soviet Player-Turn. The Soviet player-turn is simply the converse of the Axis one, with the same four phases carried out in the same order for Soviet units. No Axis operational movement or combat is allowed. On completion of the above steps, players record the passage of the month on the Turn Record Chart, and the same procedure starts again for the next game-turn.
D. A Note on the Sequence of Play. In practice, players will undoubtedly find it a great temptation to vary the above sequence of play by introducing replacements and reinforcements during the Operational Movement Phase - in effect combining the RRP and OMP. Also, it is obviously easier to specify attacks as they are resolved, rather than detailing them all in advance. Well, what you care to indulge in the privacy of your own home is your own business, but the designer's intention is that the prescribed sequence of play should be strictly adhered to, and such variations are contrary to the rules. The sequence of play is deliberately designed to make things more difficult for the players and simulate to some extent the planning and logistic problems encountered by general staffs.
3.0 GAME TERMS AND DEFINITIONS
3.1 Zones of Control
3.1.1 Every combat unit has a Zone of Control which consists of the six hexes adjacent to the hex it occupies. This term implies the potential of a unit for influencing the military situation in the neighborhood of its position.
3.1.2 A unit does not exert a Zone of Control into any hex which is adjacent via an impassable hex side, i.e. a sea or unfrozen lake hex-side.
3.1.3 Factory units and the Zhukov unit have no Zone of Control.
3.1.4 Units may temporarily lose their Zone of Control as a result of overrun.
3.2 Control of Major Cities and Victory Cities
3.2.1 Control of Major cities and Victory cities has no connection with Zones of Control, but implies "ownership" of such cities by one or other player. A Major or Victory city can never be controlled by both players at once, though it may be controlled by neither.
3.2.2 At the start of any scenario, players are assumed to already control all Major and Victory cities on their own side of the scenario start-line or border. (Exception: see rule 11.A.5.)
3.2.3 A player gains control of a Major or Victory City as soon as both of the following conditions are met:
a) one of his combat units either occupies or was the last unit to enter the city, and
b) he can trace a rail line into the city.
3.2.4 A player loses control of a Major or Victory city as soon as he can no longer trace a rail line into the city, or as soon as an enemy unit enters the city.
3.3 Control of Sea Areas
3.3.1 Control of the sea areas of the map board is relevant only for purposes of supply and disbandment/break-out (see Rules 8.B and 7.G) and reflects the capability of one side or the other to transport supplies or personnel by sea.
3.3.2 The Baltic Sea is controlled by the player who last controlled Konigsberg (hex 0520).
3.3.3 The Black Sea is controlled by the player who last controlled by the player who last controlled Sevastopol (hex 3018). (As printed; the phrase "who last controlled by the player who last controlled" is repeated in the source.)
3.3.4 The Sea of Azov is controlled by the player who last simultaneously controlled both Rostov (hex 2911) and Sevastopol.
3.3.5 The Caspian Sea is always controlled by the Soviet player.
3.3.6 If neither player control one sea area, it is considered as that of the player who last controlled that sea area. However, in the case of the Sea of Azov, if Rostov and Sevastopol control is split between the players, neither player may control the Sea of Azov.
a) Boundary of the Sea of Azov is Kerch Straits. Hex 3015 is in the Sea of Azov, 3116 is in the Black Sea, and 3115 is in both of the Sea of Azov and the Black Sea.
3.4 Other Definitions
3.4.1 A "friendly" unit is any unit of the player's own side, regardless of nationality. An "enemy" unit is any unit of the opponent's side. Sea areas and Major or Victory cities controlled by a player's own side or by his opponent are referred to as being under friendly control or under enemy control respectively.
3.4.2 A "Combat" unit is any unit with a combat factor, i.e., any unit other than a factory unit or Zhukov.
3.4.3 "Armor-type" units are all armor, armored infantry, and armored cavalry units.
3.4.4 "Infantry-type" units are all infantry, mountain infantry, shock, front, and armored infantry units. (Note that armored infantry are both armor and infantry-type.)
3.4.5 The "Phasing player" is the player whose player-turn is in progress at any point; his opponent is the "non-phasing" player. The "owing" player is the player to whom a unit belongs.
3.4.6 A Rail Line is a continuous path of hexes running from any city or town to friendly supply source map edge with the following restrictions:
a) It must not cross any lake hex side (whether frozen or not).
b) It must not pass through any hex in enemy ZOC (whether occupied by a friendly unit or not).
3.4.7 Other definitions, relevant only to particular situations, will be introduced in the rules as the need arises.
3.5 Abbreviations
The following abbreviations are used in the rules:
- ZOC - Zone of Control
- RRP - Replacement/Reinforcement Phase
- OMP - Operational Movement Phase
- AWL - Arctic Weather Line
- CRT - Combat Results Table
- VDT - Victory Determination Turn
- AV - Attack Voluntary
- HAB - Heavy Artillery Bonus
- TEC - Terrain Effects Chart
- Inf - Infantry
- RF - Replacement Factor
4.0 STACKING
4.1 Each side may have more than one friendly unit in a common hex, and this is known as stacking. The number of friendly units which may occupy any single hex is limited by the following rules.
4.2 Each unit has a stacking point number in the upper-right corner. No more than SIX stacking points of friendly units in total may occupy any one hex, regardless of terrain. Of these, no more than TWO stacking points may be "pure" armor units (i.e. not including armored infantry or armored cavalry).
4.3 These limits do not apply during operational or tactical movement, but are applied only to the phasing player's units at the end of his Operational Movement and Combat phases. Stacking limits are never applied against the non-phasing player's units.
4.4 If at either of these times the stacking limit is exceeded, the phasing player must eliminate sufficient of his own units from the hex to bring the stacking down to permissible levels. The owning player has the choice of which units to eliminate. Units of opposing sides can never stack together except temporarily when Overrun occurs. In this case, the non-phasing units must be counted for stacking limit purposes.
4.5 Dispersed units retain their normal stacking point value. Factory units and the Zhukov unit are considered to have a stacking point value of zero.
4.6 SPECIAL: Hungarian and Romanian units may never stack with the other in the same hex, nor may either of these nationalities' units even move through a hex occupied by the other at any instant during movement. If any such unit would otherwise be forced to do so for any reason, it is eliminated instead.
5.0 MOVEMENT IN THE OPERATIONAL MOVEMENT PHASE
5.1 General
5.1.1 In the OMP of his own player-turn, a player may move as many of his units as he wishes - all, some, or none - in accordance with the restrictions of this Section.
5.1.2 Units are moved one at a time in any order the owning player wishes, tracing a path from hex to hex in any direction or combination of directions. Movement from hex to hex must be consecutive (i.e. units may not "skip" hexes), and a unit may never enter a hex containing an enemy unit (EXCEPTION: Overrun).
5.1.3 As a unit moves it expends movement points for each hex entered or hex side crossed as laid down by the Terrain Effects Chart, up to the limit of its movement allowance. Basically, it costs a unit one movement point to enter each clear terrain hex, with increased costs for some units entering swamp or mountain hexes, or crossing river or Kerch Straits hex sides.
5.1.4 A unit's movement allowance is its printed Movement Factor, modified for the effects of weather, together with any movement bonuses or penalties specified in Section 5.3. A unit may never exceed its movement allowance in any OMP, and may not enter a hex if this would cause it to do so; EXCEPTION: A unit may always move one single hex in the OMP, regardless of movement point costs, if it is not moving directly from one hex in enemy ZOC to another. (EXCEPTION: see 5.2.3 b.)
5.1.5 Movement allowances may not be accumulated from turn to turn or transferred from one unit to another. Note that the die affects movement only through its determination of weather.
5.1.6 A unit may never move across a sea hex side, across a lake hex side which is not frozen (see Section 6 - Weather), or into a hex occupied by an enemy combat unit (EXCEPTION: Overrun).
5.1.7 Units that are "Dispersed" may not move.
5.1.8 Juggernaut and Armor Units may flip over to their weaker side in order to gain extra Movement Factors.
5.1.9 Garrison Units may not move.
5.2 Movement and Zones of Control
5.2.1 A unit which enters an enemy ZOC during its OMP must immediately stop and move no further that phase (EXCEPTION: Overrun).
5.2.2 A unit which begins its OMP in enemy ZOC may move out to a hex not in enemy ZOC, but may then re-enter an enemy ZOC only if its total movement point expenditure for that phase does not exceed one-half of its movement allowance.
5.2.3 In certain cases, a unit which begins its OMP in enemy ZOC may move directly to an adjacent hex in enemy ZOC (and there must cease movement). The two cases are as follows:
a) A unit may move to an adjacent hex in the ZOC of a different enemy unit (this hex may not be in the ZOC of the original enemy unit or units as well), provided that in doing so it expends no more than one movement point.
b) A unit may move to an adjacent hex in the ZOC of any enemy unit, regardless of movement point costs (it may even exceed its movement allowance), provided the hex to which it moves is occupied by a friendly unit which remains stationary throughout the OMP.
c) A unit may move directly from one hex in enemy ZOC to another only if it meets one of the above two conditions.
5.3 Movement Bonuses and Penalties
5.3.1 In certain circumstances the Movement Factor of a unit may be modified by the addition of a bonus, or the imposition of a penalty. The two bonuses explained below are cumulative, and a unit may receive either or both of them even if subject to the fuel shortage penalty.
5.3.2 STRATEGIC MOVEMENT BONUS. Any unit which neither begins nor ends its OMP in enemy ZOC receives a strategic movement bonus. This bonus is two movement points for Axis units, and three movement points for Soviet units. This bonus is unaffected by weather (Section 6.0).
5.3.3 GUDERIAN AND MANSTEIN. The Three German units marked with a "G" on the upper-right of counter historically represent the components of General Heinz Guderian's 2nd Panzer Group. Each of these units receives a bonus of one movement point in each Good Weather turn of 1941 only, provided that at the start of the OMP it is within two hexes of another Guderian unit (whether or not this latter unit is dispersed). The German 56th Panzerkorps (similarly marked with an "M") was initially commanded by General Erich von Manstein. This unit also receives a bonus of one movement point in each Good Weather turn of 1941 only.
5.3.4 FUEL SHORTAGE. Any armor, armored cavalry, or armored infantry unit which cannot trace a fuel line at the beginning of its OMP suffers a fuel shortage penalty for that entire OMP. A fuel line is traced in precisely the same manner as a supply line, except that it must be traced from the appropriate fuel source, rather than from a supply source. For Axis units, the fuel source is Ploesti (hex 2325), and for the Russians it is both of Grozny (hex 3907) and Maikop (hex 3412) (i.e., Russian units must be able to trace a fuel line from both of these points to avoid fuel shortage). Movement Allowance of any unit that is considered as fuel shortage at the beginning of OMP is reduced to 4 for Axis, to 3 for Soviet.
5.4 Overrun
5.4.1 At any time during the OMP, the phasing player may declare an Overrun Attack if his units are in a position to attack an enemy unit or defending group at combat odds of at least 5-1 after all necessary modification, and is resolved on the attacker's own Overrun/Blitz CRT. Although the attack itself is not resolved until the Combat Phase, this has the immediate effect of nullifying the ZOC of all enemy units being overrun; from the instant the overrun attack is announced the unit or units being overrun are treated as having no ZOC. Overrun markers are placed to units which are overrunning and being overran. These attacks are subject to the rules regarding Combat Limitations (Section 7.4).
a) Any attack made possible by an overrun attack (i.e. in which one or more of the attacking units made a move during the OMP which was possible only because an overrun attack had taken place) is termed a "Blitz" attack, and must also be resolved on the Overrun/Blitz CRT.
b) Blitz markers are provided to indicate which attacking units must use the Overrun/Blitz CRT, and should be placed during the OMP both on units which make an overrun attack and on units which make a move possible only because that overrun attack has taken place.
c) As indicated by the CRTs, the minimum odds for Blitz attacks are 2:1 for Axis attacks and 3:1 for Soviet attacks. Blitz attacks below these odds are not allowed, and if unavoidable for any reason, yield an automatic "AE" result.
d) Overrun and blitz attacks are never modified for the effects of weather (although other modifiers apply as normal), nor can the Combat Options of Section 7.5 be used in conjunction with them.
5.4.2 The phasing player may even move his units into or through a hex occupied solely by enemy units which have been overrun. To enter such a hex, however, a unit must expend double the normal terrain cost of the hex, and all units of both sides are counted towards stacking limits.
5.4.3 When declaring an overrun attack, the phasing player must indicate which of his units are taking part in the attack. There is no limit to the number of overrun attacks which may occur in an OMP, but no phasing unit may take part in more than one. Units which conduct an overrun attack may not take part in any other attacks in the Combat Phase.
5.4.4 The phasing player may bring up extra units to make the combat odds greater than 5-1 (CRT A) or 6-1 (CRT B) before declaring an overrun attack, but may not add any more units to the attack after it has been declared.
5.4.5 Overrun attacks are resolved in the Combat Phase before normal attacks. Note that an overrun attack always eliminates the defending units, although possibly with an Exchange result.
5.4.6 The phasing player does not have to conduct all attacks at 5-1 (CRT A) or 6-1 (CRT B) or greater as overruns - he may conduct any of them as normal attacks instead. The phasing player may also choose to overrun some of the units in a hex without overrunning all of them, but any units not overrun would still retain their ZOC.
5.4.7 A phasing unit may participate in an overrun attack even if it is also adjacent to other enemy units which would normally have to be attacked under rule 7.1.4. Such enemy units must still be attacked by other friendly units in the Combat Phase, although these could be units which moved after the overrun was declared in the OMP.
5.4.8 A player making an overrun attack must ensure that the conditions of Section 7.4 can be met in the Combat Phase; otherwise the overrun attack is illegal.
5.4.9 All attacks other than overrun and blitz attacks are resolved on the attacker's Assault CRT. A player may, however, choose to use the Overrun/Blitz CRT for a particular attack, even if he is not obliged to do so, provided that attack is resolved before any attacks on the Assault CRT.
5.5 Terrain Effects and Other Restrictions on Movement
(In addition to the TEC printed on the map.)
5.5.1 The effect of terrain features on movement is listed on the Terrain Effects Chart printed on the map board. The normal cost of entering a clear terrain (blank) hex is one movement point. The following rules are intended to clarify certain aspects of this chart and detail other special restrictions affecting movement.
5.5.2 All partial land hexes are playable for all purposes as if they were full hexes.
5.5.3 A "lake hex side" is one that is contained entirely within the lake. Where a lake covers only part of a hex side the lake has no effect on movement. Similarly, a sea hex side is one that is entirely covered by sea, including estuaries such as 2419/2420.
5.5.4 Rivers affect movement (by costing one additional movement point to cross) only if they are unfrozen and the unit is to end its OMP in enemy ZOC.
5.5.5 The Kerch Straits are hex sides 3015/3115 and 3116/3115, and a unit may cross only by expending its entire movement allowance to move the one hex. The following hex sides are treated in the same manner as the Kerch Straits: 2816/2917, 0125/0224, 0225/0224, 0325/0224, and 0324/0224.
5.5.6 The terrain effect of "Stalin Line" is only used if the strategic option of is applied.
5.5.7 The terrain effect of "Freeze lines" are explained in Section 6.2.2.
5.5.8 Hex side 1205/1206 is in fact a canal, the only one on the map, but is treated as a normal river hex side for all purposes. The sand-spit in hex 0521 is for decoration only and has no effect on movement or combat.
5.5.9 SPECIAL FINLAND. Between September 1941 and June 1944 inclusive, no Soviet unit may enter any hex North-West of the line bounded by hexes 0308, 0407, 0406, 0405, 0404, 0504, 0503, 0402, 0303, 0202, 0103 (these hexes themselves may be entered); the area covered by hexes 0104-10, 0203-08, 0304-07 and 0403 is considered occupied by Finnish forces. Any Soviet unit within this area from September 1941 to June 1944 must leave in its OMP, and if unable to do so is eliminated. Axis units may freely move through and attack from these Finnish hexes, but no Soviet attacks into the area are permitted, nor may Soviet supply or rail lines be traced through it.
5.5.10 The thick black lines represent 1941 borders. These have no effect on movement except as stated below.
5.5.11 HUNGARY is considered inactivated until the German player-turn of April 1942, or until the Russian player moves or attacks into Hungary, whichever occurs sooner. Prior to this activation, the Hungarian unit may not leave or attack from Hungary, nor may other Axis units enter Hungary (if forced to do so, they are eliminated instead), and ZOC's do not extend across the Hungarian border. The Soviet player may choose to eliminate his units if they are forced to retreat across the Hungarian border.
5.5.12 ROMANIAN units may never enter Hungary or Bulgaria, and the Hungarian unit may never enter Romania. Any such unit forced to contravene this rule would be eliminated instead.
5.6 Terrain Effects and Other Restrictions on Combat
(In addition to the TEC printed on the map.)
5.6.1 Terrain may have the effect of making combat either voluntary or mandatory as described in Section 7. It may also affect the combat factor of a unit, or the choice of which CRT column is to be used. These effects are summarized on the Terrain Effects Chart and explained in detail here.
5.6.2 Soviet infantry-type units each have 1 added to their combat factor when defending in any Major or Victory city in the Soviet Union.
5.6.3 Infantry-type units have 1 added to their combat factor when defending in, or attacking into, mountain hexes. Mountain-type units have their combat factor doubled when defending in, or attacking into, mountain hexes. Note that this addition is per unit, not per hex.
5.6.4 If defending units are being attacked from across an unfrozen river hex side, the combat odds are shifted one column to the left. This does not apply if part or all of the defending group is being attacked across a non-river hex side by units of the attacking group with a modified combat strength at least equal to that of the defending group.
5.6.5 Defending units being attacked across Kerch Straits hex sides have their combat factors doubled. Again, this does not apply if units of the attacking group with a modified combat strength at least equal to that of the defending group is attacking via non-Straits hex sides.
5.6.6 Rivers running through major cities have no effect.
5.6.7 Combat is never permitted across sea hex sides or unfrozen lake hex sides.
5.6.8 Note that frozen rivers and frozen lakes are considered as clear.
6.0 WEATHER
6.1 Weather Determination
6.1.1 Weather is determined at the beginning of each game-turn and remains in force throughout both player-turns of that month.
6.1.2 In all June, July, August and September turns the weather is automatically "Good". In all December, January and February turns the weather is automatically "Snow". The weather in other months may vary.
6.1.3 At the beginning of each October game-turn, one die is rolled:
a) On a die roll of 3-6, October has "Mud", November then automatically has "Good" weather, and the following March, April, and May automatically have "Snow", "Mud" and "Good" weather respectively.
b) On a die roll of 1-2, October has "Good" weather, November then automatically has "Snow" and the following March automatically has "Mud". Another die-roll is then made at the start of the April turn; 1-3 gives April "Good" weather with May then automatically having "Mud" and 4-6 gives April "Mud" with May then automatically having "Good" weather.
6.2 Weather Effects on Terrain
6.2.1 During any month in which the weather is "Snow", all swamp and lake hexes and river hex sides on or north-east of the Arctic Weather Line (AWL) are considered frozen. There are three separate Arctic Weather Lines, each indicated on the map as a row of hexes running NW to SE; one is for January only, one for December and February, and one for November and March. If the weather in any of these months is not "Snow", the AWL has no significance and is ignored.
6.2.2 In "Snow" months (only), rivers are considered frozen along all hex sides upstream (i.e., nearer the source of the river) of any point where the river flows north-east of the AWL. Small red lines known as 'freeze lines' across hex-corners indicate the points upstream of which these rivers freeze in 'Snow' months. In most cases, "upstream" means in practice north-east of the AWL, because most rivers flow roughly east to west. The river system stemming from Gorki (1501), however, flows west to east, and hence the whole of this system is frozen in any "Snow" month, including November/March when some of it lies south-west of the AWL.
6.2.3 Frozen swamp and lake hexes are treated as clear hexes, and frozen river hex sides are treated as clear hex sides (as if the river did not exist) for all movement and combat purposes.
6.2.4 The hexes and hex sides of the Baltic Sea never freeze.
6.3 Weather Effects on Movement
6.3.1 In all "Mud" weather turns, all units have their movement factor halved, with any fractions being rounded up for all Soviet units and rounded down for all Axis units. The maximum factor of any unit in "Mud" turns (except the Zhukov unit) is "3". This restriction is also applied to the Strategic Movement Bonus.
6.3.2 In all "Snow" weather turns, all units have their movement factor halved with any fractions being rounded up for both sides.
6.3.3 In "Snow" months, each hex of the break-out path which is on or north of the Arctic Weather Line equals one less RF. (See Disbandment and Breakout.)
6.3.4 THAW. In the first non-"Snow" game-turn after any Winter, any unit which begins its player-turn on an all-lake hex is not immediately eliminated but may move or attack from that hex to any permitted hex, treating the lake hex sides as if they were river hex sides. No unit may move or attack into an all-lake hex during such a "Thaw" turn, and any unit still on an all-lake hex at the end of its own player-turn is then eliminated.
6.4 Weather Effects on Combat
6.4.1 In all "Mud" turns, all Axis and Soviet "Assault" attacks (attacks other than overrun and blitz attacks) are modified by a one-column shift to the left on the CRT in addition to all other effects.
6.4.1a In "Mud" turns, no Armor unit may make a two hex advance after Combat. (Armored Cavalry may.)
6.4.2 In "Snow" turns, all Axis attacks in "Snow" turns, are modified by a one-column shift to the left on the CRT in addition to all other effects. Soviet attacks are unaffected.
6.5 Winter "Snow" Turn 1941/1942 Special Rules
6.5.1 All Soviet Shock Armies (Sh) retain their normal movement factor.
6.5.2 All Axis units have any fractional movement factors rounded down.
6.5.3 No Axis Unit may make a two hex advance after Combat.
6.5.4 Axis Juggernaut units which end their OMP on or north of the Arctic Weather Line and outside of any city or town must immediately flip over to their weaker side, irrespective of the movement factor used. All Axis Juggernauts on or north of the AWL which are still stronger-side up at the end of their Combat Phase are flipped over to their weaker side regardless of being in a city or town.
6.5.5 In "Snow" months of the winter of 1941/42 (only), no Axis unit on or north of the Arctic Weather Line may use the HAB.
7.0 COMBAT
7.1 How Combat Occurs
7.1.1 Combat occurs during the Combat Phase only between opposing combat units in adjacent hexes. The phasing player and his units are referred to as the "attacker", the non-phasing player and his units as the "defender", regardless of the overall strategic situation.
7.1.2 The circumstances in which combat can occur during the OMP are described in Section 5.4 Overrun. Such combats are resolved, however, in the Combat Phase, before any non-overrun attacks.
7.1.3 In some cases, combat is discretionary on the part of the phasing player (he is not obliged to attack, but may do so if he wishes. See Section 5.6 Terrain Effects on Combat and the TEC), while in other cases it is mandatory (he must attack). The non-phasing player never has any choice in the matter.
7.1.4 A phasing combat unit which is adjacent to one or more enemy units in the Combat Phase must attack at least one of them, unless:
a) it is a Major or Victory city hex; or
b) it is adjacent to enemy units only across unfrozen River or Strait hex sides; or
c) all enemy units in its ZOC are being attacked by other units; or
d) it is fortified; or
e) it is stacked with another combat unit which is fortified; or
f) both it and all enemy units to which it is adjacent are also adjacent to another phasing combat unit which is fortified.
A unit is also not obliged to attack if a combination of (b), (d), and (f) apply.
7.1.5 A phasing unit cannot attack across a sea or unfrozen lake hex side. Since ZOCs do not extend across these hex sides, such units are not considered to be "adjacent" in terms of this Section.
7.1.6 A non-phasing unit which finds itself adjacent to an enemy unit or units in the Combat Phase must be attacked by at least one such unit unless all of them either disband/break out or are relieved of the obligation to attack by rules 7.1.4 and 7.1.5.
7.1.7 The combat factor of a unit may never be divided between different attacks. No attacking unit may take part in more than one attack in a single player-turn. A unit may, however, attack more than one defending unit in the same or different hexes in a single attack, provided they are all in its ZOC.
7.1.8 A defending unit may be attacked more than once in a single Combat Phase, by different attacking units.
7.1.9 "Multi-unit/multi-hex" combat is possible, whereby attacking units in one or more hexes combine to attack defending units in one or more hexes in a single attack. Generally, the phasing player may divide attacking and defending units into groups in any manner he desires; the non-phasing player has no choice.
7.1.10 If any unit in a hex makes an attack, then all enemy units in its ZOC must be attacked in that Combat Phase by some attacking group, unless the attacking unit's hex contains another fortified combat unit and does not attack. This rule takes precedence over Rule 7.1.4, in that a unit not obliged to attack may find itself forced to do so in order to satisfy the terms of this rule.
7.1.11 The phasing player may resolve his attacks in any order he wishes, subject to the proviso that all overrun attacks must be resolved first. However, he must specify all of his attacks, announcing which of his units are attacking which defenders, before resolving any of them. Should it occur that a defending group has already been retreated or eliminated by a previous attack when the time comes to resolve an attack allocated against it, then the attacking group concerned may either:
a) not attack at all; or
b) attack instead any other defending group in the same hex or hexes occupied by the original defenders; it may not attack enemy units in any other hex.
In either case, the attacking group is eligible for Tactical Movement.
7.1.12 Phasing units always have the option to disband or break out rather than make an attack, even if the rules of this subsection would otherwise require them to attack. The conditions of Rule 8.0 must still be met, however.
7.2 How Combat is Resolved
7.2.1 Each attack is resolved separately in a six-step process as follows:
STEP ONE: The combat factor of each unit in the attacking group is modified for the effects of terrain (Section 7.5), if any, and these modified factors are totaled.
STEP TWO: The combat factor of each unit in the defending group is modified for the effects of terrain, if any, and these modified factors are totaled.
STEP THREE: The attacker selects which CRT, A or B, is appropriate, according to the constraints of terrain, weather, and nationality, as laid down in Rule 3 below.
STEP FOUR: The attack strength arrived at in step one above is compared with the defense strength arrived at in step two in the form of a ratio - attack strength: defense strength. This numerical ratio is then simplified down to one of the combat odds ratios found across the top of the CRTs, always rounding off in favor of the defender. For example, 29:10 would round down to 2:1; 7:4 would round down to 3:2, and 5:12 would round down to 1:3.
STEP FIVE: The choice of combat odds column may be affected by terrain and the presence of the Zhukov marker. If so, the combat odds are modified accordingly, note that these effects are cumulative.
STEP SIX: One die is rolled and the result is cross-referenced with the final combat odds ratio to determine the result of the attack. The above procedure is completed for each attack, and the result implemented before moving on to the next, until all attacks have been resolved.
7.3 Combat Results
7.3.1 The combat results are interpreted as follows:
"DE" - Defender Eliminated: All units of the defending group are eliminated. No effect for the Attacker.
"DD" - Defender Disbanded: All units of the defending group must immediately disband (if in supply) or break out (if out of supply). No effect for the Attacker.
"DR" - Defender Retreat: All units of the defending group are retreated 1, 2, or 3 hexes at the defender's option, and become "dispersed", unless any one of them is an infantry-type unit in a Major or Victory city, in which case none of them are obliged to retreat. "(DR)" - (Defender Retreat): Identical to a "DR" result except that defending units are not obliged to retreat if any one of them is an infantry-type unit in any kind of city (not town).
"-" - No Effect: All units involved remain in place with no combat losses.
"HX" - Defender Half Exchanged: All units of the defending group are eliminated. The attacker then eliminates from the attacking group units whose modified combat strength does not exceed half the modified combat strength of the defending group, but comes as near as possible. If the attacker cannot eliminate even a single unit without exceeding half the defender's combat strength, then he removes nothing.
"DX" - Defender Exchanged: All units of the defending group are eliminated. The attacker then eliminates from the attacking group units whose modified combat factors do not exceed the modified combat strength of the defending group, but come as near as possible. If the attacker cannot eliminate even a single unit without exceeding the defender's combat strength, then he removes nothing.
"EX" - Exchange: All units of the defending group are eliminated. The attacker then eliminates from the attacking group units whose modified combat strength is in total at least equal to that of the defending group.
"2X", "3X", "4X" - Identical to an "EX" result except that the attacker must lose units totaling at least double, triple, or quadruple the defender's modified strength.
"TX" - Total Exchange: All units involved are eliminated.
"AL" - Attacker takes losses: The attacker eliminates from the attacking group units whose total modified combat strength is at least equal to that of the defending group. (If the attacker's total modified combat strength is less than that of the defender, all of his units are eliminated.)
"AE" - Attacker Eliminated: All units of the attacking group are eliminated.
7.3.2 It is possible for an "EX", "2X", "3X" and "4X" result to occur when the modified combat strength of the attacker is less than that of the defender. In this case, all units of the attacking group are eliminated, and the defender eliminates from the defending group units whose total modified combat strength does not exceed that of the attacker, but comes as near as possible to this figure. In effect, this is a "DX" result in reverse.
7.3.3 Any attacking unit required to take losses to satisfy an "AL" or any kind of "_X" result may always lose, firstly, any HAB, and secondly, any difference between the higher and lower strengths of Juggernaut and armor units, before having to take losses in actual combat units, even if, in the case of "AL", "DX" and "HX" results, he could come closer to the maximum required loss by losing combat units first. This option is never open to the defender because armor and Juggernaut units may never flip over or break down during an opposing player-turn.
7.3.4 Units which are forced to retreat by a "DR" or "(DR)" result and cannot do so still have the result converted to "DD". This can only happen, however, if neither Exchange Conversion nor No Retreat Combat Options are operative.
7.3.5 In all cases where there is a choice of units to be eliminated, the owning player has that choice.
7.3.6 Defending units are always "dispersed" by "DR" and "(DR)" combat results, even if they do not actually retreat. Units not obliged to retreat by these results still have the option to do so.
7.3.7 Where the CRT indicates two results ("DR/AL" or "(DR)/AL"), both are applied, the DR or (DR) result first.
7.3.8 The modified combat strengths referred to in the results are those arrived at in Steps One and Two, after the effects of terrain have been taken into account. (Printed as "7.4.8" in the source; numbered 7.3.8 here as it falls under 7.3.)
7.4 Combat Limitations
7.4.1 Garrison and Factory units cannot be attacked separately if stacked with any Fortified unit. It must be attacked together with the largest such unit in the hex. Such an attack may only be an Exchange Conversion, Overrun, or Blitz attack.
7.4.2 An attack against any defending group containing one or more fortified units must be at higher odds than any attack against unfortified units only in the same hex. The total modified defense factor of a defending group containing one or more fortified units must be greater than that of any defending group of unfortified units attacked separately in the same hex.
7.4.3 If separate attacks are being made against defending units in the same hex, the highest odds involved may not be more than DOUBLE the lowest odds.
7.4.4 An attacking unit may not take part in an attack at combat odds more than THREE TIMES greater than those being applied against any other enemy unit to which it is adjacent.
7.4.5 Units attacking from hexes containing at least one friendly fortified combat unit are exempt from these rules; such units may attack at any odds they please.
7.4.6 To clarify what is meant by multiples of combat odds ratios, treat these ratios as fractions or whole numbers by dividing the first digit by the second: for example, 1:4 becomes 0.25, 3:2 becomes 1.5, and 5:1 becomes 5, so that three times 1:2 is 3:2.
7.4.7 Odds lower than 1:6 are not allowed. The attacker may not arrange his attacks in such a way that odds lower than 1:6 occur. If such attacks are unavoidable, the attacking units concerned are automatically eliminated at the beginning of the Combat Phase before any other attacks (including overrun attacks) are resolved. This is considered an "AE" combat result.
7.4.8 Odds higher than the maximum odds on the CRTs are reduced to 7:1 (Axis CRT) or 10:1 (Soviet CRT) before any further modification under Step Five of rule B above.
7.5 Combat Options
Both attacker and defender may influence the result of an attack by the employment of Combat Options. The defender may order "No Retreat" which causes his units to remain in place, usually at the cost of higher casualties. The attacker may choose, or may be obliged to use, "Exchange Conversion" which tends to cause higher losses to both sides. It is possible for both of these options to be in effect for the same attack. Combat Options only affect results on the Assault CRT. The Overrun/Blitz CRT results are never altered, and so, for example, it makes no difference to an overrun attack whether the defender had a "No Retreat" order or not.
7.5.1 Exchange Conversion. Immediately prior to the combat die roll, the attacker may choose to declare Exchange Conversion to be in effect for a particular Assault attack. This has the effect of altering the combat result as indicated on the Combat Options section of the CRT. The result is read from the Assault CRT as normal, and then converted to the result shown under the "Exchange Conversion" heading. Exchange Conversion Marker is placed on any Attacking units in this case, and the marker is removed after the resolution of the attack. The counter-mix is not a limit.
a) Exchange Conversion is mandatory (the attacker must use this option) in:
i) all attacks against a defending group which includes a garrison or factory unit.
ii) all Axis attacks against a Soviet unit in a swamp hex (or any defending group that includes such a unit).
7.5.2 No Retreat.
a) A player who wishes to declare No Retreat orders must do so at the end of his own player-turn to be in effect for his units in the immediately following enemy player-turn.
b) Soviet player must invoke this Combat Option for all of his units or none at all.
c) Axis player may declare this option to be in effect for individual German occupied hexes (including all units in the hex), and such hexes are identified with a "No Retreat" marker unless they contain Romanian, Hungarian, or Italian units.
7.5.3 No Retreat orders alter combat results as indicated under the appropriate heading in the Combat Options section of the CRT. The result is read as normal from the Assault CRT, and then converted to that shown under the "No Retreat" heading. All No Retreat markers are removed at the end of the Combat Phase. The counter mix is not a limit on No Retreat Orders.
7.6 Combat Option Effects on CRT
7.6.1 Any combat die roll of "1" in an attack at 1:4 or greater against units with a No Retreat order causes at least a "DX" result against the defender, even if the converted result is only a "-".
7.6.2 It is possible for a Soviet attack directed against more than one hex to include in the same defending group units both with and without No Retreat orders. In this case, all units of the defending group are subject to the No Retreat order, even if some of them are Romanian, Hungarian, or Italian.
7.6.3 The third column of the Combat Options section of the CRTs indicates the alterations in effect when both Exchange Conversions are used instead of either of the other two.
7.7 Tactical Movement (Retreat and Advance After Combat)
7.7.1 Only the non-phasing player may retreat after combat and only the phasing player may advance after combat. Such movement is known as Tactical Movement. Tactical movement must be made immediately following the combat resolution from which it results, if it is to be made at all. Retreat is carried out first, followed by advance.
7.7.2 It is a general principle that tactical movement is subject to the same restrictions as operational movement (movement in the OMP). The provisions of rules Sections 5.1, 5.2, 5.5 all apply to tactical movement as well, and in particular, no unit may ever exceed its movement allowance during tactical movement. (A unit is always allowed to move one hex if it is not moving from one enemy ZOC to another.)
7.7.1a Retreat After Combat.
a) On an effective "DR" or "(DR)" combat result, the defender retreats his affected units one, two, or three hexes at his option, provided their movement allowance permits this.
b) If a unit retreats only one hex, it may retreat into a hex in enemy ZOC which is occupied by a friendly unit, as long as that hex does not have an attack yet to be resolved against it in the current Combat Phase. It may not retreat into an unoccupied hex in enemy ZOC.
c) If a unit retreats two or three hexes it must retreat further away from the enemy with each hex moved.
d) Within the above restrictions, units may retreat in any direction the defender desires. If a unit which is obliged to retreat cannot do so without violating one of the above rules, then the "DR" or "(DR)" result is taken to be a "DD" result for that particular unit instead, and it must disband or break out. Other defending units in that combat which are able to retreat may still do so.
7.7.2a Dispersal. Defending units which receive a "DR" or "(DR)" combat result are dispersed, and have a "Dispersed" marker placed on them, even if they did not actually retreat. Dispersed units may not move in the OMP of their own following player-turn. The "Dispersed" marker is removed in the Recovery Phase of this following player-turn.
7.7.3a Advance After Combat.
a) If a defended hex is completely vacated by the application of any DE, DD, HX, DX, DR, or (DR) combat result (including DR/AL and (DR)/AL results), then surviving units of the phasing player which took part in that attack may advance after combat. The advance is limited to one hex (Exception: Rule B below), and may be made into the vacated hex itself or into any hex adjacent to it which is not enemy-occupied.
b) Advance after combat must take place before any other attacks are resolved. If more than one attack is being made on a hex, units involved in attacks prior to that which clears the hex of enemy units may not advance. Units which were scheduled to attack a hex and find it already cleared by previous attacks in the same Combat Phase may advance as if their attack had cleared it, provided that the attack which in fact cleared it yielded one of the above results as stated in 7.7.3.a.
c) Juggernaut units may never advance after combat.
d) Armor and armored cavalry units eligible to advance after combat have the option of advancing two hexes, rather than one. This advance is permitted only if it costs no more than 2 movement points, and the first hex of it must be one of those vacated by the defender in that combat. They may ignore all enemy ZOCs in making their two-hex advance. No armor unit may make this two hex advance if the weather is "Mud" (armored cavalry may), and no Axis unit may do so in "Snow" months of the winter of 1941/42.
(Transcriber's note: the source numbers the retreat, dispersal and advance paragraphs of 7.7 as 7.7.1, 7.7.2 and 7.7.3, duplicating the numbers of the paragraphs above them. They are marked here with an "a" suffix to keep the cross-references unambiguous.)
8.0 DISBANDMENT AND BREAKOUT
8.0.1 Any combat unit may disband or break out, and this may occur in one of two ways: either voluntarily by the phasing player, or involuntarily by the non-phasing player following a "DD" combat result.
8.0.2 Voluntary disbandment and break-outs are carried out by the phasing player at the end of his Combat Phase, after all combat and tactical movement has taken place; disbandments are resolved first, followed by break-outs. Involuntary ("DD") disbandments and breakouts are resolved at the moment of combat. A player may disband or break out only his own combat units.
8.1 Disbandment (A unit which is in supply at that moment)
8.1.1 To disband, a unit in supply is simply removed from the board, and a number of RFs equal to its combat factor is added to the owning player's replacement total for his next player-turn. Fortification status is ignored when calculating the combat factor.
- Juggernaut: two less than their weaker combat strength.
- Any other combat unit: less one.
8.1.2 A disbanded unit may always return to the game later as a replacement.
8.2 Breakout (A unit which is isolated at that moment)
8.2.1 The procedure for breakout is nearly identical to that for disbandment with the following additions:
a) Juggernaut units may not break out and are permanently eliminated instead.
b) A group of isolated units which can trace a supply line to each other (i.e. which would all be in supply if any one of them was) is known as a "pocket" and the breakout path is considered from the hex in supply to the closest unit in the pocket.
c) Units of the phasing player which voluntarily disband or break out may have moved or been dispersed in their OMP, but may not attack in the Combat Phase.
8.2.2 The break-out path to a hex in supply can be of any length, still passing through any number of enemy ZOCs but not through enemy-occupied hexes. However, in addition to the basic reduction imposed as in Disbandment, ONE RF is lost from the total of the pocket as a whole:
a) for each movement point in excess of three which would have to be expended to move along the break-out path (from the nearest unit in a pocket); and
b) for each hex in enemy ZOC along the break-out path which is not occupied by a supplied friendly unit; and
c) in "Snow" months, each hex of the break-out path which is on or north of the Arctic Weather Line.
8.3 Evacuation
8.3.1 For the purposes of disbandments and break-outs (only), any coast (partial land/sea) hex on a friendly sea area may be treated as a hex in supply.
a) a unit on such a coastal hex may disband normally; and
b) a unit which can trace a break-out path no more than 3 hexes long to such a hex may break out normally.
8.3.2 The coast hex in question cannot be enemy-occupied, and if it is in enemy ZOC then one further RF is eliminated from the unit, or pocket as a whole, before evacuation.
8.3.3 A maximum of two RFs per turn may be evacuated through each of the Baltic and Black Seas.
9.0 SUPPLY
9.0.1 In order to be "in supply", each combat unit on the map-board must be able to trace a supply line from a supply source to the unit itself. Any combat unit which is not in supply at the end of the Combat Phase of its own player-turn is Isolated (See Section 9.5). Voluntary breakout/disbandment may require supply to be checked during the Combat Phase. Soviet factories and the Zhukov marker do not require supply and suffer no penalty if they are Isolated.
9.0.2 A supply point or supply source cannot be used as such if it is in enemy ZOC but if occupied by a friendly unit could be used as part of a Supply Line from another supply point.
9.1 Supply Sources and Supply Lines
a) GERMAN and ITALIAN units: all map board-edge hexes from 0130 to 1430 and from 2630 to 2724 inclusive.
b) ROMANIAN units: Bucharest (2425).
c) HUNGARIAN unit: Budapest (1428).
d) SOVIET combat units: all map board-edge hexes from 1101 to 3301 and from 3905 to 3912 inclusive.
9.1.1 A supply line is a continuous path of hexes running from any supply source hex appropriate to that unit's nationality to the unit, either directly or via any number of friendly "supply points" (explained below).
9.1.2 In order to be part of a valid supply line, each hex on this path must be either:
a) occupied by a friendly unit (not necessarily a combat unit); or
b) closer, as defined below, to the nearest friendly supply point than a Supply Threat. A Supply line may never be traced across a Sea or Unfrozen Lake hex side.
9.2 Supply Points
a) any supply source hex appropriate to the unit's nationality, which is neither occupied by nor in the ZOC of an enemy unit.
b) any Major or Victory city under friendly control at the instant of supply determination.
c) any friendly combat unit already established as being in supply at the instant of supply determination.
9.2.1 The distance of a hex from a supply point is the length, in hexes, of the shortest route from supply point to that hex which does not pass through an enemy unit or an unoccupied hex in enemy ZOC. Count the hex to which this route is being traced but not the hex of the supply point.
9.3 Supply Threats
a) any enemy combat unit which, were it able to move at the instant of supply determination and given an unlimited movement allowance, could move to the hex in question without passing through an opposing unit or opposing ZOC.
b) any Major or Victory city under enemy control such that, if it contained an enemy combat unit, that unit would qualify as a supply threat under (a) above.
9.3.1 The distance of a hex from an enemy supply threat is the length, in hexes, of the shortest route from supply threat to that hex which does not pass through either a unit or ZOC of the side tracing supply. Count the hex to which this route is being traced but not the hex of the supply threat.
9.4 Special Supply Situations
There are two situations in which a combat unit may still be in supply even if the conditions of Rules 9.1 are not met. "Sea Supply" simulates the possibility of supplies being transported across a controlled sea area to a port; "Siege Supply" recreates the situation of units surrounded in or around a vital city.
9.4.1 Sea Supply
9.4.1.1 A port may act as a supply point provided that it is on a friendly controlled sea and is not in enemy ZOC. Any number of units may draw supply from this point, and it is not necessary for the player to control or occupy any other port along that sea coast.
9.4.1.2 If a port on a controlled sea area is in enemy ZOC, then any friendly units actually occupying the port hex are still considered to be in supply, but no other units may use it as a supply point.
9.4.2 Siege Supply
9.4.2.1 An isolated Victory city on a player's own side of the 1941 Russian border may provide supply for up to six stacking factors of friendly units which either occupy or can trace a supply line from that city. In this special case only, such a city may provide supply for adjacent friendly units even if it is in enemy ZOC.
9.4.2.2 Against this six-factor limit, friendly units actually occupying the Victory city hex have their stacking factors doubled. Where more than six stacking factors are attempting to draw supply from a single isolated Victory city, the owning player must specify which units are supplied and which are isolated.
9.4.2.3 A player may never draw siege supply from a Victory city on his opponent's side of the 1941 Russian border.
9.5 Effects of Isolation
9.5.1 At the end of a player's own Combat Phase, all of his units which are isolated and are not in a Major or Victory city hex are eliminated and removed from the map board. All except Juggernaut units and the Polish 1st Army are eligible to return later as replacements.
9.5.2 Any group of isolated units which occupies a Major or Victory city at the end of a player's own Combat Phase has stacking points equal to half the number of isolated stacking points in the hex eliminated (fractions rounded up). The stacking factor modification of Rule 9.4.2 does not apply here.
9.5.3 Players should bear in mind that disbandment/break-out, which occurs during the Combat Phase, is always preferable to having a unit eliminated under these rules, unless a supply line can be restored by tactical movement.
10.0 SPECIAL UNITS AND CAPABILITIES
10.1 Juggernaut Units
(Juggernaut Unit Definition, Movement, Combat Effects.)
10.1.1 Soviet fronts and German infantry armies are termed "Juggernaut" units. (Romanian infantry armies are not Juggernaut units.) Juggernaut units are considered to be composed of a number of smaller, lower-echelon, infantry units (German corps or Soviet armies). Each Juggernaut unit can exist in one of two forms, represented by the two sides of the counter, and can in addition be broken down into and reformed from its component parts.
10.1.2 Juggernaut units may never enter the game as replacements. The only way they may come into play is at the start of a scenario or by the combining of lower-echelon units. If any Juggernaut unit is eliminated in the following ways, it is permanently removed from the game and can never be replaced:
a) by an overrun attack, or
b) by a "DE" combat result, or
c) in any manner when it is out of supply (Juggernaut units may not break out).
This also applies to the Polish 1st Army unit.
10.1.3 Juggernaut units may not use tactical advance after combat.
10.1.4 A Juggernaut unit may flip over from its stronger to its weaker side during movement (either operational or tactical) at the discretion of the owning player if he wishes to use the higher movement factor on the weaker side; otherwise, he is restricted to the stronger side movement factor.
10.1.5 At the beginning of his OMP, all of the phasing player's Juggernaut units currently on board automatically revert to their stronger side (at no cost in replacements), provided they are in supply and not dispersed at that point. This is the only time and only manner in which a Juggernaut unit may flip over from its weaker side (or Movement Mode).
10.1.6 In "Snow" months of the winter of 1941-42 only, Axis Juggernaut units which end their OMP on or north of the Arctic Weather Line and outside of any city or town must immediately flip over to their weaker side, irrespective of the movement factor used. All Axis Juggernauts on or north of the AWL which are still stronger-side up at the end of their Combat Phase are flipped over to their weaker side regardless of being in a city or town.
Forming Juggernaut Units
10.1.7 Juggernaut units may not be formed in enemy ZOC but may be formed out of supply. At the end of any OMP (BEFORE STACKING LIMITS ARE ENFORCED), the phasing player may combine any of his infantry units (German corps or Soviet armies) which occupy the same hex by removing them from the board and replacing them with a Juggernaut unit whose weaker (lower) combat factor is equal to or less than the total combat factors of the units removed. The Juggernaut is placed weaker-side up on the same hex.
10.1.8 There is no limit (other than the countermix) to the number of Juggernaut units that may be created in a single turn, nor any restriction on which or how many infantry units may combine to make them. The component units must, however, be German infantry corps (Axis Juggernauts) or Soviet infantry armies (Soviet Juggernauts). Mountain, Shock, and Armored Infantry may not be used.
Breaking Down Juggernaut Units
10.1.9 A Juggernaut unit may be broken down into low-echelon units by the owning player at any time during his player-turn. A Juggernaut unit always breaks down into units whose total combat factors do not exceed that on the weaker side of the Juggernaut counter.
10.1.10 Any German Infantry corps (Axis) or Soviet Infantry armies (Soviet) may be selected from those available for replacement to create the Juggernaut unit, but again, Mountain, Shock, and Armored Infantry may not be used.
10.1.11 A Juggernaut unit may also break down in order to absorb combat losses from "AL" or any kind of "_X" results, and any Juggernaut which begins the Combat Phase stronger-side up is considered to have lost combat strength points equal to the difference between its two printed combat factors before any component units have to be eliminated.
10.1.13 A Juggernaut may break down after combat resolution in order to allow its component units to advance tactically after combat.
(Transcriber's note: the source numbers this section 10.1.11 followed by 10.1.13; there is no 10.1.12 in the source.)
10.2 Heavy Artillery Bonus
10.2.1 All Juggernaut units and Soviet shock armies, while at either of their combat strengths, which begin the OMP of their own player-turn undispersed, unfortified, and in supply, and which do not move during that OMP, may use the Heavy Artillery Bonus (HAB) when attacking adjacent units in the Combat Phase. No other types of unit may use this Bonus.
10.2.2 For ease of memory, HAB markers are placed on all eligible units at the beginning of the OMP, and removed as these units move during the OMP. All remaining HAB markers are removed at the end of the Combat Phase.
10.2.3 The Heavy Artillery Bonus gives Soviet shock armies ONE additional combat factor, and all Juggernaut units TWO additional combat factors (use the appropriate marker) when attacking in their own Combat Phase.
10.2.4 The Heavy Artillery Bonus cannot be used defensively.
10.2.6 The Bonus combat factors allowed by the HAB can be used as "padding" against "AL" or any kind of "_X" combat result, in the same way as can the difference between the higher and lower combat strengths of Juggernaut units and armor units. The attacker may lose the combat factors of the HAB before he has to begin taking losses from combat units; this does not in any way affect the ability of that attacking unit to use the HAB again in later turns.
(Transcriber's note: the source has no 10.2.5.)
10.2.7 In "Snow" months of the winter of 1941/42 (only), no Axis unit on or north of the Arctic Weather Line may use the HAB.
10.3 Armor
10.3.1 Refitted status for an armor unit is like a freshly sharpened cutting edge on a sword. An armor unit does not have to be refitted to move, attack, or defend, but is more effective in the status.
10.3.2 Armor units always begin any scenario in refitted status, and their combat factor for replacement purposes is the higher one.
10.3.3 An armor unit loses its refitted status, and is flipped over to its unrefitted side, in all of the following circumstances:
a) if it exceeds the movement factor printed in black or yellow on the refitted side. A refitted armor unit may move using the movement factor printed in white (i.e., larger number) but must immediately flip over to unrefitted status on completion of such movement.
b) if it receives a "DR" or "(DR)" combat result. In this case, a refitted armor unit flips over instead of being dispersed (it must still retreat if obliged to do so). Already unrefitted armor units are dispersed in the normal way.
c) as a combat loss following an "AL" or any kind of "_X" result in the owning player's combat phase. An armor unit may flip over to unrefitted status in order to 10.3.4 Note that the movement factor on an armor unit's unrefitted side is not the same as that below the line on its refitted side. An armor unit that begins its OMP unrefitted is restricted to the movement factor printed on that side of the counter. The fuel shortage penalty (Rule 5.3.4) applies equally to both refitted and unrefitted armor units.
10.3.5 To flip back over from unrefitted to refitted status, an armor unit must be undispersed, in supply at the start of its own player-turn, and may not move or be in the ZOC of an enemy unit during its OMP. It is then flipped back to its refitted side in the Recovery Phase at no cost in replacements.
10.3.6 Armor units may fortify in either refitted or unrefitted status, but may never become refitted while fortified.
10.4 Factory Units
10.4.1 Factory units are used in Soviet replacement and are placed on their own cities at the start of any scenario.
10.4.2 Factory units are combat units, representing their value as militia of their workers. They are neither infantry nor armor-type units, and their combat factor is never modified for any reason. They have a normal ZOC and, although it is not printed on the counter, are considered each to have a combat factor of "1" for defense only (even if entrained or not yet in production).
10.4.4 Factory units have a stacking value of zero and do not require supply. They may not retreat, and the only manner in which they may move is via Evacuation.
10.4.5 Factory units can never be replaced once eliminated.
10.4.6 A factory unit cannot be attacked separately if stacked with any fortified unit; it must be attacked together with the largest such fortified unit in the hex (other units may be included as well). Furthermore, such an attack may only be an Exchange Conversion, Overrun, or Blitz attack.
10.4.7 Factory units each produce RFs at the rate of one per month provided that a rail line can be traced to that city in the RRP, but do not begin to do so until the date printed on their counter, known as the activation date.
Factory Evacuation
10.4.8 Although they have a movement factor of zero, factory units may use a special form of movement simulating their dismantling and evacuation east of the Urals. The evacuation of a factory unit is a three-turn process:
STEP ONE: In the RRP of any Soviet player-turn, the factory unit is simply flipped over to its entrained side.
STEP TWO: In the RRP of the following Soviet player-turn, the factory unit is removed from the map board and placed off board to the East, provided that at that moment a rail line can be traced to the city.
STEP THREE: In the RRP of the Soviet player-turn after that, the factory unit is flipped back to its original (production) side.
10.4.9 The Soviet player may conduct the evacuation of any number of factory units simultaneously. The process may even be interrupted or delayed if, for example, no rail line can be traced in Step Two above. Once entrained, however, the factory unit cannot re-enter production until it has been evacuated.
10.4.10 A factory unit produces no replacements during any turn in which it is entrained or flipped over from one side to the other (hence the process of evacuation always halts production for at least three turns).
10.4.11 Any factory unit which commences evacuation on or before its activation date has this date postponed by three months (or by however long the evacuation took if this was more than three months).
10.4.12 No factory unit may entrain (commence evacuation) on the first turn of the campaign scenario.
10.5 Garrison Units
10.5.1 There are eight garrison units in the game (seven Soviet, one Axis), representing fixed garrisons of regular troops rather than militia units.
10.5.2 They are placed on their indicated cities at the start of any scenario as laid down in, and may not move at all during the game.
10.5.3 Garrison units are combat units with normal ZOCs, but are neither infantry nor armor-type units. Their combat factor is defensive only - garrison units may never attack - and is never modified for the effects of terrain.
10.5.4 A garrison unit, like a factory unit, cannot be attacked separately if stacked with any fortified unit. It must be attacked together with the largest such unit in the hex. Again, such an attack may only be an Exchange Conversion, Overrun, or Blitz attack.
10.5.5 Garrison units may never fortify, disband, or break out, and can never be replaced once eliminated.
10.5.6 The Soviet player may never bring into the game as replacements in any one player-turn more infantry-type units than he has garrison units currently on the board.
10.6 Zhukov
10.6.1 The Zhukov marker is not a combat unit; it represents an elite Soviet military planning headquarters (not necessarily the man himself). It has no combat factor or ZOC. It begins all scenarios in Moscow (1306), with the side marked "D (Defense)" face-up.
10.6.2 The Zhukov marker can never be alone in a hex; it must always be stacked with another Soviet unit, although this could be just a factory unit. Zhukov may not use Tactical Movement, and if for any reason, other than by virtue of rule 10.6.3 below, it is ever left alone in a hex, it is removed from the map board until the beginning of the next Soviet OMP, when it automatically reappears.
10.6.3 In addition to the temporary removal described above, the Zhukov marker can be eliminated if all the Soviet units in its hex are eliminated by assault combat or overrun.
10.6.4 Once eliminated under rule 10.6.3 above, the Zhukov marker cannot be replaced in the normal way other units are replaced. Instead, it reappears at no replacement cost at the beginning of the OMP of the Soviet player-turn exactly twelve months after its elimination.
10.6.5 The Zhukov marker has no movement factor; it has an unlimited movement capability. At the beginning of the Soviet OMP, before any combat units are moved, the marker may be placed with any Soviet unit. It remains, and may move, stacked with that unit for the rest of the OMP.
10.6.6 The Zhukov marker affects Axis attacks against Soviet units in or adjacent to the hex it occupies. All Axis attacks on defending groups which include any such Soviet units are modified by a one-column shift to the left on the CRT.
10.6.7 If Zhukov spends an entire Soviet OMP in Moscow (may be in a turn in which he returns to the map board), the marker is flipped over to the side marked "AD (Attack and Defense)". Zhukov may now influence one Soviet attack in addition to his normal defensive capabilities: In the Combat Phase of the following Soviet player-turn, any one attack on Axis units within two hexes of the marker is modified by a one-column shift to the right on the CRT. The Zhukov marker is reverted back to the original "D" side at the end of this Combat Phase, unless it is still on Moscow.
10.7 Fortification
10.7.1 Any combat units, except factory and garrison units, which are not dispersed, may be fortified by the owning player in the RRP of his player-turn. A fortified unit is so indicated by flipping the counter over, if its reverse side contains the fortification symbol, or by having the appropriate fortification marker placed on it (armor and Juggernaut units).
10.7.2 Factory and garrison units may never fortify.
10.7.3 A fortified unit has no movement allowance and may not move at all during its own player-turn. It may, however, retreat if it suffers a "DR" or "(DR)" result in the enemy Combat Phase, but loses its fortified status in doing so.
10.7.4 A fortified unit may not attack, it can only defend. Further:
a) units stacked with a fortified unit are never obliged to attack; and
b) a unit adjacent to both a friendly fortified unit and an enemy unit which are also adjacent to each other is not obliged to attack that enemy unit.
10.7.5 Some units increase their combat factor (for defense only) when fortified:
a) Armor, armored cavalry, and shock infantry combat factors are unaltered.
b) Standard, Mountain, and Armored Infantry combat factors are increased by 1.
c) German Juggernaut Infantry armies combat factors are increased by 2.
d) Soviet front units combat factors increased by 3.
e) Soviet 42nd and 62nd Armies combat factors are increased by 2.
10.7.6 Armor units may fortify at either their refitted or unrefitted strengths, but may not refit while fortified. Juggernaut units may fortify at either combat strength and may flip over to their stronger side while fortified.
10.7.7 Additional combat odds limitations are imposed when hexes containing fortified units are attacked. See Rule 7.4.2.
10.7.8 To "defortify" a unit, the owning player simply flips the unit back to its normal combat side, or removes the fortification marker, in the RRP of his player-turn. The unit may then move (if undispersed) and attack normally in that player-turn.
11.0 REPLACEMENTS AND REINFORCEMENTS
11.1 Both players may receive replacements each game-turn, in the RRP of their own player-turn. Replacements are either previously eliminated units re-entering the game or new units entering the game for the first time in accordance with the rules of this section.
11.2 Each player receives a certain number of RFs per turn, which may be used to bring into the game units with total combat factors not exceeding this amount.
11.3 RFs may be accumulated from turn to turn if unused.
11.4 The RF cost of armor units is their refitted combat strength, and such units enter the game with this side uppermost.
11.5 The RF cost of all other units is their unfortified combat factor. Remember, Juggernauts, Factories, and Garrisons can never be replaced once eliminated.
11.6 Replacements enter the game in a dispersed condition (place a "dispersed" marker on them) and may not move nor fortify in the turn in which they enter the game.
Entering Reinforcements and Replacements
11.7 Provided sufficient RFs are available, a player may select any of his units not presently on board as replacements, subject to the following restrictions:
a) No unit listed as a reinforcement may enter the game as a replacement until it has first entered as a reinforcement and been eliminated.
b) No Soviet tank army may enter the game before 1942. Guards tank armies are considered as "tank army", not "Guards army".
c) No Soviet Guards (Gd) unit may enter the game before 1943.
d) No German SS unit may enter the game before 1943.
11.8 When they enter the game, Replacements and Reinforcements may appear only in town, city or map board edge supply source hexes which can trace a "Rail Line" at the moment the replacement is due to appear. Replacements may appear at any town or City within the above restriction, but may appear at a Major or Victory city only if it was controlled by the phasing player at the beginning of his current turn. The number of stacking points of replacements which may appear at any one such hex in a single turn is limited to the following maximums:
- Town hex - 2 stacking factors
- Minor city hex - 3 stacking factors
- Major city hex - 4 stacking factors
- Victory city hex - 6 stacking factors
- Map board-edge supply source - 6 stacking factors
11.9 Units may enter in excess of the restriction of stacking limits. Those units must be within stacking limits at the end of the friendly OMP. For the purposes of this rule (only), the stacking factor of any unit is considered to be 2 greater than its printed stacking factor if its entry point is on the opponent's side of the 1941 border. All mechanized units, shock infantry and front units which appear as replacements also have 2 added to their stacking factor for the purpose of this rule, wherever they appear, and these two additions may be cumulative.
Soviet Replacements
11.10 The Soviet player receives one RF per month according to the following:
a) one RF per month for each factory unit emplaced and in production (either on its original city or evacuated to the east); plus
b) one RF per month for each Soviet Victory city under his control (including only one, not two, for Moscow); plus
c) from "Siberia":
- 1941 - 2 factors per month
- 1942 - 3 factors per month
- 1943 - 4 factors per month
- 1944 - 5 factors per month
- 1945 - 6 factors per month
11.11 The Soviet player may never bring into the game as replacements in any one player-turn more infantry-type units than he has garrison units currently on the board.
Axis Replacements
11.12 The Axis player receives the following RFs:
- 1941 - 2 factors per month
- 1942 - 4 factors per month
- 1943-1945 - 6 factors per month
11.13 In addition, the Axis player now receives ONE RF per month for each pair of Soviet Victory cities he controls (again counting Moscow as two).
11.14 The Axis player may never receive more RFs in any one month than the total number of Victory cities under his control at that instant.
SPECIAL: In his RRP of each April turn, in addition to any normal replacements, the Axis player may return to the game at no RF cost, one previously eliminated unit of either Hungarian, Romanian, or Italian nationality. A Hungarian unit may not be chosen if Budapest is currently under Soviet control, a Romanian unit may not be chosen if Bucharest is currently under Soviet control, and the Italian unit may not be chosen in 1944 or 1945.
Reinforcements
11.15 Reinforcements enter the game at no cost during the RRP of their own side's player-turn in the specified month. They begin undispersed and may move on their entry turn.
11.16 Like replacements, reinforcements may appear on town, city or map board-edge supply source hexes subject to the same rail-line and stacking restrictions in 11.8 and 11.9. 11.17 In addition to the above, reinforcements may also appear on any hex adjacent to a friendly-controlled Victory city and to which a rail line can be traced. In the absence of any city there, such a hex has the same stacking restrictions as a town.
Soviet Reinforcements:
- January 1942 - 1st and 2nd Shock (Sc) Armies
- February 1942 - 3rd Shock Army
- March 1942 - 4th Shock Army
- April 1942 - 5th Shock Army
- June 1944 - Polish 1st Army
Axis Reinforcements:
- May 1942 - Italian 8th Army
- February 1943 - 2nd SS Panzer Corps
Axis Ally Special Units:
11.18 In the Replacement Phase of the Axis player-turn, October 1943, the Italian 8th Army is withdrawn from the game and can never be replaced. If on the map board at the time, it is simply removed directly from its current location. If the Italian 8th Army is already eliminated, this rule is ignored.
11.19 The Hungarian 2nd Army is released in April 1942 unless a Soviet attack or retreat into Hungary occurs earlier. (See Section 5.5.11.)
12.0 THE SCENARIOS
12.1 Players of Sturm Nach Osten may either begin the game in 1941, when the campaign historically started, or at one of a number of alternative dates.
12.2 The victory conditions of Section 15.0 apply to all scenarios. Normally, any scenario is played from its start date through to May 1945 unless one player wins sooner. Players may, however, agree to an earlier finishing date and in this way a large choice of start dates and game lengths is available.
12.3 Each scenario is identified by its start date, and each has a "front line" associated with it, defining the boundary between the two sides as the scenario starts. The June 1941 boundary is the Russian border, the green dotted lines are the front lines for the two 1942 scenarios, the red dotted line is the 1943 boundary and the purple dotted line the 1944 boundary.
12.4 The Berlin garrison unit begins all scenarios on Berlin and the Zhukov Unit begins all scenarios in Moscow.
12.5 The combat factors referred to when defining a scenario's available forces are the weaker factors of Juggernaut units, the refitted factors of armor units, and the unfortified factors of all units. The defensive combat factors of factory and garrison units are not included in the totals; these are extra.
12.6 Juggernaut units of both sides begin all scenarios at their weaker combat strength. Those of the player moving first may, of course, flip over to their stronger side at the beginning of his first OMP, provided they are in supply.
12.7 Armor units of the player moving first begin all scenarios refitted; those of the player who sets up first begin unrefitted, unless otherwise specified.
12.8 Except where a scenario's special rules decree otherwise, both players may begin all scenarios with any units they wish in fortified status.
12.9 No factory unit may ever begin any scenario entrained.
12.10 The non-phasing player may declare "No Retreat" orders for his units in the first player-turn of any scenario.
12.11 For each scenario, the following are laid down:
(1) START DATE AND PLAYER MOVING FIRST. Since the Axis player-turn always comes first in each game-turn, scenarios which begin with a Soviet player-turn omit the Axis player-turn of that month.
(2) AVAILABLE FORCES. The number and size of combat units available to both sides is usually defined in terms of a total number of combat factors. Some scenarios, however, demand specific units. Players may never select units before their historical date of availability.
(3) SET-UP RESTRICTIONS. The areas within which both sides may set up their units are defined. Specific placement of some or all units may be demanded.
(4) SOVIET FACTORIES. The number and location of the Soviet player's factory units is laid down.
(5) SPECIAL RULES. At the start of any scenario, each side is assumed to control all Major and Victory cities on its own side of the front line boundary, except those to which it cannot trace a rail line.
12.12 The player whose player-turn is first in any scenario always sets up his units after his opponent has set up his. Units may be set up in enemy ZOC.
12.13 At the start of any scenario, both sides are assumed to have no accumulated replacements.
A. June 1941 - The Campaign Scenario
(1) This scenario begins with the Axis player-turn, June 1941.
(2) AVAILABLE FORCES: Both sides begin the game with just those combat units whose identity is underlined on the counter. There are 31 such Axis units and 20 such Soviet ones.
(3) SET-UP RESTRICTIONS:
Soviet: All Soviet units must be set up as listed in Appendix II.
Axis: The Hungarian unit sets up anywhere in Hungary, the Romanian units anywhere in Romania. Up to THREE stacking points of German infantry or mountain infantry may, at the Axis player's option, also set up in Romania. All other units may set up anywhere in Germany EXCEPT hex 0418 (Memel).
(4) SOVIET FACTORIES: All seven are set up as listed in Appendix II.
(5) SOVIET GARRISONS: All seven are set up as listed in Appendix II.
(6) SPECIAL RULES:
a) In June 1941, the Soviet player receives 6 combat factors of replacements, the Axis player 1. Normal replacement rules apply from July 1941 onward.
b) No Soviet unit may begin the game fortified.
B. May 1942 - The 1942a Scenario
(1) This scenario begins with the Axis player-turn, May 1942.
(2) AVAILABLE FORCES:
Soviet: Combat units of the Soviet player's choice totaling 72 combat factors, of which 14 must be armor and/or armored cavalry. Must include those units listed in Rule 3 below.
Axis: German combat units of the Axis player's choice totaling 90 combat factors, plus all Romanian, Hungarian, and Italian units.
(3) SET-UP RESTRICTIONS:
Soviet: The following units set up precisely as listed:
- 21st Inf - 3018
- 42nd Inf - 0308
- 2nd Shock Inf - 0309
All other Soviet units may set up anywhere on the eastern side of the 1942a front line boundary EXCEPT Sevastopol (3018), Leningrad (0308), and Kronstadt (0309).
Axis: Set up anywhere on the western side of the 1942a front line boundary.
(4) SOVIET FACTORIES: Moscow, Gorki, Tula, and Leningrad are emplaced on board, although Leningrad produces no RFs until a rail line can be traced to it. Stalino and Kharkov have been evacuated to the east and are in production, and Dnepropetrovsk has been eliminated.
(5) SOVIET GARRISONS: on Grozny, Moscow, Leningrad, Stalingrad and Sevastopol only.
(6) SPECIAL RULE: The weather in May 1942 is "Mud".
C. November 1942 - The 1942b Scenario
(1) This scenario begins with the Soviet player-turn, November 1942.
(2) AVAILABLE FORCES:
Axis: German combat units of the Axis player's choice totaling 100 combat factors, of which at least 24 must be armor, plus all Romanian, Hungarian, and Italian units. Must include those units listed in Rule 3 below.
Soviet: Combat units of the Soviet player's choice totaling 120 combat factors. Must include those units listed in Rule 3 below.
(3) SET-UP RESTRICTIONS:
Axis: The following units set up precisely as listed:
- Romanian 3rd Army - 2706
- Italian 8th Corps - 2508
- Romanian 4th Army - 3005
- Hungarian 2nd Army - 2208
- German 6th Army - 2804
- 14th Panzer Corps - 2804
All other Axis units set up anywhere on the western side of the 1942b boundary (the whole of the Kerch peninsula is now under Axis control).
Soviet: The following units set up precisely as listed:
- 2nd Shock Inf - 0309
- 42nd Inf - 0308
- 62nd Inf - 2904
All other Soviet units set up anywhere on the eastern side of the 1942b boundary EXCEPT Leningrad (0308) and Kronstadt (0309).
(4) SOVIET FACTORIES: Moscow, Gorki, Tula, and Leningrad are emplaced on board, although Leningrad produces no RFs until a rail line can be traced to it. Stalino and Kharkov have been evacuated to the east and are in production, and Dnepropetrovsk has been eliminated.
(5) SOVIET GARRISONS: on Grozny, Moscow, and Leningrad only.
(6) SPECIAL RULES:
a) The weather in November 1942 is "Good".
b) This scenario cannot end in December 1942; the December 1942 victory requirements do not apply.
D. June 1943 - The 1943 Scenario
(1) This scenario begins with the Axis player-turn, June 1943.
(2) AVAILABLE FORCES:
Soviet: Combat units of the Soviet player's choice totaling 140 combat factors.
Axis: German combat units of the Axis player's choice totaling 120 combat factors, plus the Hungarian 2nd and Romanian 4th Armies. The German 6th Army has been permanently eliminated and cannot be taken either initially or as a replacement.
(3) SET-UP RESTRICTIONS:
Soviet: Set up anywhere on the eastern side of the 1943 boundary. Units totaling at least 40 combat factors must be in Voronezh (2108) and/or in or adjacent to Moscow (1306). Units totaling at least 20 combat factors must be on hexes 1810 and/or 2010.
Axis: Set up anywhere on the western side of the 1943 boundary.
(4) SOVIET FACTORIES: Moscow, Gorki, Tula, and Leningrad are emplaced on board, although Leningrad produces no RFs until a rail line can be traced to it. Stalino and Kharkov have been evacuated to the east and are in production; and Dnepropetrovsk has been eliminated.
(5) SOVIET GARRISONS: on Grozny, Moscow, and Leningrad only.
(6) SPECIAL RULES:
a) The weather in June 1943 is "Mud". (This is not normally possible - it is peculiar to this scenario.)
b) Soviet units on or within two hexes of Kursk (1910) may not begin the game fortified.
c) After the set-up, but before play begins, the Axis player rolls one die for each of his armor units. A die roll of 1, 2, or 3 leaves the unit refitted; a die roll of 4, 5, or 6 means the units begin the game unrefitted.
E. June 1944 - The 1944 Scenario
(1) This scenario begins with the Soviet player-turn, June 1944.
(2) AVAILABLE FORCES:
Axis: German combat units of the Axis player's choice totaling 125 combat factors, plus all Hungarian and Romanian units. Must include at least 33 factors of armor, and all units listed in Rule 3 below. The German 6th and 17th Armies have been permanently eliminated, and cannot be taken either initially or as replacements.
Soviet: Combat units of the Soviet player's choice totaling 240 combat factors.
(3) SET-UP RESTRICTIONS:
Axis: The following German units set up precisely as listed:
- 2nd Army - 1218
- 4th Army - 1213
- 9th Army - 1315
- 16th Army - 0812
All other Axis units set up anywhere on the western side of the 1944 boundary.
Soviet: Set up anywhere on the eastern side of the 1944 boundary.
(4) SOVIET FACTORIES: Moscow, Gorki, Tula, and Leningrad are emplaced on board, Stalino and Kharkov have been evacuated to the east and are in production, and Dnepropetrovsk has been eliminated.
(5) SOVIET GARRISONS: on Grozny, Moscow, and Leningrad only.
(6) SPECIAL RULES: none.
13.0 OPTIONAL LENINGRAD RULE
When determining supply for Soviet units, if any active Factory unit is in Leningrad (0308), the capacity of Siege supply of Leningrad is increased from 6 to 9, even if Leningrad cannot trace a rail line to the friendly supply source map edge.
14.0 STRATEGIC OPTIONS
14.11 The strategic options are variations reflecting historical possibilities which did not actually occur. All of the options apply only to the Campaign Scenario, except Option 14.8 (Partisans) which can be used with the 1942a Scenario as well.
14.12 Before setting up the game, players should agree which of the strategic options may be used. It is strongly recommended that the use of option 14.7 at least is permitted.
14.13 Options 14.2, 14.3, 14.4, 14.5, and 14.6 are referred to as the "start options" because their use must be declared before the game begins. Options 14.7 and 14.8 are known as the "playing options" as they are introduced during the game. Each player may select at most one start option and one playing option. The Soviet player declares whether he is using any of options 14.2, 14.3, or 14.4 and sets up all his units before the Axis player has to decide whether he is using either of options 14.5 or 14.6.
14.14 In some cases, use of a strategic option may alter the game length and victory conditions, those of Section 15 being modified as follows:
a) If the Soviet player elects to use option 14.2, 14.3 or 14.4, the game automatically end after the December 1941 game-turn. If either player controls 9 Victory cities (counting Moscow and Berlin as 2 each) at the end of his opponent's player-turn in this month, he wins; otherwise the game is a draw.
b) If the Axis player elects to use option 14.8, the victory conditions of Section 15.0 apply as normal except that any Axis win counts instead as a draw; the Axis player cannot win after using this option.
The above options modify victory conditions only if they are actually used, not if they are merely permitted. Options 14.5, 14.6, and 14.7 leave the victory conditions of Section 12.0 unaltered.
14.2 Free Soviet Set-Up
14.21 Instead of setting up as listed in Appendix II, all Soviet combat units which begin the Campaign Scenario on the map board may be set up as the Soviet player wishes on any hexes within the 1941 Russian borders. Factory units, Garrison units, and the Zhukov marker must still be set up as listed in Appendix II.
14.3 The Stalin Line
14.31 This option supposes that construction and activation of the Stalin Line fortifications had been completed by the out-break of hostilities, and its use is the only circumstance in which this terrain feature has any effect on the game; otherwise it is ignored.
14.32 The Soviet 21st, 22nd, 24th, 26th and 27th Armies plus Ms and Od Armored Unit are removed from the 1941 Soviet available forces (all may be used as replacements later), and the remaining 1941 Soviet combat units may be set up as the Soviet player wishes on any hexes within the 1941 Russian borders. Factory units, Garrison units, and the Zhukov marker must be set up as listed in Appendix II.
14.33 The Stalin Line hexsides benefit only the Soviet player, and only when Axis units are approaching or attacking from the western side. Their effect is identical in all respects to that of a river, except:
a) they never "freeze";
b) no Axis unit may ever move directly from one hex in Soviet ZOC to another in an eastwards direction across a Stalin Line hexside.
14.34 Where the Stalin Line runs along a river hexside, their effects are cumulative.
14.35 The Stalin Line never impedes Soviet movement or combat.
14.4 Modernization of the Red Army
14.41 This option supposes that the pre-war modernization of the Red Army had not been curtailed, and that all Tank and Guards Armies were immediately available.
14.42 The Soviet player may select any Soviet combat units (not counting factory and garrison units) he wishes, except Shock Armies, totaling 85 combat factors, for his initial set-up. At least 20 factors must be armor and/or armored cavalry units. These units may be set up as the Soviet player wishes on any hexes within the 1941 Russian borders, with the restriction that every hex adjacent to the border must be covered either by a Soviet combat unit or its ZOC. Factory units, Garrison units, and the Zhukov marker must be set up as listed in Appendix II.
14.43 All Soviet combat units are immediately available for selection as replacements, except the five Shock Armies which appear in the normal way and cannot be taken as replacements before then.
14.5 May 1941 - The "Conservative" Axis Invasion
14.51 Both this and the next option deal with the possibility of an Axis attack on the Soviet Union a month earlier, in May 1941. Here it is assumed that the Axis invasion of the Balkans is proceeding at the same time.
14.52 If the Axis player elects to use this option, the Campaign Scenario begins in May 1941. The Axis player receives 1 RF in May 1941, the Soviet player 3 factors. Normal replacement rules apply from June 1941 onward.
14.53 The Soviet 21st and 22nd Armies begin the game dispersed.
14.54 The German 1st Panzer Army begins the game refitted, but in a dispersed condition in or adjacent to Lodz (hex 0924).
14.55 One die is rolled for weather; a roll of 1-3 gives May 1941 "Good" weather, a roll of 4-6 gives it "Mud".
14.6 May 1941 - The "Daring" Axis Invasion
14.61 This option supposes that Hitler has abandoned the Balkan invasion in favor of an earlier attack at full strength on the Soviet Union.
14.62 If the Axis player elects to use this option, the Campaign Scenario begins in May 1941. The Axis player receives 1 RF in May 1941, the Soviet player 3 factors. Normal replacement rules apply from June 1941 onward except that Axis monthly RF production rate is reduced to: 1941: 1 factor, 1942: 2 factors, 1943: 3 factors, 1944: 4 factors, 1945: 5 factors.
14.63 The Soviet 21st and 22nd Armies begin the game dispersed.
14.64 All units normally available to the Axis player in June 1941 are included in his May 1941 set-up.
14.65 One die is rolled for weather; 1-3 gives May 1941 "Good", 4-6 gives it "Mud".
14.7 The Siberian Reserves
14.71 The five Soviet Shock Armies are collectively titled the Siberian Reserves. The Soviet player may elect to bring them into the game sooner than scheduled by the risk of facilitating a Japanese invasion of Siberia (off-board) to the East.
14.72 The Soviet player may choose to start the entry of his Siberian Reserves in any turn from June to December 1941. When he chooses to commence their arrival, the order of appearance is the same - 2 in the first month and 1 in each of the three subsequent months.
14.73 At the beginning of the Soviet player-turn in which he chooses to start the arrival of the Siberian Reserves, and at the beginning of each subsequent Soviet player-turn through to December 1941 inclusive, a single die is rolled. On a die-roll of "1" the Japanese invasion of Siberia occurs, with the following consequences:
a) Soviet replacement production is 2 factors per month less than normal for the remainder of the game, and
b) the Soviet player loses the next 30 factors of replacements to be produced.
c) Shock Armies yet to appear may have their entry canceled, if the Soviet player so chooses, in which case their combat factors are deducted from the deficit.
Once the Japanese invasion has occurred, the relevant die-roll is discontinued.
14.74 Unless previously introduced under this option, the Siberian Reserves begin to arrive in January 1942 with no risk of any penalty.
14.8 Partisans
14.81 There are no partisan units in the game. Their effect is "factored-in" to Axis production. This option hypothesizes that the Axis is able to contain the Partisan threat.
14.82 The Axis player may choose to implement this option at the beginning of his player-turn in any clear-weather month up to the end of 1942. Once implemented, the option remains in force for the rest of the game.
14.83 From the turn it is implemented to the end of the game, this option has the effect of giving the Axis player 3 extra RFs each month for each pair of Soviet Victory cities he controls. However, the Axis player cannot win the game if he employs this option; a normal Axis win would instead end the game as a draw.
15.0 VICTORY CONDITIONS
15.1 Victory depends on control of a certain number of the fourteen Victory cities listed in Appendix I. Each player checks whether he has achieved victory at the end of his opponent's player-turn in each December game-turn, and also in the May 1945 game-turn. These are known as the five Victory Determination Turns (VDTs), and the game can only be won in one of these five turns.
15.2 Players check the number of cities under their control at the end of their opponent's player-turn in each VDT, and compare this with the number indicated in their own column of the Victory Requirements Table for that turn. If either player controls as many or more Victory cities than indicated, he wins the game immediately at that point. If neither player reaches the required target, play continues.
15.3 If neither player reaches their required number of Victory cities for the May 1945 turn, the game is a draw.
15.4 For the purpose of counting Victory cities, Berlin and Moscow count as the equivalent of two each. For example, the Axis player could win in December 1941 by controlling Berlin, Moscow, and any six other Victory cities at the end of the Soviet player-turn.
15.5 Each Soviet factory unit eliminated (not, of course, those evacuated to the east by the Soviet player) counts as 1/2 VP for the Axis Player.
15.6 VICTORY REQUIREMENTS TABLE
| Turn | Axis | Soviet |
|---|---|---|
| December 1941 | 10 | 8 |
| December 1942 | 12 | 6 |
| December 1943 | 10 | 8 |
| December 1944 | 7 | 11 |
| May 1945 | 3 | 14 |
15.7 Players may elect to play a shortened version of any scenario by deciding in advance to end the game no later than an agreed December VDT. If neither player has achieved victory by this point, the game is a draw. The November 1942 scenario, however, may not be ended in December of the same year!
15.8 For victory determination purposes only, Warsaw is considered Soviet-controlled only if currently occupied by the Polish 1st Army unit. For all other purposes Warsaw is controlled in the normal way.
14.9 These victory conditions do not necessarily apply when any of the Strategic Options of Section 13 are being utilized. They may be modified or superseded as described in that Section. (As printed; the strategic options are Section 14.0 in this file.)
APPENDIX I VICTORY CITIES
In Axis Territory: Berlin* (0327), Vienna (1130), Prague (0729), Budapest (1428), Bucharest (2425), Warsaw+ (0922)
In the Soviet Union: Moscow* (1306), Leningrad (0308), Kiev (1816), Sevastopol (3018), Rostov (2911), Stalingrad (2804), Voronezh (2108), Grozny (3907)
* For the purposes of victory determination and German replacements Berlin and Moscow each count as the equivalent of two Victory Cities.
+ For victory determination purposes only, Warsaw is considered Soviet controlled only if currently occupied by the Polish 1st Army unit.
APPENDIX II SOVIET SETUP; JUNE 1941
Infantry and armor (hex):
- 3rd Inf - 0919
- 4th Inf - 1120
- 5th Inf - 1321
- 6th Inf - 1422
- 8th Inf - 0518
- 9th Inf - 2321
- 10th Inf - 0920
- 11th Inf - 0718
- 13th Inf - 1017
- 16th Inf - 1816
- 18th Inf - 2020
- 19th Inf - 2214
- 20th Inf - 1211
- 21st Inf - 1514
- 22nd Inf - 0911
- 24th Inf - 1107
- 26th Inf - 1523
- 27th Inf - 0515
- Kiev Armored Unit (Ki) - 1520
Factory Units (7): Dnepropetrovsk - 2414; Gorki - 1501; Kharkov - 2211; Moscow - 1306; Stalino - 2611; Leningrad - 0308; Tula - 1607.
Garrison Units (7): Grozny - 3907; Kiev - 1816; Leningrad - 0308; Moscow - 1306; Rostov - 2911; Sevastopol - 3018; Stalingrad - 2804.
Zhukov Unit: Moscow - 1306.
APPENDIX III OPTIONAL RULES
(Listed in the rulebook index, but no Appendix III text appears in this file. The entry is noted here rather than reconstructed.)
Transcriber's Notes
These notes record where this transcription departs from the printed text of the source PDF, or where the source is incomplete.
- Scope: this file is a community rewrite of the Advanced Game rules, not an official publisher document. The Basic Game rules are not included, and the text refers to Basic Game counters and sections that are not reproduced here.
- Section 1.0 is printed as "1.0 SEQUENCE OF PLAY" on its page, although the printed index lists it as 2.0. The page heading is used.
- The cross-reference "Section 5.1.4" in rule 5.1.4 is printed as a self-reference; it has been read as the Movement Bonuses section (5.3).
- The cross-reference "Section 4 - Weather" in rule 5.1.6 is printed as Section 4; it has been read as Section 6.0 (Weather).
- Rule 3.2.4 is unnumbered in the source (the paragraph is marked "4."); it is numbered 3.2.4 here.
- Rule 5.1.6 reads "enemy combat with" in the source; it has been transcribed as "enemy combat unit".
- Rule 5.2.3 c) reads "only if meets"; transcribed as "only if it meets".
- Rule 3.3.3 repeats the phrase "who last controlled by the player who last controlled"; transcribed as printed.
- Rule 7.3.8 is printed as "7.4.8" in the source, directly after 7.3.7; numbered 7.3.8 here.
- The retreat, dispersal and advance paragraphs of 7.7 are printed with numbers 7.7.1, 7.7.2 and 7.7.3, duplicating the numbering of paragraphs above them; they are marked with an "a" suffix here.
- Rule 10.1.12 and 10.2.5 do not exist in the source.
- Rule 14.9 refers to "Section 13" for the Strategic Options, which are Section 14.0 in the source; transcribed as printed with an in-line note.
- Appendix III (Optional Rules) is listed in the index but has no text in the source PDF.
- The Victory Requirements Table (15.6) is printed as a grid; it is transcribed as a table with the values in the printed order (Axis, then Soviet).
- The Design Credits block at the end of the file is omitted.
- The Index page is omitted; it duplicates the headings of the body.