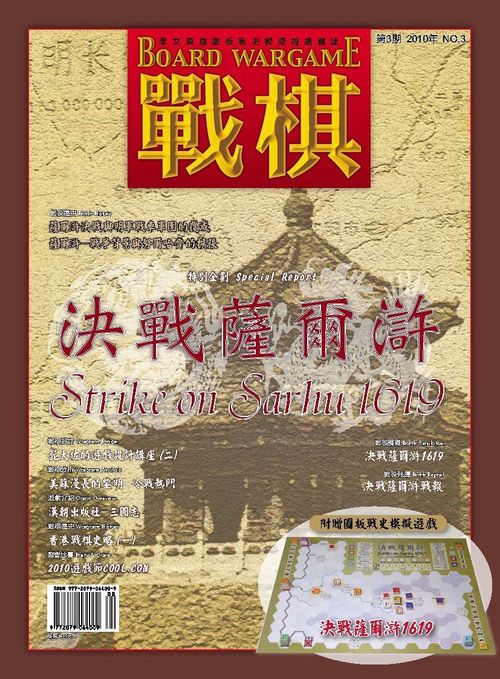
Strike on Sarhu 1619
Strike on Sarhu 1619 Rulebook
Table of Contents
Table of Contents
- 1.0 Introduction
- 2.0 Game Components
- 3.0 Game Setup
- 4.0 Sequence of Play
- 5.0 Command
- 6.0 Move
- 7.0 Combat
- 8.0 Victory Conditions
- 9.0 Special Rule
- 10.0 Variant Rule
1.0 Introduction
"Strike on Sarhu 1619" is a two player board wargame, simulating the historical battle of Sarhu that occurred in Northern China between March 1st to March 5th in 1619. "Strike on Sarhu" is played in Game Turn, each turn representing one day. Each hex represents approximately 5 to 10 kilometer across. Players assume the role of the Ming Chinese and Jurchen Commanders in the battle by controlling the counters of the Ming Chinese Army and the Jurchen Army.
Each player rolls two dice and adds the number of his Command units to determine the number of Action Points. The higher number of Action Points for both sides is available in this turn. They then alternatively use the action points for their Command units to activate combat units under that command for movement, combat, rally or pass. There are three types of combats, Firing (Fire), Charging (Charge) and Attacking (Attack).
The general rules of combat is both sides throw a die, add the applicable Tactical Value, the Combat Strength of all his combat units in that hex to derive his Total Combat Strength. The Total Combat Strengths are then compared to determine the Combat Result. Players have to choose the best combat type to maximize the combat effect as units activated by the same command can choose different types of combat. As a Command Unit can be activated several times in the same turn (depending on availability of unused action points, but a Command Unit cannot be activated by more than twice in a same turn without choosing a "pass" action for that command first) or even in the same Action Phase (but you can activate only one command in an Action Phase), it is possible for a commander to perform two actions before the enemy can react once per turn.
Players can seize the initiative by activating the right command at the right command to deliver a fatal blow to the enemy. The player that achieves the Victory Condition of the game at the end of 5th Turn is the Winner of the game. In the rulebook, Jurchen and Later Chin are used interchangeably.
1.1 Stacking
Commanders and Combat Units of both sides can stack together in the same hex. Stacking limits have to be observed at the end of movement or before announcing charges. The stacking rules for this game are printed on the Terrain effect chart as follows:
(1) Maximum stacking limit for both sides per "Pass" hex is 8 Combat Units and 1 Command Unit.
(2) Maximum stacking limit for both sides per "Fort" hex is 4 Combat Units and 1 Command Unit.
(3) Maximum stacking limit for both sides for other hexes is 2 Combat Units and 1 Command Units per hex.
1.2 Zone of Control, ZOC
The ZOC rules for this game are:
(1) All combat units have a zone of control ("ZOC") in its occupied hex only.
(2) Moving into an enemy Zone of control requires expending an additional Movement Point.
(3) Zone of control does not negate each other.
2.0 Game Components
"Strike on Sarhu 1619" contains the following components: One A2 size color game map, one sheet of 90 die-cut counters. You will need two 6 sided dices (not contained in the game) to play this game:
2.1 Map
The map shows the Liaodung Region of China in 1619. A hexagonal grid has been superimposed to regularize movement and combat. Combat units are place inside the hexes.
(1) The set up hex and entry areas of each Command are printed in different color on the map to facilitate set up.
(2) The turn track on the map is for recording the current turn number. Each turn represents one day.
(3) The Actions Points Track on the map is for recording the number of unused action points of both sides this Turn.
(4) The Player Aid Tables on the map provides players with useful game information.
(5) The number next to the set up area is the Turn number that command can be activated.
(6) 2 Orange hexes are controlled by Ming Chinese (Sarhu, Sianggia Ciff) and 3 yellow hexes (Jilin Cliff, Maldan, Abdaligun) are controlled by Jurchen with 1 victory point at the start of the game.
Example: The number inside the blue square on the right bottom of the map is three means Liu Ting Command can enter the map from there on or after Turn 3.
2.2 Terrain Effect
Refer to the Terrain Effect Chart (TEC) for the effect of terrain on movement and stacking limit.
(1) Move into Plain costs one Movement Point; Move into Hill or Mountain costs two Movement Points; Move into Pass or Fort costs two Movement Points and the units must stop.
(2) Elevation Change: Movement from a Plain hex to a Hill hex expends one additional Movement Point; Movement from a Hill hex to a Mountain hex expends one additional Movement Point; Movement from a Plain hex to a Mountain hex expends two additional Movement Points.
(3) Units cannot move across any River/Pole hex-side except at Bridge hexside (i.e. the small black bridge across the blue River hex-side)
(4) Terrain effect of river hex-side is negated if there is a Bridge symbol on that hex-side.
(5) Tactical Value of Combat Unit occupying a friendly hex is increased by 1 point (NOT one point per unit) for the side that control that hex (for control hex with a +1, i.e. Jilin Cliff, Sarhu, Sianggia Ciff,)/2 points (for control Pass/Fort with a +2, i.e. Tieling, Fushan Pass, Qinghebao, Yaku Pass, Hetuala , Malden, Abdaligun) for the side that control that hex (NOT two points per unit).
(6) When resolving combat in a Wood hex, the Tactical Value of a Chariot/Firearm Infantry Combat Unit is reduced by one while the Tactical Value of a Cavalry/Horse Archer Combat Unit is reduced by two.
(7) When resolving a Charge Attack from a Mountain hex to a hill/plain hex or a Hill hex to a plain hex, the attacker in the higher ground has a +1DRM to 1D6.
(8) When resolving a Charge Attack from a Hill/Plain hex to a Mountain hex or from a Plain hex to a Hill hex, the Tactical Value of the attacker in the lower ground has a -1DRM to 1D6.
2.3 Command Units (8: Ming Chinese x 4, Jurchen x 4)
(1) The back of the command unit shows that the command unit has been activated in a continued two actions in this turn.
(2) The blue number on the right of the Command Unit counter is its combat strength.
(3) There is no Movement Allowance for the Command Unit as an activated Command Unit can be placed on the same hex with any un-activated or activated Combat Unit of the same color at the end of the Action Phase in which it is activated.
2.4 Combat Units (59: Ming Chinese x 35, Jurchen x 24)
(1) The Combat units and Command units are printed in different color. Command Unit and Combat Units that have the same color belongs to the same troop. (There are four different troops for Ming Chinese and four different troops for Jurchen)
(2) Some Combat unit counters are printed on both sides (i.e. two steps). The front represents its full strength status and the back represents its reduced strength status. Taking a first step loss requires flipping the counter from its full strength side to its reduced strength side. Taking a second step loss will eliminate the unit and remove its counter from the map. If the Combat Unit is printed on one side only, taking the first step loss will eliminate the unit and remove it from the map.
(3) The number on the front side of the Combat Unit counter is its Combat Strength (CS). If the Combat Strength is printed in red, the combat unit can fire at enemy in the same hex or adjacent hex or attack enemy in the same hex. For Combat Unit whose Combat Strength is printed in black, they can only attack (but not fire) at enemy in the same hex.
(4) There are five types of combat units: Infantry, Cavalry, Horse Archer, Firearm and Chariot. Besides the silhouette, a unit type symbol has also been printed on top of the Combat Strength of the unit for ease of reference.
(5) The Movement Allowances for different Combat Units' types are: Three for Chariot Combat Unit; Four for Infantry/Firearm/Special Infantry; Seven for Cavalry and Horse Archer.
(6) The three special Infantry Units from Sichuan Province under Liu Ting's Command are used only when playing the Variant rules which will replace three Infantry Units
(7) Command Unit can only be used to activate Combat Units of the same color.
2.5 Markers (23)
2.5.1 Turn Marker (1)
If the Ming Chinese army is currently with initiative, the front of this marker should be placed on the turn track whereas the back of this marker should be placed there if the Jurchen army is currently with initiative. This marker also shows the current turn number. At the end of a game turn, the marker is advanced one box.
2.5.2 Control Marker (10: 1 Point marker, i.e. control marker with a +1 x 5; Blank marker, i.e. control marker without a +1 x 5)
(1) Control markers with 1 victory point are set up at the start of the game at the 5 hexes as follows: 2 Orange hexes are controlled by Ming Chinese (Sarhu, Sianggia Ciff) and 3 yellow hexes (Jilin Cliff, Maldan, Abdaligun) are controlled by Jurchen with 1 victory point at the start of the game.
(2) If a Ming Chinese's Strategic hex is solely occupied by Jurchen, flip the control marker to the Jurchen side. If a Jurchen Strategic hex is solely occupied by Ming Chinese, flip the control marker to the Ming Chinese side.
(3) If both sides have units in a hex, control of the hex does not changed.
(4) Tactical Value of Combat Unit occupying a friendly hex is increased by 1 point (NOT one point per unit) for the side that control that hex (for control hex with a +1, i.e. Jilin Cliff, Sarhu, Sianggia Ciff,)/2 points (for control Pass/Fort with a +2, i.e. Tieling, Fushan Pass, Qinghebao, Yaku Pass, Hetuala, Malden, Abdaligun) for the side that control that hex (NOT two points per unit).
2.5.3 Disorganized Marker (8)
(1) A disorganized counter is placed on a combat unit to indicate that the combat unit is disorganized.
(2) A combat unit with disorganized marker cannot initiate any charge or fire combat and its Combat Strength is halved (with all factions rounded down).
2.5.4 Action Point Marker (2: Front +0, Back +10)
(1) The marker is placed on the Action Points Track for recording the number of unused Action Points of that side.
(2) The game turn ends when the Action Points of both sides are zero.
2.5.5 Action Marker (2: Front "Move +1", Back "Move +2")
(1) Put this marker ("Move +1") on top of a command unit which has been activated once in this Action Phase.
(2) Flip this marker to its back ("Move +2") when activating the command unit for the second time in this Action Phase.
(3) A command unit can only be activated twice in a turn unless a pass action has been performed by that command unit which will remove the Action marker and flip it back to the front side.
3.0 Game Setup
The two players decide who will play as the Ming Chinese and Jurchen sides. We suggested that they sit on the eastern edge and the western edge of the map for ease of reading the information on the map:
(1) Put the game turn marker on box 1 of the Turn Track (on the map).
(2) Put a Ming Chinese Control marker in each of the following hexes: Fushun Pass, Qinghebao, Yaku Pass, Tieling, Sianggia Cliff (1 point), Sarhu Hill (1 point).
(3) Put a Jurchen Control marker in each of the following hexes: Jilin Cliff (1 point), Malden (1 point), Hetuala, Abudaligun (1 point).
(4) Put the disorganization markers and action points markers within reach of both players.
(5) Put the Action Points marker of both sides on the "0" box on the Action Points Track.
(6) Set up the Ming Chinese Command Units and Combat Units according to their color. i.e. All the nine Orange Units (Du Song Command) at Funshun Pass, all the nine Green Units (Lee Ru Bai Command) at Yaku Pass, all the nine Pink Units (Ma Lin Command) at Tieling, all the nine Light Blue Units (Liu Ting Command) off-map.
(7) Set up the Jurchen Infantry and Firearm according to their color. i.e. two Red Infantry Units in Jilin Cliff, two Yellow and two White Infantry Units in Malden, two Blue Infantry Units in Abudaligun.
(8) Set up the Jurchen Cavalry and Horse archer according to their color in Hetuala or adjacent to Hetuala as follows: five Nurhaci (Gold) units at Hetuala, five Hungtaiji (White) units in the two white hexes northwest and southwest of Hetuala, Daisan (Red) in the two red hexes north and northeast of Hetuala, five Manguertai units (Blue) in the two blue hexes south and southeast of Hetuala.
4.0 Sequence of Play
The game has five turns. In each turn, there are two phases:
4.1 Preparation Phase
(1) Advance the turn marker on the turn track by one box (starting from Turn 2).
(2) Flip all Command Unit counters so that the front side is facing up (starting from Turn 2).
(3) Remove all disorganization markers (starting from Turn 2).
(4) Both sides roll two dices and add the number of Command Units to the dice roll to calculate the result. The player with the highest result decides which side has the initiative. In case of tie, the Jurchen player moves first. However, the Ming Chinese Player automatically moves first in the 1st Turn.
(5) Both players get a number of Actions Points equal to the above highest result and place the Action Points markers on the Action Points track accordingly.
4.2 Action Phase
The Players alternatively conduct their Action Phases with the Initiative Player for this turn conducts his Action Phase first. Then the other player conducts his Action Phase. The first player then conducts his Action Phase again and so forth until both Player have run out of their Action Points. (Note that choosing a Pass Option will expend one Action Point). Possible actions in the Action Phase include:
4.2.1 Move
Spend one Action Point to activate a Command Unit for a movement. It will also activates all Combat Units with the same color of the activated Command Unit which are in or adjacent to either the activated Command Unit or another activated Combat Unit with the same color. All such activated Command Unit and Combat Unit can move once.
4.2.2 Combat
Spend 1 Action Point to activate a Jurchen Command Unit (2 Action Points are required to activate a Ming Chinese Command Unit) for a combat. It will also activate all Combat Units with the same color of the activated Command Unit which are in or adjacent to either the activated Command Unit or another activated Combat Unit with the same color. All such activated Command Unit and Combat Unit can initiate one combat.
4.2.3 Rally
Spend two Action Points to activate a Command Unit. It will also activate all Combat Units with the same color of the activated Command Unit which are in or adjacent to either the activated Command Unit or another activated Combat Unit with the same color. All such activated Command Unit and Combat Unit can remove the disorganization markers.
4.2.4 Pass
Spend one Action Point and Passes. This removes the Action Marker on the Command Unit. This will allow a Command Unit that has already been activated consecutively twice earlier in the turn to remove the Action Marker and to become eligible for activation again later in the Turn by expending Action Points.
5.0 Command
(1) Command distance: All Combat Units with the same color of the activated Command Unit which are in or adjacent to either the activated Command Unit or another activated Combat Unit with the same color are said to be within Command distance.
(2) An activated Command Unit can activate all Combat Units with the same color of the activated Command Unit which are within Command distance to perform one of the following action: Move, Combat or Rally. Only one type of action can be performed for all these units.
(3) A Command Unit can do continuous two actions without turning to his opponent's action phase once per turn. Flip the Command Unit to its back after finishing his two actions. All Command Units with its back facing up are flipped over to its front at the start of next turn.
(4) Combat Unit cannot be moved if it is out of command distance at the instance the command is activated (i.e. before any unit of this command is moved).
5.1 Order of Battle
The diagram shows the Historical Order of Battle. Each Command Unit can only activate Combat Units of the same color.
6.0 Move
Every combat unit in the game has a Movement Allowance which is the number of movement points ("MP") available to the unit to move across the hex grid of the map. Unit moves from hex to adjacent hex, expending variable costs to do so, depending on the terrain in the hex being entered. MPs may not be accumulated from turn to turn, nor may they be loaned from one unit to another. A player may move, all, some or none of his activated units, as he chooses. Units that move are not required to expend all their available MPs before stopping. The movement of each individual unit or stack must be completed before that of another is begun. A player may only change the position of an already moved unit or stack if his opponent allows it. Movement Allowance is expended when a unit moves from hex to hex.
(1) Stacking limits applies at the end of Movement.
(2) One additional movement point is expended for moving into an enemy Zone of Control.
(3) No additional movement point cost for leaving an enemy Zone of Control.
(4) Units on the map cannot leave the map.
(5) There is no Movement Allowance for the Command Unit as an activated Command Unit can be placed on the same hex with any un-activated or activated Combat Unit of the same color at the end of the Action Phase in which it is activated.
6.1 Terrain Effect
(1) Movement into Plain costs one Movement Point; Movement into Hill or Mountain costs two Movement Points; Movement into Pass or Fort costs two Movement Points and the units must stop without any further movement this turn.
(2) Elevation Change: Plain hex to a Hill hex expends one additional Movement Point; Movement from a Hill hex to a Mountain hex expends one additional Movement Point; Movement from a Plain hex to a Mountain hex expends two additional Movement Points. Cavalry and horse archers cannot move from a Plain hex to mountain hex at any time within the same Action Phase.
(3) Units cannot move across any River/Pole hex-side except at Bridge hex-side (i.e. the small black bridge across the blue River hex-side). Terrain effect of river hex-side is negated if there is a Bridge symbol on that hex-side.
Example: refer to the diagram for the various movement cost for moving into different hexes. Movement cost for moving into hill hex is two MP, but it cost one additional MP to move from plain into hill hex. Therefore, the total MP cost for moving into the hill is 3MP.
7.0 Combat
(1) There are three types of combat: Fire (F), Charge (C) or Attack (A). When conducting Combat Action for a command, each activated Combat Unit of that command can choose only one of the above combat type against an enemy in range.
(2) Some of the counters of the Combat Units are printed on both sides. These Combat Units have two steps. When the front of the two steps Combat Unit is facing up, it is in full strength. Should a combat result calls for one step loss, either a two steps Combat Unit is flipped over with its back is facing up or a one step Combat Unit must be eliminated to satisfy the loss. Should a combat result calls for two steps loss, either eliminate a two steps Combat Unit or reduce two full strength two-steps Combat Units by flipping both of them to its back, etc.
(3) At the end of a combat, if only the Command Unit remains in a hex, it is immediately moves to a hex with a Combat Unit of the same command.
7.1 Fire Combat
Chariots, Firearms and Horse Archers can choose to fire once at an enemy in the same hex or adjacent hex by performing this action.
(1) Each chariot counts as two units, each firearm/horse archer counts as one unit for firing purpose.
(2) To hit an enemy by fire combat, chariot and firearm: throw a die, add the number of units firing, +1/-1 (for firing down from a higher elevation/firing up from a lower elevation). If the sum of the above is 5 or more, one of the enemy is hit by the fire combat.
(3) To hit an enemy by fire combat, horse archer throw a die, add the number of units firing, +1/-1 (for firing down from a higher elevation/firing up from a lower elevation). If the sum of the above is 6 or more, one of the enemy is hit by the fire combat.
(4) A successful hit by fire combat will disorganize the enemy Combat Unit (if it is not yet disorganized) or cause the disorganized enemy Combat Unit to take one step loss.
(5) Combat Units from different hexes cannot combine together as a single fire combat.
(6) You can choose to fire Combat Units in the same hex either individually or as a total.
(7) There is no adverse result for the firing unit regardless of whether it hits the enemy.
Example: In the diagram, the Ming Chinese Firearms fire at the Jurchen Horse Archer Unit. It needs to roll 4 to 6 to disorganize its target. The Ming Chinese Chariot fires from a lower elevation at the Jurchen Horse Archer Unit. It needs to roll 4 to 6 to hit its target (as Chariot counts as two units for the purpose of firing). The two Jurchen Horse Archer Units fire together and need to roll 4 to 6 to hit (and disorganize) the Ming Chinese Firearm Unit, but if it fires at the Ming Chinese Chariot Unit, it only needs to roll 3 to 6 to hit (and disorganize) it.
7.2 Charge Combat
Cavalry and Horse Archer Combat Units can initiate a charge combat against adjacent enemy Combat Units not occupying a Pass or Fort hex. Stacking limits have to be observed during a Charge Combat.
(1) Each Cavalry/Horse Archer unit counts as one combat Unit.
(2) Moves the Cavalry/Horse Archer units into the enemy hex.
(3) To hit an enemy by charge combat, throw a die, add the number of units firing, +1/-1 (for firing down from a higher elevation/firing up from a lower elevation). If the sum of the above is 5 or more, an enemy is hit by the charge combat. If the sum of the above is 4 or less, the Charge failed.
(4) A successful charge combat will disorganize the enemy Combat Unit (if it is not yet disorganized) or cause the disorganized enemy Combat Unit to take a step loss.
(5) An unsuccessful charge combat will disorganize all the charging units.
(6) Command unit will move with the charging unit into the target hex.
(7) Combat units in different hexes cannot charge together as a single charge combat.
Example: In the diagram, the Ming Chinese Cavalry need to roll 5 or 6 to hit the Jurchen Horse Archers by charge combat. Since the Jurchen Horse Archers have a height advantage, they need to roll 2 to 6 to hit the Ming Chinese Cavalry by charge combat.
7.3 Attack
Activated Combat Unit can initiate an attack combat against enemy unit in the same hex. The activated attacking units are the attackers and the units being attacked are the defenders.
(1) Roll a die, add the sum of the combat strength of all units on your side + Tactical Value = Total Combat Strength.
(2) If the Total Combat Strength of the attacking units > the Total Combat Strength of the defending units, the attacking units win this Attack Combat. Otherwise, the attacking units lose this Attack Combat.
(3) If the Total Combat Strength of the Winning side ≧ the Total Combat Strength of the Losing side, the losing side loses one step. If the Total Combat Strength of the Winning side ≧ double the Total Combat Strength of the Losing side, the losing side loses two steps.
Example: In the diagram, if the Ming Chinese units initiate an attack combat against the Jurchen units and the Jurchen roll a 4, his Total Combat Strength is (4+4+1)/2+die roll = 4.5 + 4 = 8 (round off faction), then Ming Chinese has to roll 2 to 6 to win the Attack Combat as his Total Combat Strength before adding his die roll is (2+2+3)=7, his total Combat Strength after adding his die roll need to be greater than the Jurchen Total Combat Strength to win the attack combat and one of the Jurchen Unit need to take a step loss. In the same example, if Jurchen roll a 1 or 2 and the Ming Chinese roll a 5 or 6, then Ming Chinese has won the attack combat and the Jurchen has to take two step losses.
7.4 Tactical Value
(1) If you fight on a hex with your control marker, you will have a Tactical Value of +1 (for control the hex) or +2 (for control the Pass/ Fort).
(2) Each Chariot/Firearms units in forest suffer a -1 penalty to their combat strength. Each Cavalry/Horse Archer units in forest suffer a -1 penalty to their combat strength.
Example: In the diagram, the Total Combat Strength of Ming Chinese before adding his die roll is 2+(2-1)+(3-2)=4 while the Total Combat of Jurchen before adding his die roll is (4-2)+(4-2)=4.
7.5 Disorganized
The effect of disorganization is as follows:
(1) Unit with a disorganization marker has its combat strength reduced by half (rounded all factions off).
(2) Unit with a disorganization marker cannot initiate fire or charge combat.
(3) Disorganization markers are removed at the start of a new turn or when that command is activated and use a Rally Action.
(4) Disorganization markers remain with the units even if it moved and new disorganization markers are placed as necessary.
(5) When a unit with a disorganized marker enters a hex with other friendly units not disorganized, these friendly units are disorganized as a result of the movement.
(6) When disorganized combat units are attacked by the enemy's fire combat or charge combat and the combat is successful, it has to take a one step loss as it is already disorganized.
(7) For a hex with both a friendly control marker and disorganized friendly units (including command units and combat units), sum up the combat strength of all the command units and the combat units first, divide it by two and round off all factions before adding the Tactical Value for control markers.
Example: The Total Combat Strength of Ming Chinese is 7/2=3.5=3, the Total Combat Strength of Jurchen is 8/2 = 4.
7.6 Retreat Check
At the end of a combat, if all the friendly combat units in the same hex as a Command Unit are eliminated, the Command Unit is displaced to another hex with Combat Units of his same command (i.e. same color). However, if all the Combat Units of his command are eliminated, that Command is defeated and the Commanding Unit is removed from the map (i.e. retreated off-map).
At the end of any combat, if half or more of the Combat Units of a Command (i.e. 4 or more Combat Units are eliminated for a Ming Chinese Command; 3 or more Combat Units are eliminated for a Jurchen Command), retreat check should be conducted for that command:
(1) The owning player rolls one die, 1 or 2 will eliminate one of the Combat Units chosen by him (i.e. retreat and rout off-map), 3 to 6 will have no effect for the time being.
(2) For each additional combat unit of that command eliminated, a die is rolled again, 1 or 2 will eliminate one of the Combat Units chosen by him (i.e. retreat and rout off-map), 3 to 6 will have no effect for the time being.
Example: In the diagram, the Jurchen units at Jilin Cliff attack the Ming Chinese units there. The Total Combat Strength of the Jurchen units before rolling the die is: 1+4+4+1=10, the Total Combat Strength of the Ming Chinese units before rolling the die is 2+3=5. The Jurchen player rolls a 4 and the Ming Chinese player rolls a 2. Therefore, the Ming Chinese has to suffered 2 step losses for losing this combat. He has to eliminated the Cavalry Combat Unit in that hex to fulfill the 2 step losses combat result. Commanding Unit Du Song has to be displaced to other hex with orange Ming Chinese Combat Unit as he is a alone in that hex after combat.
8.0 Victory Conditions
There are three victory conditions and victory conditions are checked at the end of each turn:
(1) At the end of any turn, if Ming Chinese controls Hetuala or eliminated all the combat units of any two Jurchen troops, the Ming Chinese Player wins the game decisively.
(2) At the end of any turn, if Jurchen eliminated all the combat units of any three Ming Chinese troops, the Jurchen Player wins the game overwhelmingly.
(3) At the end of Turn 5, calculate the Victory Points of both sides by counting the number of friendly Control markers controlled by that side (just control markers with a +1 count as 1 Victory Point). The player with the higher Victory Points wins the game marginally.
(4) Should more than one of the above victory conditions are fulfilled by different players, the player who achieves decisive victory is the winner. Otherwise, the player who achieves overwhelming victory is the winner.
9.0 Special Rule
In 3rd turn, Light Blue Ming Chinese Liu Ting and all units under his command enters the map from the light blue hex on the lower right hand corner of the map as Ming Chinese reinforcement. They do not start the game on map.
10.0 Variant Rule
Substitutes three infantry units under Liu Ting's command with three Szechwan Infantry units. Note that the reduced side (i.e. back) of these three Szechwan Infantry Units are the same as that of their full strength side (i.e. front).