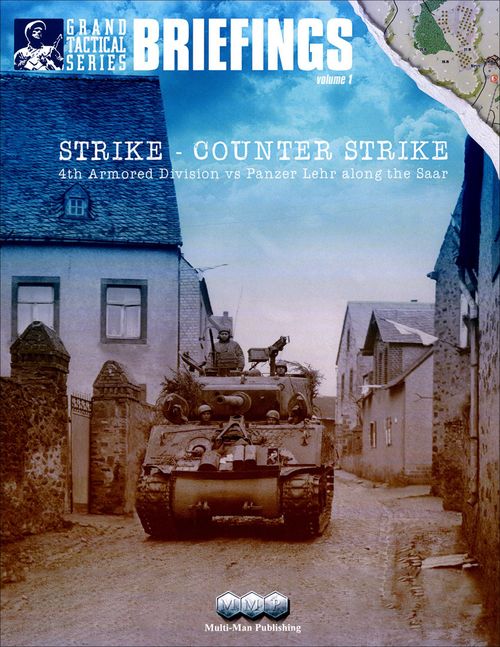
Strike: Counter Strike – 4th Armored Division vs Panzer Lehr along the Saar
Strike: Counter Strike – 4th Armored Division vs Panzer Lehr along the Saar Rulebook
Table of Contents
Table of Contents
Components
- Exclusive Rules and Scenarios
- 1 Map Sheet
- 2 1/2 Counter Sheets
- 2 Charts and Tables
STRIKE–COUNTER STRIKE uses the newest Grand Tactical Series (GTS) rules, version 2.0c, and the rules summary is also available for download from the publisher.
The STRIKE–COUNTER STRIKE Exclusive Rules make only minor modifications to the newest series rules to accommodate unique aspects of combat in the Saar Region in the fall of 1944. Any rule stated here takes precedence over any rule in the GTS Series rules but if it is not directly addressed here, the GTS Series rule is in effect.
Counter Symbols
The Unit counter symbols are shown on the inside cover of the Exclusive Rules book. The only Unit counter symbol that has any effect on the game is the engineer symbol. All other symbols are for historical interest only because the values, the colors of the values, and the colors around the values on the counters define all the other game functions.
The background color of each Unit counter shows to which "Division" the Unit belongs. The colors are light green (44th Infantry Division), olive drab (106th Cavalry Group), amber (4th Armored Division), dark grey (Panzer Lehr Division), and violet (401. Volks Artillerie Korps). The color band around the unit name designates the formation. Independent units have white or black bars around the unit name.
Exclusive Rules
1.0 Weather and Time
1.1 Weather
As in RACE FOR BASTOGNE, there are three things a commander cannot change: the weather, passage of time, and the terrain. The historical weather is provided below. If players wish the uncertainty of not knowing what the weather will be, optional Weather Rules are provided in Section O2.0.
For STRIKE–COUNTER STRIKE, Weather is divided into Cloud Cover (Clear or Overcast) and Conditions. Mud is added as a weather effect.
Cloud Cover:
- Overcast: No air strikes are allowed.
- Clear: Air Strikes allowed.
Weather Conditions:
- None: No effects on play.
- Rain: Minus two Fire Rating and Assault Rating modifier for all Units; maximum Line of Sight distance is two hexes; movement cost to enter a hex is increased by one unless a Unit is In Column and moving on a Road; no air strikes.
- Mud: The movement cost to enter Clear, Woods, and Orchard hexes for Wheeled Vehicles is increased by 1 and for Tracked Vehicles by 1/2 movement point.
The historical weather is:
| Date | 0700 | 0900 | 1100 | 1300 | 1500 | Night |
|---|---|---|---|---|---|---|
| 23 Nov | Overcast / Rain | Overcast / Mud | ||||
| 24 Nov | Overcast / None | Overcast / Rain | Overcast / Rain | Overcast / Mud | Overcast / Mud | Overcast / Rain |
| 25 Nov | Overcast / Mud | Overcast / None | Overcast / None | Clear / None | Clear / None | Clear / None |
| 26 Nov | Overcast / Rain |
1.2 Time and Night
The late fall days meant few daylight hours so the first daylight turn is 0700 and the Night Turn is the turn after the 1500 turn.
There is no movement penalty for Night.
The maximum Line of Sight distance at Night is 3 hexes.
Reduce the Fire Ratings and Assault Ratings of all Units by two (-2) at night.
No air strikes are allowed at Night.
Rain or Mud at Night combines the effects of both.
2.0 Terrain
There are two basic types of terrain in STRIKE–COUNTER STRIKE, in-hex terrain and hexside terrain features. Some values may have changed from earlier games in the system and there are some new terrain types. The Terrain Effects Chart included with the game has all movement costs as well as other aspects of specific terrain listed.
2.1 In-Hex Features
In-hex terrain is described in full below. Each in-hex type is defined by the color of the dot in the center of the hex. For example, if a hex has a green center dot, then it is a Woods hex.
If a hex does not have a center dot or portion of one, it is not playable; it does not affect Line of Sight nor may it be entered.
Play note: The map was drawn for realism so the terrain in certain hexes may not be obvious but the hex dot defines the type of terrain– even if that particular type of terrain isn't the prominent type displayed in the hex.
The in-hex terrain types are as follows: Clear (2.1.1), Woods (2.1.2), Village (2.1.3), Town (2.1.4), Orchard (2.1.5), Impassable (2.1.6).
2.1.1 Clear. Clear terrain has a white dot in the center of its hex and represents ground in which there is little or no cover. It is not blocking terrain and it does not modify the Fire Rating of Units firing into the hex.
2.1.2 Woods. Woods terrain has a green dot in the center of its hex and represents ground in which there is extensive forest cover.
Wheeled and Tracked Units cannot enter or exit a woods hex unless they are in Column and traveling along a Road or Railroad (in which case they pay the Road or Railroad movement cost). Woods are Blocking Terrain, and modify the Fire Rating of Units firing into the hex by -2. This modifier is ignored if the Fire Rating of the firing Unit is Brown, Orange, Green or Yellow.
A Wheeled or Tracked Unit in a Woods hex may not leave Column.
2.1.3 Village. Village terrain has a light brown dot in the center of its hex and represents a small number of buildings that provide limited cover. Villages are not Blocking Terrain and modify the Fire Rating of Units firing into the hex at Unarmored Units by -1.
2.1.4 Town. Town terrain has a brown dot in the center of its hex and represents significantly more buildings that provide cover and limit fields of fire. Towns are Blocking Terrain. A Town hex modifies the Fire Rating of Units firing into it by -2 against Unarmored targets and -1 against Armored targets.
Wheeled and Tracked Units cannot enter or leave a Town hex unless in Column but they may exit Column in a Town hex. Note that to leave the hex, such Units will have to reenter Column.
2.1.5 Orchard. Orchard terrain has a yellow dot in the center of its hex and represents extensive fruit orchards in the area. An Orchard hex is Blocking Terrain, and modifies the Fire Rating of Units firing into the hex at Unarmored targets by -1. This modifier is ignored if the Fire Rating of the firing Unit is Brown, Orange, Green or Yellow.
2.1.6 Impassable. Impassable terrain is solid gray and/or a hex with no dot. If an entire hex is impassable, it does not have a center circle; it cannot be entered by any Unit.
If only part of a hex is impassable, the impassable portion is a solid gray, meaning that no Unit can enter and/or leave the hex by passing over the impassable portion. An exception to this is if a Road is used to pass through impassable terrain, in which case a Unit using the Road legally can move through the impassable hex portion. Impassable hex portions are most commonly seen in hexes containing rivers. Impassable terrain has no effect on Line of Sight or fire combat.
2.2 Hexside Features
Hexside features are ones that have been abstracted and made to conform to a hex grid superimposed on the map. These features are considered to run across the length of the hex side if they are more than 50% the length of the side even if the symbol ends before the actual grid ends.
The hexside terrain types are as follows: Crest (2.2.1), Streams (2.2.2), River (2.2.3).
2.2.1 Crest. Crests are rises and falls in the ground large enough to block line of sight. They are most often caused by contours in the ground.
If a Line of Sight crosses a Crest hexside, that Line of Sight is blocked. The only exception to this is if either the spotting Unit or the spotted Unit is adjacent to the Crest hexside and no more than one Crest hexside has been crossed when drawing a Line of Sight between the two Units. (So, yes, LOS is blocked between two Units, both of which are adjacent to Crest hexsides.)
Crest hexsides have no effect on movement or fire combat (other than LOS).
2.2.2 Streams. Streams are thin blue lines that run along hexsides. A Leg Unit that enters a hex across a stream without using a Road pays 2 additional movement points if the Unit is not in Column, or 1 additional movement point if the Unit is in Column. Wheeled and Tracked Units may not cross-streams except when using a Road (and must of course be in Column to do so).
Streams modify the Fire Rating of Units Assaulting across a stream by -1.
Streams have no effect on Line of Sight.
2.2.3 River. Rivers are wide blue lines, and can only be crossed at bridges. There is only one river, the Saar River and it only has one bridge at hex 07.20.
Rivers have no effect on Line of Sight.
2.3 Roads and Railroads
Roads and railroads are special man-made features and are treated somewhat differently from other terrain.
The following are the various types of man-made transportation lines in the game: Roads (2.3.1), Railroads (2.3.2).
2.3.1 Roads. Roads allow Units in Column to move faster. Any Unit in Column that enters a hex along a road can do so for 1/2 movement point.
The Unit can decide not to use the road and instead pay the base terrain cost, as indicated by the circle in the center of the hex. A Unit not in Column, or not entering or exiting the hex along a road, must pay the base terrain cost.
Where two Roads share the same hex but do not cross, a Unit must pay the base terrain cost to go from one Road to the other. Roads have no effect on Line of Sight. Roads have no effect on combat.
2.3.2 Railroads. Railroads allow Units in Column to move faster. Any Leg unit in Column that enters a hex along a railroad can do so for 1/2 movement point. A Wheeled Unit in Column pays 2 movement points, and a Tracked Unit in Column pays 1 movement point.
The Unit can decide not to use the railroad and instead pay the base terrain cost, as indicated by the circle in the center of the hex. A Unit not in Column, or not entering or exiting the hex along a railroad, must pay the base terrain cost.
Where two railroads or a railroad and road share the same hex but do not cross, a Unit must pay the base terrain cost to go from one railroad to the other. Railroads have no effect on Line of Sight. Railroads have no effect on combat.
2.4 Bridges
The only Bridge in the game is across the Saar River at Romelfing (hexes 06.20-07.20). Note that the graphics on the map for roads that cross over streams are not considered bridges for the purposes of the following rules.
2.4.1 Crossing Bridges. A Unit must be in Column to cross a bridge, and the cost is the same as for normal movement. This means only one Unit can Assault across a bridge, and if a Unit not in Column is forced to run away, it cannot do so across a bridge.
2.4.2 Road Blocks and Bridges. Road Blocks cannot be placed in any hex that has a bridge hexside.
2.4.3 Line of Sight and Bridges. Bridges create a special Line of Sight situation. A Bridge is Blocking Terrain, but only if the Line of Sight actually passes through the Bridge graphic. For this purpose, a Bridge in the same hex as a target Unit or a firing Unit is never blocking terrain. In addition, a Line of Sight can pass through a hex with a Bridge as long as it does not cross the Bridge.
3.0 Sequence of Play
3.1 Adjustments to the Sequence of Play
- Step A) Determine Weather: Consult the Historical Weather Chart, unless using optional rule O2.0 Optional Weather Determination.
- Step B) Only the American Player has Airpower. The number of air strikes and turns they are received are determined as per special rule S2.0 American Air Support.
- Step F) is skipped in STRIKE–COUNTER STRIKE.
- Step J) Determine German Victory Points if it is a 1500 game turn.
There are no other changes to the GTS 2.0 Sequence of Play.
3.2 Adjusted Sequence of Play
A. Determine Weather. Consult the Historical Weather Chart, unless using optional rule O2.0 Optional Weather Determination.
B. Determine Airpower Availability. See special rule S2.0 American Air Support.
C. Place Reinforcements in Reinforcement Boxes.
D. First, if desired, buy Dispatch Points at a cost of 2 Command Points for 1 Dispatch Point. Spend Dispatch Points to buy Formation Activation Chits.
E. Create/Disband Artillery Parks. Attempt Contact with Leaders.
F. Skipped.
G. Put the eligible chits into the coffee mug.
H. Perform the Activation Phase.
I. Remove all barrage markers. Flip all Artillery Parks to Non-Fired sides.
J. If it is the 1500 turn, determine German Victory points. Move the turn marker up one turn box.
4.0 Land Mines
Note that the counter mix limits the number of Minefield markers.
4.1 Mine Placement
Engineers may place Land Mines as an Engineer Action. There is no roll to place them. Just declare that action and place a Minefield marker in the hex the Engineer occupies.
Only one Minefield marker may be in a hex. They can be placed in any hex the Engineer can legally enter. Mines only affect the enemy player. You may freely move through your own Mines.
4.2 Effect of Mines
A Unit must stop when entering a hex containing an enemy Minefield marker. If it wishes to leave the hex in a later movement, assault, or retreat out of such a hex (and only if actually leaving the hex - note that Assaulting Units only leave a hex after the successful completion of an Assault), it must pass a Troop Quality check to do so (and then pass any other Troop Quality checks needed). If the Unit fails, it stays in the hex and is Suppressed. This check is done before any Opportunity Fire and if the Units fails the minefield TQ check and is Suppressed, there is no Opportunity Fire. You may not spend a Command Point to ensure passing this check.
Assaulting a hex with a minefield in it, no matter which side the minefield belongs to, subtracts 2 from the defender's defense strength for the Bravery Check roll (only). Note that the hex being assaulted is the only one that receives this benefit. If you use a defense value of a Unit not in the hex being assaulted, the defense strength is not modified even if there is also a Minefield marker in the hex of the Unit whose defense rating is being used.
4.3 Removing Mines
To remove a Minefield marker, move an Engineer into the hex and in a subsequent activation, declare an Engineer action. If the Engineer is a 2-step unit, remove the Minefield marker if the Engineer action is completed.
For a 1-step Engineer, a die roll of 6 or less is needed to remove the Minefield marker. If the Engineer passes the die roll, remove the Minefield marker. If the Engineer fails the die roll, it may gain a Men at Work marker that applies to subsequent die rolls.
This process applies to both Enemy and Friendly minefields. Once you lay a minefield down, it takes a Friendly Engineer following these steps to remove it. Remember, in STRIKE–COUNTER STRIKE, the number of Minefields that can be placed is limited by the counter mix. If you want to remove a friendly minefield to use it someplace else, you have to have a Friendly Engineer to go through these steps. Mines removed by Enemy Engineers may not be reused.
If an Engineer leaves a hex containing an Enemy Minefield marker, it too must pass a Troop Quality Check or be suppressed.
5.0 Rearguards and Road Blocks
Sperre (plural Sperren) and Nachhut (plural Nachhuten) are the German words for Road Block and Rearguard and are treated exactly the same in the rules. They are created in the same way as in the Series Rules for Road Blocks and Rearguards. Exception: American 106th Cavalry Group may not deploy Rearguards.
The counter mix limits the number of Road Blocks and Rear Guards available to a player. These are absolute limits. Rearguards lost in combat may be reused again later in the game. Place any Rearguards eliminated in any way from the map back into the Available Rearguards box on their Division Display. They may be continually reused throughout the game.
6.0 Abandoned Transport
Whenever a Unit with Organic Transport enters a hex that the transport side could not legally enter, in Column or not, place an Abandoned Transport Marker on that Unit.
If a Player wishes a Unit with an Abandoned Transport marker to mount its organic transport, he must be able to trace a path from the Unit, traversable by its organic transport, to the nearest Road hex, then along a continuous path of Road hexes to the friendly board edge (north for the Germans, south for the Americans) or at least 10 hexes toward the friendly board edge. This path must be free of Enemy Units or Fire Zones. When it can do this, remove the Abandoned Transport Marker. This check is part of the Movement Action to Mount and the unit must be in terrain accessible by vehicles.
7.0 Special Rules
The following special rules are used in some scenarios. Each scenario will state which rules are to be used and if they are modified in any way.
S1.0 Random Events
During Step G of the sequence of play (when you put the eligible chits into the mug to be drawn this turn), put the Random Event chit into the Mug. If the Random Event chit is the last one left in the mug at the end of the turn, play it; it is not the first chit in play the next turn. Rather you draw randomly from the next turn's cup to see which chit is first.
Random Events occur when the Random Event Chit is drawn from the Mug. Roll one die to see what happens.
Roll of 0 or 1: No Event. Disregard and carry on with the war.
Roll of 2: Leader casualty. Roll a die to determine which side suffers a Leader casualty; odd is a German Leader, even (including 0) is an American Leader.
If it is a German Leader, the American player may pick a German leader and flip him over to his replacement side. If it is an American Leader, the German player may pick an American leader and flip him over to his replacement side.
A Leader already on his replacement side may not be selected. If there are no eligible leaders, then treat as no event.
If the reverse side is blank, remove the leader from the game.
Place any Contact markers on the leader back with the owning artillery units on their Contact Pending sides.
If the Leader's Formation Activation chit is in the cup, remove it from the cup. This only applies to the formation leader, not American Task Force Leaders. They are just removed from play.
Roll of 3: American Hero. The American Player may place an American Hero counter on any unit. This unit has all the modifiers on the Hero marker (+1 Fire, +1 Assault, +1 Troop Quality, and -1 on Defense). Remove any Cohesion Hits and/or Suppression that might be on this Unit. Cohesion Hits may be removed, even if the unit is in an enemy fire zone. Remove the Hero Marker the next time the Event Chit is drawn.
Roll of 4: German Hero. The German Player may place a German Hero counter on any unit. This unit has all the modifiers on the Hero marker (+1 Fire, +1 Assault, +1 Troop Quality, and -1 on Defense). Remove any Cohesion Hits and/or Suppression that might be on this Unit. Cohesion Hits may be removed, even if the unit is in an enemy fire zone. Remove the Hero Marker the next time the Event Chit is drawn.
Roll of 5: American Surrender. The German Player selects an American unit, adjacent to a German Unit and surrounded by German Units and/or German Fire Zones. The unit takes a TQ check. A Command Point may be spent to pass. If the unit passes, there is no effect. If the unit fails, it is eliminated. Other American Units do not negate German Fire Zones for this event. If no unit qualifies, treat as No Event.
Roll of 6: German Surrender. The American Player selects a German unit, adjacent to an American Unit and surrounded by American Units and/or American Fire Zones. The unit takes a TQ check. A Command Point may be spent to pass. If the unit passes, there is no effect. If the unit fails, it is eliminated. Other German Units do not negate American Fire Zones for this event. If no unit qualifies, treat as No Event.
Roll of 7: American Intelligence. The American Player may add 2 Command points and 1 Dispatch point to any one Division.
Roll of 8: German Intelligence. The German Player may add 2 Command points and 1 Dispatch point to his Division.
Roll of 9: Feldersatz Replacements. The German player may replace one step loss from any infantry unit not in a fire zone. A destroyed infantry unit may be placed back on the map in a Leader's hex (at one-step strength), as long as the Leader is not in a fire zone.
S2.0 American Air Support
During turns when the cloud cover is Clear, the American Player has the opportunity to have Air Support.
During step B. Determine Airpower Availability, if the cloud cover is Clear, the American player rolls one die and divides the result by 3 (fractions rounded down) to determine how many Air Support Markers he gets.
Place the available Air Support markers on one of the Divisional Displays. When that division's Activation Chit is drawn, the Air Support markers may be used to attack any German Unit anywhere on the map, at any point during the Division Activation.
Just place the number of Air Support markers you wish to use on the chosen target(s) and, after they have all been placed, attack a German Unit in that hex with a 5 White Fire Rating attack. Remember, as per the Series Rules, the only modifiers considered are the Direct Fire modifiers with positive values (that's right--no negative modifiers, even for entrenchments or Defense Rating!).
Each Air Support marker may only be used once per turn and no Air Support is allowed at Night or on turns when the Cloud Cover is Overcast. Air Support markers that are not used are removed at the end of each turn.
Air Defense: The German Player may attempt to make Air Support abort its strike mission before it completes its attack. Some Units have an Air Defense value (shown in a blue square below the Fire rating). This value has a range of 4 hexes. Each Unit with an Air Defense value, not in a Fire Zone or under a Barrage marker, and within range of a hex targeted by Air Support, may make an Air Defense roll for each Air Support marker.
If the German Player rolls the Air Defense value or less with one die, the Air Support aborts and does not attack. It is considered used and may not fly again.
S3.0 American Task Force / Team Commanders
Historical Note: American Armored Formations used Task Force/Team Leaders to extend command and control. This is particularly useful to the American player as he deploys his Combat Commands over a wide area.
Americans may use Task Force/Team Leaders. They may be placed with any of their formation units during the 4th Armored Division Activation when placing reinforcements.
Task Force/Team Leaders remain on the map and act just like any other leader.
Task Force/Team Leaders keep all Units within their command range "In Command" in order to do something that requires it to be In Command (e.g., perform a Second Action, spend a Command Point to pass a TQ Check), or that would be affected if the Unit was Out of Command (e.g., pass a Troop Quality Check). Units under command of a Task Force/Team Leader are still considered within the same formation for all functions.
Task Force/Team Leaders move like normal Leaders, i.e. they may transfer at the end of their Division or Formation Activation.
S4.0 Panzer Auf 130 Withdraw
Historical Note: The reconnaissance battalion of the Panzer Lehr Division, Panzer Auf 130, was withdrawn from the battle on 26 November and deployed to cover another threatened area.
The German player must move all the surviving units of Panzer Auf 130 off the northern edge of the map by the end of the 1500, 26 November game turn. For each surviving unit not exited, the German Player loses 3 Victory Points each turn.
11.0 Optional Rules
O1.0 Alternate Artillery Resolution
Historical Note: Research shows that a typical German Artillery battalion target zone was about 300m x 200m. For the British, a battalion barrage zone was 400 - 520 yards and a battalion concentration was about 300 yards x 300 yards. So essentially the fires zone for a battalion of indirect fires, which most of the artillery units are in GTS, is a hex. To eliminate artillery fire targeting specific units in a hex, players may wish to use this rule.
Indirect Fire from two-step HE Indirect Fire units always attacks the most vulnerable unit (highest defensive modifiers, including terrain and any markers). Consider modifiers less than zero for this determination. If there is a tie for the highest defensive modifiers, the Attacker chooses the target.
If the fire is effective, any other units roll the S? as per the GTS 2.0 Series Rules.
Indirect Fire from one- or zero-step HE Indirect Fire units only attacks one Unit in the hex, Attacker's choice, with no effect on any other Units, even if the target Unit takes effective fire (don't apply any S? result to other Units in the hex).
O2.0 Optional Weather Determination
Historical Note: Weather had a major impact in the battle, especially as rain and mud reduced mobility.
If players do not wish to use the historical weather, the following rules allow random weather generation. However, there is a chance for more or fewer "poor" weather turns that could affect game balance. Good Luck!
1. Cloud Cover. Roll a die each turn to determine the cloud cover for the turn, Overcast or Clear.
| Weather | Die Roll |
|---|---|
| Overcast | 0-5 |
| Clear | 6-9 |
Turn modifiers to the cloud cover die roll are:
- 0700 Turn: -3
- 0900 Turn: -2
- 1100 Turn: -1
- 1300 Turn: 0
- 1500 Turn: +1
- Night Turn: 0
Once the cloud cover is Clear, it remains clear for the rest of the day. There is no need to check again for the rest of the day.
On turns the cloud cover is Clear, the American Player receives Air Support as per S2.0 American Air Support.
2. Weather. To determine the weather each turn, consider the cloud cover and previous turn's weather.
If the cloud cover is Clear, the weather will be None or Mud based on the number of previous Rain turns. There is one turn of Mud for each previous Rain turn since the last Mud turn.
If the cloud cover is Overcast, roll to determine if the weather is Rain.
| Weather | Die Roll |
|---|---|
| Rain | 0-5 |
| None | 6-9 |
Modifiers:
- 23 Nov: -1
- 24 Nov: 0
- 25 Nov: +2
- 26 Nov: 0
- 27 Nov: +4
For every turn of Rain, a turn of Mud will follow if the result is None. There is one turn of Mud for each previous Rain turn since the last Mud turn.
O3.0 Roaming Mobile Units
Game Note: The following rule is suggested in order to keep highly mobile units from roaming around the battlefield in an ahistorical manner.
Anytime a Unit is more than twice the Command range from a Leader that can Command it, the Unit must make a Troop Quality Check before it conducts a Movement Action. If it passes, it may move normally. If it fails, it must move its full movement allowance to reduce the distance to a Leader that can Command it. It must reduce this distance as much as possible without entering an enemy fire zone.
12.0 Scenarios
General Comments
For the scenarios, please remember the following:
- All Units start at full strength, unless otherwise noted.
- Leaders stack with any of their Units at set up, unless otherwise noted.
- All Units may setup mounted or not, in Column or not (observing stacking limits) at the owning player's choice except when otherwise noted.
- Setup is the order the units are listed.
- Start with Step A of the Sequence of Play unless otherwise noted.
- No Indirect HE contact markers are placed at setup, unless otherwise noted.
- Reinforcements may arrive overstacked.
- Leaders arrive with any Unit of their Formation on the first turn a Unit arrives.
- The last chit drawn for a turn becomes the first chit in play the next turn, except when otherwise noted.
- The American 106th Cavalry Group dismounted cavalry troops may not deploy Rearguards.
- Units placed in a Reinforcement Hex that is within an enemy Fire Zone are considered in command. That means a command point may be spent on a second action to fire or move into an enemy Fire Zone. This is an exception to Series Rule 8.0 and otherwise the normal series rules apply. The series rule that moving out of a Reinforcement Hex does NOT trigger Opportunity Fire still applies.
Remember, the normal rule is: "One important restriction on reinforcements: you may not spend Command Points on them until they actually enter play. Reinforcement Units in entry hexes are considered Out of Command." The application of the normal rule is important for the initial entry of the Panzer Lehr Division.
In most of the scenarios Victory is determined by victory points awarded to the German Player for control of towns and villages. Control is determined by the last player to move through or occupy a hex. Award victory points to the German player for controlling towns and villages as per the following table (as indicated by red boxes on the map):
| Village or Town | Hex | Victory Points Awarded |
|---|---|---|
| Pisdorf | 14.05 | 1 |
| Burbach | 20.05 | 1 |
| Berg | 28.05 | 1 |
| Durstel | 34.07 | 1 |
| Wolfskirchen | 14.09 | 1/2 |
| Eywiller | 24.11 | 2 |
| Gungwiller | 28.09 | 1/2 |
| Drulingen | 13.12 | 1 |
| Postroff |
Setup and Reinforcement Formatting
As you can see, there has been a significant change to the formatting of the setup and reinforcement tables. These tables are now color-coded. The Unit's color band that shows the formation it belongs to is displayed as a box before the name of the Unit, and then background of the table shows the Division the Unit belongs to. (In this transcription the colors are not reproduced; each table is headed by its Division name and the units are listed under it.)
Scenario 1 (Learning Scenario): "Scholbach Schwerpunkt"
0700 - 1100, 25 Nov 1944
Description. With Combat Command B, 4th Armored Division slamming into the flank of Pz Gr Rgt 901, the Panzer Lehr Division attack started to stall. A final lunge by Pz Gr Rgt 902 against the 2d Battalion, 114th Infantry, near Scholbach proved to be the high point of the Panzer Lehr attack.
Scenario Map and Length. Use the area between hex columns 24.XX and 35.XX inclusive and between hex rows XX.15 and XX.23 inclusive. This scenario starts with Step H on 0700 25 Nov and ends when the last chit is drawn on the 1100, 25 Nov turn. The last chit is not played.
Setup
44th Inf Div (Dispatch Rating = N/A; Command Rating = 2; Start w/ 4 CP; 106 Cav Grp Attached)
| Units | Setup location | Notes |
|---|---|---|
| AC and Sct B / 106 Cav (2 Units) | w/in 2 hexes of 33.19 | |
| 2 / 114 Inf (4 Units); A / 776 TD; AT / 114 | w/in 4 hexes of 30.22 | Infantry units may set up in IPs |
| Artillery Park A with 217 and 242 FA BN | w/in 1 hex of 30.24 | Range from Artillery Park is +5 hexes. May start in contact with any American Leader |
Panzer Lehr (Dispatch Rating = N/A; Command Rating = 4; Start w/ 2 CP)
| Units | Setup location | Notes |
|---|---|---|
| 5. - 7., GrW 8., 9., and 10. PzGr Rgt 902 (6 Units); 5. 130 | In any hex along hex row XX.15 | |
| Artillery Park A with II. Pz Art 130 | 28.14 | Range from Artillery Park is +10 hexes. II. Pz Art 130 starts in contact with Pz Gr Rgt 902 Leader |
Chit Pull Cup. Place in cup for first turn: The American and German Direct Command Chits, 44th Infantry Division, and PzGr Rgt 902 Activation chits start in the Cup. The American Player may choose either the 106th Cav Grp or 114 Inf Rgt Activation chit to place in the cup.
The Panzer Lehr Division Activation Chit is the first one played and is treated as if it was drawn, i.e. roll for Command points normally.
Special Scenario Rules. Start with Step H. Perform the Activation Phase. German Units start on the map and are in Command. Dispatch points are not used. The German Player places the Pz Gr Rgt 902 activation chit in the cup each turn. The American Player may choose either the 106th Cav Grp or 114th Inf Rgt Activation chit to place in the cup each turn. If one of these formation chits is the last chit the previous turn and thus is the first played the next turn, the owning player does not add a formation chit to the cup.
Two Rearguards are available for the 44th ID. No other Rearguards, Road blocks, Nachhuten, Sperren, or Minefields are available in the scenario.
Victory Conditions. Victory Points are not awarded during the 1500 game turn. If the German Player controls Scholbach at the end of the scenario, he wins. Otherwise the American Player wins.
Special Rules in Effect. None
Scenario 2 (Fight Through the Screen Line): "Scouts Out!"
1500, 23 Nov - 0700, 24 Nov, 1944
Description. On America's Thanksgiving Day, 23 November 1944, the Panzer Lehr Division attacked, trying to recapture the Saverne Gap and cut off the XV Corps from its supply lines. The 106th Cavalry Group was screening the Corps northern flank. The Cavalry acted as a "crumple zone" for the Corps. They met the first waves of the attack, identified the axes of advance, inflicted casualties, and withdrew after buying some time for the infantry to deploy. Eventually the Cavalry was forced back, militarily credited with "completing a brilliant delaying action" that gave XV Corps enough time to reinforce and counter the German advance.
Scenario Map and Length. Use the whole STRIKE-COUNTER STRIKE Map. This scenario starts with Step H on 1500, 23 Nov and ends when the last chit is drawn on the 0700, 24 Nov turn. The last chit is not played.
Setup
44th Inf Div (Dispatch Rating = 1; Command Rating = 3; Start w/ 0 DP and 5 CPs; 106 Cav Grp Attached)
| Units | Setup location |
|---|---|
| AC and Sct B / 106 Cav (2 Units) | w/in 2 hexes of 15.16 |
| AC and Sct C / 106 Cav (2 Units) | w/in 2 hexes of 21.14 |
| AC and Sct A / 106 Cav (2 Units) | w/in 2 hexes of 24.11 |
| AC and Sct A / 121 Cav (2 Units); C / 776 TD | w/in 2 hexes of 34.07 |
| AC and Sct B / 121 Cav (2 Units) | w/in 2 hexes of 33.12 |
| D / 106 Cav | w/in 4 hexes of 24.11 |
| E / 106 Cav | w/ in 2 hexes of 16.18 |
Panzer Lehr (Dispatch Rating = 3; Command Rating = 5; Start w/ 2 DPs and 4 CPs). No units are listed in the setup table; the Panzer Lehr enters as reinforcements.
Reinforcements/Timeline. See the Master Reinforcement Schedule.
Chit Pull Cup. Place in cup for first turn: Event Chit, American and German Direct Command Chits, 44th Infantry Division, 901. and 902. Panzer Grenadier Regiment Activation chits.
The Panzer Lehr Division Activation Chit is the first one played and is treated as if it was drawn, i.e. roll for Command and Dispatch points normally.
Special Scenario Rules. Two Rearguards are available for the 44th ID. No other Rearguards, Road blocks, Nachhuten, Sperren, or Minefields are available in the scenario.
Victory Conditions. Victory Points are not awarded during the 1500 game turn. At the end of the scenario, award victory points as per the table in 9.0 Scenarios, General Comments. Round fractions down.
Additionally, at the end of the scenario, the German receives 1 Victory Point for each American Unit eliminated and loses 2 Victory Points for each German Pz 130 unit eliminated and 1 for each other German Unit eliminated. Rearguards do not count for awarding or losing Victory Points.
The number of German Victory Points determines the winner:
| Result | German Victory Points |
|---|---|
| German Victory | > 16 |
| Draw | 9 - 15 |
| American Victory | < 8 |
Special Rules in Effect. All Special Rules are in effect.
Scenario 3 (Main Battle): "Brawling"
0700, 24 Nov - Night, 25 Nov, 1944
Description. As the Panzer Lehr's initial attacks were starting to be blunted by the 44th Infantry Division a new threat to the attack appeared. The Saar River crossings through which CCB moved on the morning of 24 November lay approximately abreast of the forward points reached by the advance elements of Bayerlein's two columns. Bayerlein employed his strong eastern column to continue the main attack southward on the early morning of 25 November, at the same time turning his western column from its course in an attack toward Fenetrange designed to catch the American armor in the flank.
Scenario Map and Length. Use the whole STRIKE-COUNTER STRIKE Map. This scenario starts with Step H on 0700, 24 Nov and ends when the last chit is drawn on the Night, 25 Nov turn. The last chit is not played.
Setup
44th Inf Div (Dispatch Rating = 1; Command Rating = 3; Start w/ 1 DP and 5 CPs; 106 Cav Grp Attached)
| Units | Setup location | Notes |
|---|---|---|
| AC and Sct B / 106 Cav (2 Units) | w/in 2 hexes of 16.18 | |
| AC and Sct C / 106 Cav (2 Units) | w/in 2 hexes of 19.19 | |
| AC and Sct A / 106 Cav (2 Units) | w/in 1 hexes of 27.15 | |
| AC and Sct A / 121 Cav (2 Units) | w/in 2 hexes of 34.07 | |
| AC and Sct B / 121 Cav (2 Units) | w/in 2 hexes of 33.16 | |
| D / 106 Cav; E / 106 Cav | w/in 4 hexes of 20.14 | |
| 1 / 71 Inf (4 Units); AT / 71; Cannon / 71 | w/in 2 hexes of 13.22 | Infantry Units may set up in IPs |
| 1 / 114 Inf (4 Units) | w/in 5 hexes of 37.24 |
Panzer Lehr (Dispatch Rating = 3; Command Rating = 5; Start w/ 2 DPs and 2 CPs)
| Units | Setup location | Notes |
|---|---|---|
| 2. - 3., GrW 4., and IeIG 4. PzGr Rgt 901 (4 Units); 9. PzGr 901; 10. PzGr 901; 6. and 8. Pz 130 (2 Units); 1. Flak 311; I. PzArt 130 | North of hex row xx.16 between 12.16 and 23.16 (inclusive) | I. PzArt 130 may be placed in Artillery Park A, within the setup area, and In Contact with PzGr Rgt 901 Leader |
| PzGr Rgt 902 (10 Units); 5. and 7. Pz 130 (2 Units); II. PzArt 130 | North of a line from 23.15 to 38.07 (inclusive) | II. PzArt 130 may be placed in Artillery Park B, within the setup area, and In Contact with PzGr Rgt 902 Leader |
| V.A.K. 401 Artillery Park C with I. - IV. V.A.K. 401 (4 units) | 18.00 | Attached to Pz Lehr. Range from Artillery Park is +3 hexes. Units in contact with PzGr Rgt 901 or 902 Leader. Units may enter at hex 19.00 as Division Reinforcements |
Reinforcements/Timeline
| Game Turn | Unit | Reinforcement Hex | Notes |
|---|---|---|---|
| 0700 24 Nov | 5. - 7., GrW 8., IeIG 8., and Flak 8. PzGr 901 (6 Units) | 15.00 | |
| 0700 24 Nov | 1. and 2. Pz Pi 130 (2 Units) | 15.00 or 19.00 | |
| 0700 24 Nov | 2 / 71 Inf (4 Units); B / 776 TD | 17.27 | |
| 0700 24 Nov | 2 / 114 Inf (4 Units); A / 776 TD; AT / 114 | 38.26 | |
| 0700 24 Nov | Artillery Park A with 217 and 242 FA BN | 16.26 | Range from Artillery Park is +5 hexes. Units may enter at hex 15.27 or 17.27 |
| 0700 24 Nov | 4th Armored Division |
Chit Pull Cup. Place in cup for first turn: Event Chit, American and German Direct Command Chits, 44th Infantry Division, 4th Armored Division, 901. and 902. Panzer Grenadier Regiment Activation chits.
The Panzer Lehr Division Activation Chit is the first one played and is treated as if it was drawn, i.e. roll for Command and Dispatch points normally.
Special Scenario Rules. The German Player controls all towns north of his setup area.
All Rearguards, Road blocks, Nachhuten, and Sperren in the counter mix are available in the scenario. One American and two German Minefield markers are available.
Victory Conditions. At the end of each 1500 game turn, award victory points as per the table in 9.0 Scenarios, General Comments. Round fractions down.
Additionally, at the end of the scenario, the German gains 1 Victory Point for each American Unit eliminated and loses 2 Victory Points for each German Pz 130 unit eliminated and 1 for each other German Unit eliminated. Rearguards do not count for gaining or losing Victory Points.
The number of German Victory Points determines the winner:
| Result | German Victory Points |
|---|---|
| German Victory | >= 30 |
| Draw | 23 - 29 |
| American Victory | <= 22 |
Special Rules in Effect. All Special Rules are in effect.
Scenario 4 (4th AD attack): "They shall be known by their deeds alone"
0700, 27 Nov - 1500, 27 Nov, 1944
Description. Unlike most other U.S. Army divisions, the 4th Armored Division did not have an official nickname. When the Division Commander, Major General Wood was asked about one, he reportedly replied: "The 4th Armored Division does not need and will not have a nickname. They shall be known by their deeds alone."
By the 27th of November, the Third Army's 4th Armored Division was positioned to push north in the Saar River Valley against the Panzer Lehr. The 4th Armored Division committed two of its Combat Commands to break the Panzer Lehr line.
Scenario Map and Length. Use the whole STRIKE-COUNTER STRIKE Map. This scenario starts on 0700 27 Nov and ends when the last chit is drawn on the 1500, 27 Nov turn. The last chit is not played.
Setup
Panzer Lehr (Dispatch Rating = 3; Command Rating = 5; Start w/ 0 DPs and 3 CPs)
| Units | Setup location | Notes |
|---|---|---|
| PzGr Rgt 901 (12 Units); 6. and 8. Pz 130 (2 Units); 1. Flak 311; 1. and 2. Pz Pi 130 (2 Units); I. PzArt 130 | North of line of hexes from 12.09 to 17.12 and hex row xx.13 between 17.12 to 24.12 (inclusive) | I. PzArt 130 may be placed in Artillery Park A, within the set up area, and In Contact with PzGr Rgt 901 Leader |
| PzGr Rgt 902 (10 Units); 5. and 7. Pz 130 (2 Units); II. PzArt 130 | North of line of hexes from 25.13 to 38.06 (inclusive) | II. PzArt 130 may be placed in Artillery Park B, within the set up area, and In Contact with PzGr Rgt 902 Leader |
4th Armored Division (Dispatch Rating = 3; Command Rating = 5; Start w/ 2 DPs and 4 CPs)
| Units | Setup location | Notes |
|---|---|---|
| A, C, D, HHC / 8 / CCB (4 Units); 51 / CCB (4 Units); 22 Arm FA | w/in 2 hexes of 15.16 | TF Churchill Leader |
| 53 / CCB (4 Units); B / 8 / CCB; AC and Sct C / 25 Cav (2 Units); A / 704 TD; B / 24 Ar Eng; C / 489 AA | w/in 2 hexes of 21.16 | TF Jaques Leader |
| B, D, and HHC / 35 / CCA (3 Units); C / 10 / CCA; AC and Sct A / 25 Cav (2 Units); A / 24 Ar Eng; B / 704 TD; 66 Arm FA | w/in 2 hexes of 34.13 | TF Oden Leader |
| A, B and HHC / 10 / CCA (3 Units); A and C / 35 / CCA (2 Units); C / 24 Ar Eng | w/in 2 hexes of 28.15 | TF West Leader |
| Artillery Park A with 253 FA BN and 179 FA BN | South of hex row xx.15 | In Contact with CCB or CCA / 4 AD Leader |
| Artillery Park B with 217 FA BN and 242 FA BN | South of hex row xx.15 | 44th ID Artillery is under command of 4th AD. In Contact with CCB or CCA / 4 AD Leader |
Chit Pull Cup. Place in cup for first turn: Event Chit, American and German Direct Command Chits, Panzer Lehr Division, CCB / 4 AD and CCA /4 AD Formation Chits start in the cup.
The 4th Armored Division Activation Chit is the first one played and is treated as if it was drawn, i.e. roll for Command and Dispatch points normally.
Special Scenario Rules. German Infantry Units may be set up in IPs.
The German Player may deploy 2 Nachhuten, 1 Minen, and one Sperre within his setup area. All Rearguards, Road blocks, Nachhuten, Sperren, and Minefields in the counter mix are available in the scenario.
The German Player controls all towns north of his setup area.
Victory Conditions. Victory Points are not awarded during the 1500 game turn. At the end of the scenario, award victory points as per the table in 9.0 Scenarios, General Comments. Round fractions down.
Additionally, at the end of the scenario, the German gains 1 Victory Point for each American Unit eliminated and loses 2 Victory Points for each German Pz 130 unit eliminated and 1 for each other German Unit eliminated. Rearguards do not count for gaining or losing Victory Points.
The number of German Victory Points determines the winner:
| Result | German Victory Points |
|---|---|
| German Victory | >= 4 |
| American Victory | <= 3 |
Special Rules in Effect. All Special Rules are in effect.
Scenario 5 (Short Campaign Game): "Strike"
1500, 23 Nov - Night, 25 Nov, 1944
Description. The Panzer Lehr was rushed from the Netherlands to the Saar region to attack into the flank of the US XV Corps on 23 November to cut off the forces advancing east through the Saverne Gap. This thrust by a single understrength division was a risk and the gallant delay by the screening cavalry force and the quick reaction of 44th Infantry Division stopped the Panzer Lehr attack. It was the counterattack of the 4th Armored Division into the flank of the Panzer Lehr that brought the attack to a halt by 25 November.
Scenario Map and Length. Use the whole STRIKE-COUNTER STRIKE Map. This scenario starts with Step H on 1500, 23 Nov and ends when the last chit is drawn on the Night, 25 Nov turn. The last chit is not played.
Setup. Same as Scenario 2.
Reinforcements/Timeline. See the Master Reinforcement Schedule.
Chit Pull Cup. Place in cup for first turn: Event Chit, American and German Direct Command Chits, 44th Infantry Division, 901. and 902. Panzer Grenadier Regiment Activation chits.
The Panzer Lehr Division Activation Chit is the first one played and is treated as if it was drawn, i.e. roll for Command and Dispatch points normally.
Special Scenario Rules. All Rearguards, Road blocks, Nachhuten, Sperren, and Minefields in the counter mix are available in the scenario.
Victory Conditions. At the end of each 1500 turn, award victory points as per the table in 9.0 Scenarios, General Comments. Round fractions down.
Additionally, at the end of the scenario, the German gains 1 Victory Point for each American Unit eliminated and loses 2 Victory Points for each German Pz 130 Unit eliminated and 1 for each other German Unit eliminated. Rearguards do not count for gaining or losing Victory Points.
The number of German Victory Points determines the winner:
| Result | German Victory Points |
|---|---|
| German Decisive Victory | > 35 |
| German Victory | 31 - 35 |
| German Marginal Victory | 26 - 30 |
| Draw | 20 - 25 |
| American Marginal Victory | 16 - 20 |
| American Victory | 11 - 15 |
| American Decisive Victory | <= 10 |
Special Rules in Effect. All Special Rules are in effect.
Scenario 6 (Long Campaign Game): "Strike-Counter Strike"
1500, 23 Nov - 1500, 27 Nov, 1944
Description. This scenario extends the game beyond the culmination of the Panzer Lehr attack and through the major counterattack by the full weight of two Combat Commands of the 4th Armored Division.
Scenario Map and Length. Use the whole STRIKE-COUNTER STRIKE Map. This scenario starts with Step H on 1500, 23 Nov and ends when the last chit is drawn on the 1500, 27 Nov turn. The last chit is not played.
Setup. Same as Scenario 2.
Reinforcements/Timeline. See the Master Reinforcement Schedule.
Chit Pull Cup. Place in cup for first turn: Event Chit, American and German Direct Command Chits, 44th Infantry Division, 901. and 902. Panzer Grenadier Regiment Activation chits.
The Panzer Lehr Division Activation Chit is the first one played and is treated as if it was drawn, i.e. roll for Command and Dispatch points normally.
Special Scenario Rules. All Rearguards, Road blocks, Nachhuten, Sperren, and Minefields in the counter mix are available in the scenario.
Victory Conditions. At the end of each 1500 turn, award victory points as per the table in 9.0 Scenarios, General Comments. Round fractions down.
Additionally, at the end of the scenario, the German gains 1 Victory Point for each American Unit eliminated and loses 2 Victory Points for each German Pz 130 and PzJg 130 unit eliminated and 1 for each other German Unit eliminated. Rearguards do not count for gaining or losing Victory Points. Finally, as per special rule S4.0 Panzer Auf 130 Withdraw, the German Player loses 3 Victory Points each turn, for each unit of Panzer Auf 130 remaining on the map after the 1500, 26 November game turn.
The number of German Victory Points determines the winner:
| Result | German Victory Points |
|---|---|
| German Decisive Victory | > 45 |
| German Victory | 41 - 45 |
| German Marginal Victory | 36 - 40 |
| Draw | 31 - 35 |
| American Marginal Victory | 26 - 30 |
| American Victory | 21 - 25 |
| American Decisive Victory | <= 20 |
Special Rules in Effect. All Special Rules are in effect.
Master Reinforcement Schedule
| Game Turn | Unit | Reinforcement Hex | Notes |
|---|---|---|---|
| 1500 23 Nov | 2. - 3., GrW 4., and IeIG 4. PzGr Rgt 901 (4 Units); 9. PzGr 901; 10. PzGr 901; 6. and 8. Pz 130 (2 Units); 1. Flak 311; I. PzArt 130 | 16.00 | |
| 1500 23 Nov | PzGr Rgt 902 (10 Units); 5. and 7. Pz 130 (2 Units); II. Pz Art 130 | 19.00 | |
| 1500 23 Nov | V.A.K. 401 Artillery Park C with I - IV V.A.K. 401 (4 units) | 18.00 | Attached to Pz Lehr. Range from Artillery Park is +3 hexes. Units in contact with PzGr 901 or 902 Leader. Units may enter at hex 19.00 as Division Reinforcements |
| Night 23 Nov | 1 / 71 Inf (4 Units); AT / 71; Cannon / 71 | 15.27 | |
| Night 23 Nov | 1 / 114 Inf (4 Units) | 38.26 | |
| 0700 24 Nov |
Errata (publisher, as of 23 May 2023)
Appended from the publisher's separate one-page errata sheet; the text above is as printed.
- The town of Schalbach is incorrectly spelled Scholbach in the exclusive rules. These misspellings are on page 4 in the Contents, page 5 in the VP chart, page 13 in the title to Scenario 1, and page 14 in the Victory Conditions for Scenario 1.
- On page 13, the Command Rating for the 44th Inf Div should be 1. It is correct on the Divisional Display on the map.
- On page 13, the color code for the German unit, 5. 130 should be brown, matching the counter.
- On page 15, the rules reference under the Victory Conditions should be 12.0 Scenarios, General Comments, not 9.0.
- On page 15, the German and American Victory conditions should include "equal to":
| Result | German Victory Points |
|---|---|
| German Victory | >= 16 |
| Draw | 9 - 15 |
| American Victory | <= 8 |
- On pages 17 and 22, the German Reinforcements entering at 0700 24 November should be placed in hex 16.00, not 15.00.
- On the map, hex 31.15 is incorrectly numbered 31.25.
Clarification: Attached units are considered part of the division they are attached to, as a formation or independent units. Attached units use the division's activations, command, and operations points. This should be added under 12.0 Scenario, General Comments.