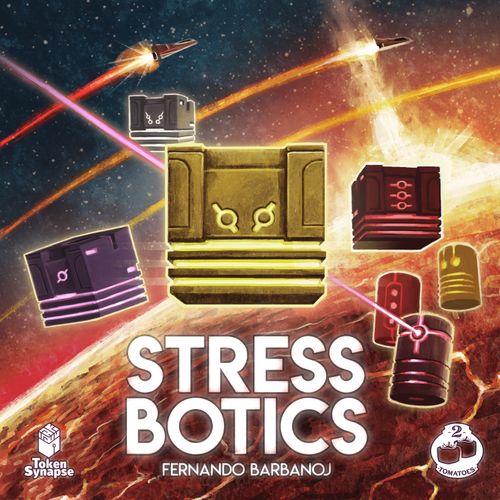
Stress Botics
Stress Botics Rulebook
Table of Contents
Table of Contents
Game Overview
In Stress Botics, you are the BetaBots, and your mission is to obtain the minerals that the corporation requires.
To do so, you will have to face the adversities of the planet, its unstable core and its pressure variations. As if that weren't enough, you will have to fight against the Cylindroids that have been sent to the planet with a single purpose: to eliminate the BetaBots and steal the minerals for their own corporation.
In order to help you, your corporation has activated the automated unit "AlphaBot", an action server that will set the pace of your work.
You must explore the planet thoroughly to obtain its minerals, which you will keep in your personal board along with any improvements you craft to make your bot more efficient. Savvy management of the resources you extract is recommended, in order to avoid them being melted by the core's lava.
All those challenges, and others that you'll encounter in your adventure, will increase the stress of your BetaBot. Delivering minerals to the ships and achieving the corporation's objectives will lower it. But remember, you can only load the ships at the delivery points and only if your BetaBots do not exceed the indicated stress limit.
Stress Botics is a competitive action programming, resource management and pickup&deliver game for 2-4 players.
The game is played over 13 rounds, and each round consists of 6 phases: Ships Phase, Programming Phase, Actions Phase, Maintenance Phase, AlphaBot and Cylindroids Activation Phase and Status Check Phase.
In the Ships Phase, all Ships advance 1 space in their trajectory.
In the Programming Phase, players draw Action Cards and program some of them. Those Actions will be performed in the following phase.
In the Actions Phase, players perform in turn order the actions programmed in the previous phase. The actions are: Move, Mine and Connect, and they are divided into different sub-actions.
In the Maintenance Phase, players replicate batteries, manage and liquefy resources, solidify lava, and prepare the production of the following rounds.
In the AlphaBot and Cylindroids Activation Phase, these are activated, resulting in a series of different events.
Finally, in the Status Check Phase, the stress level of each player, their hand limit and the turn order are adjusted.
Throughout the game, players will attempt to complete Main Objectives, which are public and available to all players, and their own Secondary Objectives, which are secret and different for each player.
Gather resources and batteries, improve your BetaBot, fight against the Cylindroids and make deliveries to the ships, all the while trying to reduce your stress level, in order to score the most Victory Points. The player with the most Victory Points at the end of the game is the winner!
Components
Boards
- 1 Main Board
- 4 Player Boards
In each player color
- 1 BetaBot
- 1 MiniBetaBot
- 1 BetaBot Status Tile
- 1 Stress Marker
- 1 Shield Marker
- 1 BetaBot AI Marker
- 3 Delivery Markers
- 3 Cargo Cards
Reference guides
- 1 Reference Guide
- 4 Gameplay Reference
Ships
- 1 Probe
- 1 Scout
- 1 Freighter
AlphaBot
- 1 AlphaBot
- 1 MiniAlphaBot
Cylindroids
- 8 Miner Cylindroids
- 8 Explosive Cylindroids
- 8 Laser Cylindroids
- 1 Cylindroids Bag
Tiles
- 1 Core Section Tile
- 3 Mantle Section Tiles
- 3 Crust Section Tiles
- 1 Core Tile
- 5 Extraction Vault Tiles
- 4 Production Vault Tiles
- 4 Turn Order Tiles
- 2 Orbit End Tiles
- 1 Aid Tile (Phase 5)
- 2 AlphaBot Status Tiles
- 1 Alternative AlphaBot's Shield Track Tile
- 1 Console Tile
- 1 Common Tank Tile (Stress Boy)
- 1 Discards Tile
Resources
- 40x Carbon
- 50x Titanium
- 40x Silicon
- 50x Lava
- 25x Gas
- 25x Acid
- 40x Betamatter
- 15x Exomatter
Batteries
- 15x Carbon Battery
- 15x Titanium Battery
- 15x Silicon Battery
Tokens
- 12 Event Tokens
- 24 Multiplier Tokens
Markers
- 5 Padlock Markers
- 1 Pressure Marker
- 1 Main Vault Marker
Cards
- 12 MOVE Action Cards
- 12 MINE Action Cards
- 12 CONNECT Action Cards
- 12 Main Objective Cards
- 16 Secondary Objectives Cards
- 7 Demand Cards
- 30 Advanced Item Cards
- 31 AlphaBot Item Cards
- 1 Shuttle Card
Game Setup
NOTE: For your first game, use the Main Objectives shown in the picture.
-
Place the Main Board in the center of the table, with the Stress side up.
-
Place the Common Tank Tile (Stress Boy) with the corresponding side up, according to the number of players. Place 1 Exomatter on it.
-
According to the number of players, take the corresponding Advanced Items, shuffle them face down forming a deck and place it to the right of the Common Tank Tile. Then reveal the top 4 cards in a 2 player game, and the top 7 in a 3-4 player game.
-
According to the number of players, take the corresponding AlphaBot Items, shuffle them face down forming a deck and place it to the right of the board. Then reveal the first 4 cards.
-
Place the Aid Tile (Phase 5) on its corresponding space.
-
Place the AlphaBot Shuttle Card below the Aid Tile, face down.
-
Shuffle all the Event Tokens without the deck-end symbol. Take two tokens at random and place them on the two central spaces of the AlphaBot Belt, with the Belt side face up. Form a pile with the rest of the tokens, including the ones with the deck-end symbol, shuffle them and place them next to the board, with the Belt side face up.
-
Place AlphaBot on top of the leftmost Event Token.
-
According to the number of players, place the corresponding AlphaBot's Status Tile on its slot, with the A Side face up.
-
Place 1 Titanium on each space of AlphaBot's Shield Track.
NOTE: For a more challenging game, you may use the alternative AlphaBot's Shield Track Tile. This is only recommended for experienced players.
- Form the 3 Action Card decks, according to the number of players:
| 2 Players | 3 Players | 4 Players | |
|---|---|---|---|
| Basic cards | 7 cards | 8 cards | 8 cards |
| Boosted cards | 1 card | 2 cards | 4 cards |
Shuffle each deck separately and place them face up on their corresponding slots of the Action Server.
-
Place the Console Tile with the A Side face up.
-
According to the number of players, take at random from the Cylindroids bag and then place the following:
- 2 Players: 1 Cylindroid on the Elevator and 1 on the A segment of the Belt.
- 3-4 Players: 2 Cylindroids on the Elevator and 2 on the A segment of the Belt.
NOTE: When placing Explosive Cylindroids, always place them disarmed side face up.
-
Place the Main Vault Marker on space 1 of the Active Main Vault Track.
-
Place the Pressure Marker pointing to the level 2 of the planet's Pressure Track.
-
Place the Core Tile with the A Side face up. According to the number of players, place the corresponding amount of Lava on it.
-
Shuffle separately each of the 3 Main Objective decks (Probe, Scout and Freighter). Reveal the first card of each deck and place it on its corresponding space of the Delivery Zone. Put the rest of the cards back in the box.
-
According to the number of players, place the Demand Cards of each ship forming a pile. Place the cards with the highest number in the upper part of the pile.
-
Place the Core Section Tile with the A Side face up.
-
Randomly place the Mantle Section Tiles connected to the Core Section Tile. Randomly place the Crust Section Tiles connected to the Mantle Section Tiles. Rotate the Core Section Tile to the starting position: all 3 tunnels must be connected to the 3 tunnels of the Mantle Sections.
-
Place the Padlock Markers to indicate which tunnels are blocked in each Sector at the beginning of the game:
- 21a. 1 Padlock Marker in the tunnel connecting each Crust Extraction/Production Vault and Main Vault.
- 21b. 1 Padlock Marker in the tunnel connecting each Crust Extraction/Production Vault and Mantle Extraction/Production Vault.
NOTE: In case there is no connecting tunnel between the Crust Extraction/Production Vault and Mantle Extraction/Production Vault, do not place a Padlock Marker there.
NOTE: In a 2 player game you may use the alternative side for a more challenging game. This is only recommended for experienced players.
- Place MiniAlphaBot in the starting Main Vault.
NOTE: For your first game, use the setup shown in the picture.
-
Place each Ship in the starting space of its trajectory.
-
Place the Orbit End Tile with the corresponding side face up, according to the number of players. Make sure it matches the Ships' trajectory.
-
For each Sector, take the depicted Extraction and Production Vault tiles and place them in the corresponding slot.
-
Place the Cylindroids bag, the resources and the batteries within reach of all players, forming the common supply.
-
Place the Discards tile next to the playing area, with the Stress side up.
Player Board Setup
The player board represents the internal mechanism of the player's BetaBot.
A. Each player takes a Player Board and all the components of their color: 1 BetaBot, 1 MiniBetaBot, 1 BetaBot Status Tile, 1 Stress Marker, 1 Shield Marker, 1 BetaBot AI Marker, 3 Delivery Markers, and 3 Cargo Cards. The player board is placed with the corresponding face up, according to the number of players.
B. Determine the starting player using one of the options below:
- Option A: Depending on the number of scopes on your BetaBot (1 scope: first player; 2 scopes: second player, etc.). Then, deal each player their Turn Order Tile.
- Option B: Shuffle the Turn Order Tiles and randomly deal one to each player.
NOTE: Always use the Turn Order Tiles according to the player count (ie: in a 3-player game, use tiles 1, 2 and 3).
C. Each player places their Stress Marker on level 0 of the Stress Track, with the stress icon face up (so the Victory Point icon is face down).
D. Each player places their MiniBetaBot on the designated location, regardless of the number of players:
- Player 1: Core Section Tile.
- Player 2: Core Section Tile.
- Player 3: Mantle Extraction/Production Vault (Sector C).
- Player 4: Mantle Extraction/Production Vault (Sector C).
NOTE: If the Lower Advanced Items Vault is located in the Mantle Section Tile (Sector C), Player 4 must place their MiniBetaBot on the Crust Extraction/Production Vault (Sector C).
E. Each player places their BetaBot on the corresponding Extraction/Production Vault Tile or on the Core Tile, depending on their starting location.
F. Each player takes their starting resources from the common supply and places them in their Tanks, as per the following table:
| Tank 1 | Tank 2 | Tank 3 | |
|---|---|---|---|
| Player 1 | 1 Carbon | 2 Lava | 1 Betamatter |
| Player 2 | 4 Lava | 2 Lava | |
| Player 3 | 2 Betamatter | ||
| Player 4 |
G. Each player places 1 Gas, 1 Titanium and 1 Acid + 1 Silicon in their Dangerous Substances Tank.
H. Each player places 1 Betamatter and 1 Silicon on one of the spaces of their Battery Producer.
NOTE: In your first game we recommend that each player starts with the AlphaBot Item "Melting Furnace" on the central extension.
I. Each player places their Status Tile with the A Side face up, and the Delivery Markers on the corresponding spaces.
J. Each player places their Shield Marker on the space marked with [*] of their Shield Track.
K. Each player places their starting batteries on their Battery Track, starting from the right:
- 1st Space (Active Battery): Carbon Battery
- 2nd Space: Titanium Battery
- 3rd Space: Silicon Battery
NOTE: When you have played several games you may, in turn order, distribute as you wish your starting batteries (2 Carbon, 1 Titanium and 1 Silicon). This can be helpful depending on your starting location.
L. Each player places a Carbon Battery inside their BetaBot. This is the active battery.
M. Each player places their BetaBot AI Marker on the Competitive AI space.
N. Each player places their Cargo Cards below their Player Board, with the screen side face up.
O. According to the number of players, form the Secondary Objectives deck, and shuffle it face down. Deal one face down card to each player. Return the rest to the box.
NOTE: Your Secondary Objectives Card remains hidden from other players throughout the game. In the image below the card is face up to represent that you can check it at any time.
Basic Rules
GOLDEN RULE: Whenever an effect of an item card contradicts these rules, the effect of the card prevails.
The colors of BetaBots, resources, ships and Cylindroids are not related.
Actions and Sub-actions
The Action Cards offer 3 possible actions: MOVE, MINE and CONNECT, which are divided into different sub-actions. When performing a sub-action, anything involving multiple players is applied in turn order.
Main and Secondary Objectives
There are 2 types of Objectives:
- Main Objectives: Available to all players. They are shown on the Main Objective Cards of each ship.
- Secondary Objectives: Different for each player. They are shown on the Secondary Objective Cards that are secretly dealt to each player at the beginning of the game.
Resources
The different resources in the game are: Carbon, Titanium, Silicon, Betamatter, Exomatter, Acid, Gas and Lava, and they are limitless. In the rare event that you run out of resources/batteries, it is recommended to replace them in the deliveries with Multiplier Tokens.
If you are going to gain new resources and do not have enough room in your tanks, you can choose which ones to keep, but you can never exchange them with the resources that you already have in your tanks. If you have enough room in your tanks, but you are not interested in all the resources, you can choose which ones to keep. At no time can you get rid of your resources in your tanks to make room for others.
Tanks
Tanks share the numbers with the corresponding slots where Action Cards are programmed. They have a storage limit for resources, indicated by small squares. Each Carbon, Titanium and Silicon occupies 1 square; each Lava 2 squares, and each Betamatter and Exomatter 4 squares.
The Dangerous Substances Tank is not numbered, and it can hold up to 6 or 7 resources (according to the number of players) in any combination of Gas and Acid.
Every time you obtain resources you can place them in your tanks, distributing them as you wish. Similarly, if you have an item that allows you to store resources you can place them there, respecting its storage limit.
Main Board Anatomy
Extraction and Production Vaults
There are 2 types of Vault (each has a number on its lower right corner):
- Extraction: Lava (03), Carbon (01), Gas and Titanium (04), Acid and Silicon (05), and Exomatter (07).
- Production: Lower Advanced Items (02), Upper Advanced Items (08), Shields (06), Batteries (09).
When a rule mentions Extraction/Production Vault, it refers to either one.
Sectors
The planet is divided into 3 Sectors: A, B and C. Whenever a rule mentions a Sector, it refers to both Section Tiles of this Sector (Mantle Section Tile and Crust Section Tile).
Common Tank (Stress Boy)
This is where the resources from the auto-production are placed, and they are used as a discount when acquiring Advanced Items.
Spaces for BetaBots and Cylindroids
Each location has a certain number of available spaces that can be occupied by BetaBots. In the Extraction/Production Vaults, for each BetaBot space, there is space for 1 Cylindroid.
- Main Vault: 4 available spaces for BetaBots. In this Vault the Cylindroids occupy spaces in the Cylindroid Belt, and thus there can be more Cylindroids than BetaBots.
- Neutral Zone: 4 available spaces.
- Core: 3 available spaces.
- Core (B Side): 1 available producing space and 3 available extracting spaces.
- Extraction Vaults: 2 available spaces.
- Production Vaults: 1 or 2 available spaces.
Main Vault
When a rule mentions the Main Vault, it always refers to the Active Main Vault, that is, where AlphaBot is currently located (unless stated otherwise).
Neutral Zone
Here is where you place your BetaBot when your MiniBetaBot is at a Delivery Base or at an Inactive Main Vault.
How to Play
Phase 1: Ships
In the Ships Phase, all ships advance +1 space in their trajectory.
NOTE: Skip this phase in the first round of the game.
When a ship leaves the planet's orbit (it no longer has any spaces left to move forward on their trajectory), adjust the stress level of all BetaBots:
- If that ship still has any Demand Cards, the stress level of all the BetaBots is increased.
- If that ship has no Demand Cards left, the stress level of all the BetaBots is reduced.
| Ship | 2 Players | 2 Players (Aggressive) | 3 Players | 4 Players |
|---|---|---|---|---|
| Probe | 0 or +5 stress | 0 or +5 stress | -5 or +5 stress | 0 or +10 stress |
| Scout | -5 or +10 stress | -5 or +5 stress | -5 or +5 stress | -5 or +10 stress |
| Freighter | -10 or +10 stress | -10 or +10 stress | -15 or +10 stress | -5 or +10 stress |
Then, place the ship on its slot on the Orbit End Tile.
Example 1: 4 players. Probe leaves orbit. Everything delivered. All Stress markers drop 5 stress.
Example 2: 4 players. Freighter leaves orbit. There's still Demand cards for it. All stress markers go up 10 stress. As all ships are on the Orbit End Tile, the game ends and the players move on to the final scoring.
Phase 2: Programming
This phase is divided into 2 steps: Drawing Action Cards and programming Action Cards.
2.1 Drawing Action Cards
NOTE: If at the beginning of this phase any of the action decks are empty, shuffle the corresponding discard pile and form a new deck. In the rare event that there are no cards left in either the action deck nor its corresponding discard pile, you won't be able to draw that type of Action Card.
In turn order, each player draws Action Cards depending on their position on the planet with regard to AlphaBot:
- If your BetaBot is in the same Main Vault as AlphaBot, you may draw 2 Action Cards of the same type or 3 Action Cards of different types.
- If your BetaBot is in the same Sector as AlphaBot or in the Core, you may draw 2 Action Cards of different types.
- If your BetaBot is in a different Sector than AlphaBot, you can only draw 1 Action Card.
- In the round 13, when AlphaBot reaches its shuttle, each player may draw only 1 Action Card.
Example 1: AlphaBot is in the initial Main Vault (1). 4 players. The purple player is in the same Main Vault as AlphaBot and draws 3 different cards. The yellow player is in the same Main Vault as AlphaBot and draws 2 cards of the same type. The red player is also in the same Main Vault as AlphaBot, but chooses to draw only 2 different cards. The white player is in the same Sector as AlphaBot and draws 2 different cards.
Example 2: AlphaBot is in the Crust main vault (4). 4 players. The purple player is in the same Sector as AlphaBot and draws 2 different cards. The red player is in the Core and draws 2 different cards. The yellow player and the white player are in a different Sector than AlphaBot, so they each draw 1 card.
NOTE: Players may choose not to draw cards or draw fewer cards than they are allowed to. Additionally, they can check how many cards there are left in each Action Card deck (without looking at them), and which cards are in the discard pile. A drawn Action Card can never be returned to the deck.
Deck End Event: If one of the Action Card decks runs out of cards, the deck end event is revealed and carried out (see Deck End Event). Next, shuffle the discard pile of that Action Card deck. Place the new deck face up on its corresponding space of the Action Server.
2.2 Programming Action Cards
Once all the players have drawn their Action Cards, they may program cards in their hand. We recommend that players program their cards simultaneously, to keep the flow of the game.
Each player chooses their cards to program and places them face down in the slots at the top of their Player Board. At the beginning of the game, each player has 2 available slots (slot 1 and slot 2). Later in the game, depending on their Battery Track, they can gain 1 more slot (in a 4 player game) or 2 more slots (in a 2-3 player game). Only one card can be programmed in each slot, and they must be placed in order: first slot 1, then slot 2, etc.
NOTE: Players may choose not to program any cards or to program fewer cards than they are allowed to.
Example: 4 players. The purple player can program up to 3 actions and programs all 3. The yellow player can program up to 3 actions, but not all of them are useful to them this round, so they program only 2. The red player can only program 2 actions and programs 2. The white player can program 2 actions, but they only have 1 card, so they program 1.
Phase 3: Actions
3.1 Actions and Sub-actions Summary
There are 3 different actions: MOVE, MINE and CONNECT. And these are divided into sub-actions. Any sub-action involving multiple players is applied in turn order.
Move Action
Spend movement points to move your BetaBot through the tunnels into different locations around the planet.
Mine Action
- Extract sub-action: Extract resources in the Extraction Vaults or in the Core.
- Attack sub-action: Attack the Cylindroids (capture, scrap or disintegrate) or attack other BetaBots.
Connect Action
- Produce in Production Vaults sub-action: Activate the Production Vault you're in (Gain resources/batteries, repair your BetaBot, or equip yourself with Advanced Items).
- Produce in the Core (Side B): Extract resources in the Extraction Vault of your choice, or change the planet's pressure level and rotate the Core.
- Activate an Item sub-action: Activate one of your items.
- Disarm/Arm sub-action: Disarm an Explosive Cylindroid to prevent it from exploding and dealing damage, or arm it.
- Switch-on the Console sub-action: Access the Console to influence AlphaBot's behavior and manipulate the Cylindroids Belt.
- Make a Manual Delivery sub-action: Make a delivery when you are at a Manual Delivery Base. With this sub-action you can achieve the main objective of the game: Making deliveries to the ships.
NOTE: Sub-actions must always be fully performed, carrying out all their steps. If it is impossible to complete some of the steps of a sub-action, it cannot be performed (unless stated otherwise).
Example: 4 players. The purple player has programmed 3 actions: MOVE, then MINE to extract resources and lastly MOVE again. The yellow player programs 2 actions: MOVE and then MINE to extract resources. The red player has programmed 2 actions: CONNECT to equip an item and then MOVE. The white player has programmed 1 action: CONNECT to repair their BetaBot.
3.2 Player Turn to Perform Actions
In turn order, players take turns to perform the actions they have programmed during Phase 2.
On your turn you choose one of these 2 options:
- Reveal your leftmost programmed card and perform it.
OR
- Return your leftmost programmed card to your hand without performing it.
Reveal your leftmost programmed card and perform it
Follow these steps in order:
- If your BetaBot is at an Extraction/Production Vault that contains resources from its auto-production, take these resources from the Vault tile you are in and place them in any of your tanks or items that can store them (see Tanks), distributing them as you wish. The resources that you don't want, or that don't fit in your tanks, stay on the tile.
- Reveal your leftmost programmed Action Card and choose which of its sub-actions you want to perform (note that the Move Action has no sub-actions).
- You may boost any sub-action, but some of them require boosting. To boost a sub-action, either use an Action Card with free boost, or spend an Active Battery (see Active battery) and return it to the common supply.
- If you have a captured Cylindroid, you can use it to perform an additional action (see Capturing a Cylindroid).
- After performing the sub-action, you may return the Action Card to your hand. To do so, pay the cost shown on the card (see Paying a Cost) with resources from the tank that shares the same number with the slot where the Action Card was programmed (if there's two types of cost, you choose which one to pay). If you don't want to keep it, place the card on the discard pile of the corresponding Action Card deck.
Return your leftmost programmed card to your hand without performing it
Return the Action Card to your hand without revealing it and at no cost.
End of Player's Turn
Once you have finished your turn, the next player in turn order performs their turn. This phase ends when all players have resolved all their programmed Action Cards.
3.3 Move Action
This action allows you to Move through the tunnels into different locations on the planet (this action doesn't have sub-actions). Your Battery Track indicates how many Movement Points you have available: For each available Movement Point, you can move your BetaBot to a Vault that is connected to your current Vault by a tunnel.
When you finish your Move, remember to check for any movement end effects and to place your MiniBetaBot and your BetaBot in their corresponding spaces of the Main Board.
Keep in mind that at the beginning of the game some of the tunnels are blocked. These tunnels get unblocked when AlphaBot moves to each of the Main Vaults of the corresponding Crust Sections (see AlphaBot Enters the 4th/5th/6th Main Vault).
Boosting a Move Action allows you to perform it twice. To boost this action:
- Use a MOVE Action Card with free boost.
OR
- Spend an active Carbon Battery.
Checking Movement Points
Check your Battery Track to determine your available movement points.
| Batteries | 2-3 Players | 4 Players |
|---|---|---|
| Less than 3 batteries | 1 movement point | 1 movement point |
| 3+ batteries | 2 movement points | 3 movement points |
| 7+ batteries | 3 movement points | - |
NOTE: When you lose your last shield, flip your Shield Marker and Status Tile to the B Side. Thereafter, you have 6 movement points when you perform the Move Action (see BetaBot Shield Track and Battery Track).
Example 1: 3 Players. The purple player has 8 batteries, so they have 3 movement points. The yellow player has 5 batteries and 2 movement points. The red player has 2 batteries and only 1 movement point.
For each available Movement Point, you can move your BetaBot to a Vault that is connected to your current Vault by a tunnel (including the tunnel that connects the 3rd and 4th Main Vault). You don't need to spend all your points.
Placing MiniBetaBot and BetaBot
Once you've finished your movement place your MiniBetaBot in that location on the planet, and then place your BetaBot on its corresponding space:
- MiniBetaBot is in the Main Vault → Place BetaBot in the Main Vault Zone on the Main Board.
- MiniBetaBot is in the Core → Place BetaBot in the Core Tile.
- MiniBetaBot is in an Extraction/Production Vault → Place BetaBot in the corresponding Extraction/Production Tile.
- MiniBetaBot is in a Delivery Base, or in an Inactive Main Vault → Place BetaBot in the Neutral Zone.
Example 1: 4 Players. MiniBetaBot is in the Main Vault → BetaBot in the Main Vault Zone. MiniBetaBot is in the Core → BetaBot in the Core Tile. MiniBetaBot is in an Extraction Vault → BetaBot in the corresponding Tile. MiniBetaBot is in an Inactive Main Vault → BetaBot in the Neutral Zone.
Example 2: 4 Players. MiniBetaBot is in a Manual Delivery Base → BetaBot in the Neutral Zone. MiniBetaBot is in an Automatic Delivery Base → BetaBot in the Neutral Zone. MiniBetaBot is in a Production Vault → BetaBot in the corresponding Tile. MiniBetaBot is in an Inactive Main Vault → BetaBot in the Neutral Zone.
Ending Movement
Regardless of the type of location, you can only end your movement in a location if it has an available space for your Betabot.
If you end your movement at an Extraction/Production Vault that contains resources from its auto-production, take these resources from the Vault tile you are in and place them in any of your tanks or items that can store them (see Tanks), distributing them as you wish. The resources that you don't want, or that don't fit in your tanks, stay on the tile.
If you end your movement at a Manual Delivery Base, immediately increase your stress level by 1.
If you end your movement at an Automatic Delivery Base, immediately increase your stress level by 5. Then, you can make a delivery without having to perform any sub-action (see Delivering to a ship).
If you end your movement in the Core or in an Extraction/Production Vault together with another BetaBot, activate the AI of each of those BetaBots.
BetaBot AI
Your BetaBot can have a Competitive or Cooperative AI, based on the number of batteries you have on your Battery Track:
- When you have 4 or less, your AI is Competitive.
- When you have 6 or more, your AI is Cooperative.
When you have exactly 5 batteries, you may choose whether you want to have a Competitive or Cooperative AI (see Battery Track Bonuses). Once you have made your choice, you cannot change it again until Phase 4 (see BetaBot AI Process).
NOTE: If multiple players place their 5th battery at the same time (for example: in Phase 4), the choice of the AI is made in turn order.
At the beginning of the game your AI is Competitive, since you start with 3 batteries on your Battery Track.
Remember that your AI can change if you gain or spend a battery, and use your BetaBot AI Marker to indicate which is the current AI of your BetaBot.
Example: 2 Players. The purple player has 6 batteries and their AI is Cooperative. They then equip an Advanced Item (Launch Amplifier), paying its cost of 3 batteries. Since now they only have 3 batteries, their AI becomes Competitive. The yellow player has 4 batteries and their AI is Competitive. They produce a battery in the Battery Vault. Since now they have 5 batteries, they can choose to keep their AI Competitive or switch it to Cooperative. They decide to keep it Competitive.
If you end your movement in the Core or in an Extraction/Production Vault together with another BetaBot, the AI of each of those BetaBots is activated. The ensuing effect depends on the combination of AIs:
- Cooperative & Cooperative: In turn order, each of the two BetaBots perform an Extract/Produce sub-action in the Core or Vault they are in, regardless of the planet's current pressure level (each player chooses a pressure level).
- Competitive & Competitive: Each of the two BetaBots lose 1 shield and then, in turn order, perform an Extract/Produce sub-action in the Core or Vault they are in (at the planet's current pressure level).
- Competitive & Cooperative: The BetaBot that has the Competitive AI performs an Extract/Produce sub-action in the Core or Vault they are in (at the planet's current pressure level), and deals 1 damage to the other BetaBot. The BetaBot with the Competitive AI doesn't increase its stress level due to this attack.
Example: 2 Players. The purple player has 7 batteries and their AI is Cooperative. They are currently in the Carbon Vault. The yellow player has 6 batteries, their AI is Cooperative, and they move to the Carbon Vault. Since both BetaBots have Cooperative AI, they can mine in that Vault regardless of the pressure level of the planet. The yellow player acts first, due to turn order.
NOTE: If you end your movement in the Core with more than one other BetaBot, you choose which one you compare your AI with.
NOTE: If there are Cylindroids in the Vault, the AI of the BetaBots does not activate.
Moving to and from the Core
To move from the Mantle Section to the Core, you must move through a tunnel that connects them directly.
You can move from the Core to the Mantle Section, even if no tunnel connects them, but you must lose shields:
- If you move from the A Side of the Core: lose 2 shields.
- If you move from the B Side of the Core: lose 3 shields.
3.4 Mine Action
This action allows you to perform one of these 2 sub-actions:
- Extract resources from the Extraction Vaults or the Core.
- Attack Cylindroids or other BetaBots.
3.4.1 Extract Sub-action
Boosting an Extract sub-action allows you to perform it twice. To boost this sub-action:
- Use a MINE Action Card with free boost.
OR
- Spend an active Titanium Battery.
Extracting in an Extraction Vault
Take from the common supply the resources shown in the Extraction Vault Tile, depending on the planet's current pressure level. Place them in any of your tanks, distributing them as you wish.
NOTE: You can't perform this sub-action if there are any Cylindroids in your Vault.
NOTE: Remember that dangerous substances (Acid and Gas) must be placed on the Dangerous Substances Tank. Keep in mind the tank's capacity limit (see Tanks).
Example: The purple player executes the MOVE action (slot 1) and ends their move in the Carbon Vault. Before deciding whether or not to keep the Action card, they discard the Mining Cylindroid in their Cylindroid Basic Container to perform the Extract sub-action and gain 3 Carbon (pressure level 4). They then decide to place those 3 Carbon in the tank below slot 1. Finally, they decide to spend 1 of the Carbon in the tank below slot 1 (slot where they used the MOVE action) to keep that Action card.
Extracting in the Core
If there is still Lava to extract, take the indicated amount of Lava from the Core Tile itself, depending on the planet's current pressure level, and place it in any of your tanks, distributing it as you wish. When all the Lava on the Core Tile has been removed, flip the tile over. From now on, you will be able to perform the Extract sub-action in the Core Tile (B Side).
NOTE: Keep in mind that if you place the Lava together with other resources, they are immediately liquefied (see Maintenance Phase).
3.4.2 Attack Sub-action
Boosting an Attack sub-action enables you to perform it once. This sub-action must be boosted, otherwise it can't be performed. To boost it:
- Use a MINE Action Card with free boost.
OR
- Spend an active Titanium Battery.
You can choose between 2 Objectives: Attacking a Cylindroid or attacking another BetaBot.
Attacking a Cylindroid
Choose any one Cylindroid in your BetaBot's location (if your BetaBot is in an Extraction/Production Vault), or one Cylindroid in the Segment D of the Cylindroid's Belt (if your BetaBot is in the Main Vault). Then choose to capture it, scrap it or disintegrate it.
NOTE: If you attack an Explosive Cylindroid while it is armed, you lose 2 shields and you cannot capture it. If you attack it while it is disarmed, you don't lose any shields and you can capture, scrap or disintegrate it.
Capturing a Cylindroid:
- Reduce your stress level by 1.
- Place the captured Cylindroid on one of the spaces of your Cylindroid Basic Container. That Container has 3 spaces, each of which admits 1 Cylindroid of one of the 2 colors shown in the circle. You can rearrange the Cylindroids you already have in the Container when you capture a new one.
NOTE: You can't choose to capture a Cylindroid if you can't keep it in your Cylindroid Basic Container or in an item card you have equipped.
During the Actions Phase, after using an Action Card (but before deciding if you keep the card) you may return to the bag a captured Cylindroid to perform its associated additional action. See the Gameplay Reference to check what action corresponds to each type of Cylindroid.
Scrapping a Cylindroid:
- Reduce your stress level by 1.
- Gain the corresponding resources/batteries, as indicated on the Gameplay Reference for each type of Cylindroid. Take them from the common supply and place them in any of your tanks, distributing them as you wish, or on your Battery Track. Then, return the Cylindroid to the bag.
Disintegrating a Cylindroid:
- Reduce your stress level by 2.
- Return the Cylindroid to the bag.
Attacking Another BetaBot
Choose another BetaBot in your location:
- Increase your stress level by 2.
- The BetaBot you attack loses 1 shield.
3.5 Connect Action
This action allows you to perform one of these 6 sub-actions:
- Produce in the Production Vaults.
- Produce in the Core (B Side).
- Activate an Item.
- Disarm/Arm an Explosive Cylindroid.
- Switch-on the Console.
- Make a Manual Delivery.
3.5.1 Produce in the Production Vaults Sub-action
Boosting this sub-action allows you to perform it twice, except if you boost it in an Advanced Items Vault. In that case, boosting the sub-action enables you to pay for the Advanced Item with resources from your tank and/or the Common Tank (instead of performing this sub-action twice). To boost this sub-action:
- Use a CONNECT Action Card with free boost.
OR
- Spend an active Silicon Battery.
NOTE: You can't perform this sub-action if there are any Cylindroids in your Vault.
Depending on the Production Vault where you take this sub-action, you will gain resources, advance on your Shield and Battery Tracks, or equip yourself with Advanced Items.
Shields Vault (06)
Move your Shield Marker as many spaces to the left as shield icons are shown in the Vault Tile, depending on the planet's current pressure level. If your Shield Marker is on the leftmost space, you cannot gain any more shields. If you also gain resources, place them in any of your tanks, distributing them as you wish.
Batteries Vault (09)
Pay the corresponding resources (Carbon, Titanium or Silicon) to gain batteries of the same type. Place the batteries on the rightmost empty spaces of your Battery Track. If you don't have empty spaces, you cannot gain any more batteries.
Advanced Items Vault (02 & 08)
There are 4 available items in a 2 player game and 7 available items in a 3-4 player game on the Advanced Item Server.
Before choosing an item, you may lose 1 shield to discard the two items that are the furthest away from the deck, slide the rest of the items to the right and reveal 2 new ones, placing them next to the deck.
Choose an item in the Advanced Item Server. Pay the cost shown on its card (see Paying a Cost) and apply any discount indicated on the Advanced Items Vault, depending on the planet's current pressure level. Then, place the chosen item card on one of your board's extensions (see Player Board Extensions).
Slide the items to the right and reveal a new Advanced Item Card, placing it next to the deck.
NOTE: Remember, if you boost the sub-action you can pay for the item with the resources from your tanks and/or the Common Tank (instead of performing the sub-action twice).
Example: 2 players: The purple player executes and boosts the Activate an Item sub-action, choosing the Carbon Processor Advanced Item. On the Stress Track, their marker is at level 11 and the yellow player's is at level 12. In the 1st activation, they transform 1 Beta Matter into 2 Carbon, and move their Stress Marker to level 12, pushing the yellow player's marker to level 13. In the 2nd activation, they transform another Beta Matter into 2 Carbon, and move their Stress Marker to level 13, and pushing the yellow player's marker to level 14.
3.5.2 Produce in the Core (B Side) Sub-action
Boosting this sub-action allows you to perform the 2 available options, but you cannot perform the same option twice. To boost this sub-action:
- Use a CONNECT Action Card with free boost.
OR
- Spend an active Silicon Battery.
Your Betabot must be at the Core (B Side). Choose 1 option:
- Option 1 - Extract resources from any Extraction Vault, at the planet's current pressure level.
- Option 2 - Change the planet's pressure level to +1 or -1 and rotate the Core one position, clockwise or counterclockwise.
3.5.3 Activate an Item Sub-action
Boosting this sub-action allows you to activate the same item twice, unless the item requires a boosted action to be activated. Boosting this sub-action doesn't allow you to activate 2 different items. To boost this sub-action:
- Use a CONNECT Action Card with free boost.
OR
- Spend an active Silicon Battery.
Activate one of your equipped visible items (see the Reference Guide).
NOTE: If you activate the same item twice due to boosting this sub-action, each activation is performed separately. This means that you first apply the first activation and then the second activation.
3.5.4 Disarm/Arm Sub-action
Boosting this sub-action allows you to disarm 1 Cylindroid and arm another, disarm 2 Cylindroids or arm 2 Cylindroids. To boost this sub-action:
- Use a CONNECT Action Card with free boost.
OR
- Spend an active Silicon Battery.
For this action, eligible Explosive Cylindroids are those in your BetaBot's location (if your BetaBot is in an Extraction/Production Vault), or in the Segment D of the Cylindroid's Belt (if your BetaBot is in the Main Vault).
Disarm an Explosive Cylindroid
Choose one armed eligible Explosive Cylindroid and flip it over so its disarmed side is face up. A disarmed Explosive Cylindroid can't explode due to an Event nor when attacked.
Arm an Explosive Cylindroid
Choose one disarmed eligible Explosive Cylindroid and flip it over so its armed side is face up. An armed Explosive Cylindroid will explode due to an Event or when attacked, damaging BetaBots and/or AlphaBot.
3.5.5 Switch-on the Console Sub-action
Boosting this sub-action allows you to perform 2 of the available options in any order, but you cannot perform the same option twice. To boost this sub-action:
- Use a CONNECT Action Card with free boost.
OR
- Spend an active Silicon Battery.
To perform this sub-action, your BetaBot must be in the Main Vault. The options available depend on which side of the Console tile is up.
At the beginning of the game, the Console Tile is placed with the A Side face up, which has 4 options. If AlphaBot loses a certain number of shields (see AlphaBot's Shield Track), flip it over to the B Side, which offers 4 slightly different options.
A Side Options
1 - Repair AlphaBot: Place a Titanium from your tanks on the lowest empty space of AlphaBot's Shield Track. If there are no empty spaces left, you cannot choose this option. Then, reduce your stress level by 2.
2 - Equip Yourself with an AlphaBot Item and Draw an Action Card:
NOTE: You are not required to carry out both steps if you do not wish to (for example: you can draw 1 card and get no items).
Equip yourself with an AlphaBot Item:
- You can equip yourself with one of the available items on the AlphaBot Item Server, in order to improve your BetaBot's performance.
- There are always 4 available items on the AlphaBot Item Server.
- Before choosing an item, you may lose 1 shield to discard the two items that are the furthest away from the deck, slide the rest of the items downwards and reveal 2 new ones, placing them next to the deck.
- Choose an item in the AlphaBot Item Server. Pay the cost shown on its card (see Paying a Cost). Then, place the chosen item card on one of your board's extensions (see Player Board Extensions).
- Slide the items downwards and reveal a new AlphaBot Item Card, placing it next to the deck.
Draw an action card:
- Draw 1 Action Card of your choice. If the deck runs out of cards, trigger the Deck End Event, as usual.
3 - Advance Cylindroids Belt or Advance the Elevator:
Perform one of these options:
- Advance Cylindroids Belt: All Cylindroids in the Cylindroids Belt advance one segment simultaneously (see Cylindroids Advance in the Belt).
- Advance the Elevator: Cylindroids on the Elevator advance to segment A of the Cylindroids Belt. If there are already Cylindroids in that segment, they are pushed to segment B, which may cause further pushes on the following segments (see Cylindroids Advance in the Belt).
Then, place new Cylindroids on the Elevator (see Placing Cylindroids on the Elevator).
Finally, increase your stress level by 2.
Example 1: Segment A: 1 Miner Cylindroid and 1 disarmed Explosive Cylindroid. Segment B: 1 disarmed Explosive Cylindroid and 1 Laser Cylindroid. Segment C: Empty. Segment D: 1 Miner Cylindroid and 1 armed Explosive Cylindroid. The purple player performs the Switch-on the Console sub-action and chooses the Advance Cylindroid Belt option. The Cylindroids in segment A move to segment B, and those in segment B to segment C (Upon reaching segment C, the Explosive Cylindroid automatically arms itself). Cylindroids in segment D move to the appropriate Vault.
Example 2: Elevator: 1 Miner Cylindroid and 1 disarmed Explosive Cylindroid. Segment A: 1 Miner Cylindroid. Segment B: Empty. Segment C: 1 armed Explosive Cylindroid. Segment D: 1 Laser Cylindroid. The purple player performs the Switch-on the Console sub-action and chooses the Advance the Elevator option. The Elevator Cylindroids advance to segment A, pushing those in segment A to segment B. The segment C and D Cylindroids do not move. The purple player then places new Cylindroids on the Elevator and increases their stress level by 2.
4 - AlphaBot Attack:
AlphaBot attacks the Cylindroids in the Cylindroid Belt segment directly in front of AlphaBot (segment A or B). Perform one of these options:
- Scrapping attack: Choose up to 2 Cylindroids in the segment. Place the corresponding resources, as indicated on the Gameplay Reference for each type of Cylindroid, in AlphaBot's Tank. AlphaBot's Tank can only hold 1 of each resource/battery. Then, take up to 2 resources/batteries of your choice from AlphaBot's Tank and place them in any of your tanks, distributing them as you wish, or on your Battery Track. Return the chosen Cylindroids to the bag.
- Capturing attack: Choose 1 Cylindroid in the segment and capture it (see Capturing a Cylindroid).
Example: AlphaBot is on top of the leftmost space. Segment A: 2 Laser Cylindroids and 1 disarmed Explosive Cylindroid. Segment B: 1 Miner Cylindroid, 1 disarmed Explosive Cylindroid and 1 Laser Cylindroid. Segment C: 1 armed Explosive Cylindroid. Segment D: Empty. The purple player performs the Switch-on the Console sub-action and chooses the AlphaBot Attack option to do a scrapping attack. Since AlphaBot is on the leftmost space, it can attack up to 2 Cylindroids on segment B (to which the AlphaBot is adjacent). They choose to attack the Explosive Cylindroid and the Laser Cylindroid. The resources these Cylindroids are made of (Explosive Cylindroid: 2 Lava, 1 Acid and 1 Gas; Laser Cylindroid: 1 Exomatter and 1 Carbon) are placed in the AlphaBot Tank, respecting the limits per resource. Then, the purple player can take up to 2 resources/batteries of their choice from the AlphaBot Tank (They could take, for example, the Exomatter they just placed and the Titanium battery that was previously added).
AlphaBot's Tank
AlphaBot's Tank receives resources and batteries when:
- AlphaBot moves to certain Main Vaults (see AlphaBot Enters the 4th/5th/6th Main Vault).
- AlphaBot's performs a scrapping attack.
AlphaBot's Tank has a limit of 1 resource/battery of each type. Resources exceeding this limit are returned to the common supply.
There are 2 ways to obtain the resources/batteries placed in AlphaBot's Tank:
- When AlphaBot's performs a scrapping attack.
- When delivering AlphaBot.
B Side Options
Repair AlphaBot:
- Lose a shield and place a Titanium from the common supply on the lowest empty space of AlphaBot's Shield Track.
- Then, reduce your stress level by 3 or gain 2 shields.
Equip yourself with an AlphaBot Item (1 Resource Discount):
- Lose a shield and place a Titanium from the common supply on the lowest empty space of AlphaBot's Shield Track.
- Then perform the corresponding option from the A Side (see Equip yourself with an AlphaBot Item), except that you need to pay 1 less resource.
Draw Action Cards:
- Lose a shield and place a Titanium from the common supply on the lowest empty space of AlphaBot's Shield Track.
- Then, draw 2 Action Cards of your choice.
AlphaBot Attack:
- Perform a scrapping attack, except that you only take up to 1 resource/battery instead of 2.
3.5.6 Make a Manual Delivery Sub-action
Boosting this sub-action allows you to perform it once. This sub-action can only be performed from a Manual Delivery Base and must be boosted. To boost this sub-action:
- Use a CONNECT Action Card with free boost.
OR
- Spend an active Silicon Battery.
When performing this sub-action, follow the steps described below to deliver to a ship.
Delivering to a Ship
You can carry out 2 types of deliveries. Here's an overview of each one:
- Manual Deliveries: Perform a boosted Make a Manual Delivery sub-action while your BetaBot is at a Manual Delivery Base. You need to meet all the conditions (see below).
NOTE: When you end your movement at a Manual Delivery Base, increase your stress level by 1.
- Automatic Deliveries: If you end your movement in an Automatic Delivery Base, and you meet all conditions for a delivery (see below), the delivery is automatically made (you do not need to perform any sub-actions).
NOTE: When you end your movement at an Automatic Delivery Base, increase your stress level by 5.
To be able to carry out either type of delivery, first you must meet all the following conditions:
- Your MiniBetaBot must be at a Manual Delivery Base or at an Automatic Delivery Base (remember to place your BetaBot on the Neutral Zone).
- The receiving ship (the one you are going to deliver to) must be exactly at the reception point of your MiniBetaBot's sector. For example, if your BetaBot is in Sector A, the receiving ship must be in the "A" space of its trajectory.
- Your stress level cannot exceed the reception point of the receiving ship.
- The receiving ship must have at least 1 Demand Card available.
- You must respect the permitted load limit that the receiving ship has established for each Demand Card. This is indicated on the Main Objective Card of each ship.
- You must have a Delivery Marker on your Player Board (each player starts with 3).
- You must have a Cargo Card whose letter matches your MiniBetaBot's sector. Each Cargo Card can only be used once.
- You must have at least 1 shield on your Shield Track. Otherwise, you can complete only your Secondary Objectives.
- You must have at least 2 batteries on your Battery Track.
Reception points by ship and sector:
| Ship | A | B | C |
|---|---|---|---|
| Probe | 10 | 15 | 20 |
| Scout | 26 | 25 | 21 |
| Freighter | 27 | 30 | 40 |
NOTE: If you have exceeded your allowed stress level you can discard up to 2 Cargo Cards. For each card you want to discard, you must lose 3 shields; if you do, discard the card and reduce your stress level by 2. When you lose your last shield, you cannot make deliveries (see BetaBot Shield Track and Battery Track).
If you meet all the conditions, carry out the following steps in order:
- If you're making a Manual Delivery, perform a boosted Make a Manual Delivery sub-action. If you're making an Automatic Delivery, ignore this step.
- Take the Demand Card from the receiving ship. Flip it over and place it below your Cargo Card whose letter matches your MiniBetaBot's sector. Then flip that Cargo Card over, so that together with the Demand Card they form a container.
- Take all the resources, batteries and Cylindroids that you want to deliver from your tanks/items/Battery Track/Cylindroids Basic Container, up to the permitted load limit indicated on the receiving ship's Main Objective Card. Place them on the container you just made, where they will remain until the end of the game. At the end of the game you will receive Victory Points according to the contents of each of your containers.
NOTE: The permitted load limit is applied to each Demand Card separately, and not globally to all Demand Cards of that ship.
Depending on the receiving ship and your MiniBetaBot's sector, place your Delivery Marker on the corresponding ship and letter of the Delivery Zone.
NOTE: If more than one player delivers to the same ship in the same sector, all the Delivery Markers are placed in the same space at the Delivery Zone.
Once a delivery is made, apply the indicated stress variation to the affected BetaBots, in turn order. For example: a Probe delivery from Sector A gives +5 stress to all other BetaBots; a Scout delivery from Sector B gives +5 stress to the delivering BetaBot and +5 stress to all other BetaBots; a Freighter delivery from Sector C causes no stress changes.
Example: 4 Players. The purple player is in the 5th Main Vault and the yellow player is in the Manual Delivery Base in sector B. The purple player executes the Move action to move to the Automatic Delivery Base in Sector B. When they get there, they immediately increase their stress level by 5. They then check if they meet all the requirements to be able to deliver (starting with their stress level, which after the increase is 9), and confirm that they are. As they're in the Automatic Delivery Base, they do not need to execute the Make a Delivery sub-action. They deliver to the Probe (which still has 2 Demand Cards) the following resources: 2 Betamatter, 3 Gas and 7 Acid. This delivery will earn them 22 Victory Points at the end of the game. Finally, they place their Delivery Marker on the corresponding space in the Delivery Zone and each BetaBot applies the corresponding stress variation (+5 stress to all those who have not made this delivery).
Example: The yellow player also planned to make a delivery (to the Probe, from the Manual Delivery Base in Sector B), and before the purple player's turn they met all the requirements to carry it out. However, due to the stress variance caused by the recent delivery, they have now exceeded the threshold stress level (their stress was 12 and now is 17, but the limit is 15) and they will not be able to deliver at this time.
Delivering AlphaBot
When AlphaBot leaves the 6th Main Vault, it must be placed on its Shuttle. From now on any BetaBot can deliver it to a ship, either through a Manual delivery or an Automatic delivery. Delivering AlphaBot counts as a complete and single delivery: You cannot deliver AlphaBot and resources/batteries in the same delivery.
To be able to deliver AlphaBot, first you must meet all the following conditions:
- Your MiniBetaBot must be in the sector's C Manual Delivery Base or Automatic Delivery Base (remember to place your BetaBot on the Neutral Zone).
- The Freighter is the only ship that can receive AlphaBot, and it must be at the reception point of sector C.
- Your stress level cannot exceed 29.
- You must have a Delivery Marker on your Player Board (each player starts with 3), but you don't need a Cargo Card.
- You must have at least 1 shield on your Shield Track. Otherwise, you can complete only your Secondary Objectives.
- You must have at least 2 batteries on your Battery Track.
If you meet all the conditions, carry out the following steps in order:
- If you're making a Manual Delivery, perform a boosted Make a Manual Delivery sub-action. If you're making an Automatic Delivery, ignore this step.
- Place MiniAlphaBot in the Delivery Zone.
- Place AlphaBot and its Shuttle Card below your board. Flip the card to show the container.
Choose 1 of these 3 rewards, and place your Delivery Marker on the corresponding space of the AlphaBot Delivery Zone:
- 8 Victory Points at the end of the game. You can only choose this option if the AlphaBot Status Tile has its A side facing up.
- Up to 2 available AlphaBot Items. Place them on your board's extensions.
- Any amount of resources/batteries from AlphaBot's Tank. Place them in your tanks, distributing them as you wish, or on your Battery Track.
Adjust your stress level:
- If AlphaBot is your 1st delivery: reduce your stress level by 10.
- If AlphaBot is your 2nd delivery: reduce your stress level by 5.
- If AlphaBot is your 3rd delivery: increase your stress level by 5.
Example: 2 Players. AlphaBot is on top of its Shuttle card. The purple player and the yellow player are in the Manual Delivery Base in sector C. The purple player's stress level is 32 and the yellow player's is 29. Following the turn order, the purple player starts, but exceeds the stress limit in order to deliver to AlphaBot. Therefore, they decide to make a delivery to the Freighter. Since delivering to the Freighter from sector C does not cause a stress variation on the rest of the BetaBots, the yellow player can deliver the AlphaBot on their turn. Upon delivery, AlphaBot's Status Tile is on the A side, so they choose the 8 Victory Point reward at the end of the game. As this is their 2nd delivery, it reduces their stress level by 5. As delivering AlphaBot does not require the use of a Cargo Card, if they wish, the yellow player could make his 3rd delivery to the Freighter in a later turn.
Phase 4: Maintenance
In this phase, you can rearrange resources and batteries, as well as combine them to obtain different results. You will be able to replicate batteries and prepare their production for the next round. One of the most important factors to keep in mind in this phase is the Lava in your tanks: you must solidify it or liquefy other resources with it. Finally, you can also change your AI to Competitive or Cooperative.
4.1 Maintenance Processes
4.1.1 Replicating and Rearranging Batteries Process
Replicating Batteries
If your Battery Track is full, you cannot perform this process.
You may produce up to 2 batteries of your choice, from the ones you have prepared in previous rounds in your Battery Producer (see Combining Betamatter Process). For each battery you want to replicate:
- Return the Betamatter and the resource on top of it (Carbon, Titanium, Silicon or Exomatter) to the common supply.
- Take a battery from the common supply matching the returned resource. If you returned Exomatter, take 2 different batteries.
- Place the battery/ies in the rightmost empty spaces of your Battery Track.
NOTE: Each round, you can prepare up to 3 batteries, but you can only replicate up to 2 batteries.
Rearranging Batteries
During this process you can rearrange the batteries on your Battery Track as you wish, even exchange the one in your BetaBot.
NOTE: At the end of this process it is mandatory that your BetaBot has a battery in it (unless you have run out of batteries on your Battery Track, and you have not replicated any, in which case omit this requirement).
4.1.2 Rearranging and Liquefying Resources Process
First, Rearrange Resources
You may rearrange your resources by moving them from one tank to another, but you must always move them to a higher number tank.
Depending on the type of resource that you want to move, keep in mind the following:
- Lava and Resources: If you move Lava into a tank that contains Carbon, Titanium, Silicon or Betamatter, these resources become liquefied (see below). The same thing happens the other way around.
- Gas or Acid: They cannot be moved from the Dangerous Substances Tank, unless you place them on a specific item that can store them (such as Nanobots).
Then, Liquefy Resources
Whenever one or more resources other than Exomatter are in the same tank as one or more Lava, each one of them is liquefied:
- Return the liquified resources to the common supply.
- Take 1 Lava from the common supply for each liquefied resource, and place them in that same tank.
- Add 1 additional Lava to that tank.
NOTE: You cannot move resources from your items to your tanks or from one item to another, but you can move them from your tanks to your items.
NOTE: Exomatter: It doesn't liquefy.
4.1.3 Solidification Process
For each tank that contains 2 or more Lava:
- Return to the common supply all the Lava of that tank.
- For each 2 Lava returned, take from the common supply 1 Betamatter and place it in that tank.
NOTE: From this moment on, you can't move the resources to other tanks.
4.1.4 Combining Betamatter Process
You may combine Betamatter with different resources to replicate batteries or with Gas or Acid to gain immediately 2 or more resources.
To replicate batteries in future rounds, you must prepare them within the 3 spaces of the Battery Producer. To prepare a battery, place on one of those spaces:
- 1 Betamatter + 1 Carbon / 1 Titanium / 1 Silicon on top → 1 matching battery.
- 1 Betamatter + 1 Exomatter on top → 2 different batteries.
You can also combine Betamatter with Gas or Acid to gain immediately:
- 1 Betamatter + 1 Gas → 2 Titanium.
- 1 Betamatter + 1 Acid → 2 Silicon.
Place the obtained resources in the same tank you took the Betamatter from, or in a higher number tank.
NOTE: You can make these combinations with Betamatter in any order you prefer.
4.1.5 BetaBot AI Process
If you've got exactly 5 batteries in your Battery Track you can change your AI from Competitive to Cooperative, or vice versa. If more than one player wants to change their AI at the same time, the changes are made in turn order.
Example: The purple player has in the battery producer: 1 Betamatter with 1 Carbon, 1 Betamatter with 1 Silicon and 1 Betamatter with 1 Exomatter. In the tanks: Tank 1: 4 Lava, Tank 2: 1 Betamatter, 1 Carbon, 1 Titanium and 1 Silicon and Tank 3: 1 Exomatter. Hazardous Substances Tank: 2 Acid and 3 Gas. They have no items equipped. 8 Shields and 6 batteries on the Battery Track and no batteries in the BetaBot. The purple player begins their Upkeep Phase.
Replicate and Rearrange Batteries → They have 2 options: Replicate 1 Carbon battery and 1 Silicon battery with the two Betamatter that have the corresponding resources, or use the Betamatter with the Exomatter to replicate 2 different batteries of their choice. Since they need 1 Titanium battery, they choose the Exomatter option to replicate 1 Titanium battery and 1 Carbon battery. Since there was only 1 free slot left on their Battery Track, they place 1 Silicon battery from the Track in their BetaBot, and the 2 new batteries on the Battery Track. Lastly, they rearrange their batteries as they see fit.
Liquefy and Rearrange resources → First they place the Exomatter and 1 Lava in tank 4. Then they place the Betamatter and Carbon in tank 3. Lastly they place 1 Lava in tank 2. Therefore, they liquefy the Silicon and the Titanium in tank 2 and obtain 1 Lava for each, resulting in 4 Lava in total. The Exomatter in tank 4 does not liquefy.
Solidification → The Lava in tank 1 and 2 solidifies, becoming 1 Betamatter in tank 1, and 2 Betamatter in tank 2. The single Lava in tank 4 doesn't solidify.
Combine Betamatter → They combine 1 Gas with the Betamatter from tank 1 to get 2 Titanium, which stay in tank 1. They combine 1 Acid with 1 of the Betamatters in tank 2 to get 2 Silicon, which stay in tank 2. Lastly, they take the remaining Betamatter from tank 2 and 1 Titanium from tank 1 to place them in one of the Battery Producer slots, in order to replicate 1 Titanium battery in the next Upkeep Phase.
BetaBot AI → Since they have more than 5 batteries on their track during this step, they cannot change their AI.
4.2 Battery Track Bonuses
Every time you place a battery on your Battery Track, a new bonus is activated and it gives you certain advantages when playing. Similarly, each time you remove a battery, the corresponding bonus is deactivated and you can no longer benefit from it. You start the game with 3 batteries.
| Battery | 2-3 Players | 4 Players |
|---|---|---|
| 1 | You can spend your Active Battery to boost sub-actions | You can spend your Active Battery to boost sub-actions |
| 2 | You can make deliveries to the ships | You can make deliveries to the ships |
| 3 | You have 2 movement points | You have 3 movement points |
| 4 | You can program Action Cards in Slot 3 | You may spend the Active Battery from your Battery Track |
| 5 | You can choose between Competitive or Cooperative AI | You can choose between Competitive or Cooperative AI |
| 6 | You may spend the Active Battery from your Battery Track | You can program Action Cards in Slot 3 |
| 7 | You have 3 movement points | Additional actions due to discarding a captured Cylindroid are boosted |
Phase 5: AlphaBot and Cylindroids Activation
First, AlphaBot is activated, revealing an Event token that triggers a series of events, including the activation of the Cylindroids. Carry all those events out in order. Finally, keep in mind AlphaBot's Shield Track and its Movement.
Then move AlphaBot to the right, onto the next segment of the AlphaBot Belt, or to the right of the last segment of the AlphaBot Belt. This movement may cause different situations, which are managed at the end of the phase (see AlphaBot's Shield and Movement).
5.1 AlphaBot Activation: Events
When AlphaBot is activated, flip the Event Token from the segment AlphaBot is on to reveal the Events side. Carry out the shown events in the following order:
5.1.1 Ships' Movement
Move the pictured ship +1 or -1 space on its trajectory, as indicated. Ships that have left the planet's orbit cannot move.
NOTE: Remember that when a ship leaves the planet's orbit, the stress level of all BetaBots changes immediately (see Phase 1: Ships).
5.1.2 Core Rotation
Rotate the Core Section Tile 1 position clockwise or counterclockwise, as indicated. If the Core Section tile has been flipped to its B side, rotate it 2 positions instead of 1.
5.1.3 Planet's Pressure Level
Adjust the current pressure level by 0, +1 or -1, as indicated.
Example 1: AlphaBot is on top of the Event Token on the left. When activated, you must reveal the token to carry out the events. Place AlphaBot next to the Event Token, and then flip the token (it's event 03). The events take place in the following order: The Core rotates 1 position clockwise, the planet's pressure level varies by +1, and the Lower Vault of Advanced Objects (02) is enhanced during Auto-production. Now carry out the Cylindroids steps: first they advance in the Cylindroid Belt, then they disembark from the Elevator. Lastly, discard the Event Token and place AlphaBot on top of the Event Token to the right.
5.1.4 Auto-Production
If the Event token displays a resource/battery icon:
- If that resource/battery is depicted in the Common Tank, take 1 matching resource/battery from the common supply and place it in the Common Tank. Ignore this step if the Common Tank already contains the maximum number of that resource/battery, as indicated on its tile.
- For each Vault that has that resource/battery depicted on its tank, take 1 matching resource/battery from the common supply and place it on that Vault. Ignore this step if that Vault already contains the maximum number of that resource/battery, as indicated on its tank.
- Then, if an Extraction/Production Vault contains all the resources/batteries indicated on its tank, flip it to its B Side. This Vault is now enhanced, and can no longer auto-produce.
If the Event token displays the item icon, flip over the corresponding Item Vault to its B Side.
NOTE: If an Extraction/Production Vault contains Cylindroid(s), it doesn't auto-produce.
NOTE: The Core does not auto-produce Lava.
Example 2: AlphaBot is on top of the Event Token on the right. Place AlphaBot next to the Event Token, and flip the token (it's event 11). The events are carried out in the following order: The Scout ship moves -1 in its trajectory (unless it has left orbit) and in Auto-production 1 Silicon and 1 Titanium are placed in the corresponding Vaults and in the Common Tank, respecting their resource limits. Now carry out the Cylindroids steps: first the Cylindroids in the Belt and in the Extraction/Production Vaults attack, then they disembark from the Elevator. Lastly, discard the Event Token and AlphaBot leaves the Main Vault.
5.2 Cylindroids Activation
The Event Token also shows how the Cylindroids are activated, and there are 3 possible cases:
5.2.1 Cylindroids Advance in the Belt
All Cylindroids in the Cylindroids Belt advance one segment simultaneously. Cylindroids in segment D move to the Crust Extraction/Production Vault closest to the Main Vault. When an Explosive Cylindroid moves to segment C, it automatically becomes armed. Cylindroids on the Elevator do not move.
When a Cylindroid moves to an Extraction/Production Vault, place it in the Vault's tank, and remove all resources from there. Remember that as long as the Cylindroid remains in the Vault, there will be no auto-production on that Vault.
Cylindroids Limit
Extraction/Production Vaults may contain a certain number of Cylindroids (see Spaces for BetaBots and Cylindroids). If not all Cylindroids fit in the Vault, move them in the following order: 1st - Miner, 2nd - Explosive and 3rd - Laser. Return the remainder to the Cylindroid bag.
Example 1: 2 players: During the Cylindroids Activation of event 12, first the Cylindroids in the Cylindroid Belt advance, and then attack. First those in segment B, starting with the Laser Cylindroid (deals 1 damage to AlphaBot) and then the Miner Cylindroid (deals 1 damage to AlphaBot). Next, those in segment C attack, starting with the Miner Cylindroid (it can't attack from this segment) and then the Explosive Cylindroid (since it is armed, it deals 1 damage to AlphaBot, to the yellow player and to the purple player). Its explosion does not affect other Cylindroids, and the Explosive Cylindroid is returned to the Cylindroid bag.
5.2.2 Cylindroids Disembark from the Elevator
Cylindroids on the Elevator advance to segment A of the Cylindroids Belt. If there are already Cylindroids in that segment, they are pushed to segment B, which may cause further pushes onto the following segments. Then, place new Cylindroids on the Elevator (see Placing Cylindroids on the Elevator).
Example 2: 3 players.
5.2.3 Cylindroids Attack
All Cylindroids in the Cylindroids Belt attack, and then all Cylindroids in the Extraction/Production Vaults attack.
Cylindroids in the Belt
Cylindroids choose the target of their attack (AlphaBot and/or Betabots in the Main Vault) depending on the belt segment they are on. Cylindroids attack in order, first by segment (A and B → C → D) and then by type (Laser → Miner → Explosive).
Example: During the Cylindroids Activation of event 04, first the Cylindroids in the Cylindroid Belt advance, and then attack. First those in segment B, starting with the Laser Cylindroid (deals 1 damage to AlphaBot) and then the Explosive Cylindroids (it can't attack, since it is disarmed). Then the Laser Cylindroid in segment C attacks (deals 1 damage to AlphaBot, to the yellow player and to the purple player). Lastly, the armed Explosive Cylindroid in segment D attacks (deals 2 damage to both the yellow player and the purple player). Its explosion does not affect other Cylindroids, and the Explosive Cylindroid is returned to the Cylindroid bag. Lastly, the Miner Cylindroid that was moved to the Vault deals 1 damage to the white player.
Segments A and B:
- Laser Cylindroid: Attacks AlphaBot → AlphaBot loses 1 shield.
- Miner Cylindroid: Attacks AlphaBot → AlphaBot loses 1 shield.
- Explosive Cylindroid: It can't attack since it's disarmed.
Segment C:
- Laser Cylindroid: Attacks AlphaBot and BetaBots → each one loses 1 shield.
- Miner Cylindroid: It doesn't attack.
- Explosive Cylindroid: Attacks AlphaBot and BetaBots → each one loses 1 shield. Explosions never affect other Cylindroids. Then, return the Cylindroid to the bag.
Segment D:
- Laser Cylindroid: Attacks BetaBots → each one loses 1 shield.
- Miner Cylindroid: Attacks BetaBots → each one loses 1 shield.
- Explosive Cylindroid: If it is armed (it might have been disarmed by a BetaBot), it attacks BetaBots → each one loses 2 shields. Explosions never affect other Cylindroids. Then, return the Cylindroid to the bag. If it is disarmed, it doesn't attack.
Cylindroids in the Extraction/Production Vaults
Cylindroids attack the BetaBots that are in the same Extraction/Production Vault. The Vault order is irrelevant, but in each Vault the Cylindroids attack in order, according to their type (Laser → Miner → Explosive):
- Laser Cylindroid: Deals 1 damage → BetaBots lose 1 shield.
- Miner Cylindroid: Deals 1 damage → BetaBots lose 1 shield.
- Explosive Cylindroid: If it is armed (it might have been disarmed by a BetaBot), it attacks BetaBots → each one loses 2 shields. Explosions never affect other Cylindroids. Then, return the Cylindroid to the bag. If it is disarmed, it doesn't attack.
Placing Cylindroids on the Elevator
There's 4 triggers that place new Cylindroids on the elevator: Event Tokens, the Switch-on the Console sub-action, specific Items and the MOVE action Deck End Event. Regardless of the trigger, always place them randomly from the bag. The number of Cylindroids to place depends on the game state:
- In a 3 or 4 player game:
- If AlphaBot has at least 6 shields, place 1 Cylindroid.
- If AlphaBot has 5 shields or less, place 2 Cylindroids.
- In a 2 player game:
- If AlphaBot has at least 6 shields, place 1 Cylindroid.
- If AlphaBot has 5 shields or less, place 2 Cylindroids.
AlphaBot's Status Tile
Every time AlphaBot loses shields, the stress level of the BetaBots varies. Check the AlphaBot's Status Tile:
A Side
Increase the stress level of all BetaBots that are outside the Main Vault by:
- 2 Players: 2 stress for each shield lost by AlphaBot.
- 3-4 Players: 1 stress for each shield lost by AlphaBot.
BetaBots inside the Main Vault do not increase their stress.
B Side
Increase the stress level of all BetaBots that are outside the Main Vault by:
- 2 Players: 2 stress for each shield lost by AlphaBot.
- 3-4 Players: 1 stress for each shield lost by AlphaBot.
BetaBots inside the Main Vault increase their stress by 1 for each shield lost by AlphaBot.
Example 1: 4 players, AlphaBot's Status Tile Side A. The purple player is in the Main Vault, the yellow player is in the Core, the red player is in the Exomatter Vault, and the white player is in Sector B Manual Delivery Base. In the Cylindroid Activation Phase, the Laser Cylindroid from section C and the Miner Cylindroid from section A attack AlphaBot, and it loses 2 shields due to the 2 damage dealt. Since the yellow player, the red player and the white player are outside the Main Vault, and the AlphaBot's Status Tile is on its A Side, each of those players increases their stress level by 2 (1 for each shield lost by AlphaBot). The purple player doesn't increase their stress level since they are in the Main Vault.
Example 2: 2 players, AlphaBot Status Tile Side B. The purple player is in the Main Vault and the yellow player is in the Core. During the Cylindroid Activation, the Miner Cylindroid on section A attacks AlphaBot (the Explosive Cylindroid is not armed yet), causing him to lose 1 shield. Since the yellow player is outside the Main Vault, and the AlphaBot's Status Tile is on its B Side, they increase their stress level by 2. Since the purple player is in the Main Vault, they increase their stress level by 1.
5.3 AlphaBot's Shield and Movement
5.3.1 AlphaBot's Shield Track
AlphaBot, similarly to the BetaBots, has a Shield Track, divided in 4 zones. Whenever AlphaBot loses a shield, return to the common supply the topmost shield from its Shield Track. Whenever AlphaBot loses the last shield from a zone, a new penalty is activated.
1st Zone penalty (5 shields or less): When placing Cylindroids on the Elevator, place an additional Cylindroid.
2nd Zone penalty (4 shields or less): At the end of Phase 5, flip AlphaBot's Status Tile to its B Side.
3rd Zone penalty (2 shields or less): At the end of Phase 5, flip the Console Tile to its B Side.
4th Zone penalty: Whenever AlphaBot loses its last shield at any time during the game, the stress level of all BetaBots is immediately increased by 5. Then, AlphaBot recovers 4 shields. Take them from the common supply and place them on the Shield Track, starting from the bottom.
Example 1: 4 players, AlphaBot's Status Tile Side A. The purple player is in the Main Vault, the yellow player is in the Core, the red player is in the Exomatter Vault, and the white player is in Sector B Manual Delivery Base. In the Cylindroid Activation Phase, the Laser Cylindroid from section C and the Miner Cylindroid from section A attack AlphaBot, and it loses 2 shields due to the 2 damage dealt.
Whenever AlphaBot recovers all the shields of a zone, the corresponding penalty is deactivated:
- If at the end of Phase 5 AlphaBot has 3 or more shields, flip the Console Tile back to its A Side.
- If at the end of Phase 5 AlphaBot has 5 or more shields, flip its Status Tile back to its A Side.
- As long as it has 6 or more shields, do not place an additional Cylindroid.
NOTE: If you want to use the alternative AlphaBot's Shield Track Tile (recommended for experienced players), keep in mind there are 3 zones instead of 4, and the number of shields on each zone changes.
5.3.2 AlphaBot Leaves the Main Vault
Whenever AlphaBot is placed on the space to the right of the last segment of the AlphaBot Belt, it is considered that AlphaBot leaves that Main Vault. Then, follow these steps in order:
Advance the Main Vault Marker on the Active Main Vault track.
Place 2 new Event Tokens at random on the AlphaBot Belt, with their Belt side face up.
Cylindroids may move to the Extraction/Production Vaults, depending on the segment of the Cylindroids Belt they are on:
- Segments A or B: They do not move.
- Segment C: They move to the Extraction/Production Vault of the Mantle closest to the Main Vault.
- Segment D: They move to the Crust Extraction/Production Vault of the same sector of the Main Vault.
If your MiniBetaBot is on the Main Vault that AlphaBot has just left, place your BetaBot on the Neutral Zone.
Place AlphaBot on the leftmost Event Token, and place MiniAlphaBot on the next Main Vault, following the arrows on the board.
If your MiniBetaBot is on the Main Vault that AlphaBot has just moved to, place your BetaBot on the Main Vault Zone.
NOTE: If AlphaBot is leaving the 6th Main Vault, consult section 5.3.4.
Example: AlphaBot leaves the 2nd Main Vault. First place MiniAlphaBot in the next Main Vault on the Planet. Place AlphaBot on the space to the right of the last segment of the AlphaBot Belt. Advance the Main Vault Marker to the number 3. Place 2 new Event Tokens. The Explosive Cylindroid in segment A and the Laser Cylindroid in segment B do not move. The Miner Cylindroid in segment C is moved to the Lower Advanced Objects Vault. The Explosive Cylindroid in segment D is moved to the Acid and Silicon Vault, so the Acid and Silicon resources are returned to the general supply. The purple player must move their BetaBot from the Main Vault to the Neutral Zone, and the yellow player moves their BetaBot from the Neutral Zone to the Main Vault. Lastly, place AlphaBot on top of the left Event Token.
5.3.3 AlphaBot Enters the 4th/5th/6th Main Vault
When AlphaBot moves to the 4th, 5th or 6th Main Vault (Crust) apply the following Unblocks and Bonuses:
- Apply the bonus depicted on that Crust Section Tile:
- Remove the padlock markers from that Sector (there may be 1 or 2).
- AlphaBot gains 1 shield. Place 1 Titanium from the common supply on the bottom empty space of AlphaBot's Shield Track.
- Place 1 Exomatter in AlphaBot's Tank, within the tank's limit of 1 resource of each type.
- Place 1 battery of each type in AlphaBot's Tank, within the tank's limit of 1 resource of each type.
Example: AlphaBot enters the 4th Main Vault. The 2 padlock markers are removed from Sector A and 1 Exomatter is placed in the AlphaBot Tank.
5.3.4 AlphaBot Leaves the 6th Main Vault
Remove the Console Tile. You won't be able to perform the Switch-on the Console sub-action because the 6th Main Vault is no longer active.
Place MiniAlphaBot on the Shuttle and AlphaBot on top of the Shuttle Card.
BetaBots that are in the 6th Main Vault are placed in the Neutral Zone.
Cylindroids that are in segments C and D move to the Extraction/Production Vaults as usual. Those from segments A and B are eliminated by AlphaBot and the resources they are composed of are placed in AlphaBot's Tank, within the tank's limit of 1 resource of each type. Then, return these Cylindroids and those on the Elevator to the bag.
The remaining resources/batteries in AlphaBot's Tank will be available for the corresponding reward of the AlphaBot Delivery.
Phase 6: Status Check
First, each player adjusts their stress level, if necessary, and checks their hand size. Then, if necessary, the turn order for the next round is established.
Stress Level
If your MiniBetaBot is on a Section Tile that hasn't been explored by AlphaBot yet, you must increase your stress level by 1 for each Section Tile that separates you from AlphaBot.
NOTE: If your MiniBetaBot is in a Crust Extraction/Production Vault, it counts as being in the corresponding Mantle tile of that Sector.
NOTE: If your MiniBetaBot is on the Core, your stress level does not increase.
Example: 4 players. AlphaBot is in the 3rd Main Vault. The purple player does not increase their stress level, since they are on a Section Tile already explored by AlphaBot. The yellow player does not increase their stress level either, because they are in a Crust Extraction/Production Vault. The white player increases their stress level by 1, since they are in the Manual Delivery Base in Sector A, thus 1 Section Tile ahead of AlphaBot. Lastly, the red player increases their stress level by 3, since they are in a Vault 3 Section Tiles ahead of AlphaBot.
Hand Size
You can have up to 5 Action Cards in your hand (6 in a 2-player game). While your stress level is higher than 25, you can have up to 4 Action Cards in your hand. In this step, discard down to your allowed number of cards.
Turn Order
The turn order for the next round is determined by the player's stress level. The first player will be the one with the most stress, and they take the 1st Player Tile. The next player will be the second with most stress, and so on. In case of a tie at stress level 0 or 40, the previous round's turn order is maintained.
Example: 4 players. At the beginning of the round, the turn order is as follows: 1st purple player, 2nd yellow player, 3rd red player and 4th white player. In Phase 6, the turn order is modified again, taking into account the player's stress level: The purple player keeps the turn order tile (1st). The yellow player gives the turn order tile (2nd) to the red player. The yellow player and the white player are both in level 0, so the white player must keep their turn order tile (4th). Thus, the yellow player receives the remaining turn order tile (3rd).
End of the Game
When the Freighter leaves the planet's orbit on phase 1 of the 14th round, the game ends immediately and players proceed to the final scoring to determine the winner.
Final Scoring
Once the game is over, players add up their Victory Points (VP) earned by:
- Main Objectives.
- Secondary Objectives.
- Delivering AlphaBot.
- Equipped Items.
- Remaining Shields.
Use your Stress Marker to calculate your VPs. First of all, remember that your stress level on the Stress Track are negative VPs. Therefore, to determine your VPs total, for each VP earned, move back (towards the 0) your Stress Marker 1 space in the Stress Track.
If your Stress Marker reaches level 0, flip it over to the side showing the Victory Points icon and continue advancing on the Stress Track, this time to count your positive VPs.
VPs for Main Objectives
Multiply the number of resources/batteries/Cylindroids you have placed on your containers (made with Cargo Cards) by the number of VPs each resource/battery/Cylindroid grants, as is shown on the Main Objective Card of the matching ship.
VPs for Secondary Objectives
If you have Delivery Markers left, you can place them on Secondary Objectives that you can complete.
If you have completed either of your Secondary Objectives, and placed a Delivery Marker on it, you get the VPs indicated on the card.
If you have completed both Secondary Objectives, and placed a Delivery Marker on each of them, you also get the additional VPs indicated on the card.
VPs for Delivering AlphaBot
If you have delivered AlphaBot and you have chosen this reward, gain 8 VPs.
VPs for Equipped Items
Add up the VPs of all your equipped items, including the ones stacked under the visible ones.
VPs for Remaining Shields
Add up your remaining shields. For each 2 shields you gain 1 VP.
Example: 3 players. Each player scores VPs as follows:
Purple Player: Main Objectives → They delivered the following to the Scout at Sector B: 4 Carbon (2 VPs each) and 3 Betamatter (1 VP each) = 11 VPs. They delivered the following to the Freighter at Sector C: 3 Exomatter (2 VPs each), 2 Lava, 1 Acid and 1 Gas (all those are 1 VP each) = 10 VPs. Total for Deliveries = 21 VPs. Secondary Objectives → They have a Delivery Marker left over, but can't complete any Secondary Objectives, so they receive 0 VP. Deliver AlphaBot → They haven't delivered it, so they receive 0 VP. Items → 2 Advanced Items = 7 VPs. 1 AlphaBot Item = 2 VPs. Total for Items = 9 VPs. Shields → They have 3 shields left = 1 VP. TOTAL = 31 VPs.
Yellow Player: Main Objectives → They delivered the following resources to the Scout at Sector C: 4 Carbon (2 VPs each) and 6 Betamatter (1 VP each) = 14 VPs. Secondary Objectives → They completed 1 Secondary Objective, and placed a Delivery Marker on it, so they receive 6 VPs. Deliver AlphaBot → They delivered it, and chose to score 8 VPs. Items → 2 AlphaBot Item = 6 VPs. Shields → They have 5 shields left = 2 VPs. TOTAL = 36 VPs.
Red Player: Main Objectives → They delivered the following resources to the Probe at Sector A: 4 Acid (2 VPs each), 3 Gas (2 VPs each) and 3 Betamatter (1 VP each) = 17 VPs. Secondary Objectives → They fulfilled 2 Secondary Objectives, and placed a Delivery Marker on each of them, so they receive 6 VP for each one and 2 for fulfilling both. Total for Secondary Objectives = 14 VP. Deliver AlphaBot → They haven't delivered it, so they receive 0 VP. Items → No items, so 0 VP. Shields → They have 11 shields left = 5 VP. TOTAL = 36 VPs.
At the end of the game, the stress level of each player is as follows: purple player → 25, yellow player → 29 and red player → 37.
Therefore, the Final Score of each player after adding the VPs to their stress level is as follows: Purple Player = 31-25 = 6 VPs. Yellow Player = 36-29 = 7 VPs. Red Player = 36-37 = -1 VP. The yellow player wins, since they have the most VPs.
Stress Botics Winner
The player with the most VPs wins the game. If no player has positive VPs, the player with less stress (ie: negative VPs) wins the game. In case of a tie, use the following tie-breakers in order to establish the winner:
1st: The player who has delivered AlphaBot. 2nd: The player with more shields. 3rd: The player who has less Delivery Markers left.
If the tie persists, the tied players share the victory.
Relevant Terms
Active Battery
When you want to boost a sub-action, you must spend an Active Battery. The battery in your BetaBot and the one on the rightmost space of the Battery Track are the Active Batteries, though the latter is only available if the corresponding bonus of your Battery Track is active (see Battery Track Bonuses). To spend it, return it to the common supply. If you spend the battery from the Battery Track, immediately move all your batteries one space to the right, without changing their order.
BetaBot Shield Track and Battery Track
Whenever you take damage, you lose 1 shield for each 1 damage taken. To indicate this, move the Shield Marker 1 space to the right on your Shield Track.
Every time you place a battery on your Battery Track, a new bonus is activated and it gives you advantages when playing (see Battery Track Bonuses).
The Shield Track is interlaced with the Battery Track and they share 4 spaces (2, 4, 6, 8). When your Shield Marker is placed on or moves rightwards through one of those shared spaces, you lose the batteries you have to the left of that space. When a Titanium Battery is on one of the shared spaces, it works as a shield: If the Shield Marker is in that same shared space and it has to be moved rightwards on the Shield Track, do not move it and return the battery to the common supply instead.
Example 1: The yellow player loses 1 shield when attacked by a Miner Cylindroid. The Shield Marker is moved 1 space to the right, occupying the 6th Battery (Carbon) space. Therefore, they lose their 7th battery (Silicon), since it is to the left of that space. The 6th battery (Carbon) is placed on top of the Shield Marker.
Example 2: The purple player loses 2 shields when attacked by an Explosive Cylindroid. Their Shield Marker is moved 1 space to the right, occupying the 6th Battery (Titanium) space. Therefore, they lose their 7th battery (Silicon), since it is to the left of that space. It should then be moved another space to the right, but since the Titanium Battery plays the role of a shield, instead of moving the Shield Marker they return the Titanium Battery to the general supply. Lastly, since they now have exactly 5 batteries, they can choose to change their AI from Cooperative to Competitive.
Example 3: The red player loses 4 shields when attacked by two Explosive Cylindroids. They first move their Shield Marker 3 spaces to the right, thus losing the 3rd and 4th batteries (both Carbon). Now, since they can't lose any more shields, they flip their Shield Marker and Status Tile to Side B. Since they should lose 1 more shield and they can't, instead they increase their stress level by 1. They now have 6 movement points, until they flip their Status Tile again.
When you lose your last shield, flip your Shield Marker and Status Tile to the B Side. Thereafter, you have 6 movement points when you perform the Move Action (12 if you boost it), but you cannot make deliveries. You still can complete your Secondary Objectives. When you lose 1 shield, increase your stress level by 1 instead. When you gain 1 shield, flip your Shield Marker and Status Tile to the A Side back again, unless your stress level is higher than 40 (see Stress Track).
Deck End Event
Whenever one of the Action Card decks runs out of cards, that deck's End Event is revealed and carried out:
- MOVE Deck: Cylindroids disembark from the Elevator. (Follow the instructions on Cylindroids Disembark from the Elevator.)
- MINE Deck: All Cylindroids in the Main Vault and Extraction/Production Vaults attack. (Follow the instructions on Cylindroids Attack.)
- CONNECT Deck: AlphaBot gains 1 shield. Place 1 Titanium from the common supply on the bottom empty space of AlphaBot's Shield Track.
Finally, shuffle the discard pile of that Action Card deck. Place the new deck face up on its corresponding space of the Action Server.
Discount
When an item has a discount, you can pay 1 resource/battery less of your choice.
Paying a Cost
Whenever you have to pay a cost, you must spend from your tanks or items that allow you to store resources. What you have paid is returned to the common supply.
When you pay batteries, you can use any from your Battery Track. Then, move all the batteries one space to the right to fill the empty spaces, without changing their order.
NOTE: The battery in your BetaBot cannot be used to pay for a cost nor can it be delivered to a Ship. It can only be spent to boost actions.
Player Board Extensions
When you equip an item, place it on one of your Player Board's Extensions. If the extension is empty, you immediately gain the indicated bonus. This bonus is only gained the first time you place an item here. If the extension is not empty, you must place it on top of the item that is already there. Only the visible item of each extension can be activated.
When placing an item on top of another, keep in mind the following limitations:
- You can place small card items on top of other small card items, but you cannot place them on top of large card items.
- Large card items can be placed on top of any item card.
NOTE: During the final scoring, all your equipped items grant you VPs, even if they are not visible.
NOTE: Some extensions only admit small card items.
Repairing Your BetaBot
Repairing your BetaBot means moving your Shield Marker to the left in your Shield Track.
Stress Track
The Stress Track indicates the stress level of each BetaBot. During the game, a BetaBot can increase or reduce their stress level.
If you reach stress level 40, flip your Turn Order Tile and, instead of continuing to increase it, you lose 1 shield for each 1 stress increased. When you lose your last shield, flip your Shield Marker and Status Tile to the B Side. Now place your Stress Marker on the level 0 and from this moment on, each time you increase your stress level you will advance on the Stress Track, counting from the level 40 (41, 42, etc.). When you repair your BetaBot while in that state, instead reduce your stress level. If you reach level 40 or less, flip your Turn Order Tile back to the A Side. From that moment you can repair your BetaBot as usual.
Example 1: 2 players. The purple player has their Stress Marker at level 38, and has 1 shield left. Due to the delivery of the yellow player to the Scout at Sector C, the purple player increases their stress level by 5. The first 2 increases cause them to place their Stress Marker at level 40 and flip their Turn Order Tile. Now, instead of increasing stress they must lose shields, and they lose their last shield, so they flip their Shield Marker and their Status Tile to the B side. Now, for the remaining 2 increases, they increase their stress level to 42, placing their Stress Marker on top of the yellow player's marker (stress level 2).
Your Stress Marker can never share the same position (except on level 0 and 40) on the Stress Track as another player's marker. If you get to an occupied position, push the other marker to the next position (works equally in both directions). This can cause more pushing between other players' markers.
If your Stress Marker is on the level 0, you cannot further reduce your stress level.
NOTE: If your Stress Marker exceeds level 40 and it is placed on the same position as another player's marker who has not exceeded it, there will be no pushes: place your marker on top of the other player's marker.
Example 2: 4 players. The purple player reduces their stress level by 2 when repairing AlphaBot, thus placing their Stress Marker at level 2. Because of this, it pushes the red player's marker to level 1 on the track, which in turn pushes the white player's marker to level 0. The yellow player reduces their stress level by 1 when capturing a Cylindroid, so they push the purple player's marker, and the purple player pushes the red player's marker. The white player reduces their stress level by 2 when repairing AlphaBot, but since they're already at level 0 on the Stress Track, they cannot reduce it any further. The red player increases their stress level by 2 when activating one of their items, thus placing their Stress Marker at level 2, which pushes the yellow player's marker to level 3.