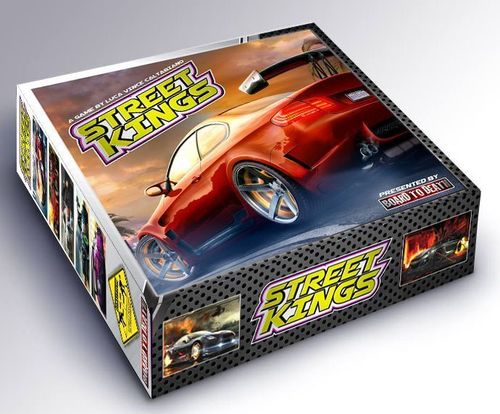
Street Kings
Street Kings Rulebook
Table of Contents
Table of Contents
- Components
- Setup
- Round Summary
- Phases in Detail
- Go to Shop Action
- Upgrade Cards
- Crew Members
- Go to the Car Show Action
- Go to the Dealership Action
- Choose a Racing Location Action
- Qualify for the Race Action
- Phase 3: The Racing Phase
- Phase 4: The Clean Up Phase
- End Game Championship
- Some Variant Rules
- Game Summary
Components
- Game board
- Finish lines (finish line marker)
- First Player card
- Trophies
- Player boards
- Player cars (wooden car pawns)
- Upgrades deck
- Car decks A, B, C, D
- Location deck
- No Parking token
- 16 grey cubes
- 4 green cubes
Setup
- Place the board in the middle of the table.
- Separate each deck of cards and shuffle them.
- Deal out two "D" class cars to each player. These cars are placed face up in front of them. Put the remaining D class cars out of the game.
- Give each player a player board and matching wooden car pawn. Place a green cube on the 2 of the credit track. Place a grey cube on each of the stats on the player board.
- Place the A, B, and C class decks on the board and reveal 3 cars from the C class deck. This creates the dealership where you can buy cars.
- Place the track deck on its spot on the board. Each player draws 3 track cards from that deck to form their hand. These cards are hidden from other players.
- Place the Parts deck on the board and reveal cards to match the number of players plus 1. This creates the Store where you can buy upgrades for your cars. (Number of players + 1)
- Place the Finish line marker on the "D" class of the track on the board.
- Choose a first player and give him the first player card.
You're now ready to hit the streets!
Sample Setup
- The finish line is placed on D.
- Track deck here. Each player draws 3 cards to form their hand.
- Class decks here. Reveal 3 C class cards.
- Turn over upgrades equal to the number of players plus 1.
- In a 2-3 player game, remove a spot at the carshow by placing the No Parking token there.
- A green cube is placed on the 2 of the Credit track. A grey cube is placed on each stat on the player boards.
Round Summary
The game is played in rounds containing phases. Each round, players will do the following phases in this order:
- The first player will choose the event class.
- Actions are taken by all players, until everyone qualifies.
- Race the event class chosen, on the 2 locations placed there.
- Clean up phase.
Phases in Detail
Phase 1: Choose a Class
The first player chooses a class for the race of this round. Place the finish line marker on that class. This determines where the finish line is on the track. You can only choose a class in which you own a car, therefore for the first round, the race will be a "D" class event.
The class chosen is the class of the car a player can use during the race or one class below. For example, if class "B" was chosen, you can use B or C cars during the racing phase of this round.
Phase 2: Players Take Actions
Starting with the first player, each player in clockwise order will do actions until all players have taken the Qualify action or said "Pass". They can only do one of these actions during their turn.
Here is the list of actions:
- Go to the shop
- Go to dealership
- Go to a car Show
- Choose a racing location
- Qualify for the race
Go to Shop Action
You can spend credits to buy upgrades or sell your upgrades.
The shop has new available items to buy every round. When you take this action, you can BUY/SELL an upgrade. The value of an upgrade is the number in the green box on the top left corner of the card. You can only buy 1 upgrade during this action but can sell as many as you wish. When you buy an upgrade, place that card under the car you want to install it on. This upgrade will add STARS to the stats of that car.
Each car can only have ONE upgrade of the same color.
Once added to a car, an upgrade is custom made for that car, you can't swap it to another car. So choose wisely where you want to install that upgrade. Crew members do not have a color and you do not install them on a car yet, they are kept face up in front of you until you start a race.
When you buy an upgrade, do NOT reveal another card from the deck. (The shop needs time to replenish its stock.) At the shop, you can also SELL your upgrades and fire crew members. Add the value of the cards you want to sell and discard those cards to the junk yard on the board. You then gain half the value in credits (rounded up). Remember, you can do both BUY and SELL in this one action but you can only buy ONE upgrade. You may sell before you buy.
Upgrade Cards
Upgrade cards show a price (green box, top left), a type, a car show value (yellow box, top right), and a color. Each upgrade adds STARS to one of the four stats: Top Speed, Acceleration, Handling, Braking.
Crew Members
Crew members have no color, so you can have more than one attached to a car. However, you can not have two cards which contain the same artwork attached to one car. Feel free to give them names when you hire them.
NOZ
NOZ is just like all the other upgrades with a few changes. It does not add to the car show income value of your car. Also, it is a ONE TIME USE upgrade which will move you up 3 spots on the track during a race. After you move your car, you may choose to use & discard a NOZ card attached to it to move an extra 3 spaces.
Go to the Car Show Action
Go to a car show and earn some credits!
When you take this action, you send one of your cars, including its upgrades to an available slot at the car show. In a 4 player game, there are only 3 spots available at the car show. In a 2 or 3 player game, there are only 2 spots available at the car show. (At the start of the game, you place the No Parking token on the spot, which is not available for this game.)
When you send your car to one of those spots, you immediately gain credit equal to the total beauty value of the car and its upgrades. (The number in the yellow box at the top right corner of the cards.) But choose wisely, that car remains there for the whole round, which means you won't be able to race with it later or upgrade it during this round.
For example, placing a car at an open spot at the car show whose car and upgrades show beauty values of 3000, 1000, 1000, 1000 and 0 will earn you 6000 credits.
You can only take this action if there is an available spot at the car show. You can also own more than one car at the car show, as long as there is room for it. Move the Green cube on your credit track according to the amount gained by the beauty value.
Go to the Dealership Action
When you take this action, you can BUY/SELL cars at the dealership. The value of a car is the number in the green box on the top left corner of the card. You can only buy a car which is one class above a car you own. (So if you own a D class car, you can only buy a C class car. If you want to buy a B class car, you need to own C class car. To buy an A class car, you need to own a B class car.)
When you buy a car, reveal a new one immediately from the same class and if the class above does not have any cars showing, reveal 3 cards from that deck as well. B class cars are only available when a player bought a C class car. The same is true for A class cars when a player buys a B class car.
- Class A cars: Revealed only when a player owns a class B car. You must own a class B car to buy a class A car.
- Class B cars: Revealed only when a player owns a class C car. You must own a class C car to buy a class B car.
- Class C cars: These are revealed at the start of the game and can only be bought if you own a class D car.
At the dealership, you can also SELL a car along with all its upgrades. Add the value of the car and all the upgrades on it and discard those cards to gain half that amount in credits (rounded up). You can do both SELL then BUY in one action. You can only buy one car and only sell one car. You can not sell only upgrades at the dealership, you must sell the car along with all its upgrades. If you want to only sell parts, you need to do the SHOP action instead.
Choose a Racing Location Action
Build the track in which the race will take place.
You can only take this action if there is an empty location spot. When you take this action, draw a location card from the deck. You must then place one of your location cards, from your hand, face down on any available location spot on the board. There are two spots you can place a location card (Location spot #1 and Location spot #2). If the deck is empty, shuffle the discard and make a new deck.
You can only place a location card face down on an empty spot. The strategy here is to place a location which is good for your car. For example, if your car is good at handling, then place a location card which contains the handling icon.
Sample Track for a Race
Each location card shows prizes (for 4th, 3rd, 2nd and 1st place, from left to right) and segments of the track (stat icons). A red icon means a penalty for the player who came in 1st (here: the winner loses Brakes on his car).
Example (location cards with prizes 1000/2000/3000/4000 and 2000/3000/4000/5000): This example track will start with handling, then top speed, then acceleration and finally end with braking. Only the second card is used in giving prizes to the players. 5000 for 1st, 4000 for second, 3000 for third, and 2000 for fourth.
The red icon on this track means that the winner will have to discard the Brakes installed on his car if any. (It's a punishing track.)
Qualify for the Race Action
Qualify for the race: (Placing your car pawn at the start line.)
When you take this action, you place your pawn on any of the spots available on the starting grid of the track (#1-4). The number on the starting grid is the order in which the cars will move during a race (the player on the #1 lane will move, then the player on the #2 lane will move and so on). Placing your pawn on the starting grid does not remove you from the action round, you can still take actions when it comes back to your turn.
During the racing phase, cars will move in this order: car in lane 1 will move first, then car in lane 2 will move second and so on. So taking this action early can mean the difference between winning and losing the race.
If you do not have a car to race with, you can't qualify and you must "pass" and skip the race. When you say pass, you're taken out of the action phase.
Important: When ALL players have taken the Qualify action or passed, the ACTION phase ends and you move on to Phase 3... RACING!
Phase 3: The Racing Phase
Before starting the race, if there are empty location spots, fill them with cards from the top of the location deck, face down. Starting with the first player, each player now chooses one of their available cars and places it on their player board to show which car is entering the race. Here you can add crew as well. The car chosen must be of the same class or 1 class lower as the race. (Example: in a B class race, you can only use a B or C class car.) Using the grey cubes, adjust the stats on your player board to match the stars of the car placed there. Once all players have chosen a car and the crew members, flip over the first location card of the race, making sure that the prizes are towards the race lanes. Prizes are NOT used on the first location card, so ignore them.
Once all players have chosen a car for the race, the first location card is flipped face up and the race BEGINS!
Moving Cars
The location card will have 2 stats on it. Each player will now move their pawn a number of spots equal to the number of STARS corresponding to the first stat of the location. The pawns are moved in order from lane 1 to 4. Then do the same for the second stat on the location card.
Example: The location card has Brakes first and then Top Speed. The player on the #1 lane will move up on the track the amount of stars his car has on the Brakes stat. Then player on lane #2 will do the same and so on. When all players have moved according to their brakes stat, start over using the Top Speed stat.
Once both stats on the first location card are used, flip over the second location card. Now move the cars again using the stats on the second location card. When a car reaches the finish line of the chosen class, place the pawn on the position on which it came in at. So 1st place car will be placed on the Gold trophy, 2nd on Silver and so on. If a car does not reach the finish line when all 4 location stats have been visited, continue using the first location card, as though you're doing laps.
Example: The second location card is flipped when the first location card is completed. Now, players will move their cars according to their Acceleration stat. When all players have moved, they do the same for the second stat, which is Handling. If they still do not reach the finish line, they redo the course (restart at the first location if cars did not reach the finish line after both locations).
End of Race
When all players have reached the finish line, rewards are given. Increase players' credits shown at the top of the second location card as prizes. Also, each player receives the trophy of the position they came in at. Gold for 1st, Silver for 2nd, bronze for 3rd and so on. If there is a RED stat icon on that location card, the player who came in 1st discards an upgrade of that stat from the car used in the race, (however, this does not apply to CREW cards.)
Example: There is a RED Handling icon on the second location card. The player who came in first must discard a handling part from that car (if any) and places it in the junk yard.
Don't forget to also increase your credits!
Phase 4: The Clean Up Phase
During this final phase:
- Each player takes all their cars back from the race or car shows and places them in front of them, face up. (Upgrades on cars are always visible to all players.)
- Each player takes back their car pawns.
- Remove the location cards from the location spots and discard them in the spot next to the location deck.
- Remove the Finish line marker from the racetrack.
- Discard ALL cards from the shop and reveal new Upgrades according to the number of players plus 1.
- Refill the dealership by flipping over new cars into the empty spots if any. Do this only for classes that have been already shown during this game.
- The first player marker moves to the player to the left and a new round begins with that player.
- You must always trade up trophies when you can.
Trade Up
At any time, players MUST trade their trophies for higher level ones.
- 2x Fourth place into 1 Bronze
- 2x Bronze into 1 Silver
- 2x Silver into 1 Gold
Important: You don't trade up to get your 7th Gold trophy. You MUST win that one by racing. You can for your 8th gold.
End Game Championship
End Game Championship Round! When a player gets his 7th Gold trophy by winning a race, there is ONE more special round. This round is just like all the others with some rule changes:
- The class marker is set to class "A" finish line and only class "A" cars are allowed during this final race. The first player can't choose what class the event will be this round.
- Place the top two location cards from the top of the deck, face down on the location spots creating a random track. Players can't play location cards this round.
- You can SELL as many cars as you want during the Dealership action. Might be a good time to trade in older cars for a new class "A".
- When a part is bought at the shop, reveal a new one.
Play this final round with these rule changes. At the end of the Championship race, players now have one last chance to TRADE UP their trophies.
The player with the most Gold trophies is the (your city's name) STREET KING!
Some Variant Rules
- Custom Finish Line: The first player can choose where the finish line will be on the racing track. The class of the race is the letter which is closest to the token. Use the custom Finish line token provided for this variant.
- Betting: Before flipping the first location card, players can bet credits, cars and even trophies on who will finish in first place.
- No Crew: Remove all the crew cards from the upgrade deck.
- No NOZ: Remove the Noz cards from the upgrade deck.
- Hidden Upgrades: Upgrades are hidden under the cars.
- Shorter Game: During setup, each player starts with one D class and one C class car. Each player gets one random upgrade to each of those cars. Play until a player has 5 gold trophies instead of 7, with no Championship round.
- Super Store: When a player buys an upgrade, reveal a new one from the deck.
- Infinite Actions (printed "Inifinite Actions"): Even if all players have qualified, the action round continues until all players say "Pass" to end the phase.
- The Elite Class: During Setup, each player gets 1 random car from each class and 1 random upgrade for each of those cars. Each player also starts with 5000 credits. The first player does not choose the class anymore for this game. The class will change every round to the next class and loop around. So first round will be class D, second round class C, third round class B, fourth round class A, fifth round class D and so on...
Game Summary
Choose a Class
The first player chooses the class for the round. (D, C, B or A)
Take Actions
Starting with the first player, players will perform any one of these actions: (Keep going around the table until all players have placed their car on the grid and have taken the qualify action or passed)
- Send one car to the car show (Earn credits)
- Go to the dealership (Buy/Sell one car)
- Go to the shop (Buy/Sell an upgrade)
- Choose a racing location (Place a track card face down on an empty spot)
- Qualify for the race (Place your car pawn on an empty spot of the grid)
Start the Race
- Each player chooses a car and places it on his player board. (You can now add crew members to the car for this race)
- Flip over the first Location card.
- Using the stats of each car, move the car pawns on the racetrack.
- Flip over the second Location card.
- Using the stats of each car, move the car pawns on the racetrack.
When all cars have passed the finish line, give out the prizes.
Clean Up
- Trade up trophies
- Remove the location cards
- Players take back their stuff (Pawns & Cards)
- Pass the First Player token
- A new round begins.