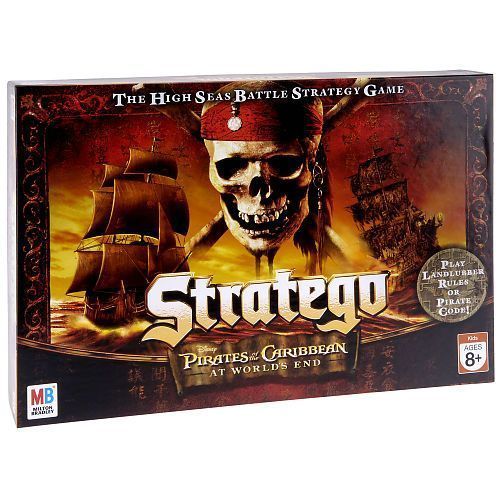
Stratego: Pirates of the Caribbean at Worlds End
Stratego: Pirates of the Caribbean at Worlds End Rulebook
Table of Contents
Table of Contents
Contents
- Gameboard
- 30 Black Pieces
- 30 Tan Pieces
- Display Tray
- Label Sheet
- Special Powers Reference Sheet
Object
Capture your opponent's Flag before he/she captures yours.
The First Time You Play
Remove the game parts from their wrappings, and discard the wrappings.
Carefully punch out the four cardboard markers from the display tray. Set these aside for now.
Apply a label to each piece as follows: apply the crew of The Black Pearl labels (Jack Sparrow, etc.) to the black pieces; apply the crew of The Flying Dutchman labels (Davy Jones, etc.) to the tan pieces. See Figure 1.
Setup
The black pieces represent the crew of The Black Pearl, and the tan pieces represent the crew of The Flying Dutchman. Hide a black piece in one hand and a tan piece in the other. Your opponent chooses a hand and takes the color army of the piece in that hand. The other army is yours.
Place the gameboard on a level surface between you and your opponent, with the STRATEGO Pirates of the Caribbean logo facing each of you. Make sure the pictures on the end of the gameboard match the pieces in your army. Note: You only use the Special Power references if you are playing The Pirate Code.
Place each of your pieces on a gameboard square in the first three rows in front of you (see Figure 2). Make sure the labeled side faces you, and is hidden from your opponent.
Your opponent sets up his/her pieces the same way.
After you've played a few times, you'll start to develop your own strategy. For now, take a look at the rules for moving and attacking, and read the Strategy Hints on page 6. They'll help guide your decisions.
The Two Games
STRATEGO Pirates of the Caribbean Edition features characters from all of the Pirates of the Caribbean movies in a classic battle between good and evil. There are two ways to play:
- Landlubber Rules: STRATEGO Pirates of the Caribbean: This game uses the same rules as the classic game of STRATEGO.
- The Pirate Code: STRATEGO Pirates of the Caribbean with Special Powers: This is the same game, but with additional powers granted to certain pieces.
Landlubber Rules: STRATEGO Pirates of the Caribbean
On Your Turn
You and your opponent alternate turns. The player controlling the crew of The Black Pearl goes first.
On each of your turns, you must do one of the following:
- Move one of your pieces; or
- Attack one of your opponent's pieces.
In a case when you cannot move or attack, the game is over and your opponent wins.
Rules for Movement
The only pieces that cannot move are your Flag and your Bombs. Move your other pieces according to the rules below.
- Move only one piece on a turn.
- Move your pieces one square at a time to an open adjacent square (a square next to it). Pieces can move forward, backward or sideways, but not diagonally. Exception: See Scout Movement, below.
- You cannot jump over other pieces, or move a piece onto an occupied square (unless attacking; see Rules for Attack on page 4).
- You cannot jump over or move onto the Forbidden Zone spaces (see Figure 2).
- You cannot move a piece, back and forth, between the same two squares on three consecutive turns.
Scout Movement – Scouts (pieces ranked 2) have special movement rules. Scouts can move any number of open squares forward, backward, or sideways in one direction. They cannot move diagonally, nor can they pass over or move onto the Forbidden Zone spaces. Before moving a Scout more than one square, you must first reveal it to your opponent. (You may wish to move a Scout only one square at a time, to deceive your opponent.)
Rules for Attack
The only pieces that cannot attack are your Flag and your Bombs. Attack rules are as follows:
- Attack Position: When a black and tan piece occupy adjacent spaces (back-to-back, side-to-side, or face-to-face), they are in Attack Position. See Figure 3.
- How to Attack: Take your attacking piece and lightly tap your opponent's piece. Reveal your attacking piece; your opponent then reveals his/her defending piece. The piece with the lower rank is captured and removed from the gameboard. If the pieces are of equal rank, both are captured and removed from the gameboard. (See Captured Pieces, below). Note: Pieces not ranked by number have special rules; see Spies and Bombs, on page 5.
- If the attacking piece wins, it moves onto the square formerly occupied by the defending piece.
- If the defending piece wins, it stays on its square.
- Attacking is always optional.
Figure 3 key: hatched squares are "Not in range"; open squares are "In range".
Captured Pieces
Any piece that is captured is immediately removed from the gameboard. Players can either place the captured pieces near the gameboard, or they can fit them into the notches provided in the cardboard display tray (shown in the Storing Your Game section on page 8). Before the game begins, both players should agree on how captured pieces will be treated.
The options are as follows:
Open Play: New players may want to place all captured pieces where both players can see them. This will help you keep track of which pieces are still in play.
Prisoner Play: The player who captures a piece takes it and keeps it secret from the other player.
Secret Play: The player whose piece was captured takes it and keeps it secret from the capturing player.
Stealth Play: ALL captured pieces are kept facedown, hidden from BOTH players. This forces both players to keep track of all captured pieces.
Special Attack / Defense Rules
Some pieces have special attack or defense rules. Using these pieces strategically can mean the difference between victory and defeat!
Spies: The pieces ranked S are the spies (Tia Dalma and Mercer). A Spy has no defensive power, so it is captured by any piece that attacks it. Likewise, it is captured by any piece that it attacks, with a few exceptions:
- A Spy may capture a Flag;
- A Spy may capture a 10-ranked piece! For example, if Tia Dalma attacks Davy Jones, Tia Dalma captures him (a huge loss for the tan army).
- A spy may capture another Spy. Keep in mind that if you attack your opponent's Spy with your Spy, both pieces are removed from play.
Bombs: If a Bomb is attacked, the attacking piece is captured. Exception: see Agent/ Buccaneer Attack Privilege, following.
Agent/Buccaneer Attack Privilege: Agents and Buccaneers (pieces ranked 3) are the only pieces that can disable a Bomb. When an Agent/Buccaneer attacks a Bomb, the Bomb is disabled and removed from play. The attacking piece then moves onto the square that was occupied by the Bomb.
Scout Attack Privilege: This privilege applies only to Scouts (pieces ranked 2). They can move any number of open squares forward, backward, or sideways. A Scout using this special movement may end its move on a square occupied by an opponent's piece, then immediately attack it.
Strategy Hints
Flag/Bomb Placement: When setting up your pieces, place your Flag somewhere in the back row, and place Bombs around it for protection. Another strategy is to place bombs in the back corners as decoys, and hide your Flag in the middle of the back row with a high-ranking piece near it, for protection. Important: It is not usually a good idea to place Bombs in the front row, or in any other place where they can block your pieces.
Protect your Agents/Buccaneers: If your opponent's Flag is surrounded by Bombs, you'll need an Agent/Buccaneer to open up a pathway.
Scouts: Place some of your Scouts (pieces ranked 2) in the first two rows, and use them to reveal enemy pieces that are moving towards you. Keep some Scouts safe, then use them later in the game to capture your opponent's Flag.
High-ranking Pieces: Place some high-ranking pieces in the front row, to capture Scouts and other low-ranking pieces.
Do not move your highest-ranking pieces into unknown enemy territory. You don't want to lose them to Bombs. If you know that you own the highest-ranking piece on the board, you also know that you can capture any piece that moves! Try to keep track of which pieces move during the game, and be wary of those that don't. Those pieces are probably Bombs and the Flag.
Spy Strategy: Try to keep your spy (Tia Dalma and Mercer) near your 9-ranked piece. If the enemy 10-ranked piece is nearby, you might be able to lure it over to capture your 9-ranked piece, then attack with your Spy to capture it!
How to Win
The first player to capture his/her opponent's Flag wins the game. If all of your movable pieces have been captured and you cannot move or attack on your turn, you must surrender and declare your opponent the winner.
(The same How to Win text is printed on the back panel of the booklet, page -8-.)
The Pirate Code: STRATEGO Pirates of the Caribbean with Special Powers
This game plays similar to Classic STRATEGO with a few added twists. Some pieces now have Special Powers, which add a whole new level of strategy to the game. The characters with their Special Powers are shown on each end of the gameboard near the logo, and are explained on the separate Special Powers Reference Sheet. To help you remember what your crew's Special Powers are, cut the reference sheet in half along the dotted lines. Each player takes the appropriate side for their crew and refers to the sheet during gameplay.
Setup
Once you've chosen your army:
The player controlling the crew of The Black Pearl takes the cardboard "Compass" token, and sets it next to the gameboard.
The player controlling the crew of The Flying Dutchman takes the three "Skull and Crossbones" tokens and sets them next to the gameboard.
Follow these guidelines for using Special Powers: Pieces with Special Powers may either make a standard move, or use ONE of their Special Powers.
Always reveal a piece to your opponent before using its Special Power.
Storing Your Game
Done playing for now? For easy storage, fold the gameboard and place it (and these rules) under the cardboard platform. Then fit each piece into a notch in the platform, as shown in Figure 4.
The Black Pearl Special Powers Reference Sheet
The crew of The Black Pearl.
Spyglass: A player may use a Spyglass to detect the identity of other pieces. To use "Spyglass," you must first reveal the piece with this power. You may then command an opposing piece up to 2 squares away (horizontally, vertically, diagonally, or any combination) to reveal its identity.
Compass: By using his special compass, Jack Sparrow may determine the general direction of whatever it is that he wants most in the world. To use "Compass," you must reveal Jack's location. Then tell your opponent what piece you want to find. Your opponent must truthfully tell you if the piece you seek is North, South, East, or West (or some combination such as North and East) of Jack's location. Use the compass on the gameboard as reference.
NOTE: If Jack wants to find something with multiple pieces, such as a "Bomb," then use the rules above to indicate the piece nearest to him. Jack may only use this power ONCE during the game. Use the cardboard "Compass" token to keep track of when Jack has used this power.
Fleet of Foot: Fleet of Foot allows a piece to move 2 spaces vertically, horizontally, or any combination. Fleet of Foot cannot be used to move diagonally. If the first square on which the piece lands is occupied by an opponent's piece (causing an attack), it forfeits its second move. It may not jump over pieces or pass over forbidden zone spaces. It may end its move on a square occupied by an opponent's piece, thereby attacking it.
Swordsman: A piece with "Swordsman" may attack several opposing pieces at once. When attacking with "Swordsman," move your piece one square onto an unoccupied square and reveal its identity. The attacking player then selects up to three adjacent opposing pieces to attack simultaneously. This can include pieces that are diagonally adjacent! To resolve a sword attack, reveal the ranks of all of the battling pieces. Any attacked pieces with a rank lower than the attacking piece are defeated and removed from the board. If an attacked piece is of equal rank, both the attacker and the attacked piece are destroyed and removed from the gameboard. If any of the attacked pieces are ranked higher than the attacking piece, the attacking piece loses and is removed from play.
NOTE: The Flag is not vulnerable to a sword attack.
Forced Surrender: Without having to move onto an opponent's square, you can just point your pistol or musket at them and force them to surrender immediately. To use "Forced Surrender," you must first reveal the piece with this power. You may then command any one piece up to two squares away (vertically, horizontally or diagonally) to reveal itself. If the revealed piece's rank is lower than that of your attacking piece, the revealed piece must surrender, and be removed from the board. If the revealed piece's rank is equal to or greater than that of the attacking piece, nothing happens.
NOTE: You can use "Forced Surrender" to attack through forbidden zones, but it cannot be used to attack THROUGH or AROUND other pieces. Flags and Bombs are unaffected by Forced Surrender.
The Flying Dutchman Special Powers Reference Sheet
The crew of The Flying Dutchman.
Spyglass: A player may use a Spyglass to detect the identity of other pieces. To use "Spyglass," you must first reveal the piece with this power. You may then command an opposing piece up to 2 squares away (horizontally, vertically, diagonally, or any combination) to reveal its identity.
Magic: The magic of the sea allows Davy Jones to instantly move any number of spaces vertically or horizontally (not diagonally) in one direction. He may not jump over other pieces but he may move through forbidden zones. He may end his move by landing on an enemy piece, thereby attacking it. He may only use this power three times in a game. Use the cardboard "Skull and Crossbones" tokens to keep track of when Davy Jones has used this power.
Fleet of Foot: Fleet of Foot allows a piece to move 2 spaces vertically, horizontally, or any combination. Fleet of Foot cannot be used to move diagonally. If the first square on which the piece lands is occupied by an opponent's piece (causing an attack), it forfeits its second move. It may not jump over pieces or pass over forbidden zone spaces. It may end its move on a square occupied by an opponent's piece, thereby attacking it.
Swordsman: A piece with "Swordsman" may attack several opposing pieces at once. When attacking with "Swordsman," move your piece one square onto an unoccupied square and reveal its identity. The attacking player then selects up to three adjacent opposing pieces to attack simultaneously. This can include pieces that are diagonally adjacent! To resolve a sword attack, reveal the ranks of all of the battling pieces. Any attacked pieces with a rank lower than the attacking piece are defeated and removed from the board. If an attacked piece is of equal rank, both the attacker and the attacked piece are destroyed and removed from the gameboard. If any of the attacked pieces are ranked higher than the attacking piece, the attacking piece loses and is removed from play.
NOTE: The Flag is not vulnerable to a sword attack.
Forced Surrender: Without having to move onto an opponent's square, you can just point your pistol or musket at them and force them to surrender immediately. To use "Forced Surrender," you must first reveal the piece with this power. You may then command any one piece up to two squares away (vertically, horizontally or diagonally) to reveal itself. If the revealed piece's rank is lower than that of your attacking piece, the revealed piece must surrender, and be removed from the board. If the revealed piece's rank is equal to or greater than that of the attacking piece, nothing happens.
NOTE: You can use "Forced Surrender" to attack through forbidden zones, but it cannot be used to attack THROUGH or AROUND other pieces. Flags and Bombs are unaffected by Forced Surrender.