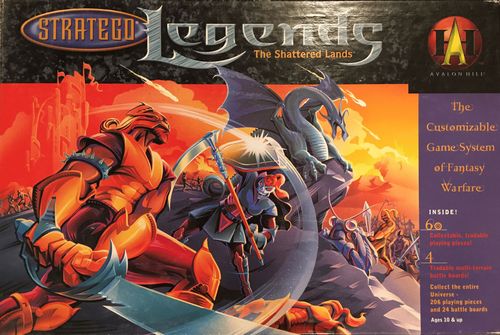
Stratego Legends
Stratego Legends Rulebook
Table of Contents
Table of Contents
Game Information
- Players: 2 (4, 6, or 8 players with additional games)
- Ages: 10 and up
- Complexity level: Moderate
Contents
- 30 beige plastic playing pieces
- 30 gray plastic playing pieces
- 4 battle boards
- 8 cardboard borders
- 6 reference charts
- label sheet
- storage tray
Object of the Game
To destroy or gain control of your opponent's castle.
The Armies
There are two armies in The Shattered Lands - those that fight for good and those that favor evil. Each army is made up of three different nations. Each has its strengths and weaknesses. Each has its heroes and foot soldiers.
The Forces of Good - Beige Army
- GOLD - The Valorians (The Shields of Valor): A heroic race whose codes of honor are as long as their titles, the Valorians are comprised of noble knights, fearsome wizards, and the clerics of the Grand Temple. But do not let their courtly ways and fine music fool you. Their true strength is found on the field of battle, where epics are written and brave men create legends.
- GREEN - The Ancients: The original inhabitants of The Shattered Lands include elves, dwarves, and other people of the earth. The Ancients work the powers of the earth against their enemies. Their seers are the most powerful of magic workers and their attacks often come from nowhere - and everywhere.
- BLUE - The Celestia: Mysterious people of the winds, the Celestia are a race of beautiful creatures. This, however, does not make them any less deadly. Their angels and spirits are embodiments of nature itself, and mythical beasts fight alongside them. Their sages lend their magic arts to the cause and protect the skies from the forces of evil.
The Forces of Evil - Gray Army
- SILVER - The Gargans: The Gargans are a teeming army of belligerent beasts, ogres, giants and titans. Swords, fangs and whips are the weapons of choice and their shamans work magic that makes them even stronger.
- RED - The Manes: Under their blood-stained banner, the fiendish undead armies of the Manes terrorize the countryside. Led by a race of dragonoids and influenced by necromancers who raise corpses and control spirits, the Manes feed on destruction and war itself.
- PURPLE - The Qa'ans: Spawn of the depths, these beings resemble insects grown large. The Qa'ans are a rancid race of monstrous mutants. Mysterious warlocks harness new magic while illusionary beings, living slimes, and other strange mutations slither their way into battle. Who knows what their true motives are?
The Shattered Lands
Assembly
- Remove the beige and gray army playing pieces from the bags. Discard the bags.
- Carefully apply the 30 blue, green and gold labels to the beige pieces, and the 30 silver, red and purple labels to the gray pieces as shown in Figure 1.
- Carefully punch out the 4 battle boards, and the 8 cardboard border pieces.
- Carefully punch out the 6 reference charts.
Setup
- Put the 8 cardboard border pieces together as shown in Figure 2.
- Shuffle the 4 battle boards and randomly place them face down on the table. Take 2 battle boards and, without turning them over, place them in front of you. Your opponent does the same with the other 2 battle boards. See Figure 3. Then, simultaneously turn the 4 battle boards face up. Without rearranging them, place them inside the cardboard border as shown in Figure 4.
Preparing for Battle
- Choose an army: Decide who will control the beige army (Landor's Legions) and who will control the gray army (Kralc's Horde). If you cannot decide, hide a gray playing piece in one hand and a beige piece in the other hand. Your opponent chooses a hand and plays with the color army selected. The other color army is yours. The beige player takes all the beige playing pieces. The gray player takes all the gray pieces.
- Who goes first: Hide a gray piece in one hand and a beige piece in the other hand. Your opponent chooses a hand. If your opponent chooses your color, you go first and vice versa. When playing multiple games, let the player who lost the last game choose whether to go first or second.
- Reference charts: Place the blue, green and gold reference charts in front of the player with the beige army. Place the silver, red and purple reference charts in front of the player with the gray army. These charts identify the abilities of your playing pieces.
- Place your army: Sit opposite your opponent. Randomly place your 30 playing pieces label-side down on the two battle boards closest to you. Place one piece on each space except water spaces (the blue spaces). Your opponent does the same. See Figure 5.
- "Shuffle" playing pieces: Offer your opponent the chance to move any of your playing pieces while they are still label-side down. You may also move any of your opponent's pieces. This ensures that the placement of the pieces is truly random.
- Stand up your playing pieces: Make sure the labels on your playing pieces face you.
- Switch two pieces: The player who goes first may make up to 2 switches of his/her own playing pieces. (One switch means exchanging the location of 2 pieces.) The other player may make up to 2 switches of his/her own playing pieces. Strategy hint: If your castle is in front of your army (close to enemy pieces), you may want to switch it with a piece in your back row.
The Armies (Pieces)
There are 206 different playing pieces in The Shattered Lands universe. Two of these pieces (#205 and #206) are available only at game conventions. However, each army on the board (and in this box) has 30 pieces. Use the reference charts during game play to identify abilities of the playing pieces you are using. See Figure 6.
Parts of a reference chart entry (Figure 6):
- Base Strength Number: strength ranges from a low of 1 to a high of 10.
- Color: blue, green, gold, silver, red or purple.
- Name of playing piece.
- Type of playing piece.
- Description: the piece's power.
- Collector's number: keep track of which pieces you own.
- Castle playing piece: no strength number.
- Star: indicates a Magic piece. No strength number.
The Battle Boards
Board Spaces: These boards have different types of terrain spaces: plains, forest, marsh, mountains, town, water and desert. See Figure 7. Certain terrain may affect gameplay by providing bonuses or penalties to certain playing pieces.
Important: The playing pieces in The Shattered Lands cannot move onto water spaces but certain pieces may fly over them.
Adjacent Spaces: Two spaces are adjacent if they touch vertically, horizontally, or diagonally. See Figure 8. There are 8 spaces adjacent to the outlined space shown.
How to Play (2-player game)
Object of the Game
To destroy or gain control of your opponent's castle.
On your turn: You must move one of your pieces or perform one action. You and your opponent alternate turns.
Standard Movement
The following standard movement rules apply to all playing pieces except "stationary" playing pieces. (Stationary pieces are described on the reference charts as pieces that cannot move.)
Important: Certain playing pieces have powers that may contradict these rules. Each playing piece's powers are listed on the reference charts. When a contradiction occurs, the playing piece's power always takes precedence. In short, the power of a playing piece always supersedes the rules.
- A playing piece may move one space at a time, forward, backward, or sideways.
- A playing piece cannot move diagonally.
- A playing piece cannot jump over another piece.
- A playing piece cannot move onto a space already occupied by a piece under the same player's control.
- A playing piece may move onto a space occupied by an opponent's piece. This move is called an attack. (See Attacking section below for details.)
- A playing piece cannot move onto water (blue) spaces.
- A playing piece cannot move back and forth between the same 2 spaces for more than 2 consecutive turns.
Note: There are also special types of movement that are discussed later in the rules.
Summary of Special Powers
All playing pieces in this game have one or more special powers. You must always show a playing piece to your opponent before using its powers. This is referred to throughout the rules as "revealing" a playing piece. In some cases, you must reveal and destroy your playing piece before its power goes into effect.
Following is a brief summary of each type of power:
- Innate Power: An innate power must be used when indicated on the reference charts. You have no choice.
- Action: Similar to an ability, an action often gives playing pieces special kinds of movement. You may use an action once on your turn, instead of making a standard move.
- Ability: An ability may affect a playing piece's movement, strength, magic and other powers. It may also affect other pieces in your army and in your opponent's army. You may choose to use an ability at any time, unless otherwise specified.
- Magic: Spells, magical creations and magical traps that both armies use while battling each other.
- Death Curse: These very powerful curses have long-term effects that can dramatically alter the outcome of a game.
Note: A detailed description of each power follows the Attacking section below.
Attacking
Whenever a playing piece moves onto a space occupied by an opponent's piece, the moved piece is attacking. At the end of the attack, none, one, or both pieces may be destroyed.
Whenever a playing piece attacks another piece, both pieces are immediately revealed. Both players may look at the reference charts to learn of any powers involved. The strength numbers of the two pieces are compared (with numbers adjusted accordingly if there are powers that modify playing pieces' strengths). Once both players have made any adjustments to their strength numbers, the piece with the lower current strength number is destroyed. If the numbers are equal, then both pieces are destroyed.
If a player attacks another player's Castle, the attacking player wins the game.
During an attack, if either of the playing pieces is a Magic piece, then the magic spell described on the reference chart is cast. (Most often the attacker is destroyed.) Follow the instructions on the reference chart for each Magic piece. Also, see Magic Playing Pieces section below for further details.
Death Curses and certain adjacent playing pieces may also affect an attack. Pay close attention to what powers you can use to increase the strength of your piece. It is up to each player to know and remember all powers that are in effect. If you forget, your opponent does not have to remind you.
Keep in mind that some powers go into effect only after a successful attack. If both attacker and defender are destroyed, it is not a successful attack for either piece.
Note: An example of a complex attack sequence is shown later in the instructions.
Attention, Warriors
There is no time to waste! You now know enough to begin the battle. Your reference charts will guide you along the way. Refer to the information on the following pages if questions arise, or to find rules clarifications and details of gameplay.
Using Your Special Powers
The following provides a detailed explanation of the special powers in this game and gives examples of each.
Innate Powers
An innate power must be used when indicated on the reference charts. You have no choice.
Examples of Innate Powers
Berserk: A playing piece with Berserk is a killing machine. After this piece successfully attacks an enemy piece, it must attack another enemy piece if it is able to do so. This continues until the Berserk piece loses an attack and is destroyed, or until there are no pieces that it can attack. If a Death Curse is set off during an attack, it must be resolved before attacking again. (See Death Curses section below for details.)
Dispel Magic: If a playing piece with Dispel Magic attacks a Magic playing piece, the Magic piece is destroyed and removed from the board without its spell being cast. (Magic pieces are described later in these instructions.)
Other Innate Powers: Many playing pieces have innate powers that change their strength numbers or their opponents' strength numbers.
Example: Gray Knight (strength 7, Paladin, #44): "Innate: +1 against red pieces. Action: Reveal Gray Knight to move him 2 spaces."
The terrain where an attack takes place may also alter the strength of some pieces.
Example: Tiera (strength 9, Cleric, #37): "Innate: -5 on marsh spaces. Innate: -5 on forest spaces. Innate: After Tiera successfully attacks, force an opponent to choose and destroy any one piece under his/her control."
Abilities
There are many different abilities shown on the reference charts. Unless otherwise stated on the charts, you may choose to use an ability at any time. It may be used during your turn or during your opponent's turn. It may be used before or after you move. It may be used before or during an attack. Unless otherwise stated, an ability may also be used as many times as you like.
Actions
Many playing pieces also have a special power called an "action." Similar to an ability, an action often gives playing pieces special kinds of movement. However, an action may only be used on your turn, instead of making a standard move. Only one action may be used on your turn.
Examples of Actions
Charging: A playing piece with Charging may move any number of spaces vertically or horizontally (not diagonally) in one direction. It may not jump over pieces or pass over water spaces. It may end its move on a space occupied by an opponent's piece, thereby attacking it.
Slashing: A playing piece with Slashing may move any number of spaces diagonally in one direction. It may not jump over pieces or pass over water spaces. It may end its movement on a space occupied by an opponent's piece, thereby attacking it.
Quickness: A playing piece with Quickness may move 2 spaces vertically, horizontally or any combination (it may not move diagonally). If the first space on which it lands is occupied by an opponent's piece (causing an attack), it forfeits its second move. It may not jump over pieces or pass over water spaces. It may end its move on a space occupied by an opponent's piece, thereby attacking it.
Flying: A playing piece with Flying may jump over any number of adjacent playing pieces and/or water spaces in a straight line and land on the first empty space beyond. Flying must be done horizontally or vertically (not diagonally) in one direction. See Figure 9. A piece may not use the Flying action to attack.
Distance Strike: A playing piece with Distance Strike is able to destroy an opponent's piece without moving onto the opponent's space. The Distance Strike piece may command any one piece up to two spaces away (horizontally, vertically, diagonally or any combination) to reveal itself. If the revealed piece's current strength number is lower than that of the Distance Strike piece, then the revealed piece is destroyed. If it is equal to or greater than the Distance Strike piece, then nothing happens. If the revealed piece is a Magic piece or a Castle piece, then nothing happens.
Surround: A playing piece with Surround may allow a lower-numbered piece to destroy a higher numbered piece. If an opponent's piece is adjacent to at least 5 pieces under your control and one of those pieces has the Surround action, then you may reveal your Surround piece to destroy your opponent's piece. If the opponent's piece is a Magic piece, it is destroyed without its magic spell being cast. (Magic pieces are described later in these instructions.) If the opponent's piece is a Castle piece, it remains unaffected.
Switching: A playing piece with Switching may trade places with another playing piece of the same type under your control. (For example, the spirit Almaetis could trade places with the spirit of Negation.) Only one of the 2 pieces needs to have the Switching action, but both pieces must be revealed.
Teleport: If you have a playing piece with Teleport, you may destroy it to allow any other non-stationary piece you control to move to the destroyed piece's space. You must reveal the Teleported piece.
Vision: A playing piece with Vision may reveal itself to an opponent and then reveal one opponent's piece up to 2 spaces away, horizontally, vertically, diagonally or any combination.
Magic Playing Pieces
Magic playing pieces are marked with a star instead of a strength number. Magic playing pieces have no base strength number and cannot be modified by powers that affect a piece's base strength number. They are also unaffected by the Distance Strike action.
Important: If a Magic piece is attacked, it is destroyed, thereby casting its magic. Follow the directions on the reference chart for any Magic piece that is destroyed.
Magic pieces provide the spells, magical creations and magical traps that both armies use while battling each other. Magic pieces may not attack and most of them are Stationary.
Note: If a playing piece with Dispel Magic attacks a Magic piece, then the Magic piece's magic is negated. In that case, the Magic piece is destroyed without its magic spell being cast. The Dispel Magic ability does not work with Death Curses. (See Death Curse section.)
Castle Playing Pieces
Castle playing pieces have no base strength number and cannot be modified by powers that affect a piece's base strength number. They are also unaffected by the Distance Strike action. If a Castle playing piece is attacked, it is destroyed and the game is over.
Playing Pieces with Death Curse
Death Curses are long-term magical effects that can dramatically alter the outcome of a game. They are enchantments that operate beyond the grave. In other words, a Death Curse doesn't take effect until after the Death Curse playing piece is destroyed. Death Curses are not affected by the Dispel Magic ability.
If a playing piece with a Death Curse is destroyed, it is placed label-side up, out of play (away from the battle board), in a location you designate as the Death Curse Area. See Figure 10. The Death Curse is in effect until another Death Curse replaces it. If no other Death Curse is set off during the rest of the game, the first Death Curse remains in effect for the rest of the game. If another playing piece with a Death Curse is destroyed, then that piece is moved into the Death Curse Area and the new Death Curse takes effect. The old Death Curse piece is moved into another location (away from the battle boards) that is called the Destroyed Pieces Area. (See Destroyed Pieces Area section below for details.) There can only be one Death Curse in effect at any one time during the game.
Each Death Curse is different, but they all add powerful magic to the game. Some affect terrain, others help in combat. Some grant movement abilities, others weaken one color group. Some Death Curses grant (or suppress) powers and bonuses while they are in effect. Others grant powers only after they are replaced by another Death Curse. Be sure to read the reference chart description carefully to determine when a Death Curse actually takes effect.
If 2 or more playing pieces with Death Curses are destroyed at the same time, then none of the Death Curses go into effect. If there is a Death Curse already in effect, it remains in effect. (The destroyed playing pieces are immediately placed in the appropriate Destroyed Pieces Area shown in Figure 10.)
Remember: Any piece may be affected by a Death Curse, even if it has the Dispel Magic ability.
Figure 10: The board shows the Death Curse Area, the Gray Destroyed Pieces Area and the Beige Destroyed Pieces Area. Place playing pieces in these areas label-side up.
Death Curse Timing
When a new Death Curse replaces an old Death Curse, make sure all directions for the old Death Curse have been followed before the new Death Curse takes effect. See Complex Attack Sequence section below for an example.
Destroyed Pieces Area
When one of your playing pieces is destroyed, place it in your Destroyed Pieces Area as shown in Figure 10.
Bringing Destroyed Pieces Back Into Play
Certain powers described on the reference charts may allow destroyed pieces to return to battle. If you have the opportunity to bring a destroyed piece back into play, it cannot be a piece currently in the Death Curse Area.
Complex Attack Sequence Example
The following example illustrates an attack sequence between Craig and Rob:
Craig's Turn
Craig controls the beige army. He moves his Tiera playing piece onto a desert space occupied by one of Rob's pieces, thereby attacking it.
Rob reveals his Skeleton Warlock and reads the description on the reference chart:
Skeleton Warlock (strength 2, Skeleton, #160): "Action: Quickness. Reveal Skeleton Warlock to move him 2 spaces. Death Curse: All skeleton pieces get +1."
Craig reveals his Tiera piece and reads the description:
Tiera (strength 9, Cleric, #37): "Innate: -5 on marsh spaces. Innate: -5 on forest spaces. Innate: After Tiera successfully attacks, force an opponent to choose and destroy any one piece under his/her control."
Tiera is on a desert space, so its strength does not decrease. The Skeleton Warlock has a base strength number of only 2, so it is destroyed. Because the Skeleton Warrior has a Death Curse, it is placed in the Death Curse Area.
In this example, there is already a playing piece (Strangling Vines) in the Death Curse Area. Strangling Vines is under Craig's control and its description states: "When this Death Curse ends, reveal all pieces that occupy forest spaces. Destroy one revealed non-stationary piece."
The Skeleton Warlock's Death Curse now replaces (and ends) the Strangling Vines Death Curse. Strangling Vines is now placed in its Destroyed Pieces Area. Craig and Rob must now reveal all pieces on forest spaces. Craig chooses to destroy one of Rob's revealed pieces, named Murkis. The Murkis piece is placed face up in its Destroyed Pieces Area.
Now Tiera's innate power is "activated." Rob must pick one of his own pieces to destroy. He picks one Bone Legion (a less important piece). Bone Legion is placed in its Destroyed Pieces Area.
Rob's Turn
Rob moves his Sinakus onto an adjacent marsh space occupied by one of Craig's pieces, thereby attacking it. Both players reveal those pieces. Rob discovers that he has attacked Srik, a powerful Elf with Slashing action and the innate power Dispel Magic. Srik has a base strength number of 7. Sinakus has a base strength number of 5. Both pieces are on a marsh space. According to the reference chart, Sinakus gets +1 on a marsh space, which boosts its strength number to 6.
Remember, there is an active Death Curse in the Death Curse area (the Skeleton Warlock). This Death Curse gives all Skeletons in play +1, which again boosts the Sinakus' strength number to 7 because Sinakus is a Skeleton. Both players have an opportunity to use their powers to increase the effectiveness of their pieces. Note that if neither player uses a power, both pieces will be destroyed because their current strength numbers are equal.
Rob uses the ability of his adjacent Enchanted Shield. Its reference states: "Ability: Reveal and destroy Enchanted Shield to give an adjacent piece +2 until the end of the turn." This boosts Sinakus' power number to 9. The Enchanted Shield is placed in the Destroyed Pieces Area.
Craig is lucky because he has 3 High Elves adjacent to Srik, the Elf. The reference to High Elf states: "Ability: Reveal High Elf and an adjacent Elf to give the adjacent Elf +1 until the end of the turn. Use this ability once per turn." With the abilities of 3 High Elves, Srik's power is boosted from 7 to 10. Rob realizes he has been beaten and chooses not to use any more powers. He places Sinakus in the Destroyed Pieces Area.
Taking Control of Your Opponent's Pieces
Certain playing pieces have powers that allow you to take control of your opponent's pieces. When using this power on an opponent, turn your opponent's piece around so that the image is facing you. While you control this piece, you may use any applicable power immediately. On future turns, you may move or perform any applicable action as directed.
Example
Larry moves his Daemin piece onto a mountain space occupied by Phil's Hillstone Curate, thereby attacking it. The reference for Daemin states: "Innate: If Daemin attacks a piece with a base strength number of 2, 3, 4 or 5, put that piece onto the space from which Daemin attacked. The attacked piece is now under your control."
Hillstone Curate has a base strength number of 5, so Larry takes control of Phil's piece by placing it on the space from which Daemin attacked. Larry turns Hillstone Curate around so that the image is facing him. Although the attack took place on a mountain space (which boosted Hillstone Curate's strength number to 7), Larry still takes control of Hillstone Curate. Why? Because Daemin's innate power specifically refers to the other piece's base strength number, not its current strength number.
Reducing an Opponent's Strength Number
There are playing pieces with abilities that reduce other pieces' strength numbers. Any piece that has been reduced to a strength number of 0 or below is immediately destroyed. No powers can be used to save a piece that has a current strength number of 0 or below.
Example
Mike's Queen Kivoa attacks Jim's magical Anti-Red Wind. The reference for Anti-Red Wind states: "Stationary: Anti-Red Wind cannot move. Magic: If Anti-Red Wind is attacked, destroy it and its attacker. Death Curse: All red pieces get -1."
Queen Kivoa does not have the ability to Dispel Magic so she is destroyed along with Anti-Red Wind. But Anti-Red Wind also has a Death Curse, so it is placed in the Death Curse Area. The strength numbers of all red pieces are reduced by one. Jezrak, one of Mike's red pieces, had a base strength number of 1. Because it was reduced to 0 by the Anti-Red Wind Death Curse, it is immediately destroyed.
Winning the Game
The first player to destroy or gain control of the other player's castle piece wins the game.
Note: If a player is unable to move any playing pieces or perform any actions, then the other player immediately wins the game.
Customize Your Army
Customize your army to create a unique force under your control! Additional playing pieces may be obtained by trading with friends, purchasing additional games or buying Stratego Legends Booster Packs. You may also use different battle boards to create terrain combinations that work best with your new army. We suggest that beige and gray armies still remain separate. With careful thought, you might build an army that's nearly unstoppable. Of course, your friends may have the same idea.
Army Size
Both beige and gray armies must contain the same number of playing pieces and the same mix of base strength numbers. When customizing your army, it must contain the following:
| Base Number Value | Number of Pieces |
|---|---|
| 10 | 1 |
| 9 | 1 |
| 8 | 3 |
| 7 | 3 |
| 6 | 3 |
| 5 | 3 |
| 4 | 3 |
| 3 | 3 |
| 2 | 3 |
| 1 | 1 |
| Magic | 5 |
| Castle | 1 |
| TOTAL |
Customized Army Setup
When you battle with customized armies, the game setup changes slightly. Each player brings one army and 2 battle boards. Players place their 2 battle boards face down in front of them. Then each player randomly shuffles his/her opponent's boards. All 4 battle boards are simultaneously turned face up and placed inside the battle boards' border as shown in Figure 3. Armies are then set up on the battle boards in the normal way.
Customizing Hints
Consider a "theme" for your army. Will it focus on movement? On attacking? Will it have a lot of Death Curses? Will it have certain types of terrain? Will it be incredibly strong against one color or moderately strong against all colors? Perhaps one army might focus on playing pieces with the ability to return destroyed pieces to battle. Another army might be extra strong defensively. Look at how playing pieces work together to come up with your own deadly combinations.
Multiple Armies
With enough playing pieces, you could have multiple armies on hand to bring out against different foes. You could label each army with a favorite name (like "Flying Death" or "Forest Brigade") and store them away until the battle horn is sounded.
Campaigns
Although each battle is a game in itself, you also have the opportunity to create campaigns - long series of battles that tell a larger story.
2-game campaign: Each player goes first once. At the end of each game, count the losing player's destroyed pieces. This is the winner's score. After completing 2 games, the player with the higher score wins.
Multi-game campaign: The player who wins the majority of games wins the campaign. This could be "2-out-of-3" or "6-out-of-10" or any number you want. Campaigns need not be played at one time. (And players can further customize their armies between battles!)
Multi-player Games
Teams of 4, 6 or 8 players may also battle. Each player brings an army and 2 battle boards to the game. Opposing teams with equal numbers of players sit on opposite sides of the table. Players place their 2 battle boards face down in front of them. Each player then randomly shuffles the opposite opponent's boards. The boards are then simultaneously flipped over and put together as shown in Figure 11 (example of a 6-player game setup).
Each player on a team controls his/her team's playing pieces when they are on his/her 2 battle boards (or the 2 boards directly across from him/her).
Play continues back and forth with a beige army player and gray army player alternating turns. A player may not take his/her next turn until all players on both sides have had a turn.
A playing piece cannot move onto a space already occupied by a piece under the same player's control or onto a space with a piece controlled by an ally.
The game ends when all the castles on one side are eliminated or one player on either team cannot move or perform an action with any of the pieces under his/her control. If a player's castle is destroyed, that player may still continue playing, aiding allies in their struggle.
GOOD LUCK!