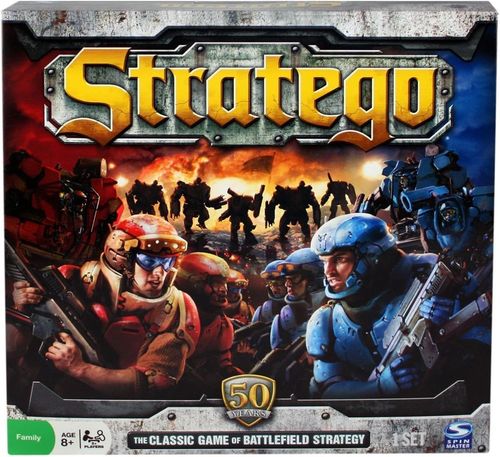
Stratego (50th Anniversary Edition)
Stratego (50th Anniversary Edition) Rulebook
Table of Contents
Table of Contents
Contents
- 30 Red Playing Pieces
- 30 Blue Playing Pieces
- 1 Red Label Sheet
- 1 Blue Label Sheet
- Game Board
- 2 Storage Bags
Assembly
Apply the labels to the playing pieces. The Red labels go on the Red pieces, and the Blue labels go on the Blue pieces. Carefully place each label within the recessed area, on the opposite side of the "S" logo.
Set Up
- Decide which player will command the Blue Army, and which will command the Red Army. (The Red Army always goes first.)
- Unfold the game board, placing the blue side in front of the Blue player, the red side in front of the Red player.
- Each player places their 30 playing pieces on the board, one piece per square in the first three rows in front of them (10 across x 3 deep). The two rows in the middle of the game board remain unoccupied.
- The "S" side of each piece should face the opposing player, so only the Commander of each army can see the placement of his/her pieces.
- How you place your army at the beginning of the game is important. It can determine whether you win or lose. Read "Rules For Moving" and "Rules For Attacking" on Page 3 and 4 in order to plan the placement of your pieces, or refer to "Suggested Strategies" at the end of these instructions.
The Playing Pieces
The pieces shown below are the only pieces that can move on the game board. The number on each piece designates their rank, with 10 (Marshal) being the highest and the Spy being the lowest.
- Marshal (x1) — rank 10
- General (x1) — rank 9
- Colonel (x1) — rank 8
- Major (x1) — rank 7
- Captain (x2) — rank 6
- Lieutenant (x2) — rank 5
- Sergeant (x2) — rank 4
- Miner (x5) — rank 3
- Scout (x5) — rank 2
- Spotter (x2) — rank 1
- Spy (x1)
The remaining pieces CANNOT BE MOVED after the game begins:
- Bomb (x6)
- Flag (x1)
Object Of The Game
Defeat your opponent's army by attacking and capturing their flag.
On Your Turn
Players alternate turns. The Red Player takes the first turn.
Each turn, you must do ONE of the following:
- MOVE one of your pieces
- OR
- ATTACK with one of your pieces
You cannot move and attack in the same turn (except for Scouts and Spotters; see "Specialist Pieces" on Page 5). If none of your pieces are able to move or attack, the game is over and your opponent wins.
Rules For Moving
- Only one piece can be moved per turn, and it can move only one square per turn (except Scouts, see "Specialist Pieces" on Page 5). Pieces can move forward, backward or sideways, but never diagonally.
- Two pieces cannot occupy the same square at the same time.
- Pieces cannot jump over or move through an occupied square.
- The Crater areas in the center of the board contain no squares. Pieces must move around these areas, never through or over them.
- Once a piece has been moved to a square and the player's hand removed, it cannot be moved back to its original position.
- Pieces cannot be moved back and forth between the same two squares in three consecutive turns.
NOTE: The Flag and the Bombs cannot move. These pieces must remain where they were placed at the beginning of the game.
Rules For Attacking
-
If one of your opponent's pieces occupies a square in front, beside or behind yours, you can attack it. You cannot attack diagonally. Attacking is always optional.
Scouts and Spotters have special attack abilities! See "Specialist Pieces" on Page 5.
-
To attack, pick up your piece and tap your opponent's piece, calling out your piece's rank (name and number). Your opponent must call out his or her piece's rank.
- If your piece's rank is HIGHER than your opponent's, you win the attack and capture his or her piece. Your winning piece now occupies that square.
- If your piece's rank is LOWER than your opponent's, you lose the attack and your piece is captured. Your opponent's piece stays in its square.
- If your piece's rank MATCHES the rank of your opponent's, both pieces are captured.
Captured pieces are immediately removed from the board.
When a piece attacks a Bomb: The attacking piece loses and is captured. The Bomb remains in its square.
Only a Miner can attack and remove a bomb! See "Specialist Pieces" on Page 5.
NOTE: The Flag and the Bombs cannot attack. They can only wait for the opposing player to attack them.
Winning The Game
The game ends when:
- A player attacks and captures his/her opponent's flag. The attacking player is the winner.
OR
- A player cannot move a piece or attack. The opposing player is the winner.
Specialist Pieces
The Scout
Scouts race forward on lightning fast turbo-pods, probing enemy units to reveal their strength.
SCOUT SPECIAL MOVEMENT AND ATTACK Scouts can move across any number of open squares forward, backward or sideways, but only in a straight line. They may not move diagonally. Scouts can move and attack in the same turn, but again, only in a straight line.
NOTE: If a Scout moves more than one space, its identity will be revealed. You may choose to move your Scouts one square per turn to hide their identity.
The Spotter
Spotters target and identify the enemy, calling in laser barrages from orbiting battleships to destroy them.
SPOTTER SPECIAL ATTACK Spotters may move, then use their special attack. A Spotter may attempt to attack and capture any piece on the square in front of it by guessing the piece's rank. Tell your opponent that you are "Spotting" the piece, then guess. Your opponent must reveal the piece's rank.
If your guess is correct, that piece is captured. The Spotter does NOT move to the captured piece's square.
If your guess is not correct, nothing happens. But your Spotter is revealed!
NOTE:
- Spotters can "spot" and capture Bombs and the Flag.
- Spotters may attack normally instead of Spotting.
The Miner
Miners pilot mechanized blast-armor, allowing them to disarm bombs without injury.
Miner Special Attack When a Miner attacks a bomb, the bomb is removed from the board. The Miner then moves into the bomb's square.
The Spy
The stealthy Spy has one mission: Destroy the Marshal!
SPY SPECIAL ATTACK The Spy has a very valuable ability: If a Spy attacks a Marshal (10), the Marshal loses and is removed from the game. However, if the Marshal attacks the Spy first, the Spy loses and is removed.
A Spy has no rank. If the Spy is attacked by any piece, it is removed.
Suggested Strategies
How you place your pieces at the beginning of the game can determine whether you win or lose. You may want to employ one or more of these strategies:
- Place your Flag somewhere on the back row, so you have many pieces in front to defend it. Place Bombs around your flag to protect it.
- Consider placing a few Bombs away from your Flag. Using Bombs as decoys can fool your opponent into moving pieces in the wrong direction.
- Scouts can be useful in the front lines. Use them to probe the strength of your opponent's pieces. You might also want to keep some Scouts in the back to help you capture your opponent's flag or Spotters once you've discovered their location.
- Your Spotters are very powerful, but can be captured easily. Protect them by moving them behind the Craters or higher-ranked pieces.
- Miners are important late in the game, so keep some of them in the back rows.
Stratego Duel: For New Players
If this is your first time playing Stratego, you may want to play with the Stratego Duel Rules. In Stratego Duel, you play with fewer pieces so that you can quickly learn how each piece is used. All rules are the same as in Stratego, except each player only plays with these 10 pieces:
- #10 Marshal (1 piece)
- #9 General (1 piece)
- #3 Miner (2 pieces)
- #2 Scout (1 piece)
- #1 Spotter (1 piece)
- Spy (1 piece)
- Bomb (2 pieces)
- Flag (1 piece)
Players can set up these 10 pieces anywhere in the 30 squares of their first three rows. For example, you could set up your Flag in a corner, with the other pieces surrounding it. (However, the other player will immediately know where to look for your flag!) Try different locations and variations on placement to find the best formation for yourself.