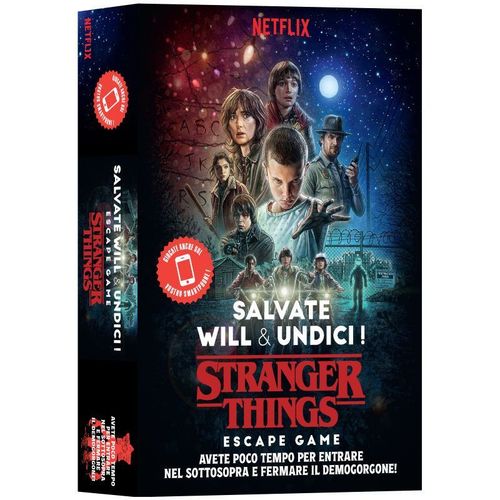
Stranger Things: Escape Game – Salvate Will & Undici
Stranger Things: Escape Game – Salvate Will & Undici Rulebook
Table of Contents
Table of Contents
Components
- 15 large chapter cards (Kapitelkarten), numbered 1 to 15
- 35 hint cards (Hinweiskarten), numbered 1 to 35
- 10 character cards (Charakterkarten), each showing the name of its character
- 1 map of Hawkins (Stadtplan von Hawkins)
- This mission booklet (Auftragsheft), which contains the rules, an answer-check table, hints and the solutions
The start card "1 – Organisiert euch, um einen Plan zu erstellen" (Mike's House, Mikes Haus) lists four hint cards to take at the start: 1 "Willkommen in Hawkins", 2 "Kommunikationskanäle mit Walkie-Talkie", 3 "Diskussion…" (the name is partly hidden in the printed artwork) and 4 "Kassette". The body text of that card is partly covered by the artwork and is not transcribed.
Setup
Take several sheets of paper, a few pens and a ruler. These items will help you during the game.
Spread the map of Hawkins out on the table between you. Make sure you have enough room to play.
Set the character cards of Eleven (Elf) and Will aside, face down, for now.
Divide the remaining 8 character cards among you as evenly as possible, either at random or according to which characters you like best.
Each player looks at their character card(s). They show items and hints that will be useful to you during the course of the game.
Place the chapter cards and the hint cards as two separate piles on the table. Take care not to shuffle them together. If they get mixed up, you can simply sort them again in ascending order, 1 to 15 for the chapter cards and 1 to 35 for the hint cards. Do not look at the other side of the cards yet.
You can play the game in two ways:
- playing with the mission booklet;
- playing with a smartphone or computer.
If you want to play with a smartphone or computer, open the website intended for this (see page 8).
Gameplay
The game consists of 15 chapters, set out by the chapter cards. Together they make up one large adventure.
Each chapter card shows the following information:
- The number and title of the chapter
- The location
- A description of the current task
- The hints found at the location (take the corresponding hint cards)
Each chapter card corresponds to one puzzle that you must solve to advance to the next chapter.
After you have drawn a chapter card and looked at it, take the hint cards named on it.
To solve the puzzle, you need to use some of the character cards and hint cards you already have at this stage of the adventure.
Attention! Sometimes a hint card discovered in a certain chapter only becomes useful later in the game. Each hint card may be used only once during the game. Once you have used a hint card to solve a puzzle, you can set it aside.
Answers
The answer for each chapter is always a combination of four digits, which may begin with one or more zeros. (For example, "0042" is a possible answer.)
Checking a Combination
With the solution table, which you will find on page 10 of this mission booklet, you can check your combination for each chapter. Look for your combination first in the leftmost column.
- If your combination is not in this column, it is unfortunately not correct. Try again or take a hint!
- If your combination is in this column, look at the symbol at the intersection of your combination and the column of the current chapter.
Correct answer: Congratulations! You may draw the next chapter card (and possibly an additional hint or character card, if you are asked to, see the box below).
Wrong answer: Try again or take a hint!
The first row of the solution table gives the reward for a correct answer in each chapter, as printed:
- Chapter 1: hint card 5
- Chapter 2: draw Eleven's (Elf's) character card
- Chapter 3: hint card 13
- Chapter 4: hint card 17
- Chapter 5: hint card 21
- Chapter 6: no card
- Chapter 7: no card
- Chapter 8: hint card 27
- Chapter 9: no card
- Chapter 10: hint card 30
- Chapter 11: hint card 32
- Chapter 12: hint card 33
- Chapter 13: draw Will's character card
- Chapter 14: no card
Important! For the solution of some chapters, you are asked to draw an additional hint card or character card. This is shown in the second row of the solution table. Do not forget to take these cards, as you will need them later in the course of the game!
Hints
If you get stuck in a chapter, the "Hints" section (from page 12) of this mission booklet can help you.
For each chapter there are three tips. Each tip gives additional information that helps you solve the puzzle.
Do not hesitate to use these hints to solve a difficult puzzle. Sometimes a small nudge helps you find the right way.
As a last resort, you will also find the solutions and explanations for each chapter at the back of this booklet (from page 16).
End of the Game
The game does not necessarily end after 60 minutes. If you still have unsolved chapters in front of you, keep playing for as long as necessary.
As soon as you reach chapter 15, you have reached the end of the adventure and can stop the stopwatch.
The following diagram shows how well you did after the game:
- 60 minutes: Professional Monster Hunter (Profi-Monsterjäger)
- 90 minutes: Experienced Monster Hunter (Erfahrene Monsterjäger)
- 120 minutes: Novice Monster Hunter (Angehende Monsterjäger)
Source note: the rules text on page 1 gives 60 minutes as the time for experienced monster hunters and 120 minutes for novices, while the end-of-game diagram on page 7 labels 60 minutes as "Profi" and 90 minutes as "Erfahrene". Both are reproduced as printed.
Playing with a Smartphone or Computer
You can also play the game without the mission booklet, and check your combinations in the web app. There you can also see how much time has already passed, and you can call up the hints. If you want to play this way, open the corresponding website before you start the adventure. To do so, scan the QR code on the left or open the following link:
stranger-things-larousse.asmodee.de
When everyone is ready, the game can begin.
Are you ready to save Will, Eleven and the small town of Hawkins? Perfect! Now you can read the opening aloud, start the stopwatch and turn over chapter card 1.
Good luck with your adventure!
Chapter Hints
Chapter 1
- You must find out which radio channels the three boys use with their walkie-talkies. To do this, first solve the equation of the communication channels to see which number belongs to which walkie-talkie colour.
- In the right-hand column of the equation only the number 5 fits. The number 5 therefore belongs to the colour blue.
- Each walkie-talkie can be assigned to a colour and an owner. The order of the walkie-talkie discussion tells you the order of the correct number combination.
Chapter 2
- Begin by rebuilding the Dark Forest (Düsterwald) with cards 8 and 9.
- Place the two flashlights in the right spots to "illuminate" the symbols with light beams.
- At the start the flashlight batteries are still fully charged, but at some point they begin to run down …
Chapter 3
- First take a closer look at the outlines on the wall. Do the geometric shapes recorded there not remind you of something?
- Each geometric shape is assigned a particular colour, which you also find on the bulbs of the Christmas lights. Using the number of each shape, you can identify the right bulb.
- Once you have found the word with four letters, you can finally pick up the telephone.
Chapter 4
- Jim Hopper's badge number is on his police badge, although it has faded somewhat over time.
- The extract from the police manual is meant to show you the directions in which to move from key to key on the typewriter.
- For each digit of Police Chief Hopper's badge number, move from key to key on the typewriter. The digit in question is also the starting point on the keyboard each time. In this way you should work out an equation that reveals Hopper's service number.
Chapter 5
- The chemical compounds in the test tubes can be converted into four-digit combinations using Nancy's periodic table of the elements.
- Compare the results of the experiments with samples C and E … If you disregard the order, they differ in only a single digit and yet have a different result.
- The last digit is a 1.
Chapter 6
- First sort the scientists' access badges by their security level.
- For each badge, look at which drawers you have to search.
- The scientists' names show you which drawers to open. Letter by letter, you can form numbers from the drawers.
Chapter 7
- After you have worked out at which four intersections you are keeping an eye on the agents, check which important places are located at these intersections.
- The town sign you received right at the start of the game will help you work out the combination.
- The intersection of Dearborn Road and Cherry Street must definitely be occupied in order to keep the whole town centre in view.
Chapter 8
- The frequencies shown on the monitors correspond to letters coded in a language known from telegraphy.
- Each decoded letter corresponds to one of the seven segments with which numbers can be formed on the digital display.
- The order of the numbers is set by the number of screws with which the monitors are attached.
Chapter 9
- Using the legend on the Hawkins map, place the 8 previous chapter cards in the right places.
- From each of the coloured crosshairs mentioned in Will's message, follow the corresponding compass direction. The distance you must cover corresponds to the number of pedal revolutions given. Note: when Will's pedals make one revolution, how many revolutions does the wheel make, taking into account the different sizes of the gears?
- Since the wheel has a circumference of 2 m, each pedal revolution moves the bicycle 4 m forward. If you transfer the correct distances from each crosshair onto the map, you will come to certain places. Which chapter numbers correspond to these?
Chapter 10
- Look closely at the symbols on the waffle packet.
- Each waffle is marked with a letter: A, B, C and D.
- Each row on the waffle packet corresponds to one digit of the combination to be found. To find the numbers, turn the waffles according to the instructions and mentally lay the chocolate-coated parts on top of each other.
Chapter 11
- After you have gathered all the components needed for the experiment, analyse the ingredients carefully according to their numerical value. Look carefully at the water in the pool.
- Calculate the number of salt sacks needed, using the pool's water volume as the basis for the calculation.
- Be sure not to forget to include Eleven in the equation!
Chapter 12
- Try to take a look into the Shadow World (Schattenwelt) in the game box.
- All four of Eleven's memories can be found in the illustration on the inside of the box lid.
- Use Jonathan's camera to work out exactly where the pictures were taken.
Chapter 13
- Three weapons must be used one after another, in the order of their strength, to defeat the creature.
- Each coloured weapon is represented by a number that can be one or two digits. For example, it could be the number of rounds of ammunition.
- To find out the strength of Eleven's psychic powers, look at the card from several metres away.
Chapter 14
- The game rules show you which tiles on the game board are victory symbols, based on their colour and die value.
- For each room, consider only the die or dice of the corresponding colour. For rooms with a secondary colour, add the two dice with which this colour can be achieved.
- By blackening all the fields that match the victory conditions, the combination should appear before your eyes.
The solutions and explanations for each chapter (pages 16–22 of the source) are not transcribed, as noted in the Table of Contents.