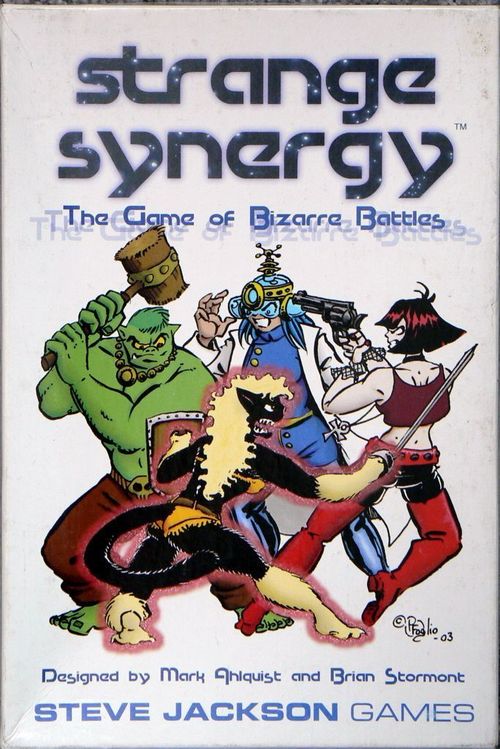
Strange Synergy
Strange Synergy Rulebook
Table of Contents
Table of Contents
Components
- 12 Warrior Cards
- 100 Power Cards
- Three die-cut sheets, which yield 12 Warrior figures and many, many gadgets and markers
- 12 plastic bases for the Warriors
- A two-sided gameboard
- A six-sided die
- This rulesheet
You will need scrap paper and a few dozen glass stones or other tokens to use as hit-point counters.
Number of Players
Two to four can play; if you have only two players, you can try taking four warriors each.
Six sets of flags are provided, because we had room on the counter sheets . . . so you can, if you like, create "purple" and "orange" teams to go with the extra flags, and invent team powers you think are appropriate!
Setup
To start:
- Set up the board. It has two sides; you choose which one.
- Separate the 100 Power Cards and shuffle them. Deal nine to each player. New Power Cards may be needed during play. Keep the deck handy and make a discard pile.
Creating Your Warriors
Next, each player must create his team of three warriors.
-
Pick a set of warriors. Each team of three is a different color, and has a different team power (see Team Powers, below). Take the three Warrior Cards and the matching three figures. Find the Flag and Home Base counters in your color; you'll need them soon.
-
Assign three Power Cards to each warrior. (Some Power Cards in the initial draw will grant extra cards. Pick these now. Roll dice if necessary to see who picks first.) The Power Cards give the warriors their special abilities. You choose which cards are assigned to each of your warriors, but each warrior must get at least three. Careful choice of power combinations can lead to formidable fighters and a super-powerful team. Random groupings can lead to a truly pathetic team.
Place each Warrior's Power Cards beside that Warrior Card so everyone can see which cards go with which warrior. Note that if a card says Secret, you may keep it upside down for now! Place the appropriate Gadget counters between the sides of each warrior figure (see picture), except for Secret gadgets. Later, you'll put status markers like "Frozen" on the warriors as well, using the slots on the top of the figures.
-
A basic warrior has six hit points. Place six tokens (glass stones, or whatever you prefer) on each of your Warrior Cards. If you have a Power Card that gives you extra hit points, and it's not a Secret card, add the extra tokens.
Flags
There is a colored flag for each team. Each player secretly writes down one flag color, other than his own. To win, he must control this flag and his own . . . see How to Win, below.
Now put the flag from each participating team in a cup. Each player draws one and reveals it. You start with only this flag, whether it's your own or another one. Don't tell which flag you wrote down as your objective!
Starting Positions
Roll the die to see who goes first. The highest roller does Phase 1 first; then proceed clockwise around the board. This sequence will be followed in each phase as the pieces are placed on the board. It will also be followed when it's time to move.
- Phase 1: Each player, in turn, places his base on the board. It must be at least two squares away from any other base already on the board.
- Phase 2: Each player, in turn, places all his warriors on the board . . . one on his base, and the other two adjacent to it (touching on a side, not at a corner).
- Phase 3: Each player, in turn, puts the flag he has on one of his warrior figures. To start, it may be a good idea to give the flag to the most protected or defensive warrior, until the powers of the other teams are known. Later, the flag can be dropped or given to another warrior (see Gadgets, below).
How to Win
You win by returning your own flag, plus the one you chose during setup, to your own base. Each flag must be carried by a living warrior who is on, or adjacent to, your base.
You also win if all your foes are dead, have left the board, or are neutralized. An enemy warrior is considered neutralized if it is unable to move or strike for three turns in a row.
Taking a Turn
Start with the first player, and proceed clockwise.
On your turn, each of your warriors takes a turn. They may go in any order, but one warrior's turn must be completed before your next warrior can start its turn.
The rules below describe the abilities of a basic warrior – one with no special powers. Power Cards and Team Powers (see below) will modify these abilities, as well as giving special defenses.
On a basic warrior's turn, it can perform one strike and one move (in any order) . . . or it can just move, or just strike, or do nothing at all!
Moving
A warrior may only move once per turn.
A warrior can move up to two squares, non-diagonally. It can change direction during a move.
Two warriors will not normally be in the same square, because a warrior is an obstacle. If two or more warriors end up occupying the same square (which CAN happen, due to unusual power combinations), the first one to have a legal opportunity to move to a vacant square must do so.
[Diagram: three grid examples, marked "OK", "OK" and "Not OK", showing a two-square straight move, a move that changes direction, and a diagonal move that is not allowed.]
Obstacles
A warrior cannot move onto or through a square occupied by an obstacle. Permanent obstacles are shown on the board as pillars and (on the desert map) a pyramid. Living warriors are obstacles. Dead warriors are not obstacles.
The edges of the game board are considered obstacles.
When a warrior attempts to enter, or is forced to attempt to enter, a square occupied by an obstacle, it ends its move in the previous square and rolls a die. On a roll of 1, 2, or 3, the warrior takes 1 hit of Hard damage. If the obstacle is another warrior, the other warrior also rolls for damage in the same way.
Yes, you can use your Move to run into someone to try to hurt them. A desperate tactic, but it sometimes works.
Thrown Gadgets: A thrown Gadget like a Grenade or Smoke Bomb may be thrown into a square with a warrior, but not into a square with a permanent obstacle. Nothing may be thrown through a warrior's square.
Knockback
Some Powers will cause warriors to be knocked away from an attack. Knockback movement is always directly away from the source of the attack, and can be diagonal. If you are diagonally next to an exploding grenade, you will move away from it one diagonal square.
If an explosion covers a large area, it is possible that there will be two squares that are both considered "directly away" from the attack. In that case, the owner of the warrior chooses.
If a single attack knocks back more than one warrior, the more distant ones must be moved first so that no warrior is moved into a collision with another warrior who is also moved by the attack.
Dead bodies are not subject to knockback. Exception: If an attack both kills a warrior and knocks him back, the body does fly through the air and can collide with another warrior, potentially doing collision damage.
Random Movement
Some Powers will cause warriors, or the point at which they move or strike, to move randomly. Roll the die on the Random Movement Table:
- 1 – Stay in place.
- 2 – 1 square north.
- 3 – 1 square east.
- 4 – 1 square south.
- 5 – 1 square west.
- 6 – Roll again and add 1 square to the distance moved.
Repeated rolls of 6 can lead to a long random movement!
Diagonals
Some Powers allow diagonal movement and attacks! In this case, note that if two obstacles are diagonally adjacent, they are connected and no strike can pass between them (see Line of Sight). Nothing can move between them except Powers that specifically don't pass through intervening squares. (Errata, SJG 2004-09-16:) Warriors that are moving diagonally cannot move between two diagonally adjacent obstacles unless, of course, they can also move through obstacles.
Leaving the Board (Surrender)
A warrior cannot be forced off the board. However, a warrior can voluntarily move off any edge of the board on its turn. This is surrender – that warrior is now out of the game.
When a warrior surrenders, any flags it is carrying are left on the last square it passed through. All its other cards, and their effects, are immediately removed from the game.
Striking
A standard warrior may strike once per turn.
Most strikes are attacks on enemies, and take away hit points. Warriors start with 6 hit points. A warrior whose hits are reduced to 0 is dead (see Death).
Unless a Power Card is used, a warrior may only strike adjacent warriors. Adjacent is defined as one square away, non-diagonally. It does not matter which way the attacker or victim is facing.
Some Powers give strikes that are made on empty squares, dead bodies, allies, or even the warrior himself.
High Is Good
When you roll the die, you want to roll high. High is good. If you remember this, it will be harder to misunderstand the rules!
Success Rolls
Most strikes require a die roll to succeed. For instance, "2+" means the strike succeeds on a roll of 2 or better. You always roll a single six-sided die. A high roll is always good.
A basic weaponless strike (using no special powers) succeeds on a roll of 4 or more.
Some strikes succeed automatically; this is indicated by "Auto" on the Power Card. If an "Auto" power is affected by a power that gives a penalty to succeed, read "Auto" as "1+" and then apply the penalty.
Damage
Each point of damage costs the victim 1 hit point.
There are four types of damage: Hard, Sharp, Energy, and Mental. Some Powers protect against specific types of damage.
Line of Sight
For normal (non-diagonal) strikes and movement, Line of Sight is simple. It's always obvious whether an obstacle, or a denied area like that caused by Anti-Magic Aura, is in the way or not.
If diagonals are involved, use these rules:
- Paths are traced from the center of one square to the center of another.
- A path that goes through any part of an obstacle or denied area is illegal.
- A path that only touches the corner of an obstacle or denied area is legal, but a path may not be traced between two diagonally touching corners.
[Diagram: "OK" and "Not OK" examples of diagonal paths.]
Damage Amounts
The basic strike represents an unarmed attack. It does 1 point of Hard damage. Unless the target has a defense which stops Hard damage, it loses 1 hit point.
Some powers do a fixed amount of damage each time they hit. Others require a die roll. Most of these do 1 to 6 points of damage . . . just roll the die. For rolls that do a different amount of damage, see the Power Card.
When damage is doubled or tripled, roll the die once and multiply the result.
When several warriors are hit by the same attack, roll damage separately for each one.
Stunning
Some strikes can "stun" the target. A stunned warrior can do nothing until the beginning of the next turn of the warrior who caused the stunning.
Death
If a warrior's hit points are reduced to 0, it is dead. It drops all its Gadgets. Discard its other, non-Gadget Power Cards and remove any of their related effects from the board (such as Mental Barriers).
Lie the figure down to show it's dead. It is not an obstacle. It is considered to occupy the square where its base is; that's where its Gadgets fall, too.
If all your warriors die, you have lost. Better luck next time!
Death Through Power Loss
Some Powers give extra hit points. If a wounded warrior loses such a Power (or just has it suppressed), and the loss of those extra hit points takes its total to 0 or less . . . that warrior dies.
Power Cards
The Power Cards are what make every game different. They give the warriors their special powers. A warrior starts with three Powers and can get more during play.
Each Power Card modifies the rules in some way; the cards always take precedence over these basic rules. The instructions on the cards are written to the warrior himself . . . that is, the "you" on the cards means the warrior, not the player.
Conflicts Between Cards
When cards conflict with each other, a specific statement always takes precedence over a general one.
Example: "Grace" says that it allows moves to be made diagonally. But "TesserKnight" specifically says that it cannot be made diagonal. The specific statement takes precedence.
(Errata, SJG 2004-09-16: the example names "Grace", not "The Moves".)
Anatomy of a Power Card
The sample card used for this section is "Flameblast" (Mutation; Strike, Defense; Secret; Range: 3; Energy (3); Auto). Its callouts are:
- Name of the power.
- Color bar indicating general power type. Red bars mean attack powers, blue means movement, green means defense, and purple indicates "special." Cards that fall into two types, like this one, show two colors.
- Power category.
- Range or area of effect.
- Immunity, if any. This card makes you immune to Energy attacks.
- General description.
- Type of damage caused by the strike (here, Energy) and amount of damage (3). Some strikes require a die roll; for instance, a (1-6) would mean 1 to 6 points of damage, rolling the die.
- Success roll. This card is automatic. Many powers require a die roll. For instance, a "4+" would mean you need a 4 or better to hit.
- Is the power secret until used?
- Power type(s). This one is both a strike and a defense.
Modifier Cards
A plus sign (+) in a card's type means it is a modifier. A modifier can be combined with any other Power Card of the same type or with that basic warrior attribute. Example: Igor has the Fast card. It is a +Move card, giving a bonus of 2 squares. This can be combined with any other Move card, or it could be combined with the basic warrior move of 2, making the total distance moved 4.
Sometimes you'll be able to use more than one modifier card at once to get a compounded effect.
Combining, Adding, and Multiplying
Some cards multiply a value, while others add. When combining two such cards, perform the addition first, then the multiplication. Example: Igor has the Strength card (+2 strike damage) and the Might card (×2 strike damage). When making a normal strike, he would do 6 points of damage: (1+2) ×2.
Other cards which affect the same thing may also be combined. Example: Sinistra has both the Enhancer Helmet and the Luck power. Each one lets her modify her die roll by 1. She can use both cards to modify her roll by 2!
Simultaneous Effects
For game purposes, nothing is simultaneous. When several warriors, for instance, are affected by the same attack, the attacker chooses the order in which they are affected.
Secret Cards
Some cards are marked Secret. You may keep them face down until they are first used. Non-Secret cards must always be face up; opponents can read them whenever they choose.
When beginners are playing, you may choose to start with all cards face up, so nobody forgets about a useful power!
Classification of Powers
There are six categories of Power: Gadget, Bio-Mod, Skill, Mutation, Super-Power, and Magic. Gadgets are objects a warrior carries; see below for Gadget rules.
The Power types are Move, Strike, Move&Strike, Defense, or Special – describing what type of ability it provides. A card labeled Move can be used in place of the basic warrior move. A card labeled Strike can be used in place of the normal strike. A Move&Strike card is used in place of both a move and strike, so under normal circumstances nothing else can be done if this card is used.
Defense cards take effect when you are the victim of a strike. Special cards are all different . . .
Some cards have multiple effects, giving (for instance) both a defense and an attack.
Team Powers
Each of the four teams also has a power which is common to the whole team. Each of these powers represents a small increase in starting abilities.
- Orcs start with 7 hits instead of 6.
- Goths do 2 hits of damage, rather than 1, if they hit with a basic strike.
- Cats have a basic move of 3 squares rather than 2, but only if they are carrying no gadgets.
- Mad Scientists may carry any number of gadgets, not just three.
Gadgets
Some Power Cards represent gadgets. Each gadget is described on its card. Gadgets cannot be used in ways other than those described . . . for instance, you cannot throw a pistol!
Each warrior can carry a maximum of three gadgets at any time. If a warrior finds itself with more gadgets, the player must immediately choose three to keep, and drop the rest.
On a warrior's turn, it can take one gadget from, or give one gadget to, an adjacent and willing warrior. This costs a strike.
A warrior can drop any or all of its gadgets on its turn; this does not cost a strike. Place the Gadget counter on the warrior's square and move the Power Card to the center of the table, to show it is unowned.
To pick up a loose gadget, a warrior must be on its square. A separate strike is required for each gadget picked up.
A warrior who picks up a gadget gets the corresponding Power Card. The gadget may be used in the same turn, if it is otherwise legal to do so (this, of course, requires the warrior to have another Strike, if one is needed to use the gadget).
Gadgets cannot be destroyed. However, a warrior who leaves the board takes all its gadgets with it except flags.
Flags are gadgets, but they provide no special powers. They are not magnetic and cannot be destroyed.
Ranged Strikes
Some strikes can be made at a distance. The "range" on the card is the number of squares the strike can reach. Ranged strikes can only be made in a straight, non-diagonal line.
Obstacles block ranged strikes unless the Power Card specifies otherwise. In the rare case where two warriors occupy the same square, they do not block each other from ranged strikes.
Area of Effect
Powers that create an area of effect form a square area around the warrior. The warrior is always in the center of the area and is not affected by the power. All other warriors, even allies, are affected if they are within the area when the power is used.
For instance, a "5 × 5" area covers a total of 25 squares, centered on the warrior.
Area effects are not blocked by anything except Power Cards that specifically state that they block area effects. The largest area is 15 × 15. This covers the whole map if the warrior is in the center, but not if he's in a corner.
Duration of Effects
Some Power Cards, once used, remain in effect for a complete turn. To show that a card's power is in effect, you may wish to place a marker on it.
Also, certain Power Cards (such as Confuse and Freeze) affect victims for a complete turn. When a warrior is suffering from such an effect, put the appropriate marker on the victim's figure.
(Errata, SJG 2004-09-16: "Deep Freeze" is "Freeze".)
Game Options
When you're familiar with the rules, these variants can change things around.
- Extra Team Powers: Each player is dealt 10 Power Cards rather than 9. Each player then chooses one of his cards to be a new team power. These cards are then shuffled and one is given to each team. Thus, you should be careful about choosing the team power, since your opponent might end up with it instead of you!
- To the Death: Don't bother with the flags. Last player with a warrior standing wins. Escaping off the board is not allowed. Not for the faint-hearted!
- Power-Ups: It works in Frag; it will work here. Scatter a number of gadgets, and perhaps a few markers representing life points, in the middle of the board, to be picked up by whoever can get to them. If you like, you can hide them under coins so nobody knows what they're going for.
- Outnumbered: One or two warriors with five cards each battle three to six "bad guys" with two cards each. You should experiment with the number of cards and warriors to find the unbalanced situation you prefer.
- Faster Movement: Make the standard move 3 rather than 2. You'll have to change or remove the TesserKnight power. Cats now move 4 if they have no gadgets . . . this is really fast!
- More Players: Really, any number of people can play. You can create new teams with the Purple and Orange counters. Or just give fewer warriors to each player; two or even one per player works. With fewer warriors, games are fast, so no one sits out long.
- Elite Force: Each player controls only two warriors. Deal out nine cards per player, but players pick the six best cards and discard the rest.
For More Stuff
Visit our website! This game's page can be found at www.sjgames.com/strangesynergy/. There you'll find more game variations and ideas, as well as any FAQ or errata that prove necessary!