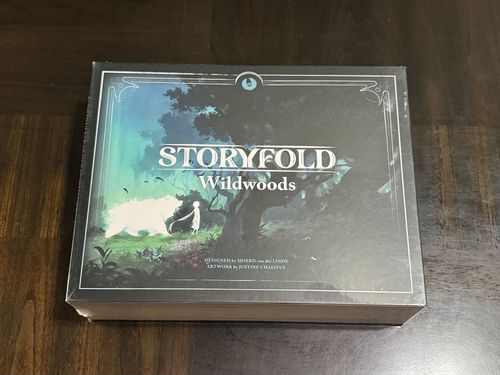
Storyfold: Wildwoods
Storyfold: Wildwoods Rulebook
Table of Contents
Table of Contents
Action Cards
The 4 Action cards represent what Luma can do. With them, you venture into the darkness and heal the forest. During the Luma Phase, you carry out actions and roll dice to gather the successes you need. Here is an overview of all the actions.
Light
Create a bright beam of light to fend off creatures and light your way.
Action: If you want to blind 1 creature, you need 1 success per icon shown on the creature card. If you have enough successes, move the creature to the end of the River and place 1 Stun token on it.
For each success: If you want to advance the Light marker, you need 1 or more successes. If you have enough successes, advance the Light marker 1 space per success.
Help
It isn't always about fighting — sometimes you just need to help.
Action: If you want to visit 1 Help location, you need 1 success per icon shown on the location. If you have enough successes, place 1 Location marker on the location and carry out its effect.
For each success: If you want to gain Crystals, you need 1 or more successes. If you have enough successes, place 1 Crystal per success on any Action cards.
Explore
The forest is full of hidden paths and secrets waiting to be discovered.
Action: If you want to visit 1 Explore location, you need 1 success per icon shown on the location. If you have enough successes, place 1 Location marker on the location and carry out its effect.
For each success: If you want to draw Explore cards, you need 1 or more successes. If you have enough successes, draw 1 Explore card per success. Keep 1 of them and discard the rest.
Heal
Heal the creatures of the forest from the shadow and restore the balance.
Action: If you want to heal 1 creature, you need 1 success per icon shown on the creature card. If you have enough successes, discard the creature. Then gain as many Crystals as shown on its creature card, and place them on any Action cards.
For each success: If you want to gain Spirit, you need 1 or more successes. If you have enough successes, advance the Spirit marker 1 space per success to the left.
Cards
Luma & Brom Cards
The Luma and Brom cards have powerful effects. You may use them at any time, as their card text states.
Luma: Luma gathers all her courage and faces the shadows alone…
During the Luma Phase, you may spend any number of icons from any Action cards, any number of times: reroll 1 die.
Through the effect of "Luma & Brom," you may place Brom on the Shadow discard pile instead of drawing the last Shadow card of the chapter. If you do, flip the Luma card over to its "Luma" side. You may only use this effect once per chapter.
Through the effect of "Luma," you may spend 1 Crystal to reroll 1 die. You may do this as often as you like — with the same or different dice. Each reroll costs 1 Crystal.
Brom: Brom — Tend / Protect
During the Luma Phase, you may spend icons from any Action cards: gain Spirit. Then flip this card over.
Through the effect of "Protect," you may spend 1 Crystal to blind 1 creature. If you do, move 1 creature to the end of the River and place 1 Stun token on it. Then flip the Brom card over to its "Tend" side.
Through the effect of "Tend," you may spend 2 Crystals to gain 2 Spirit. Then flip the Brom card over to its "Protect" side.
Explore Cards
There are 2 kinds of Explore cards: Boons and Banes.
Boons make things easier for you, Banes make them harder.
During the course of the game you add new cards to the Explore deck — Companion creatures and Traumas are among them.
If you draw a Boon card, place it on an empty Boon space. You may only use Boon cards during the Luma Phase, unless stated otherwise.
If you draw a Bane card, carry out its "Immediately" effect.
- If all Boon spaces are occupied and you draw a new Boon, you may choose any Boon card (including the one you just drew) and either use it or discard it to make room.
- If you must draw an Explore card and the Explore deck is empty, shuffle the Explore discard pile and place it as the new Explore deck on the Explore space. Then keep drawing.
- If you change scenes, all cards on your Boon spaces remain in place. You only remove them when you use or discard them.
- Trauma cards remain on your Boon spaces. To remove them, you must carry out the Heal action.
- Some cards have a permanent effect shown in italics that always applies while the card is in play.
Shadow Cards
Shadow cards represent Luma's negative thoughts and feelings.
If you must draw a Shadow card, carry out its "Immediately" effect and place it face up on the Shadow discard pile.
Story Cards
Story cards tell what Luma experiences in the forest.
If you must draw a Story card, search the Chapter deck for it, read it, and carry out its "Immediately" effect.
- Return Story cards to the box after carrying out their "Immediately" effect (unless stated otherwise).
Creature Cards
Creature cards are placed in the River. Through them you lose Spirit.
If you draw a Creature card, carry out its "Immediately" effect. It states which space in the River you must place it on.
When you activate a creature, lose as much Spirit as shown on its creature card. Then carry out its "After Activating" effect.
- If you must draw a Creature card and the Creature deck is empty, shuffle the Creature discard pile and place it face down as the new Creature deck on the Creature space. Then keep drawing.
- If an effect lets you discard a Creature card, you do not gain Crystals for it — you only gain Crystals when you heal the creature.
- Some cards have a permanent effect shown in italics that always applies while the card is in play.
Fundamentals
The River
The four numbered spaces ("3+," "4+," "5+," and "6+") and the three unnumbered spaces ("–") along the bottom edge of the book are the River. Each space holds room for 1 Action card or 1 Creature card.
The start of the River is the "3+" space, and the end of the River is the space directly to the right of the last card in the River. Over the course of the game you move cards back and forth in the River. You may only use Action cards that sit on a numbered space beneath the book. If an Action card is moved to an unnumbered space ("–"), you cannot use it again until it is back on a numbered space.
Whenever there is a gap between cards in the River, you must clean up the River: slide all cards in the River to the left to close the gaps.
- If you place or move a card onto a River space that already holds a card, move the card that's in the way — and every card to its right — 1 space further right, toward the end of the River. Then place the new card on the space that opened up.
- If you move a card to an adjacent River space, swap it with the card on that space. (You move the card that's in the way, and every card to its right, so this does not shift the rest of the row — you place the new card on the space that opened up and close the gap, since this would not change the order of the River!)
- If there are already 7 cards in the River and you must draw a Creature card, discard that Creature card and lose as much Spirit as shown on it.
Dice
When you carry out an action, you roll dice to gather the successes you need.
You start with five 8-sided dice. Some effects grant you the 10-sided and 12-sided dice as well, until the end of the current chapter.
- To carry out an action, you must roll at least 1 die.
- If an effect lets you reroll dice, you may choose any of the rolled dice and reroll them, then use the new result.
- If you want to carry out an Action card's top effect but don't have enough successes for it, you may instead carry out the bottom effect with the successes you rolled.
- If you rolled no successes at all, you carry out no effect. Simply move the Action card to the end of the River and clean up the River.
Locations
Each scene has various locations that Luma can visit along her path. Scenes contain Explore locations and Help locations, distinguishable by their colors and icons. To visit a location, you must choose the matching Action card and need as many successes as the colored dots shown on the location. If you have enough successes, place 1 Location marker on the location and carry out its effect.
Some locations state that the Light marker must be on the middle space of the Wildwoods track for you to be allowed to visit them. These locations show the progress icon at the top.
- If locations are connected by a line, you must visit them in order, left to right. To visit such a location, you must first have visited every location connected to it on its left.
- Some locations have conditions you must meet before you may visit them. These are written in italics next to the location.
- You cannot visit a location a second time if it already has a Location marker on it.
Wildwoods Track
This is where you track Luma's progress and the shadows' progress.
If you must advance the Light marker or the Shadow marker, move it further toward the middle of the Wildwoods track. If you must move it back, move it away from the middle.
Some spaces on the Wildwoods track have icons above them. These icons belong to the Shadow effects explained during the scene's setup. If you advance the Shadow marker onto a space with icons, carry them out (from left to right).
- If you move the Shadow marker back, you do not carry out any Shadow effects.
- The Light marker and Shadow marker cannot move past the end of the track or past the middle space.
Crystals
Crystals represent the gratitude of the creatures and animals of the forest.
If you gain a Crystal, place it on any one of your 4 Action cards. If you gain multiple Crystals, you may place them on the same Action card or on different ones.
After rolling, if you rolled at least 1 success, you may spend any number of Crystals to gain 1 success for each Crystal spent. You may only spend Crystals that are on the Action card you are currently carrying out.
- Each Action card may hold at most 3 Crystals.
- Crystals remain on their Action cards when you change scenes, and move with them in the River.
Spirit
Spirit represents how much longer Luma can hold out against the shadows.
If you gain Spirit, move the Spirit marker that many spaces to the left. If it reaches the leftmost space, any excess Spirit is lost.
If you lose Spirit, move the Spirit marker that many spaces to the right. If you must lose more Spirit than you have, move your Spirit marker back to the start of the Spirit track and continue losing however much Spirit you still must lose. Then draw 1 Shadow card.
Stun Token
If you blind a creature, Luma is briefly out of danger.
If a Stun token sits on a creature, you do not lose Spirit when you activate it. You must still carry out its "After Activating" effect. Afterward, remove the Stun token and return it to the supply.
Each creature may hold at most 1 Stun token.
End of Scene
At the top of every scene you can see the 2 ways it can end: Luma prevails, or the shadows prevail.
The "Luma Prevails" section states what you must do to win the scene. As soon as you have done so, carry out the "Luma Prevails" section.
If the Shadow marker reaches the middle space of the Wildwoods track (even if the Light marker is already there), the shadows prevail. Then carry out the "The Shadow Prevails" section.
Having to carry out "The Shadow Prevails" section does not mean you have lost. Your adventure continues regardless!
Saving the Game
At the end of every scene you may save the game. After carrying out the steps for changing scenes, do not carry out the setup for the next scene — instead carry out the following steps to save your game:
Decks
- Place the Shadow discard pile face up on the face-down Shadow deck, the Explore discard pile face up on the face-down Explore deck, and the Creature discard pile face up on the face-down Creature deck.
- Take your Luma card, Brom card (if it is on the Brom space), and all cards on your Boon spaces, and place them face up on the face-down Chapter deck.
- Take the Shadow deck, Chapter deck, Explore deck, and Creature deck and place them in the 4 spaces at the top of the Save tray.
Card Row (the River)
- Take the Crystals from your Action cards and place them in the Save tray in the wells beneath the space for the matching Action card. Example: place the Crystals from the card on space "3+" into the well marked "3+."
- Take the 4 Action cards and place them in the Save tray at the spaces with the matching number. Example: place the Action card from River space "3+" onto the space marked "3+."
Markers, Crystals, and Dice
- Take the Spirit marker and place it in the Save tray on the space for its current position.
- Take all your dice and place them in the supply tray. If you have the 10-sided or 12-sided die, place it with the 8-sided dice. Otherwise place them in the adjoining well. This way you know which dice you have and which you don't.
- Take all remaining markers and Crystals and place them in the supply tray.
Book
- Fold the left and right game boards over the current page as a bookmark, and close the book.
Resuming the Game
Book
- Open the book and unfold the two game boards.
Decks
- Take the 4 decks out of the Save tray and place them on the matching spaces: the Shadow space, Chapter space, Explore space, and Creature space.
- Take the face-up cards off the Shadow deck, Explore deck, and Creature deck. These are the discard piles. Place them on the matching spaces.
- Take the face-up cards off the Chapter deck and place them on the matching spaces: the Luma space, the Brom space, and the Boon spaces.
Card Row (the River)
- Take the 4 Action cards and place them on the matching spaces in the River.
- Take the Crystals from the Save tray and place them on the matching Action cards.
Markers, Crystals, and Dice
- Take the Spirit marker and place it on the matching space on the left game board.
- Take the 8-sided dice (and the 10-sided or 12-sided die, if you have it) and place them next to the space for used dice.
- Take the Crystals and markers and set them out as the supply.
Overview
Luma Phase
- Take back all used dice.
- Carry out actions:
a. Choose 1 Action card, its top or bottom effect, and a target.
b. Roll any number of available dice.
c. Count the successes. You may spend Crystals.
d. Carry out the effect.
- If you don't have enough successes for the top effect, you may carry out the bottom effect instead. e. Set aside the used dice. f. Move the Action card to the end of the River. g. Clean up the River.
- You may end the Luma Phase at any time.
Shadow Phase
- Activate all creatures, from left to right.
- Lose Spirit. If the creature has a Stun token, remove the Stun token instead.
- Carry out the "After Activating" effect.
- Advance the Shadow marker.
- Advance the Shadow marker 1 space to the left.
- If there are icons above the space, carry out these Shadow effects (from left to right).
Changing Scenes
- Discard all creatures from the River.
- Clean up the River.
- Remove all markers from the scene.
- Open the new scene.
- Save the game, or carry out the setup for the scene.
- After the setup for the scene, a new Luma Phase begins.
Saving the Game (Overview)
You may save the game after every scene. After you change scenes, carry out these steps (instead of the scene setup):
Decks
- Place the discard piles face up on the matching decks.
- Place the Luma card, Brom card, and all cards from the Boon spaces face up on the Chapter deck.
- Save these decks.
River
- Save the Crystals.
- Save the Action cards.
Markers, Crystals, and Dice
- Save the Spirit marker.
- Save the dice.
- Store the Crystals and markers.
Book
- Fold the game boards over the current page.
Resuming the Game (Overview)
Book
- Open the book, unfold the game boards.
Decks
- Place the decks on the game board.
- Take off the discard piles.
- Lay out the Luma, Brom, and Boon cards.
River
- Lay out the Action cards.
- Place the Crystals on them.
Markers, Crystals, Dice
- Place the Spirit marker on the matching space.
- Take your dice.
- Set out the Crystals and markers.