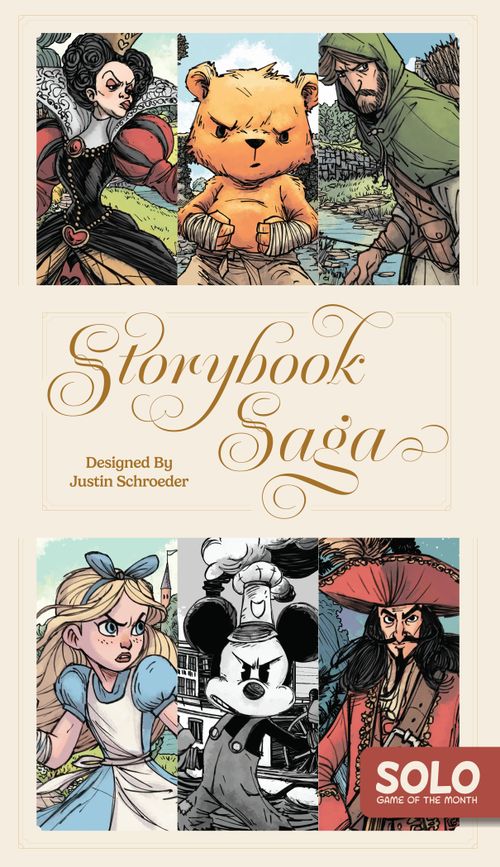
Storybook Saga
Storybook Saga Rulebook
Table of Contents
Table of Contents
Components
- 29 Hero Cards
- 4 Companion Cards
- 30 Villain / Item Cards (Tier 1 and Tier 2)
- 4 Boss Villain Cards
- 8 Location Cards
- 3 Hero Target Cards
- 18 Standard Dice + 1 Target Die
- 56 Tokens:
- 26 Damage Tokens
- 3 Villain Target Tokens
- 16 Reminder Tokens
- 5 Bonus Tokens
- 6 Friar Tuck Tokens
- 3 Wooden Pieces:
- 2 Villain Cubes
- 1 Location Card Disc
Introduction
Your favorite storybook characters are under attack! Join Winnie-the-Pooh, Peter Pan, and other heroes as they try to fend off the Sheriff of Nottingham, the Wicked Witch of the West, and other notorious villains in this solitaire dice-chucking adventure.
Overview
Storybook Saga takes place over a series of 3 Battles, each consisting of a number of rounds, and each round providing both you and your enemies with an opportunity to attack one another.
How well you do in each Battle will determine how much strength your team gains (and will take into the following Battle), but you will always progress all the way to the 3rd and final Battle.
Winning & Losing
In the final Battle you will face off against the Boss Villain that corresponds to your chosen story location. If your team can survive long enough to defeat all 3 Villains during this Battle, you win the game! If all Heroes on your team are defeated during this Battle, however, you lose.
Setup
-
Randomly select (or choose) a Location Card and place it Battles 1 & 2 side up. Then place the Location Card Disc on the card's Start space.
-
Find the Boss Villain Card (three red diamonds icon) and Companion Card with the same Location icon as your Location Card (teal bottle, green tree, purple wheel, red crossed-arrows, orange wall, green trees, teal castle, or black ship). This Boss Villain and Companion are Local to that Location. Place them to the side of your play area, and return all unused Location, Boss Villain, and Companion Cards to the box.
Difficulty Settings:
- For an Easier game, randomly select a non-local Boss Villain.
- For a Harder game, play without a Companion.
-
Lay out the 3 Hero Target Cards and 3 Villain Target Tokens in separate rows, as shown.
Note: Once you're familiar with how targeting works, you can play without these to save table space!
-
Shuffle the Hero Cards into a draw pile, leaving the 2nd Pig & 3rd Pig off to the side. Then draw two and keep one, returning the other to the bottom of the pile. Repeat this process until you have drafted 6 Heroes, and then place them in the 6 Hero slots in any order.
How to Play
Each game of Storybook Saga consists of 3 Battles, and you will fight 3 Villains in each.
Defeating Tier 1 (one red diamond) & Tier 2 (two red diamonds) Villains grants items and improves your odds, but your final success depends on defeating the Boss in Battle 3!
Battle Setup
-
In Battles 1 & 2: begin with the Location Disc in the Start space of the Location Card. In Battle 3: Flip the Location Card to its Battle 3 side and return the Location Disc to the box.
-
Draw and place the Battle's required number of Villain Cards (Tier 1 / Tier 2 / Boss Tier, three diamonds) into the 3 Villain Slots below the 3 Villain Target Tokens (any order):
- Battle 1: Fight 3 Tier 1 Villains
- Battle 2: Fight 1 Tier 1 Villain & 2 Tier 2 Villains
- Battle 3: Fight 2 Tier 2 Villains & The Boss Villain (three diamonds)
Battle 2 Example: Three Villains are placed in the three Villain Slots, each under its Villain Target Token (Lady Mombi under the L/F tokens, Jabberwock under the C/asterisk tokens, Bill Tukes under the R/B tokens).
-
Place special character components if needed:
- Friar Tuck Tokens for Friar Tuck
- Villain Cubes for The Swarm of Bees and/or The Big Bad Wolf
- Reminder Tokens on each Local Character if in Battle 3 (to help remember Location bonuses).
Character Card Anatomy
On each Hero and Villain Card you will find their: Health, Dice Allowance, Location Icon, and Attack Ability.
Note: a Character is considered Local if its Location icon matches the current Location's icon. The star icon is wild and counts as any Location.
Companion Cards provide ongoing abilities (explained on their card), but are not considered Character Cards.
Playing Battle Rounds
Each Battle round consists of the following 6 phases:
- Rearrange Heroes
- Villains Attack
- Heroes Attack
- Defeat Heroes & Villains
- Advance Round Marker
- Refresh/Check for End of Battle
Repeat these steps until either all Heroes or all Villains are Defeated and the Battle ends.
1. Rearrange Heroes
You may freely move your Heroes around (including Defeated ones) between any of the 6 Hero slots:
- You may want to do this to avoid certain attacks or make use of certain Hero abilities.
- Important: All Items and Tokens stay with their Heroes when moved!
2. Villains Attack
Resolve Villain attacks in any order, unless a Villain specifies otherwise.
For each Villain:
- Roll a number of standard dice according to the Dice Allowance shown on their card.
- Following their Attack Ability, determine the amount of Damage they deal and their Target Hero(es), according to the dice results.
- Apply Damage to the Target Hero(es) using Damage Tokens. Villains may also miss entirely!
Note: Items may be used to weaken Villain Attacks (see Items on pg. 19).
Attack Abilities (Villains AND Heroes)
Each Attack Ability consists of a Damage section and a Target section.
The Damage section tells you how much Damage the Character does, which often depends on a Dice Condition. If there is no written condition (eg. Smee), they just deal their Damage value.
The Target section tells you how a Character selects its Target(s), often also depending on a Dice Condition.
Dice Conditions may use the following Dice Icons:
- Die/Dice (one standard die)
- Dice of equal value
- Dice of inequal values
The Dice Icons used in Dice Conditions are:
- Run (arrow icon): A run of consecutive #'s (eg. 2,3,4 or 4,5,6, etc.)
- Sum (Σ icon): Requires the sum of all dice to meet a condition — either an exact number, ≥ or ≤ a number, or counts "per every" time a number is reached (eg. if total = 12, Σ 5 is reached twice)
- E: Dice with even numbers
- O: Dice with odd numbers
- MAX: The highest rolled value
- MIN: The lowest rolled value
- Middle: Ordering all rolled dice from lowest to highest, refers to the one in the middle (the rulebook shows three dice of different values, and the middle-valued one is the one referred to)
- Pair (die + die = X): Count the number of pairs of 2 dice that can be made to = X. An individual die can be used in multiple pairs (eg. a single result can be paired up with multiple different dice to make multiple 7's)
- Target Die: Roll the Target Die to determine target
Rolling the Target Die for Villains
Whenever a Villain must roll the Target Die, their Damage will be dealt to each Hero in the rolled zone:
- L: Both Heroes in the left column
- C: Both Heroes in the center column
- R: Both Heroes in the right column
- F: All 3 Heroes in the front (top) row
- B: All 3 Heroes in the back (bottom) row
- Asterisk (*): Miss! The attack deals no Damage.
Important Villain Attack Rules
- Heroes may take Damage in excess of their Health value. They are not immediately Defeated (this happens during the Defeat Heroes & Villains phase). They may still be used when Heroes Attack this round.
- Whenever a Villain Targets a Hero that's already been Defeated, they still Target that Hero slot, but you ignore any Damage that Hero would take (eg. Jabberwock still tries to attack Defeated Heroes).
- Whenever there is a tie for a Villain's Target (ie. for "largest =," etc.), you choose their Target.
Villain Attack Example: You roll 6 dice for Gentleman Starkey and get five dice plus one more. There are four possible dice pairs that add up to 7 here, so Starkey is dealing 4 Damage! You roll the Target Die and get an F, so all 3 of your front Heroes are hit with this 4 Damage. Ouch!
Christopher Robin only has 3 Health, so taking 4 Damage means he will be Defeated later this round. Your center Hero has already been Defeated, so the 4 Damage that would go here is ignored. Finally, The White Knight takes 4 Damage, bringing him down to 3 Health. He is safe for now, but perhaps not for long!
Once you've resolved attacks for all active Villains in the order of your choice, then move on to the Heroes Attack phase.
3. Heroes Attack
All Heroes attack together as a team. Heroes are not Defeated until Phase 4, so heroes who took lethal damage this round still participate.
Hero Attacks follow 4 steps:
-
Apply Start-of-Round Hero Abilities (if any)
Some heroes (eg. Tinker Bell) activate before dice are gathered. They will tell you if they do this.
-
Gather Attack Dice
Take dice from the Supply equal to the sum of all Dice Allowances listed on all Hero cards (Active OR Defeated).
These dice make up your Attack Pool.
Example: You have 4 active Heroes remaining, with Dice Allowances of 2, 2, 2, and 0, plus 2 Defeated Heroes that each grant you 1. You thus gather 8 dice total for your Attack Pool.
-
Roll and Assign Dice
Roll and assign each die in your pool to a Hero, one at a time.
Once assigned, dice cannot be moved or modified unless allowed by a special ability or item.
Continue until all dice are assigned.
Rolling Example: Rolling your 8 dice one at a time, you first roll a couple of dice that match in value, and place each one on Christopher Robin, who needs 4 dice of equal value (the equal-value icon on his card) to attack. Continuing......
Transcriber note: in the Example Con't and Rolling examples the individual die faces are described generically rather than by their printed values.
Example Con't: You then roll a die and place it on Scarecrow to try and start building a run of 3 (→). Next you roll a die, and then a die, choosing to put both on Eeyore to try rerolling later. You then roll another die, adding it to Christopher, then a die, and then a die, adding both of these to Scarecrow — he is now ready to attack!
Finally, you add the dice on Eeyore back to your dice pool to reroll them. Rolling the first you get a die again, which unfortunately doesn't help you — you just assign it back to Eeyore — but then rolling your last die you get the die you need for Christopher's attack! Nice!
4. Resolve Hero Attacks
Resolve Heroes in slot order, from 1 to 6.
When resolving each Hero:
- Remember to activate Items, which may activate first (see Items on pg. 19).
- Then Apply the Hero's main Attack Ability, if possible — Most Hero abilities have Damage and Target sections, and Dice Conditions, just like Villains (see pg. 8). If a Hero has a Dice Condition, it must be met for them to attack.
Some Heroes instead have the warning (!) icon, which indicates a Special Ability that will tell you when and how to use it.
The Attack Ability card anatomy is: Damage (red burst icon), Dice Condition (eg. "If 4 =", the equal-value icon), Target (target icon, eg. "Villain of your choice"), and Special Ability (warning icon).
These may resolve when it's the Hero's usual turn to resolve Attacks, or at another specified time.
- Each Hero's Attack Ability may only be used once per round.
- If a Targeted Villain Slot is empty, the Damage dealt to that slot is a miss and is ignored.
- When you roll the Target Die, use the Villain Target Tokens to determine the Target (unless otherwise stated): L/F, C/Asterisk, R/B (see the Target Die table on pg. 9).
Special Case: If a Hero's ability puts them to SLEEP, they can't Gather Dice or have dice assigned to them next round!
Attack Example: You've assigned the dice shown to these 2 Heroes. Because you have 3 (=) on Dorothy, you get to roll the Target Die and deal 2 Damage to the rolled Villain. (Even if you had assigned two more dice to Dorothy, she only attacks once per round, and still would have only been able to make this one attack.)
Alice's ability rolls the Target Die for each separate dice pair on her that equals 7. This means you can't use both dice with the other dice to make two 7's. She does also have a dice pair though, so you get 2 rolls. On your first Target Die roll you get an Asterisk. For Alice, this means you must immediately Defeat her and any one Villain of your choice. Sadly, you won't get your 2nd roll.
After resolving a Hero's Attack Ability, return the dice used for it to the Supply (ie. the 3 (=) dice, or the 4 (→) dice, etc. If Friar Tuck Tokens were used, return them to the Supply as well.) Leave any unused dice/tokens on the Hero for now.
Note: Item Cards that grant a Hero free dice values are not removed, even though they act as assigned dice when activating their Attack Ability.
Once all your active Heroes have been resolved in order, move on to the next phase.
4. Defeat Heroes and Villains
All Characters who have received Damage equal to or greater than their Health are now Defeated.
Defeat Heroes first. For each Defeated Hero:
- Return all dice/tokens on their card to the Supply.
- Flip the card face down, leaving it in its Hero slot with any attached Items left beneath it.
- For the rest of this Battle, you may not attack with the Hero or use their Items, but most Heroes still contribute 1 in each Hero Attack phase.
- Important: If all Heroes are Defeated, the Battle will end at the end of this round.
Then, for each Defeated Tier 1 & Tier 2 Villain:
- Flip it to its Item side. You may then either:
-
Attach the Item to any active hero, tucking it under the Hero Card.
OR
-
Discard it to draw a Bonus Token from the Supply (see Bonus Tokens below).
-
- If no heroes are active, you must take the Bonus Token option.
- Items last for the rest of the game unless their effect says otherwise (see Items on pg. 19).
Finally, Defeat the Boss (Three Diamonds) (if able):
- The boss cannot be Defeated until both other Villains in Battle 3 have already been Defeated.
- If both other Villains have been Defeated and the Boss has taken Damage equal to or above their Health, you Defeat the Boss!
- Important: If all Villains are Defeated, the Battle will end at the end of this round.
Bonus Tokens
Each Bonus Token can be discarded face up to the Supply anytime to apply its Bonus to a single Character:
- Add or subtract 1 from the value of any die on a Hero or Villain.
- Reroll any die/dice on a Hero or Villain (can be just 1, a full set, or a subset).
Note: You may hold a max of 5 Bonus Tokens at a time. If the supply is empty when you gain one, reshuffle any that have been discarded.
Tokens
- Deal 1 Damage to any Villain.
- Heal 1 Damage from any Hero.
- Flip any die on a Hero or Villain to its opposite side.
5. Advance Location Disc (Battles 1 & 2)
Move the Location Disc forward one space on the Location Card and immediately apply the Location's effect (skip this phase if on Battle 3).
Note: Complete this step during Battles 1 & 2 even if all Heroes and/or Villains have been Defeated.
Location Effects
- Any/All Heroes: This means the effect targets either the Hero of your choice or ALL Heroes, respectively.
- Any Villain: Targets the Villain of your Choice.
- Damage icon: Deal the indicated amount of Damage to the targeted Character(s).
- Heart icon: Remove Damage in the indicated amount from the targeted Character(s).
- Skull icon: Immediately Defeat the targeted Hero(es). If the effect also says Heal the Rest, then remove all Damage from all other Heroes.
- Bonus Token icon: Add a Bonus Token of your choice to your personal supply. Reshuffle the rest.
- Reminder Token icon: Add a Reminder Token to your personal supply.
- Recruit: Draw one Hero from the top of the deck. You may swap this Hero with anyone on your team, even if Defeated. Any Items transfer to the new Hero, and they enter play with no Damage. If you choose not to keep this new Hero, draw a Bonus Token from the Supply instead.
- Gain an Item: Draw the top Villain from the indicated Tier (Tier 1 or Tier 2). Flip and add it as an Item to any active Hero, or discard it to draw a Bonus Token from the supply.
- Rage: The Villain with the most Damage on them immediately resolves a bonus attack. (You choose between tied Villains, and if no Villains have Damage, nothing happens).
During Battle 3, this phase is skipped, and the Location Card instead provides ongoing abilities to Local Heroes and Villains (the star icon: Heroes always count as Local).
- Local Villain Ability (eg. Enchanted Forest, Battle 3): When a Local Villain is defeated, roll the Target Die and deal Damage to every Hero in target zone.
- Local Hero Ability (eg. Enchanted Forest, Battle 3): Add one die to pool for each eliminated Local Hero.
6. Refresh/Check for End of Battle
- Return all remaining unused dice (and Friar Tuck Tokens given to other Heroes) from Hero cards to the Supply.
- If all Heroes and/or all Villains have been Defeated: Proceed to End of Battle.
- Otherwise: Begin a new Battle round starting with Phase 1: Rearrange Heroes.
End of Battle
If it's the end of Battle 3, skip to End of Game.
Otherwise:
Clean Up for Next Battle
- Discard surviving Villains, if any.
- Remove all Damage from all Heroes.
- Flip Defeated Heroes face up — they start next Battle active again (refresh Friar Tuck Tokens too).
- Add a Hero to your team:
- Count all visible icons that match your current Location's icon (teal bottle, green tree, purple wheel, red crossed-arrows, orange wall, green trees, teal castle, or black ship), across all Heroes, the Companion, and the Location Card itself (the star icon counts for any Location).
- Draw that many Hero cards, and choose 1 to add one to your team, returning the rest to the bottom of the deck.
- Choose one hero to remove from your team (can be the newly added one), discarding any items attached to the removed hero. Your team always returns to six heroes total!
End of the Game
The game ends at the conclusion of the Battle 3.
Heroes Win If:
- The Boss Villain is Defeated, and
- At least one Hero is still active
Villains Win If:
- All Heroes are Defeated
There is no sudden-death tiebreaker — if no Heroes survive, you lose, even if the Boss has been defeated!
Item Cards
Each Tier 1 & Tier 2 Villain has an Item on the reverse side of its card. When you defeat that Villain, you gain that Item.
When an Item can be used is determined by the icon in its bottom left corner:
- Shield icon: Items are used during Villains Attack phase.
- Sword icon: Items are used during Heroes Attack phase.
- Infinity icon: Items are ongoing (always in effect).
Attaching Items
- Items may be attached to any active Hero.
- A Hero may have multiple Items.
- Attached Items must remain with their Hero for the rest of the game, unless one-time-use, or if another game effect removes them.
- If a Hero leaves your team between Battles, all Items attached to them are discarded.
There are 3 main types of Item Cards:
1. Fixed Dice
If an item shows a die face, it grants a permanent die with that value to the hero. It behaves like a normal die during attacks, except:
- It cannot be moved or modified.
- It is not removed during Refresh (Phase 6).
- If forced to "reroll" it, it counts as rerolled automatically, keeping the same value.
2. Bonus Attacks
These Items have a condition that, when met, trigger a Bonus Attack just before the Hero's main Attack Ability.
- The Target is determined by the Item card, and may be different from the Target of the Hero's main Attack Ability.
- Dice used to trigger a Bonus Attack are not removed, so they may then still trigger the Hero's Attack Ability.
- If a hero has multiple Bonus Attacks, resolve each separately.
3. Special Abilities
These may be activated once per round unless otherwise stated on the card. They may modify dice, move dice, prevent or redirect damage, heal the Hero, or otherwise alter your attack options!
- The timing for these is determined by what the ability says, and may be triggered in the middle of a Hero's main Attack Ability or Villain's Attack, but generally you choose when to use them.
Example: The effect shown on this Item allows you to flip one of the Hero's assigned dice to its opposite side. You can do this immediately after assigning a die during the Roll and Assign Dice step, or during the Resolve Hero Attacks step, but remember that you can only use it once per round!