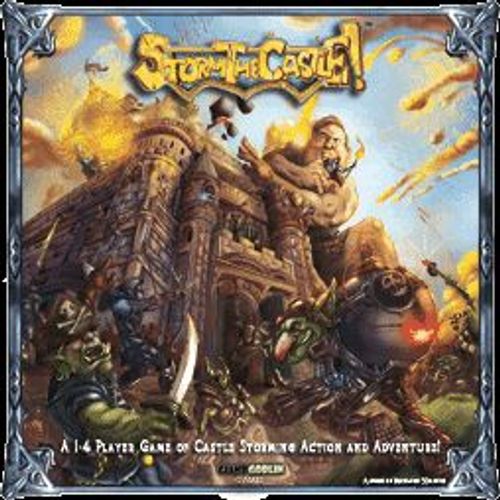
Storm the Castle!
Storm the Castle! Rulebook
Table of Contents
Table of Contents
- Introductory Game
- Game Set up
- Fantasy Defender Reference Card
- Fantasy Defender Setup
- Game Turn Summary
- Collect
- Who's the Boss? Phase
- Why be the Boss?
- Turn Order Phase
- Let's Buy and Deploy Phase
- What you may buy
- What you may buy (continued)
- Deploying Units
- Fantasy Defender's Reinforcement Phase
- Player's Turn
- Player's Actions
- Wrap Up Phase
- Intermission
- Onward March
- Battle Rounds
- Fantasy Defender Heroes
- Flipped Units
- Structures
- Battlefield Locations
- Equipment
- Ladders
- Magic
- Pushing Units
- Defenses
- Tower
Introductory Game
We encourage players who are learning Storm the Castle! for the first time or want a faster game to play the introductory game. Please refer to the back of the rules for playing with fewer than 4 players and the family and kid friendly variants.
For the Introductory Game:
- Castle walls have a health of 2 instead of 3.
- Pre-selected Fantasy Defender units will be placed as per the introductory game set-up diagram.
- Towers do not confer a +2 cover defense or +1 range to the Fantasy Defenders.
- The Hero is not summoned (lucky for you!). Place the hero tokens back into the game box.
- Do not place the peasants at each of the 4 battlefield locations.
Game Set up
Gather the turn order tokens into the game box or a cup. Each player will then blindly draw 1 turn order token.
The player with the lowest turn order token and continuing with the next lowest and so on, will choose the Dark Force army they wish to play.
Collect that Dark Force army's reference card, power cards, and tokens belonging to it. Players according to their turn order will select a battlefield to being at.
Each player now:
- Shuffles their power card deck then draw 3 cards which they may look at.
- Collects 5 gold each.
- Collects 3 magic each if playing the Arcanists and/or Undead Horde.
- Gives the Fantasy Defender reference card to the player to the left of the player with the lowest turn order token.
Fantasy Defender Reference Card
This reference card serves 4 purposes.
- The first is to explain the abilities of the defender's units and heroes.
- The second is to remind the players who will draw and resolve the event card on another player's turn.
- Third, it determines who will deploy the defenders during the reinforcement phase.
- Finally, it reminds the defender's controller to roll the dice during battles involving the defenders.
The player who currently has the reference card is referred to as the "defender's controller" or "controlling the defenders".
When an event card is to be drawn, the player who currently has the reference card and who is NOT the current player will draw the event card and resolve its effect. If the current player has the reference card, and an event card is to be drawn on his turn, he must pass it clockwise. The current player can never draw and resolve an event card on his turn.
Once the event has been resolved, pass the reference card clockwise, remembering to always skip the current player.
During the Reinforcement Phase, or when a Hero is summoned, the player with the reference card will deploy the defender(s) or hero.
If the current player has the reference card during this phase, he must pass it clockwise as explained above.
Once any defenders are deployed, the reference card passes clockwise, again always skipping the current player.
Fantasy Defender Setup
Please refer to the First Time Playing Setup Diagram. (The set-up diagrams are images and are not reproduced in this text.)
- Place 3 castle walls on each of the 4 castle sides.
- Place 1 castle wall on each side of the keep grounds.
- Place 1 peasant token on each of the 4 battlefield locations (i.e. +2 draw, +2 magic, etc.) A. If playing the introductory game, put the peasants back into the game box.
- Place the defender units into a cup or the game box. Starting with the player who drew the lowest turn order token and continuing clockwise, blindly draw 1 defender and place it anywhere on the towers or ramparts. You'll want to place the defenders in a space that will hinder the other players while making it easier for you to literally "storm the castle". A. If playing the introductory game, place the 2 musketmen and 2 dwarven pikers on the towers as show in the introductory setup diagram.
- Place any hero tokens off to the side for now. A. If playing the introductory game, place the heroes back into the game's box.
- Shuffle the defender's event and magic decks.
Place the game turn marker on turn 1.
Game Turn Summary
A game turn ends when all the players have taken their own turn and completed the 6 phases.
- Collect Phase: Players each collect 5 gold, draw 1 Power Card, and refresh any exhausted cards. The Arcanists and Undead Horde collect magic (see Magic).
- Who's the Boss? phase: Players bid on who will be the turn's "Boss". After the bid, the Boss will draw 2 Boss cards and choose 1.
- Turn Order Phase: Players randomly choose turn order tokens to determine their play order for the turn.
- Let's Buy and Deploy phase: Player's may buy units, equipment, ladders, and extra power cards. Afterwards players will deploy any units and/or equipment in turn order.
- Reinforcements: The defenders add 1 unit each game turn. On turns 4 and 7, 2 defenders are deployed. Players will also determine how many event cards are to be played this game turn.
- Players Turns and Events: Players will take their turn (move, attack, play power cards, etc) and resolve event cards.
- Wrap Up: Players discard down to 3 cards. Any defenders that were flipped now unflip. The highest Onward March event card played this turn is reshuffled back into the event deck. Finally, move the game turn marker to the next turn.
Collect
Players perform this phase together:
- Place any exhausted cards back into your hand.
- Collect Gold B. Each player collects 5 gold. C. If you control the Battlefield Location (+2 gold) gain an additional 2 gold.
- Collect Magic A. The Arcanists will collect a number of magic tokens based on units they currently have in play that generate magic. This will be shown on the Arcanist's reference card. B. The Undead Horde collects 1 magic for each non-flipped Undead unit they currently have in play. C. If you control the Battlefield Location (+2 magic), gain an additional 2 magic.
- Draw 1 Power Card A. Draw 1 power card from your power card deck. B. If you control the Battlefield Location (+2 Draw), draw an additional 2 power cards.
You can only hold so much
A player can hold a maximum of 10 gold and 10 magic at any one time. Any excess is immediately discarded and cannot be used to pay for an ability, card, etc.
Who's the Boss? Phase
Every grand invasion requires a mighty leader to coordinate the chaos – will that be you?
Players will bid to become the Boss, and if successful, will allow that player access to unique bonuses and powers that will GREATLY aid them in their plans for conquest.
The Boss Vote
- Each player declares how many base votes they have. Each player has 1 vote.
- Players secretly put any amount of gold they wish to add into their right hands. Each gold contributed adds +1 vote. A. Note: Any gold contributed is lost after the bid.
- When everyone is ready, players reveal their hand.
- Whoever has the most votes becomes the Boss for the turn. A. If this is the first turn, the player with the lowest turn order token (that was determined during setup) breaks any vote tie. B. On subsequent turns, the current Boss will break any vote ties that may occur.
Vote Bonuses:
- +1 for each gold contributed.
- +1 for each castle wall you've destroyed.
- +1 for your battlefield upgrade in play.
- +1 for if your champion is in play.
- +1 for each group of 3 fantasy defenders (excluding peasants) you've destroyed.
- +1 if you've defeated a Hero.
If you win the Boss Vote:
- Take the Boss reference card, draw 2 Boss cards, choose 1 to keep, and discard the other. Boss cards do not count against your hand size limit of 3; though you may only have 3 Boss cards at the end of any game turn. A. The (+2 Draw) Battlefield Location does not give you an additional 2 Boss cards during the collect phase nor does the (+2 Hand) Battlefield Location allow you to hold more than 3 Boss cards. B. Should you run out of Boss cards, reshuffle the Boss discards to create a new deck.
- If you've just ousted a Boss by winning the bid, he must discard any remain-in-play (RIP) Boss cards. If he has any Boss cards in his hand, you may choose one, and then discard the remaining. Take 1 gold or magic from the loot pile.
- Revel in your glorious victory.
Why be the Boss?
Being the Boss grants you unique bonuses such as:
- You gain access to the powerful Boss deck.
- No player may attack you – though you may attack them. Once they're attacked they may counterattack and attack you as normal that game turn.
- Break any Boss vote ties.
- On the Turn Order phase, the Boss draws 2 turn order tokens instead of 1.
- You may give any amount of gold to any of the players during the Let's Buy and Deploy phase – it doesn't hurt being charitable to your underlings.
Turn Order Phase
Choosing when to go in a turn will be crucial, especially during the latter game turns. Sometimes it will be best to let someone else go first to weaken the defenses. Afterwards you can gloriously come in mopping up any of the remaining resistance.
To determine the player's turn order:
- The Boss blindly draws 2 turn order tokens from the game box or cup, chooses 1, and then places the un-chosen token back.
- Going clockwise from the Boss, players will each draw 1 turn order token.
- Place your turn order token near your Battlefield start area for all to see.
- The player with the lowest turn order token is considered the first player for the turn. The player with the next lowest token, and so on, are considered the second, third, and fourth players.
Let's Buy and Deploy Phase
Each player now buys any amount of units, ladders, equipment, and additional power cards they have with their gold.
Starting with the player with the lowest turn order token and continuing with the next lowest and so on, the players deploys the units and/or equipment they purchased.
What you may buy
The battlefield is a constantly evolving spectacle of whirling blades with masses of troops attempting to scale castle walls. Players will need to wisely plan what to purchase each turn if they are to be successful.
Units: Each Dark Force player may not buy more units than he has tokens remaining. The costs for units, noted by the gold icon, are shown on your reference card.
Units you purchase are normally deployed in your battlefield's start area. You may choose to deploy any of your units in another player's battlefield start area for an additional 1 gold for each unit deployed in this manner (see Deploying Units). Your reference card has an image of a triangle and feet reminding you of this option.
Champion: You may only buy and deploy your champion if you have your champion's card in your hand. Pay the unit's cost and deploy your champion as you would normal units, then discard the card.
Battlefield Upgrade: You may buy and deploy your battlefield upgrade only if you have this card in your hand. Pay the card's cost and place the corresponding token in your battlefield's upgrade location. Once paid for, you may keep your battlefield upgrade card to the side of your play area to use as a reference, it will no longer count as being part of your hand.
Power Cards: You may purchase additional power cards for 1 gold each. Remember you can only hold 3 power cards at the end of your turn. Your reference card will have an image of your power card, reminding you of this option.
Equipment Tokens: You may purchase equipment cards from your hand and deploy them on any of your eligible units in any battlefield space, or as you unit is being deployed. Take the corresponding equipment token and place it on your unit.
You may place the equipment card near your play area to use as a reference. Once that equipment card is bought, it no longer counts as part of your hand. See
What you may buy (continued)
Ladders: Your army may use up to 3 ladders at one time and may purchase them without a power card.
Ladders are considered to be equipment. Unlike other equipment, you may only place a ladder in any battlefield start area where you have a unit or while your unit is being deployed.
Your reference card has a ladder symbol on it reminding you of this option.
Deploying Units
After you've purchased your unit(s) you may deploy your unit(s) in any of your battlefield's 3 start spaces. Remember, you may deploy in any of the 3 battlefield start spaces in another player's battlefield for 1 gold for each unit deployed in this manner.
Deployment guidelines:
- You may destroy your unit to make way for a new purchased unit you're deploying.
- If deploying on a battlefield start area that has another player's unit on that space, a battle immediately begins.
- The battle is considered to be at range 1 and continues until 1 unit remains (see Battle Rounds).
- The deploying unit is considered to have acted and may not move or attack again this turn.
- If ability allows your unit to deploy in a space other than a battlefield start area and another player's unit is there, a battle will immediately begin as normal.
- You cannot deploy in any of the 4 Battlefield Locations
Fantasy Defender's Reinforcement Phase
You didn't think the defenders were pushovers did you? During the reinforcement phase, the brave guardians of Castle Storm Haven will call upon their brothers and prepare their defenses to repel the invaders.
There are two steps to this phase: 1. Summoning the defenders and 2: Determining the number of event cards that will be played this turn.
- On all turns, except 4 and 7, only 1 defender unit is summoned. On turns 4 and 7, 2 defenders will be summoned. The defenders controller will blindly draw a defender token(s) and deploy it in any non-occupied space within the castle. A. The turn track has larger images for turns 4 and 7 to remind you to summon 2 defenders.
- The defender's unit MUST be placed inside the keep if a Dark Force player has a unit within 3 spaces of it.
- Once the defender's unit(s) is deployed, pass the reference card clockwise, remembering to always skip the current player.
Should the defenders run out of unit tokens, they cannot further reinforce the castle.
Battle Tip: You'll want to strategically place theses defenders to hinder your "allies".
Determine the Number of Event Cards
The final step to the Reinforcement Phase is determining how many event cards the dark force players will face this turn.
The event deck is packed full of nasty surprises that the invaders will have to face as they slug their way into the castle.
Determine how many Event Cards will be played:
- Count the number of castle sides (keep walls are never counted) that have at least 1 castle wall remaining, whether damaged or not, and add +1 to that number.
- Draw that many event cards and place them side by side. This will allow you to easily track which event cards were played and how many remain.
Note: Event cards are never removed from this stack when a castle side is destroyed on a turn. Once they are counted, they remain for that turn.
More than 5 Event Cards
On some turns you may be facing more than 5 event cards!
Whenever an event card is added that exceeds 5, simply resolve that additional card at the start of the next player's turn. For example:
- 6 Event Cards: An event card would be resolved at the Beginning and End of the turn for both players 1 & 2.
- 7 Event Cards: An event card would be resolved at the Beginning and End of the turn for players 1, 2, & 3.
- 8 Event Cards: An event card would be resolved at the Beginning and End of the turn for players 1, 2, 3, & 4.
Less than 5 Event cards
If less than 5 event cards are to be resolved, simply follow the normal procedure for resolving event cards, except that some players may not have to resolve an event on their turn. For example:
- 4 Event Cards: Player 3 would have the last event resolved at the end his turn. Player 4 would have no events to resolve.
- 3 Event Cards: Player 2 would have the last event resolved at the end his turn.
- 2 Event Cards: Player 1 would have the last event resolved at the end of his turn.
- 1 Event Cards: Player 1 would have the last event resolved at the beginning of his turn.
Battle Tip: Destroy the walls! These events are downright inhumane and mean! Events can severely impact your chances of winning the game. Player's may need to work together for the greater good to eliminate these walls and then work on eliminating each other (evil cackle).
Player's Turn
Now is the time to unleash your army on those chubby halflings, over-armored knights, and magic wielding buffoons. On your turn you must put your grand strategy into action.
Choose wisely as the forces of good are relentless and will not give up easily. Do not fail to underestimate your so-called allies. They to seek victory at all costs.
Players will have many options available to them including where and how to move, starting battles, playing power cards, unleashing magic, and much more.
The First Player's turn:
- If the Fantasy Defender's Hero is currently in play, the defender's controller will resolve his Onward March now (see Heroes). If not skip to step 2.
- The defender's controller draws and resolves the first event card. Once the event is resolved, the defender's reference card is passed clockwise, always skipping the current player as described previously.
- The first player then takes his turn (see player's actions).
- At the end of the first player's turn the second event card is drawn and resolved by the defender's controller. Once that event is resolved, again pass the reference card clockwise, always skipping the current player.
The second, third, and fourth player's turn:
The second player then begins his turn and actions. Unlike the first player, an event card is drawn and resolved at the END of his turn. This continues in the same manner for players 3 and 4.
Player's Actions
The following provides what actions players may take on their turn:
Moving
A player begins his turn with a total of 5 army moves to use with any combination of his units. Each space a unit moves reduces your army moves by 1. Once your army moves are reduced to 0 you can no longer move your units, but may still be able to attack, play power cards etc.
Each of your units can move up to a maximum of 2 spaces during their turn, unless an ability or card specifies otherwise.
Choose carefully as a unit that moves cannot move again if another of your units moves afterwards.
Additional Move Rules
- You may move through any dark force unit but cannot end your move in its same space.
- You may not move through or past a defender unit (see Move Lock) unless it's flipped (see flipped units).
Moving in the Battlefield
A space is designated by an "arrow" in the battlefield. Units may move forward, backward, and to the sides as these spaces are considered adjacent. You cannot move diagonal while in the battlefield as it is not considered adjacent.
Moving in the Castle
A space is designated by a "diamond" in the castle. Units may move forward, backward, to the sides, and diagonal as these spaces are considered adjacent.
Moving to another Battlefield.
Players can invade another player's battlefield to either help or hinder them! A unit on a space either located on the right or left paths of a battlefield may move to the corresponding space of an adjacent battlefield for 2 moves. If another unit is there a battle immediately begins (see Battle Rounds) until 1 of those units is victorious. This battle is considered range 1.
Moving to a Battlefield Location
A unit may move to any Battlefield Location from any Battlefield's space for a cost of 2 moves. If another unit is there a battle immediately begins (see Battle Rounds) until 1 of those units is victorious. This battle is considered range 1.
Play Power and Boss Cards
Power and Boss cards provide unique abilities to further your unrighteous cause. Some cards may bolster a unit's attack or defense, give you the power to peek into the future, and much more!
You may play any number of cards on your turn so long as you meet the requirements of that card and pay its cost (if any). The majority of your power and boss cards can only be played on your turn, unless noted otherwise on the card.
Power Card types:
- Action – Power cards unique to your army
- Common – Power cards that other players also have
- Magic – Power cards that are also referred to as spells. These cards are unique to the Arcanists and Undead horde and typically have a magic cost.
Running out of cards
Should you run out of Power or Boss cards, reshuffle the deck and draw as needed.
You may hold a total of 3 Power and 3 Boss cards at the end of your turn. If you control the +2 Hand) Battlefield location you may hold an additional 2 power cards.
Note: Remain-in-play (RIP) cards count against your hand size for both Power and Boss cards.
Attacking
Attacking is a great way to win the game, so do it as much as you can!
Each of your units may attack once during your turn against another eligible unit or structure to start a battle. Attacking is a free action and does not take a move action or count against your 5 army moves. A unit does not have to move to attack but may move then attack.
Once a unit attacks it may not move again this turn unless it battle marches (see battle march).
Melee Battles
Melee units adjacent to another unit or structure may attack to begin a battle. All battles are simultaneous, meaning both the attacker and defender will roll their attack value (see Melee Counterattacks) to determine if they hit or not.
A unit attacks by rolling a red Burst die and an additional white Battle die for each attack value greater than 1. Any hits rolled will damage the unit.
The Burst die has a side showing a hit and another showing a critical hit. Blank sides represent a miss. When a critical hit is rolled, count the roll as a hit. The player then rolls an additional 3 Battle dice to simulate finding a weakness in its target. Any hits rolled with these battle dice, are added to the previous total of hits.
The Battle die has 2 of its sides showing hits. Blank sides represent a miss.
Any hits in excess of the target's health will destroy that unit or structure. Otherwise, place a number of unit damage tokens on that unit or wall damage tokens for structures. This damage remains unless removed by an ability or power.
After rolling the attack, and any counterattacks, the battle is over.
Sometimes additional rounds of battle will be necessary (see Battle rounds).
Melee Counterattacks
After a melee unit attacks another unit the defending unit fights back even if the attacker rolled enough damage to destroy it.. Battle is simultaneous, so it's possible for both the attacker and defender to wipe each other out.
A melee unit can counterattack only once during a player's turn or on an Onward March Event. Should another Onward March be played, the unit may counterattack as normal if attacked again.
Battle Tip: Particularly devious players will attack a unit with one of their weaker units then attack that same unit again (if it had survived) with another of their units as that defending unit can no longer counterattack.
Ranged Battles
A ranged unit is a trait found on that unit's reference card, including his ranged maximum distance. A ranged unit may attack another unit or structure to begin a ranged battle. The target must be in range, eligible and visible.
A ranged unit may shoot up to a number of spaces equal to his ranged value. Some ranged units may have a range of 1. This simply means it may shoot an adjacent unit. Similar to melee battles, Ranged units will roll a number of dice equal to their attack value.
Ranged Attacks and Counterattacks against Melee units
Ranged units have the opportunity to deal their damage before a melee unit can attack or counterattack.
If a Ranged unit attacks or is attacked by an adjacent Melee unit, it deals its damage first. If the ranged unit does enough damage to destroy the melee unit, it is immediately removed and cannot participate in the battle. If the melee unit survives (and is adjacent to the ranged unit) it may attack or counterattack as normal.
If a ranged unit attacks a melee unit that is not adjacent to it, that melee unit cannot counterattack as it's to far away.
Ranged Attacks and Counterattacks against Ranged units.
If a Ranged Unit attacks or counterattacks another Ranged unit, battle is then simultaneous as normal. The target ranged unit must be in range of the attacker or it cannot counterattack as it's to far away.
Range Counterattack Limitation
Similar to Melee counterattacks, a ranged unit can counterattack only once during a player's turn or on an Onward March Event. Should another Onward March be played, the unit may counterattack as normal if attacked again.
Magic Attacks
Magic attacks works in the same manner as either melee or ranged battles, depending on the spell used. If your caster is being attacked or you're counterattacking, it may either use its melee/ranged attack value or cast spells, should you have enough magic to cast it.
When attacking, a caster may not make a melee/ranged attack AND cast a spell with an attack value at a target during the same battle. Casters may cast additional different non-attack spells if it meets any requirements (i.e. magic cost) of that spell. Once a spell is cast, it is exhausted (unless it fizzles – see magic) meaning it can't be used again this turn. That same caster may choose to battle again with another attack spell, even at the same target!
Defeated Units/Battle Trophies
The more you destroy the more respect you get on the battlefield. To represent your inglorious battle prowess:
- For every wall you destroy set it aside in your play area. This now counts as +1 vote during the Boss phase.
- For every 3 non-peasant Fantasy Defenders, and/or a hero you slay, gain +1 vote during the Boss phase. Set aside these defenders in your play area to proudly show your trophies.
- You do not gain a trophy for defeating another Dark Force player's unit.
Wrap Up Phase
Storming a castle is a tiresome and bloody job. Now it's time to clean up the mess.
- Each player discards down to 3 power cards and 3 boss cards, if you're the boss. A. Remain in Play (RIP) and Exhausted cards count against your hand size. Cards set aside to use as a reference (such as played champion, battlefield upgrades, and equipment cards) do not.
- Unflip any defender units.
- Shuffle the highest Onward March Event card drawn this turn back into the event deck.
- Move the turn tracker to the next game turn.
If at the end of turn 8 the Dark Forces embarrassingly cannot reach the Castle Keep then all is lost! The invaders are routed, the Boss beheaded, and the defenders can celebrate their valiant win!
Though take comfort in being the Baddest and Boldest Brute.
If the Dark Forces unfortunately lose, celebrate who was the vilest player. Whoever has the most trophies wins (even though you technically lost). Always think positive and dark invaders!
Each player adds the following:
- For each wall +1.
- For every 3 defender units +1 (peasants never count).
- For each castle building destroyed +1.
- If your champion is in play +1.
- If your battlefield upgrade is in play +1.
- For every 3 gold you have +1.
- If you're the boss +1.
- If your wearing a pink tie and green goblin ears +1.
Intermission
Congratulations you now know how to play! The remaining sections of the rule book deal with some additional rules to flesh out your invasion.
Onward March
Onward March event cards are the primary way the defenders activate to move and attack. As with other events, the defender's controller will resolve the Onward March event card.
There are different versions of Onward March, i.e. Onward March 1, 2, and 3. The number represents how many different defenders will be activated for the Onward March.
Note: the same defender unit can NEVER be activated more than once during a single Onward March event. The unit may be activated again, as normal, with another Onward March event card.
Defender units are similar to how the Dark Force units act. Each having 2 moves, may attack, counterattack, and can Battle March (see Battle March).
Defender units that have an eligible target must be activated first. Sometimes the defender's controller may have to attack his own units to meet this requirement.
Special Exception: If a dark force player is within 3 spaces of the keep, a defender unit must be activated first to enter into the keep, if unoccupied, to protect it. The defender's controller may move out a weaker and/or damaged unit defending the keep with a more powerful unit.
While at the keep, a defender will only attack another unit if it has a ranged attack and can't be counterattacked, or if the target is flipped. It will never battle march to leave the keep.
If there is a disagreement regarding the possibility of a defender unit being destroyed, as mentioned above, players should discuss and come to a consensus. If this is not possible, players secretly vote with the majority dictating the outcome. Any ties are broken by the Boss.
Remember, in the spirit of the game, the defenders will do ALL they can to protect the Keep!
Additional Onward March Guidelines
- The hero can be activated with an Onward March event.
- Once a defender unit attacks, it cannot move. A defender may not move nor attack again once a different defender unit moves or attacks during that Onward March event.
- Defenders are unaffected by move lock (see move lock).
- Defenders may move up to 2 spaces.
- A defender may spend 1 of its move to knock down a ladder, even if a Dark Force unit is on it (see ladders).
- Defenders may not move into Battlefield Locations or Battlefields but may attack into the Battlefield.
- If there are not enough defenders to activate, remaining activations are lost.
- Defenders may battle march as normal.
- Peasants are never activated.
Onward March and Fantasy Defender Casters
When a defender's caster (i.e. battle mage, wizard lord) is chosen to activate, the defender's controller first draws a number of spells as per directed by that unit. The player may then move and/or attack with that caster.
Battle Rounds
Some battles will require multiple battle rolls to determine a victor. This is called Battle Rounds. The only time you'll use Battle rounds is if 2 units share the same space.
A unit can share the same space, while at a Battlefield location, when a unit deploys on a space containing another unit, or when a unit moves from one battlefield to another player's battlefield space that has a unit.
Follow the rules for normal battle (either ranged or melee) but continue rolling until there is a victor or both are destroyed. If a unit cannot counterattack, it is immediately destroyed.
First strike and Battle Rounds
A unit only gets its first strike roll once when involved in battle rounds (see first strike).
Magic and Battle Rounds
Any magic cast during battle rounds stays in effect until the conclusion of the battle rounds. After the first round, no new spells with an attack value can be played.
Battle March
If a melee unit attacks and destroys an adjacent unit, it may move into the target's space. This may only be done if the attacking unit has at least 1 move available and total army moves remaining. It may not continue moving after the battle march even if it has moves remaining.
A unit battle marching may ignore move lock.
You may not Battle March
- After destroying a structure.
- If fighting a unit behind a wall (unless your unit is on a ladder).
Fantasy Defenders may Battle March as normal. They may not do this if it makes it possible for a Dark Force unit to enter the Keep this game turn or the next. Defenders may never move into the battlefield.
First Strike
Some units have the trait "first strike". A unit with first strike deals its damage first in an attack or counterattack. If the first strike unit deals sufficient damage to destroy the target, that unit cannot roll its attack or counterattack as normal.
A ranged unit will always trump a melee unit's first strike.
Fantasy Defender Heroes
Just when you think your about to crush those pesky defenders, a mighty hero always happens to appear to save the day. Heroes will be summoned when all is bleak and appears to be lost for the castle's brave defenders.
Immediately PAUSE the game when one of the following happens:
- The 9th wall is destroyed (castle and/or keep walls)
- A Dark force unit declares he will enter the keep, but before actually moving that unit..
- A Dark force unit declares it will attack a defender in the keep, but before starting the battle.
Summoning the Hero
The defender's controller randomly chooses a Hero and places him in a space based on the following priority:
- The Keep, if unoccupied.
- If occupied, place the hero in any of the 4 spaces in the keep grounds.
- If the keep grounds are occupied, place the hero on top of a Dark Force unit within the keep grounds immediately destroying that dark force unit. If the keep grounds are occupied by defenders, place the Hero anywhere in the castle grounds that will allow him, if possible, to attack a dark force unit in the keep grounds. If the castle grounds are occupied, place the hero on top of a dark force unit, immediately destroying it.
The Hero's Onward March
Once the Hero has been placed, the defender's controller (who had placed the hero) activates the Hero as if given his own Onward March 1. If the hero was placed in the keep he will not leave it, if a dark force unit is within 3 spaces of the keep. The Hero will also move into an unoccupied keep, if possible, if a dark force unit is within 3 spaces of it. While at the keep, the Hero will attack units, so long as the target is flipped or not able to counterattack.
Once the Hero has completed its Onward March, add an extra event card to be resolved at the end of the current players turn (this may mean more than 1 event card is resolved at the end of a player's turn). Resolve each event one at a time in this way.
Battle tip: some dastardly players will place a strong defender unit in the keep while the hero goes about slaying his allies in the castle.
Heroes on Subsequent Turns
Heroes are an inspiring force and add +1 event card during the reinforcement phase! They'll also make their own Onward March 1 BEFORE the first event card is drawn and resolved.
The hero is always controlled by the defender's controller. Once the hero has activated, the reference card is passed clockwise as normal.
Flipped Units
There may be times when a unit is forced to flip or voluntarily flips. A flipped unit generally represents the unit being dazed, confused, taking extra time, etc.
A unit that is flipped may:
- Not move.
- Attack or counter attack.
- Use abilities.
- Generate magic nor cast magic.
- Contribute any vote bonuses (i.e. Champion's +1 vote).
- Use equipment, have equipment deployed on it.
- Cause move lock.
- Gain any armor or cover defense bonuses.
- Does not count as controlling a battlefield location or the keep.
A Dark Force unit may unflip on its next turn for a cost of 1 move. Defenders, automatically unflip during the wrap up phase.
Defenders may also spend 1 of its moves to unflip and act during an Onward March. They're motivated to defend their castle even at the point of exhaustion!
Units may move through flipped units.
Attacking a flipped unit
A unit attacking a flipped unit gains +1 battle dice. The flipped unit cannot counterattack or benefit from defenses (see defenses).
Move Lock
In the castle, defender units "control" spaces adjacent to them. This prevents the dark forces from rushing past them. A Dark force unit adjacent to a defender cannot move into another space until that defender unit is either destroyed or flipped.
Structures
All castle and keep walls, towers, the keep, castle buildings, and the player's battlefield upgrades are considered structures.
When a structure takes damage, place a wall damage token on it for each point of damage.
Walls
Castle and Keep walls prevent movement into the castle unless it has been destroyed. Units fighting adjacent units while a wall is between them can fight each other only if a ladder is present (though this does not apply to ranged units). If a wall has been destroyed, adjacent units can fight each other as normal. .
Each wall has a health of 3. Once the wall is destroyed, take the wall piece as a trophy. It now counts as +1 vote. If a unit is the rampart's space when a castle wall is destroyed, it takes an immediate Attack 1. This represents the wall collapsing and possibly damaging the unit there. Note: this does not apply to units behind the keep walls.
Dark force units can attack walls only from the front and may not Battle march after destroying a wall.
Defenders gain a +1 cover defense while behind a wall unless a ladder has been placed and being attacked by an adjacent unit (see ladders).
Battlefield Locations
There are 4 different Battlefield Locations each conferring a unique bonus to the Dark Force player who controls the location(s). These are normally guarded by poor, dim-witted peasants who just happen to be in the way of your path of conquest. Should your unit move into a Battlefield Location with a Peasant Token, a Battle with multiple rounds will begin.
Battlefield Location Bonuses:
- +2 Draw - draw 2 additional non-Boss Power Cards during the Collect Phase.
- +2 Gold - collect 2 additional gold during the Collect Phase.
- +2 Magic - collect 2 additional magic during the Collect Phase.
- +2 Hand - your hand size for Power Cards increases from 3 to 5.
The following also applies to Battlefield Locations:
- A unit may move from any space in any Battlefield to any Battlefield Location for 2 moves.
- If a Dark Force player moves into a Battlefield Location containing another unit, a Battle begins immediately and continues until one unit is victorious (see Battle Rounds).
- A player controls a Battlefield Location so long as he has a non-flipped unit there and no other units are at that Battlefield Location.
- A unit at a Battlefield Location may move to another Battlefield Location for 2 moves.
- A unit may return from a Battlefield Location only to any Battlefield Start Area for 2 moves.
- Defeated Peasants are not counted as Battle Trophies.
- Only 1 of your units may be at a Battlefield Location at anytime.
Equipment
A unit may be equipped with a maximum of 2 equipment with different names. For example: An orc pirate may be equipped with a ladder and pirate ale but not 2 pirate ales.
Equipment can be given to any of your units on any battlefield space or while your unit is being deployed.
Equipment Summary
- A unit may have a maximum of 2 different named equipment on it any one time. If that unit is destroyed any equipment tokens attached to it returns to your token pile.
- You may not deploy equipment on units in Battlefield Locations.
- You cannot transfer equipment to another unit.
- You may destroy any number of equipment on your units.
- Any equipment purchased must be deployed that same turn and not "saved". If you cannot deploy the equipment, the money is lost and the tokens returned to your token pile.
Ladders
Ladders are considered equipment and are used to quickly scale walls to pour your minions into the castle.
Each Dark Force army may use up to 3 ladders at one time and unlike other equipment can only be placed on one of your units in your battlefield start area.
Placing Ladders
A unit with a ladder may remove the ladder token it's carrying, and place it as a free action, adjacent to a wall that does not have a ladder. It may only be placed in front of a wall (not from its back side).
A unit is considered to be "on the ladder" if a ladder shares the same space as that unit. The exception is if a ladder is placed on a keep wall and multiple units are in any of the 3 spaces in the castle grounds where the ladder is located, 1 unit must designate who is "on the ladder". Once placed, the ladder may be picked up again at a latter point as a free action by any Dark Force unit.
Moving over ladders
A unit in the battlefield may move over a wall with a ladder into an unoccupied adjacent rampart's space for 1 move.
A unit may move over a wall with a ladder in the castle grounds into the adjacent Keep grounds space for 1 move.
Knocking down ladders
Defenders may spend 1 move to knock down a ladder. Should your unit be on the ladder when this happens it takes an attack 1. A knocked down ladder is destroyed and returned to the player's token pool.
Fighting with Ladders on the Battlefield
Units can fight each other, if a wall is between them, only if a ladder is present. Ranged units are not affected by this.
Defenders gain a +1 cover defense while behind a wall (see defenses). A dark force unit attacking a defender while on a ladder negates the defenders defense.
Magic
The streams of magic can only be tapped into by mages who have learned to wield its hidden power.
Fizzle cards
Some spells will say "fizzle". When that spell is cast it is discarded.
Arcanists
The Arcanists collect magic based on what their caster units can generate at the start of the collect phase.
Only casters may use spells. Many spells the Arcanists cast can be used again from turn to turn. When a spell that is cast that does not say "fizzle" exhaust the card by rotating it to its side or turning it upside down. Exhausted cards will be refreshed on the next collect phase.
Exhausted cards count towards your hand size. Should an ability force you to discard a card(s), place the exhausted cards back into your hand. After the ability resolves, return the exhausted cards to your play area in its exhausted state.
Undead Magic
The Undead do not need a caster unit to play its spells.
The Undead Horde collect magic somewhat differently than the Arcanists. For each undead unit you currently have in play gain 1 magic during the collect phase.
Remember: flipped units do not generate magic.
Pushing Units
Some units can be pushed to move further and/or use certain abilities.
When a unit is pushed, immediately roll an attack 1 against it. Any hits rolled cause damage as normal to it. Should the unit survive, it may continue as normal.
Defenses
There are 2 types of defenses in Storm the Castle!, Armor and Cover.
Armor and Cover: Some units have thick plates of steel armor or defensive magical auras. For each value of defense the unit has roll 1 battle die (not the burst die). Each hit rolled will cancel 1 damage. This damage is canceled before the damage token is placed on the unit.
It is possible for a unit to have both armor and cover.
Rolling an Attack outside of Battle
Some events, abilities, pushing, power cards, etc., may ask you to "roll an Attack X". An attack 1 always refers to rolling the burst dice. And like battle, if a critical is rolled, count the critical as a hit and roll an additional 3 battle dice.
For each attack greater then 1, add an additional battle die to your roll.
Tower
A defender unit on the tower gains +2 cover defense and +1 range (if it's a ranged unit).