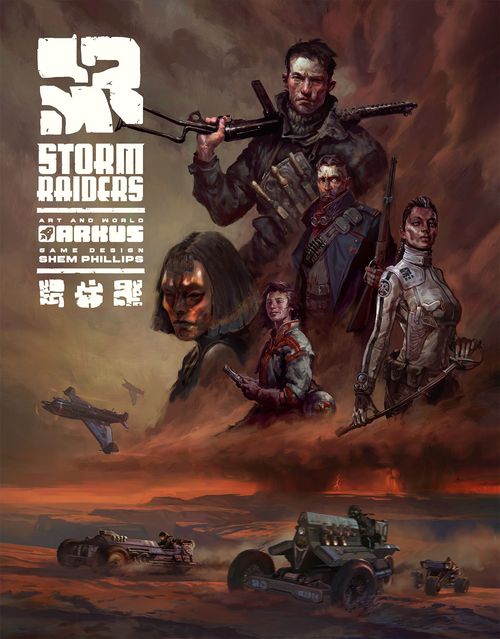
Storm Raiders
Storm Raiders Rulebook
Table of Contents
Table of Contents
- Aim of the Game
- Components
- Equipping for the Storm Season
- Dashboard Functionality
- Setup
- Gameplay Overview
- Round Structure
- Round Setup
- Phase 2: Player Turns
- Moving Across the Map
- Reaching a Wreck Site
- Reaching a Stormhold
- Taking Damage and Losing Health
- Resting
- Phase 3: Round Cleanup
- End of the Game & Scoring
- Solo Mode
- Iconography Reference
- Raider Abilities Explained
- LBV Abilities Explained
- ABV Abilities Explained
- SBV Abilities Explained
Aim of the Game
Storm raiding is a perilous task, filled with many dangers - the most devastating being the mighty Rift Storm that encircles the many islands. Players will want to stay close to the storm, without being overcome by its immeasurable force. Prestige is gained by salvaging wreck sites, fulfilling contracts, acquiring crew, upgrading vehicles, and earning medals. Players will be drafting Dice each turn to travel using either their trike, plane, or sub, or to instead take some much-needed time to rest and repair their battered vehicles.
After 6 rounds of traversing the splintered landscape, players will add up their prestige points to determine who will be remembered as the greatest Storm Raider of their time.
Components
- 1 gameboard
- 4 dashboards
- 8 subs
- 8 trikes
- 8 planes
- 1 dice tray
- 8 Storm Raiders
- 12 dials
- 28 medals
- 30 contracts
- 1 Storm mini
- 1 contract bag
- 36 crew cards
- 28 mods
- 4 health trackers
- 8 raider standees
- 1 first player marker
- 1 resource bag
- 4 reference cards
- 45 dice
- 30 damage markers
- 60 resources
- 1 scorepad
Equipping for the Storm Season
Storm Raider — A rare breed of salvager, explorer and racer. Resourceful and reckless, they compete across a broken land in search of valuable salvage left in the wake of the devastating Rift Storm.
LBV — Land Based Vehicle — No matter the terrible terrain, trikes are always a Storm Raider's first vehicle of choice for tackling land based salvage.
ABV — Aerial Based Vehicle — A marvel of the modern age, to fly in Atlantis' tempest skies takes more than courage...rather a touch of madness.
SBV — Submersible Based Vehicle — Razor sharp reefs, storm-wracked seas, only an old world fool would dare risk a ship, than trust a steel-clad sub.
Dashboard Functionality
- Prestige dials — Track your end game Prestige points on these dials.
- Mod Prestige Dial / Medal Prestige Dial / Crew Prestige Dial — the three prestige dials on the dashboard.
- Mod Slots — slots for your mods.
- LBV — Equip a Trike of your choice.
- ABV — Equip a Plane of your choice.
- SBV — Equip a Sub of your choice.
- Make Camp — Steps to undertake when Resting.
- Cargo Hold — Record and stow your Resources here.
- Health Track — Track your Storm Raider's Health.
- Medal Display — Place your Medals here.
- Storm Raider — Equip a Storm Raider of your choice.
- Vehicle Track — Track your vehicle travel times and damage tokens.
Setup
Follow these steps to set up a game of Storm Raiders:
-
Place the Main Board in the center of the play area. You may choose either side of the Board. The side showing the star icon on the left edge is recommended for your first play. Insert the Dice Tray underneath the center of the Map.
-
Place the Storm Standee/Mini on the Wreck Site with the red health icon, with the Storm's arrow pointing in a clockwise direction around the outside edge of the Map.
-
Place all Resources into the Storm Bag, giving them a good mix. From the Bag, draw and place 3 random Resources onto each Wreck Site. Keep all remaining Resources inside the Bag, keeping it nearby.
-
Mix up the Contracts in the Contract Bag. Place 1 Contract onto each of the 5 Stormholds with their light Grey side facing up. Keep the Bag nearby with all remaining Contracts still inside.
-
Set aside the 4 Starting Crew Cards. Shuffle all other Crew Cards and place them in a face-down Draw Pile on the top right of the Main Board.
-
Place all Dice, Damage Markers, Medals, and Mods near the Main Board to form the Main Supply.
-
Give each player 1 Dashboard, and 1 Reference Card. For your first game, install 3 Dials and 1 Damage Tracker into each Dashboard. These should all be set to their lowest values.
-
Shuffle all Dashboard Tiles (Trikes, Planes, Subs, and Storm Raiders) into separate piles. Deal 1 of each at random to each player. Players must place these into the indicated spaces of their Dashboards. Each player should increase their Dials as indicated on their Storm Raider (1 space per icon shown), and collect the associated Standee. Note: Experienced players may wish to select their starting vehicles and Storm Raider. If all players agree, deal players 2 of each. Players select which combination they will use, returning the others to the box.
-
Give each player 1 Starting Crew Card, returning any excess to the box. Players must place their Starting Crew Cards face-up near their Dashboards. Starting Crew Cards feature the following icon in the top right corner (rookie icon).
Gameplay Overview
Storm Raiders is played over 6 rounds. Each round players will take turns in clockwise order, starting with the player holding the First Player Marker. After all players have taken 1 turn, they will each take a second turn in the same fashion. Once all players have taken their second turn, the round ends.
On each of their turns, players will select a single Die from the center of the Map. They must use it either to move using 1 of their 3 vehicles, or to rest. Players will be aiming to visit Wreck Sites to salvage Resources and to increase their favour with the 3 Guilds (shown by increasing their 3 Dials). They will also want to spend their salvaged Resources to fulfil various Contracts on offer at the 5 Stormholds. These will provide Prestige, Medals or Mods, and often some other benefits. Traversing the landscape is hard work - players' vehicles will be pushed to their limits, and often end up taking Damage. Crew and Mods can help, but eventually players may need to make camp to rest and repair.
Contract Tokens
Contracts are double-sided. They enter play on their Grey side, and will turn to their blue side at the end of the round, unless collected by a player.
NOTE: The only difference between the two sides, is that the Grey side will always have at least 1 Medal as a reward. On the blue side, that Medal will change to a mod. If players want to focus on collecting Medals, they'll need to be quick! Fulfilling Contracts at a slower pace will provide mods for vehicles, but will also come with some Damage if players take too long.
Mods
When gaining a Mod, players take a Mod from the Main Supply and plug it in to any 1 of the open Mod slots on their Dashboard. Once placed, Mods remove the various conditions that can cause vehicles to take Damage. Players may never have more than 7 Mods.
Medals
When gaining a Medal, players take a Medal from the Main Supply, and place it on to any of the open slots along the bottom of their Dashboard. Players may never have more than 7 Medals.
Crew Cards
When gaining Crew, players draw 2 Crew Cards from the top of the Draw Pile. They select 1 to keep, placing it face-up in front of them, and place the other face-down at the bottom of the Crew Card Draw Pile. Players may never have more than 7 Crew Cards. Most Crew Cards can be used at any time (even on other players' turns), unless specified otherwise. To use a Crew Card's ability, players must turn it face-down. Face-down Crew Cards are unavailable for use again until they are refreshed by a game effect. When scoring Crew Cards, players score both face-up and face-down Cards.
Each player has a Starting Crew Card. These may be used like any other Crew Card. They also have a unique ability that players may use at any time: they may destroy their Starting Crew Card (returning it to the box) to immediately gain 1 Mod.
Round Structure
Each round is separated into 3 Phases, which should always be carried out in the following sequence:
- Round Setup (page 11)
- Player Turns (pages 12-15)
- Round Cleanup (page 16-17)
Round Setup
To set up each round, follow these steps: (Note: The first 4 steps can be skipped in the first round)
-
Discard each blue Contract from the Map that has a Damage Marker on top. Place discards aside for now, and return Damage Markers to the Main Supply.
-
Place 1 Damage Marker on each blue Contract on the Map.
-
Turn over all Grey Contracts to their blue side.
-
Place new Grey Contracts from the Bag onto each Stormhold that does not already have a Contract (of either colour). Return any Contracts set aside during step 1 to the Bag.
-
The First Player collects a number of Black Dice and Grey Dice based on the player count. See the reference at the top of the Main Board.
- 4 Players = 5 Black Dice and 4 Grey Dice
- 3 Players = 4 Black Dice and 3 Grey Dice
- 2 Players = 3 Black Dice and 2 Grey Dice
-
Roll all required Dice into the center of the Map.
-
Place 1 Medal next to the highest rolled Die if instructed. To determine this, check the reference above the left-most empty Die space at the top of the Main Board. If the icons indicate that a Medal should be placed for the number of players in the game, place a Medal. Otherwise, do not place a Medal. If there is more than 1 highest Die, and all are of the same colour, simply place the Medal next to any 1 of those Dice. If there is more than 1 highest Die in both colours, place the Medal next to any 1 of the highest Black Dice. For clarity, Medals are placed in the following rounds:
- 4 Players = All rounds
- 3 Players = Rounds 2, 4, and 6
- 2 Players = Rounds 2, and 5
Phase 2: Player Turns
On each of their turns, players must select any 1 Die from those available in the middle of the Map. After selecting a Die, they must place it either onto a vehicle to move, or onto their tent to rest. Players may use Crew Cards, and the abilities of their chosen vehicle (or Storm Raider if resting) to manipulate their selected Die. Any abilities that alter a selected Die must be resolved before the Die is placed.
1's are wild! Any time players would select a 1-valued Die, they may change it to any value. They may even decide to keep it as a 1.
Selecting a Die for Movement
When using a vehicle, players must place their selected Die onto the vehicle they wish to use for that turn. Dice should always be placed into the left-most empty space below each vehicle, whereas Damage Markers should always be placed into the right-most empty spaces. Each vehicle has their own rules for movement, but all follow 1 cardinal rule:
When placing a Die onto a chosen vehicle, it must be higher in value than all other Dice already on that vehicle (the individual values, not the sum of all Dice).
For example, if a 1 and a 3 were present, a player may only place a 4, 5, or 6 as their next Die on that vehicle. If there are no Dice present, any value may be placed. Because of this, players will often want to make small incremental steps when placing Dice, as once a 6 has been placed, no further Dice may be placed.
Each vehicle has a special ability. These are explained in full on pages 23-25. There are also rules specific to each vehicle type - both in how they are used to move across the Map, and also how they may take Damage.
Any time players place a 5 or 6 on their Trike, they must immediately place 1 Damage Marker on their Trike (see taking Damage on page x). There is a reminder of this to the left of each Trike. Likewise, any time players place a 6 on their Plane, they must immediately place 1 Damage Marker on their Plane.
Dice should always be placed into the left-most empty space below each vehicle. Damage Markers should always be placed into the right-most empty spaces. When placing a Die onto a chosen vehicle, it must be higher in value than all other Dice already on that vehicle.
Moving Across the Map
The Map is broken up into 18 sites: 5 Stormholds and 13 Wreck Sites. When using a vehicle, players must move to a different site. They cannot return to where they started on the same turn (and likewise, they cannot choose not to move). Each site may contain any number of player Standees (there is no blocking).
All sites are connected with white dotted lines. Each of these lines has a Dice icon of value 1, 2, or 3. The pips represent the hours required to traverse that path. In order to move from 1 site to another, players must use a Die of an equal or greater value to the sum of all Dice icons that they pass over in their turn. Players may move as far as they wish, even through other sites, so long as they have the pips required to do so. Importantly though, players will only ever interact with their final site (not those they pass through).
If the path they wish to travel over shows no Plane icons on any of the dotted lines, players may use their Trike or Plane. If there are 1 or more Plane icons, they may only use their Plane. Players may also use their Subs to travel between ports. To move from 1 port to another, players must use a Die of equal or greater value to the sum of both the port they are leaving and the port they are entering. Note that not all sites have ports. Non-port sites cannot be accessed by Subs (only with Trikes or Planes).
The glyph = 1. Dice pips represent hours. Players will draft Dice and use those hours to travel or rest.
If Khena wanted to move to Location 'A', the quickest route would be by using her Sub. To do this she would need a Dice value of 5+ (3 pips for the port she is departing + 2 pips for the port she is entering).
If Reid wanted to move from his current location to Location 'B', he has 2 options: 01. Use a Die with a value of 4+ on his plane to take the route headed North. 02. Use a Die with a value of 3+ on his Trike or his Plane to take the route to the East.
Reaching a Wreck Site
When a player reaches a Wreck Site, they may salvage up to 2 Resources. If they salvage at least 1 Resource, they also get to resolve the effect of the Wreck Site. This will either be to increase the indicated Dial by 1, or reduce their Health Tracker by 1. If they are not able to carry out this effect, they may instead remove 1 Damage Marker from a chosen vehicle if possible.
EXAMPLE: At this Wreck Site, a Storm Raider would increase their Medal Prestige Dial if they salvaged at least one Resource.
Depending on the vehicle they used, and the quantity and type of salvaged Resources players may need to Damage their vehicle.
- When using their Trike, players may always salvage up to 2 Resources without any consequence. However, for each Weaponry Resource they salvage, they must place 1 Damage Marker onto their Trike.
- When using their Plane or Sub to salvage 2 Resources, players must place 1 Damage Marker onto the vehicle they are using (salvaging only 1 Resource has no consequence). Their vehicle also gains 1 Damage Marker for each Weaponry Resource they salvage.
TIP: Before players salvage Resources, they should reference their vehicle to check what Damage they may incur.
When salvaging Crew Resources from Wreck Sites, players must immediately discard them to the Main Supply, then draw 2 Crew Cards from the top of the Draw Pile. They select 1 to keep, placing it face-up in front of them, and place the other face-down at the bottom of the Crew Card Draw Pile.
Reaching a Stormhold
When a player reaches a Stormhold, they may pay the indicated Resources in order to fulfill the Contract at that site. Note that there are times where players may wish to stop at a Stormhold (or Wreck Site), but take no actions there. This is allowed. When fulfilling a Contract, place the required Resources into the Main Supply (not back into the Bag). The player then takes the Contract and places it alongside their Dashboard, keeping it the same way up. They immediately resolve all possible rewards shown on the right half of the Contract. Important: Do not refill the Stormhold with a new Contract at this point. There are a variety of rewards on Contracts. These are all explained in detail on page 21.
Weaponry can be spent as any other Resource type when completing Contract Cards. Because of this, it is well sought after, and often comes with some Damage for Storm Raiders to prevent or absorb. If a player fulfills a Contract that has a Damage Marker on top, they must place that Damage Marker onto the vehicle they used this turn.
To complete this Contract, a Raider would need to return 2 of their General Goods and 1 Fuel. They would gain 6 Prestige and 2 Medals.
Taking Damage and Losing Health
There are a number of ways that vehicles can take Damage. Any time players need to place a Damage Marker on a vehicle, but there is no space available (all spaces are filled by Dice or Damage Markers), they must instead move their Health Tracker 1 space to the right if possible. If their Health Tracker is already at its limit, ignore this effect. Note that it is possible for players to gain multiple Damage Markers at the same time. They must move their Health Tracker 1 space for each Damage Marker they cannot place. The purpose of the Health Tracker is for end game scoring. Its position indicates how much negative Prestige each Damage Marker is worth at the end of the game. Players should be wary of losing too much health, but also know that if they have no Damage Markers, the position of their Health Tracker will not cause them to lose any Prestige. It's the combination of both the loss of Health and Damage Markers that players will want to avoid.
Ways that players can take Damage:
- Placing a 5 or 6 on their Trike
- Placing a 6 on their Plane
- Salvaging Weaponry
- Salvaging 2 Resources with their Plane or Sub
- Being hit by the Storm (each vehicle takes 1 Damage Marker)
- Fulfilling a Contract that has a Damage Marker on it
Resting
Rather than using their selected Die to travel, players may place it on their tent space to rest. When resting, players must follow the steps outlined on their Dashboard from left to right. These steps are:
-
Refresh 1 Crew Card if possible.
-
Remove 1 Damage Marker for every 2 pips on the Die being used to rest: (1 = No Damage is removed / 2-3 pips = 1 Damage / 4-5 pips = 2 Damage / 6 pips = 3 Damage). When removing Damage Markers this way, players may take them from any of their vehicles. Return these Damage Markers to the Main Supply.
-
Remove all Dice from their Dashboard of equal or greater value to the Die being used to rest (including that Die). Return these Dice to the Main Supply.
-
Gain 1 of the following: 1 Crew Card (draw 2, and keep 1), 1 Mod, or 1 Medal.
Each Storm Raider also has a special Rest ability. This may be activated at any point during a player's rest, unless specified otherwise.
This Raider has used a 5 value Die to Rest. They would: - Refresh 1 Crew Card - Remove 2 Damage from their Dashboard - Remove all 5 & 6 valued Dice from their Dashboard - Gain a Crew Card, Mod, or Medal
Phase 3: Round Cleanup
Once all players have taken 2 turns each, the round ends. At this point there should be just 1 Die remaining in the middle of the Map. To clean up each round, follow these steps:
-
Place the remaining Die onto the left-most empty space at the top of the Main Board. If that space has a modifier value, take note of that value, as it will be added to the Die's value soon. If the Die was a 1, reroll it until it shows a different value.
-
Determine the Storm's direction (clockwise or anticlockwise). If the remaining Die was Black, the Storm Marker will continue moving in its current direction (indicated by the Storm's arrow). If the remaining Die was Grey, turn the Storm marker around 180 degrees.
-
Determine the Storm's movement. Move the Storm Marker a number of spaces equal to the remaining Die's value, plus any additional spaces from the current round's modifier (only in the last 3 rounds). The Storm Marker follows the Storm Paths (blue lines connecting Wreck Sites). Move the Storm Marker to its new destination, taking note of each Wreck Site that it passes through.
-
Vehicles take Damage. If the Storm moves through, or lands on any player Standees, those players must place 1 Damage Marker onto each of their vehicles (see taking Damage on page 16). If a player happened to be on the same Wreck Site as where the Storm Marker started, they do not take any Damage.
-
The Storm drops new Resources. Based on the number of spaces it moved, the Storm will drop off 1-3 Resources at each Wreck Site that it passed through, and also at the site that it stopped on. The reference for how many Resources to place is shown at the top of the Main Board:
- 2 spaces = 3 Resources per Wreck Site.
- 3-4 spaces = 2 Resources per Wreck Site.
- 5-9 spaces = 1 Resource per Wreck Site.
-
Draw Resources randomly from the Bag, as during Setup. Start at the Storm Marker's new site, moving back along its recent path from there. It does not place any new Resources at the site where it started moving from. If ever there are not enough Resources left in the Bag when needing to draw (at any point during the game), place all Resources from the Main Supply back into the Bag, and continue drawing.
-
Pass the First Player Marker to the next player in a clockwise direction.
The Storm (A) will move 4 spaces, as determined by the last remaining Die. 2 Resources will be placed at each Wreck Site that the Storm passes through and ends on. Khena (B) is in the path of the Storm, so she must place 1 Damage Marker on each of her vehicles.
Note: If the Die had been Grey, the Storm would have turned around and moved in the opposite direction, hitting Reid.
End of the Game & Scoring
The game ends after Phase 3 of the 6th round. Players add up their Prestige in the following areas:
-
Contracts: Gain Prestige equal to the values shown on each fulfilled Contract.
-
Mods: Multiply the value reached on the Mod Dial by the number of Mods collected. Gain Prestige equal to that value.
-
Medals: Multiply the value reached on the Medal Dial by the number of Medals collected. Gain Prestige equal to that value.
-
Crew: Multiply the value reached on the Crew Dial by the number of Crew Cards collected (Starting Crew Cards that have not been destroyed also count). Gain Prestige equal to that value.
-
Gain 1 Prestige for every complete set of any 2 remaining Resources.
-
Damage: Multiply the value reached on the Health Tracker by the number of Damage Tokens on all their vehicles. Lose Prestige equal to that value.
The Storm Raider with the highest Prestige is the winner! In the case of a tie, the tied player with the least remaining Damage Tokens is the winner. If still tied, the tied player with the most remaining Resources is the winner. If still tied, all tied players share the victory.
Scoring Example
| Player 01 | |
|---|---|
| Contracts | 15 |
| Mods | 24 |
| Medals | 6 |
| Crew | 2 |
| Resources | 1 |
| Damage | -2 |
| Prestige Total | 46 |
Calculation example:
- Mods - 4 on the Dial x 6 Mods on the Dash = 24
- Medals - 2 on the Dial x 3 Mods on the Dash = 6
- Crew - 1 on the Dial x 2 Crew Cards = 2
- Damage - 2 on the Tracker x 1 Damage on the Dash = -2
Solo Mode
The rounds play out much like the multiplayer game, with you and your opponent alternating turns each round. Your turns function just as in the multiplayer game. Your opponent has their own rules for how they take their turns.
When determining how many Dice to roll each round, and when to place Medals on the highest Die, follow the same rules as in the 2 player game.
Remember to pass the First Player Marker at the end of each round. You will act first in rounds 1, 3, and 5, while your opponent will act first in rounds 2, 4, and 6.
Solo Mode Setup
Set up Storm Raiders as you would a 2 player game, with a few changes:
-
Do not give your opponent a Dashboard or any other components that a player would usually have.
-
Give your opponent a standee, and place it 6 spaces clockwise from the Storm (moving along the blue Storm Path).
-
After placing Contracts on the 5 Stormholds, draw another 12 Contracts at random, and stack them in a Draw Pile nearby. Their facing does not matter. Be sure only to look at the top Contract on the Draw Pile. The others should be hidden.
-
Give your opponent 1 Black Die and 1 Grey Die.
-
Take the First Player Marker for yourself.
Solo Mode: Opponent Turns
Follow these steps in order on each of your opponent's turns:
-
Roll both their Dice to determine a value and number for their turn.
-
The colour of the highest Die determines what coloured Die they will select from the center of the Map if possible. If they roll doubles, they favour Black. If the colour they want is not there, they simply take a Die of the other colour.
-
The value of the lowest Die determines what value Die of the above colour they will select. If that value is not available, they keep ascending in value until they find a Die to select. If they would select a 6, but there are no 6's, they will wrap back around to 1, and continue ascending in value from there if needed.
- For example, in the middle of the Map are the following Dice: Black 2, Black 4, Grey 5. They rolled a Black 6 and Grey 3. We know they want a Black Die, of value 3. As there are no Black 3's, they instead look for a Black 4, which there is.
-
Return the selected Die to the Main Supply. If there were multiple Dice of the same colour and value available, and 1 had a Medal, they would select the Die with the Medal. When selecting a Die with a Medal, return it to the Main Supply.
-
Move your opponent's Standee. Your opponent will only move between Wreck Sites along the blue Storm Paths (much like the Storm Marker). Your opponent is unaffected by the Storm, but may never stop their movement on the same space as the Storm Marker. They will also never stop their movement back at the same site where they started their turn. Whether they move clockwise or anticlockwise is determined by the direction of the Storm Marker, and their colour for this turn. Note that this colour is determined by their Dice roll, not necessarily by the Die they selected. If that colour is Black, they will move in the same direction that the Storm Marker is currently moving. If it is Grey, they will move in the other direction. Where they move is determined by the top Contract on their Draw Pile (this is known as their "Active Contract"). Following their direction, they want to move to the closest Wreck Site to fulfill as much of their active Contract as possible (always salvaging 1-3 Resources per turn).
-
Salvage Resources. When salvaging Resources, place them so that they cover the matching icons on their Active Contract. Your opponent will salvage Weaponry if needed, but will favour other Resources if given the choice. If they salvage Weaponry, place all other Resources first, then place their Weaponry Resources on uncovered icons from top to bottom.
-
Fulfill their Contract. If they have covered all Resource icons on their Active Contract, they have completed it. Return the Resources to the Main Supply, and place their Active Contract into a separate Pile for completed Contracts. This will reveal their next Active Contract on the top of their Draw Pile. They do not resolve any of the rewards on completed Contracts. If they only partially fulfilled their Active Contract, leave it where it is, along with any Resources present, for their next turn.
-
Scare off survivors. If there are any Crew Resources at your opponent's new site, immediately take them off the Map and place them into the Main Supply.
Solo Mode: End of Game
At the end of the game, add up your Prestige as normal. Your opponent's score is the sum of all values on their completed Contracts, plus 1 Prestige per Resources still on their Active Contract. You win if you score higher than your opponent - ties don't count!
Solo Mode: Increased Difficulty
Immediately after Setup, give your opponent 1, 2, or 3 moves to fulfill Contracts. These movements follow all the same rules (moving to the closest Wreck Site that will fulfill as much as possible of their top Contract). For these movements, they will always move in a clockwise direction. These extra movements not only give them some early progress on their Contracts, but remove some of the starting Salvage Resources from the Map.
Iconography Reference
Salvaging a Wreck Site
- Increase Mod Dial by 1
- Increase Medal Dial by 1
- Increase Crew Dial by 1
- Decrease Health Tracker by 1 (gaining Health)
Resource Types
- General Goods
- Fuel (oil, kerosene and petroleum)
- Orichalcum (a rare Atlantean Metal)
- Mechanical Machinery
- Electrical Parts
- Weaponry
- Crew
Fulfilling Contracts
- Refresh 1 Crew Card
- Increase 1 Dial and decrease another
- Remove 1 Die from any vehicle
- Remove 1 Damage from any vehicle
- Draw and keep 1 random Resource from the Bag
- Draw 2 Crew Cards. Keep 1 and place the other at the bottom of the Crew Card Draw Pile
Taking Damage
- Take 1 Damage when salvaging Weaponry
- Take 1 Damage when placing a 5 or 6
- Take 1 Damage when salvaging 2 Resources
Resting
- Rest Action
- Refresh 1 Crew Card (turn it face-up)
- Remove 1 Damage per 2 pips on resting Die
- Remove Dice of equal or greater value to resting Die
- Gain 1 Crew Card (draw 2, keep 1), 1 Mod, or 1 Medal
Other Icons
- Cargo
- Dice Types
- The Rift Storm
- Storm Raider / Player
- Trikes
- Subs
- Planes
- Medal
- Mod
- Damage
- Prestige Points
Raider Abilities Explained
REID — ABILITY - May lose 1 Medal to increase any Dial. This is optional, but having 1 Medal when resting can be a good strategy!
KHENA — ABILITY - For each Damage removed, remove 1 more. Resting with a 6 means removing up to 6 Damage Markers!
THORNE — ABILITY - Draw 2 Resources and keep 1. Take no Damage if gaining Weaponry. Draw 2 Crew Cards and keep 1 if you gain a Crew Resource.
ANYA — ABILITY - Remove 2 extra Dice of any value. These Dice can be of any value.
QARI — ABILITY - Gain 1 Mod if removing 2 or more Damage. You want a little Damage, but never too much.
MARCO — ABILITY - Refresh all Crew. Rather than refreshing just 1 Crew Card, refresh them all.
ABAAKO — ABILITY - Place your Standee on any port site. You cannot move to the Storm's site, and do not resolve any effects at the new site.
ENDI — ABILITY - May change resting Die to any value. All Dice are wild when resting!
LBV Abilities Explained
HALF CRACKED - MK2 - LBV - 7347H8 — ABILITY - May increase or decrease Grey Dice by 1. A 6 cannot be "increased" to a 1.
RUST BANDIT - MK4 - LBV - 4563RD — ABILITY - If salvaging only 1 Resource, refresh 2 different Crew. If salvaging Crew, you may use the new Crew Card before resolving your 2 refreshes.
DESERT DEUCE - MK3 - LBV - 8956D4 — ABILITY - Movement requires 1 less hour if using a 3/4/5/6. Allows you to effectively ignore 1 pip on the paths you move over.
BIG SCORE - MK3 - LBV - 8956B4 — ABILITY - May change 5's to any value. 5's are wild on this Trike!
UGLY DUCKLING - MK4 - LBV - 3293U7 — ABILITY - May flip and prevent 1 Damage if using a 1/2/3. The prevented Damage can be from any source (movement, salvage, Contracts, etc).
ZEPHYR - MK1 - LBV - 4563Z4 — ABILITY - May move into the Storm's site without taking Damage. You may move into and through the Storm on this Trike, and may even salvage Resources there.
SPECTRE - MK3 - LBV - 8874S3 — ABILITY - Remove 1 Die and 1 Damage from any 1 vehicle after fulfilling a Contract. This must be from the same vehicle, and may even be from this Trike.
TRAIL BLAZER - MK5 - LBV - 6329T0 — ABILITY - Remove 1 Black Die and 1 Grey Die from Sub if using a 4/5/6. If you don't have both colours, you can still remove 1 Die of either colour.
ABV Abilities Explained
BLUE JAY - MK5 - ABV - J06483 — ABILITY - Remove all Dice of equal value from Trike and Sub if using a Grey Die. If you place a Grey 4, remove all 4's from your Trike and Sub.
UT MORERETUR - MK1 - ABV - U8734 — ABILITY - May place Dice of equal value. You may place Dice of equal to the highest Die here, rather than always needing to increase.
JUNKER - MK2 - ABV - J74623 — ABILITY - May change 6's to any value. 6's are wild on this Plane!
FIRE BRAND - MK3 - ABV - F7362 — ABILITY - Remove 2 Grey Dice from Trike if using a Black Die. These Grey Dice can be of any value.
HORNET - MK2 - ABV - H6339 — ABILITY - Remove 1 Die from any vehicle for each Damage taken. This is the sum of all Damage taken this turn (movement, salvage, Contracts, etc).
SHRIKE - MK1 - ABV - S73645 — ABILITY - Remove 1 Damage from any vehicle if using a 1/2/3. This can be resolved at any point during this turn - even to remove Damage you would gain.
NOSE DIVE - MK2 - ABV - 3293X — ABILITY - Spend 1 less hour if bypassing a site. "Bypassing a site" means moving through, but not stopping on.
HAKMET - MK1 - ABV - R73840 — ABILITY - Salvage 1 Resource before flying, preventing all Damage if using a 2/4/6. You can still salvage up to 2 Resources after moving. Using this ability to salvage Weaponry causes no Damage.
SBV Abilities Explained
ORCA - MK2 - SBV - 73874O — ABILITY - Remove 1 Die from Plane or 2 Damage from Trike. You could also remove just 1 Damage from your Trike.
CRAB GRAB - MK1 - SBV - 28940C — ABILITY - Cannot be Damaged. Placing Mods has no effect here, but can still score Prestige. Never place Damage on your Sub.
SALVAGE SIREN - MK2 - SBV - 47953S — ABILITY - Movement requires 2 fewer hours. If the sum of both ports was 5, you'd only need a 3-valued Die to travel between them.
STRIKE OUT - MK6 - SBV - 93579S — ABILITY - Refresh 1 Crew Card after moving. You must move before refreshing this Crew Card.
BELUGA - MK2 - SBV - 83473B — ABILITY - May place Dice of equal value. The prevented Damage can be from any source (movement, salvage, Contracts, etc).
UNDERTOW - MK2 - SBV - 12084U — ABILITY - May change 3's to any value. 3's are wild on this Sub!
TIGHT SPOT - MK4 - SBV - -94213T — ABILITY - May change Grey Dice to any value. Greys are wild on this Sub!
SUB ZERO - MK1 - SBV - 29842Z — ABILITY - Salvage 1 Resource before moving, preventing all Damage. You can still salvage up to 2 Resources after moving. Using this ability to salvage Weaponry causes no Damage.