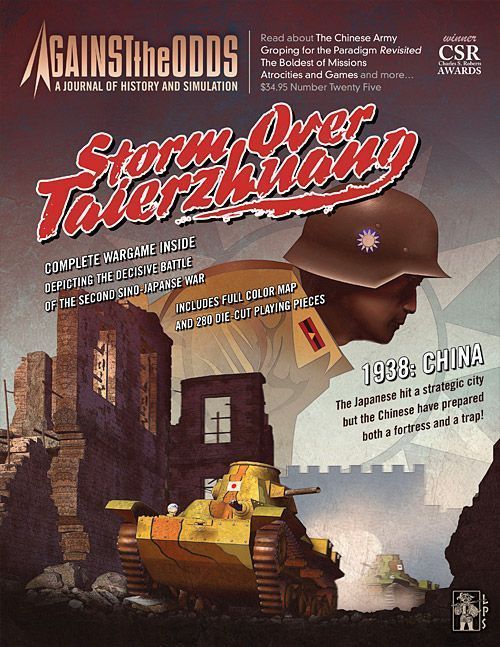
Storm Over Taierzhuang
Storm Over Taierzhuang Rulebook
Table of Contents
Table of Contents
- Read This First
- 1.0 Introduction
- 2.0 Game Components
- 3.0 Preparation and Deployment
- 4.0 Sequence of Play
- 5.0 Tactical Chit (TC)
- 6.0 Reinforcements
- 7.0 Player Impulse
- 8.0 Retreats
- 9.0 Control of Areas
- 10.0 Victory Conditions
- 11.0 The Grand Canal
- 12.0 Optional Rules
- 13.0 History
- 14.0 Designer's Notes
- 15.0 Sources
- Player Aid Charts
Read This First
We've organized the overall structure of the rules of this LPS simulation game to follow this game's sequence of play in introducing concepts. The rules themselves are written in a format known as the Case System. This approach divides the rules into Modules (each of which deals with a major important aspect of play). Modules are numbered sequentially as well as possessing a title. Each Module is divided into Sections (that deal with a major sub-topic inside the Module) which are also numbered sequentially. Modules and Sections are introduced by some text that briefly describes the subject covered by that particular Module or Section. Finally, the majority of each Section consists of Cases. These are the specific, detailed rules that govern play. Each Case is also numbered sequentially. The numbering follows a logical progression based upon the number of the Module of which the Cases are a part. A Case with the number 7.51, for example, is the first Case of the fifth Section of the seventh Module of the rules. Each Module can have as many as ninety-nine Sections and each Section can have as many as ninety-nine Cases. The numbering system is designed as an organizational aid. Use it to determine where a Case is located in the rules.
3.1.4 - The example above is the number of the fourth Case of the first Section of the third Module of the rules.
Learning to Play the Game
Begin by familiarizing yourself with all of the components listed for this game. Then skim through the charts and rules, reading all the titles of the Modules and Sections. Set up a game scenario or portion of a scenario (after reading the applicable Module) and play a trial game against yourself. During this trial game, try referring to the rules only when you have a question and remember the numbering system we employ makes it easy to look up rules when you do. While a trial game may take you an hour or two, it is the quickest and most pleasant way to learn (short of having an experienced friend teach you). We also don't recommend attempting to learn the rules word-for-word. Memorizing all the details is an effort that few can do. We've written these rules to be as comprehensive as possible - but they are not designed to be memorized. Taking in the rules in this way (as you play along) is the best approach to mastering this game.
1.0 Introduction
Storm Over Taierzhuang is a two player game simulating the Battle of Taierzhuang from March 25 to April 6, 1938. One player plays the Japanese Army and the other plays the Chinese KMT troops. The game is 13 turns long with each turn equal to one day.
2.0 Game Components
Each copy of Storm Over Taierzhuang is composed of the following:
- This rulebook
- Two sheets with 240 1/2" counters total
- One 22" x 34" map
- Two identical Player Aid Charts
In addition, two six sided dice (D6) are required to play, along with two separate opaque containers (mugs, envelopes) to hold the Japanese and Chinese Tactical Chits (TC).
2.1 Units
Each unit has a front side (ready) and a back side (spent). A unit which is on its ready side can perform actions. A unit which is on its spent side cannot perform any actions. Chinese unit designations are Division/Corps. Japanese are Regiment/Brigade/Division.
Each unit has the following factors printed on the Ready side of the counter:
- Combat Factor is used when firing (fire action).
- Defense Factor is used when resolving combat.
- Movement Allowance is used when moving.
The value on the Spent side of the unit is its Defense Factor.
2.2 Markers
Control Markers (Japanese Control, Chinese Control) are placed on areas to indicate a player's control of an area. The Turn marker is placed on the turn track (on the map) to denote the current turn.
2.3 Game Map
The map is separated into areas. Scale: 1 inch = 1/4 mile.
The area name denotes the location and place name of the area. All areas have a placement letter which denotes the starting locations of certain units in the game. The Defensive level denotes the area's terrain defensive modifier. Note Areas with a red box with a "V" are Japanese victory condition areas. Please note the areas of Taierzhuang city have two Terrain Firepower modifiers (See Case 7.2.2c).
Deployment Zones are used to set up units that are to enter the game. Units in these zones cannot be attacked nor can enemy units enter these areas.
The Turn Record Track and the Terrain Key are displayed on the map.
2.4 Important Terms
Action The activation of a friendly unit or units in one area for movement or combat during their impulse, or the play of certain Tactical Chits.
Combat Factor (CF) Numerical rating that represents a unit's ability to engage the enemy in combat. These range from 0 (very weak) to 3 (strongest). A unit whose CF is printed in black can only engage in combat against enemy units in the same area (and those with a CF of 0 have a -1 DRM).
Defense Factor (DF) Numerical rating that represents a unit's ability to survive and incur losses in combat and still remain a cohesive formation. The higher a unit's DF the better. Units that are in Spent status (face down) have a DF one less than when in Ready status (face up).
Die Roll (DR) Dice are used to resolve combat, determine random events and the outcome of other occurrences during the course of the game. The roll of one die is abbreviated to D6; two dice as 2D6. When rolling 2D6, add the two dice values together for a total which is the result.
Die Roll Modifier (DRM) A positive or negative modifier to the DR.
Fire Combat Attacking enemy units in the same or adjacent areas.
Movement Allowance (MA) numerical rating that represents how fast/far a unit can move when activated. A unit expends varying Movement Points (MPs) for entering an area depending upon terrain and the presence of enemy units.
Ready Status Face up combat units that are capable of activating during the current turn.
Spent Status Combat Units that are flipped to their back sides are termed Spent and can not activate during the current turn. Units become Spent (flipped) as a result of being out of supply (Japanese units only), from combat results or after activating. Exception Some units can activate and not be flipped to Spent Status per a random event or TC play.
Tactical Chits (TCs) These counters (from here on called TCs) are the markers which allow a player to enhance a player's Activation during their impulse or perform other non-action activities during the game and are separated into their Japanese and Chinese KMT components. The TCs are put in their respective KMT or Japanese opaque containers (mug, envelope, whatever).
2.5 Player Aid Charts (PAC)
There are two identical PACs provided with the game. Players will need to take them out from the rules section and cut them apart for use. They have the Sequence of Play, Combat Resolution charts, Random Events and the Tactical Chits described.
3.0 Preparation and Deployment
First, players decide on who will play the Japanese and who will play the Chinese. Then each player takes their respective TCs and places them in separate opaque containers (cup, mug, envelope or whatever). Place the turn marker on the turn 1 box of the Turn Record Track (see Map).
3.1 Chinese Deployment
Only units of the 2nd Army Group are available for at start set-up (Units with designations ending with 30C, or 42C). These units deploy first in any area on the map. No more than 10 units may be placed per area except for areas W and X for which only a number of units equal to a D6 roll may be deployed. Each area where Chinese units have been set up in should be marked as Chinese controlled.
All units of the 20th Army Group (units with designations ending with 52C or 85C) are set aside as part of the KMT Chinese reinforcement pool.
3.2 Japanese Deployment
The Japanese 10th Division (38 units) are placed into either of the two Japanese Eastern Deployment zones (players choice).
All units of the Japanese 5th Mixed Brigade (10 units) are set aside as part of the Japanese reinforcement pool.
4.0 Sequence of Play
This game is 13 turns long. Each turn is performed in the following sequence:
- TC Phase Each player draws TCs from their respective cups as indicated by their army's maximum TC level for the turn (see Module 5.0).
- Reinforcement Phase Starting on Turn 2, both players place any reinforcement units available for the turn in their Deployment Zones (Sections 6.1 and 6.2).
- Random Event Phase Both players each roll a D6, add their DR results together and then reference the total to the Random Events Chart (see Players' Aid Chart).
- Initiative Phase Both players make a D6 roll for initiative. The player with the higher roll goes first. Ties are re-rolled. Note The Japanese player always has initiative on Turn 1.
- Impulse Phase Both players alternate performing impulses beginning with the initiative player. During each impulse, a player can perform one action which are defined in Module 7.0. A player may pass on his impulse, in which case play goes to the other player. If both players pass in succession, the Impulse Phase ends.
- End Phase Both players perform the steps below and then begin the next turn (starting with 1 above):
- TCs may be discarded.
- The Japanese player determines if any Japanese units are out of supply. Any that cannot trace supply are flipped and/or remain in Spent Status (Section 6.3).
- All in-supply Spent Japanese units are flipped face up to Ready Status.
- The Turn Marker is advanced to the next turn.
5.0 Tactical Chit (TC)
(Sample Tactical Chits shown: Air Force, Banzai!, Night Attack.)
5.1 Replenishing TCs
At the start of every turn, players consult the current turn box on the Turn Record Track to see the maximum number of their nations TCs that they may hold (red box value for the for Japanese and blue box value for Chinese). If the quantity they currently hold at this point is below this value, they may draw TCs from the cup so that they increase their number of held TCs to the maximum permitted. Note Random events may affect a player's maximum number of TCs for a turn.
Designer's Note The TC represents each army's differing combat capabilities during the battle. The Japanese player will note that his TC Level decreases as the game progresses. This reflects the deteriorating Japanese supply situation and its effect on the Japanese combat capabilities. On the other side, the Chinese player will notice an increase in his TC Level during the game. This shows the increasing amount of supply and reinforcements pouring in the area to aid the defenders at Taierzhuang.
5.2 TC Use
When playing a TC, the players consult the Tactical Chit Summary (on player's PAC) to locate the effect of its use. Play of some TCs constitutes as an Impulse's Action (noted by a letter "A" on the TC). Multiple Non-Action TCs may be played in one impulse. TCs that constitute an Action are:
- Japanese: Heavy Artillery, Bomber Support, Fighter Support, Will of the Emperor
- Chinese: Air Force, Heavy Artillery, Night Attack, Resolute Defenders, Case #1, Li Tsung Jen's Command
Note These TC's descriptions denote them as Actions.
Game Play Note Read the descriptions and use of tactical chits very carefully.
Unless otherwise directed, any used TCs are put back in the draw cup for possible selection and use again, later in the game.
5.3 TC Discards
At the end of the turn, if the player still has TCs, he can choose to discard some, all, or none of them. Any TCs not discarded are kept for the next turn. However, the retention of unused TCs is limited to the maximum level for the upcoming turn. Unless otherwise mandated, discarded TCs are put back into their respective draw cup.
6.0 Reinforcements
Both players receive new units in the form of reinforcements during the course of the game. Units that retreated into their deployment zones following a combat (Module 8.0) can also be returned to play as reinforcements. The KMT player deploys all their reinforcements first in a turn, followed by the Japanese player.
6.1 KMT Reinforcements
During the Reinforcement Phase of a turn, starting with turn 2, the KMT player rolls 2D6. If the modified DR result is equal to or less than the current turn number or an unmodified 2, then the KMT player rolls another 2D6. This second DR result (2-12) is the number of KMT 20th Army Group units, or units that had retreated into the deployment zones earlier in the game, that can be deployed to the Chinese Deployment Zones this turn (player's choice). If an unmodified result of 12 is rolled on the first roll, it is a failure and no reinforcements become available. The units to be entered must be randomly drawn. The Chinese player can elect to discard one TC to make a re-roll of the just rolled result. This expenditure and re-roll can be only done once per regular roll (no re-rolls of a re-roll).
These reinforcing units will move onto the map as per the movement rules (See Section 7.1). Reinforcing units which are unable to or the player does not wish to enter them are left in their Deployment Zone and may be entered on any following turn.
Note These units can also enter play per Random Event 2.
Historical Note Players will note that the KMT 20th army reinforcements will enter disjointed (not everything thrown in at once). This was historical as the KMT 20th Army's General Tang En Po was from a faction who had rivalries with General Sun Lien Chung (KMT 2nd Army) and General Li Tsung Jen. General Tang did as much as he could to delay his forces entering the battle at Taierzhuang to better preserve his Army for internal power struggles later. It is said that one of the main reasons the Japanese were able to escape the trap at Taierzhuang was because of General Tang's tardiness at the battle. General Tang En Po was from a faction within the KMT who was close to Generalissimo Jiang Jie Shi (Chang Kai Shek) while Li Tsung Jen and Sun Lienchung were from factions opposed to Generalissimo Jiang. General Li, in particular, did not like or trust General Jiang Jie Shi. This is found only in the Chinese sources.
6.2 Japanese Reinforcements
During the Reinforcement Phase of a turn, starting with turn 2, the Japanese player may discard 1 TC and make a 2D6 roll. If the DR result is equal to or less than the current turn number or an unmodified 2, then the Japanese player makes another 2D6 roll. The DR total (2-12) is the number of Japanese 5th Mixed Brigade units, or units that retreated into their deployment zones earlier in the game, that can be deployed to the Japanese Deployment Zones (Japanese player's choice). Rolling an unmodified 12 on the first roll is always a failure (no reinforcement units enter this turn). The units to be entered must be randomly drawn from an opaque container (mug, envelope, etc.). Unlike the Chinese player, the Japanese player cannot exchange TC for a failed reinforcement DR.
These reinforcing units will move onto the map as per the movement rules (See Section 7.1). Reinforcing units which are unable to or the player does not wish to enter them, may enter them on any following turn. They are left in the Deployment Zone.
Note These units can also enter play per Random Event 12.
6.3 Japanese Supply
Japanese units must trace supply to at least one of their Deployment Zones during the End of Turn Phase. Each area occupied by Japanese units is checked to determine if they are in supply.
Supply can be traced only through areas which are occupied by at least one supplied Japanese unit (even if occupied by Chinese units). The supply route can only cross the Grand Canal via the railway bridge. During the End Phase, unsupplied Japanese units who are Spent cannot be flipped to their ready side or if they are in a Ready status, they are flipped to their Spent side.
6.4 Chinese Supply
Chinese units do not need to trace supply.
7.0 Player Impulse
The current active player can perform actions during their impulse. All units activated in an area must perform the same action. Units that perform an action are flipped to their Spent status.
7.1 Movement Action
A Movement action corresponds to a unit or a group of units moving from one area to another. Units can move a maximum distance in areas as their printed MA on their counters. Units with insufficient remaining MA cannot move into an area. As a unit/stack moves, subtract the MP cost to enter the area from the unit's/stack's remaining MA. Once a unit/stack has 0 MA remaining or insufficient MA remaining to enter the next area or a player does not want to move them further, the units are flipped to their Spent side.
Sample unit: Tank / Infantry; front (Ready) and back (Spent); Designation, Combat factor (if red, may attack adjacent area), Movement, Defense.
Example For his action, the Japanese player moves 5 Infantry battalions from Wanzhuang (Y) to Chentang (U). This is considered one action.
7.1.1 Movement Costs and Limits
It costs 1 MP to enter an adjacent area or onto an adjacent map area from a Deployment Zone if the area being entered is uncontrolled or friendly controlled (See Module 9.0).
It costs 2 MP to enter an enemy controlled adjacent area (whether from an adjacent map area or from a Deployment Zone). Exception See Optional Rule 12.6.
A unit or group of units must stop moving when they enter an area occupied by enemy units (even if there are friendly units there as well). Exception See Optional Rule 12.6.
Friendly units may move directly from one enemy occupied and/or controlled area to another but must use all of their MP to do so.
It costs +1 MP for tanks to enter the two Taierzhuang town areas (G and H).
All units performing a movement action as a group must move together. When units of differing MAs move together, the unit with the lowest MA determines the group's total MA. Units may be "dropped off", but any that do are considered to have finished their activation and are immediately flipped to their Spent Status.
Only Chinese units may move into an area connected at a vertex (i.e. from area C into areas F, L or I or vice versa).
7.1.2 Stacking
Each player may have a maximum of ten friendly units in an area. Stacking limits apply at all times during the game. If an area is found to be in violation of this limit, the opponent selects units to be eliminated to bring the stack back into compliance (ouch!). Stacking limits do not apply to the Deployment Zones (there is unlimited stacking in these zones).
7.2 Fire Action
Fire is performed by one or more "Ready" units which will attack opposing units in an adjacent or the same area they are located in. It may be directed/enhanced by a TC play as well. Use the following rules to resolve a Fire action for the player's impulse.
Japanese units may not attack Chinese units in their Deployment Zones (Exception Japanese Air attacks (Section 12.5)). Chinese units may not attack Japanese units in their Deployment Zones. But any units which are able to may attack out of a Deployment Zone into an adjacent map area.
7.2.1 Unit Fire Power
Fire from a unit can be performed against enemy units in the same or an adjacent area. To fire on an adjacent area, a unit must have at least a firepower factor of 1 printed in red on the counter. Units with a black firepower factor can only fire at units in the same area. Exception See Case 7.2.2a.
Designer's Note You probably noticed that few Chinese units have the capability to fire on adjacent areas since all of their units have a black print or zero firepower strength. The Chinese units were using mostly small arms and a fair bit of machineguns. Their best unit intrinsic heavy weapon was the mortar and these were not in any adequate supply. The Japanese on the other hand had a much greater amount of heavy weapons in their units so the ability of the Japanese to do ranged attacks.
7.2.2 Fire Attack Resolution
Fire attacks are resolved as follows:
- Indicate Firing unit(s) and determine the Attack Total. (Cases 7.2.2a and b)
- Indicate Target area and determine the Defense Total. (Case 7.2.2c)
- Determine Damage Points and apply them (Sections 7.3 and 7.4)
a) Attack Total (AT) The attacker totals the CF of all units firing and then adds to this the result of a 2D6 roll. Also add any modifications from a TC played. The final sum is the AT total for the attack.
Note Chinese 0 CF units not making a Human Wave Attack (see below) use only the dice total and can only attack Japanese units in the same area. If all units attacking are Chinese 0 CF units, an additional -1 DRM applies to the AT roll.
b) Human Wave Attacks Either player can elect to perform a Human Wave Attack when attacking in the same area. The AT for this attack is resolved normally except that for every two units attacking, add an additional 1 to the AT total. When used with Banzai, Night attack, and resolute defenders TCs (think of a counterattack, hint, hint, hint) this rule still applies. For each attacking unit that is used in a Human Wave Attack, the attacker rolls a D6 after the combat is resolved. If the DR result is less than or equal to the number of surviving defending units in the area, the unit is eliminated. Otherwise, the unit is not affected.
c) Defense Total (DT) The DT is the equal to the highest DF of a defending unit in the targeted area plus the defense level of the area if the defender controls the area (Module 9.0). Units in uncontrolled areas do not benefit from the defense Level of the area (Exception Taierzhuang Town areas).
d) Taierzhuang Town Taierzhuang Town has two defensive DRMs (+6 and +3). Defending units which are being fired upon while in Taierzhuang from any adjacent area, or any Japanese air units which are attacking units in these areas, benefit from the +6 DRM. Units which are defending against an attack from the same Taierzhuang Town area benefit from the +3 DRM. Defending units in a Taierzhuang town area always get the defensive bonus, no matter the circumstances.
Designer's Note Taierzhuang was heavily fortified by the KMT before the battle and festooned with strong points, barbed wire, trenches etc. The heavy Japanese artillery and air bombardments just made more rubble, making the defenses even more formidable. To add to this, street fighting is always a tough business especially in an "against the odds" situation such as this.
7.3 Damage Point (DP) Determination
If the AT is greater than the DT then the difference is the number of DPs inflicted on the defending units. If the AT is equal to or less than the DT, then there is no damage inflicted to the defenders.
7.4 Applying Damage Points
When DPs are received, the player owning the affected units must apply the DPs to his units using the following methods:
- 1 DP Retreat 1 Spent Status unit to an adjacent area or flip 1 Ready Status unit to Spent status.
- 2 DPs Eliminate 1 Spent Status unit or flip 1 Ready Status unit and retreat it to an adjacent area.
- 3 DPs Eliminate 1 Ready Status unit or If there are no Ready Status units in the area, then eliminate 1 Spent Status unit and (if present) retreat another Spent unit to an adjacent area.
The defending player can distribute and apply the DPs amongst the defending unit(s) as he sees fit.
8.0 Retreats
A unit's retreat must be made in the following order of precedence:
- To an area with no enemy units
- To an area with more friendly units than enemy (regardless of status)
- To a friendly Deployment Zone
Each unit is retreated individually by the owning player. If a unit cannot retreat, it is eliminated. Retreating to an area that exceeds the friendly stacking limit is prohibited (Case 7.1.2).
Chinese units can retreat across the Grand Canal at any point. Japanese units can only retreat across the Grand Canal at the railway bridge (between areas B and F).
Units do not have to retreat from a Deployment Zone. Units which retreat into a Deployment Zone may return as reinforcements at a later turn.
9.0 Control of Areas
The Control of areas is determined at the end of each player's action impulse. To control an area, a player's units must be the sole occupants of the area. Place a control marker into this area. An areas that is vacant or has units from both sides in it, is considered uncontrolled and any control marker in it should be removed.
10.0 Victory Conditions
At the end of turn 13, if the Japanese player controls the in supply two Taierzhuang town areas (G and H) on the map or all four in supply areas south of the Grand Canal (areas A, B, C and D) he is considered the winner. Otherwise, the Chinese player wins the game.
10.1 Sudden Death Victory
The Japanese player scores a sudden death victory if at any instant on or before game turn 13 they are in control of the two areas of Taierzheung (G and H) and all four areas south of the Grand Canal (areas A, B, C and D) and these areas are able to trace supply.
10.2 Supreme Victory
Chinese If at the end of any turn after turn 3, the Chinese KMT player manages to destroy all of the Japanese units on the map (excluding the Japanese Deployment Zones). The Chinese have won a supreme victory.
Historical Note The Chinese forces planned to lure and destroy the Japanese 10th division into Taierzhuang and they almost succeeded.
Japanese If the Japanese player destroys all KMT units on the map before the end of a turn (Deployment Zones excluded), then he has won a supreme victory.
11.0 The Grand Canal
The Japanese can only move or retreat across the Grand Canal at the railway bridge connecting areas B and F. Chinese units can move or retreat across the Grand Canal at any point.
Historical note During the battle, the Japanese did not have bridging equipment while the Chinese were ready with numerous boats to cross the canal.
Neither side can conduct a fire attack across the Grand Canal (Exception Bombers and Artillery). The Japanese can conduct a Banzai TC Attack only across the bridge connecting areas B and F. The Chinese can perform a Night TC Attack anywhere across the Grand Canal.
The bridge cannot be destroyed by either player during the course of the game (both sides wanted it).
12.0 Optional Rules
The following rules introduce additional historical detail to the game and both players must agree to them before play starts.
12.1 Japanese Initiative
The Japanese player can knowingly choose his starting TCs on the first turn (doesn't draw them randomly from the cup).
12.2 Free TC Choice
Both players can knowingly choose their TCs from their available TCs instead of picking them randomly.
12.3 Japanese Saving Face
Japanese sources for the battle actually differ greatly from Chinese/U.S. sources.
If using this optional rule, take out all the Japanese tank units and the 14 units from the Japanese 10th division from the game. Treat the fuel shortage event as a No Event.
Designer's Note According to some Japanese sources, only around 10,000 Japanese troops were in the Battle of Taierzhuang and only a few tanks. The main game is based on Chinese and U.S. sources but I'd like to give war gamers a chance to play this game on the Japanese point of view and thus it is likely very hard to win as the Japanese.
12.4 Free Choice of KMT Reinforcements
The KMT player can chose reinforcement units instead of randomly drawing them.
12.5 Battlefield Interdiction
This rule allows the Japanese player to conduct air and artillery bombardment attacks against Chinese Deployment Zones. For an artillery attack to be made, a Japanese unit must be in an area adjacent to the targeted Chinese Deployment Zone (no such requirement for an air attack). There are no Terrain Level modifiers for the Defense of units in the Deployment Zones because it is assumed the attacks occur against the enemy troops while they are in march/transport mode on the roads (easier targets). The number of Damage points is the number of Chinese units affected in the deployment zone. For each affected unit, make a D6 roll with the following results:
- Even result (2, 4 or 6) Unit is returned to the Chinese reinforcement pool.
- Odd result (1, 3 or 5) Unit is flipped to its Spent side.
If a Chinese spent unit is chosen, it automatically is returned to the Reinforcement Pool.
12.6 Infiltration Movement
With this rule as an Impulse's action, a player may move units which start next to a contested area into that area and then into a second vacant area. It costs only 1 MP for entering the enemy occupied area (instead of 2 with regular movement). The player first designates which unit or stack of units will attempt this Infiltration move. Then the player performs a D6 DR check prior to entering the first area for the unit or stack. Use all the following DRMs which apply:
- +1 if there are more friendly Unspent units in the area than enemy units.
- -1 if there are more enemy units in the area than friendly.
- -1 Japanese tank infiltrating.
- +1 if all enemy units in the area are Spent Status.
- -1 if all friendly units in the area are Spent Status.
If the modified DR is less than or equal to 3 (Japanese) or 4 (Chinese), the unit can move through the area occupied by both players. If the unit has movement factors remaining it can continue moving. If the modified DR is greater than that listed above, the unit's or stack's movement does not occur and they are flipped to their Spent status in the area they started.
Transcriber's note: the Players Aid Card's Infiltration Movement box (12.5 on the card) prints different values from the rule text above: "Japanese need 4, Chinese need 3. Roll D6 and modify:" with -1 for more friendly Unspent units in the area than enemy units, all enemy units in the area Spent, or a Japanese tank infiltrating, and +1 for more enemy units in the area than friendly or all friendly units in the area Spent. Both are transcribed as printed.
12.7 Concentration (Optional)
At the beginning of the game the Japanese player has a Concentration chit. This chit is not a TC. The Concentration Chit allows the player to do a Concentration Action during their impulse. As a single action, the player moves any units from several areas to a single area, subject to the normal movement rules and stacking. After performing this action, the Japanese player immediately gives the chit to the Chinese player who may, at his discretion, perform a Concentration Action immediately for his impulse or hold on to the chit and perform this action on a future Chinese impulse. Only the player who currently holds the Concentration chit may perform this Action. Each player can only perform this Action once per game.
12.8 Historical Set-up
Chinese
Units of the KMT 31st Division set-up in and/or adjacent to the areas of the town of Taierzhuang but can not be south of the Grand Canal.
5 units of the the KMT 27th Division are set up on any Eastern Map edge area (North of the Grand Canal). 5 units of the KMT 27th Division are set up on any area south the Grand Canal.
10 units each of the KMT 30th & 44th Divisions are set up on any Western map edge area of the map north of the Grand Canal. The other 10 units of these Divisions are set up on any area south of the Grand Canal.
Japanese
Their set-up is the same as the regular game set up.
Designer's Notes As you can see, the KMT's deployment for the Taierzhuang battle was a trap for the Japanese 10th Division. The plan was to have the town of Taierzhuang and the 31st Division be the bait and entice the Japanese 10th Division to attack them and get surrounded by the rest of the 2nd Army Group and be destroyed. If you look at the victory conditions, the KMT player wins by denying the Japanese capture of Taierzhuang and/or the 4 areas west of the Grand Canal by the end of the last turn or if the KMT destroys all Japanese units which achieves a Supreme victory. This was the KMT plan's original top goal (its like the Olympics, you want to do the best you can and go for the Gold).
Historically it was a regular KMT victory, as the mauled Japanese 10th Division managed to survive as a unit and fight its way out of the trap. In the Chinese eyes, it was a military victory, as the Japanese was forced to retreat and suffered heavy losses in the process. But it wasn't a supreme victory as you can see.
Now, for all those military strategists out there, you might see that it is obvious that Taierzhuang was a trap and that the Japanese should have seen it coming. But it must be remembered that the Japanese commanders were fresh from their astounding victories in 1937 and so were very overconfident. They thought very lowly of the Chinese forces; in fact, they actually thought that the KMT was on its last ropes and ready to collapse both militarily and politically. So as many veterans of the military battles lost will tell you, never underestimate your enemy.
As for the discrepancies between the English and Chinese references, you will see some differences in their historical deployment listings (as can be found in other English references for other battles). With this battle, you will note that the KMT 30th, 27th and 44th Divisions come in as reinforcement a few days later according to the English references. By my research, they actually were already set up in place and moved in to close the trap. The English sources state that the KMT 30th and 44th Divisions were set up west of Taierzhuang. By my research, half of their forces were set up there, while the other half of their forces were set up west of the Grand Canal to serve as reinforcements.
13.0 History
The Japanese opened their attack on Taierzhuang on the evening of March 24, 1938 with a massive artillery bombardment on Chinese positions. The Chinese defenders weeks before had heavily fortified the town and the villages in the Taierzhuang district. In addition to the fortifications, the heavy rock which was used in the construction of the building in Taierzhuang made them virtual castles. Confronted by this grim defense, the Japanese were forced to slog through these heavy defenses and incurred horrendous casualties in the process while being constantly harried by Chinese forces in their flanks. The Chinese casualties were probably worse as the huge Japanese advantage in artillery, air and tanks caused large number of losses.
By April 3, 1938 the Japanese were in possession of four-fifths of the main town of Taierzhuang. The Chinese defenders had by this time been reduced to one fourth its strength and had clung on the important west gate of the town which was only means for communication between his force in Taierzhuang and the outside. The Japanese themselves were in no better shape, General Sun Lien Chung (the commander of the 2nd army group) defending Taierzhuang had launched the majority of his forces in attacking the Japanese flanks and rear to divert and lessen the Japanese frontal attacks on the town of Taierzhuang. This was compounded by the arrival of General Tang En Po's 20th army which proceeded to close the noose, completing the encirclement of the Japanese 10th division. Japanese supplies were also rapidly dwindling and air drops mostly failed to make it through to their recipients. Most important of all was the general collapse of Japanese command, the Japanese units were stabbing in the dark since they were cut off from accurate intelligence but they still fought on since they had nowhere to go.
On April 6, 1938 the Chinese forces launched a major night assault and crushed the Japanese defenders in the town of Taierzhuang in several hours of desperate and furious combat. At the same time, units of the 20th army starting crossing the Grand Canal drew the noose tighter on the Japanese. The Japanese seeing their predicament chose to flee the town and its environs. It was all over by April 7, 1938. Taierzhuang looked like a scene of utter carnage as tanks, armored cars, trucks, and thousands of dead Japanese were strewn around the landscape like so many toys. The Japanese had lost 16,000 men (including all of their armor) at Taierzhuang and the Chinese lost around 30,000 men. General Li Tsung Jen did not pursue the Japanese since not only was his army severely depleted but ten Japanese divisions were pouring into the area. This action of non pursuit saved a good portion of his army so that it would fight again another day.
The battle of Taierzhuang is considered the first major Chinese victory in the Second Sino Japanese war. Xuzhou was eventually taken by the Japanese on May 20, 1938. The Battle of Taierzhuang was significant since not only did it seriously delay the Japanese but it broke the Japanese air of invincibility (their first major defeat in 300 years), and proved to the Chinese that they could win the war against the Japanese invaders.
14.0 Designer's Notes
The battle of Taierzhuang nagged at me for a long time. It bothered me that in the thousands of wargames published nobody has done a wargame on a battle in the Second Sino Japanese war (apart from a few ASL scenarios). This war is one of the most important wars in the 20th century (probably in history). This war was the reason Japan attacked Pearl Harbour (to secure oil supplies to continue the war in China), this war saw the rise of Mao Tse Tung and Communist China. And 60 years later, Japanese-Chinese rivalry is shaping the destiny of Asia.
Though the seeds of this game were planted years ago, I did not make this game due to several reasons: 1) Most important was the scarcity of research materials in the west about this battle. The map was especially hard to find. 2) Establishing the right game system for the battle was a challenge. 3) Real life is fast-paced and dominated by work.
Inspiration for the system came to me after reading and playing Tetsuya Nakamura's Storm Over Stalingrad. After I learned the game, I became immediately convinced that this is the system that I wanted to use for Storm Over Taierzhuang. I wanted a game on the battle to be easy to learn, simple to play, but effectively showing the flow of the battle.
The Battle of Taierzhuang eerily resembles that of Stalingrad. It is interesting to note that Vasily Chuikov, the commander of the Stalingrad defenders was sent to China to be a military advisor to Jiang Jie Shi in 1940. It's not substantiated, but it's rumored that Chuikov got the inspiration for his strategy at Stalingrad from viewing records on the Battle of Taierzhuang.
Some players may be mystified on how a lone Japanese reinforced division could hold off, let alone do an offensive vs. hordes of Chinese divisions. Japanese divisions in this era were large square formations of 20 to 25,000 men. A Chinese KMT division on paper has 10,000 men but usually had 5,000 men (or less). The Japanese also had huge advantages in tanks, aircraft and artillery. For the KMT, it only had a few of these and these were reserved for the best divisions. In Taierzhuang, the Chinese defenders had no tanks and air support and had little artillery. Anti tank capabilities were only limited to a few German Pak 36s (which were really effective vs. the Japanese tanks) and fanatical "Dare to Die" units of men equipped with bundles of dynamite and grenades charging at oncoming tanks. The Chinese main advantage was in manpower. The Chinese heavily outnumbered their Japanese opponents. Also China has a huge landmass and the Chinese forces had room to retreat and maneuver. Japanese offensives later in the war would be frequently stymied with the Chinese retreating in the face of massive Japanese firepower then as the Japanese got too deep and stretched their supply lines, the Chinese would outflank them and encircle them forcing the Japanese to retreat.
This really frustrated the Japanese high command to no end as they did not have the resources or manpower to conquer China but could not end the war due to the fear of losing face. The U.S./British/Dutch oil and steel embargo on Japan was the final straw and she would start the Pacific war in order to gain an access to oil and resources to continue the war in China by fighting and angering a much greater foe (the USA). Thus begun the Pacific war and would end in the defeat of Japan in 1945.
Hopefully this game opens up the floodgates for more designers to do more wargames on battles of the Second Sino Japanese war, so as they say, let the dice fly high!!!
15.0 Sources
- Antal, John and Maj. Bradley Gericke. City Fights. Ballantine Books, Presidio Press. 2003.
- Dorn, Frank. The Sino-Japanese War, 1937-1941. New York: Macmillan Publishing Company, 1974.
- Hsu Long-hsuen and Chang Ming-kai, History of The Sino-Japanese War, 1937-1945. Taipei, Taiwan: Chung Wu Publishing, 1971.
- Sino-Japanese Air War, 1937-1945 [Internet site, 2007]. Retrieved February 2008: http://surfcity.kund.dalnet.se/sino-japanese-1938.htm
- Various, Collected Memoirs of Former Kuomintang Generals of the Anti Japanese War. Edited by Various. Chinese Historical and Cultural Press. China. ISBN 7503415908. 2005
- Peng, Gao. & Hui, Shang Jin. The Battle of Xuzhou. Unity Press. China. ISBN 7801308433. 2005
- Ji Hong, Pu. Xuzhou Campaign Battlefield Memorandum During the Chinese War of Resistance Against Japan. Military Science Press. China. ISBN 7801378857. 2005
Player Aid Charts
The two Player Aid Charts are printed on the rules sheets (Storm Over Taierzhuang Players Aid Card). Their contents follow. The rules file also contains a leftover chart for a different game (Deathride Players Aid Card: Bombardment, Casualty Points, Rifle Fire, Terrain Key, Assaults, Chassepot Volley, Combat Eligibility); it does not belong to this game and is omitted.
Sample Unit
Sample unit (Tank / Infantry): Front (Ready) shows Designation, Combat factor (if red, may attack adjacent area), Movement and Defense; Back (Spent) shows Defense.
Sequence of Play (4.0)
- TC Phase (5.1)
- Reinforcement Phase (6.1, 6.2)
- Random Event Phase Both players each roll a D6, add their DR results together and then reference the total to the Random Events Chart (see reverse).
- Initiative Phase Both players roll a six sided die for initiative and the player with the higher roll goes first. A tie is re-rolled. Note during the first turn, the Japanese player always goes first.
- Impulse Phase Players alternate performing Impulses, Movement or Fire Combat (7.0). A player may pass on his impulse, in which case play goes to the other player. If both players pass on their actions in succession, the turn ends.
- End Phase Tactical Chit discards; Japanese player supply determination (6.3); Units are returned to Ready Status if eligible; Turn marker is advanced to the next turn.
Gameplay Notes
- Each player may only have a maximum of 10 units in an area. This limit applies during movement and retreats.
- A spent unit cannot attack and can only defend.
- An action is limited to units in one area.
- Units stop moving when entering an area under enemy control.
- You cannot retreat to areas occupied only by enemy units. If units cannot retreat into unoccupied area or area with friendly units, they are destroyed.
Combat (7.2)
- Indicate Firing unit(s) and determine the Attack Points (AT) total (7.2.2a). AT = Total of all firing units + 2d6 roll + any TC effects
- Indicate Target area and determine the Defense Point (DT) total (7.2.2c). DT = Highest Defender's DF + Terrain Level if controlled (9.0, 7.2.2d)
- Determine Damage Points (DP) and apply (7.3 and 7.4). DP = AT - DT. A result of 0 or less = No DPs. A result of 1 or greater = the number of DPs that the defender must apply as described below to his defending units:
- 1 DP expended = Retreat 1 Spent Status unit to an adjacent area or flip 1 Ready Status unit to Spent status.
- 2 DP expended = Eliminate 1 Spent Status unit or flip 1 Ready Status unit and retreat it to an adjacent area.
- 3 DP expended = Eliminate 1 Ready Status unit or If there are no Ready Status units in the area, then eliminate 1 Spent Status unit and (if present) retreat another Spent unit to an adjacent area.
Combat Modifiers
- Human Wave Attacks = +1 CF for every 2 units attacking (or as modified by Random Events)
- Engineers = +3 DRM to Fire Combat roll for same area attack
- Dare to Die = +3 DRM to Fire Combat roll
Infiltration Movement (12.5)
Japanese need 4, Chinese need 3. Roll D6 and modify:
- -1: More friendly Unspent units in area than enemy units; All enemy units in the area are Spent Status; Japanese tank infiltrating
- +1: More enemy units in the area than friendly; All friendly units in the area are Spent Status
(See the transcriber's note under Case 12.6 regarding the difference from the rule text.)
Random Events Table
Each game turn, both players roll a D6. Add the two DRs together and reference the sum to this table.
2 - The Trap is Sprung Roll four D6 and total them. This many units of the 20th Army under General Tang En Po are deployed into any Chinese Deployment Zones (Chinese player's choice) and enter the game this turn. This event can be rolled more than once but if all of the 20th Army Group units have already entered the game, treat this roll as a No Event.
3 - No Event
4 - We must defeat Japan now! Enraged Chinese peasants, abused by Japanese troops, begin to destroy railroads and roads disrupting Japanese supply and communication lines. The Japanese player puts a TCM from his hand, selected at random, back into the opaque container.
Historical Note The Chinese peasants were normally politically ambivalent (just minding their own business). A combination of KMT persuasion (both friendly and forceful) and the brutal Japanese treatment of the populace caused the civilians of the Taierzhuang district to help the KMT. They provided labor to build fortifications and trenches, to destroy roads and railways in the path of Japanese advance and they ambushed supply and communications lines.
5 - Fuel Shortage Gasoline supplies do not get to the Japanese tanks on time. All Japanese tank units become Spent. The Japanese player can discard one TC per tank unit (counter) and not flip that unit to its Spent side.
Historical Note While the KMT destroyed several Japanese tanks, many just ran out of fuel and were abandoned on the battlefield. Discarding a TC represents the Japanese straining their supply situation to provide fuel for the tanks.
6 - Generalissimo Chang Kai Shek The Chinese player rolls another D6.
- 2, 4 or 6 = Jiang Jie Shi sees the wisdom of your plan and sends you more supplies, draw one extra TC from the cup which does not count towards the Chinese maximum hand size.
- 1, 3 or 5 = Jiang fears you are upstaging him, so return a random TC from your hand to the opaque container.
Historical Note It is well known that General Li Tsung Jen and Generalissimo Chang Kai Shek did not trust each other. Chang in particular viewed Li as a political rival. While providing substantial support to Li, Chang would reserve the best supplies, equipment and support for himself and his loyal factions. He did this to deny General Li more political power and military might within the KMT.
7 - Same as a 6 result
8 - Same as a 5 result
9 - No Event
10 - Japanese Air Supply Drop The Japanese Army air force drops supplies to beleaguered Japanese troops. If the Japanese player has the Bomber TC in hand, he can play it now and do one of the following:
- a) Draw one extra TC which does not count towards the Japanese player's maximum hand size.
- b) Return one area into supply and return the Japanese units there to Ready Status.
If the Chinese player has the KMT air force TC in hand, he can immediately use it to cancel this event. The Japanese player can then immediately cancel the KMT's air force chit by playing a Fighter Support TC, thus keeping this event in effect. If the Japanese player does not have the Bomber TC in hand or decides not to avail himself of this event at this time, this is considered a No Event.
Historical Note With the lack of transport aircraft, the Japanese are using the available bombers to drop supplies.
11 - The Cause is in Doubt Any Human Wave attacks by the side that does not currently control at least one Tierzhuang town area, that player now requires 3 units (not 2) to get the +1 Firepower AP addition for the rest of the game. If this event is rolled a second time and the same player is affected, the required number of units for Human Wave attacks is raised an additional +1. If rolled for a third time in the game, treat this as a No Event for the current turn and the remainder of the game.
12 - General Itagaki to the Rescue The Japanese player rolls 2D6 and may deploy that many units from the 5th Independent Mixed Brigade into either Japanese Deployment Zones to enter this turn. This event can be rolled more than once but if all of the 5th Independent Mixed Brigade units have already entered the game, treat this as No Event.
Tactical Chit Descriptions (5.0)
Japanese
IJA Heavy Artillery (action) This chit may be played only once a turn during a friendly impulse. Perform a firepower 10 attack against one area of your choice that your army is in or adjacent to. Defender benefits from Terrain modifier irregardless of control of the area. Historical Note The Stone buildings and fortifications around Taierzhuang made Japanese artillery fire rather ineffective. While Japanese artillery was quite plentiful and was used extensively while supplies held out during the battle, they were quite inaccurate.
Bomber Support (action) This chit may be played only once a turn during a friendly impulse. Perform a firepower 12 attack against one area of the Japanese player's choice where there are no Japanese units. This chit is required to benefit from the Japanese Air Supply Drop random event. Historical Note The Japanese were not able to use bombers in the street fighting in Taierzhuang town since their own forces might get hit.
Fighter Support (action) This chit may be played during a friendly impulse. Perform a firepower 8 attack against one Chinese occupied area of the Japanese player's choice (even if friendly occupied). Terrain effects apply to this fire if applicable. This TC can also be used to cancel the KMT Air Force TC. Historical Note The Japanese air force deployed two squadrons in this battle.
Gameplay Note Japanese air units may only attack Chinese Deployment Zones if optional rule 12.5. is being used.
Banzai (action) This chit may be played only once a turn during a friendly impulse. This chit allows the chosen Japanese unit(s) in one area to either move and then fire or fire and then move before becoming Spent. If the Banzai moving units are targeted by the "Resolute Defenders" TC, then the Resolute Defenders TC is resolved first. Normal movement and fire rules apply. Activated units which did not perform both parts of the TC's action are still Spent at the end of the impulse.
Engineers Japanese player gets a +3 to his firepower roll when performing an attack. Can only be used in conjunction with either a normal unit attack within the same area or a banzai tactical chit (as long as the fire is within the same area).
The Will of the Emperor (action) Fanatical Japanese troops fight against incredible odds. This chit may be played once per turn during a friendly impulse. Choose one area and make a D6 DR. The result is the number of Spent units that may be returned to Ready status in that area.
Chinese
Resolute Defenders This chit may be played only once a turn during a friendly impulse for Ready Status units in either of the following instances:
- All the units from one area which perform a fire attack action do not become Spent.
- When Japanese units enter a KMT occupied area, the KMT units may immediately perform one fire attack (i.e., before Japanese can fire using Banzai etc). KMT units are not Spent after firing.
KMT Heavy Artillery (action) This chit may be played only once a turn during a friendly impulse. Perform a firepower 5 attack against one area adjacent to or containing Chinese units. Terrain effects apply, if applicable. Historical Note KMT artillery during the battle, while miniscule when compared to the Japanese, was actually more accurate because of German training and longer ranged guns.
Dare to Die Play of this TC gives the KMT player a +3 DRM to his fire attack roll when performing a normal same area attack or in conjunction with either the Night Attack or Resolute Defender's chit. Historical Note The KMT had very poor anti-tank capabilities during the war. These were limited to a few German Pak 36 Anti-tank guns and Dare to Die units. The Dare to Die units were close assault specialists. During the battle, a few hundred of these men were used to attack Japanese tanks. They would suicide charge Japanese tanks with satchel charges and bundles of grenades. The Dare to Die units were quite effective and, in conjunction with the few Pak 36s, they managed to take out many Japanese tanks.
Heroes of Taierzhuang Play this TC after the dice have been rolled for an AT combat calculation (Japanese or Chinese attack). The dice must be re-rolled and the new result is used for the AT calculation.
Li Tsung Jen's Command (action) Play this chit only once a turn during a friendly impulse. Choose any one area with Spent Chinese units. Roll a D6 and return that many Spent units to Ready status.
KMT Air Force (action) Play this chit during a friendly impulse. Perform a firepower 4 attack against one area of your choice. Terrain effects apply if applicable. This TC can also be used to cancel the opponent's play of a Japanese Air Force TC or the Bomber Attack TC. Historical Note Four squadrons of the KMT Air Force were deployed at the Battle of Taierzhuang (with Soviet I-15 and I-16 fighters piloted by both Chinese and Soviet "volunteer" pilots).
Night Attack (action) Play this TC during a friendly impulse. The Chinese player has the Ready units of his choice in one area either Move and Fire or Fire and Move before being Spent. Terrain effects apply if applicable. Historical Note During the battle, the Chinese used surprise night attacks to try to cancel out the Japanese superiority in firepower.