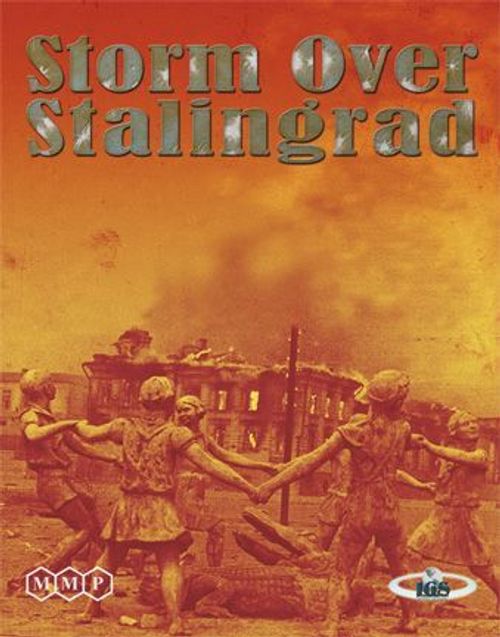
Storm Over Stalingrad
Storm Over Stalingrad Rulebook
Table of Contents
Table of Contents
- Chapter 1: Introduction
- Chapter 2: Game Components
- 3.0 Preparation
- 4.0 Game Sequence
- 5.0 Tactical Cards
- 6.0 Player Action Turns
- 7.0 Movement
- 8.0 Fire
- 9.0 Calculating Damage Points
- 10.0 Applying Damage Points
- 11.0 Reinforcements, Their Placement, and Withdrawing Units
- 12.0 Control of Areas
- 13.0 Victory Conditions
- 14.0 Special Rules
- 15.0 Optional Rules
- 16.0 Q&A Regarding Tactical Cards
- Map Translation
Chapter 1: Introduction
This is a 2-player wargame simulating the Battle of Stalingrad from October to November 1942. One player plays the German army, and the other is the Soviet army. Play continues through 6 turns, at which point the winner is determined.
Chapter 2: Game Components
The following items are included with this game. In addition, 6-sided dice (the more the better) are needed.
- Rules (1)
- Countersheet (1)
- Tactical cards (2 sheets of 16 cards each)
- Game map (2 sheets that combine to form 1 map)
Note: the 3 counters with Japanese writing on the bottom right of the countersheet (bottom left if you're looking at the back) are optional counters for "Storm over Sekigahara" from Game Journal #17.
2.1 Counters
Separate the counters from their countersheet. There are two types of counters: units and markers.
2.11 Units
(1) Each unit has a front side ("ready") and a back side ("spent").
(1-1) A unit with its face side up is in ready status and can still perform an action that turn (see 6.1).
(1-2) A unit with its back side up is in spent status and can no longer perform actions that turn. Note that the ability values of a "ready" and "spent" counter are different.
(2) Ability Values. Each unit has the 4 following ability values:
(2-1) Firepower — Used when firing (see 8.0).
(2-2) Defense value — Used when calculating damage points (see 9.0).
(2-3) Movement value — Used when the unit is moving (see 7.0).
(3) Owner / unit name — Identifies the unit's designation in the army (see 15.4).
(3-1) Parent group code — Indicates the larger group the unit is a part of.
(3-2) Battalion or regiment number — This value represents the regiment / battalion number of the unit.
(4) Placement / reinforcement indicators — There are the following 2 types:
(4-1) Letter — Used for starting placement (see 3.0).
(4-2) Number (encircled number) — This unit appears as a reinforcement in the turn indicated (see 11.1).
(5) Withdrawal turn indicator — Units that have an "S" printed on the upper right, in addition to appearing in that area at the start of the game, withdraw on the turn indicated immediately below the "S" by an encircled number (which in all cases, happens to be "3"). Note that without an "S" above it, an encircled number notates a unit that is a reinforcement.
2.12 Markers
(1) Control markers — One is placed in each area, with the face-up symbol indicating which side controls that area (see 12.0).
(2) Fire markers — This is placed in an area containing a unit that fired at an adjacent area. The side that is face up indicates which side fired (see 8.1, 9.2).
(3) Turn marker — Place in the turn track to indicate the current turn (see 4.0).
2.2 Game Map
2.21 Game Map
The game map is separated into many areas. There are 2 types of areas: general areas and ferry landing boxes.
(1) General areas
(1-1) Area name — Indicates the name of the area.
(1-2) Defensive level — Indicates each area's defensive level (see 9.2).
(1-3) Victory condition areas — Areas with a defensive level of 3 are the areas important for victory (see 13.0).
(1-4) Mamayev Kurgan — This area provides an extra tactical card each turn to the army controlling it (see 13.0). The area has a red triangle printed in it.
(2) Ferry landing boxes — The ferry landing boxes are where the Soviet reinforcements are placed when they arrive (see 5.1).
2.22 Charts and Boxes
(1) Turn track — The turn marker is placed here to indicate the current turn (see 4.0).
(2) Destroyed box — Destroyed units are placed here (see 10.0).
(3) Tactical card stack areas — Each player's stack of cards is placed here (see 3.0, 5.0).
2.3 Tactical Cards
Separate each individual card from the cardsheets that are included. There are 2 types of tactical cards; one for use by the German army player, and one for use by the Soviet army player.
3.0 Preparation
(1) Decide which player is playing the German Army, and the other plays the Soviet army.
(2) Each player places their units face up ("ready") as directed below:
(2-1) If the placement indicator is a letter: Place the unit on the map, in the area with the matching letter.
(2-2) If the placement indicator is a number: Place the unit on the turn track box with the matching number.
(3) Each player shuffles their army's tactical cards and places them on the board in the area labeled for use for that army's tactical card stack.
(4) Place the turn marker on the turn track in the first turn's box.
4.0 Game Sequence
This game progresses through 6 game turns. Each turn is performed in the following sequence:
(1) Each army's player draws tactical cards as indicated by their army's number on the turn track (see 5.1).
(2) Both players alternate performing player action turns (note that this is different terminology than a "game turn"). The German army player takes the first player action turn.
(3) A player may "pass" if they do not wish to perform any action. A player with no units that can perform actions and does not have any card remaining in hand automatically passes. Any time both players pass in immediate succession, the turn ends.
(4) When the turn ends, perform the steps below, and then return to (1) above to start the next game turn.
(4-1) Tactical cards may be discarded (see 5.3). The German army player performs this first.
(4-2) All units are returned face-up (to "ready" status).
(4-3) All "Fired" markers are removed from all areas.
(4-4) At the end of turn 3, the German army player withdraws their indicated units (see 11.3).
(4-5) Both armies receive their reinforcements, and places them in the allowed area(s) (see 11.2). The German army player places their reinforcements first.
(4-6) The turn marker is advanced 1 space on the turn track.
Turn sequence summary:
(1) Receive tactical cards
(2) Perform actions (alternating, choose one)
- (a) Movement
- (b) Fire
- (c) Tactical card
- (d) Pass
(3) End of turn
- (a) Discards
- (b) Return units face up
- (c) Remove fire markers
- (d) Receive reinforcements
- (e) Withdraw units
- (f) Advance turn marker
5.0 Tactical Cards
5.1 Receiving Tactical Cards
At the start of each turn, each player's hand can be supplied with cards from their stack.
(1) Each turn, the German army player can have cards equal to the number of "GE cards" and the Soviet army player can have cards equal to the number of "SU cards" indicated underneath the turn track, under the box for the current turn.
(2) Each turn, the player who controls Mamayev Kurgan receives 1 extra card.
(3) Each player receives enough tactical cards from their stack to bring the number of cards in their hand to the total determined in (1) and (2) above.
5.2 Using Tactical Cards (see the Q&A)
(1) When using tactical cards, directions given on the card take priority over normal rules. Whenever the tactical card does not indicate special rules, the normal rules are applied.
(2) When the timing indicates "Own army turn / use once as turn", the effects of the card are performed once and count as that army's player action turn.
(3) Other tactical cards can be used when the "Use restrictions" are fulfilled, regardless of which player's action turn it is.
(4) Any used tactical cards are discarded.
5.3 Discards
(1) At the end of a turn, if a player has tactical cards left in their hand, they can choose some, all, or none of them to discard.
(2) Any tactical cards not discarded at the end of a turn are kept for the next turn, but of course, these apply towards that player's hand size.
5.4 Replenishing Discards
(1) Each player keeps their discards separate from the other player's discards.
(2) At the beginning of a turn, if a player does not have enough tactical cards in their stack to replenish their hand, they combine their discards with their remaining stack, and shuffle them to form a new stack.
6.0 Player Action Turns
The current action turn player can perform any one of the following actions for their action turn:
6.1 Unit Actions
Choose 1 area, and the face-up ("ready") units of your army in that area can perform either movement or fire (see 7.0, 8.0).
(1) Units that perform an action are flipped face down ("spent").
(2) All units performing an action in an action turn must perform the same action.
(3) A player can choose to have any number of their units in an area perform an identical action. It is acceptable for only some and not necessarily all of a player's units in an area to participate in an action. Only the participating units are "spent".
6.2 Card Action
If a player has a card that indicates "Own army turn / use once as turn", they may use 1 such card as their action turn.
7.0 Movement
(1) Moving units can move a distance based on their movement value printed on their counter, receiving movement points equal to their movement value. Units with insufficient movement cannot move.
(1-1) It costs 1 movement point to enter an adjacent area.
(1-2) Entering an area currently under enemy control costs 1 extra movement point.
(1-3) Moving out of an area currently under enemy control costs 1 extra movement point.
(1-4) Whether or not extra movement points are required is determined separately for each and every area of the move at the moment the movement is made.
Example: One of your own army units spends 2 movement points to enter an empty enemy controlled area. At the moment they enter the area, control transfers to your army, so if moving further, there would be no need to pay an extra movement point for "leaving an enemy controlled area."
(2) All units performing movement action as a group in the same action turn must all move together from their starting area to their destination area.
(3) When units of differing movement values move at the same time, they receive movement points equal to the movement value of the slowest unit in the group.
(4) Each player may have up to 10 units in the same area at one time. Any movement that would result in more than 10 units to be in an area is not allowed.
Example: If you have an area with 8 units in it, you may not move a group of 3 units into or through that area.
8.0 Fire
Fire is performed by units with 1 or more firepower ("ready" units), or as directed by a tactical card.
8.1 Fire from a Unit
(1) Fire from a unit can be performed against the same area the unit is in or against an adjacent area.
(2) When firing against an adjacent area, a "fire" marker is placed on the firing unit, with its nationality symbol face up.
(2-1) An area with a player's own army's fire marker on it does not receive the area's defensive level benefit (see 9-2).
8.2 Fire from a Tactical Card
Follow the directions printed on the card.
8.3 Sequence of Resolving Fire
(1) Refer to 9.0 to determine the number of damage points.
(2) Refer to 10.0 and apply the damage points.
9.0 Calculating Damage Points
9.1 Calculating Attack Points
To resolve an attack, roll 2 dice, and add the total to the firepower of the attacking units. This total is the attack points.
When several units are firing, all firing units' firepower values are added together (but only a single roll of 2 dice is made).
9.2 Calculating Defense Points
(1) The defense points are equal to the defense value of the unit in the target area that has the highest defense value among those belonging to the attacked army.
(2) The defensive level of the area being fired on can be added to the defense points. However, if any of the following apply, the defensive level cannot be added:
(2-1) The units being fired on are in the same area as the firing units.
(2-2) The side being fired on does not control the target area.
(2-3) If there is a fire marker belonging to the side being fired on in the target area.
9.3 Calculating Damage Points
(1) The attack points calculated in 9.1 are compared to the defense points calculated in 9.2.
(2) If the attack points are greater than the defense points, damage points equal to the difference are dealt.
(3) If the attack points are equal to or less than the defense points, nothing happens.
10.0 Applying Damage Points
10.1 General Rules
When damage points are received, the player owning the units must apply all the damage points to their units in the target area using the following methods to spend them (note that for 1 or 2 point spending, only 1 of the 2 options listed need to be done).
(1) 1 point
(1-1) Flip 1 face-up ("ready") unit face down ("spent").
(1-2) Retreat a face-down ("spent") unit to an adjacent area.
(2) 2 points
(2-1) Move 1 face-down ("spent") unit to the destroyed box.
(2-2) Flip 1 face-up ("ready") unit to face-down ("spent") and retreat it to an adjacent area.
(3) 3 points
(3-1) Move a face-up ("ready") unit to the destroyed box.
10.2 Application
While the player owning the units that received damage is free to choose how to apply the damage, as many of the damage points as possible must be applied.
10.3 Retreats
All retreats must be made to an area controlled by that army or to an area that contains no enemy units. If there is no such place available, the retreating unit is moved to the destroyed box.
(1) When retreating, if there are multiple legal retreat destinations, the one retreated to is the one that has the least enemy units in all of its adjacent areas combined (when tied, the retreating player may choose from among them).
(2) If as a result of a retreat, the area retreated to exceeds 10 units for that army, the units that cannot be accommodated retreat 1 more area. If there is no legal place for the excess units to retreat to, they are moved to the destroyed box.
11.0 Reinforcements, Their Placement, and Withdrawing Units
11.1 Reinforcement Units
Each player receives reinforcements every turn as per their reinforcement indicators.
11.2 Placing Reinforcement Units
(1) The German army player may place their reinforcement units in any area their army controls, even if there are enemy units present.
(2) The Soviet army player may place their reinforcement units in any ferry landing boxes.
(3) If the Soviet army player still has reinforcement units in ferry landing boxes from a previous turn, they may be moved to a different ferry landing box.
11.3 Unit Withdrawal
Units that have a withdrawal turn indicated are removed from the game map at the end of turn 3.
(1) If any withdrawing units are already in the destroyed box, other units of the same type must be removed in its place.
Example: For each destroyed wheeled infantry unit with a withdrawal indicator, a different wheeled infantry unit must be removed.
(2) If there are no units of the same type as a destroyed unit with a withdrawal indicator on the board, any unit belonging to that player's army of their choice can be removed in its place.
12.0 Control of Areas
(1) At the beginning of the game, areas with their defensive level printed in a gray circle are German army controlled, and if printed in a dark red circle, they are Soviet army controlled.
(2) At any moment during any game turn, if the player controlling an area does not have a single unit in it, and their opponent has at least 1 unit in it, control transfers to the opposing army. Flip the control marker over to that army's side.
13.0 Victory Conditions
(1) At the end of turn 6, if the Soviet army player controls at least 2 of the defensive level "3" areas, the Soviet army player wins.
(2) If the above condition is not satisfied, the German army player wins.
14.0 Special Rules
14.1 Ferry Landing Boxes
(1) Units in a ferry landing box may move to an adjacent area as normal. This movement is allowed even if the German army controls the adjacent area.
(2) No unit may enter or retreat to a ferry landing box from another area.
(3) In each action turn, only 1 unit (not group) may be moved from a ferry landing box.
(4) Units in ferry landing boxes may not be the target of any kind of fire.
15.0 Optional Rules
If the players feel the game is unfair to one side, and both players agree, one or many of the following optional rules may be applied.
15.1 Bidding on Victory Conditions
(1) At the beginning of the game, both players write down the minimum number of areas that they want the Soviet army player to need to control in order to win (at least 1), and reveal them at the same time.
(2) The player that wrote a higher number becomes the Soviet army player, and must control at least the number of areas they chose at the end of the 6th turn in order to win. If they do not control at least that many areas, the German army player wins.
(3) If both players chose the same number, the sides are determined by mutual agreement or a roll of the dice.
15.2 Special Rules for the German Army's First Turn
For the first turn only, the German army may choose the tactical cards they receive.
15.3 Free Choice of Tactical Cards
Both players every turn may choose their tactical cards from the stack (but the stack must be used; cards currently in the discard pile cannot be chosen).
15.4 German Army Division Restriction
The German army cannot combine units belonging to different divisions (units with a different number before the "XX" printed on their unit designation) for movement or fire purposes.
Units not belonging to divisions (any unit without an "XX" for unit designation) may be freely combined with divisions or other units for movement or firing.
16.0 Q&A Regarding Tactical Cards
16.1 Using Multiple Cards at the Same Time
Q1: Can you play 2 or more of the same type of tactical card at once?
A: As long as the use restrictions of "Dive bombing", "Engineer support", "Defensive fire", "Land mines", or "Anti-tank guns" are satisfied, they can be used simultaneously as follows. "Dive bombing", "Defensive fire", and "Land mines" each have their effects resolved separately. Simultaneous "Engineer support" or "Anti-tank guns" modifiers are cumulative.
Q2: Can you use "Defensive fire" twice against a single movement by one enemy group?
A: Yes. If "Overrun attack" is played as well, damage from both "Defensive fire" attacks are resolved before the "Overrun attack" is resolved with the attacker's remaining strength.
Q3: Can the modifier from "Anti-tank guns" be added to cards like "Heavy artillery support", "Rocket launcher support", or "Land mines"?
A: No, it can only be added to your own army units' fire.
16.2 "Defensive Fire", "Overrun Attack", "Land Mines"
Q4: How are cards with 2 use conditions, such as "Defensive fire" or "Engineer support" used?
A: You can choose to use 1 of the 2 effects when its use conditions are satisfied. For example, "Defensive fire" can be used once during your own action turn as your action, or the other ability can be used once during an opponent's action turn when an enemy unit enters an area your army has a unit in. You can never use both options in a single use of the card.
Q5: Can "Defensive fire" be used against an adjacent area?
A: When used on one of your own action turns, you can fire on an adjacent area, and a fire marker is placed on your area as normal. When firing during an opponent's action turn, you can only fire at the units entering your area, so you cannot fire at an adjacent area.
Q6: When firing after moving by using an "Overrun attack", I receive "Defensive fire". Can I use "Engineer support" at this time?
A: No. The "Engineer support" use conditions are either during your opponent's action turn, or when "Land mines" are used.
Q7: I performed an "Overrun attack" and entered an empty enemy controlled area, but all my units from the "Overrun attack" were wiped out by "Land mines". Do I gain control of the area?
A: The attack from the "Land mines" is taken before movement is complete, so you do not gain control.
Q8: When moving after firing during an "Overrun attack", can some of the units that fired be left in the original area and others perform movement?
A: Yes, but as always, the units that move must move together.
Q9: A new group enters an area other units of that army have already entered earlier in the game turn. A card like "Land mines" or "Defensive fire" wipes out the entering units, with unspent damage points remaining. Can the remaining damage points be used against the enemy units that were already in the area?
A: No, when the use conditions are "enemy unit's movement", the only units the damage points can be applied to are the units entering the area that action turn (not game turn). Other units in the same area cannot be affected.
Q10: How is damage from "Land mines" applied?
A: Once the units that entered the area are flipped face down, the damage is applied.
16.3 "Heavy Artillery Support" and Ship/Plane Attacks
Q11: Can "Heavy artillery support" and "Naval bombardment" type cards be used against ferry landing boxes?
A: No. 14.1's "units in ferry landing boxes may not be the target of any kind of fire" applies even against tactical cards.
Q12: How is damage applied for cards that allow the current player and choose the units and assign the points? This includes "Naval bombardment", "Dive bombing" and "Molotov cocktails".
A: As an example, the German army uses "Naval bombardment" and deals 6 points of damage to an area that has Soviet army units A, B, C, D in it, all "ready". As the German army player can apply the damage as they wish, they choose to apply 3 points to unit A, 2 points to B, and 1 point to C. The Soviet army player removes unit A, retreats unit B face down, and flips unit C face down. The Soviet army player may choose themselves where unit B retreats to.
16.4 Other
Q13: Are discards face up or face down?
A: Either is acceptable, but if players cannot agree, all discards are face up.
Q14: Aren't there any supply or communication line effects?
A: No, the effects on the game were minimal, so the rules pertaining to supply were omitted.
16.5 Q&A from the Website
Q15: The "Rocket launcher support" card states that terrain effects are always applied, but are terrain effects applied to "Heavy artillery support", "Dive bombing", and "Naval bombardment"?
A: Refer to rule 9.2(2). When using tactical cards, in general refer to "5.2 Using tactical cards". In other words:
When the tactical card has special instructions: The tactical card takes priority. Example: For the "Rocket launcher support" card, "Terrain effects are always applied" is written, so 9.2(2) does not apply, and even a unit with its own fire marker or one in the opposing army's area still receives the terrain's defensive level modifier.
When the tactical card does not have special instructions: Normal rules apply. Example: "Heavy artillery support", "Dive bombing", and "Naval bombardment" have no special instructions, so terrain effects are applied when 9.2(2) states they are applicable.
Q16: Can you reroll just a single die for the "Heroes of the Red Army" card, or do both need to be rerolled?
A: Both dice must be rerolled (this clarification was added to the English language version of the card).
Errata: Listed errata for the manual was fixed in the English rules.
Map Translation
The only important area names on the map are Mamayev Kurgan, which is area G, also easily identified by the red triangle in the area, and that the 3 ferry landing boxes are labeled "L". Other than that, the area translations are given here for historical interest, and are not needed for gameplay (there's no need to make English labels for the map to play the game).
These are for the most part listed from left to right as they appear on the map, in this format: starting placement code for area (if any); starting control (German or Soviet), as well as its defensive level; name in Japanese, as printed on map; area name in English.
| Placement | Control / Level | Area Name (English) |
|---|---|---|
| S | German 2 | Kuporosnoye |
| T | German 1 | Sadovaya station |
| A | Soviet 3 | Second station |
| B | Soviet 1 | Tsaritsa Woods |
| (none) | Soviet 3 | Grain silo |
| U | German 1 | Dubovaya Gully |
| C | Soviet 2 | Army barracks |
| L | — | South ferry landing |
| D |
Not an actual area, but also on the map: the Volga River. The turn track is labeled "Turn track"; box 3 is labeled "Withdrawal". The box on the left side of the map is the Destroyed box. The text to the right of the tactical card boxes is the turn sequence.