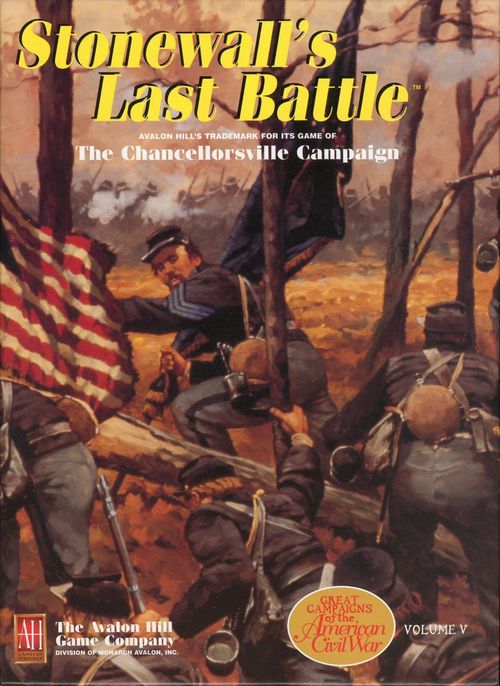
Stonewall's Last Battle: The Chancellorsville Campaign
Stonewall's Last Battle: The Chancellorsville Campaign Rulebook
Table of Contents
Table of Contents
- GCACW Standard Basic Game Rules
- Stonewall's Last Battle — Game Rules Booklet
- Advanced Game Rules
- Clarifications and Corrections
GCACW Standard Basic Game Rules
Version 1.6. This booklet is shared by all games in the GCACW series. Read it before proceeding to the Stonewall's Last Battle game-specific rules that follow.
2.0 Basic Game Concepts
One person is chosen as the Union player and the other as the Confederate player. However, playing the game solitaire presents no special difficulties.
2.1 Game Components
The components differ from one game to the next in the Great Campaigns series. Consult the original rule booklet for each game to find the list of components for that title in the series.
2.2 Playing Pieces
The following types of playing pieces (or counters) are used in the game: military units, leaders and informational markers.
Military Units
Each player controls a set of military units. These are usually identified by their commanding officer, who is listed by name on the counter (e.g., "Early-B"). Some small units, however, are simply identified by regiment (e.g., "10 GA"—the 10th Georgia Infantry). Units also have designations on each side of the organizational symbol (the colored rectangle in the middle of the counter) identifying the corps and/or the division to which the unit belongs. For example, the Union "XX" designation means the unit belongs to the Twentieth Corps; the Confederate "M-W" designation means the unit belongs to Wheeler's Corps, Morgan's Division. Union infantry units also have a numerical division designation on the right side of the organizational symbol, which is used for informational purposes only.
Military units come in five different sizes: II = Squadron (Union only), III = Regiment, X = Brigade, XX = Division, X+ = Demi-Division (Confederate only).
The demi-division was not a true military organization, although several Confederate reports from early 1862 used that term. It is an aggregation of 2 to 4 brigades from the same division and is appropriate for the early period of the war, when Confederate leaders could not easily control divisions with up to 16,000 men.
Military units are divided into three types: Cavalry, Infantry, Artillery.
Military units have two values printed on their counters: the Tactical value, representing the military competence of the unit's commander and troops; and the Artillery value, representing the number of artillery batteries attached to that unit.
Military units have two sides: the front ("normal") side and the reverse ("exhausted") side. The exhausted side is marked by a white stripe across the top of the unit.
Leaders
There are four types of leaders in the GCACW series. A leader may never occupy a hex by itself. It must always be stacked with a friendly, subordinate military unit. The unique characteristics of each leader (and the proper way to identify their counters) are described in the sections below.
Army Leaders: Army leaders have only a single number on their counters, which is their Command value. Army leaders are used to initiate grand assaults, and in Advanced Game scenarios of some games in the series they can perform the Activate Army Leader action. They must be attached to a subordinate infantry (not cavalry or artillery) unit at all times. Army leaders are present for both players in every game except SIV and AGA.
District Leaders: District leaders are distinguished by the presence of a colored star on their counter. Like corps and division leaders, district leader counters contain two numbers: a Tactical value and a Command value. District leaders are hybrid units that are used to both activate units for movement and assault (like corps and division leaders) and initiate grand assaults (like army leaders). District leaders may not perform the Activate Army Leader action. They must be attached to a subordinate infantry (not cavalry or artillery) unit at all times. District leaders are found leading the forces in a side theater that was not large enough historically to warrant the deployment of an entire army (such as SIV or the GTC side theaters). Note: Not all games have District Leaders.
Corps and Division Leaders: Corps and division leader counters contain two numbers: a Tactical value and a Command value, but no red star. Players must check the "Size" column in the scenario setup to determine which leaders with these two numbers are corps leaders and which are division leaders. Corps and division leaders are used to both activate units for movement and to initiate assaults. Corps and division leaders must be attached to a subordinate unit belonging to the same corps or division at all times. This subordinate unit can be of any type (infantry, cavalry, or artillery), depending on the composition of the units in that corps or division. Some combination of corps and/or division leaders are present for both players in every game in the series. Some corps may even have both corps and division leaders present; in this case some units may be activated by either the corps or division leader at the player's discretion.
Informational Markers
Strength Markers: A military unit must always possess a single Strength marker. A Strength marker has a front (organized) and a reverse (disorganized) side. The organized side has a single number from 1 to 21, which is both its "Manpower value" and "Combat value." The disorganized side has two numbers: a smaller number in value (1/2 to 14), which is its Combat value; and a larger number in value (1 to 21), which is its Manpower value. Strength markers never function by themselves; they must always be assigned to a military unit. At the start of a scenario, a Strength marker of the correct Manpower value is placed underneath a unit on its organized side. Wherever a unit goes, its Strength marker accompanies it. A maximum of one Strength marker may be assigned to a unit at a time. As a unit suffers losses, its marker changes. A player may examine his opponent's Strength markers at any time. Leaders never possess Strength markers.
Although Strength markers can have numbers from 1 to 21, in most games in the series, players are limited to a maximum Manpower value that is less than 21. The maximum manpower in a specific game is listed in the Advanced Game rules for that game, in the Attachment section.
Fatigue Markers: As military units move and fight, they become "fatigued." Fatigue is represented in five "Fatigue levels" from 0 to 4. Military units must always be at one of these levels. Fatigue markers are placed underneath a unit's Strength marker. As the unit's Fatigue level changes, its Fatigue marker is adjusted. A unit at Fatigue level 0 does not possess a Fatigue marker—the lack of such a marker indicates Level 0. Leaders never possess Fatigue markers.
Sample Units
The sample units depicted below are for the game HSN; similar graphics are used in most games in the GCACW series. For those games with different counter graphics, refer to the rules included with that particular game for the unit style. Each counter shows: a Name, a Size symbol, an Organization symbol, a Tactical value, and an Artillery value on military units (with front/normal and back/exhausted sides showing an Exhaustion indicator); Army leaders show a Portrait, Name, and Command Value; Corps or Division leaders show a Portrait, Name, Command Value, and Tactical Value. Strength markers show Manpower/Combat value on the organized (front) side and separate Manpower and Combat values on the disorganized (back) side. The parenthesis around the tactical value means the unit may not be the only unit in an attack (marching or assault). Note: not all games have artillery units.
2.3 The Map
Major Terrain
Each land hex on the map is classified as one of ten major terrain types: clear, rolling, rough, woods, city, swamp, provisional swamp, hill, mountain, or loess. Each terrain type has its own Movement Point cost, listed on the Terrain Chart, which military units pay to enter the hex. Clear, rolling and hill hexes have distinctive base colors: light yellow for clear, light green for rolling, and orange for hills. Other hexes can be recognized by special symbology:
- a green "brush" pattern for rough
- a dark green "forest" pattern for woods
- a gray "grid" pattern for city
- a light green "marsh" pattern for provisional swamps
- a highlight to the provisional swamp for permanent swamp hexes (in OTR and GTC this highlight is given by making the swamps a darker green; in all other games the permanent swamp hexes have a silvery-blue highlight applied)
- a brown "elevated land" pattern for mountain
- a tan pattern for hills
- a pattern of many small tan dots superimposed on an olive base color for loess (Note: TOM is the only current game with loess terrain)
A land hex is considered to be the terrain type of the predominant symbology in that hex.
Only whole hexes are playable. Partial hexes are not playable for any game purpose; they are considered off-map.
Special Hex/Hexside Features
A number of terrain types appear along hexsides, such as rivers, creeks, ridges, bluffs, fords, bridges, ferries, dams, and county borders. Several types of special terrain appear within a hex, such as villages, RR stations, pikes, roads, landings and redoubts, but these have no effect on a hex's major terrain classification.
Woods Hexside: A "woods hexside" is a hexside between a woods hex and any other hex (including another woods hex). The hexside itself does not have to be covered with a forest pattern to be considered a woods hexside.
Loess Hexside: A "loess hexside" is a hexside between a loess hex and any other hex (including another loess hex).
The only current game with bluff hexsides is TOM – see the TOM Basic Rules for all rules regarding bluff hexsides.
2.4 Zones of Control
A military unit, regardless of its status, exerts a Zone of Control (ZOC) into each of the six adjacent hexes surrounding it. Exceptions: ZOC extend across major or minor river hexsides only at fords, dams, ferries, or bridges. Also, ZOC extend into and out of swamp and mountain hexes only across hexsides crossed by a road, pike, RR or trail. Finally, ZOC do not extend across all-water hexsides.
Restricted ZOC: If a unit exerts a ZOC across a woods or loess hexside (see definition above), and no road, pike, RR or trail traverses that hexside, the hex into which that ZOC is exerted is referred to as a "restricted ZOC." Non-restricted ZOC are sometimes referred to as "normal" ZOC. Unless otherwise specified, restricted ZOC hexes function like normal ZOC hexes.
2.5 Command Radius
Sometimes a leader must trace a "command radius" between itself and subordinate units or another leader. A command radius is a path of three or fewer contiguous hexes between a leader's hex (exclusive) to a unit's hex (inclusive). Terrain is irrelevant when a leader traces a command radius—the three-hex path may enter any type of hex or cross any hexside. A command radius may not enter an enemy occupied hex or an enemy ZOC, including restricted ZOCs. (It may enter an enemy ZOC hex if that hex is occupied by a friendly unit.) The hex occupied by a leader is considered within its own command radius.
2.6 Abbreviations
Art: Artillery · Brig: Brigade · Cav: Cavalry · Cmd: Command · Disorg: Disorganized · Div: Division · Dmorlze: Demoralized · Inf: Infantry · MP: Movement Points · Org: Organized · Regt: Regiment · RR: Railroad · Sub: Substitute · VP: Victory Points · ZOC: Zone of Control
3.0 Basic Game Sequence Of Play
Each turn is performed according to a Sequence of Play:
1. Random Events Phase. Two dice are rolled; the players consult the Random Events Table. (Random events are only used in a Basic Game scenario if the scenario specifically calls for it.)
2. Leader Transfer Phase. Leaders may be transferred from one subordinate unit to another (see 6.3).
3. The Action Cycle
Action Phase
A. Initiative Segment: Both players roll a die. The player with the higher roll wins. The winner must take initiative or pass (see 4.2). If both players roll the same number, special considerations apply.
- In BAC, TOM, and AIO, either the Union or Confederate player may win initiative depending on the specific number rolled. Insubordination may also occur in BAC. Check the BAC or AIO Basic Game Rules for more details.
- In all other games, the Confederate Player wins initiative.
B. Activation Segment: The player who has taken initiative must perform a single action with an eligible leader or unit. At the end of an Activation Segment, the players return to the Initiative Segment and a new Action Phase begins. Players continue to perform Action Phases indefinitely until both players pass in the same Action Phase (see 4.4).
4. Recovery Phase. Eligible units may entrench, build bridges, repair bridges and ferries, and recover from fatigue, disorganization, exhaustion, and demoralization.
5. Turn Indication Phase. The Turn marker is advanced one box on the Turn Record Track and the players begin a new turn.
Exceptions: Occasionally, an individual Basic Game scenario might draw on one or more rules sections from the Advanced Game rules for that volume. In these situations, additional phases may be added to the sequence of play after the Random Events Phase.
4.0 The Action Cycle
Every turn has a single Action Cycle of indefinite length.
4.1 The Action Phase
An Action Cycle consists of a variable number of Action Phases. Each Action Phase is composed of an Initiative Segment and an Activation Segment. As soon as a player completes an action in the Activation Segment, a new Action Phase begins. Action Phases continue indefinitely until conditions for ending the Action Cycle are fulfilled.
4.2 The Initiative Segment
During this segment, both players roll a die. The player with the highest roll wins. If both players roll the same number, special considerations may apply:
- In BAC, TOM, AIO and HSN, either the Union or Confederate player may win initiative depending on the specific number rolled. Insubordination may also occur in BAC. Check the Basic Game Rules for those games for more details.
- In all other games, the Confederate player wins initiative.
In some games, such as all OTR scenarios and the GTC Grand Campaign game, players must note the number on the winning die. In such games, this number is used to determine which units are eligible for activation with that initiative; see 5.2 for an example. If one player has no units eligible for activation in an Initiative Segment, his opponent automatically wins, and the dice are not rolled. (Exception: In some scenarios, the turn may end early or Insubordination may occur on certain tied initiative rolls. In these scenarios, both players must roll the dice in each Initiative Segment, even if one player has no units eligible for activation. If the player who has no eligible units wins the roll, he must pass.) The winning player must choose one of the following two options:
- Take Initiative: He may take the initiative, thereby obligating him to perform an action in the subsequent Activation Segment;
- Pass: He may "pass," automatically yielding initiative to his opponent.
A player who lost the initiative roll but who has initiative yielded to him by a "pass" must choose one of the following two options:
- Take Initiative: He may take the initiative, thereby obligating him to perform an action in the subsequent Activation Segment;
- Pass: He may "pass," automatically ending the Action Cycle.
Passing. If the player who wins the initiative roll passes, he does nothing. His opponent must then either take the initiative or pass. If the opponent also passes, the Action Cycle ends.
4.3 Activation Segment
The player who takes initiative must perform a single action with an eligible unit or leader in the Activation Segment. The counter selected for this action is called the "active unit" or "active leader." The player controlling this unit/leader is called the "active player."
4.4 Ending the Action Cycle
As soon as a player completes an action in an Activation Segment, a new Action Phase begins. Action Phases repeat indefinitely in an Action Cycle until both players pass in the same Action Phase. Thus, an Action Cycle ends when the player who wins the initiative roll passes, and his opponent—who is given the choice of taking initiative or passing—also passes. The Action Cycle also ends when both players have no units eligible for activation; or if a player passes when his opponent has no units eligible for activation. When an Action Cycle ends, proceed to the Recovery Phase.
5.0 Actions
The player who takes initiative must perform a single action in the Activation Segment with one of his units or leaders. There are five types of actions:
- March
- Activate Leader
- Assault
- Burn RR Station (not in SIV or OTR)
- Entrenchment (1863 or later)
5.1 March
Only a single unit (not a leader) may be chosen to perform a March action. A unit is eligible to march only if it is currently at a Fatigue Level of 3 or less—it may not march if it is at Fatigue Level 4. The unit's Strength marker may be organized or disorganized. A unit may march more than once per turn, but never more than once per Action Phase. A March is performed as follows:
- The player with initiative selects one eligible unit anywhere on the map. The unit's Movement Allowance is calculated as follows:
- Union Infantry or Artillery Unit: The Union player rolls one die. The result is the unit's Movement Allowance.
- Confederate Infantry or Artillery Unit: The Confederate player rolls one die. The die roll is increased by 1. The modified die roll is the unit's Movement Allowance. Exception: In OTR and AGA, the Confederate player rolls one die (but does not increase the roll by 1). The result is the unit's Movement Allowance, although the unit's minimum Movement Allowance is 2, even if the roll is 1.
- Union Cavalry Unit: The Union player rolls two dice. The sum of the dice is the unit's Movement Allowance.
- Confederate Cavalry Unit: The Confederate player rolls two dice. The sum of the dice is increased by 1. The modified dice roll is the unit's Movement Allowance.
- The chosen unit's Fatigue Level is increased by one. The unit gains a new Fatigue marker (or has an existing marker flipped over) to reflect the change. If this march brings a unit on its normal side to a new Fatigue Level of 3 or 4, or a unit on its exhausted side to a new Fatigue Level of 2, 3 or 4, it is an "extended march," and the player must consult the Extended March Table. Note: Before proceeding to Step 3, enemy cavalry units in the active unit's ZOC may perform a cavalry retreat (see 7.7).
- An eligible unit may enhance its Movement Allowance by making a "force march." The Movement Points (MP) gained by a force march are added to the Movement Allowance calculated in Step 1 to determine a final Movement Allowance. If no force march is performed, the unit's final Movement Allowance is the number determined in Step 1.
- Place the "Active Movement Allowance" marker on the Movement Track in the box corresponding to the unit's final Movement Allowance.
- The unit performs its march. As it expends MP, the Active Movement Allowance marker is adjusted downward. The march ends when the marker reaches 0 or the active player states that the action is over. If the marker reaches 0 due to an attack, the action does not end until the attack is resolved.
(Optional) A unit at Fatigue Level 4 may be selected in Step 1 of a March action if its Strength marker is organized. If a unit at Fatigue Level 4 marches, its Strength marker is automatically flipped to its disorganized side. (It retains its Fatigue Level 4 marker.) The player does not consult the Extended March Table. If a unit at Fatigue Level 4 marches, it may not also force march.
Extended March. If a unit on its normal side marches and its fatigue increase brings it to Fatigue Level 3 or 4, the action is an "extended march." If a unit on its exhausted side marches and its fatigue increase brings it to Fatigue Level 2, 3 or 4, the action is also an "extended march." Before proceeding to Step 3 of the march procedure, the active player rolls a die and consults the Extended March Table (see Charts & Tables handout). This roll may be modified. If the unit's Strength marker is organized, the modified roll is cross-referenced with the "Organized" column. If the unit's Strength marker is disorganized, the modified roll is cross-referenced with the "Disorganized" column corresponding to its current Manpower value. There are three possible results:
- NE: No effect; the extended march has no effect on the active unit.
- D: Disorganized; the unit's Strength marker is flipped to its disorganized side.
- 1/2/3: The unit's Manpower value is reduced by 1, 2, or 3. The unit's new Strength marker is placed on its disorganized side.
As long as it is not eliminated by the result, the active unit resumes its march after determining the effects of its extended march.
Example: If, in RTG, a Union unit on its exhausted side that does not belong to the Army of the Potomac performs a march, and that march brings the unit to a new Fatigue Level of 3, that march is an extended march. The Union player consults the Extended March Table, adding 3 to his die roll. (+2 because the unit does not belong to the Army of the Potomac; +1 because the march increased the exhausted unit's Fatigue Level from 2 to 3.)
Force March. A player may enhance his active unit's Movement Allowance by declaring a "Force March." A force march may only be declared in Step 3 of the March procedure or Step 7 of the Activate Leader procedure. An active unit may force march only if its Strength marker is currently on its organized side. Artillery and wagon units can never force march. To conduct a force march, follow this procedure:
- Flip the unit's Strength marker to its disorganized side.
- If an infantry unit force marches, roll one die and subtract 1 from the roll. If a cavalry unit force marches, roll two dice and subtract 1 from the dice sum. The result is the number of MP added to the active unit's Movement Allowance as determined in Step 1 of the March procedure. The minimum MP bonus gained by an infantry unit's force march is 2, even if the modified roll is 0 or 1. The minimum MP bonus gained by a cavalry unit's force march is 4, even if the modified roll is 1, 2, or 3.
- If the unmodified roll in Step 2 is 6 (for infantry), the active unit's Manpower Value is reduced by two if its current Manpower Value is 6 or more; otherwise, its Manpower Value is reduced by 1. If the unmodified roll in Step 2 is from 2 to 5 (for infantry) or 8 or more (for cavalry), the active unit's Manpower Value is reduced by one. New Strength markers are placed on their disorganized sides. If the unmodified roll in Step 2 is 1 (for infantry) or 7 or less (for cavalry), the active unit's Manpower Value is unaffected.
March Example: The Union player takes initiative and declares a march with Newton's infantry division, which currently is exhausted at Fatigue Level 1 with an organized Strength marker (Manpower/Combat value of 7). The Union player rolls a die to determine Newton's Movement Allowance, obtaining a 3. Newton's Fatigue Level is increased to 2, indicating that an extended march is in effect because of his exhaustion. The Union player rolls a die, obtaining a 4, and consults the Extended March Table, cross-referencing 4 with the "Organized" column. One is added to the roll because the +1 modifier for "Other Union Units" in the "Union Army Modifiers" is the only modifier that applies. The result is "NE," so Newton is unaffected by the extended march. The Union player decides to force march Newton, which is permissible because of his organized Strength marker. He flips Newton's Strength marker to its disorganized side and rolls a die, obtaining a 1. This is reduced by 1 to 0, but the minimum MP bonus in an infantry force march is 2. Thus, Newton's final Movement Allowance is 5 (3 + 2). The Active Movement Allowance marker is placed in the "5" box on the Movement Track. Newton does not suffer Manpower value loss due to the force march because the unmodified force march die roll was 1.
5.2 Activate Leader
The "activate leader" action enables a player to perform one or more consecutive march actions with eligible military units in the same Action Phase. The following actions may not be performed in an Activate Leader action: Assault, Burn RR Station, and (in Advanced Game scenarios) RR or amphibious embarking and movement. Only one district, division, or corps leader at a time may be chosen for activation. A leader is eligible for activation only if one or more units within his command radius belonging to his command are at a Fatigue Level of 3 or less. A leader activation is performed as follows:
-
The player with initiative selects an eligible leader anywhere on the map.
-
The player with initiative must select one or more units belonging to the active leader's command that are situated within the leader's command radius (other than the leader itself). All of the units selected to participate in an activate leader action must be at a Fatigue Level of 3 or less. Place a Union or Confederate "Leader Activation" marker on top of each unit selected. The player is not obligated to select every eligible unit within the leader's command radius, although he may do so. He must select at least one. In all games there will be units that do not belong to any leader's command. (Example: Union cavalry units in SIV, OTR, SJW, HCR, SLB and AGA do not belong to a command since there are no Union cavalry leaders in those games). These units may not be selected to join an activate leader action. They may only perform march and entrenchment actions individually. The following are special exceptions to this rule:
- Artillery units in all games may be selected to join in an Activate Leader action of any non-cavalry leader, even though they do not belong to the active leader's command.
In 1864-1865, or in 1863 if playing with the "Entrenchment" action optional rule, the player must declare whether each unit selected will march or entrench. This designation must occur in Step 2 of this procedure, prior to the calculation of the Movement Allowance. The player is free to have some units march and others entrench during a single Activate Leader action.
(Optional) A unit at Fatigue Level 4 may be selected to march (not entrench) in Step 2 of an Activate Leader action if its Strength marker is organized. If a unit at Fatigue Level 4 marches, its Strength marker is automatically flipped to its disorganized side. (It retains its Fatigue Level 4 marker.) The player does not consult the Extended March Table. If a unit at Fatigue Level 4 marches, it may not also force march.
Special Rule For On To Richmond: In OTR, if the Union player is performing the Activate Leader action, he is limited in the number of units he may select by the number he rolled during the just-completed Initiative Segment of the current Action Phase:
Union Die Roll Result
Leader Activation Example (from AIO): The Union player takes initiative and declares an "Activate Leader" action with Logan. Four divisions are situated within Logan's command radius: Osterhaus (Fatigue Level 4), ML Smith (FL 0), Harrow (FL 1), and Veatch (part of XVI Corps). All four divisions are on their normal sides. Osterhaus is not eligible to participate because he is at FL4; Veatch may not participate because he is part of XVI Corps. Thus, only ML Smith and Harrow are eligible to participate and the Union player chooses them both. He places a Leader Activation marker on both units. The Union player rolls a die, obtaining a 4. Since the movement allowance is one die plus one, the Leader Movement Allowance marker is placed in the "5" box of the Movement Track, where it remains for the duration of the action. Logan, who is currently stacked with ML Smith, now transfers to Harrow's hex. The Union Player performs a march action with Harrow, whose Leader Activation marker is removed. Harrow's FL is increased to 2, so an extended march is not in effect. No force march is performed, so the Active Movement Allowance is placed in the "5" box in the Movement Track. Harrow's march ends when the Active Movement Allowance marker reaches 0. Next, the Union Player performs a march action with ML Smith. He repeats the procedure that he followed for Harrow (remove the Leader Activation marker, increase FL, place the Active Movement Allowance marker, and perform the march). The Leader Activation now ends and a new Action Phase begins.
5.3 Assault
An "assault" action enables a district, division, or corps leader to attack a single, adjacent, enemy-occupied hex with a group of subordinate units rather than attacking with each individually. Only one leader at a time may be chosen for an assault. A leader is eligible for an assault only if one or more subordinate units in the leader's hex have a Fatigue Level of 3 or less. MP are not used in an assault, and the active player does not roll a die to determine a Movement Allowance. Assaults are explained in detail in the combat section (see 7.1).
5.4 Burn RR Station
Who May Burn RR Stations. Only a single military unit (not a leader) may be chosen to perform a burn RR station action. A unit is eligible for this action if it occupies a RR station hex and is at a Fatigue Level of 3 or less; it may not be chosen if it is at Fatigue Level 4. The unit's Strength marker may be organized or disorganized, but it must have a Combat Value (not Manpower Value) of 2 or more and cannot be demoralized. Units in SIV and OTR may not burn RR stations.
Procedure. The player with initiative selects a single eligible unit anywhere on the map. The chosen unit's Fatigue Level is immediately increased by one. The unit gains a new Fatigue marker (or has an existing marker flipped over) to reflect the change. An extended march never occurs as a result of a burn RR station action, even if the unit goes to a new Fatigue Level of 2, 3, or 4.
If the unit's Combat Value is 2, 3, or 4, place a Damage marker in the RR station hex; if the unit's Combat Value is 5 or more, place a Destroy marker in the hex. The presence of other friendly units in the hex has no effect on the type of marker placed in the RR station hex. The action is now over and a new Action Phase begins. Damage/Destroy markers remain in place for the duration of the game. (Exception: Damage/Destroy markers may be removed in the Advanced Game in some of the volumes in the series). However, an existing Damage marker is flipped over to its Destroy side at the moment a unit with a Combat Value of 5 or more performs a burn RR station action in that hex. An existing Damage marker is unaffected if a unit with a Combat Value of 2, 3, or 4 performs a burn RR station action in that hex. A Destroy marker is unaffected if other units later perform a burn RR station action in that hex.
5.5 Entrenchment
Who May Entrench. In any 1864 or later scenario, or in a 1863 scenario if this Entrenchment Action optional rule is used by mutual consent of the players, players may add an "Entrenchment" action to the menu of actions available to active units. Exception: this Action is prohibited in TOM. Entrenchment actions may be performed by units activated individually or as part of an Activate Leader action. Entrenching during the Action Cycle is always in addition to normal entrenchment rules. Eligible units may still entrench in Step 1 of the Recovery Phase.
Entrenchment Action Restrictions. The unit must meet all the following conditions to be selected for an Entrenchment action:
- It must be a military unit (not a leader)
- It must be at a Fatigue Level of 0, 1, or 2 if the year is 1863 (Fatigue Level 0, 1, 2, or 3 in 1864-1865). Units may not perform entrenchment actions if the year is 1862 or earlier.
- It must not be demoralized. (It may be exhausted, and its Strength marker may be disorganized.)
- It must not already possess a completed Fort marker.
Note: A unit may perform more than one Entrenchment Action per turn, assuming it is eligible.
Entrenchment Action Procedure. If an entrenchment action is declared, the active player follows one of the following two procedures, depending on the year of the game.
(Optional) 1863 Procedure:
- The active unit's Fatigue Level is increased by two. (An extended march never occurs as a result of an Entrenchment action.)
- The player places an Entrenchment marker on the active unit (or adjusts an existing Entrenchment marker) as follows:
- If the active unit does not currently possess an Entrenchment marker, place a Breastwork–Build marker atop the unit.
- If the active unit already possesses a Breastwork–Build marker, flip the marker to its Complete side (or, if using an RTG Breastwork marker, change it from a sideways to a normal alignment).
- If the active unit already possesses a completed Breastwork marker, place a Fort–Build marker atop the unit.
- If the active unit already possesses a Fort–Build marker, flip the marker to its Complete side.
- The Entrenchment action ends, and a new Action Phase (or the next action in an Activate Leader action) begins.
1864-1865 Procedure:
- The active unit's Fatigue Level is increased by one. (An extended march never occurs as a result of an Entrenchment action).
- The player places an Entrenchment marker on the active unit (or adjusts an existing Entrenchment marker) as follows:
- If the active unit does not currently possess an Entrenchment marker, place an Abatis marker atop the unit. Exception: If an active unit is in a redoubt hex (that it is eligible to benefit from – see 9.0), place a Breastwork-Build marker atop the unit.
- If the active unit already possesses an Abatis marker, flip the marker to its Breastwork-Build side.
- If the active unit already possesses a Breastwork-Build marker, place a Breastworks marker atop the unit.
- If the active unit already possesses a Breastworks marker, flip the marker to its Fort-Build-1 side.
- If the active unit already possesses a Fort-Build-1 marker, place a Fort-Build-2 marker atop the unit.
- If the active unit already possesses a Fort-Build-2 marker, flip the marker to its Fort-Complete side.
- The Entrenchment Action ends, and a new Action Phase (or the next action in an Activate Leader action) begins.
6.0 March And Movement
6.1 Rules of Marching
A marching unit may move and/or attack.
Movement. A unit moves from hex to adjacent hex, expending a number of Movement Points (MP) equal to the cost of the major terrain in the hex entered (see the Terrain Chart). A marching unit can expend some, all, or none of its MP (unused MP may not be saved from march to march, nor may they be transferred between units). As a unit expends MPs, the Active Movement Allowance marker is adjusted downward on the Movement Track. The unit may no longer move when the marker reaches 0.
Attack. Attacks (except for assaults) are part of the march procedure. A marching unit may attack any single adjacent hex occupied by enemy units. There are four types of attacks, each of which expends a different number of MP. (The MP cost also varies for infantry and cavalry units.) A unit may not attack if it does not possess the requisite MP. The four attacks and their MP costs are:
- Column of Route: 0 MP (for both infantry and cavalry)*
- Hasty: 1 MP for infantry; 2 MP for cavalry
- Normal: 2 MP for infantry; 4 MP for cavalry
- Prepared: 4 MP for infantry; 8 MP for cavalry
* A column of route attack may not be declared if a unit's Movement Allowance is 0; it may only be used if the unit has a Movement Allowance of 1 or more at the moment of declaration.
Note: The defender's terrain does not affect an attack's MP cost. The four types of attacks listed above are used only for units attacking in a march—they are not used in an assault. Exception: If the defender is in loess terrain, a +1 MP penalty applies to the MP cost to undertake that attack (e.g., a Prepared attack carried out by an infantry unit against a loess hex would cost 5 MP, not 4).
6.2 Rules of Movement
Roads, Pikes, Railroads. If a unit enters a hex through a hexside crossed by a road, pike, or railroad (RR), it ignores the cost of the hex's major terrain and instead pays 1 MP. Unfinished railroads are treated as roads (not railroads) for all game purposes.
Trails. If a unit enters a mountain hex through a hexside crossed by a trail, it expends 2 MP. If a unit enters a non-mountain hex through a hexside crossed by a trail, it expends 1 MP.
Mountains. A unit may never enter or exit a mountain hex unless this move is performed across a hexside crossed by a road, pike, trail, or railroad.
Ridges. If a unit enters a hex across a ridge hexside, it must expend an additional 1 MP above the normal cost for entering the hex. This applies even if the hexside is crossed by a road, pike, trail, or RR, and regardless of the direction of movement (i.e., there is a penalty both when moving up and when moving down the ridge).
Bluffs. Bluff hexsides currently only appear in TOM – see the TOM Basic Rules for all rules regarding bluff hexsides.
Swamps. A unit may never enter or exit a swamp hex unless this move is performed across a hexside crossed by a road, pike, or RR. Provisional swamp hexes function in all respects as rough hexes except in rain turns, when they convert to normal swamp hexes (see 12.0).
Rivers. A unit may not cross a major or minor river hexside except at a bridge, dam, ferry, or ford. A unit crossing a bridge, dam, or ford pays no MP penalty. (The MP cost of the major terrain in the hex entered is negated if the bridge, dam, or ford is crossed by a road, pike, or RR—and the road, pike, or RR MP cost is used instead.)
Dams. Dams are considered indestructible bridges in all GCACW games. A unit may cross a dam over a major or minor river with no movement point penalty, even in a rain turn, just as if it were a bridge. Unlike bridges, dams may not be destroyed. In SLB, dams were not official terrain features although they were labeled on the maps. When using the GCACW Standard Rules in SLB the only crossing labeled as a "Dam" that should be treated as a Dam and not a ford is Scott's Dam Ford (SLB S3526). The following crossings labeled as a Dam in various GCACW games that are fords (as graphically shown on the maps) and not dams are: Occoquan Dam at SLB S5304 or SJW S5304 and Strider's Dam at SIV N4322.
Ferries. A unit may cross a ferry over a minor river in non–rain turns with no MP penalty, just as if it were a ford. However, at a major river ferry on any turn (regardless of weather), or at a minor river ferry in a rain turn or while unfordable, the unit must pay a MP penalty (simulating the use of boats to cross). The unit's Manpower value is divided by 3 (drop fractions). The result is the MP penalty to cross the ferry. This penalty is in addition to the normal MP cost to enter the hex on the far side of the ferry (typically road movement cost).
In SIV and SLB ferries were not official terrain features although they were labeled on the maps. When using the GCACW Standard Rules in those two games, only Berry's Ferry (SIV M5608) is now considered a ferry.
Note: All fords labeled as ferries on the Potomac River are NOT considered ferries. They remain fords in the GCACW Standard Rules.
Creeks. Creek hexsides do not affect movement. Units may cross them at no special MP cost.
Enemy-Occupied Hexes. A unit may not enter a hex occupied by enemy units (but see 7.6).
Enter Enemy Zone of Control. A unit must stop its movement at the moment it enters an enemy normal ZOC hex from a hex that is not in an enemy normal ZOC. The unit must then either attack or end its march. If the unit attacks successfully (i.e., it does not receive a "D," "F," "f," or "E" combat result), it is allowed to continue its march by moving and/or attacking. (However, if after a successful attack it still occupies an enemy normal ZOC, it again must either attack or end the march.) A unit must stop upon entering an enemy normal ZOC even if that ZOC is occupied by a friendly unit. If a unit enters an enemy cavalry unit's normal ZOC and the enemy unit performs a cavalry retreat, the unit may continue its march. A unit may not refuse flanks (7.8) when entering an enemy normal ZOC; however, it may refuse flanks if it marches in place in an enemy normal ZOC. In scenarios allowing Detachment (Advanced Game scenarios and Basic Game scenarios that specifically allow Detachment), a unit may detach a substitute when entering an enemy normal ZOC.
Exit Enemy Zone of Control. An active unit may not exit an enemy normal ZOC hex unless it starts its march in an enemy normal ZOC hex and its first activity is to exit that ZOC:
- ZOC to non-ZOC: If it moves from an enemy normal ZOC hex directly to a hex that is not in an enemy normal ZOC, it pays normal MP costs plus 1 MP to enter that hex. Assuming the unit has MP remaining, it may continue its march.
- ZOC to ZOC: If it moves directly from one enemy normal ZOC hex to another, it ignores the hex's MP cost and instead pays a cost equal to the unit's entire Movement Allowance. This penalty applies even if the enemy normal ZOC hex entered is occupied by a friendly unit and even if the two enemy ZOC emanate from different enemy units not in the same hex. Since the unit then has 0 MP left, its march is over and it may not attack. (Even though a hex's normal MP cost is ignored, a unit may still not enter or exit a mountain or swamp hex—except by road, pike, RR or trail—or cross a major/minor river hexside, except by ford, bridge, dam, or ferry.) If a unit moves directly from one enemy normal ZOC hex to another and the two hexes are not connected by a road, pike, RR or trail, the unit's Strength marker is flipped to its disorganized side. (If it is already disorganized, reduce the Strength marker's Manpower value by 1.) Disorganization or loss is not applied if the unit moves from one enemy normal ZOC hex to another and the two hexes are connected by a road, pike, RR or trail. A unit may neither attack nor refuse flanks (7.8) when moving directly from one enemy normal ZOC to another enemy normal ZOC.
Restricted ZOC. "Restricted" ZOC hexes—those into which a ZOC is exerted across a woods or loess hexside not containing a road, pike, RR or trail (see 2.4)—do not affect movement in any way.
Enter Friendly-Occupied Hex. An active infantry, artillery, or wagon train unit must pay an MP penalty to enter a hex already occupied by one or more friendly infantry and/or artillery units with a combined Combat Value of 3 or more, or a hex occupied by a wagon train. The MP penalty depends on the major terrain in the hex entered. MP penalties to enter a friendly-occupied hex are not cumulative: the highest MP penalty in city, clear, rough, rolling, and hill hexes is +2; the highest MP penalty in woods, swamp, and mountain hexes is +4. Cavalry units do not pay such MP penalties and do not trigger them if a friendly infantry, artillery, or wagon train unit enters their hex. Note: The active unit's Combat value is not counted when entering the friendly-occupied hex.
| Combined Combat Value in Hex | City, Clear, Rough, Rolling, Hill | Woods, Loess, Swamp, Mountain |
|---|---|---|
| Less than 3 | NE | NE |
| 3 to 11 | +1 MP | +3 MP |
| More than 11 | +2 MP | +4 MP |
| Wagon Train | +2 MP | +4 MP |
Note: The combined Combat value may fall exactly between two rows of the chart above (e.g., 11.5). If so, round the value up.
Cavalry Retreat. When an active infantry unit moves into the normal ZOC of an enemy cavalry unit—before the active player declares an attack—the cavalry unit may make a cavalry retreat (see 7.7).
Minimum 1 Hex Movement. As long as a unit does not attack during its march, it may always move at least one hex—even if its Movement Allowance is not sufficient for it to enter an adjacent hex. Exception: A unit may still not enter or exit a mountain or swamp hex (except by road, pike, RR or trail), or cross a major or minor river hexside (except at a bridge, dam, ford, or ferry). If an enemy cavalry retreat reduces an active unit's Movement Allowance to 0 before it has moved in its march, it may still move one hex. If a unit begins a march adjacent to a ferry hexside and does not have enough MP to cross due to the ferry MP penalty, it may cross that ferry hexside anyway using all of its available MP.
6.3 Leader Movement
A leader may never occupy a hex by itself; it must always be stacked with a subordinate unit. A leader is considered "attached" to a unit with which it is stacked and must move with that unit wherever it goes during a March or Activate Leader action (exception: see "Leaders and Combat," below). More than one leader may be attached to the same unit if they represent different organizational levels (e.g., a division and corps leader; or a corps and army/district leader). Once a unit with one or more attached leaders begins its movement in a March or Activate Leader action, it may not "drop off" a leader and attach it to a different unit in any hex entered during that action. A leader may neither move nor activate by itself, although it may "transfer" (see below).
Leaders and Combat. If a unit with one or more attached leaders is forced to retreat, the leaders must remain with that unit throughout the retreat. If, during its retreat, it enters a hex occupied by other units, it may not "drop off" a leader and attach it to another unit in that hex. If a unit with one or more attached leaders is eligible to advance after combat (see 7.6), the leaders accompany the unit during the advance. (Exception: If more than one unit is eligible to advance after combat, and some advance while others do not, the owning player may either keep leaders attached to their current unit, or he may reattach one or more of them to another subordinate unit in the hex immediately before the advance is undertaken.)
Leader Transfer. A leader may transfer from unit-to-unit in two ways:
Leader Transfer Phase: During the Leader Transfer Phase, the owning player may transfer some, none, or all of his leaders from one subordinate unit to another. To perform a transfer, the owning player must trace a path of contiguous hexes no more than 10 hexes in length from the leader's hex (exclusive) to the hex occupied by the unit to which the leader wishes to transfer (inclusive). This path may not enter enemy-occupied hexes, but it may enter enemy ZOC. It may transit any terrain type, including swamps, mountains, and rivers. The Union player must perform all desired transfers in the Leader Transfer Phase before the Confederate player executes any leader transfers.
Activate Leader Action: Leaders may transfer during an "activate leader" action (see 5.2). Such a transfer may only be performed once per action, and only before units march.
Army and District Leaders. Army and district leaders are subject to the following restrictions:
- They may transfer in the Leader Transfer Phase, but they may not attach to a cavalry/artillery unit or cavalry leader.
- If a District Leader is the Active Leader then he can leader transfer per section 5.2 step 5.
- If they are situated in the same hex as an active leader performing an Activate Leader action, they may transfer with the active leader in Step 5 of the Activate Leader procedure, although they are not obligated to do so. If an army/district leader transfers, it must transfer and attach to the same unit as the active leader. Exception: If the active leader is a cavalry leader, an army/district leader may not transfer in Step 5 of the Activate Leader procedure.
- If an army/district leader occupies a hex with more than one subordinate infantry unit, and one of those units to which the army/district leader is not currently attached leaves the hex during a March or Activate Leader action (including an advance after combat), the leader may attach to the departing unit or it may remain in the hex and stay attached to its current unit.
- An army/district leader is not obligated to be attached to an infantry unit to which a non-army leader is also attached. The army/district leader may be attached to an infantry unit by itself.
6.4 Stacking
An unlimited number of friendly units and leaders may occupy the same hex at a given time.
Force Markers. Since stacks of counters are unwieldy, players should use substitute counters called "Force markers" when they have more than two units per hex. Each player has his own set of Force markers and a corresponding Force Display. Each Force marker is identified by number and has a corresponding box on the display. A player may remove an unwieldy stack of counters from the map at any time and place the units, leaders, and markers comprising this stack in an empty box of the display. (Place units and markers in separate piles so they may be viewed at a glance.) Then the Force marker corresponding to this box is placed on the map in the hex formerly occupied by the stack. All units and leaders comprising a force are considered to occupy the hex in which the Force marker is situated, and they exert ZOC normally. Subject to normal marching rules, units and leaders may leave the force and be placed back on the map at any time the owning player wishes. Units may freely join a force if they end a march in the same hex as the marker. Force markers have no effect on play. Players are not obligated to use them.
6.5 Fatigue Levels
A unit's Fatigue Level is increased when it performs an action. It may also be increased due to combat. A unit at Fatigue Level 4 may not perform an action, although it may defend and retreat due to combat. Players may wish to turn units sideways when they reach Fatigue Level 4 so that they can see at a glance which units are no longer eligible for activation. (Exception: If playing with the optional rule in Sections 5.1 and 5.2, units at Fatigue Level 4 may activate if their strength marker is organized).
7.0 Combat
7.1 Attacks
Only a unit performing a march or units participating in an assault action may attack.
Targets Of Attacks. An attacking unit (or group of units in an assault) may attack any single, adjacent hex occupied by one or more enemy units. If the attacking unit is adjacent to more than one enemy-occupied hex, it may attack only one hex of the active player's choice.
Participation In Attacks. Attacks are never mandatory. In a march, only the active unit may attack. All other friendly units, even those stacked in the same hex as the active unit, never participate in the attack. A unit may attack more than once per march as long as it has the requisite MP and does not suffer a prohibitive result on the Combat Results Table. In an assault action, only subordinate units stacked in the same hex as the active leader may participate in the attack. (Exception: see "grand assault.") A maximum of one attack may take place per assault action.
Participation In Defense. All units in a hex being attacked must participate in that combat. The attacker may not single out a unit in the hex as a target, and the defender may not withhold units in the hex from combat.
Attack Restrictions
- Rivers: An attack may not take place across a major or minor river hexside unless a bridge, dam, ferry, or ford connects the attacker's and defender's hexes.
- Mountains and Swamps: An attack may not take place against a unit in a mountain or swamp hex unless the attacker's and defender's hexes are connected by a road, pike, RR or trail. A unit in a mountain or swamp hex may not attack an enemy unit unless the two hexes are connected by a road, pike, RR or trail.
- Artillery: Artillery units may not be the only units in an attack (marching or assault).
- Woods or Loess Hexsides: A unit may only attack across a "woods hexside" or "loess hexside" (see 2.3) if it meets either of the following conditions: it starts the action in the hex from which the attack is made; or there is a road, pike, RR or trail connecting the attacker's and defender's hexes. In this case it is permissible for the active unit to have marched one or more hexes before initiating the attack across the woods or loess hexside.
Attack Procedure (Marching Unit Only). A unit performing a march may attack as follows:
- Select Target: The active player states the attack's target.
- Select Attack Type: The active player states his type of attack: column of route, hasty, normal, or prepared (see 6.1). Adjust the Active Movement Allowance marker downward on the Movement Track by the attack's MP cost.
- Determine Combat Values: The players determine their Combat values and calculate the "ratio modifier" to the attacker's die roll in Step 5.
- Determine Die Roll Modifiers: The players determine the "tactical" and "artillery" modifiers and any other modifiers applying to the combat (see 7.4).
- Roll Dice: The attacker and defender each roll a die, modifying their rolls as required. The defender's modified roll is subtracted from the attacker's modified roll. The players consult the Combat Chart and apply the results (see 7.5).
- Continue Action: If the marching unit has remaining MP and the combat result does not require it to end the action, it may continue to perform its march. If the unit has no more MP or the result calls for the march to end, the action is over and a new Action Phase begins.
Attack Procedure (Assault Action Only). A corps, division or district leader may be selected for an assault only if one or more subordinate units at Fatigue Level 3 or less are stacked with that leader. A Movement Allowance is not calculated in an assault and MP are not used—thus, the active player does not specify a type of attack (column of route, hasty, normal, prepared). An assault is performed as follows:
-
Select Participants: The active player selects an eligible leader. Next he chooses one or more units in the active leader's hex belonging to the same command as that leader. Each unit selected to participate in the action must be at Fatigue Level 3 or less. Exception: A player may select one or more artillery units occupying the same hex as the active leader to participate in an assault even though the artillery units do not belong to the leader's command. Note: an artillery unit may never be the only unit in an assault.
-
Increase Fatigue: Each unit selected to participate in the assault in Step 1 has its Fatigue Level increased by one. Note: An "extended march" never occurs as a result of an assault action, even if the unit goes to a new Fatigue Level of 2, 3 or 4.
-
Select Target: The active player states the target of the attack, which must be a single, adjacent, enemy-occupied hex.
-
Cavalry Retreat: The enemy player may conduct a cavalry retreat with eligible units (see 7.7).
-
Roll for Command: The active player rolls a die. This roll may be modified.
- If he rolls a 6 (before modification), the assault automatically ends. Begin a new Action Phase—do not proceed to Step 6.
- If the roll is 5 or less, apply any appropriate modifier to this roll (see below), and subtract the modified number from the active leader's Command value. The result is the "Assault Number." If the Assault Number is less than 0, the assault ends. Begin a new Action Phase—do not proceed to Step 6. However, if the Assault Number is 0 or greater, the assault takes place—continue the assault procedure. The Assault Number is the maximum number of attacking units that may participate in the assault. (If the Assault Number is 0, one unit must participate.) If the Assault Number is equal to or greater than the number of units selected in Step 1, all the units selected in Step 1 (and no more) must participate in the assault. If the Assault Number is less than the number of units selected in Step 1, the active player must choose (from among the units selected in Step 1) a number of units to employ which equals the assault number. (The assault must proceed, even if the number of units actually employed is less than the number selected in Step 1.) Regardless of whether or not an assault takes place, all units selected to participate in Step 1, even if they ultimately are dropped from the assault, gain one Fatigue Level in Step 2.
Example (from AIO): Corps leader Palmer (XIV Corps, Command value, 5) is performing an assault. He is stacked with two XIV Corps subordinate divisions (Johnson and Baird). Both divisions are selected to participate in the assault in Step 1. The Union player rolls a die, obtaining a 5. Subtracting 5 from Palmer's Command value (5) yields 0, indicating that the assault takes place—but with only one unit. The Union player retains Johnson and drops Baird from the assault. But both divisions have their Fatigue Levels increased by one.
Grand Assault. A player may attempt a "grand assault" in Step 6 of the assault procedure only if all of the following conditions are in effect:
- Army or District Leader: A friendly army or district leader is situated within the command radius of the active leader's hex. A district leader who successfully initiated an assault may himself attempt a grand assault.
- Eligible Hexes: One or more of the six hexes adjacent to the defender is eligible to join a grand assault. A hex is eligible to join a grand assault if both of the following conditions are met: it is adjacent to the defender (including the hex in which the assault action was initiated); and it must be occupied by one or more of the attacker's units which were not selected to participate in the active leader's assault, and at least one of those units is at Fatigue Level 3 or less.
- Non-Cavalry Leader: The active leader initiating the current assault must not be a cavalry leader.
- Combat Value: The total Combat value of the units committed to the Assault action is 3 or more. Exception: this requirement does not apply in AGA and SIV.
A maximum of one grand assault may be attempted per action, although an unlimited number may be attempted per turn. A grand assault is attempted as follows:
-
Roll for Command: The active player rolls a die. In the Basic Game of all GCACW games, this roll is never modified (except if the defender occupies a loess hex add 1 to the die roll). In some Advanced Games, however, it may be modified (see below).
- If the modified roll is 6 or more, the grand assault does not take place. The grand assault ends—return to Step 7 of the assault procedure.
- If the modified roll is 5 or less, subtract the number rolled from the army (or district) leader's Command value. The result is the "Grand Assault Number." If the Grand Assault Number is 0 or less, the grand assault does not take place. Return to Step 7 of the assault procedure. If, however, the Grand Assault Number is 1 or more, the grand assault must take place. Proceed to Step 2.
Note: Advanced Game grand assault die roll modifiers, such as SLB's "Hooker Loses Confidence" (SLB, 16.0), and OTR's Union "Passive" Command Posture (OTR, 18.0) are in effect in all applicable scenarios.
-
Select Eligible Hexes: From among the six hexes adjacent to the defender, the attacker must select a number of eligible hexes (not units) equal to or less than the Grand Assault Number which he wishes to use in the grand assault. He must select at least one hex. An "eligible hex" is defined above.
-
Select Participants: In each hex selected in Step 2, the active player must select one or more eligible friendly units to join the grand assault. A unit is eligible to join a grand assault if it meets all the following conditions:
- It has a Fatigue Level of 3 or less.
- It must be eligible to participate in an attack as described in the "Attack Restrictions" rules.
- It must not have already been selected (successfully or unsuccessfully) in Step 1 of the assault procedure.
A unit's command affiliation is irrelevant in this step. Any eligible unit, regardless of its command (including all cavalry and artillery units) may join in a grand assault. Exception: Refer to the specific game module you are playing for any exceptions regarding any restrictions on units that can be selected to participate in the Grand Assault. Note: The attacker may not back out of a grand assault once the grand assault procedure goes beyond Step 1. Each hex chosen by the attacker in Step 2 must contribute at least one eligible unit to the grand assault.
Example (from AIO): Hardee, in hex W3014, successfully initiates an assault on hex W2914. Army leader Johnston (Command value 4) is in hex W3117, within Hardee's command radius. A non-active Confederate unit is in hex W3013 and another in W2813, both at Fatigue Level 2. Thus the Confederate player may attempt a grand assault. He rolls a die, obtaining a 1. Thus, the Grand Assault Number is 3 (Johnston's Command value [4] minus die roll [1] is 3). The grand assault must take place. The Confederate player selects two eligible hexes, W3013 and W2813. The non-active unit in each hex must be chosen to join the grand assault, and each unit's Fatigue Level is increased to 3. Both units contribute their Combat and Artillery values to Hardee's assault.
7.2 Combat Values
Every military unit has a Combat value shown on its accompanying Strength marker. A unit's Combat value varies depending on whether its Strength marker is organized or disorganized. If a unit's Strength marker is organized, its Combat value is simply the number shown on the marker. If a unit's Strength marker is disorganized, its Combat value is the smaller number in value. A unit with a disorganized Strength marker may have a Combat value of 1/2. If so, this fraction is retained in combat—it is not rounded up or down.) A unit's Fatigue Level has no effect on its Combat value. In combat, the attacker and defender combine the Combat values of all their participating units. Players cannot withhold any part of their units' Combat values. To determine the Combat value of an attacking unit in a march action, simply use that unit's Combat value alone (no other units may join the attack). To determine the final Combat value in an assault, combine the Combat values of all units participating in that assault, and add in the Combat values of those units joining in a grand assault (if any). To determine the final Combat value of defending units, combine the Combat values of all units in the defending hex.
Maximum Values. The maximum combined Combat Value of attacking and defending units is limited as shown in the table below (note that there are different limits in OTR). In a grand assault, the limit shown below applies to each hex containing attacking units, so the overall total from all hexes may exceed the number listed in the "Attacking" row below.
| Situation | OTR | Other Games |
|---|---|---|
| Attacking | 70 | 80 |
| Defending | 60 | 70 |
| Defending: At least ½ defending units entrenched | 100 | 120 |
| Defending: All defending units entrenched | 130 | 160 |
If in a grand assault, the total Combat value of attacking units is 80 or more, the attacker's Manpower value loss in that combat is increased as follows:
- If the attacker's Combat value is 80 to 89, his Manpower value loss number is increased by 1.
- If the attacker's Combat value is 90 to 99, his Manpower value loss number is increased by 2.
- If the attacker's Combat value is 100 or more, his Manpower value loss number is increased by 3.
7.3 Artillery Values
A unit's Artillery value is shown directly on the unit itself. A unit's Fatigue Level or Strength marker (organized or disorganized) has no effect on its Artillery value. Artillery values are used to determine the "artillery modifier" in combat (see 7.4).
7.4 Combat Die Roll Modifiers
Several factors modify combat die rolls. Modifiers are cumulative.
Ratio Modifier. The attacker's die roll must be modified by the ratio modifier. To calculate this modifier, compare the attacker's Combat value sum to the defender's Combat value sum and round this ratio down in favor of the defender to conform to one of the simplified ratios listed on the Ratio Chart. A modifier from –12 to +13 is listed next to each ratio. This is the ratio modifier.
Tactical Modifier. The attacker's die roll is modified by the tactical modifier. To calculate this modifier, the defender determines the highest Tactical value among the units and leaders in the defending hex. Meanwhile, the attacker makes the same determination among his units and leaders participating in the attack. A leader may contribute its Tactical value to an attack only if it is stacked in the same hex as a subordinate attacking unit. The defender's Tactical value is subtracted from the attacker's Tactical value. The result is the tactical modifier, which is added to (or, if a negative number, subtracted from) the attacker's die roll.
Some units have a split tactical, which consists of a number before and after a slash in the tactical position on the counter. The number before the slash is the tactical modifier to use when the unit attacks; the number after the slash is the tactical modifier to use when the unit defends.
In a March or Activate Leader action, a leader may contribute its Tactical value to any attack made by a subordinate active unit in the leader's hex, even if the attack is not being made by the unit to which the leader is attached. However in an assault action, the tactical value of the leader initiating the assault is always used, never the tactical value of a military unit or other leader.
Artillery Modifier. The attacker's die roll may be modified by the artillery modifier. (Note: If the defender occupies a woods, city, mountain, or swamp hex, it is not necessary to determine an artillery value differential because no artillery modifier can possibly apply in that circumstance.) The attacker adds the Artillery values of all attacking units and subtracts the combined Artillery values of all defending units from this sum. The result is the "Artillery Value Differential." On the Artillery Modifier Summary, cross-index the appropriate Differential column with the line corresponding to the terrain in the defender's hex. The result (a positive or negative number, or no effect) is the artillery modifier that is applied to the attacker's die roll. Some results call for the attacker to roll the die to determine the final artillery modifier. Note: the final artillery value in the defender's hex is rounded up due to any entrenchments (see 9.0).
Special Cases:
- If neither the attacker nor defender have Artillery values, no artillery modifier applies.
- If the defender's Artillery value is 0, a negative artillery modifier is converted to "no effect."
- If the total of the defenders' printed Artillery values (not counting entrenchments) in the hex is 1, a -2 modifier is converted to -1. If the total of the defenders' printed Artillery values (not counting entrenchments) in the hex is 2, a -3 modifier is converted to -2.
Artillery Modifier Summary (Attacker's Artillery Value Minus Defender's Artillery Value):
| Defender's Terrain | –4 or Less | –3 to +1 | +2 to +4 | +5 to +7 | +8 or more |
|---|---|---|---|---|---|
| Clear | -3 | -2 | NE | +1 | +2† |
| Rolling | -2 | -1 | NE | +1* | +1 |
| Rough/Hill/Loess• | -1 | -1* | NE | NE | +1* |
| Woods/City/Mtn | NE | NE | NE | NE | NE |
* Just prior to combat, roll a die. If roll is even, indicated modifier is used; if roll is odd, no modifier is used. † Just prior to combat, roll a die. If roll is even, +2 modifier is used; if roll is odd, +1 modifier is used instead. • Also applies to provisional swamp hexes in non-rain turns. § Also applies to provisional swamp hexes in rain turns. NE: No effect
Terrain. The defender's die roll may be modified by terrain:
- Bridge/Dam/Ferry/Ford: If an attack takes place across a bridge, dam, ferry, or ford hexside, the defender adds 2 to his roll.
- Creek: If an attack takes place across a creek (even across a road, pike, RR, or trail hexside), the defender adds 1 to his roll.
Note: If, in a grand assault, more than one hex adjacent to the defender's hex has attacking units, the above modifiers apply only if the defender's hex is separated from the active leader by a bridge, dam, ferry, or ford—or a creek hexside.
- Hill: If the defender occupies a hill hex, he adds 1 to his roll. However, if the active attacking unit occupies a hill or mountain hex, or if the active attacking unit is attacking down a ridge hexside, the defender's roll is not modified.
- Mountain: If the defender occupies a mountain hex, he adds 2 to his roll. However, if the active attacking unit also occupies a mountain hex, or if the active attacking unit is attacking down a ridge hexside, the defender adds only 1 to his roll.
- Ridge: If an attack takes place across a ridge hexside, and the active attacking unit is attacking up a ridge hexside, the defender adds 2 to his roll. If the active attacking unit is attacking down a ridge hexside the defender adds 1 to his roll if the defender is in a mountain hex and 0 to his roll if the defender is in any other type of hex.
Note: A unit is attacking up a ridge hexside if the ridge between his hex and the defender's hex is within the defender's hex. If it is within the attacker's hex, the unit is attacking down.
Ridge Combat Example: Geary's Union division occupies Dougherty (AIO W0533), and Cleburne's Confederate division occupies AIO W0532. If Cleburne attacks Geary, Geary adds 2 to his roll (Cleburne is attacking up a ridge hexside). If Geary attacks Cleburne, Cleburne adds 1 to his roll (Geary is attacking down a ridge hexside into a mountain hex).
Lee (Not In RTG). If a Confederate district, corps, or division leader successfully undertakes an assault action and the army leader Lee is currently stacked in the same hex as the active leader, the Confederate player adds 1 to his attack die roll. This bonus is in addition to the +1 modifier due to assault, and is applied regardless of whether or not a "grand assault" takes place. The Lee bonus may never be applied to defending units. The Lee bonus can not be applied in any RTG scenario.
The Lee assault bonus may only be used with assaults started by leaders within one corps per turn. Once the Confederate player uses the Lee assault bonus in an assault in a turn, for the remainder of the turn the bonus may only be used with assaults initiated by leaders (corps or division level) from that corps in the current turn. The SEV district (found in Eastern Theater games after 1864 such as GTC) is treated as a corps for purposes of this rule. The Confederate player must state that the Lee bonus will be used immediately before the assault roll. If the subsequent assault roll fails, Lee's bonus is still tied to that corps for the rest of the turn.
Longstreet. In any scenario occurring in 1864 or later, the Confederate player adds 1 to his attack roll if the corps leader Longstreet successfully undertakes an assault action. This bonus is in addition to the +1 modifier due to assault, and is applied regardless of whether or not a "grand assault" takes place. The Longstreet bonus can never be combined with the Lee bonus.
Jackson. In the games SJW, HCR, and SLB the Confederate player adds 1 to his attack roll if the corps leader Jackson successfully undertakes an assault action. This bonus is in addition to the +1 modifier due to assault, and is applied regardless of whether or not a "grand assault" takes place. The Jackson bonus can never be combined with the Lee bonus. Note: in SLB Stonewall Jackson is treated as a leader with a 4 tactical for offense and defense, despite the 5/4 printed on his counter.
Types Of Attacks. In a march, the type of attack chosen by the active player may modify the attacker's die roll:
- Column of Route: –3 to attacker's roll
- Hasty: –1 to attacker's roll
- Normal: No modifier to attacker's roll
- Prepared: +1 to attacker's roll
Assault Action. In an assault action, modifiers for column of route, hasty, normal, and prepared attacks never apply. Instead, an assault action always provides a +1 modifier to the attacker's die roll.
Rain. The attacker subtracts 1 from all his die rolls in rain turns (see 12.0).
Demoralization–2. If a unit with a Demoralize-2 marker is alone in a hex and is attacked by an enemy unit, the defending player subtracts 1 from his combat die roll. If the demoralized-2 unit is in a stack of friendly units that is attacked, the –1 die roll modifier only applies if at least one-half of the Combat Value in the hex is contributed by Demoralized-2 units.
Flank Attacks. If, at the moment of combat, defending units are partially or completely surrounded by active and inactive enemy units or their ZOC (or impassable terrain), the attacker's die roll is enhanced. This bonus, called a "flank attack," applies even if some of the enemy units surrounding a defender do not participate in the attack. The flank attack bonus is computed as follows:
-
"Covered" Hexes: The active player determines the number of "covered" hexes among the six hexes adjacent to the defender. A covered hex is one meeting any of the following conditions: a. It is occupied by an undemoralized unit friendly to the attacker (including the attacking unit itself). b. It is in the ZOC of any undemoralized unit friendly to the attacker (including the attacking unit itself and including "restricted" ZOC; see 2.4). c. It is a mountain or swamp hex (including provisional swamps in a rain turn) or the defender's hex is a mountain or swamp hex. The two hexes are not connected to each other by a road, pike, RR or trail. d. It is separated from the defender's hex by a major or minor river hexside not containing a bridge, dam, ferry, or ford. (Exceptions: In a turn when a river is unfordable, a hex is covered if it is separated from the defender by a ford hexside over such a river. In a rain turn, a hex is covered if it is separated from the defender by a creek hexside untraversed by a road, pike, trail or RR.) e. It is a hypothetical hex just off the map that would be adjacent to a map edge hex occupied by the defender.
Note: Each of the six hexes adjacent to the defender may be counted only once in this step even if it fulfills more than one definition of "covered."
-
Basic Flank Bonus:
- Six Covered Hexes: If all six hexes adjacent to the defender are covered, the "basic flank bonus" is +4. Proceed to Step 3.
- Five Covered Hexes: If five of the six hexes adjacent to the defender are covered, the "basic flank bonus" is +2. Proceed to Step 3.
- ≤ Four Covered Hexes: If four or less of the six hexes are covered, there is no flank bonus. Skip the rest of this procedure.
-
Final Flank Bonus: The basic flank bonus from Step 2 may be reduced to determine the "final flank bonus." The basic flank bonus is reduced by one for each covered hex meeting at least one of the following conditions: a. It is occupied by an undemoralized unit friendly to the defender. b. It is unoccupied and is separated from all adjacent units friendly to the attacker (including the attacking unit itself) by woods or loess hexsides (see 2.3) untraversed by a road, pike, trail, or RR. c. It is a mountain or swamp hex (including provisional swamps in a rain turn) or the defender's hex is a mountain or swamp hex; AND the defender's hex and the covered hex are not connected to each other by a road, pike, trail, or RR. d. It is separated from the defender's hex by a major or minor river hexside not containing a bridge, dam, ferry, or ford. (This case also includes: 1) a turn when a river is unfordable, if a hex is separated from the defender by a ford hexside over such a river, and 2) a rain turn, if a hex is separated from the defender by a creek hexside untraversed by a road, pike, trail or RR.) e. It is a hypothetical hex just off the map that would be adjacent to a map edge hex occupied by the defender.
Flank Bonus Reductions. The final flank bonus from Step 3 may be reduced in either of the following circumstances:
- Flanks Refused: Flank attack bonuses may be modified by "Flanks Refused" markers. (Flanks Refused markers are no longer optional. They are used in all GCACW games; see 7.8.)
- Cavalry: Flank attack bonuses may be modified if both the attacker and defender possess cavalry units (see "Cavalry and Flank Attacks," below).
Flank Bonus Conditions. The status of the attacker's units may modify a flank bonus. If one or more of the attacker's units occupy or exert a ZOC into a hex adjacent to the defender, and all of those units together have a combined Combat Value (not including entrenchments) less than one-fourth the defender's Combat value (including the defender's entrenchments and possibly capped by the Maximum Value from Section 7.2), that hex is not considered "covered" in Step 1a or 1b of the flank attack procedure. (The attacking player's units in different hexes can combine their Combat values to reach the one-fourth the defender's Combat value total, as long as all of the units are adjacent to the same "covered" hex). Demoralized units (active or inactive) belonging to the attacker may not contribute in any way to the achievement of a flank attack bonus. A unit helping to provide a flank attack bonus which does not participate in the attack may not contribute its Tactical value to a combat, nor does it trigger terrain modifiers.
Cavalry and Flank Attacks. The final flank bonus may be reduced if both of the following conditions are in effect:
- The active attacking unit is a cavalry unit (or the active leader making an assault is a cavalry leader).
- More than one-half of the total Combat value in the defender's hex is contributed by cavalry units.
If both of these conditions are fulfilled in a combat in which a flank bonus applies, that combat's final flank bonus may be modified as follows:
- A "final flank" bonus of +4 is reduced to a +2 bonus instead.
- A "final flank" bonus of +3 or +2 is reduced to a +1 bonus instead.
- A "final flank" bonus of +1 is ignored (no bonus is awarded).
Note: Non-flank attacks under these conditions do not provide the attacker with a +1 die roll bonus, as is the case with Flanks Refused markers (see 7.8). Also, if a Flanks Refused marker is already situated in the defender's hex, or if the defending units occupy a redoubt hex, normal flanks refused/redoubt rules apply instead of the above cavalry rules.
Combat Example (From HSN): In this example, all units' Strength markers are organized; all units are at Fatigue Level 1. Wagner's Union division (Combat/Manpower value, 7; Artillery value, 2; Tactical value, 2) is in hex 4610, a rough hex. Brown's Confederate division (Combat/Manpower value, 8; Artillery value, 2; Tactical value, 2) is performing a march in an Activate Leader action, and is attached to its division leader Cheatham (Tactical value, 3). Armstrong's Confederate brigade (Combat/Manpower value, 2; Artillery value, 0) is currently situated in 4510 (southwest of Wagner).
Brown moves into 4611 (east of Wagner) and the Confederate player declares a hasty attack against Wagner, expending his last (one) movement point. The Confederate player must subtract 1 from his combat die roll due to the hasty attack.
The Confederate player compares Brown's Combat value (8) to Wagner's Combat value (7) to obtain a combat ratio of 8-7, which is rounded down to a 1-1 ratio. The ratio modifier for a 1–1 attack is 0.
The Confederate player compares Brown's Artillery value (2) to Wagner's Artillery value (2). The Artillery Value Differential is 0. Consulting the Artillery Modifier Summary on the "–3 to +1" column and cross-referencing it with the "Rough" terrain line corresponding to Wagner's hex, there is a "–1*" artillery modifier applicable to the Confederate player's die roll. The "*" means that a die must be rolled to determine whether the modifier is used. The Confederate player rolls a die and obtains a 3, so the "-1" modifier is not used.
To determine the tactical modifier, the Union player's highest Tactical value in the hex (Wagner's 2) is subtracted from the Confederate player's highest Tactical value (Cheatham's 3). The result is 1, so there is a +1 modifier to the Confederate player's combat die roll.
For flank attack purposes, the presence of Armstrong's brigade in W5618 means that five hexes adjacent to Wagner are "covered" because they are either enemy-occupied or enemy ZOC hexes. Armstrong helps to provide a flank attack bonus since his Combat value of 2 is at least one-fourth of Wagner's Combat value of 7. Five covered hexes yields a basic flank attack bonus of +2. This is also the final flank bonus since there are no conditions present reducing the basic flank bonus.
The final modifier to the Confederate combat roll is therefore +2: –1 (hasty attack) +0 (ratio) +1 (tactical) + 2 (flank) = +2 (final). The Union roll is not modified.
Both players roll a die: the Confederate player obtains a 4 (modified by +2 to 6), and the Union player obtains a 2. The Union roll is subtracted from the Confederate roll, yielding a result of +4 (6 – 2 = +4). The Union player cross-references the +4 line with the "7-11" Combat Value column on the Defender's Combat Value (left) side of the Combat Chart (Wagner's Combat value is 7). The result is "1DR". Wagner's Strength marker is removed and is replaced with a new one showing a Manpower value of 6. The new marker is placed on its disorganized side due to the "D". Wagner's Fatigue 1 marker is increased by 3 to Fatigue Level 4. A demoralized-1 marker is also placed on Wagner due to the "R" result.
Wagner routs four hexes to 4908, using Retreat Chart 1 for all four hexes entered in the retreat. In all cases, a retreat path hex existed with a Priority Number of 1, so the Union player had to retreat into Priority 1 hexes. The Union player could have retreated two additional hexes past 4908 (using Retreat Chart 2) but declined to do so. There is no additional manpower loss due to this retreat.
The Confederate player cross-references the +4 line with the "7-11" Combat Value column on the Attacker's Combat Value (right) side of the Combat Chart. (Brown's Combat value was 8.) The result is "fa". His new Strength marker remains organized because he did not suffer a "D" result, and his Fatigue Level is increased by 1 to Fatigue Level 2 due to the "f" result. Brown's march must now end due to the "f" result, but the "a" allows him to advance into the hex vacated by Wagner. He does so, accompanied by Cheatham, ending the action.
Note: Union panic is triggered in the SJW advanced game by any italicized result on the GCACW Standard Combat Chart (see SJW Advanced Rule 6.0).
7.5 Combat Results
The Combat Chart is used to resolve combat. A combat produces two results: one for the attacker, one for the defender. To resolve a combat, the defender's modified die roll is subtracted from the attacker's modified roll. On the Combat Chart, the attacker cross-references the result with the column corresponding to his combined Combat value; the defender cross-references the result with the column corresponding to his combined Defense value (prior to applying entrenchment benefits). Both players' results, which are applied immediately, may consist of a number and/or one or two letters. A dash indicates that the player's units are unaffected.
Note: A Combat value may fall between two columns on the Combat Chart (e.g. 3½). If so, round the value up by ½ and use the right column of the two possible choices.
Letter Results. There are eight possible letter results:
- D (Disorganize/Fatigue): The unit's Strength marker is flipped to its disorganized side. (If it is already disorganized it remains so.) The unit's Fatigue Level is also increased by 3 (to a maximum of 4). If the unit is already at Fatigue Level 4, it remains so. Finally, an active unit obtaining a "D" may not expend any more MP; its march action is over and a new Action Phase begins.
- F (Fatigue-2): The unit's Fatigue Level is increased by two (to a maximum of 4). An active unit may not spend any more MPs; its march is over and a new Action Phase begins.
- f (Fatigue-1): The unit's Fatigue Level is increased by one (to a maximum of 4). An active unit may not spend any more MP; its march is over and a new Action Phase begins.
- E (End Action): An active unit may not spend any more MP; its march is over and a new Action Phase begins. This result has no effect on an assault action, since an assault automatically ends after the combat has been resolved.
- r (Retreat): The unit must retreat (see 7.6).
- R (Rout/Demoralize-1): The unit is routed (see 7.6). Also, the unit gains a Demoralize-1 marker. If it already has such a marker, it is flipped to its Demoralize-2 side. If it is already at Demoralize-2, there is no further effect.
- R* (Rout/Demoralize-2): The unit is routed (see 7.6). Also, the unit gains a Demoralize-2 marker. If it is already at Demoralize-1, flip the marker to its Demoralize-2 side and there is no further effect. If it is already at Demoralize-2, its Manpower value is reduced by one in addition to its normal manpower loss result.
- a (Advance): The unit may advance after combat (see 7.6).
NOTE: An "extended march" never takes place due to a combat result, even if a unit goes to a new Fatigue Level of 2, 3 or 4.
Number Results. Number results, which precede letter results, indicate a reduction of the unit's Manpower (not Artillery) value. Remove the unit's Strength marker and replace it with another one showing its reduced Manpower value (i.e., the unit's Manpower value before the combat minus the number result). The new Strength marker may assume a new status (organized or disorganized):
- If the original Strength marker was disorganized before the combat, the new Strength marker is also disorganized.
- If the original Strength marker was organized prior to the combat, the new Strength marker is disorganized if the combat result contains a "D" (Disorganized/Fatigue), or organized if the combat result does not contain a "D."
Exception: If in a grand assault, the total Combat value of attacking units is 80 or more, the attacker's Manpower value loss in that combat is increased (see 7.2).
Applying Results. Attacker: In a march, the attacker's letter and number results apply only to the active unit, even if other friendly units occupy the same hex. In an assault, the attacker's letter result applies to each participating unit, including those joining in a grand assault. The attacker's number result applies to the attacking force as a whole—not to each individual unit. As long as the number result is fully applied, the attacker may divide it among any of his attacking units as he wishes. Units providing flank attack bonuses which do not participate in the attack are unaffected by combat results.
Defender: The defender's letter result applies to each defending unit. The defender's number result applies to the defending force as a whole—not to each individual unit. As long as the number result is fully applied, the defender may divide it among any of his defending units as he wishes.
Combat results are always applied to the defending unit(s) before they are applied to the attacking unit(s).
Entrenchments And Combat Values. Defending units' Combat values may be enhanced by entrenchments (see 9.0). However, when determining the defender's combat result, the Combat Chart columns represent the defender's Combat value prior to the application of entrenchment benefits.
Example: If Hindman's division defends with a Combat value of 8, its combat result is determined in the "7 to 11" column of the Combat Chart. If Hindman's division defends under a completed Breastwork marker, its Combat value is 16 (8 x 2). Although Hindman's Combat value of 16 would be used to calculate the ratio in that combat, its combat result is determined in the "7 to 11" column of the Combat Chart.
Unit And Leader Elimination. A unit is eliminated at the moment its Manpower value is reduced to 0. If, due to the elimination of a unit, a leader remains in that hex with no subordinate units, the leader is placed in the nearest hex occupied by a subordinate. A leader is eliminated at the moment no units subordinate to that leader exist.
7.6 Retreats, Routs, and Advances
There are four types of retreats: normal ("r"), "Defender's Voluntary Retreat" (see below), rout ("R"), and cavalry retreat (see 7.7). In a normal retreat, a player must retreat all his defending units a minimum of two hexes and a maximum of four hexes. In a rout, a player must retreat all his defending units a minimum of four hexes and a maximum of six hexes. The choice of retreat distance and path is left to the defender, as long as the path adheres to the following rules. Retreating units must move as a stack and cannot separate. Leaders must accompany retreating units with which they are attached. MP are not expended in retreats and, with the following exceptions, terrain is irrelevant.
Retreat Restrictions. Retreating units are subject to the following restrictions:
- Mountains and Swamps: A retreating unit may only enter or exit a mountain or swamp hex (including a provisional swamp hex in a rain turn) across a road, pike, trail, or RR hexside.
- Rivers: A retreating unit may cross a major or minor river hexside only at a bridge, dam, ferry, or ford. In a rain turn, a unit may not retreat across a ford hexside or a creek hexside untraversed by a road, pike, trail, or RR.
- Off-Map: A unit may not retreat off the map.
- Start Hex: A retreating unit may not enter the hex where a retreat began.
- Same Hex: A retreating unit may not enter the same hex twice.
- Adjacent Hex: A retreating unit may not end a retreat in a hex adjacent to the hex where the retreat began. (Exception: The retreating unit may end up adjacent in a one-hex voluntary retreat, see "Defender's Retreat Option")
- Closer to Attacker: A retreating unit may not enter a hex that is closer to the active enemy unit triggering the retreat than the hex retreated out of, counting by the shortest possible path. If there is a Grand Assault, the active enemy unit is the one initiating the corps assault. A unit may not retreat into the hex occupied by the active enemy unit.
Surrender: If there is no hex to retreat into that does not violate any of the aforementioned restrictions, a retreating unit surrenders, and is eliminated from play. VP are awarded for this occurrence.
Retreat Priorities. In addition to adhering to "retreat restrictions," a retreating player must follow "retreat priorities," which are listed on Retreat Charts 1 and 2. A retreating unit must adhere to retreat priorities in each hex entered in that retreat. Furthermore, the appropriate chart to use may change from hex-to-hex in that retreat.
Retreat Chart 1: A player must use Retreat Chart 1 in any of the following cases:
- For the first hex entered in a normal or voluntary retreat.
- For each of the first four hexes entered in a rout/cavalry retreat.
- If in a retreat, rout, or cavalry retreat, a unit exits an enemy ZOC (including "restricted" ZOC; see 2.4).
Retreat Chart 2: A player must use Retreat Chart 2 in any of the following cases:
- For the second, third, or fourth hexes entered in a normal or voluntary retreat, assuming the unit is not exiting an enemy ZOC.
- For the fifth or sixth hexes entered in a rout/cavalry retreat, assuming the unit is not exiting an enemy ZOC.
Using the Retreat Charts: Prior to entering each hex in a retreat, a player checks the appropriate chart and follows this procedure:
- Check Legal Retreat Hexes: The player determines how many of the six hexes adjacent to the retreating unit may be legally retreated into according to the "retreat restrictions" rules.
- Retreat Description: For each of the legal retreat hexes determined in Step 1, the player determines the "Retreat Description" from the appropriate Retreat Chart corresponding to a retreat into that hex.
- Priority: Each Retreat Description consulted in Step 2 has a corresponding "Priority Number." The player must retreat his unit into a hex using the Retreat Description from Step 2 with the lowest Priority Number. (Exception: see "Overriding Retreat Priorities.") If more than one hex fulfills this requirement, the player may retreat his unit into any of those hexes. Also, if two different Retreat Descriptions have the same Priority Number, the player may choose either description when retreating into a hex.
- Complete Retreat: The player repeats Steps 1, 2, and 3 for each hex entered in that retreat. When he fulfills retreat requirements (at least two and up to four hexes in a normal retreat; at least four and up to six hexes in a rout or cavalry retreat), the retreat is over.
Overriding Retreat Priorities. If, by adhering to retreat rules, there is no possibility of avoiding surrender of a retreating unit due to "retreat restrictions," a player may "override" retreat priorities no more than once in that retreat. To override, a player may retreat a unit into a hex by choosing any Retreat Description on the appropriate chart, regardless of its Priority Number. He is not obligated to choose the lowest Priority Number. If the unit cannot avoid surrender due to a single override, it is eliminated.
The player can make this override at any point in the retreat path, it does not have to be at the exact point that destruction would occur; thus the player may look ahead to avoid destruction. For example, if in a retreat path by following the retreat priorities a unit would get destroyed in the 3rd hex, the unit is allowed to do its override in the 1st or 2nd or 3rd retreat hex.
Manpower Loss. If a unit retreats into a hex using a Retreat Description with an accompanying Manpower loss, the retreating unit's Manpower value is reduced by the indicated number. Replace its Strength marker with a new one on its disorganized side reflecting the loss. If a stack of more than one unit retreats into a hex calling for Manpower loss, the loss number is applied to each unit in the stack—not just one.
Note: Manpower losses in retreats may vary depending on whether a unit retreats into a hex across a road, pike, trail, or RR hexside, or if the hex retreated into is friendly-occupied (see Retreat Charts). In a retreat, entering or exiting a city hex is the equivalent of crossing a road hexside, even if no road actually crosses that hexside.
Basic Retreat Principles. At first it may seem difficult to consult the Retreat Charts for every hex entered in a retreat. However, players will find them easy to use after a few games. To help players become more familiar with the Retreat Charts, some of their basic principles are outlined below.
Retreat Chart 1: On Retreat Chart 1, the highest priority retreat is to move one hex more distant from the active enemy unit by crossing a road, pike, trail, or RR hexside into a nonenemy-occupied/non-enemy-ZOC hex. If that cannot be achieved, the next-highest priority is to attempt to do the same thing by crossing a non-road/pike/trail/RR hexside. If that in turn cannot be achieved, the next-highest priority is to retreat into any hex that is not enemy-occupied, nor in an enemy-ZOC. (This may incur manpower loss.) If that in turn cannot be achieved, the next-highest priority is to avoid retreating into an enemy-occupied hex. (This may incur manpower loss.)
Retreat Chart 2: On Retreat Chart 2, the highest priority retreat is to move into any hex that is not enemy-occupied, nor in an enemy-ZOC. If that cannot be achieved, the next-highest priority is to avoid retreating into an enemy-occupied hex. (This may incur manpower loss.)
Retreats Into Enemy-Occupied Hexes. Some Retreat Descriptions allow retreats into an enemy-occupied hex, an occurrence which causes a Manpower value loss of three to the retreating unit. (However, a unit may never retreat into the hex occupied by the active enemy unit.) A unit may not end its retreat in an enemy-occupied hex. If there is no alternative except to do so, its retreat may be extended by a sufficient number of hexes so that it ends the retreat in a hex unoccupied by an enemy unit.
Defender's Voluntary Retreat Option. On any combat result applying to the defender not containing an "r" or "R", the defender may voluntarily retreat one or more of his units from one to four hexes subject to retreat rules. This is considered a retreat, not a rout. In this case the defender may end the retreat in a hex adjacent to the hex where the retreat began. There is no Fatigue cost to do this. (Exception: If the defender receives a "—" result [no effect], all units participating in the defender's retreat option gain one Fatigue Level, to a maximum of level 4.) Even units at Fatigue Level 4 may join in this retreat. The defender must execute a voluntary retreat immediately, before the enemy player performs further actions.
Advance After Combat. If the attacker receives an "a" result, none, some, or all of the attacking units may advance into the hex vacated by the defender. An advance is not considered movement and does not expend MP. A unit may enter or exit an enemy ZOC, or advance from one enemy ZOC to another, without penalty. Regardless of whether or not a unit obtaining an "a" advances, its march may continue as long as it did not also suffer a "D", "F", "f", or "E" result. However, it may not continue to move if it advances into an enemy ZOC. In this case, the unit must either attack again or end its march. Leaders (including army/district leaders) may advance with subordinate units (and must advance if no subordinate units remain in the leader's hex). A leader may advance with a subordinate unit to which it had not been attached prior to the attack, although if it does so the active player must specify its new attachment. A leader may not advance with and attach to a non-subordinate unit.
7.7 Cavalry Retreat
A cavalry unit may use "cavalry retreat" to avoid attack by an enemy infantry or artillery (not cavalry) unit. A cavalry unit may perform a cavalry retreat more than once per action. The player owning a cavalry unit may declare a retreat in any of the following circumstances:
- Enemy Movement: An enemy infantry/artillery unit performing a march moves into a normal (not restricted) ZOC exerted by a cavalry unit.
- Starts Adjacent: An enemy infantry/artillery unit begins a march in a normal (not restricted) ZOC belonging to a cavalry unit. Exception: If an enemy infantry unit begins a march in a restricted ZOC belonging to a cavalry unit and selects the cavalry unit as the target of his attack in Step 1 of the Attack Procedure, then the cavalry unit may perform a cavalry retreat.
- Advance After Combat: An enemy infantry/artillery unit advances after combat into a cavalry unit's normal (not restricted) ZOC.
- Assault: The enemy player declares an assault action against a hex containing at least one cavalry unit (unless the assault is declared by a cavalry leader—in which case a cavalry retreat is not possible).
A player wishing to declare a cavalry retreat must make his declaration as soon as any of the above circumstances occur—before the enemy player declares an attack (or, in the case of an assault action, before the enemy player rolls a die to determine whether or not the assault takes place). If he does not make the declaration at this moment, he forfeits his ability to perform a cavalry retreat in the hex occupied by his cavalry unit for the duration of the enemy unit's march.
Performing A Cavalry Retreat. A cavalry retreat is voluntary. A cavalry unit may perform a retreat regardless of its status—even if it is demoralized, disorganized, exhausted, or at Fatigue Level 4. A player wishing to perform a cavalry retreat states this fact as soon as his opponent has performed one of the aforementioned actions. The enemy unit's march (or assault) is temporarily suspended while the retreat takes place. A cavalry retreat is performed as follows:
- Roll Die: The cavalry player rolls a die. This roll may be modified (see Cavalry Retreat table in Charts & Tables handout). The modified roll is halved (round fractions down to a whole number). The result is the number by which the enemy unit's Active Movement Allowance marker is reduced on the Movement Track. In assault actions, this roll has no effect since no Movement Allowance is determined. However, the roll still takes place to see if the cavalry unit suffers loss in Step 2.
- Manpower Loss: If the Step 1 roll (before modifications and halving) is 1, the cavalry unit's Manpower value is reduced by one. Place the new Strength marker on its disorganized side. On a roll of 2 to 6, no loss occurs.
- Retreat 4–6 Hexes: The cavalry unit must retreat from four to six hexes. The retreating player must adhere to retreat restrictions, using Retreat Charts 1 and/or 2 to fulfill this retreat. However, a cavalry unit does not suffer any Manpower value loss in a cavalry retreat, even if it retreats into a hex calling for a loss on a Retreat Chart. Exception: If in a cavalry retreat, a unit retreats into an enemy-occupied hex, Retreat Priority #5 applies and the unit(s) suffers a Manpower value loss of 3. Note: A cavalry unit may use the above rule 7.6, "Overriding Retreat Priorities", to attempt to avoid surrender.
- Fatigue: After executing its retreat, the cavalry unit's Fatigue Level is increased by 1 (to a maximum of 4). Note: An extended march is never triggered by a cavalry retreat.
- Disorganization: The cavalry unit's Strength marker is flipped to its disorganized side. If it is already disorganized, there is no further effect.
- Resume Action: The active enemy unit or leader resumes its activities from the point of interruption. If a unit's Movement Allowance has been reduced to 0, its march ends. (Exception: If the unit has not yet moved, it is permitted to move one hex; see 6.2. It may not refuse flanks.) In an assault action, if the hex the active leader is assaulting is completely vacated by the cavalry retreat, the units participating in the assault may advance into the hex vacated by the cavalry unit. No attack occurs and the assault action ends. (Exception: If the active player's command die roll in Step 5 of the assault procedure is unsuccessful, the units participating in the assault may not advance into the hex vacated by the cavalry unit.)
Cavalry Stacked With Other Units. With Cavalry Unit: If two or more cavalry units are stacked in the same hex, they must perform a cavalry retreat together. Only one die roll is made in Step 1, and all units must end the retreat in the same hex. If a 1 is rolled for the cavalry retreat, only 1 cavalry unit suffers a manpower loss.
With Infantry Units: A cavalry unit stacked with an infantry unit may perform a cavalry retreat, but the infantry unit may not.
Multiple Cavalry Retreats. Same Unit: A cavalry unit may perform a cavalry retreat more than once per action.
Cavalry Units—Separate Hexes: If two or more cavalry units occupying separate hexes are eligible to perform a cavalry retreat and all of them wish to retreat, each performs the retreat separately. The enemy unit's Movement Allowance reduction, if any, is cumulative.
7.8 Refusing Flanks
At a cost of one MP, the active player may place a "Flanks Refused" marker of the appropriate side on top of a unit performing a march. (Exception: A Flanks Refused marker may not be placed on a unit in a mountain or swamp hex; also, it may not be placed on top of a unit performing an assault.) As soon as a unit gains a Flanks Refused marker, its march ends. (It may perform actions later.) Since a unit must stop moving upon entering an enemy normal ZOC, it may not refuse flanks when entering an enemy normal ZOC. A unit may refuse flanks if it marches in place in a hex with an enemy normal ZOC (an extended march must be done if required per 5.1).
A maximum of one Flanks Refused marker may exist in a hex at a time; its effects apply to all units in the hex. A unit does not have to spend one MP to enter a hex in which a Flanks Refused marker is already situated; it may enter the hex at no extra MP cost and receive the marker's benefits—and may continue its march.
A Flanks Refused marker never accompanies a unit when it leaves a hex. A marker may not be placed on a unit after it performs a retreat, rout, or advance after combat. The players are not limited to the number of markers provided in the game.
Effects Of Flanks Refused Markers. Units in a hex with a Flanks Refused marker may perform all actions normally (although they may be forced to remove the marker after the action is over; see below). Units occupying a hex containing a Flanks Refused marker defend against enemy flank attacks more effectively, but less effectively against normal attacks:
- Flank attacks fulfilling the requirements for a +4 attacker die roll bonus are reduced to a +2 bonus instead.
- Flank attacks fulfilling the requirements for a +3 or +2 attacker die roll bonus are reduced to a +1 bonus instead.
- Flank attacks fulfilling the requirements for a +1 attacker die roll bonus are unchanged (the bonus remains +1).
- All non-flank attacks always provide the attacker with a +1 die roll bonus (in addition to other modifiers), even though requirements for flank attacks have not been fulfilled.
Removal Of Flanks Refused Markers. A Flanks Refused marker may be voluntarily removed from a stack of units at no MP cost if one of the units in the hex initiates a march. (The active unit does not actually have to leave the hex.) The marker must be removed if all the units in the hex participate in an assault action. It also must be removed if only one unit is in a hex and it moves or attacks. (This does not preclude the owning player from placing another marker on the unit later in its march at a cost of one MP.)
8.0 Recovery
In the Recovery Phase, the following actions are performed strictly in the listed order:
- Units at Fatigue Level 0 may entrench, build bridges, or repair bridges/ferries. A unit may not perform more than one of the aforementioned activities per Recovery Phase and may not perform any at all in a rain turn or if demoralized. In RTG, Confederate infantry units may impose a "levy" on Pennsylvania towns in this step (see RTG 14.0).
- In the Advanced Game, units at Fatigue Level 0, 1, or 2 may forage (see each GCACW game's "Forage" rules), but not if they undertook any activities in Step 1 of the Recovery procedure. Note: Units in RTG and SLB may not forage.
- Units at Fatigue Level 0 or 1 may be affected as follows: a. Units at Fatigue Level 0 or 1 with disorganized Strength markers have their Strength markers flipped to their organized sides. Exceptions: If a unit has a Demoralize-2 marker at the start of this step, its Strength marker remains disorganized. Also, in each GCACW volume's Advanced Game, out of supply units with disorganized Strength markers remain disorganized. Note that there is no "out of supply" status in SLB and RTG. b. Units at Fatigue Level 0 or 1 which are on their exhausted sides are flipped to their normal sides. Exception: If an exhausted unit has a Demoralize-2 marker at the start of this step, it remains on its exhausted side. c. Units at Fatigue Level 0 or 1 with Demoralize-1 markers have these markers removed; units at Fatigue Level 0 or 1 with Demoralize-2 markers have these markers flipped to their Demoralize-1 sides.
- Units at Fatigue Level 3 or 4 are flipped to their exhausted (reverse) sides. If they are already on their exhausted sides, they remain so and there is no further effect.
- All units at Fatigue Level 1 or more lose three Fatigue Levels (to a minimum Fatigue Level of 0). Replace each unit's Fatigue marker with a new marker three less than the one being removed. (Units at Fatigue Level 0 do not have markers.)
- In the Advanced Game Scenarios of HCR, SIV (Union units only), OTR, GTC, BAC, RWH (Confederate units only), SJW, AGA, AIO, TPC, and TOM out of supply units with organized Strength markers have their Strength markers flipped to their disorganized sides. Note: Step 6 of the Recovery Phase is skipped in SLB, RTG, and HSN because units are never out of supply in those games.
9.0 Entrenchments
Entrenchments enhance a unit's defensive capabilities. Units may construct entrenchments in the Recovery Phase, and in games taking place in 1863 or later, in the Action Phase. Players may also gain entrenchment benefits from a hex feature called "redoubts." Another hex feature, a permanent Fort, provides even further defensive capabilities and is described in the Advanced Game Rules of any module in which it appears. Permanent Forts typically provide the same entrenchment benefit as a Redoubt when units occupy those hexes.
Building Entrenchments. There are four types of entrenchments: redoubts, abatis, breastworks, and forts. Redoubts and permanent Forts, which are printed on the map and represent permanent fortifications, may not be built. (Exception: Some games' special rules allow redoubts to be built). However, abatis, breastworks, and forts may be built in either the Action Cycle (see 5.5) or the Recovery Phase. Units building entrenchments in the Recovery Phase must be at Fatigue Level 0. A unit building a bridge or repairing a bridge/ferry may not also entrench in the same Recovery Phase. Units may not entrench in rain turns or if demoralized.
The procedure for building entrenchments in the Action Phase (for games in 1864-1865 or games in 1863 if the Entrenchment Action optional rule is being used) is described in Section 5.5. The procedure for building entrenchments in the Recovery Phase is described below. Depending on the year depicted in the game being played, players use one of three different procedures. Please select the appropriate procedure for the time frame of the game:
- 1861: games occurring within the year 1861
- 1862: games occurring within the year 1862
- 1863: games occurring within the year 1863
- 1864-1865: games occurring in 1864 or later
Entrenchments (1861): AGA
1861 Entrenchment Procedure:
- If a unit entrenches, place an Abatis-Build marker atop the unit. Exception: if a Confederate unit entrenches in a redoubt hex, place a BW-Complete marker atop the unit.
- If a unit already possessing an Abatis-Build marker entrenches, place an Abatis marker atop the unit.
- If a unit already possessing an Abatis marker entrenches, place a BW-Complete marker atop the unit.
- Forts: the only units that may be entrenched above the BW-Complete level are those that start a scenario in a fort marker. If those units leave the fort marker they may not re-entrench beyond the BW-Complete level.
Entrenchments (1862): SJW, HCR, SIV, And OTR
1862 Entrenchment Procedure:
- If a unit entrenches, place a Breastwork–Build marker atop the unit. Exception: If a unit is in a redoubt hex that it is eligible to benefit from, place a Breastwork-Complete marker atop the unit.
- If a unit already possessing a Breastwork–Build marker entrenches, flip the marker to its Complete side.
- If a unit already possessing a Breastwork–Complete marker entrenches, place a Fort–Build marker atop the unit.
- If a unit already possessing a Fort–Build marker entrenches, flip the marker to its Complete side.
Entrenchments (1863): SLB, RTG, BAC, TOM, And LLO
1863 Entrenchment Procedure:
- If a unit without an entrenchment marker (or possessing a Breastworks-Build) entrenches, place a Breastwork marker atop the unit. This is the equivalent of the 1862 "Breastwork–Complete," and in SLB, the Complete side of the Breastwork marker is used. Note: if a unit is in a redoubt hex (that it is eligible to benefit from), this same procedure is still used.
- If a unit already possessing a Breastwork marker entrenches, place a Fort–Build marker atop the unit.
- If a unit already possessing a Fort–Build marker entrenches, flip the marker to its Complete side.
Entrenchments (1864-1865): GTC, AIO, RWH, HSN, And TPC
1864-1865 Entrenchment Procedure:
- If a unit without an entrenchment marker entrenches, place a Breastwork marker atop the unit. Exception: if a unit is in a redoubt hex that it is eligible to benefit from, place a Fort-Build-1 marker atop the unit.
- If a unit already possessing an Abatis marker entrenches, place a Fort-Build-1 marker atop the unit.
- If a unit already possessing a Breastworks-Build marker entrenches, place a Fort-Build-2 marker atop the unit.
- If a unit already possessing a Breastworks, Fort-Build-1, or Fort-Build-2 marker entrenches, place a Fort Complete marker atop the unit.
Removing Entrenchments. A unit's Abatis, Breastwork or Fort marker is removed at the moment the unit leaves the hex. If a unit with an Abatis, Breastwork or Fort marker exits a redoubt hex, its marker is removed but there is no effect on the permanent redoubt.
Effects Of Entrenchments. Entrenchments may enhance the Combat and Artillery values of defending (not attacking) units:
- Units directly under an Abatis marker (or a Breastworks-Build marker if the year is 1864 or later) have their Combat and Artillery values multiplied by 1.5 when defending.
- Units directly under a completed Breastwork, a Fort-Build marker (1863 or earlier), or a Fort-Build-1 marker (1864 or later) have their Combat and Artillery values doubled when defending.
- Units directly under a Fort-Build-2 marker (1864 or later) have their Combat and Artillery values multiplied by 2.5 when defending.
- Units directly under a completed Fort marker have their Combat and Artillery values tripled when defending.
- Units directly under a Breastworks-Build marker do not have their Combat and Artillery values modified if the year is 1863 or earlier.
Abatis, Breastwork, and Fort effects apply individually by unit, not by hex. In a stack of units, some may possess markers while others do not. Only units which actually entrenched in an earlier Action or Recovery Phase receive the Combat/Artillery value multiple provided by an entrenchment marker. Units without markers in the same hex use unenhanced values. Exception: Units in a redoubt hex belonging to a player eligible to receive redoubt benefits gain the defensive benefit of the redoubt (see below). However, only those units which entrench further in an Action or Recovery Phase gain defensive enhancements beyond those provided by the redoubt.
Entrenchments do not enhance the combat value of units for the purposes of determining if they have enough Combat value to contribute to the achievement of a flank bonus (see "Flank Bonus Conditions", 7.4). Entrenchments also do not boost a unit's Combat value for the purpose of determining the additional MP cost to enter that unit's hex (see "Enter Friendly-Occupied Hex", 6.2).
Redoubts. Many of the games in the series have redoubts either printed on the map or added with special counters. The basic rules for each game define which player owns and gets the benefits for the redoubts in that game. The directional facing of a redoubt is solely for artistic purposes and has no effect on the benefits of the redoubt, which are for the hex and not just for some hexsides. Note: All redoubts printed on the maps in Virginia are Confederate Redoubts.
- Units in a redoubt hex (that they are eligible to benefit from) with no other entrenchments have their Combat and Artillery values multiplied by 1.5 when defending. (For Combat values, retain fractions; for Artillery values, multiply the sum of all the Artillery values in the hex by 1.5 and round fractions up to the nearest whole number.)
- All Naval Batteries printed on the maps are considered to also contain a Confederate redoubt (even if there is a destroyed Naval Battery counter in the hex).
Flank Attacks Against Redoubt Hexes. If a unit occupies a redoubt and is eligible to receive defensive benefits from that hex, its defensive capabilities against some flank attacks are enhanced (see 7.4).
- +4 Bonus: If the attacking player fulfills requirements for a +4 final flank bonus in an attack against one or more units in a redoubt hex, that bonus is reduced to +2.
- +3/+2 Bonus: If the attacking player fulfills requirements for a +3 or +2 final flank bonus in an attack against one or more units in a redoubt hex, that bonus is reduced to +1.
- +1 Bonus: If the attacking player fulfills requirements for a +1 final flank bonus in an attack against one or more units in a redoubt hex, he receives no flank bonus at all.
Unlike Flanks Refused markers, non-flank attacks against redoubt hexes do not provide the attacking player a +1 die roll bonus. Defending units situated under Breastwork or Fort markers in redoubt hexes retain the redoubts' capabilities against flank attacks. However, Breastwork or Fort markers situated in non-redoubt hexes do not provide these capabilities.
10.0 Bridges, Dams, And Ferries
Units may cross major and minor rivers only at bridges, dams, ferries, and fords. A unit entering a hex across a bridge, dam, or ford ignores the cost of the major terrain in that hex and instead pays 1 MP as long as a road, pike, or RR crosses that bridge, dam, or ford. A unit also pays 1 MP if a pontoon bridge is constructed over that river (as long as both hexes connected by the pontoon bridge have a road, pike, trail, or RR in them). Units entering a hex across a bridge or ford which is not traversed by a road, pike or RR must pay that hex's major terrain MP cost. (See 6.2 for ferry MP penalties.) Roads crossing creek hexsides are not considered bridges, dams, ferries, or fords.
10.1 Pontoon Bridges
In the GCACW Standard Rules, bridges built during the game are known as "pontoon" bridges to differentiate them from "permanent" bridges which are printed on the map. Also, in all GCACW games except SLB (see below), a player must make a die roll if he wishes to build a bridge, rather than building it automatically.
Note: In SLB, all original bridge building rules (see SLB 10.0) are in effect, including major river bridges. These rules are unmodified by the GCACW Standard Rules.
Building Pontoon Bridges. Eligible infantry units may attempt to build pontoon bridges. Note: In some GCACW games, units had formerly been prohibited from building bridges over major rivers, but this is now permissible in the Standard Rules. Also, in the Standard Rules, bridges may always be built at fords.
An infantry unit is eligible to build a pontoon bridge only if it meets all of the following conditions in Step 1 of the Recovery Phase:
- It is at Fatigue Level 0 and is not demoralized.
- It has a Combat value of 5 or more. Exception: In SIV or TOM, it must have a Combat value of 3 or more.
- It occupies a hex containing at least one major or minor river hexside. A unit may build a pontoon bridge across a hexside that already contains a permanent bridge (destroyed or not). Exception: Confederate units may only attempt to build a bridge over a major river in OTR, GTC, AIO, TPC, and TOM. Union units may attempt to build a bridge over a major river in all GCACW games except SIV.
- It must not have entrenched or repaired a bridge or ferry in the same Recovery Phase.
- If the bridge is to be built over a minor river, the player must have an unused minor river Bridge marker. Exception: In SJW, HCR, RTG, and SIV, the number of minor river Bridge markers in the game is not a limit. Players may build as many minor river bridges as they wish.
- If the bridge is to be built over a major river, the player must have an unused major river Bridge marker.
In games in which either or both players may build major river bridges, they are limited to one major river Bridge marker each. Exceptions: in AIO the Union may build three major river bridges, in SLB the Union may build two, and in TPC each side may build three; in TOM the Union may build three, and the Confederates may build two.
If a game limits the number of Bridge markers that may be employed, and all the Bridge markers of that type are in use, a player may not build a pontoon bridge of that type until one or more markers become available for use again due to dismantling or destruction (see 10.2).
Pontoon Bridge Restrictions
- Cavalry/artillery units and leaders may not build bridges.
- Bridges may not be built across creek hexsides.
- A bridge may not be built between two hexes if one of the hexes contains an enemy unit (or units) with a combined Combat value of 5 or more. It may be built into a hex if the enemy unit(s) in that hex have a combined Combat value of less than 5. Entrenchments are not taken into account in determining the Combat value that prevents a bridge from being built. Exception: In SIV or TOM, a bridge may not be built between two hexes if one of the hexes contains an enemy unit (or units) with a combined Combat value of 3 or more. It may be built into a hex if the enemy unit(s) in that hex have a combined Combat value of less than 3.
- An eligible unit may attempt to build a maximum of one bridge per Recovery Phase, although it may attempt to build more than one bridge per game—even in the same hex.
- A maximum of one infantry unit per hex may make a bridge-building attempt in Step 1 of each Recovery Phase.
- A unit may not build a pontoon bridge across a hexside that already contains a pontoon bridge or a dam feature.
- Units may not build bridges in rain turns.
Pontoon Bridge Construction. For each eligible unit attempting to build a bridge in Step 1 of the Recovery Phase, the owning player follows this procedure: Exception: In SLB, bridges are not built according to this procedure. The original SLB bridge rules are in effect.
- He specifies the hexside over which the bridge will be built.
- He rolls a die, modifying this roll if necessary (see below).
- 5 or Less: If the modified roll is 5 or less, the bridge is successfully built. Place an appropriate Bridge marker (minor or major) belonging to the building player directly on the hexside, with one end of the bridge symbol pointing to the unit's hex and the other end pointing to the hex directly across the river. Exception: On an unmodified die roll of 6, the bridge is not built.
- 6 or More: If the modified roll is 6 or more, the bridge is not built. No action is taken. Another attempt to build a bridge across that hexside may not be made until the following turn.
Construction Die Roll Modifiers. A player's pontoon bridge construction die roll is modified if any of the following conditions are in effect (modifiers are cumulative):
- –3: If the Confederate player attempts to build a major river bridge within 10 hexes of the Confederate Capitol (OTR N0627).
- –1: If the Union player attempts to build a minor river bridge in 1865.
- –1: If the Union player attempts to build a bridge in any TOM scenario.
- +1: If the river being bridged is currently unfordable (see 12.0).
- +1: If the bridge is being built between hexes OTR S3409 and OTR S3509 (Barrett's Ferry).
- +2: If the river being bridged is a major river (does not apply to the Union starting in June 1864).
Use the lowest modifier below that applies, but one of these modifiers must be used:
- +0: If a road, pike, trail, or RR is situated in both hexes to be connected by the bridge, and one or more of the following features exist across the hexside being bridged: a ford, a ferry (destroyed or not), or a permanent bridge (destroyed or not).
- +1: If a road, pike, trail, or RR is situated in both hexes to be connected by the bridge, but none of the following features exist across the hexside being bridged: a ford, a ferry (destroyed or not), or a permanent bridge (destroyed or not).
- +2: If there is a road, pike, trail, or RR in only one of the two hexes to be connected. The presence or lack of the following features across the hexside being bridged has no effect on this modifier: a ford, a ferry (destroyed or not), or a permanent bridge (destroyed or not).
- +3: If both of the hexes to be connected do not contain a road, pike, trail, or RR. The presence or lack of the following features across the hexside being bridged has no effect on this modifier: a ford, a ferry (destroyed or not), or a permanent bridge (destroyed or not).
Note: If a pontoon bridge is successfully built, it is considered to have a road (not pike) running across it as long as both hexes connected by the bridge have roads, pikes, trails, or RR in them. Otherwise the bridge is not considered to be traversed by a road.
Chatham Bridge in SJW/SLB. In SJW, Chatham Bridge (S4328-S4427) is considered a Union pontoon bridge, even though it is printed on the map. It is subject to all GCACW Standard Rules applying to dismantling and destruction (see 10.2), and it may be rebuilt if it is destroyed or dismantled. Chatham Bridge does not count against the Union player's limit of one major river bridge in SJW. In SLB, Chatham Bridge is considered destroyed at the start of the game.
10.2 Destroying Bridges and Ferries
In the GCACW Standard Rules, rules for bridge/ferry destruction and dismantling supercede the pertinent rules sections in all GCACW games, including the SIV Advanced Game (see SIV, 23.1). In all games, permanent bridges, pontoon bridges, and ferries may be destroyed, although permanent bridges/ferries are more difficult to destroy than pontoon bridges. Bridges and ferries may be destroyed in rain turns and while rivers are unfordable.
Destroying Pontoon Bridges. When a player builds a pontoon bridge, he "owns" it. Enemy units may not cross that bridge in a march, retreat, or advance after combat; nor may they attack across it. The bridge remains on the map until an undemoralized enemy unit with a Combat value of 5 or more (or, in SIV or TOM, 3 or more) ends a march, retreat, or advance after combat in one of the two hexes connected by the bridge. At that time the Bridge marker is immediately removed. A pontoon bridge is automatically destroyed at the end of the Attachment Phase (an Advanced Game Phase) if the previous turn's Recovery Phase or the current turn's Attachment Phase has caused an undemoralized enemy unit to have an unentrenched combat value of 5 or more (or, in SIV or TOM, 3 or more) in one of the two hexes connected by the bridge. Entrenchments are not taken into account in determining the Combat value that is needed to destroy a bridge. ZOC extend across undestroyed bridges normally, even a pontoon bridge constructed by the enemy player.
Dismantling. If at any time during a march, an active unit occupies one of the two hexes connected by a friendly pontoon bridge, the active player may "dismantle" that bridge. If so, the Bridge marker is removed. This does not cost any MP, and the active unit may continue its march afterwards.
Destroying Permanent Bridges And Ferries. If an undemoralized infantry unit with a Combat value of 5 or more (or, in SIV or TOM, 3 or more) ends a march in either of the two hexes connected by a permanent bridge, or if an undemoralized infantry or cavalry unit of any Combat value ends a march in either of the two hexes connected by a ferry, the active player may attempt to destroy that bridge/ferry. A unit may make a maximum of one attempt to destroy bridges/ferries per turn. However, a player may make more than one attempt to destroy the same bridge/ferry in a turn, as long as the attempts are made by different units.
Exceptions: If an enemy unit occupies one of the two hexes connected by a bridge/ferry, the active player may not attempt to destroy it. Also, if one of the two hexes connected by a bridge/ferry is an enemy ZOC—including restricted ZOC—and that ZOC is not occupied by a friendly unit, the active player may not attempt to destroy it. Finally, some permanent bridges are indestructible (see below).
Dams and Fords: Dams and fords may not be destroyed.
Permanent Bridge/Ferry Destruction Procedure: To attempt to destroy a permanent bridge or ferry, a player rolls a die. (This roll may be modified; see below.)
- Bridge: If the modified roll is 2 or less, a permanent bridge is "destroyed." If the modified roll is 3 or more, the attempt to destroy the permanent bridge has failed.
- Ferry: If the modified roll is 1 or less, a ferry is "destroyed." If the modified roll is 2 or more, the attempt to destroy the ferry fails.
If a permanent bridge/ferry is destroyed, place a "Destroyed" marker directly on the hexside. If a destroy attempt fails, the player may attempt to destroy the bridge/ferry again, as many times as he wishes, as long as a given unit makes no more than one attempt per turn.
Note: SLB does not have Destroyed markers. Players may use Destroyed markers from other games, if available, or they may make their own markers.
Destruction Die Roll Modifiers. If a player attempts to destroy a permanent bridge or ferry, his die roll is modified if any of the following conditions are in effect (modifiers are cumulative):
- –2: If the Confederate player is attempting to destroy a ferry.
- –1: If neither hex connected by the bridge/ferry is an enemy ZOC hex (including restricted ZOC).
- –1: If the active unit attempting the destruction spent its entire march in the hex connected by the bridge or ferry, and the unit neither moved nor attacked during its march.
- +2: If the active player is attempting to destroy the C&O Canal Aqueduct (HCR W4126).
Indestructible Bridges. The following permanent bridges may not be destroyed:
- Chain Bridge (SJW N5809; HCR E0537)
- Aqueduct Bridge (HCR E0739)
- Patterson Viaduct (HCR E2317)
- Thomas Viaduct (HCR E2519)
- Frederick Junction RR Bridge (HCR W4317; RTG S2428)
- Long Bridge (HCR E0941)
- Hunting Creek Bridge (HCR E0845)
C&O Canal Aqueduct. This aqueduct at HCR W4126 is not a terrain feature that affects unit movement (it cannot be used as a bridge). Its only effect is destroying it gives the Confederates VPs in some scenarios. It is treated as a permanent bridge across hexside HCR W4126-W4226 only for the purpose of what rules to use for how to destroy it. Note the +2 Destruction Die Roll Modifier for the Aqueduct.
Destroyed Permanent Bridge/Ferry Effects. If a permanent bridge or a ferry over a minor river is destroyed, a ford is considered to cross the hexside formerly occupied by the bridge/ferry. (ZOC do not extend across destroyed bridge/ferry hexsides when the river they are on is unfordable.) If a permanent bridge or ferry over a major river is destroyed, no ford is considered to exist at that location. Exception: If Snicker's Ferry or Berry's Ferry, both on the Shenandoah River, are destroyed, a ford is considered to exist across that hexside.
10.3 Repairing Permanent Bridges and Ferries
The following GCACW Standard Rules for permanent bridge and ferry repair apply to all GCACW games. Note: These rules supercede the pertinent repair rules in SIV (see SIV 23.2). In SIV, both Union and Confederate units may attempt to repair bridges and ferries according to the GCACW Standard Rules procedure.
An infantry unit is eligible to repair a permanent bridge/ferry only if it meets all of the following conditions in Step 1 of the Recovery Phase:
- It is at Fatigue Level 0 and is not demoralized.
- It has a Combat value of 5 or more. Exception: In SIV or TOM, it must have a Combat value of 3 or more.
- It occupies a hex containing at least one destroyed permanent bridge or ferry hexside.
- It must not have entrenched or built a pontoon bridge in the same Recovery Phase.
- In SIV, the Union player may only attempt to repair a bridge or ferry if at least one of the hexes connected by the bridge is situated in a county that is currently controlled by the Union player (see SIV, 22.1).
Repair Restrictions
- Cavalry/artillery units and leaders may not repair bridges or ferries.
- A permanent bridge or ferry may not be repaired if one of the hexes connected by the bridge/ferry contains an enemy unit or units with a combined Combat value of 5 or more (or, in SIV or TOM, 3 or more). It may be repaired if the enemy unit(s) in the connecting hex have a combined Combat value of less than 5 (or, in SIV or TOM, a Combat value of less than 3). Entrenchments are not taken into account in determining the Combat value that prevents a bridge from being built.
- Each player may make a maximum of one repair attempt per Recovery Phase per each individual bridge and ferry.
- Units may not repair in rain turns.
Repair Procedure. If an eligible unit attempts to repair a permanent bridge/ferry in the Recovery Phase, the owning player follows this procedure:
- He specifies the hexside on which the repair will be attempted.
- He rolls a die, modifying this roll if necessary (see below).
- Permanent Bridge: If the modified roll is 3 or less, the bridge is repaired. Remove the Destroyed marker: the bridge is functional again. If the modified roll is 4 or more, the repair attempt fails.
- Ferry: If the modified roll is 5 or less, the ferry is repaired. Remove the Destroyed marker; the ferry is functional again. If the modified roll is 6 or more, the repair attempt fails. Exception: In AIO, a roll of "1" for a major river bridge repair is always successful, regardless of the modifiers.
Repair Die Roll Modifiers. A player's repair die roll is modified if any of the following conditions are in effect (modifiers are cumulative):
- +1: If the river on which a permanent bridge or ferry is situated is currently unfordable (see 12.0).
- +2: If the river on which a permanent bridge or ferry is situated is a major river.
- +1: If the attempt is for the Etowah RR bridge (across hexsides AIO W5417-W5517).
- +1: If the attempt is for the Chattahoochee RR bridge (across hexsides AIO E2514-E2614).
- –1: If the Union player attempts to repair a bridge (not ferry) in any TOM scenario.
Chatham Bridge in SLB. In SLB, Chatham Bridge (4328–4427) may not be repaired, although the Union player may build a bridge at that hexside according to normal SLB bridge rules (see SLB 10.0).
11.0 Demoralization
A unit is assigned a Demoralize-1 marker (or has an existing Demoralize-1 marker flipped to its Demoralize-2 side) if it suffers an "R" result in combat. A unit is assigned a Demoralize-2 marker if it suffers an "R*" result in combat. Leaders are never demoralized. Demoralized units may be chosen to perform actions normally, although their attack capabilities are less than normal.
Common Effects Of Demoralization–1 and Demoralization-2. A unit with a Demoralize-1 or Demoralize-2 marker is affected as follows:
- It may not entrench.
- Demoralized units (active or inactive) belonging to the attacker may not contribute in any way to the achievement of a flank attack bonus.
- Its Artillery value is 0 in both attack and defense.
- It may not be selected to participate in a grand assault.
- It may not burn a RR station, build a bridge, repair a bridge/ferry, destroy an enemy pontoon bridge, or destroy a permanent bridge.
Additional Effects of Demoralization–1 and Demoralization-2. A unit with a Demoralize-1 marker is also affected as follows:
- Its Combat value when attacking is halved. Round fractions down to a whole number. (Exception: A demoralize-1 unit with a Combat value of 1 or ½ has a Combat value of ½ when attacking.) The unit's Combat value when defending is normal.
A unit with a Demoralize-2 marker is also affected as follows:
- Its Combat value when attacking is 1. (Exception: A demoralize-2 unit with a Combat value of 1 or ½ has a Combat value of ½ when attacking.) The unit's Combat value when defending is normal.
- If a hex being attacked contains any units with Demoralize-2 markers, the defender may have to subtract 1 from his combat die roll (see 7.4).
Removal Of Demoralization Markers. A Demoralized marker remains on top of the unit to which it is assigned wherever that unit moves. However, a unit's Demoralize-1 marker may be removed (or a Demoralize-2 marker flipped to its Demoralize-1 side) during Step 3c of the Recovery Phase if that unit has a Fatigue Level of 0 or 1 (see 8.0).
12.0 Rain
Rain is a random event in all GCACW games. The GCACW Standard Rules do not change the fact that rain effects apply only in the Advanced Game in some games, and in both Basic and Advanced Games in others. Furthermore, the GCACW Standard Rules do not modify how players determine whether or not rain occurs. Each GCACW game uses its original Random Events Table according to that game's specific rules, without modification. Also, note that in rain turns, units may not perform Entrenching actions, nor may they entrench in the Recovery Phase.
The Random Events Table has four possible "Rain" results:
- Rain (Current): Rain rules are in effect throughout the current turn only. Place a Rain marker on the Turn Track in the box corresponding to the current turn.
- Rain (Current+1): Rain rules are in effect throughout the current turn and the following turn. Place Rain markers on the Turn Track in the boxes corresponding to the current and immediately succeeding turns.
- Rain (Current+2): Rain rules are in effect throughout the current turn and the following two turns. Place Rain markers on the Turn Track in the boxes corresponding to the current and immediately succeeding two turns.
- Rain (Current+3): Rain rules are in effect throughout the current turn and the following three turns. Place Rain markers on the Turn Track in the boxes corresponding to the current and immediately succeeding three turns.
Note: If a multiple turn Rain result occurs when there are already one or more Rain markers on the Turn Track, additional markers are placed on the track only if the new Rain result extends the rain time period into turns which did not previously possess a Rain marker. For example, if a "Rain (Current +2)" result occurs on Turn 6, Rain markers are placed in the Turns 6, 7, and 8 boxes on the Turn Track. If on Turn 7 a "Rain (Current +1)" result occurs, no additional Rain markers are placed on the track because the new result does not extend the rain period. However, if on Turn 7 a "Rain (Current +2)" result had occurred, a Rain marker should be added to the Turn 9 box due to the extension of the rain period.
Rain Effects
Provisional Swamps: Provisional swamp hexes function as full swamp hexes in rain turns. If a Rain event occurs while a unit is in a provisional swamp hex with no road, pike, or RR, the unit gains one Fatigue Level and its Strength marker is disorganized. (If it is already disorganized, it is not further affected.) It also must be immediately moved into an adjacent, non-enemy occupied hex. This special movement does not require activation and does not expend MP. It may not be into an enemy ZOC unless there are no non-enemy ZOC present. It also may not be into another swamp hex or across a major/minor river hexside without a bridge or ferry. If no legal hex is available to move into, the unit is eliminated, and VP are awarded for its loss. If rain takes effect while one or more units occupy a provisional swamp hex with a Flanks Refused marker, that marker is removed.
Zones of Control: ZOC do not extend across ford or destroyed bridge/ferry hexsides in rain turns. They also do not extend across creek hexsides untraversed by roads, pikes, RR or trail (unless at least one of the two hexes joined by that creek hexside is a city hex).
Attacks: The attacker subtracts 1 from all combat die rolls in rain turns. Attacks cannot be made across ford or destroyed bridge/ferry hexsides in rain turns. Attacks cannot be made across creek hexsides in rain turns unless the hexside is crossed by a road, pike, trails, or RR (or at least one of the two hexes joined by the creek hexside is a city hex). In an attack across a permissible creek hexside in a rain turn, the defender gains a +2 combat die roll modifier (instead of the normal +1).
Movement: If a unit enters a hex across a road or RR hexside in a rain turn, it expends 2 (not 1) MP. A unit entering a hex across a pike hexside expends 1½ (not 1) MP in a rain turn. If a unit enters a mountain hex through a hexside crossed by a trail in a rain turn, it expends 3 MP instead of 2; if a unit enters a non-mountain hex through a hexside crossed by a trail in a rain turn, it expends 2 MP instead of 1. In rain turns, the cost to enter all types of major terrain without benefit of roads, pikes, trails, or RR is increased (see Terrain Chart).
Rivers and Creeks: In rain turns, units may cross minor and major rivers only at bridge, dam, and ferry hexsides—never at fords or destroyed bridges/ferries. Units may cross creeks only across road, pike, RR or trail hexsides in rain turns. Exception: Units may always cross a creek hexside if at least one of the two hexes joined by that hexside is a city hex.
Bridges: Units may not build or repair bridges or ferries in rain turns but may destroy them.
Entrenching: Units may not entrench in rain turns.
River Fordability
In rain turns, units may not use fords to cross major or minor river hexsides. Furthermore, Rain results on the Random Events Table may cause fords to be unusable for an extended period of time after rain turns. Each time a Rain result occurs, the players must place a "Major Rivers Unfordable" and a "Minor Rivers Unfordable" marker on the Turn Track. (If they are already on the Track, they must be advanced a variable number of boxes.) Note: If the game being played does not have either or both of these markers, players may use OTR or GTC markers, or they may make their own.
The placement and movement of these two markers on the Turn Track is governed by the type of Rain result that has occurred and the game being played. When a Rain result occurs in any game, consult the chart below to get a Rain Number for minor rivers.
Minor River Rain Number Table
| Rain Event | OTR/AIO | SIV | All Others |
|---|---|---|---|
| Rain (Current) | 1 | 0 | 0 |
| Rain (Current +1) | 2 | 1 | 1 |
| Rain (Current +2) | 4 | 3 | 2 |
| Rain (Current +3) | 6 | n/a | 3 |
Place the Minor Rivers Unfordable marker on the Turn Track a number of boxes ahead of the current turn equal to the Minor River Rain Number. If the Minor Rivers Unfordable marker is already on the Turn Track, advance it by a number of turns equal to the Rain Number. Do not place the Minor Rivers Unfordable marker on the Track if the Rain Number is 0.
Next, consult the chart below to get a Rain Number for major rivers.
Major River Rain Number Table
| Rain Event | OTR/AIO | SIV | All Others |
|---|---|---|---|
| Rain (Current) | 1 | 1 | 1 |
| Rain (Current +1) | 3 | 3 | 2 |
| Rain (Current +2) | 6 | 5 | 3 |
| Rain (Current +3) | 9 | n/a | 4 |
Place the Major Rivers Unfordable marker on the Turn Track a number of boxes ahead of the current turn equal to the Major River Rain Number. If the Major Rivers Unfordable marker is already on the Turn Track, advance it by a number of turns equal to the Rain Number. For example, in any of the games, for a Rain Current result on turn 3, if the Major Rivers Unfordable Marker is not already on the Turn Track, place it on turn 4.
Unfordability Effects
If the Major Rivers Unfordable marker is on the Turn Track, units may not move, retreat, or advance across major rivers at fords in the current turn and all succeeding turns up to and including the box occupied by the marker. If the Minor Rivers Unfordable marker is on the Turn Track, units may not move, retreat, or advance across minor rivers at fords or destroyed bridges/ferries in the current turn and all succeeding turns up to and including the box occupied by the marker. If a unit cannot cross a hexside due to unfordability effects then its ZOC does not extend across that hexside. If a unit uses a ferry to move across a minor river that is currently unfordable, that unit must pay the normal ferry movement point penalty (Manpower value divided by 3, see Section 6.2). Remove a marker from the Turn Track at the end of the turn corresponding to the box it occupies on the Track.
Limited Intelligence (Optional Rule)
This optional rule can be used with any game in the series to better reflect the uncertainties of Civil War era command. It does significantly increase the time required to complete a scenario. This rule requires mutual trust between the players and should not be used for competitive play.
The Force Display. As described in Section 6.4, each player may remove stacks of counters and replace them with a Force Marker. Normally, forces kept off-map on the Force Display may be examined by either player at any time. When using these rules, each player's Force Display is kept secret from the enemy player. Hide each player's Force Display behind a screen or under a spare game box lid.
Placing Force Markers. Each player is allowed to utilize up to ten force markers at a time. Not all games in the Great Campaigns series include ten force markers for each player; players should substitute additional counters as necessary.
A player may place one or more force markers during the Action Cycle whenever he possesses the initiative. (He is not required to activate the units being replaced with force markers during this action; he is free to take the action elsewhere). As described in Section 6.4, the units are removed from the map and placed on the force display. Two or more force markers may be simultaneously placed in the same hex (or one or more force markers may be added to a hex that already has a force marker in it) to confuse the enemy about the direction in which a force will move. When more than one force marker is in a hex, the player is free to divide the units in that hex between those forces as he sees fit. A player is permitted to assign no actual units to a force marker; a phantom force of this type is referred to below as a "dummy marker". Dummy markers may be activated and moved (see below), but may not be used to reveal enemy forces, collect VP, or trigger any other action pursuant to the rules that requires the presence of an actual unit.
Placement of force markers must adhere to the following restrictions:
- A force marker may not be placed adjacent to an enemy unit (unless impassable terrain makes it impossible to move between the two hexes).
- A force marker may not be placed within two hexes of an enemy cavalry unit.
Exception: A force marker may be placed within two hexes of enemy cavalry if all two-hex paths between the units are blocked by either: impassable terrain; woods or loess hexsides not crossed by a road, pike, trail, or RR; or a friendly unit in the hex between the force marker and the enemy cavalry unit.
Moving Force Markers. Units on the Force Display must move according to the published rules. A player moving a hidden force still rolls for that force's movement in view of the enemy player. Thus, the enemy player will have a good idea whether or not a friendly force marker contains infantry or cavalry based on the number of dice rolled for the movement. Dummy markers can be moved as either infantry or cavalry (with or without a leader) at the discretion of the owning player. The player's choice of how to move dummy markers should be based on which type of unit he is trying to trick the enemy player into thinking is present in that force. Any extended march rolls should be rolled in view of the enemy player; however, the moving player may make fake extended march rolls for hidden forces to confuse the enemy.
Movement of dummy markers normally requires the player to win initiative and spend an activation. The only exception occurs when more than one force marker starts an activation in the same hex. In that case, one or more dummy markers may be moved from that hex at the same time as the force markers with actual units without requiring a separate activation.
Revealing Enemy Forces. Players replace friendly forces markers with the units they represent (or remove them if they are dummies) in the following cases:
- If an enemy unit or force marker is adjacent to the friendly force marker (unless impassable terrain makes it impossible to move between the two hexes).
- If an enemy cavalry unit is within two hexes of the marker.
Exception: A force marker may remain on the map within two hexes of enemy cavalry if all two-hex paths between the units are blocked by either: impassable terrain; woods or loess hexsides not crossed by a road, pike, trail, or RR; or a friendly unit in the hex between the force marker and the enemy cavalry unit.
Note: This case requires actual cavalry units to be present on the map within two hexes of the force marker; cavalry units under force markers can never reveal the composition of an enemy force.
Besides removing force markers in the cases listed above, force markers can be voluntarily removed at any time by the owning player (usually when he would rather use them elsewhere on the map).
Reference: Entrenchment Table
| Current Level of Entrenchment | Combat Multiplier | 1861 Recovery | 1862 Recovery | 1863 Action | 1863 Recovery | 1864-65 Action | 1864-65 Recovery |
|---|---|---|---|---|---|---|---|
| None (see rules if in Redoubt) | — | Abatis-Build | Breastwork–Build | Breastwork–Build | Breastwork–Complete | Abatis | Breastwork–Complete |
| Abatis-Build | 1.0 | Abatis | N/A | N/A | N/A | N/A | N/A |
| Abatis | 1.5 | Breastwork–Complete | N/A | N/A |
* Once units reach Fort-Complete, their combat multiplier is 3 in all games.
Recovery Phase Summary
- Units at Fatigue Level 0 may entrench, build bridges, or repair bridges and ferries. (They may only perform one of these activities per phase.)
- Units at Fatigue Level 0, 1, or 2 may forage in the Advanced game.
- Units at Fatigue Level 0 or 1 may be affected as follows (see 8.0): a. Units at Fatigue Level 0 or 1 with disorganized Strength markers have these markers flipped to their organized sides. Exception: In the Advanced Game, out of supply units with disorganized Strength markers are unaffected; their markers remain disorganized (except SLB/RTG/HSN). b. Units at Fatigue Level 0 or 1 which are on their exhausted sides are flipped to their normal sides. c. Units at Fatigue Level 0 or 1 with Demoralize-1 markers have those markers removed. Units at Fatigue Level 0 or 1 with Demoralize-2 markers have these markers flipped to their Demoralize-1 sides.
- Units at Fatigue Level 3 or 4 are flipped to their exhausted sides. If they are already exhausted there is no further effect.
- Units at Fatigue Level 1 or more lose 3 Fatigue Levels (to a minimum of 0).
- Out of supply units with organized Strength markers in the Advanced Game have these markers flipped to their disorganized sides (except RTG/SLB/HSN).
Woods or Loess Hexside (Restricted ZOC) Summary of Effects
- Movement: Restricted ZOC do not restrict movement in any way (Section 6.2). A unit can move through a restricted ZOC without having to stop and can leave a restricted ZOC without having to pay a +1 movement penalty.
- Attacks: Units may only attack across a woods or loess hexside in certain conditions. Refer to Section 7.0, Combat, Attack Restrictions.
- Flank Attacks: Restricted ZOC count as covered hexes when computing the basic flank bonus. However, the final flank bonus is reduced by one for each hex covered by a restricted ZOC. Refer to Section 7.4, Flank Attacks.
- Retreat And Rout: Restricted ZOC affect retreats and routs just like normal ZOC.
- Command Radius: Restricted ZOC block an enemy leader's command radius just like normal ZOC.
Stonewall's Last Battle — Game Rules Booklet
The Chancellorsville Campaign, April 27 – May 6, 1863. This booklet contains the rules, scenarios and Advanced Game rules specific to Stonewall's Last Battle. Sections 2.0 through 12.0 are in the GCACW Standard Basic Game Rules booklet, reproduced above. Bracketed items beginning "[SK1:]" are errata drawn from The Skirmisher No. 1.
1.0 Introduction
Stonewall's Last Battle simulates the Civil War campaign fought near Fredericksburg and Chancellorsville in April and May 1863. In the game the players control the Union and Confederate military forces in turns that each represent one day of real time. The map portrays a section of Virginia as it was in 1863, drawn exclusively from Civil War era maps. A hexagonal grid is superimposed over the map, and each hex covers about 2,000 yards from one side to the other. Military units from regiment to division size are represented, along with the division, corps, district and army leaders of each side. Units consist of a variable number of points, each of which represents about 500 infantrymen or 750 cavalrymen.
The rules of Stonewall's Last Battle are similar to those of the four previous Avalon Hill games in the Great Campaigns of the American Civil War series: Stonewall Jackson's Way, Here Come The Rebels!, Roads to Gettysburg and Stonewall In The Valley. However, some rules changes have been incorporated since the last game in the series, Stonewall In The Valley. The most significant changes are:
- There are now three types of leaders: division, corps and army. Only division and corps leaders may undertake Activate Leader actions, and only army leaders may order grand assaults. The assault die roll modifier for district leaders has been removed.
- The zone of control rules have been changed for units in or near woods hexes, to account for the important effect of the thick undergrowth in the woods of the Wilderness.
- Random events are once again used only in the Advanced Game scenarios.
Note for owners of Stonewall In The Valley: players familiar with Stonewall In The Valley need read only the following sections (all other rules remain the same): 2.2 Playing Pieces; 2.3 The Map; 5.2 Activate Leader; 5.3 Burn RR Station; 7.1 Attacks; 7.4 Combat Die Roll Modifiers; 7.7 Cavalry Retreat; and 10.0 and following, all of which should be read in their entirety.
13.0 Basic Game Scenarios
There are five Basic Game scenarios of varying degrees of complexity. Unless otherwise indicated in the instructions that follow, all units begin the game on their front (normal) side at Fatigue Level 0 with organized Strength markers. Before beginning, place the Turn marker on the Turn Record Track in the box corresponding to the date on which the scenario begins. This is Turn 1. During the Turn Indication Phase, advance the Turn marker one box to indicate the start of a new turn. At the end of the game, total the victory points (VP) and determine the winner. Since combat losses cause victory points to be gained or lost, players should keep track of Manpower Value losses on a piece of paper or on the Victory Point Track.
13.1 Scenario 1: Salem Church
Notes: this scenario simulates Sedgwick's belated attack out of Fredericksburg against the entrenched defenders of Early's thin, stretched line. Hooker hoped this attack would let Sedgwick advance into the rear of Lee's positions at Chancellorsville, compromising the Confederate position and reversing the course of the campaign.
Game Length: 1 turn; May 3, 1863.
Special Rules
Union Initiative: the Union player automatically wins the initiative die roll in the first Action Phase of Turn 1. This continues for several Action Phases, until the Union player launches his first attack against a Confederate unit or moves a unit north of the Rappahannock. Once either of these events occurs, initiative is determined normally for the next Action Phase.
Confederate Movement Restrictions: the Confederate player is subject to the following movement restrictions:
- McLaws may not activate until he is alerted to the Union breakthrough at Fredericksburg. Sending this message to McLaws takes an entire Confederate initiative (that is, McLaws may only move the next time the Confederate wins the initiative), but it is carried out without the Confederate player moving any units. The Confederate player simply spends one of his initiatives to alert McLaws, and the next initiative is rolled normally. The Confederate player must wait until 2 of the 6 units that begin near Fredericksburg have been moved out of their set-up hexes (either by a Union attack or by voluntary movement by the Confederate player) before spending an initiative to alert McLaws.
- The Confederate player may not voluntarily move a unit north of the Rappahannock during this scenario. Confederate units may, however, retreat north of that river. Once a unit has been forced to cross the river, it may move normally, and may even return to the south bank of the river.
Substitute Units: even though this is not an Advanced Game scenario, all the rules described in the Advanced Game "Substitute Units" section (see 21.0) apply in this scenario. Thus an "Attachment Phase" is added to the sequence of play, at which point the Confederate player may attach two brigades of Early's division if he wishes. During the scenario, both players may detach units as they wish in accordance with the Advanced Game rules.
Gibbon's Division: note that Gibbon's division belongs to the II Corps and so may not be activated during a corps activation by Sedgwick.
Union Major River Bridges: the Union player begins the scenario with the following two major river bridges in place: 4427/4328 and 4427/4428.
Victory Conditions
The Union player gains or loses victory points (VP) for the following events:
| VP | Reason |
|---|---|
| +8 | If a Union unit occupies Tabernacle Church (3828) at the end of the game. |
| +5 | If a Union unit occupies Salem Church (4028) at the end of the game. |
| +2 | For each of the following hexes occupied by a Union unit or controlled by the Union player at the end of the game: Snowden (4227), Smithfield (4530), Hamilton's Crossing (4531), Fredericksburg (4328). Note that a hex is controlled by the Union if the last unit to occupy the hex was a Union unit. |
| +1 | For each Confederate Manpower point lost in combat, in retreat, or in cavalry retreat (not in extended march, forced march, or moving from one enemy ZOC to another). |
| -1 | For each Union Manpower point lost in combat, in retreat, or in cavalry retreat (not in extended march, forced march, or moving from one enemy ZOC to another). |
At the end of the game, total the Union VP and consult the table below to determine the winner.
| Union VP | Winner |
|---|---|
| 19 or more | Decisive Union victory |
| 14 to 18 | Substantial Union victory |
| 9 to 13 | Marginal Union victory |
| 4 to 8 | Marginal Confederate victory |
| -1 to 3 | Substantial Confederate victory |
| -2 or less | Decisive Confederate victory |
Scenario 1 Set-Up — Salem Church
Confederate Set-Up
| Unit/Leader | Size | Cmd | Type | Manpower | Hex |
|---|---|---|---|---|---|
| McLaws | Div | M-L | Inf | 13** | 3628 |
| Wilcox | Brig | A-L | Inf | 3 | 4226 |
| Hays | Brig | E-J | Inf | 4 | 4227 (Snowden) |
| 18 MS | Regt | M-L | Inf | 2* | 4228 |
| Barksdale |
* 18 MS, Barksdale, Hoke, Gordon and Smith begin the game under "Breastworks–Complete" markers. ** McLaws begins the game at Fatigue Level 2.
Union Set-Up
| Unit/Leader | Size | Cmd | Type | Manpower | Hex |
|---|---|---|---|---|---|
| Gibbon | Div | II | Inf | 8 | 4327 |
| Sedgwick | Corps | VI | Ldr | — | 4328 (Fredericksburg) |
| Newton | Div | VI | Inf | 18 | 4328 (Fredericksburg) |
| Howe-A | Div | VI | Inf | 13 | 4428 |
13.2 Scenario 2: The Great Flank March
Notes: this scenario recreates the decisive moment of the Chancellorsville campaign — Jackson's surprise attack on the Union XI Corps at five o'clock in the afternoon of May 2. Despite Jackson's tragic wounding on the night of the 2nd, Lee and Stuart were able to capitalize on Jackson's success and triumphantly capture Chancellorsville on the 3rd.
Game Length: 2 turns; May 2 to May 3, 1863.
Special Rules
Turn 1: there is no Leader Transfer Phase on the first turn. Play must begin immediately with the first Action Phase.
Initiative: on Turn 1, initiative is handled in a special way. The initiative (and, in most cases, which units may activate) in the first three Action Phases is determined as follows:
- 1st Phase, Union: only 1 unit of the III Corps or the XII Corps may activate (with the corps leader if desired). The unit may move and/or attack as long as no movement or attack is made into a hex west of hex column 33xx.
- 2nd Phase, Confederate: Stuart must activate F. Lee's unit during this initiative.
- 3rd Phase, Confederate: Jackson must activate his corps (any number of units) during this initiative. All combat die rolls made for Jackson's troops during this Action Phase receive an additional +1 modifier because of surprise.
The initiative for additional Action Phases on Turn 1 is determined normally with the following changes:
- The initiative during Action Phases 4 to 6 is rolled normally, but the Confederate player receives a +1 bonus to his initiative die roll (there is no longer a +1 bonus to Confederate combat die rolls).
- Initiatives 7 and following are determined normally. However, as soon as a tie is obtained on the initiative die rolls, night has fallen (the Confederate still wins the initiative as usual). All attacks after that moment suffer a -1 penalty to the attacker's combat die rolls because of darkness. This penalty applies to both players when they attack, and it lasts until the start of Turn 2.
Movement Restrictions: no unit of either side may cross the Rappahannock east of Scott's Dam Ford during this game. Retreats across the river are permitted. [SK1: be sure to use Scott's Dam Ford and not Scott's Ford for the purposes of this rule. Scott's Dam Ford is next to U.S. Ford; Scott's Ford is much further east, close to Fredericksburg.]
Substitute Units: even though this is not an Advanced Game scenario, all the rules described in the Advanced Game "Substitute Units" section (see 21.0) apply to the Confederate player (only) in this scenario. Only detachment may occur on Turn 1. The "Attachment Phase" takes place only once during this scenario, at the start of Turn 2, during which the Confederate player may attach two or more units of the same formation occupying the same hex. During both turns of this scenario, the Confederate player may detach units as he wishes according to the Advanced Game rules.
Death of Confederate Leaders: the "Death of Confederate Leaders" rules (see 18.0) apply in this scenario. Note also that Jackson is automatically considered to have been killed in this scenario at the end of Turn 1 (unless he has already been killed). He is replaced by Stuart at the end of Turn 1 using the procedure described in Section 18.0.
Victory Conditions
The Union player gains or loses victory points (VP) for the following events:
| VP | Reason |
|---|---|
| +8 | If a Union infantry division occupies Chancellorsville (3427) at the end of the game and no Confederate infantry division is adjacent to that hex. |
| +5 | If a Union infantry division occupies Chancellorsville (3427) at the end of the game and one or more Confederate infantry divisions are adjacent to that hex. |
| +6 | If the Union player can trace a path of road/pike hexes between U.S. Ford and Salem Church free of both Confederate units and unrestricted Confederate ZOC at the end of the game. For this victory condition, the presence of a Union unit in a hex negates an unrestricted Confederate ZOC. [SK1: this path of hexes must be traced entirely south of the Rappahannock.] |
| +2 | For each Union infantry corps (up to 6) entirely south of the Rapidan/Rappahannock river line at the end of the game. No points are scored for a corps if even one of its units is north of the Rapidan or the Rappahannock. |
| +1 | For each Confederate Manpower Value point lost in combat, in retreat, or in cavalry retreat (not in extended march, forced march, or moving from one enemy ZOC to another). |
| -1 | For each Union Manpower Value point lost in combat, in retreat, or in cavalry retreat (not in extended march, forced march, or moving from one enemy ZOC to another). |
| -6 | If Confederate infantry units at Fatigue Level 3 or less and with a combined defense value of 12 or more occupy Salem Church at the end of the game. |
At the end of the game, total the Union VP and consult the table below to determine the winner.
| Union VP | Winner |
|---|---|
| 28 or more | Decisive Union victory |
| 18 to 27 | Substantial Union victory |
| 8 to 17 | Marginal Union victory |
| -2 to 7 | Marginal Confederate victory |
| -12 to -3 | Substantial Confederate victory |
| -13 or less | Decisive Confederate victory |
Scenario 2 Set-Up — The Great Flank March
Confederate Set-Up
| Unit/Leader | Size | Cmd | Type | Manpower | Hex |
|---|---|---|---|---|---|
| Lee | Army | ANV | Ldr | — | 3428 |
| McLaws | Div | M-L | Inf | 13 | 3528 |
| Anderson | Div | A-L | Inf | 10 | 3428 |
| Perry-B | Brig | A-L | Inf | 4 | 3627 |
| Jackson |
* Hill, Thomas, Rodes, 23 GA, Colston and F Lee begin the game at Fatigue Level 1 (but are neither disorganized nor exhausted).
Union Set-Up
| Unit/Leader | Size | Cmd | Type | Manpower | Hex |
|---|---|---|---|---|---|
| Reynolds | Corps | I | Ldr | — | 4225 |
| Wadsworth | Div | I | Inf | 14* | 4427 (Chatham) |
| Robinson | Div | I | Inf | 11* | 4225 |
| Doubleday | Div | I | Inf | 9* | 4326 |
| Couch |
* All units of the I Corps begin the game at Fatigue Level 1 (but are neither disorganized nor exhausted). ** Sykes' division begins the game at Fatigue Level 1 and is disorganized and exhausted. + The brigades of Davis, Sargent and McIntosh begin the game on their exhausted side (at Fatigue Level 0).
13.3 Scenario 3: Sedgwick to the Rescue
Notes: this scenario combines the Great Flank March and Salem Church scenarios, which gives a better overall view of the strategic situation on May 2 and 3. In the actual campaign, Hooker waited at Chancellorsville on May 3 for Sedgwick to save his army. This scenario allows the Union player to be more aggressive and to try to reunite the two ends of his army.
Game Length: 2 turns; May 2 to May 3, 1863.
Special Rules
Turn 1: there is no Leader Transfer Phase on the first turn. Play must begin immediately with the first Action Phase.
Initiative: on Turn 1, initiative is handled in a special way. The initiative (and, in most cases, which units may activate) in the first three Action Phases is determined as follows:
- 1st Phase, Union: only 1 unit of the III Corps or the XII Corps may activate (with the corps leader if desired). The unit may move and/or attack as long as no movement or attack is made into a hex west of hex column 33xx.
- 2nd Phase, Confederate: Stuart must activate F. Lee's unit with this initiative.
- 3rd Phase, Confederate: Jackson must activate his corps (any number of units) with this initiative. All combat die rolls made for Jackson's troops during this Action Phase receive an additional +1 modifier because of surprise.
The initiative for the remaining Action Phases on Turn 1 is rolled as usual with the following changes. The initiative during Action Phases 4 to 6 is rolled normally, but the Confederate player receives a +1 bonus to his initiative die roll (there is no longer a +1 bonus to Confederate combat die rolls). Initiatives 7 and following are determined normally. However, as soon as a tie is obtained on the initiative die rolls, night falls (the Confederate still wins the initiative as usual). All attacks after that moment suffer a -1 penalty to the attacker's combat die rolls because of darkness. This penalty applies to both players when they attack, and it lasts until the start of Turn 2.
Movement Restrictions: no unit of either side may cross the Rappahannock east of Scott's Dam Ford until Turn 2. Retreats across the river are permitted. [SK1: be sure to use Scott's Dam Ford and not Scott's Ford for the purposes of this rule. Scott's Dam Ford is next to U.S. Ford; Scott's Ford is much further east, close to Fredericksburg.]
Substitute Units: even though this is not an Advanced Game scenario, all the rules described in the Advanced Game "Substitute Units" section (see 21.0) apply in this scenario. Only detachment may occur during Turn 1. The "Attachment Phase" takes place only once during this scenario, at the start of Turn 2, during which a player may attach two or more units of the same organization occupying the same hex. During both turns of this scenario, the players may detach units as they wish according to the Advanced Game rules.
Death of Confederate Leaders: the "Death of Confederate Leaders" rules (see 18.0) apply in this scenario. Note also that Jackson is automatically considered to have been killed in this scenario at the end of Turn 1 (unless he has already been killed). He is replaced by Stuart at the end of Turn 1 using the procedure described in Section 18.0.
Activation Restriction: all the units of the Salem Church scenario (except McLaws) may not activate or entrench during the first turn of the scenario. The units affected by these restrictions are indicated in the scenario set-up below. [SK1: Gibbon should also be marked with the ++ symbol in the set-up. This unit may not activate or entrench until Game Turn 2 like the rest of the units from the Salem Church scenario.]
Union Bridges: the Union player begins with the following two major river bridges in place: 4427/4328 and 4427/4428.
Gibbon's Division: once again, note that Gibbon's division belongs to the II Corps and therefore may not be activated as part of a corps activation by Sedgwick.
Victory Conditions
The Union player gains or loses victory points (VP) for the following events:
| VP | Reason |
|---|---|
| +8 | If a Union infantry division occupies Chancellorsville (3427) at the end of the game and no Confederate infantry division is adjacent to that hex. |
| +5 | If a Union infantry division occupies Chancellorsville (3427) at the end of the game and one or more Confederate infantry divisions are adjacent to that hex. |
| +10 | If the Union player can trace a path of road/pike hexes between U.S. Ford and Fredericksburg that are free of both Confederate units and unrestricted Confederate ZOC at the end of the game. For the victory conditions, the presence of a Union unit in a hex negates an unrestricted Confederate ZOC. [SK1: this path of hexes must be traced entirely south of the Rappahannock.] |
| +2 | For each of the following hexes occupied by a Union unit at the end of the game: Salem Church (4028), Tabernacle Church (3828), Snowden (4227), Smithfield (4530), Hamilton's Crossing (4531) and Fredericksburg (4328). |
| +2 | For each Union infantry corps (up to 7) entirely south of the Rapidan and Rappahannock river line at the end of the game. No points are scored for a given corps if even one unit of the corps is north of the Rapidan or the Rappahannock. |
| +1 | For each Confederate Manpower Value point lost in combat, in retreat, or in cavalry retreat (not in extended march, forced march, or moving from one enemy ZOC to another). |
| -1 | For each Union Manpower Value point lost in combat, in retreat, or in cavalry retreat (not in extended march, forced march, or moving from one enemy ZOC to another). |
At the end of the game, total the Union VP and consult the table below to determine the winner.
| Union VP | Winner |
|---|---|
| 39 or more | Decisive Union victory |
| 29 to 38 | Substantial Union victory |
| 19 to 28 | Marginal Union victory |
| 9 to 18 | Marginal Confederate victory |
| -1 to 8 | Substantial Confederate victory |
| -2 or less | Decisive Confederate victory |
Scenario 3 Set-Up — Sedgwick to the Rescue
Confederate Set-Up
| Unit/Leader | Size | Cmd | Type | Manpower | Hex |
|---|---|---|---|---|---|
| Lee | Army | ANV | Ldr | — | 3428 |
| McLaws | Div | M-L | Inf | 13 | 3528 |
| Anderson | Div | A-L | Inf | 10 | 3428 |
| Perry-B | Brig | A-L | Inf | 4 | 3627 |
| Jackson |
+ 18 MS, Barksdale, Hoke, Gordon and Smith begin the game under "Breastworks–Complete" markers. ++ Hill, Thomas, Rodes, 23 GA, Colston and F Lee begin the game at Fatigue Level 1 (but are neither disorganized nor exhausted). * Wilcox, Hays, 18 MS, Barksdale, Early, Hoke, Gordon and Smith may not activate or entrench until Turn 2.
Union Set-Up
| Unit/Leader | Size | Cmd | Type | Manpower | Hex |
|---|---|---|---|---|---|
| Reynolds | Corps | I | Ldr | — | 4225 |
| Wadsworth | Div | I | Inf | 14* | 4427 (Chatham) |
| Robinson | Div | I | Inf | 11* | 4225 |
| Doubleday | Div | I | Inf | 9* | 4326 |
| Couch |
* All units of the I Corps begin the game at Fatigue Level 1 (but are neither disorganized nor exhausted). ** Sykes' division begins the game at Fatigue Level 1 and is disorganized and exhausted. + The brigades of Davis, Sargent and McIntosh begin the game on their exhausted side (at Fatigue Level 0). ++ Sedgwick, Newton, Howe and Brooks [SK1: and Gibbon] may not activate or entrench until Turn 2.
13.4 Scenario 4: Brandy Station
Notes: following the successful Chancellorsville campaign, Lee began moving his troops northwest in preparation for his second crossing of the Potomac. In early June the corps of Ewell and Longstreet gathered around Culpeper, their movements and bivouacs screened by Stuart's cavalry. Union intelligence sensed that something was about to happen, but knew neither the scale nor the purpose of the Confederate activity. Pleasonton, Stuart's counterpart in the Army of the Potomac, received orders from Hooker to conduct a reconnaissance across the Rappahannock toward Culpeper to obtain that information.
While reorganizing at Brandy Station, six miles northeast of Culpeper, Stuart held cavalry reviews for the local population and for Lee himself. The second of these reviews took place on June 8 and was heard by the approaching Union cavalry as they assembled for the next day's operations. Stuart, unaware that the men in blue were there, would wake the following morning to the greatest surprise of his career.
Pleasonton's plan was simple. Buford's 1st Cavalry Division would cross at Beverly Ford and ride to Brandy Station, where it would join Gregg's 3rd Cavalry Division, which would cross at Kelly's Ford. Duffie's 2nd Cavalry Division would also cross at Kelly's Ford but would ride to Stevensburg looking for Lee in that direction. The three divisions would then converge on Culpeper, where they were expected to make contact with Stuart's cavalry. Two Union infantry brigades were added by Hooker in support when he assumed that Stuart had as many as 20,000 troopers under his command (the real figure was 9,500). The blue troopers were themselves surprised when their crossing of the fords was contested, if only moderately; Stuart was closer than expected.
Game Length: 1 turn; June 9, 1863.
Special Rules
Sequence of Play: the sequence of play consists only of the Action Cycle (no Leader Transfer Phase).
Initiative: the first five initiatives are predetermined:
- 1 and 2. Union: Buford's 1st Cavalry Division; two of the three brigades of this division may activate only once each.
- 3 and 4. Union: Duffie's 2nd Cavalry Division — each brigade of this division may activate only once.
- 5. Confederate: the Confederate player may make one activation.
Initiatives 6 and following are determined normally.
End of the Scenario: the scenario ends when both players pass consecutively or if all units reach Fatigue Level 4.
Union Movement Restrictions: the two wings that make up the Union force may make their first crossings of the Rappahannock only at the fords to which they were directed. The 1st Cavalry Division and Ames' infantry brigade cross at Beverly Ford, while the 2nd and 3rd Cavalry Divisions and Russell's infantry brigade cross at Kelly's Ford. The 3rd Division may not cross until the 2nd Division has made its initial crossing (remember that cavalry units are not slowed when they move through hexes containing friendly stacks). Once on the west bank of the river, Union units may use any ford or bridge of the Rappahannock to return to the east bank. Union forces may neither move nor attack west of hex line 14xx and may never cross the Rapidan.
Confederate Movement Restrictions: the Confederate Rodes infantry division may activate only if a Union unit moves within three hexes of Culpeper (1418), or after all the Confederate cavalry units on the map are at Fatigue Level 2 or more. When it activates, Rodes modifies its march die roll by (-1), contrary to the normal Confederate modifier of (+1). A result of 1 modified to zero means the division may do nothing during that activation, but it still increases its Fatigue Level and rolls for extended march if necessary. Confederate units may neither move nor attack outside Culpeper County.
Cavalry Charge: a cavalry unit that does not begin its activation in an enemy ZOC may declare a cavalry charge if it attacks a unit during that activation. A cavalry charge adds (+1) to the attacker's die roll, but to do this both the defender and the attacker must be in clear and/or rolling terrain. The respective hexes may be separated by a creek hexside or by a fordable or bridged river. A charge may not be declared for a corps assault or a grand assault. A hex containing at least one non-demoralized infantry unit may not be charged. A cavalry unit spends all of its remaining movement points in the charge action, even though it does not need to have any more (beyond the movement points it spends to declare the attack) to initiate a charge. It may still advance after combat if qualified, but it must then end its action: it may not attack other units, nor spend an MP to establish a refused flank. The (+1) charge modifier is added to the other modifiers associated with the number of movement points spent as part of the attack.
The Horse Artillery Marker: the Confederate horse artillery marker represents the whole of Stuart's available guns and is placed in hex 2115. The horse artillery marker has no combat value, and may neither retreat nor move. All Confederate cavalry units have an artillery value of zero until the guns are distributed to the brigades. The Confederate player may distribute the horse artillery by using one of his initiatives to declare this action. The horse artillery marker is then removed from play, and the three Confederate brigades with artillery values on their counters immediately receive that capability. If a Union unit enters the hex occupied by the horse artillery marker before the guns have been distributed, that marker is removed from play and the Confederate player loses the ability to use the artillery values of his cavalry units for the rest of the game.
Victory Conditions
The Union player gains or loses victory points (VP) for the following events:
| VP | Reason |
|---|---|
| +1 | If a Union unit enters the hex occupied by the horse artillery (2115) before the Confederate player uses an initiative to distribute those guns to his brigades. |
| +1 | If a Union unit enters Stevensburg (1920) at any time during the game. |
| +2 | If a Union unit becomes adjacent to Culpeper (1418) at any time during the game. |
| +1 | If a Union unit occupies Fleetwood Hill (2015) at the end of the game. |
| +1 | For each Confederate Manpower Value point lost in combat, in retreat, or in cavalry retreat (not in extended march, forced march, or moving from one enemy ZOC to another). |
| -1 | If a Confederate cavalry unit occupies Fleetwood Hill (2015) at the end of the game. |
| -1 | For each Union Manpower Value point lost in combat, in retreat, or in cavalry retreat (not in extended march, forced march, or moving from one enemy ZOC to another). |
At the end of the game, total the Union VP and consult the table below to determine the winner. [SK1: the victory conditions are those corrected by The Skirmisher No. 1.]
| Union VP | Winner |
|---|---|
| 8 or more | Decisive Union victory |
| 5 to 7 | Substantial Union victory |
| 2 to 4 | Marginal Union victory |
| -1 to 1 | Marginal Confederate victory |
| -4 to -2 | Substantial Confederate victory |
| -5 or less | Decisive Confederate victory |
Scenario 4 Set-Up — Brandy Station
Confederate Set-Up
| Unit/Leader | Size | Cmd | Type | Manpower | Hex |
|---|---|---|---|---|---|
| F Lee-B | Brig | Cav | Cav | 3 | 1710 (Oak Shade) |
| WH Lee-B | Brig | Cav | Cav | 3 | 1914 |
| 6 VA | Regt | Cav | Cav | 1 | 2114 |
| Horse Artillery | — | — | — | — | 2115 (St. James Church) |
Union Set-Up
| Unit/Leader | Size | Cmd | Type | Manpower | Hex |
|---|---|---|---|---|---|
| Davis-B | Brig | 1 | Cav | 2 | 2313 |
| Devin-B | Brig | 1 | Cav | 2 | 2313 |
| Whiting | Brig | 1 | Cav | 2 | 2412 |
| Ames | Brig | — | Inf | 3 | 2411 |
| Kilpatrick |
Advanced Game Rules
Additional rules are used in the Advanced Game which increase the realism and the complexity of play. The Advanced Game rules may not be used in the Basic Game scenarios. Note that several new phases are added to the sequence of play in the Advanced Game (see 14.0).
14.0 Advanced Game Sequence of Play
Each turn of the Advanced Game is carried out according to the following "sequence of play":
1. Random Events Phase. Two dice are rolled; the players consult the Random Events Table.
2. Ammunition Phase. Both players may replenish their ammunition.
3. Leader Transfer Phase. Leaders may be transferred from one subordinate unit to another.
4. Attachment Phase. Substitute units may be reattached to other units.
5. The Action Cycle. Action Phase:
- A. Initiative Segment: both players roll a die. The player with the higher result wins (the Confederate player wins ties). The winner must take the initiative or pass.
- B. Activation Segment: the player who took the initiative must perform a single action with an eligible leader or unit. At the end of an Activation Segment, the players return to the Initiative Segment and a new Action Phase begins. The players continue to conduct Action Phases indefinitely until both players pass in the same Action Phase (see 4.1).
6. Recovery Phase. Eligible units may entrench, build bridges and recover from fatigue, disorganization, exhaustion and demoralization.
7. Turn Indication Phase. The Turn marker is advanced one box on the Turn Record Track and the players begin a new turn.
15.0 Random Events
Each player rolls two dice in each Random Events Phase. The players consult the Random Events Table according to the result obtained by adding the two dice. Note that random events are not determined for Turns 1 and 2 of Scenario 6.
Rain (Current): the effects of rain are exactly the same as in the Basic Game. Rain results are ignored on April 29 (Turn 3 of Scenario 6).
Hooker Relieved: if this result occurs, check whether both of the following conditions are in effect: 1) Hooker was present in the hex of a Union unit at the moment it suffered a combat loss; and 2) total Union combat losses in the game so far are 10 Manpower points or more. [Combat losses count only Manpower Value points lost in combat, in retreat, or in cavalry retreat (not in extended march, forced march, or moving from one enemy ZOC to another).] If both conditions are met, the Hooker army leader counter is replaced; otherwise ignore the event. If Hooker is relieved, the Union player rolls a die. On a result of 1 to 3, the Hooker counter is replaced by the Meade counter. On a result of 4 to 6, the Hooker counter is replaced by the Couch counter. Replace the promoted corps leader (Meade or Couch) with a substitute (by flipping the corps leader counter to its reverse side). Note also that the Union Command Paralysis event and the "Hooker Loses Confidence" rules are ignored for the rest of the game.
Improved Union Logistics: the Union player receives twice the usual number of ammunition replenishment attempts in the following Ammunition Phase.
Union Command Paralysis: if Hooker is still in command of the Army of the Potomac and if the "Combine Flanks" movement limit is still in effect (see 19.1), one flank of that army suffers command paralysis for that turn (see 16.0).
Delayed Union Logistics: the Union player receives no ammunition replenishment attempts in the following Ammunition Phase.
Delayed Confederate Logistics: the Confederate player receives no ammunition replenishment attempts in the following Ammunition Phase.
Confederate Reinforcements: when this event occurs, some of Longstreet's corps may return from Suffolk (see 17.0).
Improved Confederate Logistics: the Confederate player receives twice the usual number of ammunition replenishment attempts in the following Ammunition Phase.
16.0 Union Command Paralysis
If a "Command Paralysis" result occurs on the Random Events Table, and if Hooker is still in command of the Union army, and if the "Combine Flanks" movement limit (see 19.1) is still in effect, then one flank of the Union army suffers command paralysis. To determine which flank is affected by the paralysis, roll a die. On a 1-4, the flank without Hooker is affected; on a 5-6, Hooker's flank is paralyzed.
Dividing the Army into Two Flanks
The Union army is divided into two flanks as follows:
Left flank: all units that are closer to Falmouth (4426) than to hex 3120 form the Union left. "Closer" is determined by comparing the length of a path of hexes traced between the unit and the indicated hex. A path may not cross a minor river or major river hexside (unless there is a bridge or a ford) and may not be traced through a Confederate unit or an unrestricted Confederate ZOC. For this rule, the presence of a Union unit negates the Confederate ZOC. In case of a tie (that is, both paths are of equal length), the units are assigned to the right flank.
Right flank: the units that are closer to hex 3120, or equidistant between the two hexes, form the Union right flank.
Note: units that cannot trace a line to either hex continue to belong to the same flank as on the previous turn. The assignment of each unit to a Union flank takes place only at the start of each game turn; there is no change of flank assignment when a unit moves.
Effects of Command Paralysis
The units of the affected flank suffer the following penalties during the Action Cycle of the current turn:
- The movement capability of each infantry unit performing a march is reduced by two, to a minimum of one (even during an "Activate Leader" action).
- Infantry units may not make forced marches (they may make extended marches).
- The leaders of that flank may not declare "assault" actions.
Note: Union Command Paralysis has no effect on Union cavalry or artillery units.
Hooker Loses Confidence
In addition to the effects described above, the Union player must also check whether Hooker has lost confidence in himself each time the Union Command Paralysis event takes place. The Union player rolls a die and consults the "Hooker Loses Confidence" table. The table sets the probabilities of a loss of confidence on the number of combat losses suffered by each player. Losses on this table concern only Manpower Value points lost in combat, in retreat, or in cavalry retreat (not in extended march, forced march, or moving from one enemy ZOC to another).
Modifiers to the Hooker Loses Confidence table:
- +1: if the Union player has lifted the "Combine Flanks" movement limit (see 19.1).
- +1: if a Union infantry division currently occupies both Fredericksburg (4329) and Chancellorsville (3427).
Effects: if Hooker loses confidence, the effects remain for the rest of the game unless Hooker is relieved of his command. If Hooker is relieved, the effects are removed. The effects are as follows:
- -1: to all Union combat die rolls when the Union player attacks (no change to results on defense).
- [SK1: +1: to all Union assault die rolls (including grand assaults).]
Units may be affected by both command paralysis and loss of confidence simultaneously. In that case, all the effects are cumulative, with the worst effect taking priority. Thus, the leaders of a paralyzed flank may not declare an "assault" action, attack die rolls suffer a -1 penalty, and the infantry units of the paralyzed flank suffer the movement penalties of command paralysis.
Example: during the Random Events Phase of the May 1 turn, a Union Command Paralysis event is obtained for the first time in the game. Hooker is still in command of the Union army, which controls Chancellorsville but not Fredericksburg. Union losses in combat and in retreats amount to 19, Confederate losses to only 10. Hooker will lose confidence on a result of 1 to 3. A 3 is rolled and the effects listed above are applied for the rest of the game (unless Hooker is relieved). If the Union player had controlled Fredericksburg in addition to Chancellorsville, no loss of confidence would have occurred.
17.0 Confederate Reinforcements
If the "Confederate Reinforcements" result occurs on the Random Events Table, the Confederate player must roll one additional die. That result is compared with the current date to see whether a division arrives, as shown in the table below:
| Date | Result to trigger reinforcements |
|---|---|
| April 29 to May 1 | 1 |
| May 2 | 1 to 2 |
| May 3 | 1 to 3 |
| May 4 | 1 to 4 |
| May 5 | 1 to 5 |
| May 6 | Automatic |
The first time reinforcements are triggered, place Hood's division and the corps leader Longstreet in hex 4534. If reinforcements are triggered a second time in the game, Pickett's division appears in the same hex. If 4534 is occupied by the Union, this event is ignored. See the Confederate player's set-up to determine the Manpower Value of the Confederate reinforcements.
18.0 Death of Confederate Leaders
How Confederate Leaders Are Killed
In a combat in which one or more Confederate corps or division leaders occupy the defending hex, or a hex containing subordinate units that are attacking, one of those leaders may be killed. If during the combat procedure both players roll a 1 before modifiers are taken into account, the resolution of the combat is temporarily halted so that the Confederate player checks whether his leaders die. If one of the leaders in question is Jackson, no roll is necessary to see whether he dies; Jackson is automatically killed. If another leader is involved, the Confederate player rolls a die. If the result is even, a Confederate leader is killed; if the result is odd, the Confederate leaders are unaffected. If more than one Confederate leader occupies the defending hex or the hexes containing subordinate attacking units, the one with the highest Tactical value is killed. The Confederate army leader Lee may never be killed.
Effects of the Death of a Confederate Leader
If a Confederate leader is killed, flip his marker to its reverse side, revealing a substitute ("Sub") leader. That leader is considered the new corps or division commander. Apart from the reduced Tactical and Command values, the new leader functions in exactly the same way as the one who was killed. A substitute leader remains in play for the rest of the game and may never be killed. The death of a leader does not affect the Tactical modifier in the current combat.
Exception: when Jackson dies, Stuart's infantry leader counter is placed on Jackson's hex (the Confederate cavalry must continue without a corps leader). The Confederate cavalry's substitute leader is used only if Stuart is killed before Jackson dies.
19.0 Special Movement
19.1 Combine Flanks
Hooker's strategy for the Chancellorsville campaign was to use Sedgwick's troops on the Union left as the anvil on which the hammer (the Union right) would break Lee. Hooker wanted to draw Lee off his Rappahannock line and did not contemplate a move south toward Spotsylvania Court House until the Union flanks had been combined. Thus, in the Advanced Game, no Union infantry unit may enter a hex that is both west of the Telegraph Road and whose last two digits are "32" or greater, until the Union establishes a contiguous path of connected road/pike hexes between U.S. Ford (3525/3624) and the Telegraph Road. This path must be traced entirely south of the Rappahannock and must end on the Telegraph Road between Fredericksburg and hex 4230. It must also be free of Confederate units and unrestricted Confederate ZOC (even at the end of the path). The presence of a Union unit in a hex on the path negates an unrestricted Confederate ZOC. This "Combine Flanks" movement limit is lifted for the rest of the game as soon as this path is created. Once lifted, this limit may not be re-established if the Confederate player subsequently blocks the path between U.S. Ford and the Telegraph Road. Lifting this limit also reduces the probability that Hooker loses confidence (see 16.0) and gives victory points to the Union player.
19.2 Off-Map Movement
If pressed by the Union army, the Confederate player may want to retreat or move off the southern edge of the map in order to reduce his combat losses. The Confederate player is free to move units off the map in this way at any time. Units doing so are lost to the game and give victory points to the Union player. For each Confederate Manpower point moved off-map, the Union player may pursue with a maximum of 2 Union Manpower points. Thus, if a Confederate division with 8 Manpower points exits, the Union player may pursue with a maximum of 16 Manpower points of units in any combination. This pursuit also causes the Union units to be lost to the game, but gives additional victory points to the Union. The Union units that pursue need not do so on the same turn that the Confederate exits. The Union must have lifted the "Combine Flanks" movement limit (see 19.1) to pursue in this way.
20.0 Ammunition
In the Advanced Game, players must record the ammunition expenditures of their units during the game.
20.1 Depots
Both players have depots on the map at the start of the Advanced Game. These depots provide additional ammunition to the player who controls them, to replace ammunition that has been expended in combat. They have no combat value and may not be attacked; they may neither move nor retreat. Units may enter a hex occupied by an enemy depot as long as no enemy unit is there. If they do, the depot is destroyed and removed from the map. Once destroyed, depots may never be rebuilt.
Guinea Station Off-Map Depot: the Confederate player has an off-map depot at Guinea Station. A marker is provided to remind the players of this fact, and it must be placed on the map edge in one of the two hexes from which ammunition supply paths may be traced (see below).
20.2 The Ammunition Pad
Players record ammunition consumption on the ammunition pad. On the pad, all units (but not leaders) are assigned a number of boxes, each of which represents one level of ammunition. When all of a unit's boxes have been checked off, the unit is out of ammunition — place an "Out of Ammo" marker on the unit. Always make marks on the ammunition pad in pencil, so that they can be erased when a unit replenishes its ammunition. Leaders never possess ammunition.
How Ammunition Is Expended
When a unit receives a "D" (Disorganized) result from combat, whether attacking or defending, it loses one level of ammunition. The owning player checks off a box next to that unit's name on the ammunition pad. (Exception: a unit receiving a "D" result that is already out of ammunition does not lose a level.) A unit engaged in a combat that does not receive a "D" result does not lose a level. If several units are attacking or defending in the same combat and they receive a "D" result, they each lose one level. However, units helping to provide flank attack bonuses that do not take part in the attack do not lose a level.
Units may never lose more than one level of ammunition per combat, though they may lose more than one per turn. Ammunition is not expended during cavalry retreats.
Effects of Lack of Ammunition
A unit that is out of ammunition is penalized as follows:
- Combat value: its combat value for attacking or defending is halved. Round down, but no unit may be reduced to a combat value of less than 1/2. A unit that is both demoralized and out of ammunition may not attack. In a stack of attacking or defending units, add the combat values of all units that are out of ammunition and divide the sum by two.
- Artillery value: its artillery value is 0 both in attack and in defense.
- Cavalry retreats: if it is a cavalry unit making a cavalry retreat, subtract 2 from its die roll.
Ammunition Replenishment
Both players make several attempts to replenish ammunition for some of their units during the Ammunition Phase. A unit may attempt to replenish even if it is not out of ammunition. Unless modified by a random event, the Confederate player receives 4 attempts per turn and the Union player 6. Each successful attempt allows a single unit to erase one box. An attempt is successful if the modified die roll is 6 or less. The modifiers that are added to the die result are listed below:
| Modifier | Value |
|---|---|
| The unit is exhausted | +1 |
Number of obstructed hexes along the supply path: obstructed hexes are hexes containing friendly infantry units with a combined combat value of 3 or more. See the restrictions below for the definition of the supply path.
| Obstructed hexes | Modifier |
|---|---|
| 0 hexes | 0 |
| 1 to 2 hexes | +1 |
| 3 hexes or more | +2 |
The Rappahannock and Rapidan rivers: if the supply path crosses the Rappahannock and/or the Rapidan, add an additional modifier based on the distance between the unit and the last hex before the path crosses one of those rivers (that is, the last hex on the depot side of those rivers):
| Distance | Modifier |
|---|---|
| 1 to 5 hexes | +1 |
| 6 to 14 hexes | +2 |
| 15+ hexes | +3 |
Restrictions
Predetermined replenishment attempts: all replenishment attempts must be designated before any die roll is made.
Two attempts per unit: no more than two attempts may be designated for a given unit in the same turn.
Supply path: only units that can trace a supply path from a depot may replenish their ammunition. A supply path is created by tracing a continuous series of connected road, railroad or pike hexes between a depot and a hex adjacent to the unit to be resupplied. It may then pass through one hex off the road, railroad or pike to reach the unit in question. The path must not include enemy units or unrestricted enemy ZOC and must not cross a ford during a turn in which a rain random event is in effect. For this rule, the presence of a friendly unit negates the enemy ZOC. Note that the Confederate player has an off-map depot at Guinea Station. Because of this off-map depot, Confederate depot paths may begin from hex 4233 or 4534 (like the depot at Hamilton's Crossing).
Regaining ammunition: if a unit that is out of ammunition has one or more check marks erased in an Ammunition Phase, its "Out of Ammo" marker is removed and it regains its normal combat capabilities.
Example: it is the Confederate player's turn to replenish his ammunition during the Ammunition Phase. The two divisions of Rodes and Hill have two checks each from a recent encounter with the Union army. The Confederate player assigns two replenishment attempts to each division. Both units are located south of the Rappahannock and both are exhausted. The path between Hill and the depot at Hamilton's Crossing is unobstructed, but the only path to Rodes must be traced through Hill's hex. The chances of recovering a box for each roll are 1-5 for Hill and 1-4 for Rodes. The results are: 3 and 4 for Hill and 4 and 5 for Rodes. The Confederate player erases two checked boxes on Hill's line of the ammunition pad and one checked box on Rodes'. The Confederate replenishment for this turn is now finished.
21.0 Substitute Units
Each player has eight "substitute" units (five infantry brigades and three cavalry regiments). The number of substitute units provided in the game is a strict limit. If all the substitutes are in use, no others may be used. However, if substitutes are attached to other units, they are removed from the map and become available again.
21.1 Detachment
When a unit with a Manpower Value of 2 or more makes a march, the owning player may detach one or more substitute units from the active unit.
How to Detach
To detach, the owning player places a substitute unit in the hex of the active unit and assigns it a Manpower Value. The active unit is given a new Strength marker reflecting its reduced strength (the Manpower Value of the detachment is subtracted from the Manpower Value of the active unit). A detached substitute may be placed in the hex where an active unit begins its march or in any hex crossed by the active unit during its march. After a detachment is placed on the map, the active unit may continue its march. Use a cavalry substitute if an active cavalry unit detaches it; use an infantry substitute if an active infantry unit detaches it. After placement, substitutes function normally.
Detachment Restrictions
Marker limit: a detachment may be made only if a substitute unit of the same type as the active unit (infantry or cavalry) is available at that moment.
Size: after detaching, an active unit must have a minimum Manpower Value of 1. The Manpower Value that may be assigned to a substitute unit is limited to:
- 8 or less for substitute infantry brigades
- 2 or less for substitute cavalry regiments
Determining the Status of Detachments
Fatigue: if a substitute is placed in the hex where an active unit begins a march, the substitute is given a Fatigue marker equal to the Fatigue Level of the active unit before it was chosen for the march. If a substitute is placed in a hex other than the one where the active unit begins a march, the substitute is given a Fatigue marker equal to the Fatigue Level of the active unit at that moment.
Entrenchment: if an entrenched active unit detaches a substitute in the hex where it begins a march, the substitute is given the same type of entrenchment marker as the active unit possessed.
Disorganized, demoralized, exhausted: if an active unit has a disorganized Strength marker, or is on its "exhausted" side, or has a Demoralize marker, any substitute detached from that unit must have the same characteristics.
Command: the owning player must note on a piece of paper the command (that is, the division and/or corps, as applicable) to which each substitute belongs (it belongs to the same command as the unit from which it is detached). A substitute is not obliged to remain at any particular distance from its division or corps leader; in fact, it may eventually join a unit of another command. However, its division and corps of origin may include it in an Activate Leader or assault action.
Ammunition: a substitute receives a number of ammunition boxes equal to the number possessed by the active unit. Draw those boxes next to the substitute's name on the ammunition pad. If the active unit is out of ammunition, the substitute receives no ammunition boxes and also receives an "Out of Ammo" marker.
Artillery Values of Detachments
Substitutes always have an artillery value of 0; they may never receive artillery from the active unit. (Exception: some Confederate divisions have additional markers with artillery values that may be used as substitutes as described in 21.4.)
21.2 Attachment
In the Attachment Phase, a substitute that is stacked in the same hex as a friendly unit may "reattach" to that unit. As long as a substitute attaches to a unit of the same type (infantry or cavalry), it is possible to attach to any friendly unit regardless of its size or affiliation.
How to Attach
To attach, remove from the map the attaching units and all the markers that accompany them. The Manpower Value of an attaching unit is added to the Manpower Value of the unit to which it attaches; that unit receives a new Strength marker with an increased Manpower Value.
Attachment Restrictions
Unit: a substitute may not attach part of its strength to another unit. The whole of the substitute must be attached (and the substitute counter is removed from the map).
Size: a unit may not attach to another unit if the addition of the Manpower Values raises the Manpower Value of the unit remaining on the map above the following strengths:
| Strength | Unit type |
|---|---|
| 16 | for infantry divisions |
| 8 | for infantry brigades |
| 2 | for infantry regiments |
| 4 | for cavalry brigades |
| 2 | for cavalry regiments |
Exception: some Confederate infantry brigades may be merged into a division as described in Section 21.4.
Determining Status After Attachment
Organized status: the status of the Strength marker (organized or disorganized) of the unit to which the substitute attaches determines the status of the new Strength marker, unless the Manpower Value of the substitute is greater — in that case, use the status of the detachment.
Fatigue and exhaustion status: if a substitute attaches to a unit and the two units have different Fatigue Levels, the unit remaining on the map after the attachment receives a Fatigue Level equal to the higher of the two levels. If a substitute attaches to a unit and one of the units is on its "exhausted" side while the other is on its normal side, the unit remaining on the map is flipped to (or remains on) its "exhausted" side.
Entrenchment status: if an entrenched substitute attaches to an unentrenched unit, the unit remaining on the map after the attachment remains unentrenched (the substitute's entrenchment marker is removed). However, if an entrenched or unentrenched substitute attaches to an entrenched unit, the unit remaining on the map after the attachment remains entrenched.
Demoralized: if a substitute attaches to a unit and at least one of the units is demoralized, the unit remaining on the map is given a demoralization level equal to the highest level of demoralization possessed by either of the units before the attachment.
[SK1: Special Attachment. Even though they are not substitutes, both players' infantry brigades, infantry regiments and cavalry regiments that begin the game on the map may attach to any friendly unit of the same type, respecting the attachment constraints. For example, the Buschbeck brigade, which begins Scenario 6 on the map, may attach to any Union infantry unit. Exception: in Basic Game Scenarios 1, 2 and 3, the infantry regiments and brigades beginning on the map may attach only to units of the same formation, as indicated in the scenarios' special rules.]
21.3 Substitutes and Ammunition
If a substitute attaches, erase its ammunition boxes on the ammunition pad. The unit to which it attaches keeps its current number of ammunition boxes. (Exception: if the Manpower Value of a substitute is greater than the Manpower Value of the unit to which it attaches, the unit remaining on the map after the attachment is given the number of ammunition boxes previously possessed by the substitute.)
When a substitute replenishes its ammunition, its checked boxes are erased normally on the ammunition pad. However, if a substitute has no checked box (or no remaining unchecked ammunition box), and if that unit is able to have one or more checks erased during replenishment, the player may add ammunition boxes to that substitute as long as the unit has no more than three unchecked boxes (for cavalry) and four unchecked boxes (for infantry) at any moment.
21.4 Confederate Division Leaders
Three of Lee's six division commanders acted with great autonomy at certain moments of the Chancellorsville campaign, splitting their command over the various brigades that were used to cover the possible routes of the Union approach. These commanders are those represented as division leaders in the game (Anderson, Early and McLaws). To give the Confederate player the flexibility those commanders enjoyed during the campaign, these divisions may be represented by a division unit without a division leader marker, or by several brigade units with a division leader. The special detachment and attachment rules described below therefore apply to these divisions. Where not specifically described below, the attachment and detachment of these units follows the general rules presented earlier in this section.
Additional Markers
When detaching substitutes from the division unit of these three commanders, the Confederate player may choose an unused brigade marker of the appropriate division as a special substitute marker. These special substitutes are in addition to the five infantry substitutes already allotted to the Confederate player. The brigades available for each of these three divisions are listed below:
- Anderson's division: Perry, Posey, Mahone, Wilcox, Wright
- Early's division: Gordon, Hays, Hoke, Smith
- McLaws' division: Barksdale, Kershaw, Semmes, Wofford
Note: these markers are available as special substitutes when they are not in use, even if the unit was included in the initial set-up of a scenario. Also, all substitutes detached from the brigades of these divisions must always be taken from the pool of five infantry substitute markers.
Perry's Brigade: only one of the Perry brigade markers, which is represented by two markers with different artillery values, may be used at any one time.
Use of the Leader Marker
If a substitute is detached from one of these three division-sized units and this results in a reduction to a Manpower Value of 8 or less, that division must be replaced by a brigade-sized unit and the leader marker. Conversely, if two or more brigades of the same division whose combined Manpower Value is 9 or more are present in the same hex during the Attachment Phase, they may combine to reform the division-sized unit. In that case, the division leader marker is immediately removed from the map. The division leader need not be present in the hex for the reattachment to take place; he is removed from the map whatever his current location. If more than two units are attached at the same time, assign the statuses (for example fatigue, ammunition, demoralization, exhaustion, entrenchment) based on the statuses of the largest unit before the merger. If the two units are the same size, the Confederate player may use the more favorable status. Note that separate brigades detached from the same division may still exist elsewhere on the map after the brigades with a Manpower Value of 9 or more have merged into a division-sized unit. Those separate brigades must be activated individually or by the corps leader, since the division leader is no longer available.
[SK1: if the Anderson, Early or McLaws divisions have a Manpower Value of less than 9 as a result of a march or combat, the division-sized unit may remain on the map. It does not have to be replaced by the brigade-sized unit and the corresponding leader. If the Anderson, Early or McLaws divisions have become brigade-sized units with a leader, and the combined Manpower Value of that division's brigades falls below 9, the brigades may reform into a division only if an additional force attaches so as to raise the strength to 9 or more.]
Artillery Values
Unlike standard substitutes, most of the special substitutes mentioned above have non-zero artillery values. However, the Confederate player may never change the overall artillery value of his army by detaching or attaching these special substitutes. If these limits cannot be respected, the detachment or attachment may not take place. This restriction leads to the special situations described below:
Detachment: this rule forbidding overall increases in artillery strength obliges the Confederate player to lower the Manpower Value of the division below 9 (by dividing the division into two or more brigades) if he wants to detach a brigade with a non-zero artillery value. The Confederate player may still use generic substitutes instead of increasing the number of available brigades with zero artillery values. Note also that the Confederate player may detach several brigades at the same time in order to preserve the artillery strength (for example, Early's division, with an artillery strength of 4, is divided into 4 brigades each with an artillery strength of 1).
Attachment: to comply with this rule forbidding overall increases in artillery strength during reattachment, the Confederate player has two options. The first consists of reattaching two or more brigades simultaneously with a combined artillery value equal to or greater than that of the division unit. In such a case, all changes of artillery value are confined to the hex where the reattachment takes place. The second option requires modifications to that division's special substitutes elsewhere on the map. In that case, the Confederate player's gain in artillery values due to the merger into a division-sized unit is offset by replacing that division's special substitutes with a non-zero artillery value elsewhere on the map with units having a zero artillery value (using generic substitutes if necessary).
Example: it is the Attachment Phase of May 4. On a previous turn, Anderson's division (Manpower Value 10; artillery value 2) was divided into three brigades of different Manpower Values, as follows: Perry-A (Manpower Value 5; artillery value 1), Mahone (Manpower Value 4; artillery value 0), and Posey (Manpower Value 1; artillery value 1). During this Attachment Phase, Perry-A and Mahone are stacked at Chancellorsville (3427), while the Anderson leader marker and Posey's brigade are west of Wilderness Tavern (2926). The Confederate player wishes to reform Anderson's division in the Chancellorsville hex. He replaces the Perry-A and Mahone markers with the Anderson division marker (artillery value 2). A Strength marker with a Manpower Value of 9 is assigned to that unit. Anderson's leader marker is removed from the map, even though it is not in that hex. However, the Confederate player has increased his army's artillery strength by one. Posey's marker must be replaced by a substitute with a zero artillery value (either a generic substitute or the Perry-B or Mahone markers of Anderson's division). Taking Perry-B or Mahone is recommended, since those options allow the Confederate player to keep a Tactical value of 2 in the Wilderness Tavern hex.
22.0 Advanced Game Scenarios
There are two Advanced Game scenarios, one of 7 turns (Scenario 5) and the other of 10 turns (Scenario 6). Unless otherwise indicated in the set-up, units begin the game on their normal sides with organized Strength markers.
22.1 Scenario 5: An Inevitable Destruction…
Notes: late on April 30, 1863, the morale of the Army of the Potomac reached new heights. Their new commander, General "Fighting Joe" Hooker, had led three Union corps in a brilliant and audacious flank march across the Rappahannock at Kelly's Ford and then south across the Rapidan to Chancellorsville. General Robert E. Lee was just beginning to realize the danger his rebel army was in, caught between two Union forces each at least equal to his own. The enthusiasm of the Union army was summed up in Hooker's General Orders No. 47:
It is with heartfelt satisfaction that the commanding general announces to the army that the operations of the last three days have determined that our enemy must either ingloriously fly, or come out from behind his defences and give us battle on our own ground, where certain destruction awaits him…
Hooker even went so far as to tell a reporter that "the rebel army… is now the legitimate property of the Army of the Potomac. They may as well pack up their haversacks and make for Richmond." Yet a week later Hooker's army was retreating behind the Rappahannock, having been resoundingly beaten by Lee's army, half the size of his own.
Game Length: 7 turns; April 30 to May 6, 1863.
Special Rules
Random Events: random events are determined every turn of this scenario.
Turn 1 Activation Restrictions: on Turn 1, only the following Confederate units/leaders may perform actions or make leader transfers: all cavalry units, Posey, Mahone, Wright and Anderson. Units that are not eligible to move may nevertheless entrench during the Recovery Phase of Turn 1. A Confederate unit is freed from this restriction as soon as a unit of the Union right flank comes within 4 hexes of that Confederate unit. In addition, all Confederate units are free to move in hex rows numbered 40xx or higher (that is, to the east) if the Confederate is attacked during Turn 1 by the Union left flank. [SK1: note that a failed assault attempt is considered an attack.] See "Union Command Paralysis" in Section 16.0 for the definition of the Union right and left flanks.
Bridges: the Union player begins the scenario with the following two major river bridges in place: 4529/4628 and 4427/4428.
Union Movement Restriction: the Union Provost Guard unit and one of the two Union reserve artillery units must remain north of the Rappahannock at all times.
Victory Conditions
The Union player gains or loses victory points (VP) for the following events:
| VP | Reason |
|---|---|
| +2 | Per cavalry brigade that moves off the southern edge of the map by a road between hex 0134 and hex 1633 before the end of Turn 2. No more than 5 brigades may be counted for these points. |
| +2 | If the Culpeper railroad station is damaged or destroyed at any time during the game. |
| +2 | If the Orange Court House railroad station is damaged or destroyed at any time during the game. |
| +1 | For every 10 Union Manpower points exited off the southern edge of the map (see 19.2). |
| +1 | For every 5 Confederate Manpower points exited off the southern edge of the map (see 19.2). |
| +6 | If the Union player is able to lift the "Combine Flanks" movement restrictions (see 19.1) at any time during the game. |
| +4 | If a Union infantry division occupies Fredericksburg (4329) at the end of the game. |
| +3 | If a Union infantry division occupies Chancellorsville (3427) at the end of the game. |
| +3 | If the Confederate depot at Hamilton's Crossing is destroyed. |
At the end of the game, total the Union VP and consult the table below to determine the winner.
| Union VP | Winner |
|---|---|
| 53 or more | Decisive Union victory |
| 38 to 52 | Substantial Union victory |
| 23 to 37 | Marginal Union victory |
| 8 to 22 | Marginal Confederate victory |
| -8 to 7 | Substantial Confederate victory |
| -9 or less | Decisive Confederate victory |
Scenario 5 Set-Up — An Inevitable Destruction
Confederate Set-Up
| Unit/Leader | Size | Cmd | Type | Manpower | Hex |
|---|---|---|---|---|---|
| Lee | Army | ANV | Ldr | — | 4329 |
| McLaws | Div | M-L | Inf | 11* | 4329 |
| Barksdale | Brig | M-L | Inf | 7* | 4328 (Fredericksburg) |
| Anderson | Div | A-L | Ldr | — | 3828 (Tabernacle Ch) |
* McLaws, Barksdale, Perry, Early and Wilcox begin the game under "Breastworks–Complete" markers.
Confederate Reinforcements
| Unit/Leader | Size | Cmd | Type | Manpower | Hex |
|---|---|---|---|---|---|
| Longstreet | Corps | L | Ldr | — | 4534 |
| Hood | Div | L | Inf | 14 | 4534 |
| Pickett | Div | L | Inf | 12 | 4534 |
Union Set-Up
| Unit/Leader | Size | Cmd | Type | Manpower | Hex |
|---|---|---|---|---|---|
| Reynolds | Corps | I | Ldr | — | 4529 |
| Wadsworth | Div | I | Inf | 14 | 4529 |
| Robinson | Div | I | Inf | 11 | 4628 |
| Art Res-2 | Brig | AP | Art | 2 | 4628 |
| Doubleday |
* Griffin, Sykes and Humphreys begin the game on their "exhausted" side (at Fatigue Level 0).
22.2 Scenario 6: The Chancellorsville Campaign
Notes: this scenario presents the whole of the Chancellorsville campaign and allows the Union player to choose the places of his crossings of the Rappahannock. It also gives the Confederate player the chance to scout the fords of the Rappahannock aggressively and thus be informed of the Union movements earlier than historically.
Game Length: 10 turns; April 27 to May 6, 1863.
Special Rules
Random Events: random events are not determined in this scenario until the start of Turn 3.
Union Movement Restrictions: the Union Provost Guard unit and one of the two Union reserve artillery units must remain north of the Rappahannock at all times.
Turn 1 Special Rules
Activation Restrictions: on Turn 1, no unit may activate except the following Union units and leaders: Meade, Griffin, Sykes, Humphreys, Devin, Howard, Devens, Steinwehr, Schurz, Buschbeck, Slocum, Williams, Geary.
Because no Confederate activity is allowed on Turn 1, do not make initiative die rolls at the start of each Action Phase of Turn 1. The Union player may activate his eligible units and leaders in consecutive Action Phases for as long as he wishes or is able to, until the Action Cycle of Turn 1 ends. Note that the Union units listed above may not cross the Rappahannock on the first turn. No unit (Confederate or Union) may entrench this turn.
Turn 2 Special Rules
Confederate Hidden Movement: on Turn 2, only Confederate units in hexes numbered 35xx or less (that is, to the west) may perform actions [SK1: or leader transfers]. In addition, those units move this turn during a special hidden movement phase that occurs before any Union action. If the scenario is played solitaire, hidden movement is determined by die rolls, as described in the section that follows; for solitaire play, ignore the rest of this rule. However, in a two-player game, after the end of the Attachment Phase of Turn 2, the Confederate player secretly performs actions with his eligible units and leaders in consecutive Action Phases for as long as he is willing or able to do so. All these actions are hidden from the Union player. When the Confederate actions are finished, the Confederate player writes the location and status (Fatigue Level, organized or disorganized) of each unit on paper. This information is revealed after the Recovery Phase of Turn 2. Note that none of these Confederate units may cross to the east bank of the Rappahannock during this turn. The units are removed from the map after the hidden movement has been recorded, and they exert no ZOC on the north bank of the Rappahannock (even if they are secretly located next to a ford hex).
No Initiative Die Rolls: on Turn 2, all Union units are eligible to perform actions. Because all Confederate activity takes place during the special hidden movement phase described above, do not make initiative die rolls at the start of each Action Phase of Turn 2. The Union player may activate his eligible units and leaders in consecutive Action Phases for as long as he is willing or able to do so, until the Action Cycle of Turn 2 ends. Note that Union units may not cross the Rappahannock this turn. Note also that the six Union cavalry units that begin the game in a Warrenton Junction hex may perform only one action during this turn.
Secret Union Bridges: after the end of the Union actions, but before the Southern hidden movement is revealed, the Union player secretly records the location of his two major river bridges across the Rappahannock. These bridges must be built in hexes that contain a Union infantry unit with a combat value of at least 5 or more and that has a Fatigue Level of 0 or 1 at the end of the Action Cycle of Turn 2. The name of the infantry unit that built the bridge is also recorded. The hex on the south bank of the Rappahannock where the bridge is built must not contain a Confederate unit with a combat value of 5 or more. Note that this is the only time bridge construction may occur at a moment other than the Recovery Phase. The locations of these bridges will be revealed during the Union player's movement on Turn 3, as described below. The Union player may build additional bridges over a minor river hexside during the Recovery Phase of this turn.
Revealing Hidden Movement: after the Union player has secretly recorded the positions of the two major river bridges, the Southern hidden movement is revealed. The following table is provided to generate the Southern hidden movement if this scenario is played solitaire. In solitaire play, after the end of the Union movements of Turn 2, roll a die on this table for each of the three Confederate cavalry units. If the same location is obtained more than once, reroll until each of those three units has a unique location. These rolls replace the Confederate hidden movement phase. Note that in solitaire play it is assumed that Posey and Mahone do not leave the entrenchments in which they begin the game. It is also assumed that the leader Stuart remains stacked with F. Lee's brigade.
| Result | "Hidden" movement location |
|---|---|
| 1 | 2315 |
| 2 | 2419 |
| 3 | 2618 |
| 4 | 2721 |
| 5 | 2821 |
| 6 | 3121 |
Turn 3 Special Rules
Random Events: at the start of Turn 3, random events are determined. On this turn, a rain result has no effect.
Secret Union Bridges: the secretly recorded major river bridges are placed during the Action Phase of this turn, during a march action by the Union infantry unit that builds the bridge. Note that this unit does not move any hex; its march action is devoted to building the bridge. This march action may be one of the marches associated with a corps activation (so that the other divisions of the corps may then cross the bridge during the same Action Phase). Note that these bridges are not immediately destroyed if a Confederate unit with a combat value of 5 or more marches into the hex on the south bank of the Rappahannock. However, if a Confederate unit with a combat value of 5 or more remains in that hex at the end of the Action Cycle of Turn 3, the bridge is considered destroyed. If the Union player declines to reveal a bridge during Turn 3, it is considered destroyed and must be rebuilt during the Recovery Phase according to the standard bridge construction rules. This special secret bridge construction may not be held over to future turns.
Confederate Movement Restrictions: on Turn 3, Confederate leaders and units in hexes numbered 36xx or higher (that is, to the east) may not transfer or perform actions until they are released. They are released to perform actions in hexes numbered 36xx or higher as soon as a Union unit enters a hex numbered 36xx or higher that is south of the Rappahannock. They are entirely released to move freely over the whole map once a message reaches them from a unit located in hexes 35xx or less. Sending this message takes an entire Confederate initiative (that is, the units in hexes 36xx or higher may only move on the next Confederate initiative), but it is accomplished without the Confederate player moving any units. The Confederate player simply gives up one of his initiatives to alert the rest of his army, and the next initiative is rolled normally. The Confederate player must wait until one of his units in hexes numbered 35xx or less has "met" a Union infantry division that is in a hex south of the Rappahannock before giving up an initiative for the purpose of alerting the rest of the Confederate army. The "meeting" with the Union infantry division occurs when one of the two following conditions occurs: the Union division moves into a hex south of the river that is in an unrestricted zone of control of a Confederate unit, or a Confederate unit moves next to the Union division while it occupies a hex south of the river. Even if this message is never transmitted to the rest of the Confederate army during Turn 3, all Confederate units are free to move over the whole map at the start of Turn 4.
Victory Conditions
The Union player gains or loses victory points (VP) for the following events:
| VP | Reason |
|---|---|
| +2 | Per cavalry brigade that moves off the southern edge of the map by a road between hex 0134 and hex 1633 before the end of Turn 5. No more than 5 brigades may be counted for these points. |
| +2 | If the Culpeper railroad station is damaged or destroyed at any time during the game. |
| +2 | If the Orange Court House railroad station is damaged or destroyed at any time during the game. |
| +1 | For every 10 Union Manpower points exited off the southern edge of the map (see 19.2). |
| +1 | For every 5 Confederate Manpower points exited off the southern edge of the map (see 19.2). |
| +6 | If the Union player is able to lift the "Combine Flanks" movement restrictions (see 19.1) at any time during the game. |
| +4 | If a Union infantry division occupies Fredericksburg (4329) at the end of the game. |
| +3 | If a Union infantry division occupies Chancellorsville (3427) at the end of the game. |
| +3 | If the Confederate depot at Hamilton's Crossing is destroyed. |
At the end of the game, total the Union VP and consult the table below to determine the winner.
| Union VP | Winner |
|---|---|
| 48 or more | Decisive Union victory |
| 33 to 47 | Substantial Union victory |
| 18 to 32 | Marginal Union victory |
| 3 to 17 | Marginal Confederate victory |
| -13 to 2 | Substantial Confederate victory |
| -14 or less | Decisive Confederate victory |
Scenario 6 Set-Up — The Chancellorsville Campaign
Confederate Set-Up
| Unit/Leader | Size | Cmd | Type | Manpower | Hex |
|---|---|---|---|---|---|
| Lee | Army | ANV | Ldr | — | 4328 (Fredericksburg) |
| McLaws | Div | M-L | Ldr | — | 4328 (Fredericksburg) |
| Barksdale | Brig | M-L | Inf | 5* | 4328 (Fredericksburg) |
| Semmes | Brig | M-L | Inf | 5* | 4329 |
* Barksdale, Wilcox, Posey, Mahone, Early and Colston begin the game under "Breastworks–Complete" markers.
Confederate Reinforcements
| Unit/Leader | Size | Cmd | Type | Manpower | Hex |
|---|---|---|---|---|---|
| Longstreet | Corps | L | Ldr | — | 4534 |
| Hood | Div | L | Inf | 14 | 4534 |
| Pickett | Div | L | Inf | 12 | 4534 |
Union Set-Up
| Unit/Leader | Size | Cmd | Type | Manpower | Hex |
|---|---|---|---|---|---|
| 1 PA | Regt | — | Cav | 1 | 5828 (King George Ct Hse) |
| Reynolds | Corps | I | Ldr | — | 5025 (Belle Plain) |
| Wadsworth | Div | I | Inf | 14 | 5025 (Belle Plain) |
| Robinson | Div | I | Inf | 11 | 5128 (Bloomsbury) |
Clarifications and Corrections
Official errata sheet published by Multi-Man Publishing for Stonewall's Last Battle. The scenario-level items are already incorporated in the text above; the entrenchment change and the Q&A are reproduced here.
9.0 Entrenchments
[correction — for Advanced Game scenarios only]: ignore the "Build" side on Breastworks markers. Units may complete Breastworks in just one turn. The idea is that the entrenchment process should take less and less time as the war goes on. This change makes SLB consistent with RTG, which occurs just a month later. Only the early 1862 campaigns in the series should use the two-turn Breastworks procedure. [Though it should not be considered an official rule change to SJW or HCR, players could consider inserting the two-turn breastworks procedure described in the SIV, SLB, and ONR rulebooks into their games of SJW and HCR. This would apply the two-step procedure throughout 1862. It then might even be a good idea to swap the Breastworks counters from SLB with those provided with SJW or HCR.] Note that Fort construction still takes two turns.
Thus, the first two bullets in the "Building and Removing Entrenchments" section should be replaced with just a single bullet:
- If a unit entrenches, place a Breastworks marker atop the unit on its completed side.
Remove the third bullet in the "Effects of Entrenchments" section.
Note that this rule change does NOT apply to Basic Game scenarios. There should be no entrenching in any Basic Game scenario. This is because two scenarios are just one turn in length, while the other scenarios (two days in length) start at 5 pm, not giving units enough time to fully complete breastworks before the final turn of the scenario.
Questions and Answers — 21.4 Confederate Division Leaders
Q: When attaching two Rebel special brigades whose total manpower level is less than 9 (i.e. Gordon and Smith in Scenario 1), they cannot form a division-sized unit, just a larger brigade. Is any extra artillery value permanently lost in this type of attachment if both the brigades have artillery? A: Yes, any artillery lost in combining brigades together into brigades is lost forever. It cannot be regained when later combining to form a division-sized unit.
Q: When one of the three Rebel special divisions (Anderson, Early, McLaws) is in play as the division-sized unit and falls below manpower level 9 due to marching or combat, is the division forced to be detached into brigades? A: No, the division-sized unit can remain on the map.
Q: If one of the three Rebel special divisions (Anderson, Early, McLaws) has detached into brigades and the total brigade strength has fallen below 9, can the brigades only reform back into the division if they first attach enough manpower to bring them up to strength 9 or more? A: Yes, that is correct.