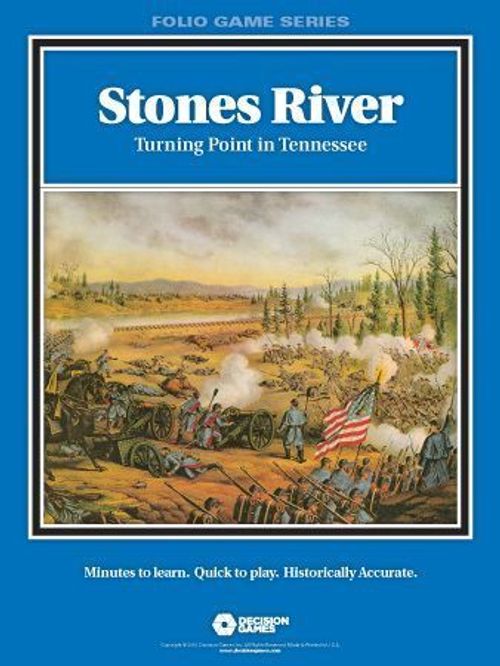
Stones River: Turning Point in Tennessee
Stones River: Turning Point in Tennessee Rulebook
Table of Contents
Table of Contents
- Part A: Musket & Saber Standard Rules
- Part B: Stones River Exclusive Rules
Part A: Musket & Saber Standard Rules
Musket & Saber Standard Rules (V6F, July 2012; errata of 12 Oct 2013 incorporated). These standard rules apply to every Musket & Saber folio, including this one. Exclusive rules for Stones River follow in Part B.
1.0 Introduction
Each game in the Musket & Saber system depicts a battle from the musket era (c. 1756-1871). Players command opposing forces in the situation faced by their historical counterparts. The goal is to reach the victory conditions established by the exclusive rules for a game, usually the capture of key terrain, or the destruction of enemy units, or both.
Hexes are 352 yards across, daylight turns are 90 minutes, and units are 300 to 4,500 men or up to 24 cannon.
2.0 Components
2.1 Inventory
This game consists of: the Musket & Saber Standard Rules explaining the mechanics of play; Exclusive rules including the set up and victory conditions; the Terrain Effects Chart (TEC) and Combat Results Table (CRT) in the exclusive rules folder; a map of the battlefield, including the Turn Record Track (TRT); a die-cut sheet of playing pieces (counters).
Note on this transcription: the folio's Terrain Effects Chart (TEC) and Combat Results Table (CRT) are missing from the source copy used for this rulebook. Every reference to the CRT or TEC below is reproduced as printed; the tables themselves are not reproduced here.
Players must provide one or more six-sided dice (two differentiated dice per player is ideal).
2.2 The Map & Terrain
The hexagonal grid is superimposed on the terrain to regulate the placement and movement of units; a unit on the map is considered to be in a single hex at any given time. Each hex has a unique four-digit number to aid set up and play.
Every hex has a primary terrain, which affects movement into, and sometimes out of, that hex, and may affect combat. The basic terrain is "clear." A hex with any amount of another primary terrain is considered to consist entirely of that feature (but note that a "clear" hexside has a combat effect when adjacent to woods).
Each hex also may have one or more secondary terrain types. The effects of secondary terrain may modify the primary, or may affect units separately.
Still other terrain features lie on the hexside between two hexes. They affect movement and combat across that hexside only, and have no effect on units in either adjacent hex.
Terrain types and effects are summarized on the Terrain Effects Chart (TEC). [TEC not included in this transcription.]
2.3 The Counters
Most of the counters represent combat units (2.4). Others represent key leaders or fulfill a game function. The counter types and the rules section describing their uses are: [The counter-type table is not reproduced in the source text.]
2.4 Combat Units
Infantry, artillery, and cavalry are combat units. The rules are written for infantry, with special rules for cavalry and artillery at 8.0 and 9.0. Each combat unit has the following information:
- Army: the background color denotes which counters belong to each army; they are listed in the exclusive rules.
- Unit ID: its historical identification. The unit above is Cleburne's [Confederate] Brigade from the Shiloh folio.
- Formation: the unit's place in its army's command hierarchy. It affects the ability of a unit to cooperate with others in combat. A formation of "0" indicates an independent unit, belonging to no formation; an "A" indicates a unit that may be treated as belong to "All" other formations.
- Combat Factor (CF): this is the measure of the unit's ability to inflict damage in combat (see 7.0). Zero is a factor. A parenthesized CF is halved when attacking.
- Morale Rating (MR): the unit's ability to withstand the vicissitudes of combat. It may be modified by terrain (TEC), leaders (10.0), disruption (2.8 & 11.0), and/or nature (14.0). To check a unit's morale, roll a die: if the roll is greater than the MR, the unit fails. Regardless of the MR and any modifications, a unit always succeeds on a die roll of "1," and always fails on a die roll of "6." The effect of failure is explained in the specific rules requiring the check.
- Movement Allowance (MA): the unit's ability to move across the map (see 4.3). A "V" in place of a number means the unit's MA is variable (see 4.4). A bracketed MA means the unit cannot skirmish (see 7.13).
2.5 Steps
Most infantry units have two strength steps. The front side shows the unit at its full, two-step strength. The reverse side, with a red band, shows the unit after it has suffered casualties (see 7.8 and 11.2). The factors are generally weaker, but the degree of weakening varies from unit to unit. Infantry with a red band on the front are one-step units and are blank on the reverse side.
2.6 Artillery & Cavalry
Artillery and cavalry units have only one step. They have printing on the reverse side indicating a loss of unit effectiveness (see 2.9, 7.8, & 11.3). A player may flip a unit to its ineffective side at the beginning of any of his movement phases (useful for units that move faster when ineffective).
2.7 Battalions & Squadrons
Infantry battalions and cavalry squadrons are one-step units with an ineffective side like artillery and cavalry. They have special stacking and combat capabilities (see 5.1, 7.4, & 7.5).
2.8 Disruption
A unit may become disrupted for one of several reasons. Mark a disrupted unit with a Disrupted marker. It may recover during the movement phase (see 11.1). It may be disrupted and recover any number of times per game. It operates normally except for the following:
- it exerts no ZOC (6.0);
- it must roll for its MA (4.4);
- its CF is treated as parenthesized (2.4 & 7.7);
- it may not advance after combat (7.12);
- subtract two from its morale rating (2.4; it passes a morale check on a roll of "1");
- if forced to retreat (7.9), it must retreat two hexes.
2.9 Ineffectiveness
Ineffectiveness applies only to infantry battalions, to all artillery and cavalry units, and to leaders. Flip an ineffective unit to its reverse side; it operates normally but with considerably reduced values. It may recover during movement (see 11.3).
3.0 Sequence of Play
3.1 The Course of a Game
Set up the map and counters according to the instructions in section 17.0 of the exclusive rules. The players then alternate moving and attacking with their units during the game turns (3.2) to reach the victory conditions set in section 18.0 of the exclusive rules. Victory is determined after the last game turn is completed.
3.2 The Game Turn
The game is played in a series of game turns, tracked by moving the Game Turn marker along the TRT on the map. Each turn consists of five phases. The exclusive rules for each folio specify which player is the first player and the number of turns in the game.
- First Player Movement Phase: the first player moves his units according to the rules for movement (4.0), stacking (5.0), zones of control (6.0), and entering the map (13.1). Eligible units may recover from combat damage (11.0) and/or re-enter the map (13.2).
- First Player Combat Phase: the first player uses his units to attack enemy units within the constraints of the combat rules (7.0, as modified by 8.0, 9.0, & 10.0).
- Second Player Movement Phase: same as above, with the players switching roles.
- Second Player Combat Phase: same as above, with the players switching roles.
- Game Turn Marker Phase: if the last turn is completed, determine the winner (18.0); if turns remain, advance the turn marker and play another turn.
4.0 Movement
4.1 The Movement Phase
During his movement phase, the active player may move as many or as few of his own units as he desires. The inactive player's units may not be moved. No combat takes place during the movement phase. Units may move off the map at any time; treat it as having routed off the map with an unsafe line of retreat (see 7.10).
In lieu of movement, a unit may attempt to recover from the effects of combat (see 11.0).
4.2 Moving a Unit
Units are moved one at a time tracing a path of contiguous hexes, in any direction or combination of directions. The distance a unit may move is limited by its movement allowance (4.3 & 4.4), terrain (4.5), friendly units (5.0), and/or enemy units (6.0).
If the owning player desires, a stack of units (5.0) may move together. The units must start and remain together, and use the MA of the slowest unit.
4.3 Movement Allowance (MA)
A unit's printed MA indicates the number of movement points (MP) available during each movement phase. As a unit enters a hex it must pay one or more MP depending on the terrain (see 4.5). A unit may not exceed its MA during a single movement phase. Unused MP may not be accumulated or transferred to another unit.
4.4 Variable Movement Allowance
The MA of some combat units (only; leaders, HQ, and Trains are unaffected) must be determined at the moment their movement begins. For each unit meeting one or more of the criteria listed below, roll one die (if the unit's printed MA is greater than six, roll two dice). The die roll is its MA for that movement phase. If the roll exceeds the unit's printed MA, use the printed MA. Roll for a unit if it:
- has a printed MA of "V" (see 2.4);
- is disrupted (see 2.8 & 11.1);
- is overstacked (see 5.2);
- is disengaging (see 6.3);
- is subject to a fortune of war (see 12.4).
4.5 Terrain Effects on Movement
Entering a clear hex across a clear hexside costs one MP. Other terrain requires more MP to enter; those costs are listed on the TEC. Units crossing certain hexside terrain must pay additional MP, denoted by a "+1" on the TEC. Those MP are added to the normal cost to enter a particular type of terrain. A unit lacking the necessary MP may not enter the hex.
4.6 Road & Trail Movement
To use a road or trail, a unit must move from a hex containing the path across a hexside containing the same path into another hex containing the same path. Any break, even within a single hex or across a single hexside, terminates the path. Units using a path ignore the movement effects of other terrain and pay just one MP cost for the path hex. Road, trail, and non-road/trail movement may be combined in a single movement phase.
Infantry and cavalry may not use road or trail movement to enter an Enemy Zone of Control (EZOC; see 6.0); they pay the full terrain cost starting with the last hexside crossed. Artillery may use road/trail movement to enter EZOC.
4.7 March Movement
March movement allows units (not HQ or Trains) to move faster if far enough from enemy units. A unit may employ march movement as long as: 1) neither it nor its zone of control (see 6.0) start the phase in or enter an EZOC during movement, and 2) it does not initiate combat during the combat phase (except by virtue of an FOW). It may not enter certain terrain (see the TEC).
In place of the unit's printed MA, all infantry and artillery units receive a march movement allowance of nine MP; all cavalry units receive an allowance of 15 MP. If the unit is rolling for its MA (4.4), roll one die and add three for infantry and artillery, roll two dice and add three for cavalry.
A marching unit pays only 1/2 MP when marching along a road (only; not a trail); any leftover 1/2 MP is lost as soon as the unit leaves the road, even if another segment of road is used later in the same move. If the marching unit on a road leaves or enters a hex containing another combat unit, it pays 1 MP, not the 1/2 MP.
A marching unit may recover (see 11.0).
5.0 Stacking
5.1 Stacking Generally
A hex with more than three units in it at the start of a phase is overstacked. There is a limit to the number of units that can participate in combat in a single hex (7.4 and 7.5).
5.2 Overstacking & Movement
If, at the beginning of a movement phase or at the instant of combat, there are more than three units in a single hex, the hex is considered overstacked. Battalions, squadrons, leaders, and headquarters do not count for stacking purposes.
If a unit begins its movement in an overstacked hex, roll to determine the unit's MA. All units in the overstacked hex must roll, even after enough units have departed the hex to bring it within stacking limits. An overstacked hex may remain overstacked indefinitely.
5.3 Combat Stacking
For combat, one artillery unit plus one battalion/squadron plus any one other combat unit may fight from a single hex. The owning player may readjust stacked units freely, choosing which fight and which stand by. Stacked units must participate in the same combat (but see 8.4).
Additional units stacked with the engaged units may not participate in combat in any way, but may be forced to retreat or rout (see 7.8).
Units defending or attacking from an overstacked hex have their CF halved (see 7.7).
6.0 Zones of Control
6.1 Zones of Control Generally
The six hexes adjacent to a unit constitute its zone of control (ZOC). All combat units exert a ZOC at all times (but see 6.4). All ZOC exist independently of one another.
The ZOC of enemy units (EZOC) inhibit movement (6.2), impose combat requirements (7.2), and restrict retreat (7.6 & 7.9). Friendly ZOC have no effect on friendly units.
6.2 ZOC Effects on Movement
A unit must cease moving when it moves into an EZOC. A unit already in an EZOC generally may not exit until released by the outcome of combat (but see 6.3).
Disrupted units and units with parenthesized combat factors may not enter EZOC during movement, unless accompanied by a leader or by an undisrupted unit with a non-parenthesized combat factor. Once in an EZOC, those units operate normally (but see 11.1).
6.3 Disengagement
A unit may disengage (move out of an EZOC) during movement if it has a higher printed MA than every unit exerting an EZOC on it.
A unit with the same or lower MA may disengage if it begins the movement phase stacked with another friendly unit in the EZOC and that other unit remains in the hex.
Disengaging units must roll for their MA. If the result is insufficient to reach another hex, the unit may not move. Disengaging units may not enter another EZOC during the movement phase of disengagement.
6.4 Limiting ZOC & ZOC Effects
Disrupted (see 11.1) and ineffective (11.3) units exert no ZOC. No unit may exert a ZOC into a hex or across a hexside into/across which it could not move.
Some kinds of in-hex terrain block ZOC going in or out of a hex. Some hexside terrain blocks ZOC across the hexside. Consult the TEC. [TEC not included in this transcription.]
7.0 Combat
7.1 The Combat Phase
During his combat phase, the active player (the attacker) may use his units to attack those of the other player (the defender). Combat generally takes place between adjacent opposing units (but see 8.4). Within the constraints of this section, the attacking player may conduct as many or as few attacks as he wishes and in any order. This section is written primarily for combat involving infantry; see 8.0, 9.0, & 10.0, respectively, for special rules for artillery, cavalry and leaders.
7.2 Potential Combats
A defending unit exerting a ZOC onto an attacking unit at the beginning of the combat phase triggers a potential combat. Defending units adjacent to an attacker but not exerting a ZOC do not trigger combat, but the attacker has the option of attacking if allowed within the constraints of this section.
Attacking triggered defenders is not mandatory. The triggering unit may attack another defender or remain inactive; however, any a triggered defending unit not attacked during the combat phase (bombardment may not count; see 8.4) receives a fortune of war (see 12.4).
The FOW must be played on the triggered unit as soon as all triggering units have completed their combat. The FOW may be used to move all units in the triggered hex, or by one unit to charge or recover. Ignore EZOC for recovery and charge, and the need to move one hex to charge.
7.3 Combat Procedure
Resolve each combat using the following steps:
- Identify the involved units (7.4 & 7.5).
- Make a morale check (2.4) for any defender lacking a safe line of retreat (7.6). If a unit fails, it is disrupted (11.1); if already disrupted, it routs (7.10; treat the rout as the result of combat).
- If desired, make a choice of tactics (7.13), attacker first.
- Determine whether the attack is coordinated (7.14).
- Calculate the combat differential (7.7) and locate the corresponding column on the CRT. [CRT not included in this transcription.]
- Roll one die to determine the combat result (7.8). Since many results require a second die roll for a morale check, we recommend rolling two differentiated dice, with one identified as the combat die and the other as the morale die.
- Apply the result (7.9 to 7.12).
7.4 The Defenders
Each attack may target one defending hex. Each hex may be the target of only one declared attack (but see 7.13, 8.4, and 12.4).
A hex may be defended by up to one artillery unit plus one battalion/squadron plus any one other unit. Additional defending units stacked in the hex do not take part in the combat, but may be affected by the result.
If a stack is involved, the defending player must select one unit as the primary defender; the unit's morale rating will be the MR for the combat. The primary defender may not be an ineffective unit unless nothing else is available.
A single defending unit may be involved in more than one combat if forced to retreat into a hex that is attacked subsequently.
7.5 The Attackers
An attacking unit may attack into any adjacent hex into which it could move during normal movement (but see 8.4). Whether the attacker is in an EZOC does not affect its ability to attack, but if it is in an EZOC, a potential combat is triggered (7.2). A unit with a CF of zero may not attack; parenthesized CF are halved.
One artillery unit plus one battalion/squadron plus any one other unit may attack from a hex. Other units stacked in that hex may not take part in the combat, but may be affected by the combat result. Stacked units must attack together (but see 8.4). If more than one attacking unit is involved, the attacking player must select one unit as the primary attacker. The primary attacker may not be an ineffective unit or an artillery unit unless nothing else is available.
An enemy-occupied hex may be attacked by as many units as can be brought to bear in the six adjacent hexes, plus any artillery units able to bombard in support (see 8.8). The attacker may choose which units attack which defending hexes in any combination.
A unit may attack only once per combat phase.
7.6 Lines of Retreat
At any given time, a unit has one of the following.
- Safe Line of Retreat (SLR): a path of hexes from the unit to its active army HQ (12.1), or its active trains (12.2), or its army's line of communications (LOC) hex (12.3 & exclusive rules). The path may not enter or cross prohibited terrain, enemy occupied hexes, or enemy zones of control. For this purpose, an EZOC is negated by the presence of a friendly unit or the ZOC of a friendly unit.
- Unsafe Line of Retreat: identical to the SLR but passes through or ends in an unnegated EZOC.
- No Line of Retreat: when no path exists without prohibited terrain or enemy occupied hexes.
7.7 Calculating the Differential
Generally, the printed CF of each unit and leader involved in a combat is used to calculate the differential. Under certain circumstances, the CF may be modified. The most common modification is halving the CF, which may be done for a variety of reasons: certain terrain types (consult the TEC; effects are cumulative), disruption (11.1), parenthesized attack CF, and/or uncoordinated attacks (7.14). [TEC not included in this transcription.]
If a unit is to be halved once, divide the combat factor by two, rounding up any remainder. If a unit is to be halved twice or more, treat it as having a combat factor of one, regardless of its original combat factor (a zero CF remains a zero).
Total the modified combat strength of all involved attacking units and leaders. Subtract the total combat strengths of all involved defending units and leaders to get the differential. Find the appropriate column on the CRT. [CRT not included in this transcription.]
7.8 Combat Results
Each box on the CRT contains one or more combat results, which are explained below. All results must be applied before proceeding to the next combat. In those cases where one result is parenthesized, the parenthesized result is applied only if the first result does not take effect (for example, a unit passes its morale check after an "m" result). [CRT not included in this transcription; the result codes below are as printed in the standard rules.]
- NE = No Effect: all units on both sides remain in place.
- Ar or Dr = Attacker retreat or Defender retreat. The owning player has a choice: either the primary unit on the affected side is disrupted (see 11.1) or all units of the affected side retreat (7.9). If the primary unit already is disrupted the retreat must be made. Retreating leaders, battalions, squadrons, and artillery become ineffective (2.8). Victorious attackers may advance (7.12).
- Ac or Dc = Attacker check for retreat or Defender check for retreat. If the primary unit on the affected side passes a morale check (2.4), apply the (parenthesized) result. If it fails, the affected side retreats (as above).
- Ax or Dx = Attacker loss or Defender loss. If the primary unit passes its morale check (2.4), it takes a loss (7.7); no advance may be made. If it fails the check, or if the owning player chooses, all units of the affected side are disrupted (no further effect if already disrupted) and must retreat (7.6); a victorious attacker may advance (7.9).
- Dm = Defender rout check. If the primary defending unit passes the morale check (2.4), apply the parenthesized result. If it fails, all participating and stacked defending units rout (7.10), victorious attackers may advance (7.12), and the attacking player receives a FOW (12.4).
- Ex = Exchange. The primary unit on each side loses one step (7.11). No units retreat or advance, even if the defender's hex is emptied as a result of the step loss.
- DF = Fortune of War. In addition to any other result, the defending player receives a fortune of war (12.4) to be played immediately.
- Leader = Leader Casualty Check. Make a casualty check (10.3) for any stacked, participating, and/or coordinating leaders on both sides.
7.9 Retreat
A unit forced to retreat must move away from its combat hex. The length of the retreat may be one, two, or three hexes at the owning player's discretion. The retreat path may pass through and/or end in friendly occupied hexes. If the destination hex is attacked later in the same combat phase, the retreated units do participate in the defense.
A unit with a safe line of retreat (SLR; 7.6) must move along it; if the unit has more than one SLR, the owning player chooses which it follows.
A unit with an unsafe line of retreat (7.6) must make a morale check for each EZOC hex it enters. If it fails the check, it routs. If the final hex of the retreat is in an EZOC, the unit must continue retreating until it reaches a hex free of EZOC. If the unit cannot reach such a hex within its printed MA, it routs from the last hex of its retreat (7.10).
A unit with a line of retreat only to a map edge is treated as routing with no SLR (7.10).
A unit with no valid line of retreat of any kind is captured; remove it from the map.
Any leader, cavalry unit, artillery unit, battalion, or squadron forced to retreat is flipped to its ineffective side; if already flipped, there is no further effect.
7.10 Rout
Determine a line of retreat (7.6) for each routing unit. If the unit has an SLR, it retreats three hexes and is disrupted. If no line of retreat exists, the unit is captured; remove it from the map and hand it to the opposing player. If an unsafe line exists, remove the unit from the map and place it on the TRT two turns after the current turn; it is eligible to re-enter the map per rule 13.2.
7.11 Step Losses
Step losses always come from the primary unit in that combat; however, if the unit is stacked with a non-participating battalion or squadron belonging to the same formation, or is stacked with another full-sized unit with the same unit ID (2.4), the stacked unit may be used to absorb losses.
If a unit is eliminated, determine its line of retreat (7.6). If a safe or unsafe line of retreat exists, remove the unit from the map and set it aside; it may be eligible to reenter the game later (see 11.2). If no line of retreat exists, the unit is captured; remove it from the map and hand it to the other player.
Certain choices of tactics (7.13) may inflict a second step loss. It may come from any participating unit at the owning player's discretion. If no second step is present to be lost, the opposing player receives an FOW.
7.12 Advance
Whenever a hex is vacated as a result of a retreat or rout—not when emptied by step losses—the victorious player may, but is not required to, advance his participating units one hex. The decision to advance must be made before the next combat begins.
If there were multiple attackers, any or all may advance. Disrupted units, units with parenthesized CF, artillery, and defending units in some terrain (see the TEC) may not advance. [TEC not included in this transcription.]
An advancing unit may move into the vacated opponent's hex, or into any vacant hex adjacent to the defender's hex (as long as the advancing unit could move into the hex during movement). The choice of hex(es) is entirely at the discretion of the advancing player, but hexes may not be overstacked after the advance. Advancing units ignore EZOC. An advancing unit may not fight again in that combat phase (but see 12.4).
If the combat has resulted in a rout of the defending units (only), for any reason, advancing attackers may advance two hexes instead of one.
7.13 Choice of Tactics
The standard combat rules may be modified by one or both players through the following tactics. The attacking player always announces his choice first. Once selected, the choice of tactics may not be withdrawn.
1) Skirmish. Any attacking infantry unit with a non-bracketed, non-V Movement Allowance may conduct a skirmish attack. The target of the attack must be either adjacent or two hexes away: if adjacent, the skirmishing unit may not be in an EZOC (due to enemy disruption and/or terrain); if two hexes away, the intervening hex must be unoccupied by either side. In all cases, the skirmishing unit must be able to move into the defender's hex during normal movement. Skirmishing may not be combined with any other type of combat except bombardment (see 8.4). Skirmishing does count as an attack for purposes of 7.2. More than one unit may skirmish attack the same hex; coordination applies. When calculating the combat differential, use the MA of involved infantry units on both sides as combat factors (ignore their printed combat factors); bracketed or "V" MA count as zero. Disrupted units with a non-bracketed MA skirmish with a strength of "0." Defending artillery uses its defense factor, defending cavalry uses its combat factor. No terrain effects apply. Treat all A or Ex results as NE; treat all Dx or Dm results as Dr. Ignore all secondary results. Skirmishers may not advance after combat.
2) Press Forward. Attacking infantry only; may not be disrupted or ineffective. Add two to the attacking combat factor (total, not per attacking unit). If the defender does not retreat, the attacker loses one step in addition to any other result from the CRT. If the defender retreats, the attacker must advance.
3) Charge. Attacking infantry only (see 9.3 for cavalry charges). The charge must be declared during the preceding movement phase. Charge participants may not be disrupted or ineffective. A maximum of one leader plus one infantry battalion plus one other infantry unit of any size may charge a given defender's hex. They must start their move stacked and must be coordinated (7.14). The charge may move through friendly units (including into the hex adjacent to the enemy being charged), but may not be overstacked at any time. It may not be made into certain kinds of terrain (see the TEC). The unit/stack must move one or two MP. No artillery support is allowed, and no other units may attack the same defender. Make a morale check (2.4) for one charging unit before resolving combat. If it fails, resolve the combat normally with the attackers CF halved. If it passes, resolve the combat, treating A or Ex results as Ax and all D results as Dm (Ax). If the defender retreats, defending artillery is captured. A victorious attacker must advance. [TEC not included in this transcription.]
4) Disengage. Either or both players may select this option. Calculate and resolve the combat normally. If the attacker selects disengagement, treat any D, Ex, or Ac result as an Ar; the unit must retreat, it may not opt to be disrupted. If the defender selects it, treat any A, Ex, or Dc result as a Dr; the unit must retreat, it may not opt to be disrupted. If both players select the tactic, it is possible both will retreat (defender first). Disengaging leaders, cavalry, artillery, battalions, or squadrons are not flipped to the ineffective sides (if already flipped, they remain so). If this tactic is chosen after the attacker chooses a charge, the attacker suffers no losses regardless of the outcome.
5) Last Stand. Defending infantry and/or artillery only; may not be disrupted or ineffective. This tactic may not be chosen if the attacker has chosen "Disengage." Add 3 to the defending combat factor. If the attacker does not retreat, the defender loses one step in addition to any other result from the CRT. If the defenders are forced to retreat, defending artillery is captured.
7.14 Coordination
An attack is coordinated only if all attacking infantry and/or cavalry units are in the same formation (2.4); supporting artillery requires no coordination.
A leader may coordinate units from different formations as long as all attacking formations are within the leader's command span (see 10.0) and the leader is stacked with or adjacent to one of the attacking units.
In an uncoordinated attack, units belonging to the formation of the primary attacking unit attack normally; the CF of units from all other formations is halved.
8.0 Artillery
8.1 Artillery Units
Artillery units have a different set of factors than infantry and cavalry. Instead of one combat factor, they have two: attack and defense. The attack factor is used when attacking an adjacent enemy unit (8.3), bombarding (8.4), or supporting a friendly unit (8.8). The defense factor is used when attacked by an adjacent enemy unit. The range factor is used during bombardments.
Artillery units in some folios have no morale rating. They have an MR of "6" when effective (but fail a morale check on a roll of "6"), and an MR of "3" when ineffective.
8.2 Artillery & Terrain
Artillery is affected differently by some terrain for both movement and combat. Artillery may not move into, or bombard or support an attack into, any terrain prohibited to it. Consult the TEC. [TEC not included in this transcription.]
8.3 Artillery Combat
Artillery adjacent to an enemy unit fights like infantry except it may not advance. Artillery may not attack any hex into which it could not move or bombard, but may defend any hex.
An artillery unit engaged in combat with an adjacent opponent suffers all combat results except "Ammo" ("Ammo" affects only bombarding artillery). Artillery is captured if forced to retreat by a charging enemy or if it chooses Last Stand (see 7.13).
8.4 Bombardment
Bombardment is an attack by artillery during its combat phase against a non-adjacent or an adjacent one separated by a prohibited hexside. To bombard an enemy occupied hex, an artillery unit must:
- have attack and range factors greater than zero;
- be undisrupted and effective (11.1 & 11.3);
- have a line of sight to the target (8.6);
- be within range of the target (8.7).
Each bombarding artillery unit may target one enemy unit; it may select any unit in a stack. Stacked artillery need not bombard together; they may target different units in one hex or different hexes. Artillery in different hexes may bombard the same target hex. All artillery bombarding a single hex must be declared before any bombardments are resolved; once targeted on a selected hex, the chosen units may not shift fire to another hex, but may bombard any unit in the targeted hex.
Each artillery unit bombards separately unless coordinated. To be coordinated, a unit must be stacked with or adjacent to another coordinating unit and/or a coordinating leader.
Bombardment does not qualify as an attack for purposes of 7.2 unless some result (retreat, rout, step loss, disruption) is inflicted on the defending unit.
8.5 Bombardment Resolution
To resolve a bombardment, total the attack strength of the participating artillery. Double the artillery's CF if the targeted unit is cavalry. Express the total bombarding strength as a positive number and find the equivalent differential column on the Combat Results Table. Roll the die; cross-index to get the result. [CRT not included in this transcription.]
Ignore parenthesized results. Bombarding artillery is unaffected by any results except Ammo, which renders the bombarding artillery ineffective (if multiple units are firing, only one unit becomes ineffective.
8.6 Line of Sight (LOS)
An LOS is a path from the center of the firing hex to the center of the target hex. If any intervening hex or hexside is blocked, the artillery may not bombard. If the LOS is congruent to a hexside, the LOS is blocked only if both hexes adjacent to that hexside are blocked (ignore the hexside terrain for this purpose). Units, friendly or enemy, do not block LOS.
Terrain in the firing and target hexes does not block the LOS, but bombardment is not permitted into certain terrain types. [TEC not included in this transcription.]
The maximum LOS during daylight turns is 10 hexes; do not count the observer's hex, do count the observed hex.
8.7 Range
An artillery unit's range factor indicates the maximum number of hexes distant the unit may bombard; count the target hex but not the bombarding unit's hex. Add one hex to the range of any artillery unit firing from a hill.
8.8 Supporting Fire
Artillery may bombard to support other units in close combat. The artillery unit:
- may not be adjacent to an enemy unit (unless separated by a prohibited hexside);
- must be able to bombard the defender; and
- must be adjacent to a unit attacking the same defender.
Add the bombarding artillery strength to the attacker's combat strength before calculating the odds. Double the artillery's CF if any defending unit is cavalry. As above, bombarding artillery is affected by only by "Ammo" results.
No coordination is necessary for supporting artillery; it may support a unit from any formation.
9.0 Cavalry
9.1 Cavalry Units
Except as noted in this section, cavalry units operate like infantry and are affected by all game rules in the same way. Cavalry may stack with all other unit types.
9.2 Cavalry Combat
Cavalry engages in and suffers from combat just like infantry with the following exceptions:
- it is affected differently by certain terrain types (see the TEC);
- it is doubled when attacking a disrupted or ineffective defender;
- any defender retreating from attacking cavalry is disrupted after applying any other combat result (if already disrupted there is no additional effect);
- the CF of bombarding or supporting artillery is doubled against cavalry.
9.3 Cavalry Charges
A cavalry charge may be made by up to one squadron, one leader and any one other cavalry unit; they must be coordinated and are treated collectively as a single unit. All must be effective and undisrupted. The charging units may be stacked with other units prior to initiating the charge but may not be overstacked. Stacked cavalry units may initiate separate charges. Resolve the charge as follows.
- The charge must be declared during the preceding movement phase. The unit must move one or two hexes and may enter, cross, and attack into clear terrain only. It may not enter a hex occupied by another friendly unit.
- No artillery support is allowed. The defender may be attacked only by other charging cavalry. Resolve each charge separately (this is an exception to 7.4).
- Before resolving the combat, make a morale check (2.4) for the charging cavalry. If it fails, it is disrupted. If it passes, make a morale check for the target unit unless it is an infantry unit in square (9.5). If the target unit fails, it disrupts. Regardless of the roll, if it is an infantry unit, it may form square.
- Use the cavalry's charge factor in lieu of its CF; it is doubled against a disrupted or ineffective opponent.
- Treat all Dr, Dc, and Dx results as Dm; if the defender routs, it also suffers a step loss (except artillery, which is captured). Treat any other result—the defender passing the rout check or an Ex, NE, or any A result—as Am (Ar). Resolve an Am result the same way as a Dm result.
- If the defender routs and the cavalry is still effective, it may advance zero, one, or two hexes and conduct another charge. The new target may be a unit already attacked or still to be attacked that phase. Victorious cavalry may continue advancing and charging indefinitely, as long as the defenders rout and the cavalry remains effective.
- The charging cavalry becomes ineffective at the end of a charge unless already ineffective.
9.4 Countercharges
Defending cavalry may countercharge adjacent attackers. It need not move but must meet all other requirements. Against attacking infantry or non-charging cavalry, treat the countercharging cavalry as the attacker and resolve per 9.3. Against charging cavalry, both sides use their charge factors. Treat A results as Am, D results as Dm. If neither unit routs, both retreat (Ar and Dr).
9.5 Squares
An infantry unit may form square at the beginning of its movement or during a cavalry charge (see 9.3). Place a square marker on the unit; it may be removed at the beginning of a subsequent movement phase. Treat all units in the hex as being in square. Only the infantry in square participates in combat. A disrupted unit may form square, but cavalry is doubled when attacking it.
Units in square may move one hex per movement phase. Roll for disruption if the square enters or crosses any terrain other than clear. If the unit attacks while in square, subtract two from its CF. Add two to the CF of any non-cavalry unit attacking the square. Non-charging cavalry does not receive this bonus.
A unit in square does not make a morale check when charged by cavalry. Add two to the unit's combat and morale factors when being charged by cavalry.
10.0 Leaders
10.1 Leader Movement & Stacking
A leader does not count for stacking. He may move with a unit/stack or may move alone. He may stack with any friendly unit, even one not in his command span. A leader moving alone always has 12 MP, pays 1/2 MP per road hex, 1 MP for all other hexes (but may not enter prohibited terrain). He may not enter EZOC and may leave EZOC freely. If at any time other than the movement phase a leader ends up alone in an EZOC, and has an SLR, move him to the nearest friendly unit. If there is an unsafe line of retreat, check for a leader casualty (see below); if the leader survives, place him on the nearest friendly unit. If the leader has no line of retreat, he is captured.
A leader is flipped to his ineffective side as a result of combat (see 7.8). Ineffective leaders move normally, but have no other effects. Effectiveness may be recovered during movement (see 11.3).
10.2 Leader Effects
A leader's command span indicates the formations over which he has authority; an "A" indicates all formations in that army. Each effective leader may assist one unit within his He may assist a unit for movement only if he begins the turn stacked with it. For other effects, he must be stacked with the unit at the instant the effect takes place (except for coordination, which may extend to units in other hexes). A leader may do any or all of the following.
[Source text: the sentence "Each effective leader may assist one unit within his" is garbled in the source (the words "command span" are missing and the sentence runs into the next one). It is reproduced as printed.]
- Movement: the leader adds his movement value to the unit's MA. If the unit must roll for an MA, add the leader's movement value to the die result. The leader must remain with the unit throughout the movement phase. An accompanied unit with a parenthesized combat factor may enter an EZOC.
- Morale Checks & Recovery: add the leader's morale rating to the MR of the unit when it checks morale. Regardless of the leader, the unit fails on a die roll of "6." A leader stacked with an active HQ, active trains, or the army's LOC hex (see 12.3) may add his morale rating to an eliminated unit attempting to recover a step.
- Coordination: a leader may provide coordination for an attack involving the unit. Treat all involved units within the leader's command span as belonging to a single formation.
- Participation in Combat: a leader need not participate in combat with a stacked unit (on attack or defense). If he does, add his combat and morale factors to the unit's factors for all combat purposes except bombardment and skirmishing. A parenthesized or disrupted unit is no longer halved when stacked with a participating leader. If the unit advances after combat, the leader must accompany it.
10.3 Leader Casualties
Any time a leader coordinates or participates in combat, or is stacked with a unit during combat (including bombardment), and a "Leader" result occurs, roll a die. A coordinating or stacked leader becomes a casualty on a roll of "6"; a participating leader on a roll of "5" or "6." Remove the casualties from the map; they are out of the game for good. Leaders retreating alone through an unsafe hex become casualties on a roll of "6."
11.0 Recovery
11.1 Disruption Recovery
A unit may recover from disruption during any of its movement phases. If the recovering unit is in an EZOC, it may not recover during that movement phase. If the unit is eligible for march movement throughout the turn (it may but need not undertake actual march movement), it recovers automatically.
In any other circumstance make a morale check (2.4) for the unit at the end of its move (do not add two to the roll). If the unit passes, remove the marker. If it fails, the marker remains. At night (14.2), a unit not attacking (it may move, march, and/or defend) recovers automatically, without a morale check and regardless of EZOC.
11.2 Step Recovery
Step recovery is done during each player's movement phase and may be done simultaneously with disruption and/or effectiveness recovery. If the player receives replacement steps (consult the exclusive rules), each replacement step restores an eliminated one-step unit or one step of an eliminated two-step brigade. Place the replaced unit on the next box of the TRT; it is eligible to return to the map in its next movement phase (13.2).
A replacement step may also be used to flip a reduced two-step brigade back to full strength on the map; if the unit meets the requirements for disruption recovery (see above), flip it back to its full strength side. Unexpended replacements are lost; they may not be accumulated.
Additional replacements may be created by making morale checks for eliminated units off the map (not for reduced units on the map). The owning player may make a check for each such unit each friendly movement phase. If the unit passes the morale check, the step is recovered and the unit eligible to return to the map as though created with a replacement step. If the unit fails the morale check, it is destroyed and no longer eligible to return to play; it also may count for victory determination (see 18.0).
A one-step unit with a red dot next to its formation number may not be replaced using replacement steps. Each step of a two-step unit may have a dot; it is possible for a unit to be able to recover both, one, or no steps. Those non-replaceable units may be replaced using leader-assisted (only) morale checks.
A unit may recover from disruption and/or ineffectiveness simultaneously.
11.3 Effectiveness Recovery
Artillery, cavalry, battalions, squadrons, and leaders flipped to their ineffective sides have the same constraints as disrupted units. They recover effectiveness during their movement phase if they meet the requirements for recovery from disruption (which may occur simultaneously).
12.0 Army Morale
12.1 Headquarters
The headquarters counter (HQ) represents the nexus of each army's command network. It does not count for stacking purposes; friendly units may move and stack normally in its hex.
The HQ may move during any friendly movement phase by being flipped to its inactive side (its MA is printed on that side). The HQ must be flipped to its inactive side at the beginning of the phase if it is to move. It always receives its full MA only; it never rolls for MA and cannot march move. It moves like a cavalry unit for terrain purposes. It may not enter an EZOC.
The HQ exerts no ZOC. It has a combat strength of zero; if attacked, it may not retreat or disengage. It is unaffected by combat results, but each time it is attacked (even if there are other units in the hex) the enemy player receives two fortunes of war. If unstacked and attacked in close combat, no die roll is needed; the attacker may advance into the hex, capturing the HQ; it is out of the game for good.
While the headquarters is active, the army functions normally. Whenever it is moved, placed in an EZOC, lacks an SLR to its active trains or to its LOC hex, or is subjected to an enemy attack (regardless of the result), flip the unit to its inactive side. It recovers to its active side at the beginning of any friendly movement phase in which none of those conditions apply.
While the HQ is inactive all units in its army must roll for their MA, reentering units may not enter at it (see 13.2), and safe lines of retreat may not be traced to it.
12.2 Trains
The trains represent the nexus of an army's logistical network. Its march movement allowance is limited to its printed MA (on its inactive side only). It always receives its full MA only; it never rolls for MA and may not march move. The MA is doubled during road movement. It may enter only clear, road, and trail hexes and cross bridge and ford hexsides. It must stop after entering a clear hex.
No friendly unit may move through the trains counter at any time for any reason. If a unit (friendly or enemy) is forced to retreat through the trains, it may pass through the trains but is disrupted (if already disrupted, there is no further effect).
It may not enter EZOC and has no combat factor or ZOC. If attacked, it ignores all combat results, but the attacker receives two FOW each time it is attacked. An enemy unit may enter its hex during movement or after combat, capturing the trains. Once captured, it is out of the game for good.
The trains remains active until it moves, is placed in an EZOC, lacks an SLR to the army's LOC hex, or is attacked (regardless of the result). If the trains is to be moved, it must be flipped to its inactive side at the beginning of the movement phase. It remains inactive until the beginning of a movement phase in which none of those conditions exists.
While the trains is inactive, units may not trace an SLR to it and reentering units may not enter at the trains.
12.3 LOC Hexes
An LOC hex represents a route to the army's off-map logistical and administrative base. It functions as long as it is not occupied by an enemy unit or EZOC. Without a functioning LOC, HQ and trains may not be active and units may not return to the map (13.2).
12.4 Fortunes of War
Fortunes of war (FOW) represent interruptions to the normal flow of play brought about by the chaos of battle. Players receive FOW as a result of combat. Each FOW allows the player to take one of the actions listed below. Those actions must be carried out immediately; any FOW not used immediately is lost; they may not be accumulated.
- Move an Enemy Unit. Pick an enemy combat unit (not stack, but it may be one unit in a stack). Roll the die. On a result of one or two, the unit may be moved. Roll for the unit's MA. Normal movement rules apply, but the unit may not use march movement and may not be moved off the map. It may be moved into an EZOC (that is, your ZOC). If moved during a combat phase, the unit must participate in any subsequent combat in its final hex, even if it has participated already.
- Move a Friendly Unit/Stack. Any one friendly unit or stack may be moved; if a stack is moved, it must move together. Roll for a unit's MA; for a stack, roll for the slowest unit's MA. All movement rules apply. If moved during a combat phase, the unit must participate in any subsequent combat in its final hex, even if it has participated already. In lieu of moving a unit on the map, a unit on the next turn box of the TRT may be placed on the map (13.2). If the moving unit moves next to an enemy unit yet to be attacked in that combat phase by other friendly units, the moving unit reinforces that attack. If the moving unit moves next to an enemy unit that has not been attacked or already has been attacked the moving unit must attack it; if it moves adjacent to more than one unattacked enemy unit, it triggers combats against each.
- Charge with a Friendly Unit/Stack. Any one friendly unit or stack may initiate a charge. The unit may not be in an EZOC and may not have participated in combat that same phase. If the primary unit passes its charge morale check (2.4), the CF (or cavalry charge factor) of all charging units (but not leaders) is doubled. The target unit may have been involved in combat during the same combat phase. If the target unit is yet to be involved in combat, the charge counts as its combat for that phase; treat the units slated to attack that defender as having received an NE result.
- Enemy Morale Check. Make a morale check (2.4) for any one undisrupted enemy combat unit (not a leader). If the unit fails, it is disrupted.
- Friendly Recovery Check. Make a morale check (2.4) for one combat unit to recover (any kind). The check may be made regardless of enemy proximity. A failed roll does not result in the destruction of the unit.
13.0 Entering the Map
13.1 Arrival of Reinforcements
Reinforcements enter the map after the game has begun. The turn and hex of entry is specified in the exclusive rules. Units enter one at a time, though battalions, squadrons, leaders, and HQ may enter stacked with another unit. Each unit pays the appropriate MP cost for the entry hex and moves normally thereafter.
Reinforcements may not enter an enemy-occupied hex, but may enter an enemy-controlled hex (an EZOC). If the entry hex is enemy occupied, the reinforcements may be delayed (indefinitely) until the hex is unoccupied. Alternatively, the hex of entry may be shifted along the map edge from the specified entry hex, at a cost of one MP per hex shifted, until reaching a hex not occupied by an enemy unit.
13.2 Reentry of Recovered Units
Units in the current box on the TRT at the beginning of the owning player's movement phase may return to the map. Each unit may be placed on or adjacent to an active HQ or adjacent to an active Trains unit, or on or adjacent to its side's LOC hex. The reentering unit may not be placed in an EZOC or enemy occupied hex, or into a hex that would become overstacked by its placement. Eligible units not placed for any reason are moved to the next box on the TRT.
14.0 Nature
14.1 Nature Generally
Low light and inclement weather affect operations in a variety of ways. Unless specified otherwise in this section, all standard rules apply.
14.2 Night
Night turns are indicated on the TRT and affect play as follows.
- Recovery: units recover more easily at night (11.1 & 11.3) but replacement rules (11.2) do not change.
- Morale Checks: add two to all morale check die rolls (2.4).
- Movement: only charging units (7.13-3) may enter an EZOC. All units may disengage (6.3) freely, without regard to comparative MA or leaving units behind, but do roll for the MA of disengaging units.
- Combat: no combat is allowed except for infantry charges (7.13-3). If the defender routs, the attacker may advance into the vacated hex only. If the defender does not rout, the attacker must retreat and is disrupted; the defender may not advance.
- LOS (8.6) is zero at night: artillery may not bombard or support an attack, but may defend themselves normally.
14.3 Twilight
Twilight turns are indicated on the TRT and affect play as follows.
- Morale Checks: Add one to all morale check die rolls (2.4).
- Coordination (7.14) is not possible.
- LOS (8.6) is one: artillery may support or bombard only adjacent hexes.
15.0 Designer's Notes
Musket & Saber is a remake and merger of the old Napoleon at War and Blue & Gray series with an eye to greater realism in combat. For an extensive discussion of the game, go to the Decision Games website at www.decisiongames.com and click forums.
Part B: Stones River Exclusive Rules
Stones River: Turning Point in Tennessee Exclusive Rules (v3, 2010, Decision Games). These rules apply only to this folio and supplement the Musket & Saber Standard Rules in Part A.
16.0 Introduction
16.1 Historical Background and 16.2 Course of the Game are reproduced under Table of Contents above.
16.3 Folio Components
This folio includes a booklet of Standard Rules, these Exclusive Rules (including the Combat Results Table and Terrain Effects Chart), a 17" x 22" map (including the Turn Record Track), and a die-cut sheet with 100 counters. The Confederate units have gray backgrounds, the Union units blue.
Player Note. The limited number of Disruption markers is not a design limitation but a result of limited counter space; players are free to make any mutually agreeable substitution should additional markers be needed.
[The Combat Results Table (CRT) and Terrain Effects Chart (TEC) named in 16.3 are not included in the source copy used for this rulebook.]
17.0 Set Up
17.1 Getting Started
Determine which army each player will command. Lay out the map and sort the units by side and formation. Each player deploys his units on the map or as reinforcements according to the instructions in 17.2 and 17.3 below. Units placed on the map are identified by formation, ID, and a four-digit hex. The notations "w/1" and "w/2" indicate placement within one or two hexes, respectively, of the specified hex.
Reinforcements are identified by formation, ID, and an entry location (entry hex or box). The turn of arrival is indicated by a "T" (for example, "T2" means the specified unit is available at the start of the owning player's movement phase on Turn 2).
The Confederate player is the first player. The game starts with the Confederate Movement Phase of Game Turn 1. Place the Game Turn marker in the Turn 1 box of the Turn Record Track. Place the Day marker in the 31 December box of the TRT. Place the Confederate Fresh/Fatigued marker in the Turn 5 box of the TRT, Fresh side showing. The game may last for up to 23 turns; eight game turns each on the first two days, seven on the third. At the end of Turn 7 of 2 January, determine the winner according to Section 18.0.
17.2 Confederate Set Up
- HQ (Inactive): 2422
- Hardee (Effective): with any unit of Formation 4
- Cleburne (Effective): with any unit of Formation 4
- Formation 0:
- Jackson: with the main body of Formation 3
- Res: 1613
- Formation 1:
- Maney: 1419
- Smith: 1522
- Rest of Formation: in any hexes 1618-1917 and/or 1719-1918
- Formation 2:
- Anderson, Artillery: 1517
- Chalmers: 1716
- Deas, Wthrs battalion: 1421
- Walthall: 1418
- Formation 3 (except Hanson & the Artillery): unstacked on the line of hexes from 2014 through 2512, inclusive
- Formation 3 (Hanson, Artillery): 1613
- Formation 4: w/1 of 1324
17.3 Union Set Up
All Union artillery, battalions, and squadrons are set up Ineffective.
- HQ: arrives T2 at Entry Hex A (0201)
- Rosecrans (Ineffective): 1110
- Thomas (Ineffective): 1110
- Sheridan (Ineffective): with any unit of Formation 3
- Formation 0 (Pion): 1509
- Formation 1: w/1 of 0920
- Formation 2 (except 3/2/R): w/1 of 0823
- Formation 2 (3/2/R): 0518
- Formation 3: w/1 of 1118
- Formation 4 (except 3/1/C): w/1 of 1110
- Formation 4 (3/1/C): arrives T8 at entry Hex "A" (0201)
- Formation 5 (except 1/2/C): w/1 of 1315
- Formation 5 (1/2/C): T4, Entry Hex "A" (0201)
- Formation 6: T8, Entry Hex "A" (0201)
- Formation 7: w/2 of 1511
18.0 Victory Conditions
18.1 Confederate Victory
The Confederate player wins if both the Union trains and HQ are on or west of the 04xx hexrow and/or off the map for any reason at the end of the game.
18.2 Union Victory
The Union player wins if there are no Confederates west of Stones River and there are at least four Union infantry brigades east of the river by the end of the game.
18.3 Winning a Drawn Battle
If neither player achieves the conditions set forth above, the battle is drawn and the game is won on victory points (VP). Each player receives the following points:
- 1 VP for each enemy unit destroyed (see 11.2); do not count eliminated steps or routed units on the TRT.
- 1 VP for each leader casualty.
- 2 VP for each unit or leader captured.
- 4 VP for a captured enemy HQ or Trains.
The player with the greater total wins, but if the total point count for the winner is less than 10, consider the game a draw.
19.0 Special Rules
19.1 Surprise
The Union army was preparing to attack at 7:00 on the morning of 31 December. The Confederate attack–at 6:00–struck while men were still eating or straggling into formation. During the Confederate Movement Phase of Turn 1, make a morale check for each Union unit the first time a Confederate unit enters its ZOC. If a unit fails the morale check, it is disrupted. In the following Union Movement Phase, all MA die rolls are halved (round up).
19.2 Confederate Fatigue
At the beginning of each Confederate Movement Phase beginning with Turn 5 of 31 December, roll a die. On a result of 1-3, the Confederate army is fatigued; flip the marker to its Fatigued side. On a roll of 4-6, move the marker to the next turn. Repeat the process every turn until the Confederates become fatigued. Whichever side is showing, remove the marker at the beginning of Turn 8 of 31 December; the marker is out of play for the rest of the game (but see 19.3).
If the Confederates become fatigued, they remain so until the marker is removed. The effects of fatigue are as follows.
- Each Confederate unit must make a morale check upon entering an EZOC (units already in EZOC make no check). If the unit fails, it is disrupted (units already disrupted suffer no further effect).
- After any Confederate attack yielding an NE, Ex, or any A result, the Union player receives an FOW in addition to any awarded by the CRT or after a rout.
- After any Union attack yielding an Ex or any D result, the Union player receives an FOW in addition to any awarded after a rout.
19.3 New Year's Day
The combination of frigid weather and a full day of battle left both armies exhausted on 1 January. Both players must take a day of rest that day or risk pushing their armies past the point of exhaustion.
During 1 January, play proceeds normally; however, at the end of any game turn in which a player has launched an attack other than a bombardment, his entire army is considered fatigued for the remainder of the game. His opponent's army also becomes fatigued beginning the turn after one of his units enters an EZOC (unit's already in an EZOC may fight normally). If neither army becomes fatigued on 1 January, the Fatigued marker is removed from the game for good.
19.4 The Pioneers
The Union Pioneer Brigade consisted of three battalions made up of 10-man details from every regiment in the army. It was to be used as a construction party but was capable of fighting and is treated as an infantry unit for all game purposes. In addition, the Union player may use the unit to create new fords across Overall Creek (along the West side of the map) and/or Stones River. Move the brigade to a clear hex adjacent to one of the watercourses. It must stay there two complete Union Movement Phases to complete a crossing to an adjacent clear hex. You will have to write down the hexes involved as there are no counters for this purpose. In subsequent turns, treat the crossing as a ford. If at any time the Pioneers move or engage in combat (other than bombardment), the process stops and they must begin anew. (Historically, the Pioneers partially constructed a crossing between 1205 and 1306.)
19.5 The Nashville Pike Bridge
This bridge (1918-2018) had been burned by the Confederates in the pre-battle preparations; the icon was included for use in a future scenario. Treat it as a ford hexside for game purposes.
20.0 Folio Notes
20.1 Designer's Notes
Stones River is a classic situation: well-matched armies deployed and (more or less) ready for battle, commanded by aggressive generals who sought nothing less than destruction of their opponents. One of the bloodiest battles of the war, in both absolute terms and percentage of those engaged, it featured powerhouse attacks, ignominious routs, heroic stands, and one of the first great coordinated artillery barrages of the war. The battle has been unfairly overlooked both in histories and wargames (including the original Blue & Gray system).
The game was a clean and simple design, since the armies were so evenly matched and both generals sought easily definable victories. The only difficulties were handling the surprise attack without choreographing the Confederates or unduly hamstringing the Federals—the morale checks handle the job nicely—and the Confederates' mid-afternoon collapse. The fatigue rule, duplicated in Shiloh, keeps the Confederate player in the game while encouraging him to cut back on his activity.
20.2 Confederate Player Notes
You start the game with a great positional advantage and would be foolish to throw it away: attack with everything you've got. Sooner or later your attack will run out of steam as your units fade and the Union line stiffens. Don't persist in your attacks too long (as Bragg allowed his army to do) or you face the possibility of a collapse. If you haven't succeeded entirely, and you probably won't, use the rest of the first and the whole second day to position yourself for another try.
You should consider attacking on the second day (and accepting the inevitable fatigue) only if you get an irresistible opening in the Union line and can force your opponent to counterattack (at least then you'll be equally fatigued). The attack on the third day will be more methodical, but if you've caused enough damage to the Union forces you should be able to roll them back to the west edge of the map.
20.3 Union Player Notes
The first few turns won't be much fun for you. Accept the inevitability of lost units and ground and start building a strong defensive position, but do so with an eye to counterattacking if possible. If you can rock the Confederates back on their heels by the end of the first day, you will be in that much better a position for your own offensive. If all you can do is what Rosecrans did—hold the last line—you'll have a long way to go to win the game. Like the Confederate, you probably should avoid attacking on the second day and should be prepared for methodical and persistent fighting on the third.
21.0 Orders of Battle
Formations noted in [brackets].
Braxton Bragg's Confederate Army of Tennessee
- Leonidas Polk's Corps
- Cheatham's Division [1]: Donelson, Maney, Smith, Stewart, Cheatham's Artillery (6,000 men, 16 guns)
- Withers' Division [2]: Anderson, Chalmers, Deas, Walthall, Withers' Artillery (7,500 men, 16 guns)
- William Hardee's Corps
- Breckenridge's Division [3]: Adams, Hanson, Palmer, Preston, Breckenridge's Artillery (7,000 men, 18 guns)
- Cleburne's Division [4]: Johnson, Liddell, Polk, Wood, Cleburne's Artillery (6,250 men, 16 guns)
- McCown's Division [5]: Ector, McNair, Rains, McCown's Artillery (4,500 men, 18 guns)
- Jackson's Brigade [0] (850 men, 6 guns)
- Reserve Artillery [0] (officially 6 guns; the counter represents a collection of batteries)
- Wheeler's Cavalry [6]: Buford, Pegram, Wharton, Wheeler (5,000 men, 3 guns)
Total Strength: 32,100 infantrymen, 5,000 cavalrymen, 90 guns
Williams S. Rosecrans' Union Army of the Cumberland
- Alexander McCook's Right Wing
- Davis' 1st Division [1]: 1/1/R, 2/1/R, 3/1/R, 1/R (4,500 men, 16 guns)
- Johnson's 2nd Division [2]: 1/2/R, 2/2/R, 3/2/R, 2/R (6,000 men, 18 guns)
- Sheridan's 3rd Division [3]: 1/3/R, 2/3/R, 3/3/R, 3/R (5,000 men, 18 guns)
- George Thomas' Center Wing
- Rousseau's 1st Division [4]: 1/1/C, 2/1/C, 3/1/C, 4/1/C, 1/C (7,000 men, 12 guns)
- Negley's 2nd Division [5]: 1/2/C, 2/2/C, 3/2/C, 2/C (7,000 men, 20 guns)
- Fry's 3rd Division (partial) [6]: 1/3/C (1,750 men)
- Thomas Crittenden's Left Wing
- Wood's 1st Division [7]: 1st, 2nd, 3rd, & Artillery (4,500 men, 20 guns)
- Palmer's 2nd Division [8]: 1st, 2nd, 3rd, & Artillery (4,500 men, 20 guns)
- Van Cleve's 3rd Division [9]: 1st, 2nd, 3rd, & Artillery (4,000 men, 20 guns)
- Pioneer Brigade [0] (2,000 men, 6 guns)
- David Stanley's Cavalry [10]:
- Kennett's Division: Minty, Zahm (1,800 men, 2 guns)
- Reserve Brigade (800 men)
- 4th US Cavalry (400 men, 260 after details)
Total Strength: 39,500 infantrymen, 3,000 cavalrymen, 137 guns
The wing organization was used because the entire army was officially designated a single corps, the 14th. Shortly after the battle, the Right and Left Wings became 20th and 21st Corps, respectively, the Center retaining the designation 14th Corps.