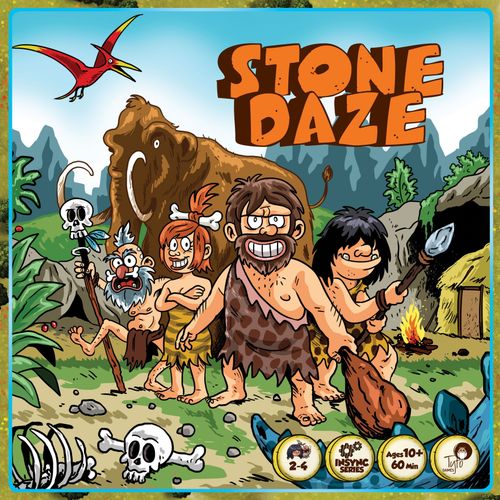
Stone Daze
Stone Daze Rulebook
Table of Contents
Table of Contents
Overview
Ages: 10+. 45-60 min. 2-4 Players.
Contents
One game board, 14 control panels, 14 meeples (7 each clan), 14 clubs (7 each clan), 2 sets of rock mounds (each inc. 2 large, 3 small), 2 swamp pieces, 14 "head bump" markers, 4 panel bases, 2 sacred places, 28 discs, 6 tokens, game rules.
Objective
Your goal is to be the first to reach your opponent's Halhala (sacred place) with any of your clan's figures. First player, or team, to achieve that goal is declared the winner.
- Halhala is defined as shown in blue at the figure below. It is defined as the last 10 squares on each clan's side.
- If two opposing characters reach their goal simultaneously, the player landing the next character in place is winner, etc.
- When playing 2 players, each player plays the whole clan (7 figures). When playing 3-4 players, you play as two teams. You may divide the figures as you see fit, and the clan is played as a team. Players have to cooperate to reach victory.
Starting a Game
Each player or team designs their half of the board.
- First, place your Halhalas' sacred circle on its mark on the board. Next, place in it your 7 action discs (red). This is where you also store your "Bump on the head" markers.
- Next, design the tactical elements on your portion of the board:
Swamps and rock mounds can be located anywhere in the clan's side of the board, other than at what is defined as "Halhala".
- Swamps are impassable to all cavemen, with one exception. Each clan has their visionary guy who knows how to cross the swamp, and climb the fence (fence element is an add on). This is further explained on the Actions portion of the rules.
- Rock mounds are both defensive and offensive elements. A figure behind a rock mound is safe from getting hit (a defensive position), but is also unable to throw their clubs past the mound. Cavemen can advance or retreat over the mounds. A cavemen standing on a mound is able to throw their clubs farther (see in depth rules regarding the rock mounds in tossing rules).
- Next, position your figures. Figures can be located up to and including the third row in any way players see fit.
Note each character has a pointed base - pointing forward.
Game Sequence
StoneDaze is a game with an unlimited number of moves, each completed simultaneously in the following order:
- Initial setup.
- Players give movement orders to all figures using the control panels. Next players decide if they wish to apply any actions. Once both players finish giving movement & actions orders (or both teams), they declare "Done", and set panels to the side (Do it discreetly, players should not expose their panels to their opponent).
- Next, players physically place their clubs. Choose targets according to throwing rules. Your figures can throw their clubs in relevance to their CURRENT position. Declare "Done" when finished.
- Players reveal their control panels and move the figures according to movement orders as given on the panels. In your early games, you might do this one character at a time, so that each player can follow what is happening. With time, you will move faster.
- Figures that move (or stay) where the opponnent's clubs have been placed is marked as "hit". For the first hit, place a "head bump" marker on the figure's head. When a figure which already has this marker is hit again, it is out of the game and removed from the board. Two hits and the caveman or woman is out of the game!
- Round is done, reset your panels (place the black disc in the middle square), assess the situation, and lead your clan to the next round.
Movement
Movement orders are given by using the control panels. Each cavemen or women have their own control panel. Movement orders are given by using the black discs.
- Only one figure is allowed on each square area at any given time.
- Players give movement directions to all characters each round.
- Each round, all figures can stay in place or move to any of their 8 surrounding squares.
- The desired new location is indicated on the panel using the black discs. Remember: orders are given discreetly.
Note: each meeple has a pointed base indicating a forward direction. Movement orders on the panel are always in relation to the meeple's forward orientation.
The center square of the nine is the meeple's current position. If you wish your cavemen to stay in place, the disc remains at the center square on the panel.
Example: ordering this caveman to move forward and to the right would be indicated on the panel by placing the black disc on the forward-right square, and translated to such movement.
- If two or more cavemen are ordered to go to the same area, none of them move and each remains in its place, (you can use this as a tactical tool to limit rival clan's movements as the game develops).
- It is not allowed for two cavemen to trade places.
Turning
A meeple can also turn in its place, 90 degrees to both sides. If you wish a meeple to turn, use the other side of the black disk. If placed on the square right of the center, your caveman would turn to the right. If the disc is placed to the left of the center square, the caveman would turn to the left.
Note: a caveman can't turn and move at the same round.
Turning 180 degrees
All cavemen or women can also turn 180 degrees in one move. This will "cost" you an action disc (red disc). To apply such movement simply place a red disc in the middle square.
Taking Action
After giving movement orders to the clan players can apply different actions associated with the different clan members.
Each clan has 7 action discs stashed in their Halhala. Players decide when they wish to apply an action during the game. When playing in a team, team mates decide together when and who would take any given action.
Each caveman or women has two different actions they can take.
To apply an action, simply place a red disc on the desired action on the panel. For example: If you wish this caveman to light a fireball, simply place a red disc on the fireball mark.
- Each disc can be used only once, thus players have 7 actions they can order the characters during a game.
- At the end of a turn, once a disc was used, simply turn it to its silver side to indicate the disc and action were exhausted, and leave it on the panel. A caveman can exhaust any specific action only once during a game. You can apply both actions of any character during the game.
Note you can apply up to 2 actions for each clan member. It is up to the players to decide who, where, or when, to use any of the actions.
Players are limited to taking max. 2 actions per round.
The Actions
Players can apply 8 different types of actions. Different figures can take different actions.
Fire
The most common action your clan can take is starting a fire. They all love fire, it changed their lives dramatically! When lighting a fire you create an obstacle that lasts for 2 rounds. A fire prevents the opposing clan from advancing into the lit areas (your clan members also can't move to these areas).
To indicate the fire's location use the Fire token. Note the token is double sided. It has a large fire illustration on one side and a smaller one on the other.
A cavemen or woman can start a fire at any of their surrounding 8 squares. Fires limit the movements of all characters, including yours. When you light a fire it occupies 2 squares on the first round (large fire symbol), and 1 square on the following round (smaller fire symbol). After the first round a fire was lit, turn the token to the smaller fire mark. You cannot move the token to a different square.
Note: you decide on the orientation of the fire. The 2 lit squares are in relevance to how the token is placed. The fire tip indicates the fire's direction. (Two examples are illustrated: A1/A2 and B1/B2.)
Fire action is applied by first placing the action disc when giving movement orders. The token is placed on the board at the desired location after players declare "Done" and are not allowed to change movement orders.
- A caveman or woman who steps into a fire is marked as "Hit" with a bump on the head. Remember: caveman cannot step into a fire, thus the caveman also remains place.
Fire Ball
Lighting a fire ball is similar to lighting a fire only here the fire zone is 1 square in both turns, and it advances one square the second round. Fire ball action is applied by use of the fireball token.
A fireball could be lit at any of the 3 squares in front of the caveman or woman lighting it. At the second round it advances 1 square in the direction forward of the character lighting it.
Fireball action is applied by first placing the action disc when giving movement orders. The token is placed on the board at the desired location after players declare "Done" and are not allowed to change movement orders.
- A caveman or woman who's hit by a fireball is marked as "Hit" with a bump on the head! Unlike the fire action, here the hit caveman does move to its desired location although hit.
Runners
The two brothers in your clan have fast feet! These two can advance 2 squares in the direction indicated on the panel.
If your runner cannot apply his desired move (if any other caveman wanted to move to its destination) your runner would advance one square only.
Mighty Tosser
This action allows your caveman to toss 2 clubs at once. You may throw your clubs any way you see fit including placing both on one square. This action could be applied once one of your cavemen is out of the game and its club is free to use.
Extra Force
This action gives extra force to the toss. If you hit an opponent when the action is applied your rival is out of the game in one hit!
The Healer
This action is applied by the older caveman in your clan. This wise character can heal any hit cavemen. You can apply the healing action on any hit cavemen who is located at any of the 8 surrounding squares around the healer after movements are made, at the end of the round. When a round is done, and if a hit caveman was healed, you remove the head bump, and your caveman is as good as new.
Call the Bird
The girl has a special power. She can call in the bird at any stage of the game. When applied, the dragon can drop up to 2 clubs within its range!
To apply the big bird's action use the dragon token. The token can be placed at any of the three squares on your last row (Halhala row) that are relative to the dragon girl.
You can call the bird only when you have a caveman out of the game and you have a free club (and up to 2 clubs). Clubs can be placed anywhere within the range marked in green. The range is 3 squares wide and through the whole board's length. Note: the girl calling the bird stands in the middle of the range's width.
Climber
This action allows the caveman to overcome the swamp obstacle. The caveman can cross the swamp in one round landing on the other side of the swamp. Crossing the swamp could only be done by a vertical movement (not diagonal).
Throwing the Clubs
After players give movement and action orders they declare "Done" and set the panels to the side. You are no longer allowed to change your orders on the panels. After laying any tokens if used, players throw their clubs.
- Each caveman is allowed to throw one club each round. Each caveman has a range of where they can throw the clubs. Players are allowed to place clubs anywhere in the caveman's tossing range.
- Your mission is to try and anticipate your opponent's moves and place your clubs where you think opposing cavemen are going to move (or stay).
Club throwing range definition: a rectangle of 6 by 3 in relevance to the caveman's location and direction.
Club throwing range is in relevance to the direction the caveman is facing, always straight ahead.
- Note there are colored stone markings on the side of the board to help you calculate a caveman's maximum tossing range. The row with the same color as where your caveman is located now, is the maximum range for the caveman to toss his/her club.
- It is allowed to place more than one club to a specific square.
- A caveman moving to or remaining in a targeted area is "hit".
- Remember: For the first hit, place a "head bump" marker on the caveman's head. When a caveman already has this marker and is hit again it is out of the game and removed from the board in daze....
- Important: you place your clubs in reference to the current caveman location not its future one.
- You can throw your clubs over other cavemen, and over the swamp.
Rock Mounds
Rock mounds are protective elements but also restrict your club tossing range. You can throw the club at the rock mounds but not further.
- A caveman directly adjacent to a rock mound is protected from being hit as long as the rocks are between your caveman and your opponent. In the illustration, the caveman is protected from above, but unprotected from the sides or from behind.
A caveman who is not directly beside the rocks is unprotected from all sides.
In another illustration, a caveman is protected from its left side, but is vulnerable from all other directions.
- Once behind a rock mound your tossing of the club is restricted. You can toss your club on the rocks but not further.
- When your caveman is not directly adjacent to the rocks within their tossing range, he/she can throw their clubs freely and with no restrictions. If rocks are not in the caveman's tossing range, it can place the club anywhere within its range.
- A caveman standing on a rock mound has an advantage in that they can toss the club an extra row to the distance, thus the range is now 7 squares to the distance.
Note that a rival caveman occupying the vacant spaces is protected by the rock mounds and could not be targeted by this caveman.
Time to gather your clan and face the challenge. Who will it be to call this valley Hooha, and who would it be to go wander the wilderness in daze?
Add-on Rules (Sold Separately)
The Gate
The gate is an extra tactical element. The gate allows passage only through the middle square and at only one direction.
The gate is placed during set up anywhere you see fit on your portion of the board, with the exception of your Halhala row.
The white arrow indicates the square and direction in which your cavemen can pass this obstacle.
A reminder: your climber can go over the fence. If you choose to apply this action, your climber simply advances freely through the obstacle.
Haunted Grounds
The haunted ground game piece is used to spice things even more. When a caveman is hit for the second time and removed from the board, place the piece on that caveman's last location. From now on no cavemen, from both clans, can occupy it, and all cavemen have to maenuver around it, out of respect.
Mega Club
The Mega club is a very distructive tool. It could be used any time during the game and by any cavemen or woman you see fit. If you throw the mega club at one of the single rock mounds you simply break it to pieces and it is removed from the board.