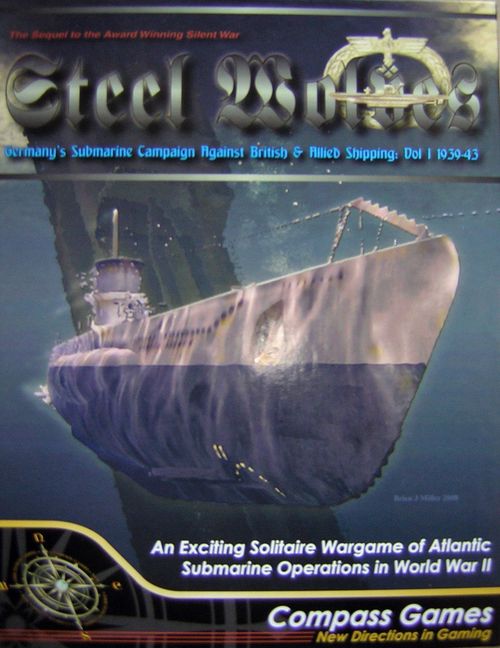
Steel Wolves: Germany's Submarine Campaign Against British & Allied Shipping – Vol 1 1939-43
Steel Wolves: Germany's Submarine Campaign Against British & Allied Shipping – Vol 1 1939-43 Rulebook
Table of Contents
Table of Contents
- [1.0] Introduction
- [2.0] Game Components
- [3.0] Setting Up the Game
- [3.1] The "War Mix"
- [3.11] The "War Mix" Table is divided into the five War Periods. Inside each War Period is a column for each convoy and the Loner cups. Task Force and Allied Submarine cup compositions are listed in a secondary table. Along the left side of the table are the Allied ship categories. These are broken down by type and nationalities. All Norwegian, Dutch, Greek, Australian, Polish, and Free French escorts are mixed with and considered British for purposes of the War Mix Table.
- [3.12] Several Allied ship pieces have Entry Dates or War Period numbers printed on them. These ships should not be placed into the War Mix cups until their date or period of entry into the war unless directed by a War Event.
- [3.13] Italicized Allied ships
- [3.14] Aircraft Capable Ships
- [3.15] The War Mix should be re-shuffled every two months, to avoid the player remembering what units are in which cup. Additionally, the War Mix is re-shuffled as per the War Mix Table any time the War Period advances [17.1].
- [3.1] The "War Mix"
- [4.0] Sequence of Play
- I. Strategic Segment
- [5.0] War Event Phase
- [5.1] At the start of each turn, the player rolls one die. If the die roll is 0, 1, 2, 3, or 4, the player rolls again on the War Events Table and follows the event's instructions.
- [5.2] Some events are one-time only events (such as Dunkirk). Once these have occurred, they cannot occur again. Treat any further rolls of those events as No Event unless otherwise specified in the table.
- [5.3] Some War Events direct the player to deploy a certain number of submarines to an OpArea or Special Mission Zone for the turn. If insufficient numbers of submarines exist in the OpArea or SMZ, additional submarines must utilize Patrol Movement to enter the OpArea or SMZ as per the following priorities:
- [5.4] Several War Events have the notation: {If it hasn't occurred by 1st week of (Month Year), conduct this Event as per [5.4]}. In such a case, the War Event Phase is modified as follows:
- [6.0] Torpedo Improvement Phase
- [7.0] The Intelligence Phase
- [7.1] B-Dienst Areas
- [7.11] Consult the B-Dienst Table by rolling a die and finding the result under the current War Period. Place the B-Dienst Area marker in the listed OpArea. All die rolls on the Area Activity Charts [13.21] in this Area are increased by one (+1).
- [7.12] The OpArea listed may also have a TF and/or SC listing under it. In such a case whenever a convoy is contacted in the OpArea, an additional die roll is made. If the result matches one of the lines, that convoy is instead a Task Force or a Special Convoy [28.0].
- [7.13] B-Dienst Areas only last for one turn, with the marker being removed in the Conclude Turn Phase [16.0]. Another attempt will be made in the following turn.
- [7.14] There may never be more than one B-Dienst Area in existence during any one turn.
- [7.15] Submarines are never required to respond to B-Dienst information. The decision to Patrol Move and take advantage of the target-rich environment is up to the player and should be balanced by the risks associated with Patrol Movement (see [12.0]).
- [7.1] B-Dienst Areas
- II. Triple R Segment (Reinforcement, Ready, Repair)
- [8.0] Submarine Reinforcements Phase
- [9.0] Ready Submarines Phase
- [9.1] For each submarine in the Pierside/Shipside Box, roll a die. If the result is equal to or less than (= or <) the "Readiness" rating of that submarine, the submarine is moved to the Ready for Sea Box of the Base display. If the roll is greater than the rating, the submarine remains in place and must reattempt in the following turn.
- [9.2] For each submarine in the In-Port Box, roll a die. If the result is equal to or less than (= or <) the "Readiness" rating of that submarine, the submarine is moved to the Pierside/Shipside Box of the Base display (Exception: Type II U-Boats are moved to the Ready For Sea Box). If the roll is greater than the rating, the submarine remains in place and must reattempt in the following turn.
- [9.3] For each submarine in the Work Up Box, roll a die. If the result is equal to or less than (= or <) the number in the box, the submarine is moved to the In-Port Box of the Base display. If the roll is greater than the rating, the submarine remains in place and must reattempt in the following turn.
- [10.0] Repair Phase
- [10.1] The Base Max Repair Capacity is the total number of submarines that may be in boxes "1", "2", and "3" at any one time. A submarine with damage may not be advanced into the repair process unless there is room for it.
- [10.2] If a submarine receives damage of one (1) or more, and the Base is already at its Max Repair Capacity (the total number of submarines that may be in boxes "1", "2", and "3" at any one time), any submarines in excess must be placed in the "Hold Box". Which submarine(s) go in the Hold Box is up to the player, but it usually makes sense to repair a sub with less damage first, shunting a more damaged sub into the Hold Box even if it arrived earlier.
- [11.0] Prep for Operations Phase
- III. Operations Segment (Conduct Individually for each submarine)
- [12.0] Patrol Movement Phase
- [13.0] Search and Contact Phase
- [13.1] Activity Determination Step
- [13.2] Search and Contact Procedure
- [13.21] Consult the Area Activity Chart in the OpArea in which the submarine is located. If the submarine is located in a Special Mission Area that has been activated by a War Event, the player consults the Area Activity Chart of the OpArea from which the submarine entered the Special Mission Zone. If there are any colored boxes in the row for the current War Period, the player owning the submarine rolls a die, adding the following cumulative modifiers:
- [13.22] The player rolls on the Contact Table for that OpArea, again first determining the War Period, and then rolling a die, applying the following modifiers:
- [13.23] If the Contact Table result is 'Loner' and the OpArea has a Coastal icon in it, the player may decide to concentrate on coastal shipping routes. The decision is made before drawing any units from the Loner Cup. If the player decides to raid coastal shipping, combat continues normally with the following exceptions:
- [14.0] Combat Phase
- [14.1] First Attack Round
- [14.11] Place the "Current Area" marker in the OpArea and remove the submarine(s) to the appropriate combat display. Place the submarine in one of the Submarine boxes on the Combat Display. No more than one submarine may be placed in each box. A submarine may always be placed in the outermost boxes, but to place a submarine in the more inner boxes, a die roll must be made. The player totals the tactical rating of the submarine, the rating of the submarine's Ace Skipper (if any), and a die roll. If the result exceeds the number in the desired box, the submarine is placed there. If equal to or less, the submarine may only be placed in a box allowed by the roll. If no such boxes are available, the submarine does not intercept the target. See also [24.2] Wolfpacks and Combat.
- [14.12] The player reveals a number of Allied units on the Combat Display equal to the Tactical Rating of the submarine by turning them face up, one at a time. The ships the player chooses to reveal must be from either the column the submarine is in, or from an adjacent one on the Combat Display.
- [14.13] Crash Dive
- [14.1] First Attack Round
- [15.0] Transit Movement Phase
- [15.1] Deployment
- [15.2] Return to Base (RTB): From an OpArea or SMZ to a Base
- [15.21] Submarines may only choose to RTB voluntarily by skipping the Search and Contact, and Combat Phases. Such a submarine returns towards a base moving a number of OpAreas equal to its speed rating (see also [18.0] Damage and [21.0] Bases). Perform a Transit Event roll for the sub using the OpArea with the most red boxes/dots.
- [15.22] An RTB result from combat, Transit Event, or Endurance means "immediately enter RTB status and place in the "Done" section of the OpArea in which the RTB result occurred". A submarine forced to RTB is flipped to its Transit side, and an RTB marker is placed on it, and it is placed in the "Done" section of the OpArea. During the Transit Movement Phase of subsequent turns, the submarine is moved via OpAreas to a destination Base as directly as possible within its operational radius. If undamaged, the submarine is placed in the Work Up Box. If damaged, it must determine the level of damage before being placed in a Repair Box. (See [18.0] Damaged Submarines).
- IV. End Turn Segment (After all submarines have completed movement and combat)
- [16.0] Conclude Turn Phase
- [17.0] War Progress Phase
- [17.1] Procedure
- [17.2] Automatic Advance
- [17.3] When the War Period advances, re-sort the War Mix [3.1] as per the War Mix table for that War Period.
- [17.4] There is one occurrence (Barbarossa) that is resolved in the same manner as a War Period change, but only changes the status of the Arctic OpAreas and introduces Soviet units to various cups:
- [17.5] Other Occurrences
- [18.0] Damaged Submarines
- [18.1] Should a submarine receive a second Damage marker, a die is rolled:
- [18.2] Should a submarine receive a third Damage marker, it is sunk. Advance the Submarines Sunk marker by one (1).
- [18.3] Damaged submarines that RTB must roll one die on the Damage Table when entering the base, adding one if the crew is Inexperienced [8.1]. The results of this die roll either place the submarine in one of the Repair Boxes or into the Work Up Box. Damaged Submarines may not depart a major base until they have gone through the Ready Submarines for Sea Phase [9.0].
- [18.4] The player may "decommission" a badly damaged submarine that the player does not want to repair, once it is on the repair track or in the hold box. The submarine is removed from the game but is not counted as "lost." If the submarine has an Ace Skipper, determine if he is assigned another submarine as per [25.3].
- [18.5] Damaged Surface Ships
- [19.0] Events
- [19.1] Transit Events
- [19.11] Transit Encounters
- [19.12] If a submarine receives an RTB result, the submarine is marked RTB and placed transit side up in the "Done" section of the OpArea used to determine the Transit Event Check. If more than one OpArea could have been used (same number of red boxes), the submarine is placed in whichever OpArea the player decides.
- [19.13] Removal Transit Event Checks
- [19.2] Combat Events
- [19.1] Transit Events
- [20.0] Special Mission Zones (SMZs)
- [20.1] SMZs may be entered at any time that their OpArea may be (exception, see Scapa Flow and Gibraltar [30.4]. SMZs are linked by a light blue arrowhead to one or more OpAreas. SMZs may only be entered via a linked OpArea.
- [20.2] When assigned to an active SMZ, allocated submarines are exempt from Congregating Risk [22.0] in that OpArea.
- [20.3] Immediately after arriving in an OpArea, a submarine may be repositioned to an active SMZ that is connected by a light blue arrowhead to that OpArea. If a player moves a submarine to one of the SMZs belonging to that OpArea, any Transit Event check must be performed with a die roll modifier of +2, using the Area Activity Chart of the OpArea from which the submarine entered the SMZ.
- [20.4] When in an SMZ, the submarine conducts the mission given by the War Event. If it is a Search and Contact mission, use the Area Activity Chart belonging to the OpArea from which it entered into the SMZ. All die roll results on this Area Activity Chart are increased by one Activity Level. Thus, Green becomes Orange, Orange becomes Blue, and Blue becomes Red. Red remains Red and White remains White. Other results may apply as directed by the War Events Table.
- [21.0] Bases
- [21.1] Forward Bases
- [21.2] Submarine Tenders
- [21.21] When a Forward Base is made active by the War Event Table, the player selects a submarine tender and places it in the SMZ in the War Progress Phase of the turn unless otherwise noted.
- [21.22] A submarine tender's support capacity is listed on the Submarine Tender card and on the Tender counter. This is the maximum number of submarines that can be in the tender's Work Up, In-Port, Shipside, and Ready for Sea Boxes at any one time. If the tender is at maximum capacity, no additional submarines may RTB to that tender.
- [21.23] A damaged submarine may RTB to a Forward Base in an attempt to make minor repairs. Roll immediately on the Submarine Damage Table. If the result is 'Superficial Damage', move the submarine to the Work Up Box of the appropriate tender. If any other result, move the damaged submarine to the 'Done' section of the applicable OpArea, and in subsequent turns it may only RTB to a major base.
- [22.0] Congregating Risk
- [22.1] For each multiple of six submarines beyond the first six in an OpArea with RED or BLUE boxes in its Area Activity Chart for the current War Period, implement the following modifiers for all submarines:
- [22.2] The above modifiers are cumulative for additional multiples of six (i.e. -2 search penalty and +2 to transit roll if thirteen submarines in an OpArea, etc.).
- [23.0] Spotted Effects
- [24.0] Wolfpacks
- [24.1] Wolfpack Formation
- [24.2] Wolfpacks and Combat
- [24.21] If a Diligent Escort counter is drawn, its attack is made on a randomly chosen U-Boat prior to placing it in its proper column.
- [24.22] Combat Events [19.2] only apply to the U-Boat that reveals the event chit.
- [24.23] Each U-Boat resolves its attack and counterattack individually (one at a time). The following sequence is used:
- [25.0] Ace Skippers
- [25.1] Ace Skippers provide the following to their submarine:
- [25.2] Ace Skipper Determination [also 14.5]
- [25.3] The Ace Skipper normally remains with one submarine and is lost if the submarine is lost. There are times however when the skipper is reassigned to another submarine or to shore duty (removed from the game).
- [25.31] The Master Submarine Reinforcement List contains notes on when some of the early war skippers were historically reassigned to a different submarine that is still under construction. The decision to do so is up to the player.
- [25.32] When a submarine with an Ace Skipper is withdrawn for refit or removed from service (via War Event Table or being a constructive total loss [18.1]), the player may roll a die to determine the skipper's next billet. If the result is a 0 thru 3, the skipper is removed from play (re-assigned to training command, given a surface command, promoted to flotilla command, or transferred to the BdU Staff). If the result is 4 thru 9, he may be assigned to any submarine on the reinforcement list that is at least four months from being received.
- [26.0] Minelaying
- [26.1] Laying a New Minefield
- [26.2] New Minefield Resolution
- [26.21] For the piece drawn, consult the Attack Results table for the appropriate tonnage and make a roll with no modifiers. If the ship is sunk, advance the ships sunk marker by one and the tons sunk by the appropriate amount.
- [26.22] If the piece drawn is a Combat Event or aircraft, return it to the cup and do not draw another. There is no effect.
- [26.23] A strength 3 minefield immediately becomes a 2 and a strength 2 becomes a 1 (for the following turn). Strength 1 minefields are not carried over to the following turn.
- [26.3] After laying a minefield, a submarine is moved from the SMZ to an adjacent OpArea of the player's choice and proceeds to the Endurance Check with a +1 die roll modifier to the endurance roll [14.7].
- [27.0] Surface Gunnery Combat
- [28.0] Task Forces, Special Convoys, and Loners
- [28.1] Task Forces and Special Convoys use the mechanics of the Combat Phase [14.0] with the following differences:
- [28.11] The submarine reveals Allied units [14.12] in the following fashion:
- [28.12] The player may not attack units of a task force or special convoy with deck gunnery.
- [28.13] The Counterattack round [14.2] is conducted normally.
- [28.14] Wolfpack attacks may not be made unless allowed by War Event.
- [28.15] Re-Attacks [14.4] may not be made unless allowed by War Event. If so, conduct the re-attack round normally except that additional units are revealed as per [28.1].
- [28.2] Loners
- [28.1] Task Forces and Special Convoys use the mechanics of the Combat Phase [14.0] with the following differences:
- [29.0] Convoy Straggle
- Designer's Notes and Historical Perspectives by Brien Miller
- War Event Tables
[1.0] Introduction
Steel Wolves is a solitaire simulation of the German submarine war against the Allies during the 1939 to early 1943 period of the Second World War. The scenarios allow the player to recreate various stages of the war or the entire campaign. In these scenarios, the player takes on the role of Befehlshaber der U-Boote (BdU), deploying available submarines in order to attack the Allied navies and merchant fleets. Additionally, there are patrol games consisting of single submarine patrols, and convoy scenarios with Wolfpack attacks.
[1.1] How to Read these Rules
To help you quickly familiarize yourself with the game, a detailed sequence of play has been created. The rules follow this sequence: Set up the game, and follow the sequence of play to get an overview of game events. Then, begin the game, referencing the rules as you go. It is recommended for new players to first play a patrol game and convoy scenario before proceeding to play a campaign game. Certain rules apply to all submarines, and other rules only apply to German U-Boats. If the rule says "submarine" it applies to all. If the rule says "U-Boat" it only applies to German submarines.
[2.0] Game Components
Steel Wolves has the following components:
- One 22" x 34" Game Map
- Four Combat Displays
- Three Base Displays (backed with Sense of Scale Displays)
- One Counter and Map Explanation Card
- One Sequence of Display Card (Backed with Silent War SoP)
- One Charts and Tables Card
- One Victory Point Table Card
- Twelve Counter Sheets
- One Rules Book
- One Scenario Book
- One Master Submarine Reinforcement List
- One Task Force, Submarines, and Other Cups List
- Two Ten-Sided Dice
- One Box and Lid Set
Note: Players must supply up to fourteen opaque cups depending on scenario played.
[2.1] The Game Map
The map portrays the Atlantic Theater of Operations and contains graphic representations of submarine transit routes and areas where submarines conducted operations and special missions, as well as a number of displays and charts necessary for play. There are five types of play "Areas" on the map:
- Submarine Base: Represented by a hexagon and a port (anchor) symbol.
- Operations Area (OpArea): Large circular area containing an Area Activity Chart (AAC). An Operations Area is divided into an Operating section (top) for the submarines conducting combat in that Area and a Done section (bottom) for submarines which have completed their turns. When a submarine is in the Done section it may not conduct any activity until the following turn.
- Special Mission Zone (SMZ): Small circular area without an AAC, that points to one or more OpAreas. There is often richer hunting in these zones, but at a higher risk. They are also the only places where minefields may be laid. They can also be "friendly" zones, containing supply ships or submarine tenders.
- Transit Zone: Three SMZs are also Transit Zones (English Channel, Bay of Biscay, and Gibraltar). They must be crossed, usually at higher risk, in order to move between the OpAreas or OpAreas and Bases connected by them.
- Neutral Port: Small square areas in Spain where Germany was able to maintain "interned" supply ships from which U-Boats could refuel so long as they remained out of official view of Franco's authorities.
[2.11] Transit Routes
All OpAreas are linked by transit routes, a series of lines that delineate movement for submarines. Some transit routes have a circled '2' on them. Movement between the two OpAreas in such a case costs 2 movement points, and patrol movement is prohibited. Units that can only move at speed '1' may move across such a route only if in Return to Base (RTB) status.
[2.12] East vs West
The map has a dashed line running North to South. See [30.2]. In War Periods 3, 4, and 5, all convoys generated in "West" waters use the West Inner and West Outer cups. Certain War Events can specify that units in specific OpAreas or SMZs draw from different cups.
[2.13] Area Activity Charts
Each OpArea has an Area Activity Chart (AAC) which provides the following information about the area:
- Printed along the top is the geographic group to which the OpArea belongs.
- Printed vertically along the side is the name of the individual OpArea.
- A submarine icon indicates that enemy submarines may be encountered in the OpArea [14.6]. The pale icons in Cape Verde and West Africa are only active if optional political rule [36.63H] is in effect.
- A graphic table indicates merchant density and ASW danger in the OpArea by means of color coding. A red dot in a box indicates that the base color is used for merchant density but the box is considered red for purposes of ASW counterattack on a submarine and for Transit Event Checks [19.1].
- An aircraft icon indicates that land based air can be encountered in the OpArea during the applicable War Period. If the icon is solid, air cover is "heavy". If the icon is outlined, air cover is "light". Note: An SMZ connected to an OpArea with light aircover is considered to have heavy air cover.
[2.2] Game Charts and Tables
There are a number of charts and tables in Steel Wolves, some printed on the map and others on separate cards.
[2.3] Playing Pieces
There are several different types of pieces in the game. Submarine, aircraft, and ship illustrations are not to scale with each other:
A. SUBMARINES
Every Axis submarine that participated in the Battle of the Atlantic is represented by its own playing piece. There are also some optional submarines and several enemy (Allied) submarines. There are two sides to every submarine: Transit side and Patrol side.
Transit Side: The Transit side has the name and class name of the submarine plus the following information and ratings:
- Entry Date: The date in which the submarine arrives in the game (W/S means at "War Start", 9/39). Some Allied submarines are marked with a War Period to indicate when they are added to the mix. Some Soviet submarines are marked "Barb" to indicate they enter play when Barbarossa occurs. A few submarines (and surface units/aircraft) are marked with 'Evnt' and enter play as a result of a War Event.
- Speed: The number of OpAreas that a submarine may move in a single turn while in transit mode.
- Range: The maximum number of OpAreas that a submarine may be from any friendly Base at any time. Range may not be traced through the English Channel or Gibraltar.
- Readiness: The value the player must roll to "ready" the particular submarine for sea.
Patrol Side: The Patrol side has the name, class name, and range of the submarine plus the following ratings:
- Attack: The fighting value of the submarine, a mixture of the number of torpedo tubes the submarine has, whether or not the submarine has tubes both fore and aft, whether tubes are internal or external, and the overall loadout of torpedoes.
- Defense: An evaluation of the submarine's ability to maneuver, speed of dive, diving depth, tonnage, and the "robustness" of her design and construction. Size matters.
- Tactical: An estimation of the submarine's "handiness" in combat, a mixture of the measurement of her general modernity, engineering responsiveness, and most importantly, her combat systems, scopes, TDC, as well as the progress of experience in naval construction.
- Endurance: A rating that determines if the submarine may remain on patrol or if it must return to base. This rating factors in torpedo loadout and consumables such as food, water, and especially fuel supply.
- Crash Dive: A rating in a triangle that gives a submarine a "second chance" against sudden attacks such as from patrol aircraft, diligent escorts, gunfire from merchant ships, and malfunctioning torpedoes.
Notes: Tactical is in a sense a counter-intuitive rating. The more capable the submarine is, the more aggressively it tended to be handled by the skipper, resulting in the revealing in the exposure of the submarine to higher risk.
Some Type VII U-Boats have different ratings than others of their class. These are the few that were built with no stern torpedo tubes due to a lack of high-grade metals required at the time of construction. Other Type VIIs were built with only two forward torpedo tubes but all were retained for training command.
B. SURFACE SHIPS
Most surface units are represented by generic pieces that are used over and over again, however a number of surface ships have their names printed in color italics indicating that the playing piece represents a specific ship. All surface ship playing pieces have a type designation, tonnage rating, defense rating, and an anti-submarine (ASW) rating. Some also have a name and/or an availability date or period printed on them. The back of all non-submarine Allied surface units has a Red Ensign or a White Ensign for fog-of-war purposes. The majority (but not all) of the Red Ensign marked units are merchants, and the majority of White Ensign units are naval units.
-
Type: The general type of ship such as BB for Battleship, CV for Carrier. Following is a complete list of ship types used in the game:
Naval Units
- CV – Aircraft Carrier
- CVE – Escort Carrier
- ACV – Auxiliary Carrier (reclassified CVE in July 1943)
- AVG – Aviation Support Ship (reclassified CVE in July 1943)
- CS – Seaplane Carrier
- BB – Battleship
- BC – Battlecruiser
- CA – Heavy Cruiser
- C – Cruiser (units of the class have been modified to both heavy and light)
- CL – Light Cruiser
- ML – Minelayer
- AM – Armed Merchant Cruiser
Escorts
- DD – Destroyer
- DE – Destroyer Escort
- PF – Patrol Frigate
- CT – Corvette
- SL – Sloop
- TB – Torpedo Boat
- PG – Patrol Gunboat
- CG – Coast Guard Cutter
Merchants
- M – Merchant, including freighter, stores ship, transport, and auxiliaries such as depot ships and tenders
- AO – Oil Tanker
A few ships have a plus symbol (+) beneath their designation (example: AT Aquitania). This identifies ships that were capable of traveling at high speed when alone.
There are several Diligent Escort pieces in the game. These are the Allied surface ships that have "Diligent" printed on the front with a red silhouette and orange rating factors. These represent particularly alert, aggressive, and tenacious escort captains who occasionally surprised a submarine skipper with their skill and daring.
Some German ships are included. Their use is described under [21.2] and [21.3]. Large counters are used as described on the War Event Table [5.0]. Small counter use is described under [21.2] and [21.3].
C. AIRCRAFT
Allied aircraft have a name, ASW rating, and an availability date. German aircraft have a name, range, and an availability date.
D. COMBAT EVENT
Some Allied pieces have the words "COMBAT EVENT" on them. These pieces indicate that a unique event has occurred. (See Combat Events [19.2]).
E. TDC MARKERS
TDC markers represent the Target Data Computer (TDC) solutions on a target, incorporating the vagaries of target position, course, and speed relative to the submarine, and general good or bad fortune inherent in World War II submarine combat. TDC markers have target modification values between -4 and +4 printed on them.
F. ACE SKIPPERS
These pieces represent the top German, Italian and French submarine skippers of World War II. Ace Skippers improve the capabilities of their submarines in several ways [25.1].
G. MARKERS
The rest of the counter mix includes markers for the game turn, recording the number of ships and tonnage sunk, the number of submarines lost, current War Period in the game, etc.
[2.4] Combat Displays
There are four different combat displays used in Steel Wolves:
[2.41] Loner Display
This is used when a 'Loner' contact is generated on a Contact Table. All targets are considered to be in the same column as the submarine.
[2.42] Large Convoy Display
This is used when a large convoy (C2) is generated on the Contact and Engagement Tables.
[2.43] Small Convoy Display
This is used when a small convoy (C1) is generated on the Contact and Engagement Tables. The column labels indicate where to place units from the corresponding cups. The Entry die roll notations are for determining in which column the submarine may begin combat [14.11]. The flags serve no game purpose.
[2.44] Task Force Display
This is used when a Task Force or Special Convoy is generated due to War Event or B-Dienst. ALL units in the Center are considered to be in the same column. See [13.24] for what units are placed in which columns as it depends on the nature of the contact.
[2.5] Scale
The map represents the Atlantic Theater from the Mediterranean to the Gulf of Mexico and from the Barents Sea to the Southern tip of Africa and part of the Indian Ocean and as such is somewhat scaleless. Each game turn is one week.
[2.6] Conventions
When rolling the ten sided die, zero (0) is always zero (0) and not ten (10).
The following logical terms are used throughout the rules:
- #: number or value
- >: greater than
- <: less than
- = or >: equal to or greater than
- = or <: equal to or less than
- drms: Die Roll Modifications (changes to the die roll + or -)
Fraction Rounding: Fractions are rounded up or down to the nearest integer. However, pay close attention; although a common convention was desired, Steel Wolves uses both rounding-up, and rounding-down in order to keep as close to the statistical model as possible. When unspecified, round all fractions less than one half (< 0.5) down, and all fractions equal to or greater than one half (= or > 0.5) up.
[3.0] Setting Up the Game
Choose a scenario: Lay out the map and sort the submarines by the month noted on each piece from the beginning through the end of the scenario. You can speed up setup by sorting the submarines by month or by Entry Date instead of having to pick through the countermix for a particular name. The Entry Date "w/s" indicates that the submarine is available at "war start."
Place the submarines for the beginning month of the scenario in their arrival locations, Transit side up. Place other markers aside as these will not come into play until later in the game. Next, sort out the Allied units/markers with either the British White Ensign or Red Ensign on the back. These will be distributed among several cups in a "War Mix."
[3.1] The "War Mix"
The "War Mix" is the distribution of the Allied ships into opaque cups. The cups are as follows:
- Loner Cup: Represents merchants sailing alone, convoy stragglers and rompers, and occasional patrolling warships.
- Outer Cup: Represents the outer columns of a convoy, with a higher density of escorts. In War Periods 3-5 there is also a "Western Outer Cup".
- Inner Cup: Represents the intermediate columns of a convoy, between the outer and center columns. In War Periods 3-5 there is also a "Western Inner Cup".
- Center Cup: Represents the innermost columns of a convoy, with a lower density of escorts and higher value targets.
- Task Force Cup: Represents naval units in other than convoy formations. There is always a British TF Cup. In War Period 1 there is also a French TF Cup, and in War Periods 3-5 an American TF Cup. Soviet TFs may be generated by War Event.
- Fleet Escort Cup: Represents task force screens and escorts for special troop transport or other high priority convoys. There is always a British FE Cup. In War Period 1 there is also a French FE Cup, and in War Periods 3-5 an American FE Cup. Soviet FEs may be generated by War Event.
- Submarine Cup: Holds Allied submarines and is only drawn from for Sub vs Sub combat [14.6]. In War Periods 3, 4, and 5 there is a 2nd Western Submarine Cup.
- Liner Cup: Contains fast troopships that usually sailed alone. Only drawn from when a 'Liner' marker is revealed on the combat display.
- TDC Cup: Holds target data solutions that are applied to targets. There is a mix of values that changes as the war progresses and the ability of a submarine to ensure favorable solutions changes due to target speed, defense, doctrines, etc.
[3.11] The "War Mix" Table is divided into the five War Periods. Inside each War Period is a column for each convoy and the Loner cups. Task Force and Allied Submarine cup compositions are listed in a secondary table. Along the left side of the table are the Allied ship categories. These are broken down by type and nationalities. All Norwegian, Dutch, Greek, Australian, Polish, and Free French escorts are mixed with and considered British for purposes of the War Mix Table.
Choose the columns for the War Period noted in the scenario and sort the Allied pieces into each cup as per the Table. If a ship category (such as M6k tons or more) has different types of pieces distribute them randomly into the cups. Note that AO units etc are considered to be Ms. The type of flag on the back of the unit makes no difference and such units (For example, a freighter with a white ensign and a freighter with a red ensign) are distributed randomly. The flags are meant to apply some fog of war in that you can rarely be certain of what you see through the periscope.
Escorts are generally grouped into three categories on the table. DD 2t represent heavier, usually more modern destroyers. DD 1t tend to represent older and lighter units, though there are exceptions. ES or "Other ES" is everything else, including sloops, destroyer escorts, corvettes, torpedo boats, frigates, and Coast Guard cutters. In unique situations, an escort is referred to by type rather than ES for clarity (Example: French Torpedo Boat (TB)).
[3.12] Several Allied ship pieces have Entry Dates or War Period numbers printed on them. These ships should not be placed into the War Mix cups until their date or period of entry into the war unless directed by a War Event.
Example: The British, Canadian, and Norwegian Flush Deck destroyers are marked WP4, but may be brought in earlier by War Event.
[3.13] Italicized Allied ships
If any of the italicized Allied units are noted as sunk at the beginning of a scenario, their pieces are not placed in the War Mix. They are removed from the game and not replaced (exception, ships of the same class [14.81]).
[3.14] Aircraft Capable Ships
Some ships, notably aircraft carriers and some cruisers, have an aircraft silhouette on them. These vessels are Aircraft Capable Ships, and are treated as follows:
A. If the ship has an ASW factor, the value is used as normal for revealed escort level and for counter-attack.
B. If the ship has a zero '0' ASW factor it has no value for calculating revealed escort level [14.16.B] but is considered to have an ASW value of one-half (½) for purposes of counterattack [14.2.A].
[3.15] The War Mix should be re-shuffled every two months, to avoid the player remembering what units are in which cup. Additionally, the War Mix is re-shuffled as per the War Mix Table any time the War Period advances [17.1].
Note: There will almost always be more pieces available by date and type for placement into the cups than the mix calls for. This was done to give a representative sample of the types available, especially escorts. Unused pieces are set aside, but should be available for drawing the next time the mix is re-shuffled.
[3.2] Other Cups
The Liner, Task Force, Fleet Escort, Submarine, and TDC cups are filled as per the list in the scenario book for the proper War Period. It is recommended you fill these first as they call for specific units. Units placed in the Fleet Escort Cups should be White Ensign backed whenever possible.
[3.3] Marker Set Up
Place the Tonnage, Ships Sunk, and Submarines Lost markers in the appropriate boxes on the Tonnage & Ships Sunk / Submarines Lost Track, and the Torpedo, Month, Week, Year, and War Progress markers in their respective boxes according to the scenario. The game is now ready to begin.
[4.0] Sequence of Play
Steel Wolves is played in Game Turns representing approximately a week of actual time. Each game turn contains Segments and each Segment contains Phases. The following sequence of play is for the operational and campaign scenarios.
Note: The organization of the rules generally follows the sequence of play. The section numbers of the segments begin with "5.0" as that is the rules section covering that segment.
I. STRATEGIC SEGMENT
- [5.0] War Event Phase — Roll a die; if result is 0-4, reroll on War Events Table and implement the results. Also see [5.4]
- [6.0] Torpedo Improvement Phase — Consult Torpedo Improvement Table. If die roll is successful, move Torpedo Value marker one space to the right.
- [7.0] Intelligence Phase
- 7.1 Roll die on B-Dienst Table. Mark B-Dienst Area.
- 7.2 Check Master Submarine Reinforcement List for B-Dienst level change.
- 7.3 Check Master Submarine Reinforcement List for Enigma level change.
- 7.4 Determine Weather Systems
- 7.5 Place German (and/or Vichy) aircraft in OpAreas being searched.
II. TRIPLE 'R' SEGMENT (Reinforcement, Ready, Repair)
- 8.0 Submarine Reinforcements Phase — Consult the Master Submarine Reinforcements List. Place and remove submarines and Allied units as appropriate.
- 9.0 Ready Submarines Phase (at bases and sub tenders)
- 9.1 Roll for subs in the Pierside Box; if roll is = or < than Readiness # place in Ready For Sea Box.
- 9.2 Roll for subs in In-Port Box to ready them; if roll is = or < than Readiness # place in Pierside Box.
- 9.3 Roll a die for subs in the In-Port Box. If result = or < number in box, move submarine to Work Up.
- 10.0 Repair Phase (at bases) — Roll = or < than # in Repair Box to move sub to next box (3 → 2 → 1 → Work Up).
- 11.0 Prep For Operations Phase — Move all submarines from "Done" section of each OpArea to "Operating" section. Determine minefield results.
III. OPERATIONS SEGMENT (Conduct individually for each Sub)
- 12.0 Patrol Movement Phase — Subs currently deployed with their Patrol side up may move to the "Operating" section of an adjacent OpArea or Special Mission Zone if currently active and there is no '2' on the transit route. Roll for a Transit Event.
- 13.0 Search and Contact Phase — Follow Search and Contact instructions. If Wolfpack formation is desired, determine how many U-Boats can conduct combat simultaneously.
- 14.0 Combat Phase
- 14.1 First Attack Round
- 14.2 Counterattack Round
- 14.3 Withdrawal (Proceed to 14.4 or 14.5)
- 14.4 Re-Attack Rounds (Optional, followed by Withdrawal)
- 14.5 Ace Skipper Determination
- 14.6 Sub vs. Sub Combat
- 14.7 Endurance Check
- 15.0 Transit Movement Phase — Submarines that are in the Ready for Sea Box of a base, are outbound to a patrol area, or have an RTB marker and are in the Operating section of an OpArea may move a number of OpAreas up to their movement rating. Roll for a Transit Event if applicable. Place outbound submarine in "Done" section of OpArea Patrol side up if it intends to patrol there next turn or Transit side up if it intends to continue on to another OpArea or Base.
IV. END TURN SEGMENT (After all subs have conducted movement and combat)
- 16.0 Conclude Turn Phase — Return German aircraft to base. Remove Weather Systems. Remove Spotted markers from subs on roll of 0-6; Automatically remove Spotted markers upon return to Base. Check Scenario Victory Conditions. Advance Date markers.
- 17.0 War Progress Phase — Check for War Period Transition and occurrence of Barbarossa
I. Strategic Segment
[5.0] War Event Phase
If it is the first War Event Phase of a new War Period, follow the instructions at the top of the War Event Table for the new period, then continue below.
[5.1] At the start of each turn, the player rolls one die. If the die roll is 0, 1, 2, 3, or 4, the player rolls again on the War Events Table and follows the event's instructions.
[5.2] Some events are one-time only events (such as Dunkirk). Once these have occurred, they cannot occur again. Treat any further rolls of those events as No Event unless otherwise specified in the table.
[5.3] Some War Events direct the player to deploy a certain number of submarines to an OpArea or Special Mission Zone for the turn. If insufficient numbers of submarines exist in the OpArea or SMZ, additional submarines must utilize Patrol Movement to enter the OpArea or SMZ as per the following priorities:
- Patrol side up submarines in adjacent OpAreas must enter the OpArea/SMZ.
- Non-RTB submarines that are Transit side up in or adjacent to the OpArea must be flipped to their Patrol side and if adjacent, patrol moved to the OpArea and/or SMZ.
- If the OpArea/SMZ is adjacent to a submarine base (such as Bay of Biscay or SW Approaches), Ready for Sea submarines at the base must transit to the OpArea/SMZ.
(Note: this and [15.12] are the ONLY times a Transit side submarine may be flipped to Patrol side and conduct combat in the same turn).
If the player still does not have enough submarines to fulfill the conditions of the War Event, there is no penalty, but the player must move as many submarines as possible up to the number indicated.
[5.4] Several War Events have the notation: {If it hasn't occurred by 1st week of (Month Year), conduct this Event as per [5.4]}. In such a case, the War Event Phase is modified as follows:
[5.41] Prior to enacting [5.1], the player rolls a die. If the result is 0-6, that particular event occurs and the [5.1] roll is skipped. If the result is 7-9, then player then rolls as per [5.1] and this will be repeated in the following week.
[5.42] If the 3rd week of the month results in the Event in question not coming up, it automatically occurs in the 4th week of the month.
Example: It is the first week of May 1940 and the Operation Weserübung Event has not occurred. The player skips [5.1] and rolls the die as per [5.41]. The result is a '7'. Weserübung does not occur and the player then rolls again as per [5.1] to see if a different Event occurs.
In the second week of May 1940 the player does the same, and again in the third week if necessary. If it still hasn't occurred by the 4th week, the player makes no War Event roll and Operation Weserübung occurs automatically.
[6.0] Torpedo Improvement Phase
Commentary: The British, Germans, and Americans all had severe problems with their torpedoes. While the Germans corrected known flaws relatively quickly, they didn't realize they had an additional depth setting problem with the torpedoes until 1942.
The G7 (representing G7a steam torpedoes and G7e electrics) torpedo marker begins the game on the Current Torpedo Value track according to the scenario instructions.
During the Torpedo Improvement Phase, the player consults the Torpedo Improvement Table. This table lists a range of ships sunk and a series of die rolls. If the number of ships sunk in the previous turn causes the cumulative total to exceed one or more of the listed numbers of ships sunk, the player rolls a d10. If the die roll equals or exceeds the result listed for that number of ships sunk, the torpedo marker is immediately advanced indicating a fix to the torpedo problem. If the die roll is less than the result there is no change, and another roll may not be attempted until the next listed number of ships sunk is reached.
Example: In 1939 the player sinks 80 ships. He is now eligible to attempt torpedo improvement from –1 to 0. The die roll is '5' indicating that no improvement is made (a '9' is required). The player may not roll again until later turn in which 85 ships have been sunk, and a result of '8' or '9' will result in the improvement to 0.
[6.1] Other Axis Torpedoes
The torpedoes of other Axis countries are the same as the German level except they are never less than -1 or greater than +1.
Note: If using the optional Political Rules [35.0], the Torpedo Improvement Phase is skipped.
[7.0] The Intelligence Phase
The Intelligence Phase determines what outside forces affect the ability of submarines to operate and search at the tactical level.
[7.1] B-Dienst Areas
B-Dienst (Beobachtungsdienst) is the German naval codebreaking organization. It was fairly proficient at breaking British naval ciphers and merchant codes. B-Dienst has two effects on the game: Determination of B-Dienst areas (representing specific intelligence) and modification of the AAC search die roll, representing general code breaking.
[7.11] Consult the B-Dienst Table by rolling a die and finding the result under the current War Period. Place the B-Dienst Area marker in the listed OpArea. All die rolls on the Area Activity Charts [13.21] in this Area are increased by one (+1).
[7.12] The OpArea listed may also have a TF and/or SC listing under it. In such a case whenever a convoy is contacted in the OpArea, an additional die roll is made. If the result matches one of the lines, that convoy is instead a Task Force or a Special Convoy [28.0].
[7.13] B-Dienst Areas only last for one turn, with the marker being removed in the Conclude Turn Phase [16.0]. Another attempt will be made in the following turn.
[7.14] There may never be more than one B-Dienst Area in existence during any one turn.
[7.15] Submarines are never required to respond to B-Dienst information. The decision to Patrol Move and take advantage of the target-rich environment is up to the player and should be balanced by the risks associated with Patrol Movement (see [12.0]).
[7.2] B-Dienst Level
The general codebreaking ability of B-Dienst to track Allied shipping and convoy routing is reflected in the B-Dienst Level. The higher the level, the better BdU is able to determine convoy courses and course changes. The level is listed at the start of each scenario and rises or falls as listed in the Master Submarine Reinforcement List. The Level is added to the die roll whenever a submarine makes a search on an AAC [13.21].
[7.21] Political Effect
If using the Optional Political Rules, a rise in B-Dienst Level only occurs on achieving a successful request to Improve Intelligence.
[7.3] Enigma
Enigma represents the security of German communications. When penetrated, the Allies gained the ability to route convoys around submarines, making it harder for convoys to be intercepted. The level is listed at the start of each scenario and rises or falls as listed in the Master Submarine Reinforcement List. The Level is added to the die roll whenever a submarine makes a search on an AAC [13.21], and whenever a U-Boat is attempting to join a wolfpack [24.1].
[7.31] 4-Rotor Enigma
Admiral Dönitz introduced 4-Rotor Enigma in early 1942. This greatly multiplied the difficulty of Allied codebreakers over the 3-Rotor system. The separate U-Boat commands for the Mediterranean and Arctic continued to use 3-Rotor Enigma. When 4-Rotor Enigma comes into play, the Enigma Level Marker is flipped to 4-Rotor as a reminder that the level is one less for the U-Boats assigned to the Arctic and Mediterranean by War Event.
[7.32] Italian Communications
The Germans refused to provide Enigma machines to the Italian submarines under BdU operational control. Ironically, since Italian codes were never penetrated, the Allies were more uncertain of the location of Italian boats, and less able to route convoys away from them. Whenever the Enigma Level is a negative number, Italian submarines do not use it as a modifier to the AAC search roll.
[7.33] Political Effect
If using the Optional Political Rules, successful requests are required to raise Enigma levels and introduce 4-Rotor Enigma.
[7.34] Enigma Plus B-Dienst
While the Enigma Level and B-Dienst Level are both added to the AAC search roll, the combined modifier for them may never be more than +3 or less than -3.
[7.4] Weather
Significant weather events can affect searching. These are represented by markers depicting low pressure systems (more properly tropical or extratropical cyclones). There are two types, "low" (990 millibar) and "very low" (965 mbar) low pressure markers. Weather affects all naval and air operations in an area. There can be up to three (3) low pressure markers on the map at the same time. There are three steps for determining status of weather: in order, they are, A) Check for Weather Formation, B) Determine Location, and C) Determine strength.
Note: Although these weather systems move, the duration is usually a week or less. For game purposes, they are localized to the OpArea in which they have the most effect. Every OpArea on the map can have localized storms, often severe, but they are usually of short duration and can be ridden out by submarines at depth. These rules represent longer duration, severe storms that cannot be avoided as the submarines need to return to the surface to recharge batteries and replenish oxygen.
A. Weather Formation
Roll three dice. One low pressure system will be generated for each zero rolled.
B. Weather Location
For each low pressure system, roll on the below table and place a 990 mbar marker in the indicated OpArea. If the same location is rolled for two or three systems, place one 965 mbar marker in the OpArea.
| Die Roll | June thru November | December thru May |
|---|---|---|
| 0 | South Africa | North Sea |
| 1 | Guiana Basin | Norwegian Sea |
| 2 | Caribbean | Barents Sea |
| 3 | Gulf of Mexico | Western Approaches |
| 4 | US East Coast | Western Approaches |
| 5 | Bermuda | SW Approaches |
| 6 | Maritimes | Greenland Gap |
| 7 | Grand Banks | Grand Banks |
| 8 |
C. Weather Strength
For each 990 mbar marker, roll a die. If the result is 0-1, flip it to the 965 mbar side.
[7.41] Effects of Weather
990 mbar LOW PRESSURE Marker
The 990mb marker represents storm weather with considerable cloud build up, rough seas, and reduced visibility. The following effects are in place in the OpArea and any connected SMZs:
- Aircraft may not be placed in the OpArea.
- Allied aircraft and carrier units have their ASW factors reduced by 1, to a minimum of 0.
- There is a -2 modifier to all submarine rolls on the AAC [13.21].
- There is a -1 modifier to the submarine's attack value for EACH attack.
- Surface gunnery attacks are not allowed.
- Minelaying is not allowed.
- All convoys have a Straggle level of 1 more than normal, to a maximum of 2.
- At the beginning of the Endurance Check [14.7], a die is rolled for each Italian submarine that is in or has transited through or from the OpArea during any part of the turn. On a result of 0-1, the submarine receives a Damaged marker.
965 mbar VERY LOW PRESSURE Marker
The 965mb marker represents significant and hazardous weather with solid sky cover, very heavy seas, and near zero visibility. The following effects are in place in the OpArea and any connected SMZs:
- Aircraft may not be placed in the OpArea.
- Any Allied aircraft revealed is returned to the appropriate cup. No other unit is revealed in its place.
- All escort ASW factors are reduced by 1 to a minimum of 0 unless a carrier or aircraft capable ship in which case the factor is 0.
- There is a -3 modifier to all submarine rolls on the AAC [13.21].
- There is a -2 modifier to the submarine's attack value for EACH attack.
- All results of "damaged" against an Allied unit is changed to sunk.
- Surface gunnery attacks are not allowed.
- Minelaying is not allowed.
- No Wolfpacks may be formed.
- All convoys have a Straggle level of 2.
- At the beginning of the Endurance check [14.7], a die is rolled for each submarine that is in the OpArea at the end of the turn, or has transited through or from the OpArea during the turn. On a result of 0-1 (0-3 for Italian submarines), the submarine is damaged.
- On any result of "damaged" against a submarine, a second die is rolled, if the result is greater than the defense rating of the submarine, the submarine is lost. Ace Skipper ratings modify this die roll by subtracting the skipper's rating from the die.
[7.42] Weather Markers are removed from the map in the Conclude Turn Phase [16.0].
[7.5] Aerial Reconnaissance
During this phase the player may place available Luftwaffe search aircraft to assist U-Boats (not non-German submarines) in locating convoys.
[7.51] The player simply places the aircraft in any OpArea within the aircraft's range of its base. The presence of each aircraft:
- Adds +1 to rolls on the AAC [13.21].
- Adds +1 to rolls for Wolfpack Formation [24.1]
[7.52] Multiple aircraft have a cumulative benefit.
[7.53] Focke-Wulf 200 Condors have a range of '2'. All other aircraft have a range of '1'. Range may not be traced via the English Channel or Gibraltar.
[7.54] Aircraft may be based at any Submarine Base in play, including Narvik. If the player wishes to change the base, the aircraft is moved to the new base during this phase but may not search until the following turn.
[7.55] Aircraft may be lost to Allied fighters. Beginning in War Period 3, if during the turn a CV, CM, CVE, or ACV is revealed in an OpArea being searched that has an Axis aircraft [14.12], the player rolls one die. If the result is a '0', the aircraft is immediately removed from play. If using the optional Political rules, the Political Influence marker with OKL goes down by one.
[7.56] Vichy Aircraft
Some scenarios and political events provide a Vichy aircraft to the player, and the Bizerte aircraft is used, with a range of '1'. Due to communications issues, the Bizerte only provides the +1 AAC roll benefit to Vichy French submarines and may only operate from a French base.
II. Triple R Segment (Reinforcement, Ready, Repair)
[8.0] Submarine Reinforcements Phase
Commentary: The Kriegsmarine did not enact a massive expansion of the U-Boat arm for more than a year following the start of the war. This left Dönitz with a paucity of U-Boats for the first two years of the war. The trickle of new U-Boats quickly became a flood in 1941. Not only did new submarines appear, but nearly every submarine received a major overhaul during the course of the war. While these refits do not alter a submarine's ratings, they do represent a major logistics impact to operations and therefore are included as part of the game.
Players consult the Master Submarine Reinforcements list at the beginning of the month following the first month of the campaign being run and each month thereafter. The list is organized in the following fashion:
A. Following the date, there may be changes to different features of the game and war mix:
- Items listed in parens ( ) are scheduled changes to war periods, units to add or remove from the war mix, etc. Also listed here are opportunities for the player to re-assign ace skippers as per [25.31].
- Items listed in curly brackets { } are changes to aspects such as Enigma and B-Dienst and aircraft available to the player. If using the Optional Political Rules these notations are ignored and the aspects dealt with politically.
- Items in angle brackets < > are optional units that must be traded for. They are only received if the trade is made as per Optional Rules.
B. Following a Base of arrival are listed all submarines that enter the war starting in October, 1939. If a base of arrival is not yet active, the submarines are received in Germany. All arriving submarines are placed in the Pierside box of the receiving Base. Some submarines are followed by "Inexp" in which case they are marked with an Inexperienced 1 marker. The player may voluntarily delay these submarines one month for extended workup in which case the Inexperienced marker is not placed. See [8.1].
C. Following the word "Withdraw" are submarines which are withdrawn for extended overhaul. These submarines immediately conduct RTB movement and associated Transit Event Checks as described in [19.13].
Submarines in the Mediterranean Sea when removed are placed in the "Mediterranean Refit" box. Those not in the Mediterranean are placed in the "Atlantic Refit" box. Any damaged marker is removed. If the submarine has been sunk no other submarine takes its place. While in overhaul, a submarine cannot be removed from play via the War Event "Relegation to Training Duty".
D. Following the word "Return" are overhauled submarines returned to service. All returning submarines in the "Mediterranean Refit" box are placed in Italy regardless of the below designation, while "Atlantic" submarines are placed in Germany, Norway, or France as indicated.
Commentary: Since deployments to the Mediterranean will almost certainly not match historical ones, each submarine is given a base to return to in the Atlantic area. This designation is ignored if the submarine is in the Refit Mediterranean Box.
[8.1] Inexperienced Crews
The Germans historically deployed some U-Boats with relatively untrained crews. These U-Boats are noted in the Master Submarine Reinforcement List with (Inexp) following them. Such U-Boats are marked with an "Inexperienced" marker.
[8.11] Effects of Inexperience
U-Boats with an Inexperienced marker on them suffer the following penalties:
- -1 to all Search rolls on the AACs [13.21]
- -1 to all Surface Gunnery Attack Rolls [27.1]
- -1 to Defense Value during Counterattack [14.2B]
- +1 to all Torpedo Attack Rolls [14.16]
- +1 to Diligent Escort rolls
- +1 to Event Aircraft rolls
- +1 to all Crash Dive attempts [14.13]
- +1 to all Endurance rolls [14.7]
- +1 to all Transit Event Checks [19.1]
- +1 to all Damage Table rolls [18.3]
[8.12] Gaining Experience
An Inexperienced marker is removed from any U-Boat returning to base (after any Damage Table roll) provided that U-Boat did not:
- RTB while transiting outbound
- Bypass Search & Contact [13.1]
- Voluntarily RTB unless damaged
[8.13] Late Deployment (Training)
The player may choose to deploy inexperienced U-Boats one month later than historical, in which case the U-Boat does not carry the Inexperienced marker.
[8.14] Early Deployment
The player may choose to deploy submarines not marked (Inexp) one month earlier, marking it as Inexperienced provided he does not exceed the number of Inexperienced boats allowed by the countermix (6).
[8.15] Very Early Deployment (Optional)
The player may choose to deploy U-Boats TWO months earlier by placing an Inexperienced '2' marker on a U-Boat and doubling the penalties listed under [8.11]. If [8.12] would normally call for removal of the marker, a '2' marker is instead flipped to the '1' side and the submarine must conduct another patrol to be fully trained.
[9.0] Ready Submarines Phase
Commentary: Prior to deploying to sea, a submarine must be "readied". This represents provisioning and fueling, as well as assembling and training the crew. The latter evolution (to use the Navy term for an activity) can be somewhat indeterminate in length of time it takes. The average German and Italian submarine was able to perform a turn around between patrols in three to seven weeks. Sometimes it took more, in part due to subtle sabotage from French yard workers who risked their lives while under close scrutiny. The small Type II submarines could be turned around quickly.
Procedure: Start with the Pierside or Shipside Box and work towards the Work Up Box for each Base/Tender.
[9.1] For each submarine in the Pierside/Shipside Box, roll a die. If the result is equal to or less than (= or <) the "Readiness" rating of that submarine, the submarine is moved to the Ready for Sea Box of the Base display. If the roll is greater than the rating, the submarine remains in place and must reattempt in the following turn.
[9.2] For each submarine in the In-Port Box, roll a die. If the result is equal to or less than (= or <) the "Readiness" rating of that submarine, the submarine is moved to the Pierside/Shipside Box of the Base display (Exception: Type II U-Boats are moved to the Ready For Sea Box). If the roll is greater than the rating, the submarine remains in place and must reattempt in the following turn.
[9.3] For each submarine in the Work Up Box, roll a die. If the result is equal to or less than (= or <) the number in the box, the submarine is moved to the In-Port Box of the Base display. If the roll is greater than the rating, the submarine remains in place and must reattempt in the following turn.
[10.0] Repair Phase
Submarines with a damaged marker may be repaired at a Base. There are four boxes within the Repair Box in each Base display, a "Hold", "3", "2", and "1" box. In each of the "3", "2", and "1" boxes, a Repair Number is printed.
Repair Procedure: Roll a die for each submarine in a Repair Box, starting with the submarines in Repair Box 1 and advancing one box at a time to the Hold Box. If the result is equal to or less than (= or <) that box's Repair number, advance the submarine to the next box. A submarine in box "1" advances into the Work Up Box.
[10.1] The Base Max Repair Capacity is the total number of submarines that may be in boxes "1", "2", and "3" at any one time. A submarine with damage may not be advanced into the repair process unless there is room for it.
[10.2] If a submarine receives damage of one (1) or more, and the Base is already at its Max Repair Capacity (the total number of submarines that may be in boxes "1", "2", and "3" at any one time), any submarines in excess must be placed in the "Hold Box". Which submarine(s) go in the Hold Box is up to the player, but it usually makes sense to repair a sub with less damage first, shunting a more damaged sub into the Hold Box even if it arrived earlier.
[10.21] When submarines are repaired and there is room for more to be repaired, submarines may be advanced from the Hold Box into the "3" box (regardless of the actual damage it suffered - it is assumed to have deteriorated from waiting in the holding basin), but must wait until the following turn to roll for repair.
Note: Players should carefully plan for the return of damaged subs to avoid the holding basin penalty. For example, subs operating out of the French Atlantic bases can "bounce" to Germany if needed.
[11.0] Prep for Operations Phase
[11.1] All submarines at sea are moved from the "Done" section of their OpArea to the "Operating" section.
[11.2] Minefield Resolution
For every minefield on the map from previous turns, make a die roll on the Minefield Table as per [26.4] to determine Allied losses (if any).
[11.21] Once losses are determined, remove all strength '1' minefields and flip all strength '2' minefields to their strength '1' sides.
III. Operations Segment (Conduct Individually for each submarine)
[12.0] Patrol Movement Phase
Normally when on patrol, submarines tend to remain in a single OpArea. However, the player may change their patrol area to an adjacent OpArea using Patrol Movement. To use Patrol Movement, a patrol side up submarine is simply moved to any adjacent OpArea, so long as that OpArea does not place the submarine further from a Base than its Range rating and the transit route does not have a circled '2' in it. A roll is made for a Transit Event (see [19.1]). If an RTB result is obtained, flip the submarine to its Transit side, place an RTB marker on it, and move it to the "Done" section of the OpArea to which it moved.
[12.1] A submarine may enter an SMZ connected to its current OpArea using Patrol Movement for no additional movement cost. A roll is made for a Transit Event (see [19.1]).
Example: A War Event has occurred for the St Lawrence SMZ. A submarine on patrol off the US East Coast may Patrol Move to the Maritimes, and then enter the St Lawrence Special Mission Zone for no additional cost, rolling for a Transit Event using the Maritimes Area Activity Chart.
[13.0] Search and Contact Phase
Commentary: Submarine combat is essentially sorting through the available contacts and determining quickly the best opportunities for sinking selected ships. Information is usually imperfect, time short, angles and opportunities limited. Within these bounds, a submarine commander must make his decisions such that the best opportunity to inflict damage is taken.
[13.1] Activity Determination Step
Any patrol side up submarine may choose to bypass the Search and Contact Procedure in order to not engage in combat. Such a submarine is spending most of its time submerged and/or avoiding surface traffic. If the player chooses this option, remove any Spotted marker from the submarine and proceed directly to the Endurance Check [14.7] with a –2 modifier to the Endurance roll.
[13.2] Search and Contact Procedure
To determine if the submarine makes contact with the enemy and, if so, how many ships the submarine contacts, the player follows these steps:
[13.21] Consult the Area Activity Chart in the OpArea in which the submarine is located. If the submarine is located in a Special Mission Area that has been activated by a War Event, the player consults the Area Activity Chart of the OpArea from which the submarine entered the Special Mission Zone. If there are any colored boxes in the row for the current War Period, the player owning the submarine rolls a die, adding the following cumulative modifiers:
- +1 if this is a B-Dienst OpArea [7.11].
-
- the current B-Dienst Level + the current Enigma Level as a single modifier that cannot be greater than +3 or less than -3 [7.34].
- +1 per German (or Vichy) aircraft searching the OpArea [7.5].
- +2 if the search is in a Virgin OpArea [30.5].
- -1 if the submarine is Spotted and it is War Period 3 or later.
- -3 if U-Boat tried and failed to join a wolfpack (see [24.1]).
- -1 if U-Boat is Inexperienced [8.1]
- -1 or more if more than six submarines are in the OpArea [22.1].
- -2 if a 990 mbar weather system [7.41] is in the OpArea.
- -3 if a 965 mbar weather system is in the OpArea.
The color of the box result determines the Activity Level:
- White - no contact (see first bullet below)
- Green - contact with a small number enemy ships
- Orange - contact with a slightly larger number of enemy ships
- Blue - contact with a moderate number of enemy ships
- Red - contact with a large number of enemy ships
If neither of the below is the case, determine contact [13.22]:
- If the unmodified die roll is a zero, the box is white, and the AAC has a submarine icon next to the WP line for the current War Period, the player rolls a second die. If this is also a zero, the player submarine has encountered an enemy submarine. Proceed to the Sub vs. Sub Combat segment [14.6].
- If there is no contact, proceed directly to the Endurance Phase [14.7] with a –1 modifier to the Endurance roll.
[13.22] The player rolls on the Contact Table for that OpArea, again first determining the War Period, and then rolling a die, applying the following modifiers:
- -1 if the color of the AAC box is green.
- +1 if the color of the AAC box is blue.
- +3 color of the AAC box is red.
- +1 per Aircraft (see [7.5])
Modified die-rolls of less than zero are considered zero, and those greater than eleven are eleven. The result is either: No contact, L = Loner, or a two letter designation for a convoy. In the case of a convoy, the designation is for historical reference only. The size of the convoy depends on the color of the AAC box used to generate it. Those generated from green or orange boxes are small convoys (C1). Those generated from blue or red boxes are large convoys (C2).
If the OpArea is the current B-Dienst area, or a War Event indicates, any convoy may be replaced by a Task Force or Special Convoy. See [28.0].
At this point, the player may withdraw the submarine from combat if it has a Damaged marker on it. This represents a damaged boat declining to attack defended convoys but still looking for loners.
[13.23] If the Contact Table result is 'Loner' and the OpArea has a Coastal icon in it, the player may decide to concentrate on coastal shipping routes. The decision is made before drawing any units from the Loner Cup. If the player decides to raid coastal shipping, combat continues normally with the following exceptions:
A. Any un-named merchant vessel revealed has its defense lowered by '2' (to a minimum of '0'), and tonnage is reduced to '1t'. This can be raised to '2t' by the Combat Event "Tonnage Doubled".
B. Allied aircraft remain on the display even if the OpArea has 'light' aircover for that War Period.
Commentary: Coastal shipping abounded in certain areas. Consisting of small tramp freighters, ferries, larger fishing vessels, etc, the targets were small, slow, and easily intercepted and sunk. Air cover tended to be heavier with short ranged aircraft contributing to coverage.
[13.24] The Player consults the Engagement Table, cross-referencing the Activity Level from the Area Activity Chart die roll with the Contact result from the Contact Table. The Engagement Table will direct the player to randomly select a number of pieces from the 'War Mix' cups. Pieces are drawn from the cup (without examining them) and placed face down on the appropriate Combat Display in the column indicated below:
C1: Small Convoy — A small convoy uses the Small Convoy Display [2.43]. Pieces drawn from the Outer Cup are placed in the outer columns and pieces from the Inner Cup are placed in the Inner columns.
C2: Large Convoy — A large convoy uses the Large Convoy Display [2.42]. Pieces drawn from the Outer Cup are placed evenly in the two outer columns. Pieces drawn from the Inner Cup are placed evenly in the two inner columns, and those from the Center Cup are placed in the two center columns.
C3: Loner — Pieces from the Loner cup are placed randomly on the Loner display. See [28.2].
C4: Special Convoy (Spec) — The Task Force / Special Convoy display is used. Units drawn from the Center Cup are placed evenly in the Center. Units drawn from the Fleet Escort Cup are placed evenly in the outer columns. See [28.1].
C5: Task Force (TF) — The Task Force / Special Convoy display is used. Units drawn from the Task Force Cup are placed evenly in the Center. Units drawn from the Fleet Escort Cup are placed evenly in the outer columns. See [28.1].
Note: In some cases, there are not enough units in a Task Force or Fleet Escort cup to fulfill what is called for by the Engagement Table. This is on purpose to reflect fleets and times that did not field larger task forces or were short of escorts. In such a case, use all available units. Similarly, if an odd number is in a cup that calls for even placement in certain columns, choose a column randomly by die roll after the submarine is placed as per [14.11].
[13.3] Wolfpack Formation
If a convoy or task force is located by a U-Boat, the player may attempt to bring in additional U-Boats as per [24.1].
[14.0] Combat Phase
The player now engages the Allied units in a series of attack rounds. The rule text is for attacking Large Convoys and Small Convoys. For attacking Task Forces and Special Convoys see [28.1], and for Loners see [28.2].
[14.1] First Attack Round
For a large convoy (C2) use the Large Convoy Display. For a small convoy (C1) use the Small Convoy Display.
[14.11] Place the "Current Area" marker in the OpArea and remove the submarine(s) to the appropriate combat display. Place the submarine in one of the Submarine boxes on the Combat Display. No more than one submarine may be placed in each box. A submarine may always be placed in the outermost boxes, but to place a submarine in the more inner boxes, a die roll must be made. The player totals the tactical rating of the submarine, the rating of the submarine's Ace Skipper (if any), and a die roll. If the result exceeds the number in the desired box, the submarine is placed there. If equal to or less, the submarine may only be placed in a box allowed by the roll. If no such boxes are available, the submarine does not intercept the target. See also [24.2] Wolfpacks and Combat.
Example: The player desires to attack a large convoy with U-25 (with Schütze (+1)) from the center. He makes a die roll of 6. The final result is die roll 6 +1 (Schütze) +3 (tactical rating of U-25) = 10. This is not greater than the number for the center (10), but is enough to be placed in an Inner column (greater than 8 needed). If the result was 8 or less the submarine could always be placed in an outer column.
[14.12] The player reveals a number of Allied units on the Combat Display equal to the Tactical Rating of the submarine by turning them face up, one at a time. The ships the player chooses to reveal must be from either the column the submarine is in, or from an adjacent one on the Combat Display.
- If an Allied aircraft is revealed, consult the current War Period line of the AAC. If there is a solid aircraft icon, the aircraft remains on the display. If there is an outlined aircraft icon (denoting "light" air cover), the aircraft remains on the display on a subsequent die roll of 0-4. If no icon exists, or a die roll of 5-9 is made for "light" aircover, the aircraft is returned to the cup and another unit is drawn in its place. This unit is revealed regardless of the flag on its reverse side.
- If a "Combat Event" marker is revealed, the event is immediately resolved as per the Event's instructions (see [19.2]). If any additional Combat Event markers are drawn during an attack round, they are returned to the cup without drawing any unit in its place.
- If a "Diligent Escort" is revealed, unless the player successfully crash dives [14.13] the player rolls immediately on the Diligent Escort row of the Other Submarine Hazard Instance Table, adding one (+1) if the crew is Inexperienced. Combat then proceeds normally with the Diligent Escort in its place, face up, in the proper column. If the submarine is damaged, the player may choose to withdraw from combat at this point, proceeding to the Endurance Check [14.7].
At this point the player may choose to attack with deck guns if the following conditions exist:
- There is a revealed merchant 7t or smaller (or a larger merchant that is damaged).
- There is no White Ensign backed unrevealed unit in the same or adjacent column as the submarine.
- There is no revealed naval unit (aircraft, escort, CL, BB etc).
- The submarine is not a Type II, XIV, XXI, or XXIII U-Boat.
If attacking with deck guns proceed to [27.0], otherwise continue to [14.14].
[14.13] Crash Dive
If a Diligent Escort is drawn, or the Combat Events "Circular Running Torpedo" or "Patrol Aircraft Spots Submarine" are rolled, or a merchant opens fire on the submarine with guns, the submarine may attempt to evade using its crash dive rating (in the green triangle). Before resolving the escort, aircraft, or circular torpedo, the player rolls a die (adding one if an Inexperienced U-Boat).
If the result is less than or equal to the crash dive rating, all results except No Effect are changed to Spotted (all results are No Effect in case of circular torpedo) and combat continues normally.
If the submarine fails the roll, the occurrence (escort or event) is resolved normally, and combat continues normally.
[14.14] The player utilizes the Tactical Rating of the submarine to determine the number of "TDC" (Target Data Computer) pieces that are randomly selected from the pool of face down TDC markers. The player places TDC markers (without examining them), one per target, on any of the revealed OR face down Allied ships in the same column containing the submarine or in an adjacent column. No target may ever have more than one TDC assigned to it. Once they are all placed, TDC markers may not be moved.
[14.15] The player reveals the TDC markers and selects targets for attack. A target must be a unit with a TDC marker on it. The player may select as many targets as he can allocate the submarine's attack value to, and all targets must have at least one (1) attack factor allocated to it. Note that the submarine's attack factor may be higher due to the Straggle level [29.0] of the convoy. The total of all attacks may not exceed the attack value of the attacking submarine. A submarine can only attack targets that are in the same or an adjacent column.
Example: U-25 (5-2-3) has Schütze (+1) as her Ace Skipper and is in combat against one revealed 2-0 merchant, one 1-0 merchant, and one revealed 7-1 destroyer. Straggle Level is one, which raises U-25's attack rating to '6'. The 2-0 cargo ship has a TDC value of –2 but is in an adjacent column. The 1-0 cargo ship has a TDC value of 0, and the destroyer a +1. The player assigns 3 attack points to the first merchant and 3 attack points to the second merchant. He does not target the escort. Total attack points assigned: 6.
[14.15A] Once all the targets have been selected, any unrevealed Allied unit that is being attacked is now turned face up. If an Allied aircraft or Combat Event marker is revealed, remove the TDC marker from it. Attack points allocated to the aircraft or Combat Event marker may be reallocated to any other unit with a TDC marker on it.
- If an Allied aircraft is revealed, consult the current War Period line of the AAC. If there is a solid aircraft icon, the aircraft remains on the display. If there is an outlined aircraft icon (denoting "light" air cover), the aircraft remains on the display on a subsequent die roll of 0-4. If no icon exists, or a die roll of 5-9 is made for "light" aircover, the aircraft is returned to the cup and another unit is drawn in its place. This unit is revealed regardless of the flag on its reverse side.
- If a Combat Event marker is revealed, the event is immediately resolved as per the Events instructions unless a Combat Event has already occurred this round (see [19.2]). If any additional Combat Event markers are drawn during an attack round, they are returned to the cup.
- If a Diligent Escort is revealed, the player rolls immediately on the Diligent Escort row of the Other Submarine Hazard Instance Table, adding one (+1) if the crew is Inexperienced [8.1], and applying any result. If the submarine successfully crash dives [14.13], all results except 'No Effect' are changed to spotted. Combat then proceeds normally with the Diligent Escort in its place, face up, in the proper column. If the submarine is damaged, the player may NOT choose to withdraw from combat at this point.
[14.15B] Targeting an Escort
Commentary: Most successful attacks on escorts occurred with the escort unaware of the submarine's presence until the hit (or until the torpedo track was sighted with insufficient time to react). In other words, active ASW was not occurring during the attack. The escort was steaming at slow speed with the convoy or task force, and perhaps changing station. Furthermore, escorts tended to be on the periphery and more exposed.
A submarine can target one non-aircraft capable [3.14] escort and that escort's ASW value is not counted as part of the defense of that unit (ASW level of other revealed escorts ARE counted) if none of the following are in effect:
- The submarine is SPOTTED.
- A Diligent Escort has been revealed.
- An aircraft is on the display.
- The attack is on the Loner display.
- A member of a Wolfpack has already attacked, alerting the escorts. Only the first member of a pack can take advantage of this benefit.
- The following Combat Events occur: i) Patrol Aircraft spots submarine. ii) Counterattack (escorts spot submarine and hold it down). iii) Counterattack - combat (escorts attack before sub can).
If the player fires at an unrevealed target that turns out to be an escort, its ASW rating may be ignored so long as another escort isn't being targeted in this fashion and the above conditions are met. If the escort is damaged or sunk, its ASW value is not used in the counter-attack round.
[14.16] Each attack is resolved separately. The following procedure (steps a through d) is used for each attack:
A. Total the following for the attacking submarine:
- The portion of the submarine's Attack Value (possibly raised by convoy Straggle or lowered by weather) allocated to this target.
- The value of the Ace Skipper marker assigned to this submarine (if any). Each attack gets this bonus.
- The current G7 torpedo value (a negative number reduces the final attack value.)
B. Total the following for the target:
- The target's Defense Value. (Subtract two if the vessel is in port [14.18]).
- The ASW value of all revealed Allied vessels in the submarine's column and adjacent columns, and the ASW value of all revealed aircraft and aircraft carriers with an ASW factor (see [3.14] regardless of column.
- The TDC marker value (a negative number reduces the target's final defense value.) The TDC value may be modified by Combat Event or if coastal areas are not blacked out [30.25].
- If the target ship is not in the same column as the submarine, add one (+1).
- If the target ship has a Damage marker subtract one (-1).
C. Subtract the target's value from the attacker's value (round down) to get a result and roll a die, adding one if the crew is Inexperienced [8.1]. If the roll is equal to or less than the result (difference), the target has been hit.
Example: Continuing from the U-25 example above with a current Mark G7 torpedo value of minus one (-1). The player calculates the following attacks:
Assuming Cargo Ship #1 is 2-0, Adjacent Column: a) 3 attack points + 1 Ace Skipper point + torpedo value -1, for a total of (3+1+[-1]) = +3. b) 2 defense points + 1 revealed escort + TDC –2, +1 for being in an adjacent column for a total of (2+1+[-2]+1) = +2 c) The player must roll equal to or less than (3-2) = 1 to hit this target. (20% chance of hit)
Assuming Cargo Ship #3 is 1-0, Same Column: a) 3 attack points + 1 Ace Skipper point + torpedo value –1 for a total of (3+1+[-1]) = +3. b) 1 defense point + 1 revealed escort + TDC 0 for a total of (1+1+0) = +2 c) The player must roll equal to or less than (3-2) = 1 to hit this target (20% chance of hit).
D. If the target is hit, consult the Attack Results Table. Find the size of the target in tonnage in the left column and roll a die with the following modifiers:
- Add the current value of the G7 torpedo (adding a negative number results in subtraction).
- Add two if the vessel is in port [14.18].
- Subtract one if the vessel is a British, Canadian, or American merchant and from 5t to 12t in War Period 5.
The Japanese merchant marine was relatively new by global standards. The merchant shipping attacked by the Germans in the Atlantic early on was elderly, most being constructed before or during the First World War with many dating from the 1800s. Very little merchant tonnage was built during the Great Depression. With the huge wartime builds of new shipping by Britain, Canada, and the United States, the balance of ships became better able to survive damage.
- If the modified result falls into the orange results, the target has been damaged. Place a Damage marker on the vessel. If the target already had a Damage marker, it is sunk.
- If the result falls into the red results, the target has been sunk. Advance the Ships Sunk marker by one and the Tonnage Sunk marker(s) by the tonnage size.
- If the result is a red box with a white X, the target has an explosive cargo (ammunition, aviation gasoline, etc) and has blown up, potentially damaging the submarine. Roll a die immediately on the Exploding Target line of the Other Submarine Hazard Instance Table with no modifiers. Advance the Ships Sunk marker by one and the Tonnage Sunk marker(s) by the tonnage size.
Note: The torpedo value counts for or against the player twice: First, in terms of hitting the target (running at the proper (or not) depth), and second, in terms of detonating correctly (in terms of the magnetic exploder that was so problematic or the defective contact exploders).
[14.17] There will be times when it is not possible for a submarine to hit a target, through a combination of low attack factors, low torpedo rating, adverse TDC modifiers, and/or high escort values. In such cases follow these guidelines:
A. If no successful attack can be made in the first attack round, there is no Counterattack [14.2]. The player may withdraw [14.3] or conduct a Re-Attack round [14.4] normally.
B. If no successful attack can be made in a Re-Attack round, a counterattack round is conducted normally regardless of whether an attack is made in the first attack round.
Note: Unrevealed units with TDC markers are taken into account for determining whether an attack can be successful or not. These units are considered to have a defense of '1' until revealed. If attacked, and it is determined that the target cannot be hit, the attack goes through with an automatic miss, followed by a counterattack.
[14.18] There will be Events and special naval base rules [30.4] which specify that targets are "inport". In such a case the defense value is lowered by two (to a minimum of zero) for being motionless and attack results rolls are raised by two for ships not being buttoned up or otherwise prepared for at-sea conditions. ASW ratings are reduced by one to a minimum of zero for the First Attack Round and subsequent Counterattack (only).
[14.2] Counterattack Round
Counterattack normally occurs after an attacking submarine has conducted combat against surface ships, but under certain Combat Events, Counterattack may occur before and after the submarine has attacked surface ships.
Note: Any units sunk in the attack round before are removed prior to Counterattack.
To conduct Counterattack, use the following procedure:
A. Add the following for the Allies:
-
The ASW value of all revealed Allied forces (even those not attacked) in the column containing the submarine and in all adjacent columns, fractions rounded up. Remember, the ASW value of a ship with a Damage marker is zero. The ASW value of an aircraft or aircraft carrier or aircraft capable ship without an ASW factor (see [3.14]) is added regardless of the column the aircraft is in. Exception: ASW value of an American flagged aircraft or carrier is not counted for counter-attack prior to American entry into the war (WP4), though it is counted for purposes of revealed escort level for target defense.
Forty-eight US Navy PBYs flew out of Argentia, Newfoundland from the Spring of 1941 until transferred to the Pacific following Pearl Harbor. They spotted U-Boats for convoys and radioed their positions, often making the U-Boat submerge and spoiling the submarine's attack, but were prohibited from making direct attacks. Aircraft carriers also escorted convoys such as the one taking American troops to Iceland prior to American entry into the war.
-
The number of red boxes and boxes with red dots for the current War Period in the Area Activity Chart of the OpArea where the combat is occurring.
-
The general ASW value from the War Period display for the current War Period and region.
B. For the submarine, add:
- The submarine's Defense value.
- The value of the Ace Skipper marker assigned to this submarine (if any).
- Subtract one (-1) if an Inexperienced [8.1] U-Boat.
C. Subtract the submarine's result from the Allied result. If less than zero there is no counter-attack. If zero or greater, locate the applicable row on the Counterattack Table. Roll a die and apply the following modifiers:
- For each damage marker a submarine has, add one (+1).
- If this Counterattack is following a Re-Attack, add one (+1).
- If the submarine has a Spotted marker, add one (+1).
In some cases on the table, a second roll on the counterattack table is needed. Apply the results of the table immediately. Any submarine forced to RTB is flipped to its transit side and must withdraw.
Example: The Inexperienced Type IIA U-5 is surprised by the diligent sloop HMS Rochester and a French 6-1 destroyer in War Period 1 in the North Sea with a general ASW level of 0. The player calculates the following counterattack:
a) 4 revealed ASW +2 red boxes in the Area Activity Chart +0 general ASW level = +6. b) 2 submarine defense points -1 for being Inexperienced = +1. c) Subtract sub defense from ASW (6 minus 1 = 5). d) Roll on the 5-6 line of the counterattack table.
[14.3] Withdrawal
Once the Counterattack Round is over, the player may voluntarily withdraw the submarine from combat, placing it in the DONE section of the OpArea. If the player voluntarily withdraws, proceed to Ace Skipper Determination (see [14.5]).
[14.4] Re-Attack Rounds
If the submarine has not been sunk, withdrawn, or forced to RTB (Return to Base), it can choose to engage a second time. The TDC markers from the first round are removed and mixed back into the draw pool. Revealed units remain revealed.
Unless otherwise allowed (such as by War Event), Re-Attacks are not allowed on:
- Task Forces.
- Special Convoys.
- Liners from the Loner Cup with a plus symbol (+) on the counter indicating high speed. These are removed from the display for any re-attack rounds unless damaged.
- Cruisers (CA or CL) from the Loner Cup. These are removed from the display for any re-attack rounds unless damaged.
- Armed Merchant Cruisers (AM) from the Loner Cup. These are removed from the display for any re-attack rounds unless damaged.
Procedure
Prior to Re-Attack combat, determine if the Straggle level [29.3] of the convoy has changed, after which point the player may re-position the submarine to an adjacent column.
Example: Submarine Faà di Bruno sank one ship from a convoy with a straggle level of one. If the player rolls a 0, the Straggle level will rise to two. If he rolls a 9, it will drop to zero. The player rolls a four and there is no change. Faà di Bruno is in the leftside Inner column of the Convoy Display. It may reposition to the leftside Outer column or to the leftside Center column.
The player then repeats steps [14.12] through [14.17] followed by [14.2], with the following exceptions:
A. Allied units must be revealed in the following order (see [14.12]):
- Ships with the White Ensign must be revealed first (if in columns eligible for revealing).
- Only when all White Ensigns have been revealed may a Red Ensign marked unit be turned over.
In the Re-Attack round, one is subtracted from every TDC marker except for any –4 markers. This represents the submarine maneuvering for a better shot.
[14.41] The first Re-Attack is at the player's option. A second Re-Attack may only occur if the submarine has an Ace Skipper and the player rolls equal to or less than the Ace Skipper's rating. If attempting a second Re-Attack on Loners [28.2] a separate roll is made for each one.
[14.42] Once a second Re-Attack is concluded, combat ends [14.3].
[14.5] Ace Skipper Determination
If the submarine has sunk three (3) or more ships and 23,000 or more tons during this Combat Phase, the submarine has an "Ace Skipper".
- If the submarine does not already have an Ace Skipper, an Ace Skipper marker is randomly drawn and assigned to that submarine with the +1 side of the marker.
- If the submarine already has a +1 Ace Skipper, the Skipper is flipped to the +2 side.
- If the submarine already has a +2 Ace Skipper there is no additional benefit.
See ACE SKIPPERS [25.0] for additional rules.
[14.6] Sub vs. Sub Combat
If the Search and Contact Phase resulted in an encounter with an enemy submarine, conduct the following steps:
A. Randomly select an Allied submarine from the appropriate cup. Depending on location, the player may need to set it aside and draw another (see notes following the Allied Submarine Cup Table).
B. Make a die roll and subtract one if the player submarine is SPOTTED and/or DAMAGED, and subtract two if the player submarine is conducting transit movement (see [15.44]). If the final result is 0-4 the enemy has spotted the player submarine first. If the result is 5-9 the player has detected the enemy first.
C. Place the submarine which detected the other first in the Submarine Box of any column on the Combat Display, and the detected submarine in a Target Box of the same column. Draw and reveal a TDC marker for the target submarine.
D. Conduct one attack round with the firing submarine using its full attack rating and torpedo level plus any Ace Skipper value against the target submarine's Defense rating plus any Ace Skipper value. See below to determine Allied torpedo level.
Allied torpedo values:
| War Period | Value |
|---|---|
| 1939 | British -2; All others -1 |
| 1940/WP2 | All -1 |
| WP3 - WP4 | American -2; All others -1 |
| WP5 | American -1; All others 0 |
E. If the target submarine is hit, consult the 1-4 row of the Attack Results Table. If the player submarine is sunk, advance the Subs Lost marker by one. If an Allied submarine is sunk, advance the Ships Sunk marker by one and the Tonnage Sunk marker by the appropriate amount.
| Tonnage | Class of Enemy Submarine |
|---|---|
| 1t | British: H, L, S1, S2, U1, U1Mod; French: Requin, 600, 630, Saphir, Minerve, L'Aurore; Dutch: O-12, O-21; Polish: Wilk, Orzel; Greek: Nereos; Yugoslav: Hrabri; Soviet: Shchuka, Stalinets; American: R, S1, Mackerel |
| 2t | British: O, P, Porpoise, T1, T2; French: 1500; Soviet: Leninets, Katyusha; American: Gato |
| 3t | British: River; American: B |
| 4t | French: Surcouf |
Sub vs. Sub Combat ends following a single combat round. There is no Counterattack or Re-Attack round.
[14.7] Endurance Check
Commentary: There are four key elements to keeping a World War II warship at sea: Fuel, victuals, crew, and weapons loadout. During the Battle of the Atlantic, given the great distances involved, small submarines, and small number of torpedoes carried (5 to 22), the most often encountered limitations were fuel and torpedo loadout.
Procedure
Following a turn's combat(s) for a submarine, the player must roll a die to see if the submarine has expended its loadout of torpedoes or is running too low on fuel or other consumables. To do this, the player cross-indexes the submarine's endurance with the current value of the G7 torpedo on the Endurance Table, and rolls a die applying the following die roll modifiers:
- -2 Submarine bypassed Search and Contact Phase ([13.1]), or
- -1 Submarine did search but either: i) Encountered no contacts, or ii) Utilized Italian Torpedo Doctrine [30.81], or iii) Only conducted surface gunnery combat
- +1 Submarine is damaged.
- +1 Submarine laid a minefield [26.0] this turn.
- +1 U-Boat crew is Inexperienced [8.1].
Note: Negative modifiers are not cumulative, while positive ones are. Negative modifiers may not be applied to a U-tanker [21.33].
- If the result is higher than the number indicated, the submarine is marked RTB and placed in the "Done" section of the OpArea. It must return towards a base in the following turn.
- If the result is equal to or less than the number, place the submarine in the "Done" section of the OpArea. It may continue to patrol in the following turn.
[14.71] Refueling at Sea
The player may at times take advantage of supply ships and U-tankers in order to refuel a submarine at sea or in a neutral port. See [21.3].
[14.8] Clean-Up
Return the Allied units and Combat Event markers to the appropriate cups. Remove TDCs from the combat display and return them to the draw pool. Place the submarine(s) in the 'DONE' section of the proper OpArea and remove the 'Current Area' marker.
[14.81] If any of the ships that have italicized names were sunk or damaged, they are removed from the game and not placed back into the cups. If other units of the same class are available, one (player choice) is placed in the appropriate cup. Damaged units are repaired and eligible for cup placement in the following War Period.
Example: In November 1942, BB Duke of York is sunk. She is removed permanently. The player may replace her with King George V or Anson. She may not be replaced by Prince of Wales (listed as sunk in list below Task Force Cup designations) or Howe (not in service until December 1942).
[15.0] Transit Movement Phase
Submarines move along the light blue lines connecting the Areas. Submarines performing Transit Movement are placed on their Transit side. There are two types of Transit Movement:
- Deployment
- Return to Base (RTB)
[15.1] Deployment
If the submarine starts the Operations Segment in the Ready for Sea Box of a Base, it may be moved any number of OpAreas up to its speed.
- If the submarine is moving from an OpArea to an adjacent Base (such as from the North Sea to Germany), no Transit Event roll is made UNLESS the submarine must traverse a transit zone (such as the Bay of Biscay).
- If the submarine cannot return to base in one move, it is left in the "Done" section of the closest OpArea to the base that it can reach. During the Transit Movement Phase of the following turn(s), the submarine repeats Transit Movement until it can be moved to the Work Up Box of the destination Base. Conduct applicable Transit Events.
Note: departure from a permanent base to an adjacent OpArea is counted against its speed rating, while departure from a Special Mission Zone (SMZ) to a connected OpArea is not since the SMZ is considered to be "in" the OpArea.
Perform a Transit Event roll [19.1] for the sub using the OpArea with the greatest number of red boxes and boxes with red dots for the current War Period through which the submarine moved. Do not use the OpArea from which the submarine started. If the submarine survives undamaged, place it in the "Done" section of the ending OpArea. The player places the submarine Transit side up if it intends to transit further next turn, or Patrol side up if it intends to patrol next turn. Once in patrol status a submarine may never enter transit status again unless it is returning to base.
[15.11] In the following turn(s), a Transit side up submarine repeats transit movement (and Transit Event roll). A submarine may never move farther from an active base than its range value (Exception: see U-tankers [21.33C]).
[15.12] Close Hunting Grounds
A submarine departing a base and moving to an adjacent OpArea may flip to its patrol side and conduct search & contact or lay mines during the same turn. In addition to adjacent OpAreas, the following two OpAreas may be reached and searched during the turn of departure from a base under the following conditions:
- Western Approaches: The submarine must depart from Germany, France-Atlantic, or Norway (not Narvik).
- Southwestern Approaches: The submarine must depart from France-Atlantic, or depart from Germany and transit the English Channel.
Such a submarine does not get a 2nd opportunity to conduct search and combat if it is in Home Waters [30.1].
[15.2] Return to Base (RTB): From an OpArea or SMZ to a Base
Submarines may conduct RTB movement voluntarily or as a Combat or Transit Event result. Such a submarine is marked with an RTB marker and can never return to patrol status without readying at a Base.
[15.21] Submarines may only choose to RTB voluntarily by skipping the Search and Contact, and Combat Phases. Such a submarine returns towards a base moving a number of OpAreas equal to its speed rating (see also [18.0] Damage and [21.0] Bases). Perform a Transit Event roll for the sub using the OpArea with the most red boxes/dots.
[15.22] An RTB result from combat, Transit Event, or Endurance means "immediately enter RTB status and place in the "Done" section of the OpArea in which the RTB result occurred". A submarine forced to RTB is flipped to its Transit side, and an RTB marker is placed on it, and it is placed in the "Done" section of the OpArea. During the Transit Movement Phase of subsequent turns, the submarine is moved via OpAreas to a destination Base as directly as possible within its operational radius. If undamaged, the submarine is placed in the Work Up Box. If damaged, it must determine the level of damage before being placed in a Repair Box. (See [18.0] Damaged Submarines).
[15.23] An RTB submarine that begins the transit movement phase in the same OpArea as a supply ship or U-tanker, or adjacent to a Spanish port containing a supply ship, may attempt to reprovision as per [21.3].
[15.24] Cautious Transit
A submarine that is Transit side up may choose to move a single OpArea instead of at a higher speed in order to reduce vulnerability to patrolling ASW assets. If a submarine chooses to move one OpArea, subtract one from the Transit Event check [19.1].
[15.3] Some OpAreas are connected by transit routes with a '2' on them. A submarine may only cross that route if it has two movement points. If it only has one, it must wait for the following turn.
[15.31] An RTB submarine that only has one movement point may cross the transit route even if it has a '2' on it.
[15.4] Transit Encounters
Submarines conducting transit movement occasionally encountered Allied shipping. When this occurred, a decision had to be made whether to investigate and engage or to continue on.
[15.41] Procedure
Transit Encounters are not applicable if:
- The submarine has departed a base in the current turn
- The submarine is conducting Cautious Transit [15.24].
Otherwise, during the Transit Event Check [19.1] of an outbound or RTB submarine, if the result is a zero (0) before any modifiers are applied, and the modifiers do not result in a Transit Event, there may be an encounter. In such a case, proceed directly to [13.2] and conduct the Search & Contact procedure using the AAC used for the Transit Event Check with the following changes:
[15.42] If there is no contact, there is no effect. Transit movement is concluded normally.
[15.43] If the submarine is RTB, roll a die. If the result is 0-5, the submarine is out of torpedoes. In such a case, no attacks may be made against enemy submarines in case of a Sub vs Sub contact (though the player submarine may be attacked) and only surface gunnery attacks may be made against shipping.
[15.44] Once the type of contact has been determined, but before any units are placed on a combat display, the player must choose whether to conduct combat. If the player chooses to withdraw, transit movement continues normally. (Exception: The player may not withdraw from Sub vs Sub combat).
[15.45] If the AAC die roll is an original zero (0) and there is a submarine icon on the AAC, there is a Sub vs Sub contact (another die roll of zero as described in [13.21] is not necessary). There is a -2 modifier as per [14.6] for determining who spots who in this instance.
[15.46] The player may not choose to concentrate on coastal shipping [13.23].
[15.47] The submarine cannot make In Port [14.18] attacks.
[15.48] Once combat ends, the player determines the status of the submarine:
- If the submarine was already RTB, it remains RTB and is placed in the 'DONE' section of the OpArea which triggered the combat.
- If a transiting U-Boat brought in additional U-Boats for a wolfpack, an Endurance check is made and if passed, the U-Boat is placed in the 'DONE' section of the OpArea patrol side up (transit side up and marked RTB if it failed the check).
- If a submarine attacked alone, an Endurance check is made and the submarine is placed in the 'DONE' section of the OpArea. If it passes the Endurance check the player may choose to place it patrol side or transit side up.
IV. End Turn Segment (After all submarines have completed movement and combat)
[16.0] Conclude Turn Phase
[16.1] Check Victory Conditions
Check victory conditions for victory or defeat. If either is achieved, play ends immediately.
[16.11] Scenario Victory
If playing anything other than the full campaign (Campaign I), check the Victory Conditions listed therein.
[16.12] Campaign Victory
If playing Campaign I, conduct the following at the end of the 4th week of each month (only):
- Determine the number of Victory Points [31.03] earned. Advance the VP markers accordingly.
- If applicable, determine if Britain has sued for peace [31.04].
- Return the Ships Sunk and Tons Sunk markers to zero.
[16.2] Spotted Marker Removal
Roll a die for every submarine at sea with a Spotted marker on it, and subtract the rating of the sub's Ace Skipper if it has one. On a die roll of 0 through 6, remove the Spotted marker. On a die roll of 7 through 9, the submarine remains spotted.
[16.21] Upon entry to a Base, any Spotted marker a submarine has is removed.
[16.3] Remove all Weather System markers.
[16.4] Return all German and Vichy aircraft to base.
[16.5] Remove any B-Dienst marker from the map.
[16.6] Advance the Week marker, and the Month/Year markers if needed.
[17.0] War Progress Phase
Commentary: The status of the Atlantic War was much less driven by naval events than the Pacific War. Therefore, War Period change is not affected by ships and tonnage sunk.
[17.1] Procedure
The War Period marker begins the game set on the War Period Track, according to the scenario instructions. During certain months (Check for change to War Period X as per [17.1]) is listed in parens on the Master Submarine Reinforcement Chart. In such a month, a die roll is made during the first week. If the result is 0, 1, or 2, the War Period is changed immediately. If the result is 3 or higher, another attempt is made in the following week and so forth.
[17.2] Automatic Advance
If the War Period has not advanced by the fourth week, the War Period advances automatically in the first week of the following month.
[17.3] When the War Period advances, re-sort the War Mix [3.1] as per the War Mix table for that War Period.
[17.4] There is one occurrence (Barbarossa) that is resolved in the same manner as a War Period change, but only changes the status of the Arctic OpAreas and introduces Soviet units to various cups:
- Submarines Stalinets, Leninets, and Shchuka to the Submarine Cup.
- Soviet AO 6t to Center Cup.
- One Soviet M to Outer Cup and one to West Outer Cup.
[17.5] Other Occurrences
Certain other events occur during this phase, such as the placement of supply ships following War Events.
[18.0] Damaged Submarines
Submarines may be "damaged" during Transit Events or during combat. If damaged, a Damage marker is placed on the submarine. The actual level of damage is determined when the submarine reaches a base.
[18.1] Should a submarine receive a second Damage marker, a die is rolled:
- If the die result is greater than (>) the Defense rating of the submarine, it is sunk. Advance the Submarines Sunk marker by one (1).
- If the sub is not sunk, place a second Damage marker on the sub. When the sub reaches base, determine its damage level (see [10.0] Repair Phase) by rolling twice on the Damage Table and adding the resulting Repair Box numbers. If the total damage of the sub would place it beyond Repair Box "3", then the submarine is considered a "constructive total loss." It is removed from play but it does not count against the submarines sunk.
[18.2] Should a submarine receive a third Damage marker, it is sunk. Advance the Submarines Sunk marker by one (1).
[18.3] Damaged submarines that RTB must roll one die on the Damage Table when entering the base, adding one if the crew is Inexperienced [8.1]. The results of this die roll either place the submarine in one of the Repair Boxes or into the Work Up Box. Damaged Submarines may not depart a major base until they have gone through the Ready Submarines for Sea Phase [9.0].
[18.4] The player may "decommission" a badly damaged submarine that the player does not want to repair, once it is on the repair track or in the hold box. The submarine is removed from the game but is not counted as "lost." If the submarine has an Ace Skipper, determine if he is assigned another submarine as per [25.3].
[18.5] Damaged Surface Ships
Surface ships can be damaged as a result of submarine attack. The ASW value of a ship with a Damage marker is zero (0), and a negative one (-1) modifier is applied to the target value during the Combat Phase. A damaged ship which receives a second damage result is sunk. If a damaged surface ship survives all combat (that is, it is not sunk), then the damage has no further effect. Remove the Damage marker; the ship is assumed to have made it to port. Damaged ships with their names in italics are removed from play for the remainder of the current War Period. All other ships are immediately placed back in the appropriate cups.
[19.0] Events
Commentary: At various times throughout the game, events will be summoned by the game system. Players must immediately resolve these events as they have immediate consequences for the submarine(s). There are three types of events, War Events (described under [5.0]), Transit Events and Combat Events.
[19.1] Transit Events
Transit Events reflect instances where submarines were spotted and attacked before they were aware of the attacker's presence, or the loss of a submarine due to "causes unknown". These could include being torpedoed by an Allied submarine, attacked by an aircraft, striking a mine, or simply accidental loss such as a battery explosion, or a catastrophic mechanical failure. A Transit Event Check occurs during Transit and Patrol Movement any time a submarine enters an OpArea or SMZ.
Procedure
Every time a submarine completes a Transit or Patrol Movement, the player performs a Transit Event Check. The Transit Event is based on the governing OpArea. The governing OpArea is determined in the following manner:
- For Patrol Movement, use the OpArea the submarine has moved into.
- For a Special Mission Zone, use the OpArea from which the submarine entered the Special Mission Zone.
- For Transit Movement, use the OpArea with the greatest number of red boxes and boxes with red dots for the current War Period through which the submarine moved. Do not use the OpArea from which the submarine started.
Roll a die for the submarine and apply the following cumulative modifiers:
- Add one if the submarine is conducting patrol movement [12.0].
- Add one if the OpArea used to determine the Transit Event has a coastal icon or an aircraft icon for the current War Period.
- Subtract one if the submarine is conducting Cautious Transit [15.24].
- Add one if the submarine is Spotted during War Period 3 or later.
- Add two if the submarine is entering a Special Mission Zone (SMZ) (not a Forward Base).
- Add two if the submarine is ENTERING the naval base of Scapa Flow or Gibraltar [30.4] (not if entering the English Coast SMZ or transiting Gibraltar).
- Add one or more for Congregating Risk [22.1].
- Add one if the crew is Inexperienced [8.1].
- Add the appropriate number on the map if transiting the English Channel, Bay of Biscay, or Gibraltar.
If the die roll equals or exceeds (= or >) the number at which red boxes or red dots results start, the player has encountered a Transit Event. The player now rolls again twice on the Transit Event Table (located on map) to find the row and column, and cross-references the result. The result is applied immediately.
[19.11] Transit Encounters
Submarines conducting transit movement occasionally came across Allied shipping. If the ORIGINAL Transit Event Check die roll is a '0' before adding any modifiers, and the modifiers do not result in a transit event, conduct another die roll to determine any encounters as per [15.4].
[19.12] If a submarine receives an RTB result, the submarine is marked RTB and placed transit side up in the "Done" section of the OpArea used to determine the Transit Event Check. If more than one OpArea could have been used (same number of red boxes), the submarine is placed in whichever OpArea the player decides.
[19.13] Removal Transit Event Checks
Submarines are occasionally removed from play due to relegation to training duty, or temporary withdrawal for refit and overhaul. If such a submarine is at sea, the player must immediately conduct transit movement and associated checks until the submarine reaches a base, at which point, if it survives, it is removed or placed in the refit box. The player is in effect conducting multiple moves with that submarine IN THE CURRENT TURN using current War Period lines even if the period may change in the time it would take the submarine to RTB normally. This is to avoid the need or remembering what boats are due to be removed when they reach base. If the submarine is lost, raise the Submarines Lost number by one. If lost, another submarine does not have to be withdrawn in its place.
Example: U-651 is in the Caribbean OpArea in April, 1942 when it is withdrawn for refit. The player flips the submarine to its transit side and chooses to move it to Bermuda and the Sargasso Sea, conducting a transit event check. If the submarine survives, the player moves it to Mid-Ocean and the SW Approaches, conducting another transit event check. If it survives, the player moves it across the Bay of Biscay and into the France-Atlantic base, conducting yet another transit event check. If it survives, U-651 is placed in the Europe Refit Box. If it was sunk, the player increases the Submarines Lost marker by one.
[19.2] Combat Events
Each cup contains one chit marked "Combat Event." When an Event chit is revealed, play is momentarily stopped and the Event is immediately resolved. The results of the Event supercede the rules in all cases.
[19.21] Procedure
Upon revealing an Event chit, roll a die and consult the Combat Event table (it is printed in the back of the Scenario booklet). Implement the effects listed. The Event is applicable to a single attack round, and only one Event can occur per attack round.
[19.22] In certain situations, especially with loners, there will be times when there are no eligible targets but a Combat Event marker is drawn. In such a case all Events are n/a except for 'Patrol Aircraft Spots Submarine' and 'Mechanical Troubles'.
[20.0] Special Mission Zones (SMZs)
Commentary: Special Mission Zones represent discrete locations within an OpArea, usually inshore. Operating within them entailed higher risk, but could result in higher rewards. Often, submarines were co-opted by higher levels of command for special missions.
Special Mission Zones (SMZs) are the circular areas on the map without Area Activity Charts in them. These areas are where submarines carried out special missions such as covering invasions, laying mines, landing agents, or supporting surface raiders. These SMZs see intensive activity by enemy surface forces thus increasing both the chance to contact and engage targets, as well as increasing the danger of detection and ASW attack.
[20.1] SMZs may be entered at any time that their OpArea may be (exception, see Scapa Flow and Gibraltar [30.4]. SMZs are linked by a light blue arrowhead to one or more OpAreas. SMZs may only be entered via a linked OpArea.
[20.2] When assigned to an active SMZ, allocated submarines are exempt from Congregating Risk [22.0] in that OpArea.
[20.3] Immediately after arriving in an OpArea, a submarine may be repositioned to an active SMZ that is connected by a light blue arrowhead to that OpArea. If a player moves a submarine to one of the SMZs belonging to that OpArea, any Transit Event check must be performed with a die roll modifier of +2, using the Area Activity Chart of the OpArea from which the submarine entered the SMZ.
[20.4] When in an SMZ, the submarine conducts the mission given by the War Event. If it is a Search and Contact mission, use the Area Activity Chart belonging to the OpArea from which it entered into the SMZ. All die roll results on this Area Activity Chart are increased by one Activity Level. Thus, Green becomes Orange, Orange becomes Blue, and Blue becomes Red. Red remains Red and White remains White. Other results may apply as directed by the War Events Table.
[20.5] If an SMZ is connected to an OpArea with 'light' air cover [14.12 and 14.15.A], the SMZ itself is considered to have 'heavy' air cover [2.13].
[20.6] Unless directed to remain by War Event, submarines in an SMZ are returned to an adjacent OpArea where they conduct an Endurance Check [14.7]. There may be a modifier to the Endurance Check if minelaying [26.3] or directed by War Event.
[20.7] While an SMZ is a Forward Base [21.1], there is no +2 Transit Event modifier for entering it.
[20.8] Gibraltar, the Bay of Biscay, and the English Channel are also Transit Zones which have unique modifiers to Transit Event Checks. These are cumulative with the standard +2 modifier for entering an SMZ.
[21.0] Bases
Bases are where submarines start and end missions (unless they are sunk during the mission). There are five major Bases in the game, Germany, France-Atlantic, Norway, Italy, Greece. Major bases are represented by Base Displays on the Map. Of the major bases, only Germany is continuously active throughout the war. The others become active at various times as below:
A. Norway - Active on War Event. B. France - Active War Period 2. Repair capability increases in War Period 4. C. Italy - Active on War Event. D. Greece - Active War Period 4.
Note: There are other major bases such as Toulon, and certain SMZs or special ports (such as Cádiz) that are only available through special scenarios or use of the optional Political Rules [35.0].
[21.1] Forward Bases
The player at times may have an advanced base available as per War Event, represented by a submarine tender. Other forward bases may be available in special scenarios.
A. Murmansk - Active on War Event. Inactive War Periods 2-5. B. Narvik - Active on War Event.
[21.11] Once active, a Forward Base SMZ may no longer be the target of a Special Mission unless inactivated by a War Event. Submarines moving to a Forward Base do not add +2 to their Transit Event roll as per [20.3], but it does cost 1MP to move from the Forward Base to an adjacent OpArea (example: Narvik to Norwegian or Barents Seas).
[21.2] Submarine Tenders
Submarine Tenders are specialized ships that support submarines in forward areas, providing fuel, torpedoes, food, and other supplies. They lacked the capabilities of a full base, but could conduct minor repairs and provided valuable service in extending the time a submarine could operate from its home port.
[21.21] When a Forward Base is made active by the War Event Table, the player selects a submarine tender and places it in the SMZ in the War Progress Phase of the turn unless otherwise noted.
[21.22] A submarine tender's support capacity is listed on the Submarine Tender card and on the Tender counter. This is the maximum number of submarines that can be in the tender's Work Up, In-Port, Shipside, and Ready for Sea Boxes at any one time. If the tender is at maximum capacity, no additional submarines may RTB to that tender.
[21.23] A damaged submarine may RTB to a Forward Base in an attempt to make minor repairs. Roll immediately on the Submarine Damage Table. If the result is 'Superficial Damage', move the submarine to the Work Up Box of the appropriate tender. If any other result, move the damaged submarine to the 'Done' section of the applicable OpArea, and in subsequent turns it may only RTB to a major base.
[21.3] Supply Ships
The player will have several units at his disposal to extend the endurance and sometimes range of his submarines. These units are marked with a supply icon.
[21.31] Interned merchant freighter or tanker
Several German ships were purposefully interned in Spanish ports for the purpose of clandestinely supplying U-Boats. Provided the submarine entered submerged at night, the Franco government turned a blind eye to these activities until Allied pressure prompted him to put a halt to it. The player is limited to a single attempt for all tankers (not per tanker) per week.
Procedure
A. An undamaged RTB submarine that is in the SW Approaches (El Ferrol) or Morocco (Cadiz or Canary Islands) at the beginning of the transit movement phase may attempt to refuel and reprovision with food/water from a German tanker in one of these ports. The player makes an Endurance Check for the submarine with no modifiers. If the submarine passes, the RTB marker is removed from the submarine, which is placed in the "Done" section of the appropriate OpArea, patrol side up. If the attempt fails, the submarine must conduct RTB movement normally to a base.
B. If the endurance roll is a 0, and the War Period is 4 or 5, roll a second die. If this roll is also a 0, remove the tanker. Allied pressure has forced the Spanish government to enforce neutrality in that particular port.
[21.32] At-sea supply ship or raider
Supply ships were often at sea to support surface raiders. These were usually reserved for surface ships only, but at times OKM would allow a submarine to refuel and/or reprovision. These will usually be made available by War Event. If a named supply ship is already in play when another is granted, any unused supply ship may be substituted. If all are currently in play, any additional supply ship is lost. Any supply ship or raider may attempt to reprovision two submarines per week.
Procedure
A. An undamaged RTB submarine that is in an OpArea with a supply ship or raider at the beginning of the transit movement phase may attempt to refuel and reprovision. The player makes an Endurance Check for the submarine with no modifiers. If the submarine passes, the RTB marker is removed and the submarine is placed in the "Done" section of the appropriate OpArea, patrol side up. If the attempt fails, the submarine must conduct RTB movement normally to a base.
B. If the endurance roll is a 0, roll a second die and add the Enigma level [7.3]. If the result is a 2 or less, remove the supply ship. Allied intelligence has allowed the interception of the ship through direction finding and/or codebreaking.
[21.33] U-tankers
In order to extend endurance, several submarines were modified for the at-sea supply role (UA and the Type XB) or built from scratch for that role (Type XIV). Known as Milchkühe (milk cows), these U-tankers were a force multiplier in the following manner:
A. An undamaged RTB submarine that is in an OpArea with a U-tanker at the beginning of the transit movement phase may attempt to refuel and reprovision. The player makes an Endurance Check for the submarine with no modifiers. If it passes the roll, the RTB marker is removed and the submarine is placed patrol side up in the "Done" section of the OpArea.
B. If the endurance roll is a 0, roll a second die and add the Enigma level [7.3]. If the result is 1 or less, the U-tanker is sunk. Advance the subs lost marker by one. If the roll is a 2, the U-tanker is damaged and must RTB.
C. If a U-tanker occupies an OpArea, other submarines may occupy the OpArea even if it is one beyond their printed range. If the U-tanker is lost or otherwise leaves the area, all such submarines immediately enter RTB status.
UA may only act as a U-tanker in 1942-43, and may attempt to supply one submarine per week. Type XB U-tankers may attempt to supply two submarines per week. Type XIV U-tankers may attempt to supply three submarines per week. When a U-tanker has reached its weekly limit (or at the end of the turn), conduct an Endurance Check (no negative modifiers apply if it supplied any submarines) and move it to the "Done" section of the OpArea. A U-tanker may only conduct search & combat if it does not attempt to resupply any submarine.
[22.0] Congregating Risk
Commentary: One of the greatest risks for submarines was congregating a great number of them in an operating area. First, the radio traffic often alerted the Allies to increased activity, and second, the activities of one submarine might unexpectedly draw enough attention to reveal another.
There is no limit on the number of submarines that may be in an OpArea. However, as the number of submarines increases, liabilities of increased submarine activity take effect.
[22.1] For each multiple of six submarines beyond the first six in an OpArea with RED or BLUE boxes in its Area Activity Chart for the current War Period, implement the following modifiers for all submarines:
- Add one (+1) to any Transit Event die roll if the sub is passing through, arriving or departing.
- Subtract one (-1) when searching for ships on the Area Activity Chart.
[22.2] The above modifiers are cumulative for additional multiples of six (i.e. -2 search penalty and +2 to transit roll if thirteen submarines in an OpArea, etc.).
Note that congregating risk is determined at the instant of checking for (1) Search & Contact, and (2) Transit Event Check. It does not matter how many submarines were in an OpArea earlier in the turn; only how many there are now.
| Subs in OpArea | Transit Check Modifier | AAC Search Modifier |
|---|---|---|
| 0-6 | 0 | 0 |
| 7-12 | +1 | -1 |
| 13-18 | +2 | -2 |
| 19-24 | +3 | -3 |
| 25-30 | +4 | -4 |
[23.0] Spotted Effects
A spotted submarine has greater difficulty locating the enemy (as the enemy is avoiding the area the reported submarine is in.) as well as experiencing an increased risk of encountering Allied escort forces. When spotted during War Periods 3 through 5, subtract one (-1) from any rolls on the Area Activity Chart and add one (+1) on any Transit Event rolls.
Spotted submarines must also add one (+1) when rolling on the Counterattack table per [14.2], and subtract one (-1) for determining who sighted who in Sub vs Sub Combat [14.6].
[23.1] Additional Spotted markers have no effect. If a submarine that is already Spotted receives a Spotted result, no action is taken.
[24.0] Wolfpacks
Wolfpacks are groups of U-Boats that attack together, hoping to overwhelm the escort of a convoy. They are not discrete groups, but can form and disband on a weekly basis. Only German U-Boats may wolfpack, beginning with War Period 2.
Commentary: Although Dönitz had been thinking about pack tactics since before the war, communications limitations and operations did not permit it until the summer of 1940. Some early attempts were made, but coordination was not attained.
[24.1] Wolfpack Formation
When a U-Boat discovers a convoy, the player may attempt to bring in other U-Boats to coordinate a wolfpack attack on that convoy. The initial U-Boat may be designated to "Shadow" the convoy, broadcasting a signal which other boats will home in on to locate the convoy. Doing so will usually allow more U-Boats to attack, but entails some risk to the shadowing U-Boat from High Frequency Direction Finding (HF/DF or "Huff Duff") and restricts the shadowing U-Boat to attacking only during the re-attack phase.
Procedure
The player decides whether the first boat to contact will "Shadow" the convoy and broadcast. He then makes a roll on the Wolfpack Congregation Table to determine whether other not yet moved U-Boats in the OpArea will be able to locate the convoy and make a coordinated attack. The number of boats listed on the table are for number of attempts, not for number of successful boats.
Congregation Table Modifiers:
-
-2 if no shadowing U-Boat
-
-2 if Task Force, Small Convoy, or Special Convoy
-
+? Enigma Level
-
+? Ace Skipper Rating
-
-3 if U-Boat is coming from an adjacent OpArea (WP5 only)
-
+1 per German aircraft in OpArea
-
-1 if Weather system in OpArea
-
-1 if Inexperienced Crew
-
If the modified die roll exceeds the number listed for the U-Boat, it may attack the convoy.
-
If the modified die roll equals the number listed for the U-Boat, it may attack the convoy, but only in the re-attack round.
-
If the modified die roll is less than the number listed for the U-Boat, it may not attack the convoy. It may still conduct an independent search in the OpArea containing the convoy, but with a -3 modifier to the search roll.
Beginning with War Period 5, the player may attempt to bring in U-Boats from adjacent OpAreas with a -3 penalty to the Formation die roll.
[24.11] Huff Duff
If a shadowing U-Boat is guiding other boats in, and an original zero (0) is rolled, the Allies have gotten a DF fix or high confidence bearing on the transmitter and dispatched an escort or aircraft to intercept the U-Boat. Make an immediate roll on the Huff Duff Table for the current War Period. Apply any results immediately. If the shadower is driven off or destroyed, another U-Boat already brought in may assume the role of shadower.
Example: U-49 is in the Greenland Gap during War Period 3 and locates a large convoy. There are six other U-Boats in the OpArea that haven't moved and the player decides to form a wolfpack. He orders U-49 to shadow the convoy, broadcasting homing signals. The Enigma Level is 0, and there are no other modifiers.
U-78 attempts to join the pack and it is the 2nd boat. It needs to roll a '3' or more to join. A '2' is rolled and the boat fails to join.
U-46 attempts to join with +1 Skipper Endrass as the 3rd boat. With the Ace Skipper modifier, U-46 only needs a '2' or better. A '6' is rolled and U-46 joins the pack.
U-110, U-124, and U-722 attempt to join. These are the 4th through 6th boats so must each roll a '4' or better. U-110 rolls a '7' and joins. U-124 rolls a '0' and fails.
Since U-124 rolled a zero, the player must roll on the Huff-Duff Table to determine the result of Allied direction finding on U-49. He consults the WP3 line and rolls a '1' for no effect.
(Had U-49 been driven off, forced to RTB, or destroyed, the player could designate U-46 or U-110 as the new shadower. If he did not, subsequent boats would have a -2 drm for attempting to join.)
U-722 rolls a '5' and joins.
U-202 attempts to join as the 7th boat. It needs a '5' or better and rolls a '5'.
U-46, U-110, and U-722 may attack in the first attack round. U-49, as the shadower, may only attack in the re-attack round. Since U-202 rolled EQUAL to the needed number, it may also only attack in the re-attack round.
[24.12] Wolfpack Placement
Members of a Wolfpack are placed on the display one by one. A U-Boat may always be placed in the outermost columns of the combat displays unless those columns are full. To place a U-Boat in the inner or center columns, a die roll must be made as per [14.11]. A shadowing U-Boat may only be placed during re-attack.
[24.13] If a U-Boat is unable to be placed in a column by die roll and the outermost columns are full, it is held off-display. See [24.25].
[24.14] Disbanding
All Wolfpacks disband at the end of the combat phase.
[24.2] Wolfpacks and Combat
Combat occurs normally as per [14.0] with the following exceptions:
[24.21] If a Diligent Escort counter is drawn, its attack is made on a randomly chosen U-Boat prior to placing it in its proper column.
[24.22] Combat Events [19.2] only apply to the U-Boat that reveals the event chit.
[24.23] Each U-Boat resolves its attack and counterattack individually (one at a time). The following sequence is used:
A. Starting with the U-Boat of your choice, reveal Allied units per [14.12]. B. With the same sub, place TDC markers per [14.14]. C. Make the attack with that U-Boat, utilizing the current Revealed Escort level. D. Resolve the counterattack on that U-Boat. E. Remove all TDCs. F. Return to step (a) with U-Boat #2, and so on.
[24.24] Revealed Escort Level
Each U-Boat will have its own Revealed Escort level, which applies to the attack and the counterattack.
A. If a U-Boat has an escort in its column, the escort's ASW factor is applied to that U-Boat. B. If a U-Boat has an escort in an adjacent column, and no U-Boat is in that column, the escort's ASW factor is applied to that submarine. C. The ASW level of an aircraft is applied to all U-Boats regardless of column.
Note: this can result in the ASW factor of an escort vessel being applied to up to four U-Boats.
[24.25] Re-Attack
Wolfpacks may re-attack as per below (Ace Skippers may attack a third time as per [14.41]). To determine how re-attack occurs, go through the following steps:
A. Check for Convoy Scatter [29.4]. B. Each member of the Wolfpack must successfully roll for Re-Attack. The die roll must be equal to or less than the tactical rating of the U-Boat plus any Ace Skipper value. Failure of this roll results in the U-Boat withdrawing [14.3] from combat. C. U-Boats that pass the roll may reposition to an adjacent column. D. U-Boats held off display [24.13] in the first attack round and the shadowing U-Boat may make a roll for placement on the display as per [24.12]. They do not have to make the roll in (A) above. Their "first" attack is considered a re-attack in all ways except that they do not get to reposition to an adjacent column.
[25.0] Ace Skippers
Commentary: In any military endeavor, there are gifted individuals who rise above their peers to achieve great results. STEEL WOLVES provides twenty-seven named skippers who accomplished great feats of daring. However, behind every great skipper is a skilled, dedicated crew that allows the submarine to perform as a superb engine of war.
[25.1] Ace Skippers provide the following to their submarine:
- A bonus to each torpedo attack [14.16.A]
- A bonus to submarine defense [14.2.B]
- A possibility to conduct a 2nd re-attack round [14.41]
- A bonus for conducting a re-attack as part of a wolfpack [24.25]
- A bonus for Spotted marker removal [16.2]
- A bonus for new minefield results determination [26.2]
- A bonus to the submarine's readiness roll (In Port and Pierside/Shipside, NOT Work Up since that reflects port facilities rather than crew).
The bonus is +1 or +2 depending on the skipper's rating.
[25.2] Ace Skipper Determination [also 14.5]
If the submarine has sunk three (3) or more ships and 23,000 or more tons during this Combat Phase, the submarine has an "Ace Skipper".
- If the submarine does not already have an Ace Skipper, an Ace Skipper marker is randomly drawn and assigned to that submarine with the +1 side of the marker.
- If the submarine already has a +1 Ace Skipper, the Skipper is flipped to the +2 side.
If the submarine already has a +2 Ace Skipper there is no additional benefit.
[25.3] The Ace Skipper normally remains with one submarine and is lost if the submarine is lost. There are times however when the skipper is reassigned to another submarine or to shore duty (removed from the game).
[25.31] The Master Submarine Reinforcement List contains notes on when some of the early war skippers were historically reassigned to a different submarine that is still under construction. The decision to do so is up to the player.
[25.32] When a submarine with an Ace Skipper is withdrawn for refit or removed from service (via War Event Table or being a constructive total loss [18.1]), the player may roll a die to determine the skipper's next billet. If the result is a 0 thru 3, the skipper is removed from play (re-assigned to training command, given a surface command, promoted to flotilla command, or transferred to the BdU Staff). If the result is 4 thru 9, he may be assigned to any submarine on the reinforcement list that is at least four months from being received.
[25.33] When an Ace Skipper is assigned to a new submarine the following are in effect:
- Any +2 skipper is flipped to his +1 side.
- The submarine is available one month earlier without the penalties of [8.1].
Example: In April 1940 the player elects to reassign Joachim Schepke (+2) from the Type II U-19 to the Type VII U-100 as allowed by the Master Submarine Reinforcement List. Schepke (+2) is removed from U-19. U-100 with Schepke (+1) is now available in August 1940 instead of September.
[26.0] Minelaying
Minelaying was very effective in destroying shipping until countermeasures were taken to the magnetic mine during the first year of the war. The player may decide to conduct a minelaying mission with U-Boats (German submarines only), or be directed to do so by War Event. If the player decides to conduct a minelaying mission, the player chooses a Ready For Sea U-Boat and places a Mine counter on it, which it will carry to its destination SMZ. No attacks may be made until the minefield is laid.
If a War Event directs the player to mine a certain SMZ, the player picks a U-Boat in or adjacent to an OpArea containing the SMZ and places a Mine counter on it. This U-Boat is assumed to have sailed with the mines on OKM orders.
[26.1] Laying a New Minefield
The U-Boat laying the minefield must go through its Transit Event check for entering the target SMZ and remain unspotted. If such is the case, a new minefield is laid at strength 2 with the following exceptions:
- Type XB and VIID U-Boats lay strength 3 minefields. These boats are marked with a mine symbol.
- Type II and Type XXIII U-Boats lay strength 1 minefields.
[26.11] If the U-Boat is spotted, the player has three options:
A. Drop the mine counter and patrol the SMZ (spotted). This U-Boat has jettisoned the mines (or laid them in a harmless area). A +1 drm is applied to the Endurance Check.
B. Drop the mine counter as in (A) and patrol the OpArea from which it entered the SMZ (spotted). A +1 drm is applied to the Endurance Check.
C. Place the U-Boat with the mine counter in the "Done" section of the OpArea from which it entered the SMZ, removing the Spotted Marker. This U-Boat must reattempt the minelaying mission in the next turn unless it RTBs. A -1 drm is applied to the Endurance Check.
[26.2] New Minefield Resolution
Immediately after laying a new minefield, the player rolls on the Minefield Table, adding the modifiers listed. If the result indicates a piece or pieces are to be drawn, pull them from the indicated cup.
[26.21] For the piece drawn, consult the Attack Results table for the appropriate tonnage and make a roll with no modifiers. If the ship is sunk, advance the ships sunk marker by one and the tons sunk by the appropriate amount.
[26.22] If the piece drawn is a Combat Event or aircraft, return it to the cup and do not draw another. There is no effect.
[26.23] A strength 3 minefield immediately becomes a 2 and a strength 2 becomes a 1 (for the following turn). Strength 1 minefields are not carried over to the following turn.
[26.3] After laying a minefield, a submarine is moved from the SMZ to an adjacent OpArea of the player's choice and proceeds to the Endurance Check with a +1 die roll modifier to the endurance roll [14.7].
[26.4] Old Minefield Resolution
Results from old minefields are determined in the Prep for Operations Phase [11.2]. Resolve as per [26.2] except that there is no Ace Skipper modifier to the die roll.
[26.5] Limitations
[26.51] Only as many minefields as there are counters may be carried at any time.
[26.52] The following SMZs may not be mined:
- Canary Islands, Rio de Janiero, or the River Plate.
- Murmansk unless required by War Event.
- Levant unless required by War Event.
- Narvik before Operation Weserübung Event and after WP1.
- Bay of Biscay, Dakar, and Diégo Suárez after WP1.
- Scapa Flow/English Coast after WP2.
- The Azores unless the Allied Occupation Event has occurred.
[26.53] Minefields may not be laid in an SMZ attached to an OpArea with a low pressure weather system [7.41].
[27.0] Surface Gunnery Combat
Commentary: Most submarines in the Atlantic War were armed with deck guns. Use of cheap and plentiful 88mm or 105mm shells against an unprotected merchant was an effective method of saving scarce and expensive torpedoes. However, many merchants were given an armed guard crew with one or more guns themselves. These merchants were not "armed merchant cruisers" which were naval auxiliaries; they were civilian "Defensively Equipped Merchant Ships" (DEMS). A single hit from a 3" to 5" gun could fatally hole a submarine or render it unable to dive, and a merchant firing guns nearly always prompted a crash dive, usually followed by an attempt to overhaul the ship for a torpedo attack. By 1943 nearly all merchants were armed and during the war 26,000 British/Commonwealth and 144,000 American guncrew were stationed on Allied merchant ships.
[27.1] Procedure
If the below conditions listed exist during combat [14.12] the player may choose to conduct surface gunnery combat:
- There is a revealed merchant 7t or smaller (or a larger merchant that is damaged).
- There is no White Ensign backed unrevealed unit in the same or adjacent column as the submarine.
- There is no revealed naval unit (escort, CV, CL, AM, BB etc) or aircraft.
- The submarine is not a Type II, XIV, XVIIB, XXI, or XXIII U-Boat.
- There is no Weather marker in the OpArea.
Conduct the Combat Phase normally but instead of the attack round perform the following:
-
Place a Spotted marker on the submarine.
-
Choose any revealed Allied merchant 7t or smaller (or a larger merchant that is damaged) in the same column.
-
Make a die roll on the Defensively Equipped Merchant Ships Table. If the merchant is armed it fires on the submarine unless the submarine successfully crash dives [14.13]. If the submarine does not successfully crash dive, roll immediately on the DEMS line of the Other Submarine Hazard Instance Table with a +1 modifier if the submarine is damaged.
Note: Only British and French merchants may be armed in War Period 1. Sailing & fishing vessels are never armed.
-
If the submarine is a Type XI U-cruiser it may still attack the merchant using its four 127mm guns from outside the merchant's range. French submarine Surcouf may do the same with her 203mm guns. All other submarines may only continue to attack with torpedoes, proceeding to [14.11].
-
If able to attack with guns, make a die roll on the 29-36 line of the Attack Results Table (Type XI U-Boats use the 18-28 line, and Surcouf uses the 10-17 line). The value of the G7 torpedo is NOT applied to the result, but one is subtracted if the crew is Inexperienced [8.1].
-
Proceed to the Counterattack Round.
If the submarine conducting surface gunnery does not conduct a torpedo attack in one of the attack rounds, apply a -1 modifier to the Endurance roll [14.7].
[28.0] Task Forces, Special Convoys, and Loners
Task Forces represent naval formations, usually moving at a relatively high speed. Units are pulled from the Fleet Escort and Task Force cups of the nation involved. Special convoys are similar, usually composed of troopships or other fast merchants. Units for these are pulled from the Fleet Escort Cup of the nation involved and the Center Cup. Loners are ships sailing unescorted, and submarines at times can encounter several of them within a week long turn.
[28.1] Task Forces and Special Convoys use the mechanics of the Combat Phase [14.0] with the following differences:
[28.11] The submarine reveals Allied units [14.12] in the following fashion:
- If the submarine is in an outer column, the first unit revealed must be one in the Outer column (Fleet Escort). After that, one may be revealed in the Center and the next in the Outer column, the next in the Center etc. The flag on the back of the unit does not matter (these are only applicable to the Convoy and Loner displays), only its position.
- If the submarine is in the Center, the submarine must reveal one unit in the Outer column(s) for every two (fractions rounded up) units revealed in the Center column.
- Any aircraft revealed stays on the display (unless removed due to weather [7.4]), regardless of aircraft icons in the OpArea. These are considered to be ship launched aircraft.
- If a "Draw Liner" marker is revealed, it is returned to the cup and a replaced with a unit drawn from the Liner Cup.
[28.12] The player may not attack units of a task force or special convoy with deck gunnery.
[28.13] The Counterattack round [14.2] is conducted normally.
[28.14] Wolfpack attacks may not be made unless allowed by War Event.
[28.15] Re-Attacks [14.4] may not be made unless allowed by War Event. If so, conduct the re-attack round normally except that additional units are revealed as per [28.1].
Example: The player has encountered a task force at sea off the Maritimes with U-109 and Bleichrodt (+1). He wishes to position the U-Boat in the center as per [14.11], so makes a die roll, getting a '3'. To this he adds the tactical rating of the Type IXB (3) and +1 for the Ace Skipper. The result is '7', which is insufficient to get into the center of the rapidly moving force. The player positions U-109 in the left column.
The player must first reveal a Fleet Escort. It is a Gleaves class destroyer. With a tactical rating of '3', he must reveal two more units, one of which must also be in the outer column. In the outer column he reveals an SB2U Vindicator. In the center he reveals the battleship New Mexico.
If U-109 had gotten into the Center it could have revealed one unit from the Fleet Escort column(s) and two units from within the Center.
[28.2] Loners
The majority of loners were encountered with no other units in sight. Attacks on the Loner Display take place as per [14.0] with the following exceptions:
[28.21] The submarine is considered to be in the same column as all targets.
[28.22] The player then chooses how many units to reveal, regardless of the tactical rating of the submarine as these encounters may be days apart.
[28.23] The player places TDCs by each target (regardless of the tactical rating of the submarine) and flips them.
[28.24] The submarine may then make an attack as per [14.16] on each target using the full attack rating of the submarine (or using deck guns if allowed as per [27.1]). If attacking an unrevealed unit the unit must be revealed before any attacks are made. This could result in up to four separate attacks. Note that [14.15B] is n/a.
[28.25] The ASW value of any revealed unit is applied to the defense of each target.
[28.26] The counter-attack round is conducted normally. A single counterattack is made (not one for each attack).
[28.27] In the re-attack round, all units must be revealed. Any cruiser (CL or CA), armed merchant cruiser, or liner with a '+' symbol denoting high speed, is removed from the display prior to re-attack unless damaged.
[28.28] A separate re-attack may be made against each remaining target as per above with the standard modifiers from [14.4].
[28.29] If in Home Waters [30.1] the submarine may have an additional chance for search and combat.
Example: U-26 encounters four loners. The player chooses to reveal all four at once, ending up with a 1-0 merchant, a 7-1 destroyer, an armed merchant cruiser, and a 0-0 merchant. Surface gunnery attacks may only be made against the 1-0 and 0-0 merchants (unless they end up being equipped with guns [27.1]. U-26 may conduct an attack on each target utilizing all five points of its attack factor, and the '1' ASW value of the destroyer applies to all of the attacks. In the reattack round, the armed merchant cruiser is removed from the display unless it was damaged.
[29.0] Convoy Straggle
Unlike Silent War, where the convoys were mostly under Japanese Naval control and thus more regimented, convoys in Steel Wolves are composed of numerous independent merchantmen of different nationalities and languages sailing without a great deal of naval coordination (especially early in the war) and in often poor weather.
Unregimented or large convoys often became stretched out or separated as ships suffered mechanical problems or good order wasn't maintained, particularly as a result of U-Boat attacks. The deterioration of good-order is called "Straggle".
All convoys have a STRAGGLE LEVEL ranging from none (tight) to two (disordered).
[29.1] The following large and small convoys begin combat at Straggle level 1:
- Convoys everywhere in War Periods 1 and 2.
- Convoys on the South Atlantic / Indian Ocean portion of the map (Exception: West Africa in War Period 5).
- Convoys in War Period 4 in Western Waters (Exception: Grand Banks / Greenland Gap).
All Special Convoys start combat at Straggle Level 0. Task Forces do not have Straggle.
Weather systems [7.4] in an OpArea increase the Straggle level of all convoys located there.
[29.2] Effects of Straggle
A convoy's current level of Straggle is added to the attack value of each submarine making an attack on the convoy display.
Example: U-54 (Type VIIB) with an attack factor of four (4) attacks a convoy with a Straggle level of two (2). The U-54's attack factor is increased to six (6); combat is then calculated normally.
[29.3] Increasing & Decreasing Straggle
The Straggle level of a convoy can increase and decrease. Between attack and re-attack rounds (after the counterattack on the last boat in a Wolfpack), the player rolls a single die. If the die roll is LESS THAN the number of ships sunk or damaged from that convoy in the prior round, the Straggle condition for the upcoming round is increased by one. NOTE: A zero (0) always increases the Straggle level by one. A nine (9) always decreases the Straggle Level by one.
[29.4] Convoy Scatter
In rare occurrences, a wolfpack attack on a large convoy (only) is so severe that the convoy will scatter. If the following are all in effect, the convoy scatters:
- A wolfpack has sunk one third (rounded down) of the units on the display in the first attack round. Aircraft and unrevealed pieces on the display count as units. Combat Event markers and aircraft that have been removed do not.
- The convoy already has a Straggle Level of '1' or '2'.
- The player rolls a '0' when determining if Straggle Level increases.
If the Convoy scatters, the wolfpack immediately dissolves. All U-Boats in the wolfpack that were eligible to re-attack instead conduct separate re-attacks one at a time using the Loner Display with three Allied units on the display, and the units will be drawn from the Inner (or West Inner) Cup rather than the Loner Cup.
Designer's Notes and Historical Perspectives by Brien Miller
Perspective:
A primary point of the Nuremberg Trials was to outline in the clearest sense, the extraordinary horror of what Hitler's Germany launched upon Europe, not just in the matter of individual crimes but rather in the nature of the greater crime committed, that being, "Aggressive War" which Chief Judge Robert Jackson's summary statement to the court succinctly summed up as the kingpin crime which holds all other crimes together.
"Aggressive war" in Justice Jackson's view is not simply some vague rhetorical slogan, but a clear legal opinion well crystallized. Specifically: An "aggressor" is held to be that state which is the first to commit: (1) Declaration of war upon another state; (2) Invasion by its armed forces, with or without a declaration of war, of the territory of another state; (3) Attack by its land, naval, or air forces, with or without a declaration of war, on the territory, vessels or aircraft of another state;
The 1939-1945 war in Europe was not just the outgrowth of both the militaristic aggression and the inequitable end of the earlier Great War, but the rise of a hideous ideology embodied principally in Fascism, fueled by reactionary political nationalism, which took a culturally gifted nation into the depths of a dystopian nightmare.
In its fascistic quest to organize a nation under unitary corporatist values, Hitler and his National Socialist German Workers Party (NAZI) attempted to forge through bloodshed, a singular collective martial identity with the will and ability to commit violence through war in the pursuit of an ideal: Germanic Exceptionalism, a goal touted as the triumph of the will, which in reality was little more than an euphemism for the triumph of terror, violence, and racist hate.
In their rejection of egalitarianism, rationalism, and the rule of law, the NAZI German State unleashed a second Great War that saw the depredation of Europe, the devastation of culture, the genocidal murder of whole segments of the populace, and ultimately the ruination of very thing it was all claimed to have been done in the name of, the German people, for a second time in but a mere twenty-one years.
Steel Wolves, the German Submarine Campaign against Britain and its Allies is a study of but one single aspect of that tragic 1939-1945 European War and is wholly meant to be a companion experience to Silent War, the American Submarine campaign against Imperial Japan. In no way whatsoever, is this game meant to promote, glorify, or indemnify the history of Germany's war of aggression against Europe. While we can, and should, from a historical perspective, understand, analyze, and draw lessons from an operational study of this or any military campaign, any broader understanding other than the illegality of the war, the tragedy of its violence, and the resolve to never allow any nation to commit such aggressive war in future, for whatever the reason, Global Terrorism included, would fail to heed the bitter lessons of history and risk once more, the failures of the past.
Steel Wolves: Design Considerations
Steel Wolves and Silent War are abstractions in game format, which, at best, attempts to quantify and qualify a few of the actions and activities which we, the designers, after years of study, believe had an impact on a major wartime endeavor, the first and critical half of German Submarine Campaign 1939-1943. It is, essentially, a academic exercise about something that is effectively a remote and generally unknowable experience and it's true purpose is simply to highlight key aspects of this grand historical event in ways that can reveal paths into understanding it.
More poignantly, both games are simulations about a unique position that only a scant few men in all of history have ever held (or will ever hold); a war time command of a nation's strategic submarine force in a campaign to destroy the enemy's ability to support and supply their nation through maritime sea-lift power. That is the essence of what is under study in these titles.
As noted in Silent War, the job of the Commander of Submarines, in Steel Wolves' case Befehlshaber der U-Boote (BdU), is that of an accountant. It is a job about logistics, about operational deployments and tempo, about post patrol analysis, and about piecing together— while ashore— an ever changing tactical situation at sea through the use of information gained imperfectly through nascent voice and code based radiotelephone technology- and do so in a situation critically reliant not just on information, but on good information in order to predict effective future actions. As it was with Christie and Lockwood, so it was with Karl Dönitz, Germany's Befehlshaber der U-Boote (BdU) from 1939 to January 1943, the supreme commander of the Kriegsmarines Subamarine Arm (Ubootwaffe) during World War II. Like Silent War, Steel Wolves is a game about one man's unique job.
So in many basic ways, both the American and German Admirals had similar responsibilities which a game can simulate. However, unlike Silent War's American counterparts, Dönitz had, and faced, a wider range of considerations during his tenure, not the least of which was that he was tightly linked into the highest echelons of the military-political leadership of NAZI Germany. Ideology aside, unlike his foreign equivalents, he had direct access to the highest circles of leadership and had to vie with Erich Raeder, the Großadmiral of the Kreigsmarine (OKM) for naval resources; with Herman Goering, the Luftwaffe Reichsmarschall (OKL) for air support; with the many Generals of the General Staff of the Army (the Heer and OKW), ultimately dealing even directly with Adolf Hitler, supreme leader of NAZI Germany in the matter of any military activity that came, literally, to der furher's attention. It would be as if Admirals Christie or Lockwood had direct lines to the Roosevelt's White House and visa-versa, and had the enshrined ability to jump over Nimitz's and King's head to discuss submarine policies directly with the President.
Also, unlike his American counterparts, Dönitz had a tremendous influence on pre-war submarine construction. Although he did not possess absolute control over it, it was with his guidance that the character and nature of Germany's second incarnation of a U-Boat arm developed. It was Dönitz, answering to the problem that daunted his World War I predecessors, that being the ability of the British to blockade Germany beyond the range of the High Seas Fleet and its U-Boats, and inevitable institution of a maritime convoy system that so effectively shut down Germany's World War I campaign, who selected the Type VII as the preferred boat, failing to realize that they too would be required to operate at ever greater ranges as the war pushed even further out into the Atlantic.
But unlike his WWI predecessors, Dönitz clearly envisioned wolf pack tactics as an answer to the convoy system which so effectively curtailed the successes of the U-Boats in World War I. However, this required essentially inventing from new cloth methods and procedures for communicating and controlling forces at sea from a central command center ashore and meant that, in the words of the American commanders, he would be "playing checkers" with the submarines to a greater degree than previously envisioned. The great insight Dönitz proffered was that packs would not be set structures but rather fluidic in nature, with boats moving into and out of them as needed as opposed to a pre-set task force comprised of several submarines with an overall commander "at sea."
More critically, Dönitz faced an opposition wholly unlike the Japanese, an opposition armed with the 1917-1918 convoy experience of Great Britain backed by the immense industrial might of the United States, and in a time period that saw rapid technological development in key areas that directly enhanced operations against enemy submarines. And of this technological advancement, nowhere was it more evident than in the emerging science of mechanical code-breaking. Although, ironically, Britain and her allies never cracked the Italian codes, the Germans might as well have published their plans on the front page of the Völkischer Beobachter. With swelling numbers of new merchant hulls to replace the losses from the rickety depression era fleet, with the experience gained in convoy operations, early airborne ASW, and improvements to the escort fleet, both tactically and technologically, Dönitz faced an inevitable Götterdämmerung (as it so proved) if he didn't interdict England before perhaps the middle of 1941, before the United States could join the war in full, before the balance of the battle shifted, as it did once before, to the British. It was the same terrible nightmare that faced Germany in 1917 and 1918 all over again, but with odds even longer than before— made notably longer by the enemy's ability to replace merchant losses earlier, and by improvements in ASW capabilities since 1918.
These aspects: the scope of his involvement with the political arena, the influence on design and construction, the use of fluidic wolf packs, the nature of the opposition, and the more challenging situation cast a unique set of conditions upon the German Campaign which the American Campaign did not have. Thus, with all of the above in mind we set out to evolve the Silent War system to accommodate the Atlantic Campaign, avidly noting all of the comments, good and bad, positive and negative, critique worthy and those of mere opinion that that the Pacific game garnered.
In general, the comments fell into one of two categories; critiques on the level of abstraction and a perceived lack of decision making within that level of abstraction.
The abstraction Silent War entailed was done in order to design a no-record-keeping required, story driven, experience; and to that end Silent War is generally highly successful, often masking the underlying fact that a submarine's attack upon a convoy is actually a statistical compilation of a week's activities of that submarine. As such, players don't see the one to two day convoy chases as the whole of the week is subsumed into one single engagement. However, in hindsight, some of this abstraction may have been unnecessary or even unwarranted; Silent War's use of four column convoy form, which was more an abstraction of A-B-C-D war mix than a model of a convoy was perhaps an abstraction too far.
The second set of comments that we followed closely were the discussions about whether it presented the player with enough decisions or not. As one can sense from the above, abstraction subsumed certain decisions into the mechanics, decisions which a well reasoned group of players maintained they wanted in their hands. The problem of course, is balancing additional detail needed to implement those decisions against the resulting expanded play options. Detail + options = mechanical activities but in turn, more mechanical activities means more time spent in administering the game prior to getting a bang for the buck.
Thus, between the differences induced by the German experience as outlined above, and the comments we compiled from Silent War, we decided early on to— for better or worse— take this game away from its predecessor's level of abstraction towards a more detailed model- adding a series of elements that significantly expands the issues the player must sort through in order to play. The result can be clearly seen just by opening the box: where Silent War had five countersheets between submarines and surface ships, one of which held all the merchant and Japanese units, Steel Wolves has twelve (12) and takes three (3) just to accommodate all the merchants and naval units involved. Even IJN, the new expansion pack for Silent War presents the entirety of the Japanese Navy using only two (2) sheets. The result then, of the situation and answering the call for more play capability (options + decisions) overlaid on a game that already has 240% more playing pieces, and twice the mechanical sub-systems, means that players will indeed get what was so wanted: more of it in your hands- a whole lot more.
Aside from the sheer volume of components, perhaps the most obvious changes that players will see will be the combat displays, the Contact Tables, and the optional (but recommended) Political game. The combat displays now feature actual convoy/task force arrangements, and the detailed contact tables delineate actual convoys by code placing them in sea areas where they were historically encountered. Overall, there is more detail in the game to wrestle with and commensurately, players will note a significant increase in both decisions to be made and in the efforts needed to support making those decisions.
While we were mostly successful at keeping this move from abstraction back towards physical portrayal from increasing the complexity of any one system within the game, the added detail clearly increases the sheer effort to play the game— it takes more cups to sort and distribute the counters from- more base displays, and more tables to resolve the needed enhancements. And while much of this is due to the the unique considerations of the German campaign, we were also very aware that this campaign is much more familiar to a lot of people that was the Pacific campaign. Hence we opted to incorporate historical detail such as specific convoy types so that players can find HX, SC's and other types of convoys in the right places at the right times, a purely "chromatic" add-in, right along with the increase in effective game system needed to resolve actual mechanics. Ultimately, there are more tactical decisions as well as more options for how and where a player will use U-Boats. Alone, the political system adds significant variation, although it takes playing out the alternatives to at least half way through the campaign (if not longer) to see their effect.
But all this added detail comes with the age old warning, "be careful of what you wish for." More decisions mean more decision points. Every decision point means at least two branches, and generally one or more branching choices suggests that there is a gradient of information that has to be assessed in order to "make the decision." In turn, this nearly quadrupled the amount of development effort stretching the project from the projected two and a half years out to five. It has dramatically increased the information layer in the game and forced the game to get bigger. As a result, the game has more maintenance activity in it in order to support the added layer of detail. Some will surely not like all the added effort, while others will ravishingly revel in it. In the end, we opted to follow this path because, in our view, to represent the campaign honestly required it given that the goal remains to provide the player with the experience of the circumstances facing BdU from 1939 to 1943.
Ultimately, to design and produce this game we listened to all the comments, on BGG, on Consimworld, and in the many reviews written about Silent War. In turn, we learned from Silent War and incorporated as much as we could into Steel Wolves. Still, Silent War players should be able to drift fairly easily into Steel Wolves, and new players will not be much more greatly challenged by Steel Wolve's learning curve given that the number of Submarines at start is small making entry easier. What we know we did was to enhance the game's story telling aspect and vastly enhance its tenseness as you try to challenge England for survival at sea.
The German Submarine Campaign
As noted above, Steel Wolves was five years in the making encompassing a broader, deeper, and more complex assimilation of not only the data of the campaign, but numerous issues that were well beyond the scope of its predecessor, Silent War. In doing so we encountered a very different environment than we did with Silent War because of the sometimes near reverential attention paid to matters of German technology, especially that of Hitler's period. Despite this, the overriding conclusion that emerges is a Kreigsmarine U-Boat arm that much an extension of it's World War I predecessor, armed with the wrong choice of submarine type, and ultimately, was forced to wage a major submarine campaign against great naval powers years ahead of when it would have actually been ready to do so.
As the KM Bismarck was little more than the World War I Bayern class carried forward 20 years, it's U-Boat arm was little more than it's World War I predecessor handicapped by not having an the application of deep operational analysis of 1914-1918 experience, vis-a-vie the changing technological situation, that it should otherwise should have had. To be fair, with the various treaties, such a long term analysis would have been a daunting challenge, but as it was, it didn't go deep enough.
Still, Dönitz clearly correctly identified two major issues with the previous campaign; having a critical mass (number) of the right types of submarines with which to wage an aggressive commerce war against convoys of the presumed foe, Britain. The issue wasn't that the solution wasn't seen, it was in the assumption that the smaller, and hence less capable boat was the right answer to the "right type" of craft for it versus the larger cruiser (nascent "Fleet") submarine. The notion that smaller hulls vs. larger hulls gain certain tactical advantages while allowing for more boats to be built does not overcome the fact that a Submarine Campaign is a strategic endeavor and hence strategic considerations must dominate- the few minor tactical advantages of the smaller boat was offset by its reduced capability to remain at sea for the lengths of patrols that ultimately were required. It was less robust than larger types and in the end, the few tactical advantages such as faster crash dive times proved statistically whimsical at best. Moreover, one clear lesson from World War I was outright ignored: when faced with convoying of merchant ships, the Germans choose to try to build more submarines rather than develop tactics to defeat the convoys. More submarines, it was assumed would allow more loners to found and sunk: as V. E. Tarrant points out in The U-Boat Offensive 1914-1945, this was a fallacy, resulting in wasted resources for little payoff. What was needed was enough robust boats with good endurance to sustain operations for longer periods of time and operate effectively against convoys. Dönitz had the convoy tactics worked out; he didn't have the right weapon.
Evidence that thinking was still rooted in the sinking of loners can be seen not in the U-Boat arm, but in the actual strategy foreseen by OkM, a strategy that involved using surface ships to disrupt convoys so that the submarines could achieve the types of results their World War I counterparts saw— against scattered loners. This concept simply was unrealistic given the number of convoys that would come into existence versus that what even a small unmolested surface navy could achieve with the best of operational tempos. The German surface fleet simply could not hope to sustain that level of operations against Britain and later it's Allies, and while in a few instances the approach led to exactly what it's designers hoped, the toll on the surface fleet eventually reduced it to impotence in the strategic sense. Moreover, it shows how thinking was still focused on earlier ideas, rather than on dealing directly with the future questions of convoy operations and improving escort ASW technologies.
Nowhere is this more evident than in the one tactical capability that was poorly served by smaller boats; the over all underwater speed of the German submarines was, omitting the Type 21, less than that of other nation's undersea craft. This was directly attributable to smaller hullls. To be fair, German designers did indeed understand this; their fleet designs and ultimately the Type 21, although flawed in their own ways, show engineering insight— but it was not the engineers who selected the fleet mix.
Dönitz's truly great insight was crafting the pack tactic that developed fluidly at sea, controlled from an ashore command center, as the right means for overcoming the a convoy. But technology had shifted the odds somewhat: where in World War I, the aircraft was hardly a concern, it had evolved into a clear threat by 1939. And although slow to resume convoying early, the British eventually did so and combined with modern air cover, pushed the operational areas further out into the Atlantic forcing the Germans to operate ever further from base, well beyond what they had done in World War I.
Thus, the Germans were faced with having a critical-mass of submarines in the right places at the right time, in order to sustain an operational tempo that maintains a large number of ready torpedo tubes at sea. Simply put, there were insufficient numbers of the right type of submarine during the early critical time when Britain might have been isolated or knocked out- prior to the advent of the technological revolutions that made Allied ASW deadly by late 1943. Moreover, its Surface Fleet was too small to achieve a sustainable disruption role; those resources would have best gone into submarines, so that, when the war came; the U-Boat arm would be better placed to challenge England— a clear lesson that should have been learned from World War I. Thus, between submarines too small and too few, unable to sustain an early effective tempo, a surface component that took up vital resources, and then all the various distractions placed on BdU in support of purposes hardly strategic, the U-Boat was was hard pressed to deliver its one goal, that being isolating or knocking out Britain.
All that said, we now need to turn to the idea that Britain could be isolated or even knocked out. It is clearly true that in late 1917, Britain was on the brink of being knocked out of war by the U-Boat Campaign. Replacement tonnage was behind losses which were rising in the face of a strengthening U-Boat arm, and only very reluctantly did the Admiralty adopt the Convoy system which was the nation's salvation.
It was clearly with the past in mind that Churchill made his much famous, well known, but misunderstood quote "The only thing that ever frightened me during the war was the U-Boat peril." Given the situation in 1917, it is easy to see why he would have felt this way, and his quote is often cited as evidence of how close the World War II U-Boat war came to bringing down Britain. However, statistics strongly suggest otherwise: In all but one month, more new replacement merchant tonnage was launched than lost. The total number of ships reaching England was more than sufficient to maintain it's survival by a considerable margin and of all ships that braved the North Atlantic, approximately 98% of them reached their destination during the critical period of the war. Perhaps it was not, to quote another famous former British General and Prime Minister, "a close run thing," after all. In fact, to allow a player to even have such a chance, we had to compress the numbers somewhat for the England Imperiled rule.
Could, with the right submarine mix, the proper tactics, and a superb concentration on a submarines first strategy, Germany have achieve this goal? Dönitz himself strongly suggested that perhaps it could have given more years to prepare, but from our perspective, it is hard to conclude that. Perhaps if a well shaken out Type XXI, in massive numbers (200+) were used in a war launched in 1943 there may have been a chance assuming a sustained effort against Britain and without high levels of United States aid/interference. But as it was, with only a handful of submarines, and a cadré of dedicated professionals who did indeed perform daringly and dauntingly, BdU and the U-Boat arm failed by May 1943 as evidenced by Dönitz himself in his war diary. That being said, the U-Boat arm did inflict considerable damage and a great deal of consternation upon England and in the end, aided their cause long enough to keep the Allies from Fortress Europe's shores until 1944. But the Submarine Campaign to bring England to its knees had failed and at a horrific cost in lives and material.
Finis
Lastly, in a personal way, this game completes a minor circle in life; the very first warship of any kind I ever stepped foot on was the Type IX U-505, then located just outside the east wing of perhaps my most favorite place in all of my childhood world, the Museum of Science and Industry in Chicago; that great classical building by Charles Atwood that housed the art exhibition for the 1893 Columbian Exposition, was reborn in the 1920's with a grand Art Deco interior, and has served as a palace of discovery, learning, and fascination ever since. In those halcyon days of youth, that submarine seemed so big and complex; Since then, I have stepped into many others, including the U.S.S. Cod (SS 224) a World War II Gato class in Cleveland, and the then operational U.S.S. Whale (SSN 638) and still operational U.S.S. Albuquerque (SSN 706) as well as battleships and carriers. Yet, each time I did, I could not help but think back to the U-505, and reflect upon my early experience inside what was a terribly small and cramped space.
We know today that many German sailors perished in just such submarines like the 505 and her predecessor types II and VII. Of the 40,600 officers and men involved, 30,246 died, with another 5,338 taken as prisoners of war. So we shall end upon this pyrrhic note: although they were combatants fighting under the colors of their nation, in many ways, they were also casualties of the same terrible ideology of a NAZI regime that sent them to war in 1939 to 1943, and then again later to slaughter in the Iron Coffins that so many of their ships became between 1944, and 1945. It is a terrible price for a nation to pay— and they paid it twice in a mere thirty years. It is why these designer's notes open with a particular perspective, and closes again upon it.
Brien J. Miller
War Event Tables
If an Event specifies "U-Boats", only German submarines may be used. If it specifies "submarines", non-German submarines may be used. The designations of Chancellery, OKM, and BdU indicate the type of Political Request [36.64] that must be overcome for the player to cancel the Event requirements under the optional Political Rules.
War Period 1
| Die Roll | Event |
|---|---|
| 0 | Minelaying (OKM) — Two U-Boats must conduct minelaying missions to Ireland, English coast, English Channel, and/or Gibraltar SMZs. Only one may be a Type II boat. No attacks may be made. |
| 1 | Iron Convoy (OKM) — A special convoy is picking up iron from Narvik. Deploy two U-Boats to the Norwegian Sea. Any contacts for these boats only are a special convoy on a subsequent die roll of 0-4 and a task force if die roll is 5-7. If Operation Weserübung has occurred, this Event is n/a. |
| 2 | Defense of Norway (Chancellery) — Player must deploy fourteen U-Boats, only eight of which may be Type II, to the Norwegian and North Seas to oppose nonexistent Allied invasion. Only encounters with convoys are used for all U-Boats in these OpAreas. Any convoy is a Task Force on a subsequent die roll of 0-2. If Operation Weserübung has occurred, this Event is n/a. One time only Event. |
| 3 | Soviet Collaboration — The Soviets invite a German submarine tender to operate out of Murmansk. Place Sub Tender Grille in the Murmansk SMZ. If re-rolled: Air Raid on Scapa Flow (OKM) — Following an air raid on the British Home Fleet, two U-Boats must be deployed to Scapa Flow to intercept departing warships. Any contact by these boats only is a British Task Force on a subsequent die roll of 0-3. |
| 4 | Minelaying (OKM) — Two U-Boats must conduct minelaying missions to Ireland, the English coast, English Channel, and/or Gibraltar SMZs. Only one may be a Type II boat. No attacks may be made. |
War Period 2
Withdraw all Type IIB U-Boats from service. No more U-Boats may RTB to Murmansk, and once no U-Boats are present, remove Grille from Murmansk. Narvik and the Bay of Biscay may no longer be used for patrol or minelaying purposes. Submarine Base France-Atlantic opens.
| Die Roll | Event |
|---|---|
| 0 | No Event |
| 1 | Relegation to Training Duty (BdU) — Remove two U-Boats from play, only one of which may be Type II. |
| 2 | Sortie of the Admiral Scheer — During the Panzerschiff's cruise, the Admiralty suspends most sailings for one week, resulting in a dry spell for the U-Boats. Apply a -4 modifier to all Search & Contact rolls not in the Mediterranean or the South Atlantic/Indian Ocean. Place the Deutschland PS between the Central Atlantic OpAreas as a reminder, and remove it in the War Progress Phase. Any convoy encountered is a task force on subsequent die roll of 0-4. In the War Progress Phase the player may place supply ship Eurofeld in any OpArea. One time only Event. |
| 3 | Sortie of the Admiral Hipper — The heavy cruiser breaks out into the Atlantic. Apply a -1 modifier to all Search & Contact rolls not in the Mediterranean or South Atlantic/Indian Ocean. Place the Hipper CA between the Central Atlantic OpAreas as a reminder, and remove it in the War Progress Phase. Any convoy encountered is a task force on subsequent die roll of 0-2. In the War Progress Phase the player may place supply ship Nordmark in any OpArea. One time only Event. |
| 4 | Operation Berlin (OKM) — With the Scharnhorst and Gneisenau being prevented from attacking convoys several times by elderly British battleships, OKM directs BdU to set a trap for the British fleet in the Western Approaches. Place the Scharnhorst BC in the Western Approaches as a reminder, and remove it in the War Progress Phase. Six U-Boats must be deployed. Any convoy encountered by these boats is a task force on a subsequent die roll of 0-5. This Event may be re-rolled once, in which case the trap must be set in the SW Approaches. In the War Progress Phase of this Event's 2nd occurrence (only) the player may place supply ship Uckermark in any OpArea. Additional rolls are No Event. |
War Period 3
Withdraw all Type IIC and VIIA U-Boats from play. Apply a -1 modifier until July 1941. The Weather Reporting requirement is in effect even if not rolled during WP2.
| Die Roll | Event |
|---|---|
| 0 | Pan-American Security {If it hasn't occurred by 1st week of June 1941, conduct this Event as per [5.4]} — In the Bases for Ships deal, the United States transfers fifty old destroyers and ten modern Coast Guard cutters to the British. Add the following units to the War Mix: Banff SL to Center Cup; British Flush Deck 6-1 to Outer and West Inner Cups; Norwegian Flush Deck to Inner Cup; Canadian Flush Deck 6-1 to West Outer Cup. If re-rolled: The United States charters 78 Panamanian tankers for British use. Add one randomly drawn Panamanian AO to the Loner and West Inner Cups. Treat any further rolls as No Event. |
| 1 | American Neutrality? — The US establishes command at Argentia, Newfoundland and begins escorting Halifax convoys. Replace one British destroyer (with lowest ASW value) in the West Outer Cup with one American 6-1 Flush Deck and one 7-1 Gleaves DD. Add PBY '2' to West Inner Cup (see [14.2.A.1]), and American R12 and S15 submarines to West Sub Cup. If this Event is re-rolled the player may place one supply ship in any OpArea. |
| 2 | Operation Rheinübung (OKM) — Player must deploy seven U-Boats to the SW Approaches and seven to Mid-Ocean as U-Boat traps in support of Bismarck. Place the Bismarck BB between the North Atlantic OpAreas as a reminder, and remove it in the War Progress Phase. Any convoy encountered in these areas is a Task Force on a subsequent die roll of 0-5. Non-compliance with this Event lowers influence with the Chancellery by one. With the sinking of Bismarck, OKM places her supply ships at BdU's disposal. In the War Progress Phase, place the Gedania, Belchen, and Esso Hamburg in any OpAreas in the Atlantic from West Africa northward. If re-rolled: The Admiralty uses ULTRA information to intercept German supply ships. Remove every at-sea supply ship. If re-rolled again, treat as No Event. |
War Period 4
Withdraw all Type IID and IA U-Boats from service. Remove any at-sea supply ships. Weather reporting is no longer in effect.
| Die Roll | Event |
|---|---|
| 0 | Panama Canal (BdU) — Three U-Boats must deploy to the US Canal Zone to disrupt shipping. If re-rolled: Baltic Operations (OKM) — OKM directs BdU to send five submarines to the Baltic Sea to contain a possible breakout by the Soviet fleet from Leningrad. Any aircraft based in Germany or Norway must be deployed to the Baltic. Contacts are as followed: Each submarine's modified search roll = 9: Soviet Task Force. Each submarine's search roll = 0, followed by another 0: Sub vs Sub (Soviet sub only). No wolfpacks are allowed. One time only Event. |
| 1 | Shore Bombardment (OKM) — Three submarines must deploy to the Lesser Antilles to bombard oil refineries on Aruba. Type VII boats may not be used for this Event. No attacks may be made. If re-rolled: Minelaying (OKM) — One U-Boat must conduct a minelaying mission to Murmansk. It may be one of those assigned to the Arctic Campaign. No attacks may be made. |
| 2 | Minelaying (OKM) — Two U-Boats must conduct minelaying missions in the Levant. No attacks may be made. |
| 3 | Relegation to Training Duty (BdU) — Remove three U-Boats from play. No boats may be removed from those dedicated to the Norwegian or Mediterranean campaigns. If all VIIB and IXA U-Boats are removed from service or lost, only one U-Boat must be removed. |
| 4 |
War Period 5
In 1943 apply a +1 modifier to the Event roll.
| Die Roll | Event |
|---|---|
| 0 | Hitler Delusion (Chancellery) — Hitler imagines the Allies are about to invade Portugal. Six U-Boats must deploy to SW Approaches and/or Morocco to patrol close inshore. No attacks may be made unless a Task Force or Special Convoy is encountered as per B-Dienst Table. If re-rolled: Operation Torch {If it hasn't occurred by 1st week of December 1942, conduct this Event as per [5.4]} — The player must make the following deployments, and the Event cannot be ignored: Casablanca: Every Atlantic U-Boat in the SW Approaches and Morocco must search for the invasion force in the Casablanca SMZ. Add US AP 14t permanently to the US Task Force Cup, ACV Santee to the Fleet Escort Cup, and submarine Shad to the Submarine Cup (not the West Submarine Cup). Make a special die roll for all encounters: 0-4: US Task Force. 5-7: US Special Convoy. 8-9: As per Contact Table, using West Cups for convoys. Western Mediterranean: Every U-Boat in the Western Mediterranean must search for the invasion force off Algeria. Make a special die roll for all encounters: 0-5: British Task Force. 6-7: British Special Convoy. 8-9: As per Contact Table. Wolfpack attacks may be made in all engagements, as well as reattacks. In the War Progress Phase add USAAF B-24 to Center Cup. Following this Event Mid-Ocean and Sargasso Sea are considered to be "West" waters. One time only Event. |
| 1 | Dieppe Raid (OKM) — Two U-Boats must deploy to the English Channel to attack the raiding force. All encounters are with a Task Forces on subsequent die roll of 0-5 or a special convoy on die roll of 6-9. Wolfpack attacks may not be made, but reattacks may. Non-compliance with this Event lowers influence with OKW by one. If re-rolled, OKM places the supply ship Charlotte Schliemann at BdU's disposal. Place the supply ship in any OpArea of the South Atlantic / Indian Ocean Display. If re-rolled: Baltic Operations (OKM) — OKM directs BdU to send five submarines to the Baltic Sea to intercept Soviet minelaying operations. Any aircraft based in Germany or Norway must be deployed to the Baltic. Contacts are as follows: Each submarine's modified search roll = 9: Soviet Task Force (if ML Marti has been sunk, add Soviet M4t to represent auxiliary minelayer). Each submarine's search roll = 0, followed by another 0: Sub vs Sub (Soviet sub only). No wolfpacks are allowed. One time only Event. |