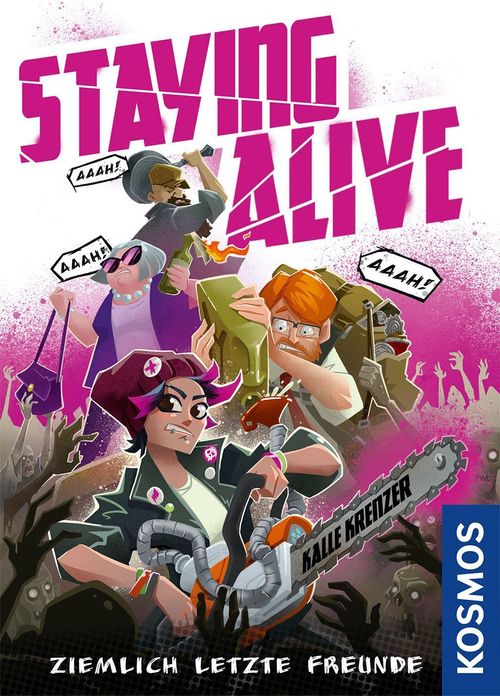
Staying Alive
Staying Alive Rulebook
Table of Contents
Table of Contents
Material
- 9 role cards
- 1 escape card
- 1 hourglass (90 seconds)
- 32 stamina tokens
- 60 module cards (12 modules with 5 cards each). Each card shows its module number in the bottom right.
- 28 base cards for 3+, 4+ or 5 players
Setup
The rulebook gives the module recommendations for games 2 to 8 on page 12. For your first game, take only the base cards for your player count and the Lookout role. In the steps below, ignore all modules and other roles.
- Choose 3 modules of your choice. We recommend that one of them be a target module. These are modules 1 to 5.
- Shuffle the 15 module cards together with the base cards. In a 4-player game, remove the 5 cards marked with the five-dot symbol (●●●●●). In a 3-player game, additionally remove the 7 cards marked with the four-dot symbol (●●●●). IMPORTANT: If you play with the target module Codes (module 2), follow the special setup rule on page 13 as well.
- Place the deck on the face-up escape card and leave room next to it for a shared discard pile.
- Each player takes 1 random role card and places it face up in front of them. The Lookout role must be among them.
- Each player takes 6 stamina and draws 3 cards from the deck.
- The Lookout begins by turning the hourglass over and taking the first turn. After that, you take turns clockwise until you have either won or lost.
Page 2 shows an example setup for 3 players.
Turn
Each turn consists of 3 steps:
- First, you draw the top card of the deck and add it to your hand.
- Then you perform up to 2 actions.
- Finally, you check your strain or escape.
THE MOST IMPORTANT RULE: You may only speak when it is your turn. During your turn you may say, describe, read aloud, explain, repeat, suggest, instruct, and so on, whatever comes to mind. You may not, however, show your cards openly. For everyone else at the table, radio silence applies at all times, and this covers every form of communication: no talking, clearing your throat, groaning, nodding, winking, pointing, shaking your head, and so on.
However: A deliberate throat-clearing, for example because the hourglass is about to run out and the Lookout is not paying attention, can be quite funny. It is your game, and having fun with it is the most important thing. So loosen this rule as you see fit.
Placing, Laying Out and Taking Back Cards
- Discard a card: When you are told to discard cards, always place them face up on the discard pile. You may look at the discard pile at any time, but the cards are no longer in play.
- Lay out a card: When you are told to lay out cards, always place them face up in front of you. They are usually needed for other cards later. Laid-out cards do not count as cards in your hand or in your backpack. Their strain is ignored.
- Take back a card: When you are told to take back cards, this always means cards that you have already laid out in front of you. Take them back into your hand.
Example from the page margin, Durst: If you have Thirst and the card Water in your hand, you may, as an action, place both together on the discard pile.
Example from the page margin, City Map: As an action, you may either lay out the City Map in front of you or, if it is already lying there, take it back into your hand.
Actions
You have 2 actions per turn. Which actions you have depends on the action symbols on your cards. You may let actions lapse. Carrying out an action that has no effect still uses up the action (for example, using the First Aid Kit on someone without an injury). There are 5 actions:
- Pass left (one left-pointing chevron: 1 action; two chevrons: 2 actions, i.e. your whole turn): Give this card to the person to your left, into their hand.
- Backpack (backpack symbol): Put any number of cards with the backpack symbol from your hand into your backpack and/or take them back out of it. No matter how many cards you put in or take out, it costs you only 1 action. Cards in your backpack lie face down in front of you. You may look at them at any time. Their strain is ignored.
- Special action (one hand symbol: 1 action; two hand symbols: 2 actions, i.e. your whole turn): Carry out the special action described on the card.
- Swap roles (circular arrows symbol): Swap your role card with the person to your left. From then on, both of you have the ability of the role you now hold.
- Attack (attack symbol): Carry out 1 attack with one of your weapons. Attacks can destroy zombies. All zombies are marked with skulls (usually a normal skull or an armoured skull).
Examples from the page margin:
- Lighter: For 1 action you may pass the Lighter to the left or put it in your backpack. For 2 actions you may carry out its special action: discard Firewood, and then everyone may discard Cold.
- Pistol: For 1 action you may pass the Pistol to the left, put it in your backpack, or attack with it, provided you discard 1 Pistol Ammunition.
Attacks
For each attack, carry out the attack line of the chosen weapon. The left side shows what you must discard for the attack: Stamina (heart symbol), Fuel (canister symbol) or matching ammunition (the three ammunition symbols). The right side shows how many and which zombies you can destroy with it, and whom they must be on. One attack may be split across several zombies, but not across several people.
- Each normal-skull symbol on a weapon lets you destroy 1 zombie with a normal skull.
- Each armoured-skull symbol on a weapon lets you destroy 1 zombie with an armoured skull or with a normal skull.
Melee weapons (sword symbol) can only destroy zombies in your own hand. Ranged weapons (gun symbol) can only destroy zombies held by someone else within range. Every ranged weapon has a maximum range (shown by a range arrow with a number), which runs to the right (i.e. counter-clockwise). Range 1 is the person to your right. Range 2 can also reach the person two places to your right, and so on.
The attack line of the Rifle reads as follows: If you discard 1 Rifle Ammunition, you may destroy up to 2 zombies with skull symbols held by 1 other person within range 3.
Example from the page margin: From your position you can reach Shaun with every ranged weapon, because every weapon has at least range 1. Liz, for example, you can reach with the Fat Shotgun (range 2), and Ed with the Rifle (range 3).
You must name the targets of your attacks precisely, for example: "I discard Rifle Ammunition and destroy 2 Crawlers in Shaun's hand." If your attack misses entirely or in part, for example because Shaun has 1 Crawler and 1 Huntress rather than 2 Crawlers, you still resolve all successful hits, but the action and the fuel or ammunition are used up anyway. In this case Shaun would discard the Crawler but keep the Huntress. So it pays to listen carefully!
Checking Strain or Escaping
As long as the deck is not empty, count the strain symbols on your hand cards. You lose 1 stamina if you have 5 or more strain.
If the deck is empty (that is, you can see the escape card), you must decide whether to stay in the game (for example, because someone still needs a card from you) and lose 1 stamina for it, or escape.
Stay: You lose 1 stamina and remain in the game.
Escape: You lose as much stamina as you have strain symbols on your hand cards. Laid-out cards and cards in your backpack do not count. Place your remaining hand cards face down in front of you and wish the others luck that they also escape successfully. You are now out and no longer take part in the game. The players to your left and right are from now on directly adjacent.
IMPORTANT: Nobody may escape as long as not all target modules have been fulfilled.
Victory and Defeat
If the hourglass runs out, or someone would have to lose stamina and has none left, you have lost. This also applies to escaping. Having zero stamina is therefore still acceptable.
If you are playing with one or more target modules, their tasks must also be fulfilled in order to win. Apart from the target modules, it does not matter whether you fail to solve problems or fail to destroy zombies. As long as you all escape successfully, you have won.
Escaping successfully simply means surviving the stamina loss from the escape, that is, not dropping below zero stamina.
You now know all the rules needed to attempt your first escape. Once you have managed it, page 12 explains how to continue. Before that, you can read a detailed example from page 7 onwards to familiarise yourself with the game. Pages 13 and 14 contain additional information on the target modules and individual cards.
Detailed Example of Play (without role cards)
Shaun begins the game with the first turn. First he draws a card and tells the others that he has Thirst and a Crawler. He also has the Pistol and matching ammunition. Ranged weapons can only be used against zombies held by other people, never against oneself, so he uses his two actions to pass first the Pistol and then the ammunition to Liz, who sits to his left. He says so out loud and repeats that he has a Crawler in his hand. Before ending his turn, he checks his strain by counting the strain symbols on his hand cards. Thirst has 2 and the Crawler 1. Since only 5 or more strain is a problem, nothing happens and Shaun ends his turn.
Liz is next and draws a card first. She now has a Lighter, a Frying Pan, a Crawler, an Injury, and the Pistol with ammunition from Shaun. The Pistol can destroy exactly 1 zombie in the hand of the person to her right. So Liz says "I destroy the Crawler in Shaun's hand with the Pistol." She places the matching ammunition on a shared discard pile, and Shaun places his Crawler on it too. Liz also has the Frying Pan. Melee attacks can only be used against zombies in one's own hand, and because Liz still has a Crawler, she says "I destroy the Crawler in my hand with the Frying Pan." The Frying Pan states that she loses 1 stamina for this, so she places one of her stamina tokens in the middle of the table and places the Crawler on the discard pile. Her two actions are used up, and when checking her strain she comes to only 4 symbols, so nothing happens and she ends her turn.
Next is Ed, who also draws a card and informs the others. He now has the First Aid Kit, Provisions, a Breaker, and the Chainsaw. The Chainsaw is perfect for the Breaker, because the Breaker is armoured and can only be destroyed with a matching weapon. However, Fuel is needed for this, which Ed does not currently have. The First Aid Kit can, as a special action, heal the person to his left from an injury. Ed has noticed that Liz has an injury, but unfortunately she sits to his right. So with his first action he passes the First Aid Kit to Dianne and tells her to pass it on to Shaun so that Shaun can heal Liz. With his second action he gives the Provisions to Dianne, because he cannot use them at the moment. He accepts the remaining 2 strain, and his turn is over.
Now Dianne is up and draws a card. She has a Huntress, an Injury, Water, a Rifle, and the First Aid Kit and Provisions from Ed. She has noticed that Shaun has Thirst, and so she gives him the Water. She also gives him the First Aid Kit, so that he can heal Liz, which she tells him again. Her two actions are now used up. She checks her strain and finds 6 strain symbols. From 5 or more strain you lose 1 stamina. So she places 1 token in the middle of the table and ends her turn.
It is now Shaun's turn again. He draws a card and now has Thirst, a Crawler, the First Aid Kit, Water and Rifle Ammunition. First he uses the special action of Thirst, and discards it together with the Water. As his second action he uses the First Aid Kit, and because he himself has no injury, Liz, who sits to his left, may discard her injury. Shaun keeps the First Aid Kit, however! The Rifle Ammunition has no strain, so he has only 1 strain from the Crawler, and he ends his turn.
This is roughly how the start of a game might look. Meanwhile, of course, the hourglass is running, and it must be turned over regularly by the Lookout. The other roles also influence the game.
We now fast-forward several turns and look at the end of the game. We assume that the game is played with target module 3, the Horde, and that 3 Megaphones are already laid out. Remember that all target modules must be fulfilled, otherwise you may not escape even though the deck is empty.
Liz is on turn and draws the last card of the deck, so that the escape card is face up. She has the Horde in her hand, which must be discarded as part of a target module. She also has the Megaphone needed for this, and so she passes it directly to Ed. She also has a Huntress and Hunger in her hand, but she cannot deal with either: she has no weapon, and to pass the Huntress she would need 2 actions. For the Hunger she lacks the Provisions. So she lets her second action lapse. Although she has only 4 strain, she loses 1 stamina, because she does not escape but stays in the game. Because of the Horde she would not have been allowed to escape anyway.
Ed cannot draw a card, because the deck is empty. He plays the special action of the Megaphone and takes the Horde from Liz. As a second action he plays the special action of the Horde, because 4 Megaphones are now laid out, and discards the Horde. Ed still has the Chainsaw and Provisions in his hand, and 4 stamina. He decides to escape and loses 2 stamina, because the Chainsaw and Provisions together have 2 strain. Since he still has 2 stamina left, he has escaped successfully. He places both cards face down in front of him and ends his turn.
Dianne has only the Frying Pan and 2 stamina left. She could escape, but she knows that Liz's situation is problematic. Dianne tells Liz that she should pass her the Huntress. She lets both her actions lapse, stays in the game and loses 1 stamina, even though she could escape (the deck is empty).
Shaun has a fairly full hand: a Rifle, Fuel, the First Aid Kit and the Pistol. Together these come to 4 strain, but Shaun has only 1 stamina left. If he stays in the game, he loses 1 stamina, but would then be in the same situation on his next turn. If he escapes, the group has lost, because he would lose more stamina than he has. Liz and Dianne no longer need his help. So he uses the backpack action to put all four cards face down in front of him into his backpack. He lets his second action lapse and escapes. Because he has no strain left in his hand, he loses no stamina. Like Ed, he is now out of the game and waits with a cold drink until everything is over.
Liz is on turn again, remembers Dianne's statement and passes her the Huntress, which costs both her actions. The Huntress goes directly to Dianne, because Ed is no longer in the game, so Liz and Dianne now sit next to each other. She now has only 1 strain from Hunger and 2 stamina. Because Ed escaped with the last Provisions, she cannot do anything about the Hunger any more. She escapes, loses 1 stamina through the Hunger, and is also out.
Now only Dianne remains in the game, with the Frying Pan, a Huntress and 1 stamina. She destroys the Huntress with the Frying Pan, which costs her 1 stamina, then puts the Frying Pan in her backpack and escapes. Although zero stamina is narrow, it is possible, so Dianne has also escaped successfully and the group has deservedly won the game!
Module Recommendations
Escaped successfully? Excellent. But now the real game begins! We recommend using the modules listed below for the next 7 games. Modules always consist of 5 cards (module 6 therefore has 5 cards, each showing a small 6 in the bottom right corner). For your first escape there was only the Lookout role. From the second game onwards, each player receives 1 random role card. Remember that the Lookout must always be among them.
| Game | Modules | What it is about |
|---|---|---|
| 1 | None | You simply appoint one Lookout and get used to the situation. |
| 2 | 6 | You now know what each of you has to do and can turn to other problems. For example, the icy weather. |
| 3 | 6, 7 | Besides the cold, injuries are now also a problem. But you have to hold on. |
| 4 | 1, 8 | You have heard of a safe place. Grab a city map and plan the route. |
| 5 | 2, 9 | You have found securely stored equipment. What was the code for the lock again? Observe the special setup rule on page 13! |
| 6 | 3, 8, 10 | A horde of zombies has discovered you! Distract them long enough for you to escape. |
| 7 | 4, 7, 11 | You find an escape car, but first you have to repair it. A pack of zombie dogs does not make things easier. |
Done with all of these? Then put together your own games by shuffling the base cards with 3 modules of your choice. We recommend always including 1 target module (these are modules 1 to 5). But you may also combine the modules completely freely.
Card Details
Target Modules (1-5)
1: The condition of the city maps must be fulfilled before you may escape. Whether they fit together can be seen from the pink path. In a 4-player game this might look as follows:
(Diagram on page 13 showing the four players Liz, Ed, Shaun and Dianne with city map cards laid out in one row, Shaun, Dianne, Ed and Liz from left to right.)
Every player must have at least 1 city map laid out in front of them. The city maps must lie next to each other in a matching way, along the pink path, and you may only escape once all 5 city maps are laid out next to each other in a matching way and every player has at least 1 city map laid out.
Card text of the City Map: Lay this card out or take it back.
2: IMPORTANT: Before you shuffle this module into the deck, you must randomly return 1 of the 5 cards to the box unseen! So there are always only 4 code cards in play. You must discard all 4 cards before you may escape.
3: The Horde must be discarded before you may escape. It does not count as a zombie.
4: You must use the Key. If successful, your strain plays no role.
Example: The deck is empty. Shaun passes the Car Manual on and places a Pistol face down on the car pile. With his second action he uses the Key. Because during the game he remembered well which cards were placed on the car pile in which order, he names them in order from top to bottom and turns each one over in turn: "Pistol, Tyre, Frying Pan, Spark Plug, Car Battery." Every card turned over was correct. Shaun did everything right and the group wins immediately. If, for example, he had got the order of Tyre and Frying Pan wrong, the group would have lost immediately.
5: The Key Cards must be laid out in the order 1, 2, 3, 4. You must discard all 5 cards of the module before you may escape.
Example: Shaun lays out the Scanner and directly afterwards Key Card 1. Liz lays out Key Card 2 and lets her second action lapse. Ed then lays out Key Cards 3 and 4, so that the Scanner and all Key Cards can be discarded. Had Liz used her second action for anything else, or had anyone laid the cards out in the wrong order, everyone would have had to take back all Scanner and Key Card cards laid out up to that point.
Notes on Individual Cards
Beast: The Beast counts as a zombie, but all attacks except the Molotov go into thin air. As a reminder, it has a more heavily armoured skull symbol.
Blood Rush: If the Tactician role gives you 1 action with which you then destroy 2 zombies in melee, you may also discard the Blood Rush.
Daredevil: If the deck is empty, the ability when staying or escaping gives you no advantage any more.
Scout: You may of course also talk about the card you put back.
Panic: As a Radio Operator, you may say 1 word during every other player's turn despite Panic.
Planner: Placing the card on or under the deck and talking about the card is also allowed.
Collector: You must be able to name the desired card. If the person asked does not have the corresponding card, your action is still used up.
Tactician: The chosen person may freely decide what the action is used for. It does not matter whether you carry out your remaining action before or after this.
Lookout: Anytime means anytime. So also during another player's turn. If the Lookout escapes, there is urgency, because then nobody can turn the hourglass any more.
Scope, Shield, Ammunition Belt, "Flamethrower": For a one-off 2 actions, you place one of these cards under your role card, so that from then on it gives it an additional ability. If you swap your role card, the additional ability is swapped too.
Example from page 14: The Flamethrower card reads: "Place this card under your role card. It now has an additional ability: In melee combat, the following applies: [normal skull symbol] = [armoured skull symbol]." (The skull symbols are shown on the card; the text is read from the card image.) The page also shows the Tactician role card before and after the Flamethrower has been placed under it.
Zöter: To destroy the Zöter you must use, for example, 2 of the 3 skull symbols on the Rifle 2.0 or both skull symbols on the Katana. If you assign only 1 skull symbol from 1 attack to it, the attack goes into thin air.
Zombiker: If you attack the Zombiker without being able to place a Crawler back, your attack goes into thin air.
Lookout and the Hourglass
The Lookout role card reads: "You may turn the hourglass over at any time, but each time you lose 1 stamina for it." The hourglass runs constantly during the game and must be turned over regularly by the Lookout. If the Lookout escapes, nobody can turn the hourglass any more.
Difficulty
To adjust the difficulty, you have several options:
- Be stricter or more lenient with communication.
- Use more or fewer than 3 modules.
- Start with less stamina, or let the Lookout start with 8 stamina. Once they have lost 2 stamina, the limit of 6 stamina applies to them again.
Tip for target module 2 (Codes): If you hold a code card, it is best to tell the others which digit appears in each of the four codes on it. That digit is definitely contained in the code you are looking for! If you do this with all 4 cards, you will quickly arrive at the solution. Which digits are contained is more important than their order.
Quick Start Guide
The rulebook's last page reproduces a short quick-start guide, transcribed here in full.
Setup
Shuffle the base cards for your player count together with 3 modules of your choice and place them face down on the escape card. Observe the special rule for module 2. Each player takes 6 stamina, draws 3 cards and lays out 1 random role card. The Lookout must be among them; they receive the hourglass, turn it over, and begin the game with the first turn.
Turn
First draw 1 card, then carry out up to 2 actions, and then check your strain or escape. Only the person whose turn it is may speak.
- Discard a card: Place the card face up on the discard pile.
- Lay out a card: Place the card face up in front of you.
- Take back a card: Take a laid-out card back into your hand.
Actions (a double symbol means 2 actions)
- Chevron / double chevron: Pass the card to the left.
- Backpack symbol: Put any number of cards with the backpack symbol into your backpack and/or take them back out.
- Hand / double hand: Carry out the card's special action.
- Circular arrows: Swap your role card with the person to your left.
- Stamina / fuel / ammunition symbols and attack symbol: Attack with a weapon.
Attacks
Depending on the weapon, discard stamina, fuel or matching ammunition, and for each skull on the weapon destroy 1 matching zombie. An armoured skull can also destroy a normal skull. Melee weapons only destroy zombies in your own hand. Ranged weapons only destroy zombies held by someone else within range (the range runs "rechts herum", which the rulebook specifies as counter-clockwise). Targets must be named precisely. Attacks cannot be split across several people.
Checking strain or escaping
Laid-out cards and cards in your backpack are ignored.
- Deck not empty: lose 1 stamina if you have 5 or more strain.
- Deck empty: stay in the game and lose 1 stamina, OR escape and lose stamina equal to the strain of your hand. Escape is only possible when all target modules are fulfilled.
Win: everyone escapes successfully. Loss: the hourglass runs out, or someone would have to lose stamina and has none left.