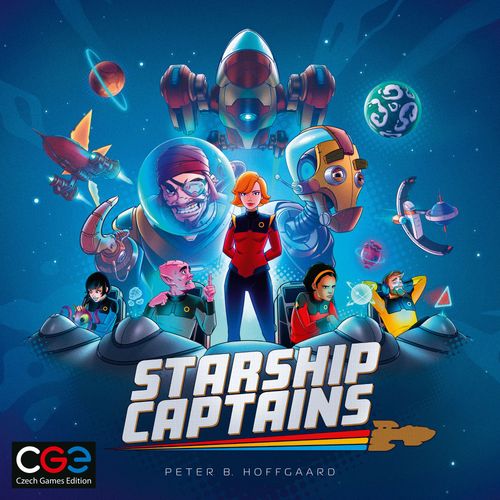
Starship Captains
Starship Captains Rulebook
Table of Contents
Table of Contents
Components
Captain's log: Test. Test. Is this thing recording me? Oh, cool! Do I need to say "Captain's Log" or can I just start talking?
- 1 double-sided main board
- 1 central tech board
- 3 double-sided faction tracks
- 4 ship boards
- 4 double-sided tech-slot boards
- 50 tech cards
- 12 omega tech cards
- 2 station cards
- 50 mission cards
- 11 event cards
- 18 red ensign figures
- 18 yellow ensign figures
- 18 blue ensign figures
- 12 cadet figures
- 8 android figures
- 20 promotion rings
- 4 ship figures
- 32 damage tokens
- 30 pirate ship tokens
- 27 artifact tokens
- 18 medal tokens
- 16 triangle tiles
- 1 starting player marker
- 1 pad of score sheets
- 3 faction trophy tokens
- 12 faction markers (in 4 player colors)
- 12 pieces of tape included
Figures come in a variety of poses, with a distribution that may vary from box to box. Poses have no game effect.
To assemble ship board: Apply 3 pieces of double-sided tape as shown. Fold board. Press tight.
Ship figure assembly: attach the ship figure to its stand as shown by the arrows.
A tutorial video is available at cge.as/scv.
Solo Components
- 6 passenger cards
- 7 action cards
- 3 solo event cards
Setup
Main Board
Use the 1-3 player side of the board if you have fewer than 4 players. If you have 4, use the other side. Some numbered tiles (the "6" and route tiles marked for 4 players) are used only in a 4-player game. With fewer players, leave them in the box.
- Place components on the round-counting track along the top of the board: for round 2, 1 medal per player and the home station tile; for round 3, 1 cadet per player; for round 4, 1 cadet per player.
- Shuffle the mission deck. Mix up the triangle tiles and randomly deal 1 to each planet. The tiles determine the setup of the board:
- Mission tiles are replaced with mission cards.
- Station tiles are flipped so that the effect side is up. Slide the matching station card underneath.
- Numbered tiles are flipped so that the orange side is up. (We will call the orange side "face up.") They stay on the board.
- Home Station is the only location that is not a planet. It is dealt no tile. It has a station tile, but that tile starts the game on the round-counting track.
- Mix up the pirate ship tokens with the skull side showing. Place 1 on each route with the skull symbol and flip it to ship side up.
Techs
-
The tech deck has alpha and beta techs mixed together. Shuffle it, then deal from the top.
- 4a. Deal 1 alpha tech face up to the Tincan faction track (the gold one, illustrated at the top of the page).
- 4b. Deal 5 alpha techs face up to the tech board.
While dealing the alpha cards, you will run into a few beta cards. Just put these on the bottom of the deck without looking at them. Once cards are dealt, place the tech deck on the tech board.
-
Shuffle the omega deck and deal 3 cards to the tech board. Set the rest of the deck aside in case it is needed during play.
Faction Tracks
Each track is double-sided. Randomly choose a side for each track.
Shuffle these event decks and deal 1 random event from each to the corresponding track, face up.
The Tincan track has only one possible event. Place this card face up on the Tincan Track. The event reminds you to also give the track one alpha tech card (step 4a).
General Supply
Keep these pieces in a general supply. Players will need them during play: artifacts (mixed up, face down), pirates (mixed up, face down), medals, damage, cadets, androids, ensigns.
Player Setup
Captain's Log: My refurbished cruiser is in much better condition than I was led to believe. And after meeting my crew, I am certain I got the best of the class.
Each player takes a ship board, a tech slot board, and the other components shown here:
- Place your ship figure on Home Station.
- Place your 3 faction markers on the starting spaces of the 3 faction tracks.
- Insert 5 promotion rings into your board.
- Take 1 medal and keep it here.
- Crew: Place 1 ensign of each color in your ship board's queue, in the order marked on the board. Place 1 ensign of each color and 1 gray cadet in your ready room.
- Queue: Crew figures in the queue are off duty right now.
- Ready room: Crew figures here are ready for assignments.
- Tech-slot board: The board is double-sided to offer more variety of play. Be sure everyone is using the same side.
- Damage: You start with 7 damage: 3 in cargo slots, 4 in the marked tech slots.
- Cargo Slots: These can hold cargo – unless they have damage.
Gameplay
Captain's Log: The crew is mine to command. The course, mine to decide. The decisions that determine success or failure are mine and mine alone. Good thing I've had 3 months of captain training!
Choose one person to be the starting player. The starting player gets the starting player marker and takes the first turn of the game.
Players take turns in clockwise order. On your turn you pick one of these choices:
- Activate a Room, or
- Complete a Mission,
or you can Pass.
Usually, you will need to assign one or more crew members to the chosen task, and they will leave your ready room and end up in the queue. Eventually, you will choose to pass or be forced to pass because you have no one available to get more work done. Once you pass, you take no more turns for the remainder of the round.
Once all players have passed, the round ends, the starting player marker moves one place to the left, and everyone's queue sends new figures into the ready room for the next round.
After four rounds, the game ends, and whoever has the most points is the winner.
Activating a Room
Captain's Log: The crew know their assignments, so now I can just sit back and let the ship run itself.
Rooms
Your ship has four basic rooms from the start. Certain techs also function as rooms and can be activated in the same way.
- Helm (red): Move the ship.
- Weapons (yellow): Fight pirates.
- Science (blue): Take a tech.
- Repair (gray): Repair the ship.
Room Techs: They have a variety of functions.
Activating a Room with a Crew Member
To spend your turn activating a room with a crew member, do the following:
- Select a room on your ship board or on one of your techs.
- Take a figure from your ready room that matches* the room's color.
- Tap the figure on the room you are activating, then move the figure to the end of the queue. (The end farthest from the ready room.)
- Resolve the effects depicted in the room.
* Matching Colors
A cadet matches no room except the gray room.
Everyone matches the gray room.
Androids will not activate rooms. (Our primitive technology irritates them.)
Activating a Room with Artifacts
During play, you may acquire artifacts, which are kept in your cargo hold. When two artifacts are combined, they awaken an ancient AI that knows how to activate a room with the color they have in common.
To spend your turn activating a room with artifacts:
- Select a room on your ship board or on one of your techs.
- Spend 2 artifacts with the color that matches the room. (Any pair of artifacts matches the gray room.)
- Perform the room's effect.
Example: a yellow-and-red artifact plus a red-and-blue artifact share red in common, so this pair can activate a red room (or the gray room). A red-and-blue artifact plus another red-and-blue artifact share both red and blue in common, so this pair can activate a red room or a blue room (or the gray room).
Discarded Artifacts: Once used, artifacts are discarded into a face-up pile. If you run out of random artifacts to draw, flip the discard pile face down and mix it up to form a new draw pile.
Going Places
Captain's Log: Some captains might worry about putting flight controls in the hands of an inexperienced ensign, but I have complete confidence in her abilities. Also, she is the only one on duty who has had any pilot training.
You can spend as much time as you want improving your ship and preparing your crew. But sooner or later, if you want to make your mark on this galaxy, you're gonna have to leave Home Station. That's why your ship has a Helm … and a red ensign who knows how to use it.
Moves
When you activate this room, you get two moves. You will discover other ways to get moves during the course of the game.
A move is always along one of the routes on the board, from one location to the next. A move is always optional. If an effect gives you two moves, it is okay to use only one of them.
Each time you move along a route that has a pirate, your ship takes 1 damage. Damage will be explained later.
Jumps
This effect looks similar to a move, and it is. It's a jump. To jump, pick up your ship figure and place it at any location on the board. Unlike a move, a jump avoids all pirates.
Destinations
Missions. Often, your best move is to go to a planet with a mission. This sets you up to complete the mission on a later turn.
Stations. If you end your turn on a station with a station tile, perform all the effects shown on the tile.
The tile can be used only once per round. Move the used tile to the round-counting track. It goes on the triangle space beside the other pieces waiting for next round's setup.
If you end your turn on a station that does not have its reward tile, nothing happens. (It can't help you until new supplies are shipped in.)
Triangle Tiles. Some planets have nothing of interest right now, but it's still okay to end your turn there. Maybe a mission will show up later!
Whose mission is it, anyway? The first ship to the planet is the one that gets the mission. To track this, put your ship on the planet if you are the only player there. Any mission at the planet – or any mission that shows up there later – is reserved for you. Latecomers put ships beside the planet.
This almost never happens, but: If a player abandons their reserved planet and leaves 2 players still there, then neither can reserve it, but either can complete the planet's mission on their turn.
Damage and Repairs
Captain's Log: … structural damage to decks 1 and 2, a hull breach on deck 3, a leaky faucet on deck 4 …
Your ship starts damaged and sometimes it seems like you spend the whole game repairing it.
Taking Damage
When your ship takes damage, take 1 damage token and place it in a cargo slot. Damage is never added to tech slots during play.
Busted Cargo: If you take damage when you have no empty cargo slots, you must discard an artifact or pirate token to make room for it.
Excess Damage: If all cargo slots are full of damage, any excess damage you take goes on top of the damage in the slots. There is no limit to how much damage your ship can take.
Cargo Slot: Can hold 1 artifact or 1 pirate token, unless it has damage.
Repairing Your Ship
This effect lets you remove 1 damage token from your ship – either from your ship board or from your tech-slot board.
If you have excess damage, your cargo slots remain full of damage until all excess damage has been repaired. (But that does not prevent you from repairing tech slots instead.)
The repair room can be activated by an ensign or commander of any color. It can even be activated by a cadet!
Tech Slot: Can hold 1 tech card, unless it has damage. Some tech slots start damaged, but tech slots take no damage during play.
Cargo
When you gain artifact or pirate tokens, simply place them in empty cargo slots. Artifacts go face up. Pirates go skull side up because their rewards are no longer relevant.
If you do not have enough empty cargo slots, you are allowed to discard artifacts and pirate tokens to make room. Look at any artifacts you might gain and decide which tokens to keep and which to discard.
Timing Note: If you gain multiple artifacts in a row, look at all of them before deciding which ones to keep.
Of course, you cannot discard damage tokens to make room for cargo.
Pirates!
Captain's Log: Today we had our first encounter with a Ni'an vessel. They responded to our hail with a blast of cannon fire that destroyed shuttle bay 2. Ensign Rulok speculated that this may simply be their culture's equivalent of a friendly greeting.
Pirates on Routes
Whenever you move along a route with a pirate token, you take 1 damage. But nothing happens to the pirate – it just shoots you as you fly by.
Any route can have a pirate, but never more than 1. There are several ways for pirates to appear on the board:
Pirate Ambush
Certain missions might cause pirates to appear. To resolve this effect, draw a pirate token at random and check the route at your location that matches the color of the pirate's exhaust. If that route has no pirate, put the token on it. (Discard the token if a pirate is already there.)
Example: a pirate with green exhaust matches the green route.
As with damage, the ambush effect is not optional. You either draw for the ambush or choose to ignore the entire reward for that line of the mission card.
Pirate Uprising
The pirate uprising, explained in the Missions section, also uses route colors to determine where pirates appear.
During Setup
During setup, pirates are placed only on marked routes. You don't worry about their color.
Other Pirates
You might find effects that simply place pirates without worrying about matching colors or pirate-setup marks.
If Tokens Run Out
If you are supposed to draw a pirate and cannot, flip all discarded pirate tokens to their skull side and mix them up face down to make a new pile.
Fighting Pirates
The "fight pirates" effect can be found in this room and on some technologies and missions. If you choose to fight:
- Choose 1 pirate on any route leading from your current location.
- Take 1 damage.
- Take the pirate token and its rewards.
- Add them to your ship.
Two Types of Pirate Tokens
- Take 1 medal from the general supply and put it on your board. Also take 1 random artifact. Then put the pirate ship token and the artifact token in your cargo hold, as explained on page 9.
- Take 1 android figure from the general supply and put it in your ready room. Then put the pirate token in your cargo hold.
Techs
Captain's Log: Though our cruiser was built in the previous century, it is fast becoming the most modernized ship in the fleet. So far we have installed a new propulsion system, a new weapons system, and an auxiliary coffee machine.
Types of Techs
- Room Tech (e.g. Engineering Lab): Can be activated by a matching crew member.
- Ability Tech (e.g. Auxiliary Engine): Specifies when it applies (e.g. "Once per turn, when moving: +1 move").
- Omega Tech (e.g. Wanted List): Will score points at the end of the game.
Researching a Tech
The effect in this room lets you take a tech card from the central tech board and put it in an empty tech slot – one with no tech card and no damage token. (If you have no empty tech slot, the room has no effect.)
Your tech might give you one or more tech bonuses, which you resolve immediately. At the end of your turn, deal a new card to the empty space you left on the central tech board. Always deal from the alpha-beta deck, even if an omega tech was taken.
Tech Bonuses
The icons along the sides of a tech card are potential bonus effects. If your new tech has any icons that match an adjacent icon, immediately resolve those effects in order from top to bottom.
There are 3 types of tech bonuses:
- Repair 1 damage.
- Gain 1 medal.
- You can do 1 move.
Example: sliding a new tech (Tincan Assembly Line) into an empty slot next to Hull Plating — if the new tech's icons don't match Hull Plating's icons on that side, there are no bonuses. But if the new tech's icons match the icons on its other side (against the next card over), you gain 1 medal, then you can do 1 move.
Recycling a Tech Slot
This is a special type of research effect that allows you to discard a tech and put a new tech in its slot, gaining any applicable bonuses.
You can also use this effect to take a tech and put it in an empty slot, just like the regular research effect.
Damaged Slots
Some tech slots start the game damaged to indicate that your ship needs to be modernized (repaired) before you can add a tech there. Damage prevents you from putting a tech in that slot, but it does not affect the tech bonuses printed on the board.
Missions
Captain's Log: I hope they're okay. Wait, was that recorded? Computer, restart log. I have sent Ensign Rulok and Cadet Bolzano on their first away mission. I am certain they will do well.
Completing a Mission
To spend your turn completing a mission:
- Your ship must already be at the planet with the mission.
- The mission must not be reserved for another player. (See page 8.)
- Your ready room must have enough figures.
- Take mission. Place the mission in the slot beside your ship's transporter.
- Assign crew. For each line of the mission card, take one crew figure from your ready room and place it on the transporter pad beside that line. The crew figure can be any color. You can even send cadets.
- Resolve mission. Resolve each line of the mission in order, top to bottom:
- If the figure is an ensign matching the color of the line, you may perform all depicted effects, left to right. (Commanders and androids have special rules, explained on page 15.)
- If the figure does not match, or if there is an effect you want to avoid, ignore the entire line.
- Slide crew. Once all lines have been resolved, slide the figures into the queue. (Except for androids – they have to be returned to the general supply.) Figures slide into the queue in order, with the topmost figure in front.
- Flip mission. Remove the card from the slot and keep it face down. The mission is complete! It will be worth points at the end of the game.
Note: Your most efficient use of a mission is to match all the colors and collect all the rewards, but it is perfectly acceptable to match nothing and collect nothing except the points. Let the crew know you're proud of them anyway – after all, if people are sent on a mission they aren't qualified for, that's your fault, not theirs!
New Mission
After you complete a mission, you need to reveal a new mission somewhere else.
- Take the highest-numbered face-up triangle tile and place it face down on the planet where you just completed the mission.
- The planet you took the tile from is now the only planet with nothing on it. Deal a new mission there, face up.
Note: The location of the next new mission is predictable. It's possible to camp out on that planet and wait for a mission to come to you. This tactic is sometimes effective and sometimes not, but it always impresses the crew. "Our captain just has a nose for trouble!"
Pirate Uprising!
As players complete missions, the triangle tiles will count down. When tile 1 is placed face down, there is a pirate uprising!
- Place 1 pirate token skull side up on each of the numbered triangle tiles.
- At each of those planets, reveal the pirate.
- If there is no pirate on the matching route, move the pirate there. Otherwise, discard the new pirate.
- Once you have finished with the pirates, turn all numbered tiles face up. The countdown begins again.
Tip: Players can resolve all planets simultaneously. If 2 planets would send a pirate to the same route, the pirate from the higher-numbered planet is discarded.
Example: The pirate with purple exhaust goes to its planet's purple route. The pirate with green exhaust goes to its planet's green route. The pirate with yellow exhaust is discarded: Its planet's yellow route still has a pirate that was placed there during setup.
Your Crew
Captain's Log: Bolzano has been promoted to ensign and assigned to the security team. I found myself ridiculously excited to be handing out my first promotion. I don't know which of us was more proud.
Meet Your Crew
You start the game with two ensigns of each color and one cadet. However, your crew can learn and improve.
- Red Ensigns: Fly your ship and often take leadership roles on missions.
- Yellow Ensigns: Handle weapons, tactics, and security.
- Blue Ensigns: Trained for research and engineering tasks.
- Cadets: Not good at anything yet. But they try hard.
- Commanders: Seasoned veterans. And they act like it.
- Androids: Mysterious Tincan guests who have offered to join your crew for a short time.
Training and Promotion
Training and promotion happen at the beginning of your turn. If you want to improve one or more crew members, you must do so before activating a room or assigning crew to a mission. Only figures in your ready room can be trained or promoted.
Training
You can train a cadet to be an ensign or retrain an ensign to change its color. Training costs 1 medal – return it to the general supply.
Choose a cadet or ensign figure in your ready room and return it to the general supply. Replace it with a new ensign figure in the color of your choice.
Example: Captain Andersen wants to spend this turn moving her ship, but she used her only available red ensign earlier in the round. Fortunately she has a cadet in her ready room. She spends a medal to turn her cadet into a red ensign and assigns the new red ensign to the helm room. She then moves her ship twice.
Note: It's more efficient to train a cadet than to (re)train an ensign. But if you have no cadet in your ready room, the ability to change an ensign's color can come in handy.
Medals
You improve your crew by spending medals. You start the game with one medal and more can be earned during play.
When you gain a medal, take it from the general supply. Keep your medals on your board until you are ready to use them. There is no limit to the number of medals you can have.
Promotion to Commander
You can promote an ensign to commander. Choose an ensign figure in your ready room, pay 3 medals, and put one of your available promotion rings on the figure – it's now a commander (of the same color).
You are limited to 5 commanders. Note that you have no way to change a commander's color.
Commanders
Commanders are like ensigns, but twice as good because they can do two tasks.
First Task: Start by using a commander just like an ensign of that color. Commanders can activate rooms or go on missions.
Second Task: Your commander either does extra work, or your commander commands a subordinate.
Extra Work: If you ask your commander to do extra work, your options depend on what the original assignment was.
- A commander who has activated a room can then activate another room before returning to the queue. You can choose the same room twice or two different rooms. Of course, the extra work must be done in a room with the matching color (which includes the repair room).
- A commander who has resolved a line of a mission can then resolve that same line again (before you move on to the next line). If the line offers choices, the choices made the second time can be the same or different.
Command a Subordinate: Instead of doing extra work, your commander can command a subordinate to report to the ready room. The subordinate must be either a cadet or an ensign of the commander's color. The subordinate can be anywhere in the queue (but not on a mission with the commander).
After the commander activates the assigned room or resolves the assigned line of the mission, move the subordinate to the ready room.
Example: Captain Kristensen is resolving her yellow commander's line of the mission shown here. She takes 2 damage and then advances 4 spaces on a track of her choice. (She chooses Tincan.) Before moving on to the blue ensign's line, she must decide her commander's second task. She could take 2 more damage and then advance 4 spaces on a track again (the Tincan track or a different one) but she doesn't want that much damage. She decides to command a subordinate instead. Her choices are the cadet or the yellow ensign. She chooses to command the ensign and moves it from her queue to her ready room. Then she continues to the next line of the mission.
Androids
This effect allows you to gain an android. Take the figure from the general supply and put it in your ready room.
Androids can never activate a room. But you can send an android on a mission:
An android matches all three ensign colors. So it can gain the rewards from any line of a mission.
Some mission lines are marked so this color cannot be matched by any figure except an android. As usual, any figure can be assigned here, but only an android can perform the effects and gain the rewards.
After you complete the mission, the android leaves your ship. Its obligations fulfilled, the android returns to the general supply instead of going to your queue like your other crew figures do.
Tip: It is normally inefficient to pass while you still have crew figures in your ready room. Androids are the exception, however. Because your android figure can be used only once, it is sometimes smart to save it for a later round.
Diplomacy
Captain's Log: I am preparing for my meeting with the envoy from the Tin— that is, from the Tink … en. Tink … en. Tinken. From the Tinken. If they want us to pronounce it Tinken, why do they insist on spelling it Tin Can?
Faction Tracks
You will have many opportunities to advance on one or more of the faction tracks. Whenever you advance onto or through a space with a bonus, resolve it immediately.
- Advance 1 space on the Cooperative (your fleet) track.
- Advance 1 space on the Tincan (android) track.
- Advance 1 space on the Ni'an (pirate) track.
- Advance 3 spaces on any one track.
- Advance 1 space on any track. Then, again, advance 1 space on any track. The tracks can be the same or different.
Points
Each faction track is divided into 4 zones, which are marked as being worth 1, 2, 3, or 4 points. Each time you loop back to the starting space, it is worth +5 points. There is no maximum value for the faction tracks.
If you loop around, flip your marker to the +5 side to remind you that you have +5 points on that track.
If you loop all the way around twice, take the track's trophy! It reminds you that you scored another +5, and it shows how impressed we are. If two players win the trophy … well, we weren't expecting even one player to win it – just keep track of your +5s somehow.
Faction Events
Each faction has its own set of event cards. At the start of the game, one card was randomly chosen for the Ni'an and Cooperative factions. The Tincan faction uses the same event every game, but it also gets a random alpha tech.
When you reach the marked space of the track, your political connections with that faction have led to an important event that will affect all players. Resolve it immediately. Then remove the card from the track to show the effect cannot happen again.
Only 2 events can happen per game. If two have been reached, remove the third card from its track and return it to the box. (The third faction feels ignored by the players' diplomatic efforts and refuses to negotiate out of spite.)
Meet the Factions!
The Cooperative: Your faction wants to be the leaders of the galaxy, but really you are just new kids on the block. Your position on this track represents how much the admirals at Fleet HQ like you.
The Tincan: Once the rulers of the galaxy, these ancient androids are now scattered and confused. You may find them willing to share technology with your "delightfully childlike" people.
The Ni'an: Ruthless pirates who raid Tincan settlements just for fun. They always seem to get the better of you in any negotiation, and they never let friendship get in the way of a good fight.
End of Round
Captain's Log: No matter what time it is, the sky is always dark and the stars are always out. If you don't like the night shift, don't work in space. That said, I think everyone is due for some shore leave.
Passing
Passing is one of your three options on your turn. You can pass by choice, or you can be forced to pass if your ready room has no crew and your cargo hold has no artifacts you can use.
Tip: Saving an ensign or commander for the next round is rarely a good move. If you are worried about not having a crew member of the right color, don't forget that an ensign's color can be changed with a medal.
Once you have passed, you take no more turns for the rest of the round. Once everyone has passed the round is over.
The Queue
During the round, figures will gradually move from the ready room to the end of the queue. There are sometimes ways to move someone from the queue to the ready room, but for the most part, the figures in your queue stay there until the end of the round.
At the end of the round, slide figures from the queue into the ready room until only the last three figures in the queue remain.
Starting the New Round
- New stuff! After round 1, each round begins with new stuff from HQ. Distribute the new round's figures or tokens evenly to all players. New cadets go directly to the ready room.
- Stations. For each station tile on the round-counting-track, either move it to its station if no player's ship is there or move it to the next round if its station is occupied.
- First player. Pass the starting player marker to the left. The new starting player can begin play with a ready room full of people who are once again lively, eager, and bright-eyed (if they've had a good breakfast).
End of the Game
Captain's Log: We've made some friends. We've learned to understand our enemies. Our decisions have changed the future. Oh, and there was even that one weird mission that changed the past. Now I look at myself in the mirror and ask, have we done well? Then I look at my crew and say, yes we have!
The game ends after four rounds. The Cooperative gives every captain a commendation and tells you all what a great job you've done. But among yourselves, you know that some captains have done a better job than others, and now it's time to calculate who is the best.
Scoring
At the end of the game, score points as shown on the score sheet:
- Points for missions.
- Points from the three faction tracks (don't forget the +5 for each loop).
- Points from any omega techs (and from your passenger in the solo game).
- 1 point for each commander, android, and pirate token on your ship.
- ½ point for each medal and artifact on your ship.
- -1 point for each damage on your ship.
The game comes with a pad of score sheets. If you use these all up, cool! You can download the PDF from czechgames.com and print off more.
Winning
The captain with the most points should tell the other, less-accomplished captains that they also performed very well under very tough conditions. Try not to sound condescending. It's hard – you have the best ship and the best crew, and that obviously means you are the best captain in the fleet.
Epilogue
Players can look up the hidden meanings of their scores in the list on the facing page. Feel free to debate who got the best epilogue.
A Game by Peter B. Hoffgaard
Development Team: Tomáš "Uhlík" Uhlíř, Michaela "Mín" Štachová, Vít Vodička, Adam Španěl
Art Direction: Jakub Politzer
Art: Jiří Mikovec, Jiří Kůs, František Sedláček, Mergen Erdenabayar, Alena Kubíková, Jan Vohlídal, David Izaj
3D Art: Radim "Finder" Pech, Roman Bednář
Graphic Design: Michaela Zaoralová
Production: Vít Vodička
Rulebook Writer: Jason Holt
Project Management: Jan Zvoníček
Project Supervision: Petr Murmak
A special thanks to: My wife Nina for her love and support and for having the patience to listen to me talk about the game for so long. My dachshund Spock for inspiring several cards and for making me go outside for a walk from time to time. My good friend and awesome designer Jonathan "Jonny Pac" Cantin for all his encouragement and for helping me with the early prototype. Jesper Jühne for always believing in the game and trying out so many different versions of it. Matthieu Verdier for coming up with the idea for the tech bonus icons. Tomáš "Uhlík" Uhlíř and all of the CGE team for their passion and hard work in making my dream game come to life.
… and also thanks to: Mads Fløe, Tine Kristensen, Daniel Tamborra, Christian Daugbjerg, Jacob Coon, Danni Loe, Gil Hova, Daniel Johansen, Nicki Thomas Hansen, Loke Daugbjerg Andersen, Chris Marling, Rolf Howalt Svendsen, Christian Melchior, Hanne Aya Skogberg, Kieren Otton, Jost L. Hansen, Jais Lytje.
© Czech Games Edition, October 2022, www.CzechGames.com
Epilogue
Captain's Log: I would like to close this log by saying— oh no, what's that?!
Look up your score in this list to discover your epilogue.
- 0–20: You dock at Home Station with a grinding noise that ruptures the airlock. Fortunately no one was waiting at the gate to greet you.
- 21: Your return to Home Station is little noted except by those who develop a mysterious rash three weeks later.
- 22: Fleet HQ tapes a Certificate of Participation to your ship.
- 23: You are tried in a court martial for dereliction of duty, insubordination, and injecting too much drama into morning roll call.
- 24: Back at Home Station everyone seems to know you. When they pass you in the hall, they wink knowingly. Eventually you learn that your tour of duty was part of a Fleet HQ reality show.
- 25: You return to Home Station pursued by an angry Ni'an fleet, which demands a 3-year supply of chocolate. Reasoning that you won't be much help, the station is forced to concede.
- 26: Your humanity is put on trial. Your defense attorney is a Muppet. Speak with standard word order he cannot.
- 27: Admiral Borscht has taken note of your unique skills and offers you a position of great prestige. You never dreamed you might someday become the admiral's personal food server.
- 28: As you begin your approach to Home Station, a future version of your ship decloaks and destroys your present-day vessel. Well, you're sure you had / will have a good reason.
- 29: You return to Home Station to find the station overrun by small furry ball-shaped creatures. Well, at least it wasn't your fault this time.
- 30: You return to Home Station to find that it is now ruled by apes. Well, that's weird.
- 31: Fleet HQ approves of your work. They let you take 10 days off before giving you your next assignment.
- 32: You are the first person ever to be awarded the Medal of Poking Your Nose Where It Doesn't Belong.
- 33: Fleet HQ is pleased with you and your ship, but all anyone wants to talk about are the rumors that, on your next tour, your chief of security will be replaced by an amorphous blob with a raygun. For comic relief.
- 34: As you return to Home Station you see your own ship leaving for its first mission. Looks like you forgot to resolve one of those time paradoxes.
- 35: Each of your commanders receives the Medal of Bravery in the Face of Extreme Weirdness.
- 36: Upon your return, you are invited to a press conference where reporters ask questions like, "How do you go to the bathroom in space?"
- Your ship is awarded the Medal for Being a Good Ship Even Though Ships Can't Wear Medals Because They Don't Have Uniforms.
Solo Rules
Captain's Log: Though I am always surrounded by my crew, I find there are times when a captain must stand alone.
In the solo game, you and Captain Shadow – a nonplayer ship figure – will go forth to defend, negotiate, and explore!
Setup
Solo-game cards have white backs.
Setup is mostly the same as in a 2-player game, with these exceptions:
- Use the solo-game side of the central tech board. It starts with 2 omega techs instead of the usual 3.
- Each faction has only one possible event card.
- You need to set up the solo-game action deck.
Captain Shadow does not need a ship board or a tech-slot board. Just place a second ship figure on Home Station.
Passengers
While you are preparing for departure, Fleet HQ informs you that you will be taking along a passenger. Choose 1 from the deck. For your first game, we recommend Teddy.
For later solo games, choose one of the other passengers at random. (Or not-at-all at random. It's really up to you.) The passenger has been assigned to your ship for the duration of the game.
The passenger specifies certain cards to remove from the tech deck and place on the Tincan event. Generally, there is a strong relationship between these techs, the passenger's effect, and the bonus or penalty the passenger will give your score at the end of the game.
Action Card Setup
There are 7 solo-action cards.
Take one action card of each type and shuffle them face down to make a four-card action deck. Place it in the designated slot on the tech board.
Shuffle the remaining 3 cards and deal them face down to rounds 2, 3, and 4 of the round-counting track.
Gameplay
You are always the starting player. You take turns with Captain Shadow, whose actions are specified by the action deck. After each of your turns, draw the top action card and place it above the central tech board. Cards go above the tech board spaces in order from left to right.
Take Tech: Captain Shadow jumps to your current location. ("I've got your back!") Captain Shadow takes a tech from the tech board. Discard the tech on the space below this action card. Replace it with a new one from the tech deck.
Complete Mission: Captain Shadow attempts to move to a mission 1 move away. If there are multiple such missions, Captain Shadow will move to the one you choose. ("I'm happy to cooperate with you. After all, this isn't a competition!")
However, Captain Shadow will never move to your planet – that mission is yours! If Captain Shadow has no mission to move to, this action does not have an effect (not even if there is a mission at Captain Shadow's current planet).
If Captain Shadow moves to a mission, remove it from the board. Deal a new mission, just as you would if you had completed the mission yourself.
Fight Pirate!: Captain Shadow removes a pirate ship from the board.
The ship must be on a route leading from Captain Shadow's current location. If there are no such pirates, nothing happens. If there are multiple possibilities, you choose. ("That one? But of course! Whatever is best for our fleet!")
Passenger Action: Your passenger takes an action. (And Captain Shadow takes a break.)
Each passenger, except for Teddy, has an action they take when this card is drawn from the action deck.
End of the Round
If you pass, Captain Shadow keeps playing until all the action cards have been drawn. And vice versa, if Captain Shadow's deck runs out of actions before you pass, you may finish the round by taking several turns in a row.
Once both you and Captain Shadow have passed, it is time for all the usual end-of-round things. And in addition, you add the new round's action card to the deck without looking at it. Round 2 will have five action cards, round 3 will have six, and round 4 will use them all. In each round, the action cards are dealt as shown above, starting with the leftmost space.
Scoring
Your passenger gives you an adjustment to your score at the end of the game. (Captain Shadow does not score. Captain Shadow just rides off into the sunset … or wherever.)
Add up your points and check the Epilogue list on page 19 to find out what your score really means.
Rules Summary
Setup
Set up as shown on pages 4 and 5.
- Use four-player side of main board for 4 players, other side for fewer. Two triangle tiles are marked as being only for a 4-player game.
- Triangle tiles generate random space station locations and random starting locations for random missions.
- A random pirate is placed on each marked route.
- Ni'an and Cooperative faction tracks use a random event card. Tincan track gets its event and an alpha tech.
- Deal 5 alpha techs.
- Deal 3 omega techs.
Set up player boards as shown on page 6.
- Order of crew in queue is printed on board.
- Everyone uses same side of tech-slot board.
- Don't forget your medal!
Round
Players take turns. Begin with starting player. Proceed clockwise.
On your turn, choose one:
- Activate a room:
- Move a matching figure from ready room to end of queue OR spend two artifacts that match room.
- Resolve room's effect.
- Complete a mission at your current location:
- Put mission card beside transporter.
- Place one figure from ready room at each line of mission.
- Resolve lines top to bottom: If the color matches, you may resolve all effects left to right.
- Once all lines are resolved, slide crew into queue, in order. Except for androids – they are discarded.
- Keep completed missions in a face-down pile near your board.
- Move highest-numbered face-up triangle tile to empty space. Turn it face down.
- Deal new mission to space where tile was.
- If all triangle tiles are face down:
- Draw pirates for planets with numbered tiles. If matching route has no pirate, add the pirate.
- Turn tiles face up.
- You cannot complete a mission reserved for someone else.
- Pass.
- Once you have passed, you take no more turns for the round.
- If you cannot activate a room or complete a mission, you must pass.
When everyone has passed, the round ends.
- Slide figures from queue into ready room, leaving only last 3 figures in queue.
- Distribute figures or tokens at the top of the main board.
- Return each station tile to its station, or slide it to next round if a player is at its station.
- Pass starting player marker to the left.
Crew
Cadets are gray figures.
- Cannot activate rooms except the gray repair room.
- Can go on any mission, but does not match any color.
- Can be trained as an ensign of any color by paying 1 medal.
Ensigns are red, yellow, or blue figures (with no promotion ring).
- Can activate matching room or the gray repair room.
- Can go on any mission. Matches one particular color.
- Can be retrained as an ensign of any color by paying 1 medal.
- Can be promoted to a commander of the same color by paying 3 medals.
Androids are gold figures.
- Cannot activate rooms.
- Can go on any mission. Matches any color.
- Only androids can match the gold color.
- Cannot be retrained or promoted.
- Instead of moving to queue, the android leaves.
Commanders are red, yellow, or blue figures with a promotion ring. Limit 5.
- Can activate matching room or the gray repair room.
- Can go on any mission. Matches one particular color.
- Cannot be retrained or promoted.
- A commander given an assignment first performs the assignment as an ensign of that color. Then you must choose one:
- Extra work:
- If the commander activated a room, it can activate a room again, same or different, according to rules for an ensign of that color.
- If sent on a mission, and if matches color, you may resolve the line twice. Can make same choices or different.
- Command a subordinate:
- Move a cadet or a matching ensign from anywhere in queue to ready room.
- Subordinate must be in queue, not on mission with commander.
- Extra work:
Pirates
Pirate tokens are drawn randomly.
5 or 6 are placed at the start of the game.
New pirates may be placed at current location by ambushes or at numbered tiles when they are refreshed.
- Draw for relevant location. If matching route has no pirate, put the token there. Otherwise discard it.
Whenever you fly a route with a pirate, take 1 damage.
Pirates can be defeated by fighting them.
- Whenever you fight a pirate, take 1 damage.
- Take the token and its depicted rewards.
Damage and Cargo
You start with damage in 7 marked slots – 4 tech slots, 3 cargo slots.
When you take damage, it goes in a cargo slot:
- If all slots are full, discard an artifact or pirate token to make room for damage.
- If all slots are full of damage, just keep extra tokens on top of full slots.
- Damage during play never goes in tech slots.
A repair effect can remove 1 damage from your ship – you choose cargo slot or tech slot.
- If all cargo slots are damaged, repairing a cargo slot removes an excess damage token, until you have no excess damage.
A damaged tech slot must be repaired before you can put a tech there.
- However, if it has bonus icons, these can still create bonuses with neighboring cards.
When you gain an artifact or pirate token:
- Put the token in an empty cargo slot.
- If none are empty, you may discard an artifact or pirate token (with no effect) to make room.
- If all are full of damage, you must discard the token.
Faction Tracks
When you advance onto or through a space with a bonus, resolve it.
If you resolve an event remove the card.
- If two events are resolved, remove the third event card (with no effect).
There is no maximum point value.
Notes on Certain Cards
Gateway to the Stars. You are not allowed to change the order of the missions.
Restore the Hive Mind. Androids on the mission are still part of your crew until the mission is completed.
Tincan Library. Draw 3 cards from the tech deck. You may choose 1. Cards you don't choose go to the discard pile.
Steal Secret Plans / Omega Megacomputer. These are the only cards that use the omega deck. Draw 3 cards from the omega deck and choose 1 – you may put it in an empty tech slot or replace an existing tech with it. Keep the other 2 cards in a discard pile. It is very unlikely that the deck will run out of cards, but if it does, shuffle the discard pile to make a new omega deck.
Holodeck. Treat this card as though the copied effect were printed on it. In particular, an effect that says, "Discard this to:" will cause you to discard the Holodeck.
Quantum Torpedoes. The fight-pirate effect is always optional, so you can choose to fight only one pirate.
Artifact Display / Trophy Display. These techs allow you to spend a cargo token at a time when you would normally spend a medal. You can't just discard the token and take a medal.
Dimensional Lockers. These are cargo slots that can't be damaged. You can move cargo tokens between this card and your cargo slots at any time. Even if you have excess damage, you can still store cargo here.
Hull Plating. The pirate token you discard must be in one of your cargo slots. You can't discard a pirate you are fighting to prevent its damage.
Hyper-Charger. If you get a move or jump effect, you can pretend it's a repair effect instead.
Ni'an Comms. If the mission has at least one damage, move, or jump icon printed on one of its lines, you gain the benefit of Ni'an Comms. It doesn't matter whether you used that line of the mission.
Observers (Fleet Observer, Ni'an Observer, Tincan Observer). These cards care only about whether the completed mission has at least 1 line of the depicted color. They don't care if you used that line or not, and a mission with 2 red lines is the same as a mission with 1.
Repair Bots. When you get a repair as a tech bonus, you can do up to 2 repairs instead.
Stealth Paint. On a mission, "your first damage" could be damage printed on the mission card or it could be damage you get as a consequence of a fight-pirate effect.
Universal Translator. For example, if you get "advance 2 spaces on a track of your choice," you can turn that into "advance 2 spaces" on a different single track – but not "advance 1 space, then advance 1 space again."
Wormhole Generator. When you get a move as a tech bonus, it's not actually a move – it's a jump.
Artifact Blueprints. There are only 3 distinct types of artifacts, so the maximum value of this card is 6 points.
Crowdsourcing. Artifacts face down on a room do not count in final scoring. They are discarded if the room is discarded or replaced.
Diplomatic Order #12 / Explosive Crisis. When you end your turn at a space station, resolve any event card effects before resolving the station's tile.
Honesty Summit. When markers move back, they do not trigger bonuses.
Effects
Effects are always evaluated in order, from left to right.
- Move: You may do 1 move with your ship.
- Two moves: You may do up to 2 moves.
- Fight pirates: You may fight and defeat a pirate on a route leading from your current location. If you do, don't forget to take damage.
- Research: You may take 1 tech from the tech board and put it in one of your empty tech slots (no card, no damage). At the end of your turn, replenish the tech board with the card on top of the tech deck.
- Recycle a tech slot: Same as the research effect, however, you also have the option to discard one of your current techs and put the new tech in that slot. Tech bonuses apply as usual.
- Repair: You may repair 1 damage.
- Damage: Take 1 damage. This effect is not optional. Damage always goes to cargo slots, not tech slots.
- Gain android: Take an android figure from the general supply and put it in your ready room.
- Gain tokens: Gain the depicted tokens.
- Gain a pirate token: When you gain a pirate token, just take it from the general supply, as you do with any other token.
- Gain multiple artifacts: When you gain multiple artifacts in a row, you draw them all before deciding which ones to keep.
- Discard token for benefit: You may discard the depicted token to gain the depicted benefits. (If you don't pay, you don't get the benefits.)
- Discard tech for benefit: You may discard a tech from one of your tech slots to gain the depicted benefit. (If you don't discard, you don't get the benefit.)
- Slash (choice): The slash indicates you choose one of the two depicted options.
- Pirate ambush: Draw a pirate and place it on the matching route at your current location. If that route already has a pirate, discard the one you just drew. This effect is not optional.
- Jump: You may jump to any location – pick up your ship figure and set it down at another location, ignoring pirates on routes.
- Jump + ambush: Effects are always evaluated from left to right. This means you choose where to jump first, then a pirate appears on a route leading from your new location.
- Advance from queue: Move the first figure in your queue into your ready room.
- Advance 3: You may advance up to 3 spaces on the corresponding faction track.
- Advance 2, choice of track: You may choose a faction track and advance 2 spaces on it.
Discard this to: Certain tech cards are single-use. When you use the card, put it in the discard pile. Even a commander is unable to use the card twice.
This can replace an existing tech: When you take this tech, you can discard a tech from one of your tech slots and put this tech there.
Rules Reminders
Player setup: Don't forget to take 1 medal.
Whenever you fight a pirate, you take 1 damage.
No path ever has more than one pirate token.
Tech bonuses are based on matching adjacent icons; you ignore any icons the tech card covers up.
A tech bonus is only one effect, not two (even though you can see the icon twice).
When you take a tech, it is replaced by one from the alpha-beta tech deck, even if you took an omega tech.
You can train and promote only crew in your ready room, and only at the beginning of your turn.
Resolve mission effects line-by-line, top to bottom. In each line, resolve effects left to right. If an effect allows you to advance on a faction track, resolve the advancement immediately (including all effects, in order) then continue resolving the line.
Once two faction events have been triggered, discard the third with no effect.
Shortage: If you run out of medals, damage tokens, or crew figures, use some suitable substitute. These components are not intended to be limited.