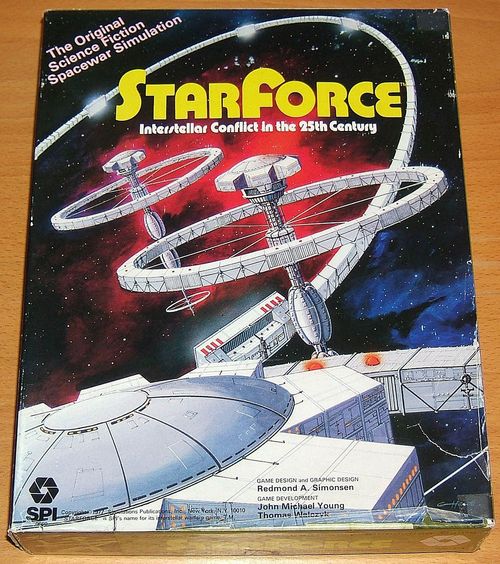
StarForce 'Alpha Centauri': Interstellar Conflict in the 25th Century
StarForce 'Alpha Centauri': Interstellar Conflict in the 25th Century Rulebook
Table of Contents
Table of Contents
- [1.0] INTRODUCTION
- [2.0] GENERAL COURSE OF PLAY [BASIC GAME]
- [3.0] GLOSSARY OF TERMS FOR THE BASIC GAME
- [4.0] GAME EQUIPMENT
- [5.0] SEQUENCE OF PLAY [BASIC]
- [6.0] HOW TO PLOT SHIFTING
- [7.0] STELLAR SHIFTING [MOVEMENT]
- [8.0] BASIC GAME COMBAT
- [9.0] STRATEGIC COMBAT RESULTS
- [10.0] ADVANCED GAME DESCRIPTION
- [11.0] ADVANCED GAME SEQUENCE OF PLAY
- [12.0] ADVANCED GAME TACTICAL PLOTTING
- [13.0] TAC-SHIFTING, MODE CHANGING, AND BREAK-OFFS
- [14.0] ADVANCED GAME COMBAT
- [14.1] WHEN CASTS MAY BE MADE AND WHAT UNITS MAKE THEM
- [14.2] THE STRENGTH AND RANGE OF CASTS
- [14.3] THE NUMBER OF CASTS A UNIT MAY MAKE THE TARGETS AFFECTED AND THE EFFECTS OF MULTIPLE CASTS
- [14.4] DETERMINING IF AN ENEMY UNIT IS IN THE VOLUME OF THE CAST
- [14.5] THE ANTI-CAST
- [14.6] CAST RESOLUTION
- [14.7] NEUTRALIZATION
- [15.0] RANDOMIZATION AND THE STELLAR RANDOMIZER
- [16.0] INTRODUCTION TO THE SCENARIOS
- [17.0] SCENARIO 1: THE ALPHA CENTAURI CAMPAIGN
- [18.0] SCENARIO 2: THE EPSILON ERIDANI CAMPAIGN, 2405 A.D.
- [19.0] SCENARIO 3: THE RISE OF THE HUMAN LEAGUE, 2415 A.D.
- [20.0] SCENARIO 4: 2430 A.D. PHH - HL SHOWDOWN
- [21.0] SCENARIO 5: 2451 A.D. L'CHAL-DAH CONTACT
- [22.0] SCENARIO 6: 2462 A.D. SECOND PHH - HL WAR
- [23.0] SCENARIO 7: 2465 A.D. REVOLT OF EPSILON INDI
- [24.0] SCENARIO 8: 2476 A.D. THE WAR WITH THE RAME
- [25.0] SCENARIO 9: 2480 A.D. L'CHAL-DAH EXPANSION
- [26.0] SCENARIO 10: 2482 A.D. WAR OF THE DEFENSE LEAGUE
- [27.0] SCENARIO 11: 2487 A.D. THE WAR FOR IDENTITY
- [28.0] SCENARIO 12: 2505 A.D. THE WAR FOR THE LEAGUE
- [29.0] SCENARIO 13: 2775 A.D. THE FIRST XENOPHOBE INCURSION
- [30.0] SCENARIO 14: 2785 A.D. THE SECOND XENOPHOBE INCURSION
- [31.0] SPECIAL RULES
- [31.1] DEPLOYMENT OF XENOPHOBE STARGATES
- [31.2] UNKNOWN SPACE AND ITS EFFECTS UPON SHIFTING
- [31.3] MODIFIED SEQUENCE OF PLAY AND HIDDEN MOVEMENT
- [31.4] FIRST GAME TURN RULES [FIRST INCURSION ONLY]
- [31.5] NOVA INDUCEMENT AND COMBAT RESOLUTION
- [31.6] FIRST GAME-TURN RULES AND STANDARD RESULTS OF FIRST INCURSION [SECOND INCURSION ONLY]
- [31.7] XENOLINK
- [32.0] RESERVE STARFORCES
- [33.0] FAKERFORCES
- [34.0] GATELINK
- [35.0] SITUATIONAL CONTINUITY
- [35.1] DURATION OF COMBAT SITUATIONS PER GAME-TURN
- [35.2] FORCES INVOLVED IN THE FIRST AND SECOND CYCLES OF PROLONGED COMBAT SITUATIONS
- [35.3] WHEN AND HOW NEW FORCES ARRIVE IN A PROLONGED SITUATION
- [35.4] HOW UNITS MAY LEAVE A PROLONGED SITUATION
- [35.5] CONDITIONS FOR PERMANENT
- [35.6] STELLAR SHIFTING AND STARGATES IN PROLONGED SITUATIONS
- [36.0] BATTLE MODE CREW FATIGUE
- [37.0] SEQUENTIAL PLAY
- [38.0] THE RESCUE MISSION
- [39.0] VERBAL PLOTTING
- [40.0] GAME NOTES
[1.0] INTRODUCTION
StarForce is a simulation of interstellar warfare as it might be fought in the 25th through 27th centuries. The game is not meant to be predictive, i.e., its designer does not purport that the "future" shown in its scenarios and rules will be the actual future. The game should not be viewed as an extrapolation of present day trends into the far future. Rather, the game is a set of imaginary conditions and technology which make possible far-flung interstellar societies (and conflict in those societies).
The main technological advance which makes the whole game "future" possible is a means of "shifting". Shifting relies upon a combination of human telesthetic and telekinetic abilities with sophisticated, intelligent machines, to temporarily join two widely separated points in space in order that a ship may shift instantly from one point to the other. In this manner, all relativistic time-space problems are neatly sidestepped and communications between star systems light years apart are made feasible.
There are two versions of the game, both of which may be modified (and made more complicated) by the use of optional rules. The basic version of the game is known as the Basic Strategic Game and it uses rules sections 1.0 to 9.0. In this version all play takes place on the large star map known as the Stellar Display. The Advanced Game uses most of the same rules sections (omitting 8.0 and 9.0) plus sections 10.0 through 15.0. The Advanced Game uses both the Stellar Display and the smaller Tactical Display. Both games use a common set of counters and markers.
Both games also share the set of game situations (scenarios) given in sections 16.0 through 31.0. It is strongly recommended that Players acclimate themselves to the strange terminology and unusual game system by playing a few "learning" games using the basic rules. The one feature that experienced gamers will have the most difficulty getting used to is the three-dimensional quality of the game and the demands that such an environment makes upon the Players.
[2.0] GENERAL COURSE OF PLAY [BASIC GAME]
Each Player assumes the role of the overall operational commander of the SpaceForces of a race or political subdivision of that race. At the beginning of each Game-Turn he writes the movement orders that his StarForce units will execute, shifting them across the light-years to gain control of star systems and to defeat Enemy StarForces. Combat situations occur when opposing forces occupy the same position in the same Game-Turn. Control of these positions is determined by the use of a probability table that yields an outcome when forces of given strengths engage each other in combat. In these combat situations, the Players will also write orders for their StarForce units, allocating varying amounts of their total strength to defensive and offensive roles. Each specific game (scenario) has a set of objectives (victory conditions) which the Players must attempt to achieve. Usually these victory conditions require the control of specific star systems.
[3.0] GLOSSARY OF TERMS FOR THE BASIC GAME
Lite - an abbreviated form of the phrase, “Light Year" (the distance light travels in a year - 9.458 trillion kilometers). Each hexagon on the Stellar Display measures one Lite across.
LiteZulu - an exact three dimensional position on the Stellar Display. All positions on the Stellar Display are rendered in terms of their four-digit hex number and their Zulu coordinate (i.e., how many Lites above or below the two dimensional plane that location is). There are 37,639 LiteZulus on the Stellar Display. For example, Sol is located in LiteZulu 2020/0; Alpha Centauri is in LiteZulu 1821/-4. '
Randomizer, Decimal - four sets of 0 to 9 chits which are used to produce random numbers for the various tables in the game. Place these chits in a widemouthed opaque container (e.g., a coffee mug) from which they can be easily drawn.
Star System - any one of the variously colored discs on the Stellar Display. Each star system consists of a star and its associated planets (the planets are not represented due to the large scale). Star systems are grouped into three classes as distinguished by the size of their symbol: 1) the three "home" systems of the three races (e.g., Sol is the home system of the Human Race); 2) the secondary systems (those having colonizable planets, but no native, sentient life forms); 3) the tertiary systems (those stars which have planets that require "terraforming" before colonization). Players should note that the stars are named according to various human, present-day astronomical cataloging systems. In some cases the full catalog name has been shortened to the "declination" of the star. Even though the game takes place 500 years in the future, the relative position of the stars on the Display would not have changed within the scale of the game, so that the map is fairly accurate representation of the presentday stellar neighborhood with minor distortions due to rounding off and the hexagonal grid. Players interested in astronomy should also note that although some of the star systems on the map are actually binaries or trinaries, they have not been symbolized as such.
StarForce - a fleet of four interstellar spaceships represented by a single counter; the operational, mobile unit in the game. StarForces shift about on the Stellar Display and engage each other in combat.
Shift - (he instantaneous movement of StarForce units from point to point in space. All movement in the game is in terms of shifting. StarForces have a basic Shift Range of five Lites (which may be extended with the aid of other StarForces, StarGates, or by a risky procedure known as Overshifting). Note that, unlike almost all games, movement in StarForce is not traced step-by-step through the intervening space between point of origin and destination; rather it is a transfer from point of origin to destination without ever having traveled through the space between.
StarGate - a space station in orbit around a star, which is not itself capable of shifting but which is capable of augmenting the shift abilities of Friendly StarForces. It may also participate in combat somewhat in the manner of a fortress or strongpoint.
Stellar Display - the large, strategic map of all the star systems within twenty Lites of Sol (approximately). This local neighborhood of stars is fixed upon a plane extended out from the equator of the planet Earth. Star systems are located "horizontally" on this plane by being placed in the appropriate numbered hex. Their "vertical" distance from it is given in terms of their Zulu coordinate, i.e., how many Lites above or below the plane their position lies. If the map were provided in actual threedimensional substance, it would appear as a "sphere" composed of 37,639 hexagonal solids. Since such a map is impractical, the system of plus and minus numbers combined with position numbers on the hexagonal grid are used to produce this threedimensionality on a two-dimensional map surface. Players will note that stars are grouped by color coding to indicate whether they are below, in, or above the equatorial plane of the map. (see Zulu Limit).
True [Lite] Distance - this is the true three-dimensional, straight-line distance between any two points on the Display. Players should always bear uppermost in their minds the three-dimensionality of the game; points that may seem close together on the map twodimensionally may in actual three-dimensional terms be very far apart. See 7.6 for further explanation.
Zulu Coordinate (or number) - a number that expresses the "vertical" distance (in Lites) a given point is from the two dimensional plane of the map. Zulu numbers are always expressed as a positive (+) or negative (-) number, indicating whether the point is above or below the plane. For example, Sol is at Zero Zulu, i.e., right in the plane of the map. LiteZulu 2020/+21 is 21 Lites away from Sol, even though it appears in the same two-dimensional hex. Examine the map. Find hex 2039 (right under the name of the game). LiteZulu 2039/0 is closer to Sol than LiteZulu 2020/+21, even though 2020/+21 is in the same numbered hex as Sol.
Zulu Limit - the highest plus or minus number allowable within that area of the map. Note that the map is divided into concentric rings centered around Sol. Each of these rings has a Zulu Limit number printed in it.
A Special Note to Experienced Gamers: It's probable you'll find StarForce to be quite unlike any game you've ever played. It combines some of the aspects of a naval game with those of an air game. Nevertheless, it involves control of "territory" as in a land game. Since we are all creatures of habit, it might be difficult at first to discard the game playing preconceptions developed over years of experience. The best way to approach the game is with an open mind, free of assumptions about what can and can't be done. Becoming comfortable with the three dimensionality of the environment is critical to the mastery of the system. At least as much as other games, StarForce is a matter of being in the right place at the right time with the right amount of force. There are no "front lines" in StarForce, no easily discernible pattern of advance and retreat -winning strategies are based upon proper deployment and outguessing the opponent as much as possible.
Pre-publication playtesting of the game indicated that a lack of gaming experience was actually an asset, since the novice has less to "unlearn" and could more easily adapt to the mechanics of the system. A useful exercise to help you out of the flat-environment thinking most games encourage, is to take two distant stars and plot the most economical course between them, then add a third star to the group and try to plot the optimum point in space from which all three might be most easily reached. It's not as easy as it sounds.
NOTE TO ALL PLAYERS: A thorough reading of the glossary and a careful examination of the charts and tables associated with the game will greatly facilitate your understanding of the rules.
[4.0] GAME EQUIPMENT
[4.1] THE GAME MAP
The Stellar Display and the Tactical Display The 22" x 34" mapsheet has two playing fields printed on it. The larger one is the Stellar Display, showing 74 star systems in a three-dimensional "sphere" of space measuring roughly 40 light-years in diameter. The Stellar Display is used in both the Basic and Advanced games. The Tactical Display is used only in the Advanced Game. It is a representation of a small segment of any given position on the Stellar Display. The Tactical display is .01 light-years in diameter. See the Basic and Advanced Glossaries for a fuller description of both Displays.
[4.2] THE PLAYING PIECES
On the die-cut counter sheet there are five differently colored sets of combat unit counters plus a number of markers and chits. Players should punch these pieces out of the sheet (pressing on the faces of the counters) and sort them by color and type into the compartmented plastic tray.
[4.21] SUMMARY OF UNITS AND MARKERS USED IN THE BASIC GAME AND THE ADVANCED GAME
- StarForce unit (counter bears a code letter).
- StarGate unit (counter bears a code number). Note that the code letters and numbers on StarForce and StarGate counters are for identification purposes only.
- Decimal Randomizer Chit (a chit numbered 0 to 9).
[4.22] Summary of additional markers used in the Advanced Game only
- Stellar Randomizer Chits: each shows a number at the top (first or second half of hex coordinate) and a plus or minus number at the bottom (Zulu coordinate).
- Neutralization Markers ("N").
- Tactical Situation Markers ("TAC SIT").
- Star Marker.
[4.3] GAME CHARTS AND TABLES AND THE RULES FOLDER
Almost all the charts and tables used in both game versions will be found, in duplicate, on the game map. These charts and tables will be fully explained in the appropriate rules sections. Players will note that the rules are organized in their order of use in the Game-Turn. Players are advised to peruse the outline at the beginning of the rules if they have not already done so. Players should familiarize themselves with all the components of the game before reading any further. Do not expect to understand the various tables at first glance.
[4.4] THE SIMULTANEOUS MOVEMENT PLOTTING PAD
StarForce is played in simultaneous Game-Turns. Players write out in advance the actions their units will perform in the coming Game-Turn. The SiMove Plotting Charts are merely a handy format for organizing this order writing. When the pad is used up, Players can use ordinary lined paper or order new pads from SPI.
[4.5] GAME EQUIPMENT INVENTORY
Each complete game of StarForce should contain the following items: One game map (22" x 34") One set die-cut counters (200 pieces) One rules folder One Simultaneous Movement Plotting Pad One box/lid/cover sheet assembly (Note that unlike almost all other SPI games there is no die in StarForce. The various tables are based on the decimal system and use chits to generate random numbers, thus obviating the need for a die.)
If any of the inventoried items are missing or damaged beyond utility, Players should contact SPI within fifteen days of their purchase. Write: StarForce, Customer Service, Simulations Publications, Inc., 44 East 23rd Street, New York, N.Y. 10010
[4.6] GAME SCALE
Each LiteZulu on the Stellar Display is one Lite across by one Lite deep. The Stellar Display is 39 Lites across by 43 Lites "deep". The Stellar Game Turn represents twelve hours of real time. The MiniLiteZulus on the Tactical Display are each one MiniLite across by one MiniLite deep (one MiniLite=one-third of a light-day). The Tactical Display is one hundredth of a Lite across by one hundredth of a Lite deep. Each Toe-Turn represents thirty minutes of real time.
[5.0] SEQUENCE OF PLAY [BASIC]
[5.1] THE GAME TURN
StarForce: Alpha Centaur! is played in Game-Turns. During each Game-Turn each Player plots his movement secretly and then simultaneously executes it. After Movement Execution the Players may or may not go into combat depending on whether they simultaneously occupy one or more LiteZulus. There is not necessarily a limit to the number of Game-Turns in each scenario (a scenario being one particular situation set of initial forces, and set of Victory Conditions). The game usually will continue until one Player wins a victory. All action must take place in the sequence as outlined below or it is a violation of the rules and not permitted.
[5.2] GAME-TURN OUTLINE
A. Stellar Shift Plot Phase; Each Player writes secretly the new LiteZulu position that each of his StarForces will shift to in the Shift Execution Phase, (see 6.0 for How to Plot Shifting).
B. Shift Execution Phase 1. Safe-Shift Execution Segment: Move all StarForces that are making shifts within their safe maximum (see 7.2)
-
Overshift Execution Segment: For StarForces which are conducting shifts greater than their safe maximum, consult the Overshift range section on the Maximum Shift Table (7.5) and draw a chit once for each StarForce that is Over-shifting, taking the action indicated by the Table.
-
Zulu Coordinate Readout Segment: For each numbered hex in which two or more Players have units (StarForces or StarGates) they inform one another of their respective Zulu number of these forces, thus determining whether or not they occupy the same LiteZulu. Players also reveal the Zulu number of any StarForce which is in a LiteZulu adjacent to an Enemy StarGate. Note that there are twenty LiteZulus adjacent to each StarGate, that is, the one in the LiteZulu directly "above", the one in the LiteZulu directly "below" and the three (plus one, zero and minus one) Zulu levels respective to the StarGate Zulu Coordinate in the six adjacent hexes (see also 7.41). At this point, If opposing Players do not have opposing units in the same LiteZulu, Players proceed to the following Game-Turn. If, however, they do have units in the same LiteZulu opposing one another, the they proceed to the Combat Execution Phase.
C. Combat Execution Phase: If opposing forces are in the same LiteZulu, a Strategic Combat Sequence is initiated, i.e., a series of Strategic Combat Segments are played until the situation is resolved, namely, until only one Player's forces remain in the given LiteZulu. Note that more than one Combat situation may arise in a given Game-Turn. Players pick the largest combat situation to be resolved. They then continue until it is resolved and precede to the next largest combat situation. Optionally, Players may decide to resolve one Segment at a time for each situation until all are resolved (this is a slightly more complicated technique, but is more realistic).
-
Initial Combat Segment: Each Player totals up the Strength Points of his forces in that LiteZulu. Note that entering StarForces and certain "defending" StarForces may have different Strength Point values (see 8.2). The first Combat Segment is then executed by comparing the attacking and defending Strength Points allocated by each Player, taking the difference and referring to the Strategic Combat Results Table, picking a chit from the Decimal Randomizer and receiving a result which is immediately applied (see 8.0). If there are still opposing forces in the same LiteZulu, proceed to the second Combat Segment.
-
Second [and Subsequent] Combat Segment: Each Player recomputes his Strength Points based on the number of StarForces remaining and the change in Strength for the second Combat Segment (see 8.2) plus any StarGates. Play continues through a series of Combat Segments until one Player or another has been removed from the contested LiteZulu.
D. Stellar Neutralization Recovery Phase (This Phase is only applicable to the Advanced Game and a Modified Basic Game). All units, which were neutralized in the previous Game-Turn are, returned to normal use and strength (remove Neutralization Marker).
[6.0] HOW TO PLOT SHIFTING
GENERAL RULE: During the Shift Plot Phase of each Game-Turn, the shifting of the various StarForces is secretly written out in advance. Players, when plotting, should take two columns of the Simultaneous Movement Pad in order to Plot a single Game-Turn. The first column should be used to plot the activity the StarForce is engaged in that Game-Turn, and the second column should be used to plot the planned destination LiteZulu of the StarForce. Individual StarForces are identified by letters which correspond to lines on the SiMove pad.
[6.1] SHIFT PLOT CODE
S - Normal shift by StarForce without assistance or enhancement.
ES - Enhanced shift; this represents a StarForce moving to a LiteZulu which has been "enhanced" by another Friendly StarForce or StarGate.
GS - Gate Shift; extended shift made by using an assisting Friendly StarGate; this represents a shift which is assisted by a Friendly StarGate which is in the beginning LiteZulu.
EGS - Enhanced Gate Shift; extended shift by StarGate to a LiteZulu enhanced by a Friendly StarForce; this represents a StarGate assisting the StarForce in moving and another Friendly StarForce enhancing the destination LiteZulu. Note that this is a one-way process, you may not shift from an enhanced LiteZulu to an assisting StarGate in the same manner.
GGS - Gate-to-Gate Shift; extended shift from assisting StarGate to another assisting StarGate.
E - Enhancing; this represents that a StarForce is engaged in nothing other than enhancing the destination of another Friendly StarForce. Note that an enhancing StarForce may only be used by one given StarForce once per Shift Plot Phase.
[6.2] DESTINATIONS
In the second box for every shifting StarForce is written the LiteZulu which is planned to be the ending LiteZulu for that shifting StarForce. If a given StarForce is engaged in enhancing for another StarForce then write an "E" in the second box. A planned-ending-LiteZulu should be written in pencil if an Overshift is involved. If, due to the Overshift Results Table, a given StarForce does not complete its intended shift the actual ending position (LiteZulu) should be written in that box.
[6.3] OVERSHIFT RANGE CODING
Whenever an Overshift is plotted for a StarForce, write the key letter of the appropriate Overshift range column in a circle after the basic shift code. For example, if a StarForce were making a normal shift to a destination six Lites distant, the letter "A" would be written in a circle after the normal "S" code.
[6.4] SHIFT PLOT EXAMPLE
| Unit | Starting LiteZulu | Movement (plot code) | Plot (destination) |
|---|---|---|---|
| A | 2020/0 | S | 2422/-3 |
| B | 2020/0 | S | 2422/-3 |
| C | 2036/+1 | GGS | 2020/0 |
| D | 2036/+1 | GGS | 2020/0 |
| E | 2422/-9 | E | 2422/-9 |
| F | 1821/-4 | ES | 2422/-9 |
(Table transcribed from the illustration of a completed Simultaneous Movement Plotting Pad.)
[7.0] STELLAR SHIFTING [MOVEMENT]
GENERAL RULE: Movement is not movement through space, as is normally thought of, but rather movement from one point in space directly to another point in space without having traversed the intervening distance. This movement, or transfer, is referred to as a "shift" when performed on the Stellar Display. Players must always keep in mind that they are shifting in a threedimensional environment, although the Stellar Display is a two-dimensional surface depicting a plane coinciding with the equator of the planet Earth. In conjunction with the Zulu coordinate system, it represents a three-dimensional space extending above and below that plane.
In Stellar shifting, there is no "Movement Allowance" such as in many other SPI games. Rather, StarForces have Shift Ranges which cannot be exceeded except in certain circumstances. The basic Shift Range of a StarForce is five Lites. This may be increased through the assistance of a Friendly StarGate or the "enhancing" of a given shift by other Friendly StarForces.
SHIFT PROCEDURE: A Simultaneous Movement Pad is included with each copy of StarForce. Each line across represents the activity of a single StarForce. During each Stellar Shift Plotting Phase, Players, using one line across for each StarForce, write the Plot Code (i.e., the type shifting to be engaged in) and the expected destination LiteZulu in the second box.
During the Stellar Plot Execution Phase, Players place their StarForces in their newly plotted positions (if they successfully shift). In certain cases, Players may attempt to shift a distance greater than allowed. This is called Overshift and entails some risk-taking by the shifting StarForces.
[7.1] HOW TO SHIFT STARFORCES
[7.11] During the Shift Plot Phase all StarForces may be plotted to shift (with the exception of StarForces which are being used to enhance a given LiteZulu).
[7.12] The distance of a shift is calculated in terms of Lites. In order to calculate the actual number of Lites shifted, the Players should refer to the True (Lite) Distance Table (see 7.6).
[7.13] Any number of Enemy or Friendly StarForces and other units may exist in the same LiteZulu without interfering with one another for movement purposes. StarForces which begin the Shift Plot Phase in the same LiteZulu may shift out to different LiteZulus or to the same LiteZulu without any interference. StarForces which do not begin in the same LiteZulu may shift into the same LiteZulu, again without interference.
[7.14] A combat situation is never begun until both types of shifts, that is safe shifts and Overshifts, are completed. Only then does a combat situation begin to be executed.
[7.2] SHIFT RANGES
[7.21] Normal, unassisted safe shift range for a given StarForce is five Lites. This number is constant for all StarForces and is, therefore, not printed on the playing pieces.
[7.22] Enhanced safe Shift Range for a StarForce is ten Lites. An enhanced shift is defined as a shift to a Friendly StarGate, or to a non-shifting, Friendly StarForce which has been assigned the task of enhancing its LiteZulu.
[7.23] A StarForce used to enhance its current LiteZulu may not itself shift and may only enhance that LiteZulu for a single Friendly StarForce.
[7.24] A StarGate has a basic capacity of assisting two StarForces in their shifting. This capacity may be increased to four StarForces if all the involved StarForces are performing exactly the same shift, i.e., all the StarForces are shifting from the same point of origin to the same destination. StarForces shifting from an assisting StarGate to an ordinary, unenhanced LiteZulu have a Shift Range of ten Lites. StarForces shifting from an assisting StarGate to a LiteZulu enhanced by a Friendly StarForce have a Shift Range of fifteen Lites (note that in this case there must still be one enhancing Friendly StarForce in the destination LiteZulu for each shifting StarForce). StarForces shifting from one StarGate to another have a Shift Range of twenty Lites.
[7.25] When using only its basic capacity of assisting two StarForces, a StarGate may perform any combination of tasks, e.g., it may enhance its location for one in-shifting StarForce and assist the shifting of one out-shifting StarForce or it could assist the outshifting of two StarForces to two different destinations. It may not perform such mixed missions when exceeding its basic capacity.
[7.3] RANGE EFFECTS WHEN SHIFTING INTO LITEZULUS DEFENDED BY ENEMY STARGATES
[7.31] Whenever a StarForce attempts to shift into a LiteZulu containing an active Enemy StarGate, it must add four Lites to the calculated distance of the shift. For example, if a StarForce in 2022/0 attempts to shift into 2020/0 (Sol) which contains an Enemy StarGate, the distance of the shift would be treated as six Lites (rather than two) which would force the StarForce to risk an Overshift on the "A" Range column.
If a StarForce were being assisted by a Friendly StarGate, it could be up to six Lites away from an Enemy StarGate and still shift to it without risking Overshift.
[7.32] A StarForce which begins the Game-Turn adjacent to an Enemy StarGate (i.e., in any one of the twenty LiteZulus within one Lite of the StarGate's position) may always shift into that StarGate's LiteZulu without risk of Overshifting. Note that this is true even in the Xenophobe Scenarios which reduce the normal Shift Range of Xenophobe StarForces to one Lite when operating in PSL space and PSL StarForces to one Lite when operating in Xenophobe space (see scenarios 13 and 14 and their special rules).
[7.4] SEMI-HIDDEN UNIT DISPLAY
[7.41] The positions of StarForces are revealed to the opposing Player only to a limited extent. Upon the completion of all shifts, the owning Player places one StarForce counter in every numbered hex that contains at least one Friendly StarForce. The exact Zulu Coordinates of the individual StarForces in that numbered hex are revealed in only two cases: One, in the case of Friendly StarForces in one of the twenty LiteZulus adjacent to an opposing StarGate or, two, when opposing StarForces are in the same numbered hex. In the first case, the quantity and Zulu Coordinate(s) of only those StarForces actually adjacent to the opposing StarGate are revealed. In the second case, each Player must reveal to the opposition the Zulu Coordinates only of all Friendly StarForces in the hex, not the number of StarForces.
[7.42] The actual number of StarForces is only revealed when opposing units are actually in the same, identical LiteZulu (or when StarForces are adjacent to an Enemy StarGate).
[7.43] The LiteZulu of a StarGate is always known by all Players (exception, see Xenophobe scenarios). StarGates are always assigned to a given Star system and only one StarGate per system is allowed.
[7.5] MAXIMUM SHIFT TABLE
(see the map)
[7.51] The Maximum Shift Table details the Shift Ranges of StarForces when performing one of the five basic types of shifting described in 7.2. For each type of shift there is a Safe Maximum (within which the StarForce is guaranteed to arrive at its destination) and the Overshift Ranges (which cross-index with an Overshift results section to give the outcome of Overshifting given distances).
[7.52] Examples of Overshifting!
-
A StarForce in 1819/+7 is attempting to shift (unassisted in any way) to 1922/+2. This is a true distance of six Lites. The result would be resolved on the "A" column of the table. There is a 70% chance of safe shifting and a 30% chance of Mirror shifting. The Player draws one of the 0 to 9 chits and gets a result of "7" indicating a Mirror Shift; the StarForce is placed in LiteZulu I717/+12 instead of its intended destination.
-
A StarForce is making an Enhanced Gate Shift from Sol (2020/0) to a Friendly StarForce in LiteZulu 2325/+16 (adjacent to Sigma Draconis). This is a true distance of seventeen Lites and the result therefore would be resolved on the "B" range column. The Player draws a "4" chit and completes the shift safely.
-
Three StarForces are using a StarGate in 1319/+1 to make a Gate-to-Gate Shift to a StarGate in 3223/+17. This is a true distance of twenty-five Lites, and would therefore be resolved on the "C" range column of the Overshift results table. The Player draws a result of "9" indicating all three StarForces are Randomized.
[7.53] Explanation of Overshift Results and Their Application
S = Safe Shift. Complete shift as plotted.
M= Mirror Shift. Shift the StarForce in exactly the opposite of the three-dimensional direction plotted.
R= Randomized. In the Basic game, the StarForce is removed from play for the remainder of the game.
When two or more StarForces are making exactly the same Overshift from the same point of origin to the same destination and they are making either a simple Gate Shift or a Gate-to-Gate Shift, only one result chit is drawn for all the StarForces involved. When the shift is a Normal Shift, an Enhanced Shift, or an Enhanced Gate Shift, the Overshift results are determined on a StarForce-by-StarForce basis, drawing one chit for each unit.
[7.54] Determining the Final Resolution of a Mirror Shifted StarForce.
Mirror shifting results in the StarForce being positioned in exactly the opposite direction from that which was plotted. Draw an imaginary straight line from the center of the Two-dimensional destination hex through the center of the two-dimensional hex-oforigin and continue it backwards until it passes through the center of a two-dimensional hex exactly the same distance from the point of origin as the intended destination hex. Now reverse the Zuluchange of the plot to determine the final LiteZulu position of the Mirror Shifted StarForce.
The accompanying diagram illustrates the example of Mirror Shifting given in 7.52, example 1.
[7.55] Whenever the results of Mirror Shifting (or Randomization in the Advanced Game) would place a unit off the Stellar Display, an adjustment is made to maintain the unit within the confines of the map. If the "uncontrolled" shift exceeds the Zulu limits of the Display, reduce the Zulu number until it is just within the maximum allowed at that particular point in the volume. If the twodimensional limits of the Display are exceeded, bring the StarForce back along the line of the Mirror Shift until it attains the map.
[7.6] TRUE [LITE] DISTANCES
If StarForce were a two dimensional game, there would be no difficulty in determining the distance from one point to another on the map: Players would simply count the number of hexagons from one point to another and that would be that. Due to the three-dimensionality of the game, however, things are not so simple. "Straight line" distances must be calculated through the three-dimensional volume at every conceivable angle. Stars that look relatively close may actually be far apart due to their three-dimensional displacement in space. It would not be accurate to calculate distances in the most obvious way, i.e., counting the distance in hexes two dimensionally and then simply adding the "up" or "down" differential between two points. Doing that would not give the shortest distance between two points. What one really wants to know in this case is the length of the hypotenuse of the right triangle formed by the "horizontal" and "vertical" distances. Luckily, Pythagoras figured this one out a while back by developing the simple formula stating that the sum of the squares of the two other legs of the triangle (A2+B2=C2). Rather than burden Players with the task of figuring out square root problems every time they shift their StarForces, we've supplied a table that does it for them. (See the True Distance Table).
[7.61] TRUE DISTANCE TABLE
(see, also, the abbreviated version of the table on the map)
| Zulu Differential \ Planar Differential | 0 | 1 | 2 | 3 | 4 | 5 | 6 | 7 | 8 | 9 | 10 | 11 | 12 | 13 | 14 | 15 | 16 | 17 | 18 | 19 | 20 |
|---|---|---|---|---|---|---|---|---|---|---|---|---|---|---|---|---|---|---|---|---|---|
| 0 | 0 | 1 | 2 | 3 | 4 | 5 |
[7.62] How to Use the True Distance Table Distances in StarForce are measured in Lites; every two-dimensional hex is one Lite across and every Zulu increment or decrement is a distance of one Lite. To discover the true, three-dimensional distance between two points simply count the two dimensional distance and then calculate the Zulu differential between the two points. On the True Distance Table, cross index the Zulu differential with the distance across the Equatorial Plane (the two-dimensional distance). The figure indicated will always be the true distance (rounded off to the nearest Lite).
[7.63] Rules of Thumb Although the True Distance Table is easy to use, even it gets to be a bore if one has to refer to it every time a shift is made. Such will not be the case if the Player keeps a few "rules of thumb" in mind when figuring distance. In this discussion, the term Zulu Delta (ZD) will be used to refer to the "vertical" distance between two points and the term Planar Delta (PD) will be used to describe the two-dimensional "horizontal" distance between two points.
-
If either the Zulu or the Planar Delta is "1" or "0" then the true distance is either equal to "1" or equal to the Delta greater than "I". For example, Epsilon Eridani and Tau Ceti are PD 4 by ZD 1 distant from each other. Ignore the ZD to calculate the distance.
-
Rule One can be extended to cover greater distances: If one Delta is "2" or less and the second Delta is "4" or greater, then the second Delta is the true distance.
If one Delta is "3" or less and the second Delta is "9" or greater then the second Delta is the true distance.
If one Delta is "4" or less and the second Delta is "16" or greater then the second Delta is the true distance.
-
If one Delta is "3" or less, and one Delta is "4" or less than the true distance is "5" or less (i.e., within the safe maximum for a normal shift).
-
When the Zulu numbers of the two positions have the same sign (i.e., plus or minus) subtract the smaller from the larger to discover the Zulu Delta; for example, subtracting -4 from -16 yields a Zulu Delta of 12. When the signs are different, ignore them and add the two numbers together; for example, +5 added to -3 equals a Zulu Delta of 8. Of course, when one of the Zulu numbers is Zero, the Zulu Delta is equivalent to the second Zulu number.
-
The true distance will never be greater than one and a half times the larger of the two Deltas.
[8.0] BASIC GAME COMBAT
GENERAL RULE: Combat occurs between opposing units who, after executing their plotted movement, are in the same LiteZulu. Unlike most other simulation games, in a combat action there is no set role of attacker or defender. Rather, each of the opposing sides may be either an attacker or defender, or both, in a given Combat Segment.
PROCEDURE:
For each Player involved in a specific Combat action, total the Strength Points of all his units involved in that LiteZulu. This represents, for each Player, a pool of Strength Points, from which he may allocate his attack and his defense. From this pool, each Player should simultaneously write down the number of points allocated to attack and the number of points allocated to defense. Combat is executed simultaneously, that is, the effects of combat are taken into consideration after each Player has attacked in turn. Either Player may attack first. He states the number of Strength Points he has attacking and the opposing Player states the number of Strength Points that are defending. State the comparison as the difference between the attacking Strength Points and the defending Strength Points. Consult the Basic Game Combat Results Table, draw a chit from the Decimal Randomizer and read the result on the appropriate line under the Differential Column. The result is not applied immediately. The formerly defending Player now proceeds with his attack against the formerly attacking Player. Repeat the above resolution procedure. After both Players have executed their attacks the results are applied.
Each combat action continues until only one Player's units are left in that LiteZulu. There may be any number of Combat Segments until this final resolution. After a given combat action is completed, the Players proceed to any other combat actions, which might have occurred in that Game-Turn. After all combat actions are resolved, proceed to the next Game-Turn. Note: Players may wish to resolve Combat Situations in a concurrent fashion, i.e., execute all first Combat Segments in all situations, then all second Combat Segments, etc. This optional routine is more complicated to keep track of, but is somewhat more realistic.
CASES:
[8.1] WHICH UNITS MAY ENGAGE IN COMBAT
[8.11] During the Combat Segment of a given Game-Turn, Players must engage units in combat which are in the same LiteZulu as opposing units. Only those Friendly units in a given LiteZulu with opposing units may participate in combat (and only with those opposing units). Combat is not voluntary; units are compelled to engage in combat by the act of having ended their Shift Execution Phase in the same LiteZulu as opposing units (exception: see First Combat Segment 8.2).
[8.12] There is no limit to the number of units, opposing or Friendly, which may be in a single, given LiteZulu and therefore involved in a single combat action.
[8.2] FIRST COMBAT SEGMENT
[8.21] During the First Combat Segment of each combat action, StarForces that have just entered the LiteZulu (i.e., did not begin the Shift Plot Phase in that LiteZulu) have a different Strength than for the subsequent segments in the same combat action (see 8.3 Strength Calculation).
[8.22] In the First Combat Segment StarForces which have just entered the LiteZulu may not attack nor be attacked by opposing StarGates, or opposing StarForces which have themselves just entered that LiteZulu. They may only be attacked (and may only attack) Enemy StarForces which began the Game-Turn in that LiteZulu.
[8.23] StarForces which began the Shift Plot Phase in that LiteZulu have the option of refusing combat for the first Combat Segment. If the Player does refuse combat, no combat is possible during that Combat Segment. Play then proceeds to the second (and any following) Combat Segments.
[8.24] After the first Combat Segment (i.e., in the second and further combat segments of a given combat action) all units are at full Strength. Moreover, subsequently, all units in that contested LiteZulu must engage in combat, whether in attack or defense. Note that if both Players allocate all of their Strength Points to defense, this is still defined as "combat" even though no resolution takes place.
[8.3] COMBAT STRENGTH CALCULATION
[8.31] In all Combat Segments, StarGates are worth five Strength Points.
[8.32] In all Combat Segments, StarForces which began the Game-Turn in a given LiteZulu are worth three Strength Points.
[8.33] In the First Combat Segment (only) of a given combat action, StarForces which have just entered the LiteZulu are worth only two Strength Points. After the First Combat Segment in that combat action the surviving StarForces are worth three Strength Points.
[8.34] In the Combat Segment in which they perform a break-off (see 8.6) StarForces are worth only two Strength Points (and may only use that Strength defensively).
[8.4] COMBAT SEQUENCE
[8.41] As stated before, there may be more than one combat action in a given Game-Turn. There is one combat action for each different LiteZulu on the Stellar Display in which there are opposing units.
[8.42] For each combat action, there is at least one (the First) Combat Segment and there may be an indefinite number of Combat Segments following that. Note that there are differences between First Combat Segments and all subsequent Combat Segments (8.2). Combat continues with the sequence of plotting Attack and Defense Strength Points by each Player and execution of the simultaneous attacks until the LiteZulu is occupied only by units of one Player, or no Players.
[8.43] Note that a given unit may only be in one contested LiteZulu per Game-Turn. Thus, if a StarForce wishes to break off and withdraw to a Friendly StarGate or any other LiteZulu, (see Combat Breakoff, 8.6), that StarGate or LiteZulu must not be (or have been) occupied by Enemy units in that Game-Turn.
[8.5] COMBAT DIFFERENTIAL CALCULATION AND PLOTTING FOR THE COMBAT SEGMENT
[8.51] The simultaneous combat situations are expressed as a difference between attacking Strength Points less the defending Strength Points. For instance, if seven Strength Points have been allocated to attack by one Player against four Strength Points allocated to defense by another Player, the Combat Differential Calculation would be expressed as "+3". The appropriate column is consulted on the Combat Results Table.
[8.52] Except for the reduction in Strength Points during the First Combat Segment and a similar reduction during break-off, unit Strengths are never affected during Strategic Combat by any means. Their Strength is always full. It is not unitary; the "pool" of Strength Points may be applied and divided in any manner.
[8.53] In order for a Player to be considered an attacker during a particular Combat Segment, he must have allocated at least one Strength Point to the attack.
[8.54] Plotting the Allocation of Strength Points. If Players are using the normal technique of resolving each combat action from start to finish before going on to any others occurring in that Game-Turn, they may simply write their combat allocations on scrap paper, stating Attack Strength allocation first and Defense second. For example, if the Player with a total of eight Strength Points at his disposal wished to attack with only two, he would write "2/6". If one or more of a Player's StarForces are going to break-off at the end of that segment, he must indicate which StarForces are doing so. Remember, when a StarForce breaks off it is worth only two Strength Points for that Segment and those Points may only be used defensively. If a Player had two StarForces and wished one to break off and one to attack with all its Strength, he would write the following plot: "3/2, M(B) to 2020/0" - indicating StarForce "M" breaks off to Sol (2020/0).
If Players are going to resolve Combat Segments concurrently, they will have to use a separate sheet from the SiMove pad and identify each allocation by LiteZulu.
[8.6] COMBAT BREAK-OFF
[8.61] At the end of any Combat Segment, from the second Combat Segment onward, either Player may choose to withdraw some or all of his units. This is known as "breaking-off. It need only be done in a given combat action and it does not affect other combat actions that are going on simultaneously.
[8.62] Only StarForces may break-off an action; StarGates are immobile and may not, therefore, breakoff action.
[8.63] Units may preferentially break-off to one of two locations. They may break off to the LiteZulu from which they entered the contested LiteZulu. If they Overshifted into the combat action LiteZulu, they need not suffer Overshift upon returning to the LiteZulu from which they entered. Alternatively, they may withdraw to any uncontested Friendly StarGate. This StarGate must be within ten Lites of the point of break-off.
[8.64] If neither of the above alternatives in 8.63 are available, the withdrawing StarForces must withdraw to an adjacent, uncontested LiteZulu of their own choice.
[8.65] StarForces which are breaking-off do so immediately after combat execution in a given segment. Remember, StarForces which are breakingoff are worth only two Strength Points each (which may only be used defensively).
[8.66] StarForces which are breaking-off may breakoff into different LiteZulus even if they originate from the same LiteZulu.
[8.67] StarForces may never break-off into a LiteZulu that was contested at any time during that Game-Turn.
[8.68] Stalemate Break-Off In a given combat situation, if neither Player suffers any losses after the completion of the first six Combat Segments, then all of the StarForces belonging to the Player who does not have a StarGate in that LiteZulu must break-off and end the action. The same judgment must be made at the completion of each set of six Combat Segments and the same compulsion to break-off is applicable if during that set of six Combat Segments no losses were inflicted on either Player. If the combat situation is one of those rare instances that take place in a LiteZulu which has no StarGate, the Player with the greater number of StarForces which did not begin the Game-Turn in that LiteZulu must break-off, after six stalemated Segments. If neither Player has StarForces which began the Game-Turn in that LiteZulu, then both Players are forced to breakoff.
[9.0] STRATEGIC COMBAT RESULTS
[Basic Game only]
[9.1] STRATEGIC COMBAT RESULTS TABLE
Players should see the map, where they will find two copies of the table, and a brief summary of the results.
[9.2] HOW TO USE THE STRATEGIC COMBAT RESULTS TABLE
The table is used to resolve combat during the combat execution segment. The Decimal Randomizer Chits are used to produce random numbers to indicate which result will apply to a given situation. When a Player attacks in a given situation, he picks one chit (blindly) from the Randomizer and reads the result aloud. Cross-indexing that chit number with the appropriate attack-defense differential column will yield a combat result. If both Players are attacking in a given situation, both draw a chit before applying results. Note that no more than one chit at a time should be drawn and it should be immediately placed back into the Randomizer before another draw is made.
Differentials are calculated by subtracting the opposing Player's Strength Points from the attacking Player's attack Strength Point allocation. For example, five Strength Points allocated to the attack opposed to three Strength Points allocated to the defense would mean the attacker would read his result from the "+2" column on the table.
If more Strength Points have been allocated to the defense than the opposing Player has allocated to the attack, the attack will be made at a negative differential (or may be disallowed altogether if it falls below -3).
[9.3] APPLICATION OF RESULTS
The result numbers on the table are the number of StarForces (not Strength Points) eliminated by the attack. StarGates are equivalent to two StarForce units for combat results purposes. They may never be partially affected (by a "1" result for example). Results are applied at the end of the Combat Execution Segment, after both Players have executed their attacks. The units involved must suffer the losses indicated if at all possible. Of course, units may never suffer losses greater than their value. The losing Player decides which of his units will be lost. The only case in which a Player will be forced to lose a StarGate is when the result against him is two or more, and he does not have sufficient StarForces present to make up the required loss. Note: The Stellar Randomizer (15.0) may be used in conjunction with the Strategic Combat Results Table simply by substituting a Randomization result for each StarForce loss.
[9.31] StarGate Preservation: If a Player loses his StarGate in a combat situation, but also manages to destroy or drive off all the Enemy StarForces in that Game-Turn, the StarGate reappears in the immediately ensuing Game-Turn. It may not, however, be used for shifting, position-finding, or combat in the Game-Turn in which it reappears and if the Enemy Player has forces remaining in that LiteZulu at the end of that Game-Turn, the StarGate permanently disappears. If, however, the StarGate survives this one Game-Turn in "limbo", it returns to full strength and normal use at the very start of the next Game-Turn (for example, a StarGate which was "destroyed" in combat on the third Game-Turn, reappears in the fourth Game-Turn, and is returned to normal use for the fifth Game-Turn).
[9.32] Examples of Combat Resolution "Alpha" Player with two StarForces and one StarGate in the contested LiteZulu allocates nine of his eleven Strength Points to attack "Bravo" Pl&yer's three StarForces. Bravo Player has allocated four of his nine Strength Points to attack Alpha's forces. Alpha Player draws a "0" chit from the Decimal Randomizer and cross indexes that result with the "+5" column of the Combat Results Table. The Table indicates a loss of two Bravo StarForces. Bravo draws a "9" chit and reads the result on the "+2" column which indicates a loss of three Alpha StarForces. Now the Bravo Player removes two of his StarForces from the map and Alpha must lose his StarGate plus one of his StarForces in order to fulfill the "lose 3" result. This leaves each Player with one surviving StarForce. In the next Combat Execution Segment, both Players attack each other's StarForce with an allocation of one Strength Point. Alpha draws a "7" chit and Bravo draws a "3". Both results are read on the "-1" column. Bravo is destroyed and Alpha survives. Since Alpha has completely eliminated the enemy forces from the LiteZulu, this combat situation is over (and, moreover. Alpha's StarGate will reappear in the next Game-Turn).
[10.0] ADVANCED GAME DESCRIPTION
Advanced StarForce is distinguished from the basic game mainly by its more detailed and complex system of combat action and resolution. Combat no longer takes place on the Stellar Display. Instead, each combat situation is transferred to the Tactical Display where StarForces make use of tactical maneuver and force allocation to decide the outcome.
All of the rules of the Basic Game are used with the exception of 5.2C (the Basic Game Combat Execution Phase) and Sections 8.0 and 9.0. Players are cautioned that the Advanced Game presents interesting tactical intricacies at the expense of playability. If Players have neither the time nor the patience to deal with this increased complexity, they should not get involved with the Advanced Game. Simply because the title of this game-version is "Advanced", Players should not misconstrue this to mean that the Basic Game is strictly for novices. The Advanced version is presented to sate the appetites of those gamers who desire detailed play. Both versions should be appreciated on their own merits without ascribing an intellectual hierarchy to them.
[10.1] ADVANCED GAME GLOSSARY ADDITIONS
Note that some of the terms in the glossary will not make complete sense unless understood in the context of the entire rules. Do not expect to totally grasp all the implications of some terms simply by reading these introductory definitions.
Anti-cast - the defensive value of a given StarForce (effective for the entire Tac-Turn) derived to by subtracting the TelePoints allocated to other functions from the total available. StarGates also develop Anticast strengths but on a Phase by Phase basis.
Cast (or Combat Cast) - a three-dimensional projection of combat strength into a certain specified portion of the Tactical Display. Both StarForces and StarGates may make casts. The word is used in the sense of a broadcast or the casting of a net.
Disruption - a tactical combat result which halves the total number of TelePoints available to a StarForce or StarGate until the Disruption Recovery Phase of the next Tac-Tum.
MiniLite - the Tactical Display analog to the Stellar Lite. One MiniLite is equivalent to a third of a Light Day. Each numbered hexagon on tile Tactical Display is one MiniLite across.
MiniLiteZulu - the Tactical Display analog to the Stellar LiteZulu. There are 1001 MiniLiteZulu positions on the Tactical Display. A position on the Tactical Display is given in terms of its three-digit hex number followed by its MiniZulu number, e.g., 110/+2.
MiniZulu Limit - the entire Tactical Display has a "vertical" limit plus or minus five. Note that the Tactical Display is not subdivided into rings as is the Stellar Display.
Mode - a StarForce on the Tactical Display is said to be in either one of two modes: Stellar Mode or Battle Mode. Stellar Mode is the "normal" travel mode of a StarForce. Battle Mode is the optimum fighting configuration for a StarForce. It sacrifices some of the mobility of the Stellar Mode for an increase in combat power. StarForces change mode by the expenditure of TelePoints. StarGates do not have different modes.
Neutralization - a combat (or movement) result which affects both StarPorces and StarGates. A StarForce is neutralized when it suffers randomization (either through Overshift result or Cast result) or when it executes a break-off maneuver from the Tactical Display. A StarGate is neutralized when it suffers two successive disruption results in combat. StarForces and StarGates recover from neutralization in slightly different ways.
Randomizer, Stellar - a set of 43 chits numbered with two sets of figures. The Stellar Randomizer is used to develop the new position (on the Stellar Display) of StarForces which are randomized as a result of combat or as a result of Overshifting.
Tactical Display - the smaller of the two fields of hexagons printed on the map. The Tactical Display represents a volume of space one hundreth of a Lite across and one hundreth of a Lite deep. This is roughly one-millionth of the volume represented by a Stellar LiteZulu. Note that the Tactical Display uses its own numbering system on its hexagons. The lefthand digit of each three digit number indicates the planar distance from the center hex. The middle digit indicates the "sextile" (60° wedge) that that hex falls within. The right hand digit counts the number of hexes clockwise from one of the six primary planar axis of that ring of hexagons. The foregoing explanation of the number system is presented simply for curiosity value.
Tactical Sequence - the interruption of the Stellar Game-Turn to resolve a combat situation by running a series of Tac-Turns.
Tac-shift - the Tactical Display analog to Stellar shifting. StarForces Tac-shift by allocating TelePoints to do so. StarForces may not 'Over-Tac-shift". StarGates may not Tac-shift nor may they aid StarForces in their Tac-shifting.
Tele Value - the overall movement/combat/defense ability of a StarForce or StarGate quantified in terms of TelePoints. Each Tac-Turn, Players decide how they will allocate these Points to the various game functions performed by their units. StarGates have a TeleValue of 64 (see the map for the TeleValues of StarForces in given modes).
[11.0] ADVANCED GAME SEQUENCE OF PLAY
The Stellar Game-Turn is exactly the same in the Advanced game as in the Basic Game with the exception that Basic Game-Turn Phase C (the Combat Execution Phase) is replaced by the Tactical Sequence. A Tactical Sequence is initiated under the same conditions as the Combat Execution Phase is in the Basic Game, i.e., whenever opposing units occupy the same LiteZulu after executing Stellar shifts. The Tactical Sequence is composed of an indefinite number of Tac-Turns (which are further subdivided into a number of Phases). Each Tactical Sequence is carried through to resolution before initiating the Tactical Sequence for any other Tactical Situation. All Tactical Situations are resolved before going on to the next Stellar Game-Turn.
[11.1] TACTICAL SEQUENCE OUTLINE
[11.11] TACTICAL SITUATION DEPLOYMENT PRE-PHASE
Before the first Tac-turn of a given situation can be started, the forces involved must be transferred from the Stellar Display to their starting positions on the Tactical Display. Leave a "Tac Sit" marker on the Stellar Display to help mark the LiteZulu involved.
Step 1: If there is a StarGate involved, place it in the exact three-dimensional center of the Tactical Display (MiniLiteZulu 000/0).
Step 2: If the Stellar LiteZulu involved contains a star system assume the star to be in position 000/-1. Players may wish to place the Star marker to remind them of its presence.
Step 3: Both Players secretly write down the coordinates of the MiniLiteZulu(s) in which their respective StarForces are going to start. Initial deployment of StarForces in this step is performed under the following restrictions: A. StarForces which began the Stellar Game-Turn in the LiteZulu may be deployed anywhere on the Tactical Display (individually or in groups). They may be considered to be in Battle Mode if the owning Player wishes.
B. StarForces which shifted .into the LiteZulu during that Stellar Game-Turn may be in any MiniLiteZulu which has a hex number in the 500 series (for example, 551 /-2) or any MiniLiteZulu with a Zulu number of plus or minus five (for example, 000/+5). StarForces which shifted in from the same LiteZulu must initially deploy on the Tactical Display within the same MiniLiteZulu or in positions within one MiniLite of all the members of that common group. All incoming StarForces are in Stellar Mode.
Step 4: Place all StarForces on the Display. Do not reveal their MiniZulu coordinates at this time. Begin the first Tac-Turn of the Sequence.
[11.12] THE TAC-TURN
A. Tac Plot Phase: Players secretly write down (plot) the actions which their units will take during both of the Execution Phases of this Tac-Turn.
B. First Tac Execution Phase: 1. Tac-shift and Mode Change Segment: Players simultaneously execute all Tac-shifts and Mode changes plotted for this Execution Phase.
-
Combat Cast Segment: Players simultaneously execute any combat casts they have plotted to take place in this Execution Phase.
-
Cast Results Application Segment: Players apply the results of the Combat Casts made in Segment Two of this Execution Phase. StarForces which have been randomized are removed from the Tactical Display and held aside to be placed on the Stellar Display at the end of this Stellar Game-Turn.
-
Plot Modification Segment: StarForces which have had their TeleValue for the Second Execution Phase halved by a Disruption result in the First Execution Phase must have their Plots adjusted to reflect this fact. Second Phase Tacshifts and Break-offs are aborted and half the plotted TelePoint cost of the aborted action is diverted to the Anti-cast for the Second ' Execution Phase. Casts plotted for the Second Execution Phase are still made but at half value.
C. Second Tac Execution Phase: 1. Tac-shift and Break-off Segment: Players simultaneously execute all Tac-shifts and break-offs plotted for this execution Phase (except those aborted by First Phase results).
-
Combat Cast Segment: Same as in Phase B (except for halving of effective strength due to disruption).
-
Cast Results Application Segment: Same as in Phase B.
D. Position Revelation Phase; If a Player has an undisrupted/un-neutralized StarGate on the Tactical Display, his opponent must reveal to him the exact position of all of his StarForces. Independent of the presence of a StarGate, Players must reveal to each other the positions of all units which occupy the same numbered hex on the Display. A disrupted StarGate is treated as a StarForce with respect to intelligence gathering. A neutralized StarGate cannot ascertain the position of any Enemy StarForce.
E. Disruption Recovery Phase: StarForces and StarGates which were disrupted in the previous TacTurn are returned to normal, undisrupted status (assuming that they haven't suffered an additional combat result in this Tac-Turn).
F. Situation Judgment Phase: If the Tactical Display now contains no mutually hostile units (disregarding neutralized StarGates) the Tactical Sequence is ended for the LiteZulu in question. If hostile units still oppose each other on the Display, the Players begin another Tac-Turn.
G. Stalemate Judgment: If neither Player has made at least one viable combat cast (i.e., one that required a chit pick) in the preceding twelve Tac-Turns of this situation, then the non-Star Gate owning Player must execute a break-off with all his forces within the next two Tac-Turns (without making any further casts). If there is no StarGate on the Display, the Player who did not have StarForces beginning the Game-Turn in that LiteZulu is compelled to break-off. If neither began the Game-Turn in the LiteZulu then both Players must break-off.
[12.0] ADVANCED GAME TACTICAL PLOTTING
GENERAL RULE: During each Tac Plot Phase, each Player secretly records on a SiMove sheet all the operations that his units will perform in the coming two Execution Phases of that Tac-Turn. Once plotted, these operations may not be voluntarily changed. These operations are (with one exception) always mutually exclusive for a given unit within a given Execution Phase. The overall capability of a unit to perform these operations is measured in terms of TelePoints. Allocation of TelePoints to one activity diminishes the ability of the unit to perform other activities in the same Tac-Turn.
CASES:
[12.1] UNIT TELEVALUES
StarForces and StarGates have specific TeleValue which they can allocate in terms of TelePoints to perform different operations in the Execution Phases of the Tac-Turn.
[12.11] Summary of Unit TeleValues
| Unit | Mode | TeleValue |
|---|---|---|
| StarForce | Stellar | 32 |
| StarForce | Battle | 64 |
| StarGate | Not Applicable | 64/64 |
[12.12] StarForces use their TeleValue to cover all their operations through both Execution Phases. StarGates have a TeleValue that is fully available for both Execution Phases of a Tac-Turn (i.e., StarGate Points allocated for use in the First Execution Phase do not diminish those available for use in the Second Execution Phase and vice-versa).
[12.2] PLOTTING FOR THE TAC-TURN
Each Tac-Turn consists of one Tac Plot Phase followed by two Execution Phases. Players should use two consecutive boxes on the lines of the SiMove sheet to write the plot for each of their StarForces and StarGate.
[12.21] Undisrupted StarForces can perform any one of the following four actions in a given Execution Phase: Tac-Shift, Mode Change, Break-off, or Combat Cast. After writing one of these operations for each Execution Phase, for each StarForce and indicating the number of TelePoints of the unit's per-Turn TeleValue expended in each of the plotted operations, the Player records any unused TelePoints as the Anti-cast that unit will have during that entire Tac-Turn.
[12.22] An un-neutralized StarGate may plot only one type of operation for each Execution: Combat Cast. Unlike StarForces, however, a StarGate can plot more than one cast per Execution Phase. The Anti-cast of a Stargate can vary from the First to the Second Execution Phase because the Stargate is allowed to use its full TeleValue each Execution Phase and can have two completely different plots written for it in a Tac-Turn.
[12.23] Once written, plots may not be voluntarily changed. The plot for the Second Execution Phase, however, is subject to modification as a result of combat effects of the first Execution Phase. See 11.12B-4.
[12.3] ADVANCED GAME TACTICAL PLOT CODES AND ACTIONS
| Code | Action | Prefixes and Suffixes and Example |
|---|---|---|
| T | Tac-shift | Prefix with TelePoint cost; suffix with destination. Example: 32T 421/+3. Phase Allowable: 1st and/or 2nd. |
| M | Mode Change | Prefix with TelePoint cost; suffix with "b" when changing to Battle Mode; with "s" when changing to Stellar Mode. Example: 16Ms. Phase Allowable: 1st only. |
| B | Break-off | Suffix with Stellar LiteZulu destination. Example: B 2020/+1. Unit must be in Stellar Mode. Phase Allowable: 2nd only. |
| C | Combat Cast | Prefix with TelePoints allocated; suffix with "p" or "n" to indicate relative Zulu direction. Further suffix with "Clock number" to indicate planar direction. Example: 32 Cp9. Phase Allowable: 1st and/or 2nd. |
| A | Anti-Cast | Prefix with TelePoints allocated. Example: 8A. Phase Allowable: 1st and/or 2nd. |
[12.31] Tac-Shift Plot: This is similar to writing a Stellar Shift plot with the addition of the TelePoint expenditure for the true distance traveled written as a prefix.
[12.32] Mode Change Plot: Mode changes can only be plotted to occur in the First Execution Phase.
Players should note the operative value of the unit for the Tac-Turn is the TeleValue of the unit when in the Mode to which it is being changed. For example, a StarForce Plotted to change to Battle Mode has the use of 64 TelePoints, 32 of which it must expend for the Mode Change, leaving it 32 Points to allocate for a Second Phase Plot (and/or to allocate for its Anticast).
[12.33] Break-off Plot: Break-off can only be plotted for the Second Execution Phase and only if the unit is going to be in the Stellar Mode by the Second Execution Phase.
[12.34] Combat Cast Plot: A StarForce can only have one cast per Execution Phase plotted for it. A StarGate can have several cast plots per Execution Phase (in fact as many as twelve different casts per Phase). Casts are always prefixed with the TelePoint Strength of the cast and suffixed with a "p" (positive) or "n" (negative) to indicate the relative Zulu direction of the cast. The "horizontal" direction of the cast is indicated by writing a "clock number" that indicates through which apex of the hex the cast is being made.
[12.35] Anti-cast Plot: The Anti-cast is not so much plotted as it is developed as the remainder of a unit's TeleValue after TelePoints have been allocated to other operations.
[12.4] TAC PLOT EXAMPLE
This example shows the Plot for the first Tac-Turn of two StarForces which have shifted in to contest a LiteZulu:
| StarForce | Position | First Execution Phase | Second Execution Phase / Anti-cast |
|---|---|---|---|
| A | 542/+4 | 28T 160/+1 | 4A |
| B | 543/+5 | 32Mb | 32T 442/+4 |
(Transcribed from the illustration of a completed plotting sheet.)
StarForce "A" is shown to be making a six MiniLite Tac Shift in the First Execution Phase, doing nothing in the Second Execution Phase and maintaining an Anti-cast of four TelePoints.
StarForce "B" is shown to be changing to Battle Mode in the First Execution Phase, making a Tac shift of one MiniLite in the Second Execution Phase and having no TelePoints remaining to devote to its Anticast.
[12.5] PLOT MODIFICATION
If due to a disruption result suffered in the First Execution Phase of a Tac-Turn, a unit can no longer literally fulfill its plot for the Second Execution Phase, then a modification of that plot must be made. The effect of disruption is to halve the TeleValue of a unit. Modifications are made in the following manner:
[12.51] If the StarForce was plotted to execute a Tacshift or break-off in the Second Execution Phase, that plot is cancelled. The TelePoints allocated to that Tac-shift are halved and are contributed to the Anticast of the StarForce.
[12.52] If the StarForce (or StarGate) is plotted to execute a combat cast in the Second Execution Phase, the effective strength of the cast is cut in half (due to the disruption) but it is still executed. If a cast with a plotted strength of "2" is thereby reduced to an unallowable "I", the cast is not made (and that one TelePoint is added to the modified Anti-cast of the unit).
[12.53] The Anti-cast defense of the unit is halved. After this halving is made, any halved TelePoint allocation from aborted Tac-shifts or disallowed casts are added to this figure to produce the modified, effective Anti-cast of that unit for the Second Execution Phase of that Tac-Turn.
[12.54] Examples of Plot Modification 1. A StarForce in Battle Mode which was plotted to perform no operation in the First Execution Phase and to make a 32 TelePoint cast in the Second Execution Phase (leaving 32 TelePoints as its Anti-Cast) would modify its cast to 16 and its Anti-cast for the Second Execution Phase would also be reduced to 16.
-
A StarForce in Battle Mode which was plotted to perform a two MiniLite Tac-shift in the First Phase (expending 48 TelePoints) and to make a cast of 8 Telepoints (maintaining an 8 Telepoint Anti-cast) would perform its Tac-shift, suffer the disruption result in combat and have its cast reduced to 4 and its Anti-Cast reduced to 4 for the Second Execution Phase.
-
A StarForce in Battle Mode which was plotted to Tac-shift three MiniLites (costing 56 TelePoints) in the Second Execution Phase and maintain an Anti-cast of 8 TelePoints throughout the Tac-Turn, would have its Tac-shift cancelled and have 28 TelePoints added to its reduced Anti-cast of 4 yielding an effective Second Phase Anti-cast of 32.
-
A StarForce in Battle Mode which was plotted to change to Stellar Mode in the First Phase and to break-off in the Second Phase would change mode (leaving 16 Points for the Second Phase break-off), cancel the break-off and halve the 16 Points assigned to it and use it as an 8 Point Anti-cast.
[13.0] TAC-SHIFTING, MODE CHANGING, AND BREAK-OFFS
GENERAL RULE: When operating on the Tactical Display, StarForces engage in tactical shifting (very similar to shifts on the Stellar Display), Mode changing (changing from normal stellar travel configuration to a more powerful combat configuration), and breaking-off (leaving the Tactical Display and stellar shifting to a different LiteZulu). All of these operations require the expenditure of TelePoints from the unit's total available TeleValue. No more than one of these operations may be performed by a given StarForce in a Given Execution Phase. None of these operations may be performed by StarGates.
CASES:
[13.1] TAC-SHIFTING
[Moving StarForces on the Tactical Display] Tac-shifting is in most ways identical to Stellar shifting in that it is movement in three dimensions, instantaneously, without traversing the intervening space. The distance of the Tac-shift is measured in terms of MiniLites (this is a true distance measurement and Players are referred to the Abbreviated True Distance Table printed on the map). Tac-shifting is distinguished by the fact that TelePoints must be expended to Tac-shift given distances and that Overshift is not allowed on the Tactical Display.
[13.11] StarForces in Stellar Mode have a maximum Tac-shift Range of ten MiniLites (which would cost all 32 TelePoints available to them on a given TacTurn).
[13.12] StarForces in Battle Mode have a maximum Tac-Shift Range of five MiniLites (which would cost them all 64 TelePoints available to them on a given Tac-Turn).
[13.13] Tac Shift TelePoint Cost: The first fifth of their total Tac-Shift Range traveled, in a given Execution Phase, always costs StarForces in Battle or Stellar Mode one half of their total, undisrupted TeleValue. Each additional fifth traveled costs one half of the remaining TelePoints. For example, a StarForce in Stellar Mode executing a Tac-shift of three MiniLites would expend 24 TelePoints in doing so. See the TelePoint Cost Table on the map to get a clearer idea of the costs involved.
[13.14] Note that if a StarForce (in either Mode) is plotted to Tac-shift in both Execution Phases, the maximum distance it could travel in that entire TacTurn would be two fifths of its Tac Shift Range. This is mentioned to underscore the fact that each Tac shift is a separate operation, the cost of which is calculated for that Execution Phase.
[13.15] Note that if a StarForce in either mode is in a disrupted condition, the maximum Tac-shift it could make in a given Tac-Turn would be one fifth of its range. In other words, the Tac-shift cost remains the same and is not halved along with the disrupted unit's TeleValue.
[13.16] There is no limit to the number of StarForces that can occupy a single MiniLiteZulu. StarForces may Tac-shift into or "through" each other's positions without interference. StarForces may Tac-shift into or "through" a StarGate's position without interference.
[13.17] When a star system is present on the Tactical Display, StarForces may not Tac shift into its MiniLiteZulu from a distance of greater than one MiniLite, nor Tac-shift out of the star system's position to a point more than one MiniLite distant. StarForces may Tac-shift "through" a star's position without interference. The limitation only applies when either beginning or ending a Tac Shift directly in the star's MiniLiteZulu.
[13.18] There is no "Semi-Hidden Unit Display" on the Tactical Display. Each StarForce counter on the Tactical Display represents only one StarForce and every unit on the Display must be represented. Enemy unit positions are revealed in the Position Revelation Phase of each Tac-Turn; see the Sequence of Play.
[13.19] StarForces may not Tac-shift off the Tactical Display, i.e., they may never be plotted to a position with a MiniZulu greater than plus or minus five nor a hex number outside the "500" series.
[13.2] MODE CHANGING
The normal mode of a StarForce is the Stellar Mode. This is the mode it is in when shifting on the Stellar Display. When on the Tactical Display, a StarForce may change to Battle Mode, a combat configuration which sacrifices a certain amount of mobility for an increase in combat power. StarForces in Stellar Mode have a TeleValue of 32; in Battle Mode they have a TeleValue of 64.
[13.21] Changing mode costs half of the TelePoints of the resulting mode, i.e., a StarForce changing form Stellar to Battle Mode expends half of the 64 Battle Mode TelePoints and has 32 TelePoints remaining to use for other operations in that Tac-Turn. Similarly, a StarForce changing from Battle Mode to Stellar Mode has 16 TelePoints remaining to use for other operations in that Tac-Turn.
[13.23] No other operation may be executed in the First Execution Phase in which a StarForce changes mode.
[13.24] A StarForce must be in Stellar Mode in order to execute a break-off maneuver in the Second Execution Phase.
[13.25] If Players are going to use a mixed force of StarForces, some in Stellar and some in Battle Mode, in the same Tactical Situation, they may use one of the spare sets of StarForce counters to represent units in Battle Mode. The Mode status of an Enemy Player is always known by the Friendly Player.
[13.3] BREAK-OFF
Break-off is the technique by which undisrupted StarForces in Stellar Mode may voluntarily leave the Tactical Display before the end of the Tactical Sequence. Assuming all conditions have been met, the Player may plot a Break-off maneuver for any or all of his StarForces in any Tac-Turn. All break-offs are executed in the Second Execution Phase.
[13.31] It costs a Stellar StarForce 16 TelePoints to execute a Break-off.
[13.32] Break-offs are the very first operation executed in the Second Execution Phase. Remove the StarForces that are breaking-off and hold them aside until all Tactical Situations are resolved for that Stellar Game-Turn, then place the StarForces in their new LiteZulu on the Stellar Display.
[13.33] Units may break-off to one of three locations: 1. The LiteZulu in which they began the Game-Turn (if it was not contested at any time during the Game-Turn).
-
A Friendly StarGate within ten Stellar Lites which is not itself in a LiteZulu that was contested at any time during the Game-Turn.
-
Any uncontested LiteZulu of the twenty LiteZulus adjacent to the one in which the Tactical Situation is taking place.
[13.34] If breaking-off to a StarGate, the StarForces count against the capacity of that StarGate during the next Stellar Game-Turn. If all StarForces Break-off in the same Tac-Turn as many as four units may breakoff to the same StarGate. If breaking-off at different times or from different Tactical Situations, only two StarForces may break-off to that StarGate. This is simply a corollary of the StarGate capacity case (7.24).
[13.35] When executing a break-off to a StarGate or to a former position, StarForces are not subject to Overshift results, even though they may have Overshifted to enter the contested LiteZulu in the first place.
[13.36] StarForces which execute break-offs are neutralized (see 14.7) for the duration of the next Game-Turn.
[14.0] ADVANCED GAME COMBAT
[Cast and Anti-Cast]
GENERAL RULE: In the Advanced Game, all combat takes place on the Tactical Display. StarForces and StarGates allocate TelePoints to project Combat Casts into the threedimensional volume of the display. The effective strength of these casts are compared to the Anti-cast Strength of any Enemy units caught within them. The Anti-cast is subtracted from the Cast Strength and the resultant number determines what column of the Cast Resolution Table will be used. A chit drawn from the Decimal Randomizer and the number drawn is crossindexed with the appropriate column on the Cast
Resolution Table. The result indicated is applied during Cast Results Application Segment of the Execution Phase.
CASES:
[14.1] WHEN CASTS MAY BE MADE AND WHAT UNITS MAKE THEM
Casts may be made in any Tac Execution Phase in which the casting unit is not plotted to Tac-shift, change mode, or break-off. StarForces in either mode may make casts, and StarGates may make casts (unless they are neutralized). All casts in a given Execution Phase are considered to be simultaneous.
[14.2] THE STRENGTH AND RANGE OF CASTS
All casts, regardless of strength, have a range of five MiniLites of true distance. The cast projects outward from the casting unit in a three-dimensional wedge shape (see cast pattern). The exact direction is plotted in advance during the Tac Plot Phase. Units must allocate TelePoints to a cast in certain fixed quantities. The effective strength of the cast diminishes as the distance of the target increases.
[14.21] A given unit may only make casts at one of the following levels of strength (in TelePoints): 2, 4, 8, 16, 32, or 64. No other cast strengths may be plotted by any unit. Note that all the allowable casts are powers of two (i.e., 2x2x2x2x2x2).
[14.22] The strongest cast a Battle Mode StarForce could make would be a cast of 64 in a single Execution Phase (and this would mean it could perform no other operation for that entire Tac-Turn and would not have any Anti-cast protection). A StarGate could make two 64 TelePoint casts, one each Execution Phase of the Tac-Turn.
[14.23] Casts only have their full, plotted strength in the MiniLiteZulu that the casting unit occupies. The effective strength of the cast is cut in half for each MiniLite of distance out from this point. See the Cast Attenuation Table on the map.
[14.24] A given cast affects 94 MiniLiteZulus on the Tactical Display (fewer if made towards the edges where some of it will fall outside the Display). The basic shape of this Cast Volume is shown in the accompanying perspective drawing which represents MiniLiteZulus as hexagonal cells (like a honeycomb). There is also a two dimensional rendering of the cast pattern given on the map.
[14.25] When plotting a cast, its direction is always relative to the point of origin, i.e., its direction in the horizontal plane will be described as a 60° arc emanating through two of the hexsides of the casting unit's position and plotted as the relative clock number formed by the apex of those two hexsides. For example, when viewing the numbered hexagons from a right-reading viewpoint a cast to the "3 O'clock" direction would be a cast directly to the right.
The MiniZulu direction of the cast is always relative to the casting unit's position. A cast must always be plotted as positive ("upward") or negative ("downward") relative to the point of origin. For example, a unit at MiniZulu +3, and casting positively could not affect any Enemy unit "below" +3 on the Display.
[14.26] Example of MiniLite Zulus Affected by a Typical Cast (in tabular format)
Cast is being made from 260/-2, positively, to 5 O'clock. The Strength allocated to the cast is 32 TelePoints. By cross-indexing the affected hex numbers with the MiniZulu coordinate at which they are affected, the Player will be able to read the effective strength of the cast in that exact MiniLiteZulu;
| Hex Number | -2 | -1 | 0 | +1 | +2 | +3 |
|---|---|---|---|---|---|---|
| 260 | 32 | 16 | 8 | 4 | 2 | 1 |
| 251, 160 | 16 | 16 | 8 | 4 | 2 | 1 |
| 250, 150, 000 | 8 | 8 | 4 | 2 | 2 | 1 |
| 342, 241, 140, 130 | 4 | 4 | 2 |
(Column headings are the MiniZulu coordinates at which the hex is affected.)
• = that MiniLiteZulu is completely out of range.
Players will be relieved to know that they will not have to figure out such a complete scheme of affected hexes when they make their own casts; only the effect on MiniLiteZulus with targets in them need be calculated.
[14.27] The orientation of a counter on the Display has no bearing upon which directions it may cast to, i.e., their is no "facing" of counters as in some games.
[14.3] THE NUMBER OF CASTS A UNIT MAY MAKE THE TARGETS AFFECTED AND THE EFFECTS OF MULTIPLE CASTS
A StarForce in Battle or Stellar Mode may never plot more than one cast per Execution Phase. A StarGate, on the other hand, may plot as many as twelve different casts per Execution Phase. Friendly units are never affected by their own casts or the casts of other Friendly units.
[14.31] If a StarGate is plotting more than one cast for a given Execution Phase, each cast must be made to a different direction (either different Zulu directions and/or clock directions).
[14.32] The attenuation effect of each cast is calculated individually even when two units are casting in the same direction from the same MiniLiteZulu with the same number of TelePoints. The Effect upon a given target in a given MiniLiteZulu is, however, additive. For example, if three different units were making casts which overlapped in a given MiniLiteZulu containing an Enemy unit, that Enemy unit would be subjected to the effective combined total of all three of those casts. If a StarGate makes two or more simultaneous casts that overlap each other, they are additive as well.
[14.33] A given cast affects all Enemy units caught within its range: Enemy (or Friendly) units do not "screen" or block out casts for other Enemy units which may be "behind" them. The star system which may be present on the Tactical Display does not interfere with casts into or through its position.
[14.4] DETERMINING IF AN ENEMY UNIT IS IN THE VOLUME OF THE CAST
Since the MiniLiteZulu coordinates of StarForces are not routinely revealed until the end of the Tac-Turn, there will sometimes be some doubt as to whether or not an Enemy unit which appears to be within the Cast Volume of a particular cast, actually is. Use the following procedure to make the determination.
[14.41] If an Enemy unit is in the two-dimensional pattern of the cast, the casting Player reads out the MiniLiteZulu (having that hex number) that his cast is affecting. He does this one MiniLiteZulu at a time until he reads out the one that the Enemy unit is in (in which case the opposing Player announces the fact) or until he has exhausted the list of affected MiniLiteZulus having the same hex number as the target.
[14.42] Even if the cast would not have an affect upon the Enemy unit in question, the Enemy Player must reveal the position of any of his units which are within the nominal Cast Volume. In this way. casting also becomes a method of intelligence gathering.
[14.43] The casting Player does not directly have to reveal the position of his casting unit(s), nor does he have to reveal the strength of the cast until the target(s) are actually acquired (i.e., determined to be in the Cast Volume).
[14.44] Since the position of the StarGate is always known, any target within the cast of the StarGate can simply be announced by the owning Player once the direction of the Gate's cast(s) has been announced.
[14.5] THE ANTI-CAST
The Anti-cast is the defensive value of a StarForce or StarGate. For StarForces it is the remainder of the unit's Tac-Turn TeleValue after the expenditures for all other operations during that Tac-Turn have been subtracted. For StarGates it is the remainder of the Gate's Execution Phase TeleValue after subtracting the expenditures for all casts made in that Phase.
[14.51] The maximum possible Anti-cast a StarForce in Battle Mode could have would be 64 (assuming it plotted no other operations for the entire Tac-Turn). The maximum possible for a Stellar Mode StarForce would be 32. StarForce Anti-casts are plotted to be in effect for the entire Tac-Turn.
[14.52] The maximum possible Anti-cast for a StarGate is 64 per Execution Phase. StarGate Anticasts can be varied from Phase-to-Phase.
[14.53] The Anti-cast of a given unit cannot be reduced during a given Execution Phase. The effective Second Phase Anti-cast of a StarForce can be reduced if it has suffered a disruption result in the First Execution Phase.
[14.54] Friendly units in the same MiniLiteZulu do not add their Anti-cast values together and cannot aid the defense of another.
[14.6] CAST RESOLUTION
[see the Cast Resolution Table on the map]
[14.61] How to Use the Cast Resolution Table Total up the effective (after attenuation) cast values of all casts being made upon a given Enemy-occupied MiniLiteZulu. For each Enemy unit in the MiniLiteZulu, determine the TelePoint Differential column to be used by subtracting the unit's Anti-cast from the combined effective cast upon that position. Draw a chit from the Decimal Randomizer and cross index the result with the proper Differential column to find the outcome of the cast. Do this procedure for each Enemy unit in the MiniLiteZulu. Do not apply the results until all casts have been made by all Players.
Example: Enemy StarForces "A" and "B" in 251/+2 are caught in the casts of three Friendly units, the combined effective value of which is nine TelePoints. StarForce "A" has an Anti-cast of two; StarForce "B" has an Anti-cast of eight. The casting Player picks a chit to discover the effect upon "A" and draws a "5". Reading the result on the "+4 thru +7" column indicates a disruption. The draw for "B" is "6"; reading on the "+1" column indicates that the cast had no effect on "B".
Note: TelePoint Differentials of greater than 32 are treated as 32. TelePoint Differentials of less than Zero have no effect. For a casting Player to use the Zero column he must be effectively casting into the MiniLiteZulu with at least one TelePoint.
[14.62] Explanation of Cast Results • = No effect.
D = StarForce disrupted (no effect on StarGate). The StarForce has its TeleValue cut in half until the Disruption Recovery Phase at the end of the next TacTurn. If a unit receives a Disruption result in the First Execution Phase, its Second Execution Phase plot may have to be adjusted. StarForces which receive a disrupted result while already disrupted are randomized.
R = StarForce Randomized (StarGate Disrupted). In the Results Application Segment, remove the affected StarForce from the Tactical Display. At the end of the Stellar Game-Turn the unit suffers randomization procedure (see 15.0) which will leave it in a neutralized state for the next Game-Turn. A single "R" result obtained against a StarGate simply has the effect of a disruption (i.e., the Gate's TeleValue is halved until the Disruption Recovery Phase of the next Tac-Turn). If the StarGate should suffer a second "R" result before it recovers from the first, it is neutralized. See Neutralization, 14.7. A StarGate can never suffer randomization as does a StarForce.
Note: If Players find it convenient, they may turn disrupted StarForces and StarGates face down on the Display to indicate their status.
[14.7] NEUTRALIZATION
Units can be neutralized in three ways: as a result of randomization or mirror shifting when an adverse result is obtained on the Overshift Results Table; as a result of combat randomization or StarGate Neutralization; and as a result of executing a Breakoff maneuver. Units which exist on the Stellar Display in a neutralized state have no intelligence-gathering ability (i.e., they can't detect the positions of Enemy units in the same numbered hex).
[14.71] Effect of Neutralization on StarForces Neutralized StarForces are prohibited from the Stellar shifting for one complete Game-Turn and are in a continual state of disruption if they are caught in a tactical situation (which means if they suffer a "D" result in that Tactical Sequence they will be randomized and neutralized for another complete Game-Turn).
[14.72] Effect of Neutralization upon StarGates The StarGate is stripped of all TeleValue. If the Tactical Situation is resolved in favor of the Enemy (i.e., only Enemy units remain on the Tactical Display at the end of the Tactical Sequence) the StarGate is permanently removed from play. If the StarGate is alone on the Display at the end of the Sequence or if Friendly StarForces have driven the Enemy off, the StarGate remains neutralized for the next complete Game-Turn. If the Enemy Player does not have forces in the Gate's LiteZulu at the end of that Game-Turn, the StarGate returns to normal use and strength in the Neutralization Recovery Phase.
[14.73] When using Neutralization rules in a Modified Basic Game, StarForces have a Combat Strength of "l" when neutralized; StarGates have a Zero Strength. When the StarGate does not recover its Strength, this is termed permanent neutralization.
[15.0] RANDOMIZATION AND THE STELLAR RANDOMIZER
GENERAL RULE: StarForces can suffer randomization as a result of Overshifting or as a result of combat on the Tactical Display. Randomization is an involuntary uncontrolled shift into a LiteZulu somewhere on the Stellar Display. The exact LiteZulu a unit is randomized to is determined by the use of the Stellar Randomization chit system. This is a set of 43 dual numbered chits, which render the full coordinates of a LiteZulu by making three draws from the set. The first two draws develop the four digit hex number (by reading the top number on the chit and combining them) and the third draw yields the Zulu coordinate (by reading the plus or minus number on the bottom of the chit).
CASES:
[15.1] EFFECTS OF RANDOMIZATION
When a unit is Randomized it is also neutralized, and does not recover from that neutralized state until the Neutralization Recovery Phase of the following Game-Turn. See 14.7.
[15.11] If the top number of either of the first two Randomizer chits drawn read "Dstr", the unit is permanently destroyed (and removed from the map for the remainder of the game). A "Dstr" chit drawn as the third chit has no effect.
[15.12] If the top number on either of the first two chits drawn reads "Brkf" instead of a number, the unit is either neutralized in place (if randomization was a result of Overshifting) or forced to make immediate break-off from the Tactical Display (even if it is the First Execution Phase of the Tac-Turn and/or even if the unit is in Battle Mode). The break-off destination is any one of the immediately adjacent, uncontested LiteZulus, at the owning Player's discretion.
[15.13] If by some freak chance, a unit is randomized to a LiteZulu containing a star system, it is destroyed instead. The exception to this is, if by even greater chance, the unit is randomized to the LiteZulu it presently occupies (either due to a mandated Overshift "Brkf result or a fortuitous combination of the three chits). In such a case, the unit is neutralized in place. Since there's only one chance in 40,000 of this happening, the rule is moot, at best.
[15.2] USING AND READING THE STELLAR RANDOMIZER
Place all 43 chits in a large, wide mouthed, opaque container (a pipe-tobacco can is ideal). Each time a randomization is called for, the affected Player shakes the container slightly and draws one chit and records the top two numbers. He replaces the chit, shakes the container and draws another and records the top number on that chit. He replaces the chit and draws a third chit, this time reading the bottom number on the counter. The combination of the two digit numbers in the first two yields the new hex number the unit will be in. The plus or minus number read on the third draw is the new Zulu coordinate. If either the first of second draw yields a "Dstr" or "Brkf chit, the procedure stops at that point and the effect is applied.
[15.3] PLACING THE RANDOMIZED UNIT ON THE STELLAR DISPLAY
At the end of the Neutralization Recovery Phase, after all units which were randomized/neutralized throughout the present Game-Turn are returned to normal. Players position their newly randomized units on the Stellar Display. If the position produced by the chit-draws is one which is within the limits of the Stellar Display, simply place the unit in that position (recording it on the SiMove Plot sheet) and place a Neutralization marker on the unit.
If the position is one that exceeds the limit if the Stellar Display, it must be adjusted just enough to bring the randomized unit back onto the Display. If the unit is exceeding the limit of the Stellar Display by virtue of a Zulu number that is too "high" or "low", simply reduce that number until the position is just within the outer Zulu limit. If the position is outside the Display because the second two digits of the hex number are too high or low, adjust those figures until the new position of the unit is just within the edge of the Display.
Example: A randomized unit is directed to be placed in LiteZulu 2937/+13. No such position exists. The hex number of the position is adjusted to 2935 (the hex number in the 2900 row which comes closest to the theoretical position) and the Zulu coordinate is reduced by two to "II", the upper limit of the Display at that point.
[16.0] INTRODUCTION TO THE SCENARIOS
GENERAL RULE: StarForce is composed of scenarios, each of which presents a given game situation that Players may set up and compete in. Each scenario is a self-contained module which uses only the rules and scenario information.
CASES:
[16.1] THE RACES AND THEIR STAR SYSTEMS
Each of the three races have their own natural star systems: their home system and the colonies. Note that all the systems inhabited prior to First Stellar Peace are listed even though some were not colonized until during the course of the game, and others remained neutral during many of the wars, and thus do not appear in the scenarios. A pronunciation guide is given for each of the major stars.
[16.11] Human Race and its systems: Home system: Sol, 2020/0 (Sole)
Colonies: 1. Alpha Centauri, 1821/-4. colonized by Sol; (AL-fah-SEN-tor-ee)
-
Tau Ceti, 3015/-3, colonized by Sol; (Tau SE-tee)
-
Epsilon Eridani, 2713/-2, colonized by Sol; (EP-se-lon Ear-e-DON-ee)
-
82 Eridani, 3009/-14, colonized by Tau Ceti;
-
Epsilon Indi, 2523/-10, colonized by Sol; (EP-se-lon IN-dee)
-
Delta Pavonis, 2427/-18, colonized by Epsilon Indi; (DELL-tah Pah-VOH-niss)
-
Eta Cassiopeiae, 3018/+15, colonized by Sol; (A-tah KASS-see-oh-PAY-uh)
[16.12] L'Chal-Dah Race and Its Systems: Home system: Sigma Draconis, 2326/+17; (SIG-mah drah-KOH-niss)
Colonies: 1. HR 8832, 3223/+18; 2. 61 Cygni, 2626/+7; (SIG-nee)
[16.13] Rame Race and its Systems: Home system: 70 Ophiuchi, 2036/+1; (Oh-PEE-oo-kee)
Colonies: 1. 36 Ophiuchi, 1636/-8 2. HR 7703, 2833/-11
[16.2] HOW THE SCENARIOS ARE ORGANIZED
Each of the scenarios is organized on an identical basis. It begins with the title and a brief introduction placing it within the framework of the Future Notes. Then each Player's available stellar system, which automatically have StarGates, are listed, as well as the number and initial placement of his StarForces. This section is titled "Orders of Battle and Deployment".
After these deployment instructions, the scenario's Victory Conditions are detailed. This dictates the objectives of the Players in the game. Occasionally a single objective is shared by the Players, sometimes a general condition must be achieved by any of the Players and occasionally totally different conditions are tailored for a given Player.
After this. Special Rules are detailed, if there are any necessary in that scenario. These may modify the standard rules, indicate the use of the additional Xenophobe rules, or give one Player a specific advantage, such as a free plot prior to the nominal start of the game.
Generally speaking, the scenarios are not limited by a time limit, in Game-Turns. They may go on forever, until the Victory Conditions are fulfilled.
Finally, the scenario recommends in what form it should by played: as a Basic Game, or Advanced, or possibly some combination of the two. Thus the scenarios are related to the rules for the maximum Player enjoyment.
[16.3] SETTING UP THE GAME EQUIPMENT TO PLAY THE SCENARIOS
[16.31] Take the Game Map and back-fold it along the machine-made folds. This will make the map lie flat on the table. Small pieces of masking tape (not permanent, cellophane tape) may be used at the corners to hold the map against accidental brushes of the hand. Ideally, Players should get themselves a piece of24x36xl/16th inch Plexiglas to place over the map. This can be obtained at most hardware and building supply stores. Although it will cost about $10 for such a sheet of plastic, its a good one-time investment that can be used with all SPI game maps to provide a perfectly flat, one-piece playing surface.
[16.32] Place the map on a large, smooth table and arrange seating on opposite sides of long edges of the map. Place the game box with the counters sorted in it, at one end of the map and the rules booklet at the other end. Provide each Player with a pencil and a few sheets of the SiMove pad as well as some scrap paper.
[16.33] Provide two wide-mouthed, opaque containers, one for the Decimal Randomizer chits and one for the Stellar Randomizer chits.
[16.34] Choose the scenario to be played and deploy the forces called for in the order of battle. Begin the game.
[17.0] SCENARIO 1: THE ALPHA CENTAURI CAMPAIGN
After the development of telesthetic powers, the Solar Hegemony established a permanent colony at Alpha Centauri, the nearest stellar system. After several years of developing their own economy and StarGate, the colony declared independence. Sol dispatched a group of StarForces which neutralized the StarGate and seized its mechanisms. The first Human interstellar war was over in less than one day.
[17.2] ORDERS OF BATTLE AND DEPLOYMENT
Star Systems and StarGates / StarForce:
Sol Player:
- 2020/0 (Sol) 4
Alpha Centauri Player:
- 1821/-4 (Alpha Centauri) 1
[17.3] VICTORY CONDITIONS
Sol must permanently neutralize the Alpha Centauri StarGate within four Tac-Turns (or Combat Segments) of first entering the Tactical Display to win. If not, Alpha Centauri "wins".
[17.4] SPECIAL RULES
none.
[17.5] RECOMMENDED FORMAT
This scenario is intended to teach the basic mechanics of StarForce. It is not recommended for balance. Players should use the Advanced Game.
[18.0] SCENARIO 2: THE EPSILON ERIDANI CAMPAIGN, 2405 A.D.
[18.1] INTRODUCTION
Sol has now colonized three star systems. One of them, Epsilon Eridani, has decided to split from the Solar Hegemony and attempt to seize a newly accessible habitable system, Epsilon Indi (2523/-10), for its own.
[18.2] ORDERS OF BATTLE AND DEPLOYMENT
Star Systems and StarGates / StarForces:
Solar Hegemony Player:
- 2020/0 (Sol) 4
Epsilon Eridani Player:
- 2713/-2 (Epsilon Eridani) 3
[18.3] VICTORY CONDITIONS
Either side must hold Epsilon Indi system at the beginning and end of two consecutive Stellar Game-Turns (this is termed "occupation" and is used in other scenarios) or permanently neutralize the opposing force's StarGate. Permanent neutralization of the Enemy StarGate takes precedence over holding Epsilon Indi.
[18.4] SPECIAL RULES
The Epsilon Eridani forces may make full Stellar shift before the beginning of the first Game-Turn and the simultaneous plotting of both forces.
[18.5] RECOMMENDED FORMAT
This is another scenario intended to familiarize Players with the StarForces rules. It may be played with equal enjoyment either with the Basic Game rules or the Standard Game rules. Do not use the Reserve StarForces Optional Rule (32.0)
[19.0] SCENARIO 3: THE RISE OF THE HUMAN LEAGUE, 2415 A.D.
[19.1] INTRODUCTION
Following the successful revolt of Epsilon Eridani (2405 A.D.), the Solar Hegemony collapsed and was replaced by the Pan-Human Hegemony (PHH). The PHH was still Sol-oriented, although not as much as the older Solar Hegemony. However, a still more frontier-oriented society, the Human League (HL), arose and challenged the PHH by seizing Epsilon Indi (which has no StarGate in this scenario).
[19.2] ORDERS OF BATTLE AND DEPLOYMENT
Star Systems and StarGates StarForces:
PHH Player:
- 2020/0 (Sol) 5
- 1821/-4 (Alpha Centauri) 3
HL Player:
- 3015/-3 (Tau Ceti) 3
- 2713/-2 (Epsilon Eridani) 2
- 3009/-14 (82 Eridani) 2
[19.3] VICTORY CONDITIONS
PHH Player must permanently neutralize two enemy StarGates, or re-occupy (see 2405 A.D. Victory Conditions) Epsilon Indi and permanently neutralize one enemy StarGate. HL Player must neutralize StarGate at Sol or Alpha Centauri. The first Player to accomplish his Victory Conditions is the winner. If both accomplish them in the same Game-Turn, the Human League wins.
[19.4] SPECIAL RULES
The Human League Force may make one free Stellar shift prior to the beginning of the first Game-Turn.
[19.5] RECOMMENDED FORMAT
This scenario may be played with equal pleasure either in the Basic or Advanced Game modes, though the latter is more intriguing.
[20.0] SCENARIO 4: 2430 A.D. PHH - HL SHOWDOWN
[20.1] INTRODUCTION
The antagonism between the PHH and HL grew worse. Essentially the PHH wanted centralization on Sol and expansion limited to already-inhabitable planets. The HL desired more independence from the Home System and the terraforming of systems not naturally habitable. The proponents of either system were in near equilibrium when the final break took place.
[20.2] ORDERS OF BATTLE AND DEPLOYMENT
Star Systems and StarGates / StarForces: [see Special Rule 20.4]
- 2020/0 (Sol) 5
- 1821/-4 (Alpha Centauri) 3
- 3015/-3 (Tau Ceti) 3
- 2713/-2 (Epsilon Eridani) 3
- 2523/-10 (Epsilon Indi) 1
- 3009/-14 (82 Eridani) 2
- 2427/-18 (Delta Pavonis) 1
[20.3] VICTORY CONDITIONS
The Player with the greater number of StarForces at the beginning of the game must permanently neutralize two enemy StarGates. The Player with the lesser number of StarForces must permanently neutralize one enemy StarGate. If identical in number of StarForces, the first Player to permanently neutralize two Enemy StarGates is the winner.
[20.4] SPECIAL RULES
In this scenario system-control is assigned randomly. One Player picks a chit for each of the above-listed star systems: an even number indicates that he receives the system and its StarForces, and odd number indicates that his opponent does. As the chits are drawn from the Decimal Randomizer, do not replace them until every system has been assigned.
[20.5] RECOMMENDED FORMAT
This is a fast-playing and variable scenario. It is best played by the full Advanced Game version. Players should feel free to make a deliberate assignment of systems if they find a mix which balances well in relationship to their style of play.
[21.0] SCENARIO 5: 2451 A.D. L'CHAL-DAH CONTACT
[21.1] INTRODUCTION
Ever since first venturing out of the Solar system, humans awaited First Contact. Finally, in 2451, a small fleet of L'Chal-Dah from Sigma Draconis has stumbled across the nearest Human colony, Eta Cassiopeiae, defended only by its own StarGate. They attempt to probe and/or capture, with access to their own StarGate at 61 Cygni by break-off.
[21.2] ORDERS OF BATTLE AND DEPLOYMENT
Star Systems and StarGates StarForces:
Human Player:
- 2020/0 (Sol) 2
- 1821/-4 (Alpha Centauri) 1
- 3015/-3 (Tau Ceti) 1
- 2713/-2 (Epsilon Eridani) 1
- 3009/-14 (82 Eridani) 0
- 2523/-10 (Epsilon Indi) 1
- 3018/+15(Eta Cassiopeiae) 0
- 2427/-18 (Delta Pavonis) 0
L'Chal-Dah Player:
- 2326/+17 (Sigma Draconis) 2
- 2626/+7 (61 Cygni) 0
- 3223/+17 (HR 8832) 1 Start at
- 3018/+15 2 (In the Eta Cassiopeiae LiteZulu)
[21.3] VICTORY CONDITIONS
Human Player must permanently neutralize all Enemy StarGates; L'Chal-Dah Player must permanently neutralize the Sol StarGate, or any other two Human StarGates.
[21.4] SPECIAL RULES
The Game begins with a Tactical Display deployment of two L'Chal-Dah StarForces, and the deployment of the defending Eta Cassiopeiae StarGate. Play proceeds on the Tactical Display before any Stellar Display plotting.
[21.5] RECOMMENDED FORMAT
This is definitely most enjoyable as a full Advanced Game with full optional rules.
[22.0] SCENARIO 6: 2462 A.D. SECOND PHH - HL WAR
[22.1] INTRODUCTION
Although the PHH had been defeated in 2430 A.D. the basic cause of the conflict had yet to be resolved. Both sides strengthened themselves as much as possible, and tightened their control over other systems. Thus when hostilities again broke out the opposing sides were more clearly delineated.
[22.2] ORDERS OF BATTLE AND DEPLOYMENT
Star Systems and StarGates StarForces:
Human League Player:
- 3015/-3(TauCeti) 3
- 2713/-2 (Epsilon Eridani) 2
Pan-Hegemony Player:
- 2020/0 (Sol) 4
- 1821/-4 (Alpha Centauri) 2 Variable Allegiance [see Special Rules]
- 3009/-14 (82 Eridani) 2
- 2427/-18 (Delta Pavonis) 2
- 2523/-10 (Epsilon Indi) 1
[22.3] VICTORY CONDITIONS
The Player with the greater number of StarForces at the beginning of the game must permanently neutralize two Enemy StarGates. The Player with the lesser number of StarForces must permanently neutralize one Enemy StarGate. If identical in number of StarForces, the first Player to neutralize two Enemy StarGates is the winner.
[22.4] SPECIAL RULES
One Player picks a chit for each of the above listed variable star systems: an even number indicates that he receives the system and its StarForces, an odd number indicates that his opponent does. (see 22.3)
[22.5] RECOMMENDED FORMAT
This scenario is best played by the full Advanced Game version.
[23.0] SCENARIO 7: 2465 A.D. REVOLT OF EPSILON INDI
[23.1] INTRODUCTION
Soon after the PHH-HL War of 2462 A.D. which had ended in an indecisive victory for the Pan-Human Hegemony, Epsilon Indi revolted against PHH control. Most of the members of the old Human League rallied to support Epsilon Indi, with the exception of Epsilon Eridani, who, having been beaten twice by the PHH, decided to switch sides. The L'Chal-Dah chose to remain neutral, intervening on the side of the PHH only when victory became apparent.
[23.2] ORDERS OF BATTLE AND DEPLOYMENT
Star Systems and StarGates / StarForces:
Pan-Human Hegemony Player:
- 2020/0 (Sol) 4
- 1821/-4 (Alpha Centauri) 2
- 2713/-2 (Epsilon Eridani) 1
Epsilon Indi Player:
- 2523/-10 (Epsilon Indi) 2
- 3015/-3(TauCeti) 2
- 2427/-18 (Delta Pavonis) 2
- 3009/-14 (82 Eridani) 1
[23.3] VICTORY CONDITIONS
The PHH Player wins by permanently neutralizing the Epsilon Indi StarGate or any other two Enemy StarGates. The Epsilon Indi Player wins by permanently neutralizing the Sol StarGate or any other two Enemy StarGates.
[23.4] SPECIAL RULES
The first Player to permanently neutralize an Enemy StarGate receives on the following Game-Turn: L'Chal-Dah Forces: StarGates: StarForces 2326/+17 (Sigma Draconis) 2 2626/+7 (61 Cygni) 1 3223/+17 (HR 8832) 1
See Special Rules on inter-race cooperation in 2487 A.D. Scenario (27.4). If both Players neutralize an Enemy StarGate on the same Game-Turn the L'ChalDah remain neutral.
[23.5] RECOMMENDED FORMAT
This scenario is best played with the full Advanced Game version.
[24.0] SCENARIO 8: 2476 A.D. THE WAR WITH THE RAME
[24.1] INTRODUCTION
After the absorption of the L'Chal-Dah into the Human League on Associate basis, the combined leagues made contact with yet a third, more alien race, the Rame, originating from 70 Ophiuchi. After some years of relatively peaceful contact, the Human League attempted to subjugate the Rame.
[24.2] ORDERS OF BATTLE AND DEPLOYMENT
Star Systems and StarGates / StarForces:
Rame Player:
- 2036/+1 (70 Ophiuchi) 6
- 1636/-8 (36 Ophiuchi) 0
- 2833/-11(HR7703) 0
Human League Player: Human:
- 2020/0 (Sol) 6
- 1821/-4 (Alpha Centauri) 0 L'Chal-Dah:
- 2326/+17 (Sigma Draconis) 4
- 2626/+7 (61 Cygni) 0
[24.3] VICTORY CONDITIONS
HL Player must permanently neutralize all of Rame Player's StarGates, without having the Sol or Sigma Draconis StarGates neutralized. Rame Player wins if he avoids this condition for twenty Stellar Game-Turns.
[24.4] SPECIAL RULES
See Special Rules for 2487 A.D. on inter-race cooperation (27.4).
[24.5] RECOMMENDED FORMAT
This should be played as an Advanced Game, with rule 32.0, Reserve StarForces.
[25.0] SCENARIO 9: 2480 A.D. L'CHAL-DAH EXPANSION
[25.1] INTRODUCTION
The L'Chal-Dah continued their new policy (begun in 2465 A.D.) of expansion and activity in stellar politics by attempting to strengthen their power base at the expense of the Rame.
[25.2] ORDERS OF BATTLE AND DEPLOYMENT
Star Systems and StarGates / StarForces:
L'Chal-Dah Player:
- 2326/+17 (Sigma Draconis) 3
- 2626/+7 (61 Cygni) 1
- 3223/+17 (HR 8832) 3
Rame Player:
- 2036/+1 (70 Ophiuchi) 3
- 1636/-8 (36 Ophiuchi) 1
- 2833/-11 (HR 7703) 1
[25.3] VICTORY CONDITIONS
The first Player to permanently neutralize any Enemy Home System StarGate, or any other two Enemy StarGates wins.
[25.4] SPECIAL RULES
The L'Chal-Dah Forces may make one full Stellar shift before the simultaneous plotting of both forces.
[25.5] RECOMMENDED FORMAT
This scenario is best played using the full Advanced Game version.
[26.0] SCENARIO 10: 2482 A.D. WAR OF THE DEFENSE LEAGUE
[26.1] INTRODUCTION
After the Rame were defeated by the L'Chal-Dah in 2480 A.D., the two formed the L'Chal-Dah dominated Defense League. Renouncing their associate status in the PHH, the L'Chal-Dah attempted to free themselves from human interference, with the ultimate goal of defeating the Humans entirely (perhaps then giving the Humans associate status in their league).
[26.2] ORDERS OF BATTLE AND DEPLOYMENT
Star Systems and StarGates StarForces:
Defense League Player: Rame:
- 2036//1 (70 Ophiuchi) 1
- 1636/+1 (70 Ophiuchi) 1
- 2833/-11 HR 7703) 1 L'Chal-Dah:
- 2326/+17 (Sigma Draconis) 2
- 2626/+7 (61 Cygni) 1
- 3223/+17 (HR 8832) 1
Pan-Human Hegemony Player:
- 2020/0 (Sol) 5
- 1821/-4 (Alpha Centauri) 3
- 2713/-2 (Epsilon Eridani) 2
[26.3] VICTORY CONDITIONS
The PHH Player wins by permanently neutralizing the StarGates at Sigma Draconis and 70 Ophiuchi, or any other four Enemy StarGates. The DL wins by permanently neutralizing the Sol StarGate or preventing PHH victory. The game ends after the completion of twenty Game-Turns.
[26.4] SPECIAL RULES
The L'Chal-Dah and the Rame may not use one another's StarGate or StarForces to improve shift radius, although they are fully compatible in combat (see 27.4 for more elucidation).
[26.5] RECOMMENDED FORMAT
This scenario is best played using the full Advanced Game version.
[27.0] SCENARIO 11: 2487 A.D. THE WAR FOR IDENTITY
[Three-Player Game]
[27.1] INTRODUCTION
After several years, the Human League with its Associates, L'Chal-Dah and Rame, collapsed. Three factions emerged: the Pan-Sentient League (advocating complete freedom for all biologic and cybernetic sentients); the shrunken HL; and a resurgent PHH. The First Interstellar Peace established the PSL as dominant throughout the sphere.
[27.2] ORDER OF BATTLE AND DEPLOYMENT
Star Systems and StarGates / StarForces:
PSL Player:
- 2326/+17(SigmaDracoms) 4
- 3223/+17 (HR 8832) 0
- 2626/+7 (61 Cygni) 0 Rame:
- 2036/+1 (70 Ophiuchi) 3
- 1636/-8 (36 Ophiuchi) 0
- 2833/-1KHR7703) 0
PHH Player:
- 2020/0 (Sol) 3
- 2523/-10 (Epsilon Indi) 2
- 1821/-4 (Alpha Centauri) 2
- 3018/+15 (Eta Cassiopeaie) 1
HL Player:
- 3015/-3(TauCeti) 2
- 2713/-2 (Epsilon Eridani) 2
- 3009/-14(82 Eridani) 2
- 2427/-18 (Delta Pavonis) 1
[27.3] VICTORY CONDITIONS
A Player loses the scenario when any two of his colonial StarGates are permanently neutralized, or when his home system StarGate is permanently neutralized. However, his units remain in play and he may continue playing (acting as a "spoiler" or allying with another Player). The last Player who has not lost, wins. Note that Tau Ceti (3015/-3) is the Human League "home" system.
[27.4] SPECIAL RULES
-
Inter-Race Compatibility and Cooperation: The StarGate of one race may not be linked to the StarGate of another race in order to make a Gate-to-Gate shift. Nor may the StarGate or StarForce of one race enhance its position for an in-shifting StarForce of another race. The StarForce of one race may make a simple Gate shift from the StarGate of another cooperating race and a Gate-to-Gate shift if both StarGates are owned by the same race. Forces of different races are fully compatible in combat.
-
Alliances: Players may confer with each other and make verbal deals, they are bound only by what they actually plot each Combat Segment (or each Tac Plot Phase). Players indicate when plotting whether or not they wish their combat effect to affect both of the other Players in a particular LiteZulu or only one (if, indeed, both are in the LiteZulu). In the basic game, they must also indicate whether or not they wish their defensive allocation to be added to that of another Player (this is only operative if that other Player has also indicated mutual defense). If three Players are contesting the same LiteZulu and none are cooperating in combat, each Player makes separate resolutions of combat against each other Player, using his full allocated Strength against Basic Game (in the Advanced Game there is less of a problem since all hostile casts are additive and no defensive effects are ever additive).
-
Two-Player Version: There are only two active roles: the Pan-Sentient League and the Pan-Human Hegemony. The Human League is considered to be wavering and fractionated, and until it is committed, its forces and systems are inoperative and do not count towards victory. Each Game-Turn (at the end of the Stellar Plot Phase) each Player draws a chit from a set of ten Decimal Randomizers put aside to represent the political wavering of the HL. Each Player adds the chit to those drawn on previous Game-Turns (these political chits are not returned to the special Randomizer). The Player who achieves a total of 23 (or more) "political chit points" has "convinced" the Human League to join his cause and gets the use of HL forces at the beginning of the next Game-Turn (the Inter-Race Compatibility rules still apply). If either one (or both) of the Players loses one of his colonial StarGates before either Player has 23 political points, that Player must skip a turn at chit-pulling on the Plot Phase immediately following the permanent neutralization of the StarGate. If one Player wins before either Player reaches 23, both Players alternately draw all the remaining chits to see if the Human League decides to declare war on the winner (in which case, the HL forces would be operated by the losing Player; the systems and forces of the initially losing League or Hegemony are inoperative and are removed from play). The victory conditions remain the same.
[27.5] RECOMMENDED FORMAT
2487 A.D. should be played with Basic Game rules, and the 15.0 rules section of the Advanced Game. It is still functional with all of the Advanced Game rules.
[28.0] SCENARIO 12: 2505 A.D. THE WAR FOR THE LEAGUE
[ThreePlayer Game]
[28.1] INTRODUCTION
The PSL temporarily lapsed when the Pan-Human hegemony rose to power again in two systems. The Rame and L'Chal-Dah pulled out of the PSL, while the other human systems remained neutral. The conclusion of this war saw the end of intra-sphere rivalries. The PSL was re-established with unanimity.
The three sides essentially fought for control over the new colony of Delta Pavonis, which had yet to orbit and crew its StarGate.
[28.2] ORDERS OF BATTLE AND DEPLOYMENT
Star Systems and StarGates StarForces:
Rame Player:
- 2036/+1 (70 Ophiuchi) 4
- 1636/-8 (36 Ophiuchi) 0
- 2833/-11(HR7703) 0
L'Chal Dah Player: 2326/+17(SigmaDraconis) 4 3223/+17 (HR 8832) 0 2626/+7 (61 Cygni) 0 PHH Player: 2020/0 (Sol) 5 2523/-10 (Epsilon Indi) 0
[28.3] VICTORY CONDITIONS
Players lose the game if their home system StarGate is permanently neutralized (see 2487 A.D.); Players may win by controlling Delta Pavonis LiteZulu (2427/-18) for four consecutive Game-Turns.
[28.4] SPECIAL RULES
See 27.4. L'Chal-Dah is uncommitted in a two-Player version.
[28.5] RECOMMENDED FORMAT
This scenario is best done as a Basic Game with Advanced rule 15.0 and Optional Rule 33.0, FakerForces.
[29.0] SCENARIO 13: 2775 A.D. THE FIRST XENOPHOBE INCURSION
[29.1] INTRODUCTION
After two and one-half centuries of generally pacific conduct and gradual terraforming of all the depicted star systems, the PSL sphere was invaded by a rabid species known only as the "Xenophobes". They began inducing novas in PSL stars (causing them to explode) incinerating the inhabitants. Not knowing where they were coming from, and the thought pattern being so alien as to be largely undetectable, the PSL StarForces were forced to search the periphery of its Known Volume for the Xenophobe "base camp" StarGates. The Xenophobes were inhibited by smaller shifts due to unfamiliarity with the PSL Volume.
[29.2] ORDERS OF BATTLE AND DEPLOYMENT
Star Systems and StarGates / StarForces Xeno Player: Three StarGates, 12 (total) positioned randomly, (See 31.0 Special Rules) PSL Player: All systems on the 6 (deployed Stellar Display as desired) (except 511/+1,1812/-2,2734/+2)
Beginning with Game-Turn Two, the PSL receives one additional StarForce every even-numbered Game-Turn, until twelve additional StarForces have been received. StarForces appear at the start of the plot Phase in any LiteZulu having an un-neutralized PSL StarGate.
[29.3] VICTORY CONDITIONS
Scenario continues until all Xeno StarGates have been destroyed or all PSL Home Systems stars (Sol, Sigma Draconis, and 70 Ophiuchi) have gone nova. At that time, Victory is determined according to the number of Victory Points, the Player with the higher total winning.
Xeno Victory Points 20 Points for each PSL home system destroyed 10 Points for each secondary star system destroyed 3 Points for any tertiary system destroyed 5 Points for each "destroyed" result against PSL StarForces.
PSL Victory Points 25 Points for permanent neutralization of Xeno StarGate 1 Point for each "destroyed" result against Xeno StarForces.
Xenophobe Player wins automatically if all the PSL Home systems are destroyed.
[29.4] SPECIAL RULES
See section 31.0, Xenophobe Special Rules.
[29.5] RECOMMENDED FORMAT
Players should use the Basic Game modified by the use of Randomization rules (15.0) for both Overshift results and combat results. Players may add optional rules to suit their taste for complexity. Playing the Xenophobe scenarios using the Advanced Game can be interesting, but will be extremely time consuming (seven to twelve hours of play would not be unusual). See the Special Rules, 31.0.
[30.0] SCENARIO 14: 2785 A.D. THE SECOND XENOPHOBE INCURSION
[30.1] INTRODUCTION
After the First Incursion of the Xenophobes had been driven off by the PSL, a watchful peace ensued. Approximately 30 billion PSL sentients died in the First Incursion, creating a shortage of telesthetics and forcing a reduction in the number of PSL StarForces. 10 years after the First Incursion, the Xenophobes returned.
[30.2] ORDERS OF BATTLE AND DEPLOYMENT
Star Systems and StarGates StarForce:
Xeno Player: Two StarGates, 8 (total) positioned randomly (see 31.0 Special Rules) PSL Players All systems on the 4 Stellar Display (except
- 1511/+1,1812/-2,2734/+2)
Beginning with Game-Turn Two, the PSL receives one additional StarForce every even-numbered Game-Turn until a total of eight additional StarForces have been received. These StarForces appear at any LiteZulu having an un-neutralized PSL StarGate.
[30.3] VICTORY CONDITIONS
Essentially the same as 29.3. See 31.6 in the Special Rules.
[30.4] SPECIAL RULES
See 31.0.
[30.5] RECOMMENDED FORMAT
Same as recommended in 29.5.
[31.0] SPECIAL RULES
FOR THE XENOPHOBE SCENARIOS
GENERAL RULE: Since a special situation is being simulated in the two Xenophobe incursion scenarios, a number of special rules must be applied to the game.
CASES:
[31.1] DEPLOYMENT OF XENOPHOBE STARGATES
In the First Incursion, three Xenophobe StarGates must be deployed; in the Second Incursion, two must be deployed. Use the following random procedure:
[31.11] Draw two chits (secretly) from the Stellar Randomizer. This will indicate the hex position of the first Xenophobe StarGate. The Xenophobe Player then decides if the hex position of the first StarGate will be two Lites distant from the positive outer limit of the Stellar Display or two Lites distant from the negative outer limit. For example, if the chits drawn indicate hex number 2033, the first Xeno StarGate could be positioned at LiteZulu 2033/+19 or 2033/-19. Whichever the Xeno Player chooses, the remaining Xeno StarGates must be positioned on the same outer limit of the Stellar Display.
The hex numbers of the remaining Xeno StarGates are chosen in the same manner. If any of the hex numbers drawn are ones outside the two-dimensional limits of the Display, the number is adjusted in a manner similar to that described in 15.3. The positions of Xeno StarGates are not known to the PSL Player (and the StarGate counters are not displayed on the map). In order to discover them the PSL Player must shift adjacent to them.
[31.12] After positioning his StarGates, the Xenophobe Player sets up his available StarForces in those same positions, in any distribution he desires.
[31.2] UNKNOWN SPACE AND ITS EFFECTS UPON SHIFTING
For the PSL Player, unknown space is defined as any LiteZulu outside the normal Zulu limits of the Stellar Display. For the Xenophobe Player, unknown space is defined as any LiteZulu within the normal Zulu limits of the Stellar Display. Additionally, any LiteZulu which is further than ten Lites from a Xeno StarGate is considered as unknown space to the Xeno Player, even if it is outside the normal Zulu limit of the Stellar Display.
[31.21] Effects of Unknown Space on Shifting: Whenever the destination LiteZulu of a Stellar shift is in unknown space, the Maximum safe shift is reduced to one Lite for a normal shift (plot code "S") and to five Lites for a Gate assisted shift (plot code "GS"). Other types of shifts are unaffected (i.e., plot codes "ES", "EGS" and "GGS"). See the Maximum Shift Table on the map. If the destination LiteZulu is in known space and the point of origin is in unknown space, then normal shift ranges apply.
[31.22] Entering a LiteZulu Held by an Enemy StarGate: Players do not add four Lites to the effective distance of their shift when entering an Enemy StarGate-LiteZulu. This is a suspension of standard case 7.31. This means that in order to enter an Enemy StarGate-LiteZulu without risk of Overshift, a Friendly unit must be adjacent to the StarGate or within five Lites if shifting with the aid of a Friendly StarGate.
[31.3] MODIFIED SEQUENCE OF PLAY AND HIDDEN MOVEMENT
Since the two opposing space forces are telesthetically "blind" to each other over any appreciable distance, all shifting is completely hidden, i.e., it is plotted without displaying any counters on the Stellar Display until a combat situation is imminent.
The Xenophobe Player secretly plots his projected shifting for all the Game-Turns up to and including the Game-Turn in which he will enter a LiteZulu adjacent to a PSL StarGate. He does not at this time execute this plot. The PSL Player plots and executes Game-Turn by Game-Turn the shifts he desires his forces to make. As he executes his shifts he announces what Game-Turn he is executing. If the Game-Turn he is executing is the Game-Turn in which the Xenophobe Player has forces adjacent to a PSL StarGate, the Xenophobe Player informs the PSL Player of this fact after the PSL has executed that Game-Turn's plot. He also tells the PSL to which StarGates he is adjacent (but not the composition of the forces which are adjacent) and the exact position of his adjacent forces. Both Players then plot and execute the next Game-Turn. Assuming that the Xenophobe Player enters a PSL StarGate LiteZulu in that Game-Turn, a combat situation would ensue. At the end of that Game-Turn, the Xenophobe Player would inform the PSL if there are any Xeno forces adjacent to PSL StarGates. If not, the Xeno Player would make another series of advance plots and the procedure described above would again be pursued. If there are Xeno forces adjacent, only the next Game-Turn's plot would be written after the Xeno Player informs the PSL Player which StarGate LiteZulus he is adjacent to.
[31.31] If the PSL Player is searching unknown space in an attempt to locate the Xeno StarGates, he must tell the Xeno Player Game-Turn-by-Game-Turn which unknown LiteZulus he is shifting into. If one or more of these LiteZulus is adjacent to a Xeno StarGate the Xeno Player must reveal the position of that StarGate. The PSL Player does not have to reveal the size of the forces with which he is searching. When the PSL finds a Xeno StarGate the Xeno Player cancels his plot back to the Game-Turn of discovery and both Players proceed to write and execute their shifts for the next Game-Turn. For example, if the Xeno Player had plotted to be adjacent to a PSL StarGate on Game-Turn Fifteen but the PSL has come adjacent to a Xeno StarGate on Game-Turn Twelve, the Xeno Player would cancel his plots for Game-Turns Thirteen through Fifteen and write a revised plot for Game-Turn Thirteen. As long as one or the other Player is adjacent to an Enemy StarGate, the plotting and execution takes place on a normal Game-Turn by Game-Turn basis. Players always inform each other of this adjacency in the Zulu Coordinate Readout Segment of the Game-Turn in which the condition exists.
[31.32] If the Xeno Player has StarForces in a LiteZulu in which the PSL is searching (or if the PSL has forces in the same LiteZulu adjacent to his StarGate that the Xeno Player is revealed to be in) then the Xeno plot is cancelled back to that point and a combat situation ensues. This allows Players to set up ambushes for each other.
[31.33] If at any time during his projected plot the Xeno Player will be making Overshifts, he must openly resolve these (in advance of actually executing them) but he need not tell the PSL Player the forces involved. Of course, Overshifts which apply to cancelled plots are themselves cancelled unless the Xenophobe Player maintains those plots after having had the opportunity to cancel them. Similarly, the PSL Player must openly resolve any Overshifting he performs on a Game-Turn by Game-Turn basis.
[31.33] If there occurs a fifteen Game-Turn period in which the Xeno Player does not make an attack on a PSL StarGate, the Xeno Player forfeits the game.
[31.4] FIRST GAME TURN RULES [FIRST INCURSION ONLY]
In the First Incursion scenario, the PSL is completely unaware of the existence and threat of the Xenophobes until they make their first attack. Additionally, the Xenophobes do not know the full extent of the PSL hegemony and are a hair-trigger bloodthirsty race of psychopaths. To simulate this the following provisions are applied:
[31.41] Pre-Game Plot: Before the game actually begins for both Players, the Xenophobe Player may plot and execute as many as ten Game-Turns of shifting. During this time the PSL Player does nothing. On or before the end of these ten pre-Game-Turns the Xenophobe Player must bring forces adjacent to one or more PSL StarGates. He then announces to the PSL Player that the next Game-Turn is the official start of the game, the "First" Game-Turn. Note that unlike all subsequent situations, the Xeno Player does not announce his positions nor the StarGates to which he is adjacent. He merely announces the fact of adjacency. In the first Game-Turn the Xenophobe Player must attack one or more PSL StarGates.
[31.42] Surprise Attack Provision: In the first Game-Turn (only) the Xenophobe Player may automatically destroy one PSL StarGate (and induce nova in its star) without having to resolve any combat in that LiteZulu regardless of the PSL forces present. All PSL StarForces present must immediately plot a break-off maneuver. If the Xenophobe Player is attacking more than one PSL StarGate and system in the first Game-Turn, he must designate which is to be the victim of the surprise attack before knowing whether or not there are PSL StarForces present. Any other systems being attacked on the first Game-Turn are resolved normally. None of the three home systems may be designated as the object of the surprise attack (even if only one system is attacked and it is a home system. In such a case the Xeno Player would lose the advantage of a surprise attack.). The surprise attack force must be at least two StarForces in strength.
[31.5] NOVA INDUCEMENT AND COMBAT RESOLUTION
The Xenophobe murderers use the star of the system as a weapon. By planting a Conversion Trigger in the heart of the sun they cause it to nova (greatly accelerate its energy output) in order to scorch the orbiting planets and destroy all life. In order to perform this triggering successfully, the StarGate defending the system must be dealt with first. The following cases simulate this:
[31.51] Nova Inducement: In the Basic Game, if the Xenophobe Player has one or more StarForces present in the PSL LiteZulu in which the StarGate has been eliminated (neutralized) he may cause the star to go nova in any Combat Segment following the elimination of the StarGate. One Xeno StarForce must be assigned to task of triggering the star, and it must be plotted to break-off in the Combat Segment in which the star is triggered. If it is randomized before it can break-off, the star is not triggered. If it successfully breaks-off, the star is triggered and the
StarGate is destroyed permanently. Remaining opposing StarForces may remain behind to fight (but the outcome is academic, since the system has been destroyed).
[31.52] Nova Inducement in the Advanced Game: In order to plant the Conversion Trigger in the star, at least one Xeno StarForce must spend an entire TacTurn in the star's MiniLiteZulu. It must be in Stellar Mode and assign half its TelePoints to the task of planting the trigger (which actually is completed in the Position Revelation Phase of that Tac-Turn).
If the Xeno StarForce is disrupted (or randomized) before that time, the trigger is not considered planted and the star will not go nova. The PSL StarGate must be in a disrupted (or neutralized) state during the planting of the trigger. In the Tac-Turn following the successful planting of the trigger, the Xeno StarForce must Tac-shift out of the MiniLiteZulu containing the star and attempt to execute a break-off maneuver in the Second Execution Phase. The star goes nova during the Combat Cast Segment of the First Execution Phase (After successful planting of the trigger) and any StarForces in the MiniLiteZulu with the star are destroyed in the Results Application Phase. Any remaining StarForces may still contest the LiteZulu but they may not enter the MiniLiteZulu containing the star. The StarGate is not permanently destroyed until the resolution of the Tactical Sequence.
[31.53] When playing either Xenophobe scenario, Players should use the Basic Game system (preferentially) and modify it by using rule 15.0, Randomization, instead of using total elimination. When Xenophobe units are randomized (whether as a result of combat or Overshifting) they are removed from the game for three entire Game-Turns following the one in which they were randomized. They reappear (in a normal, ready state) at the beginning of the fourth Game-Turn after randomization. They reappear at any un-neutralized Xeno StarGate of the owning Player's choice. When Xeno units randomize (either in combat or shifting) the Xeno Player should still draw two chits in order to receive a possible destroyed result. When PSL units are randomized (even when operating in unknown space) they follow the randomization procedure as detailed in 15.0 and must adjust their final position as per 15.3, always repositioning themselves in known space.
[31.54] When using the Basic Game Combat Resolution Table, the attacking Player determines how the defending Player will take his losses.
[31.6] FIRST GAME-TURN RULES AND STANDARD RESULTS OF FIRST INCURSION [SECOND INCURSION ONLY]
The Second Incursion found the PSL weaker but warier. No surprise attack could catch them completely off-guard. To simulate this, use the following provisions in the Second Incursion Scenario:
[31.61] Pre-Game Plot: The Xenophobe Player has a pre-game plot of five shifts during which the PSL Player does nothing. If at the end of those five preGame-Turns, the Xenophobe Player is not adjacent to a PSL StarGate, he merely informs the PSL Player that the First Game-Turn is about to begin. The Xenophobe Player has five official Game-Turns in which to come adjacent to one or more PSL StarGates for the first time. There is no surprise attack; all PSL StarGates and forces perform normally.
[31.62] Standard Results of the First Incursion: As a result of the First Incursion, the following star systems do not have StarGates and do not count for Second Incursion Victory points: 2036/+1 (70 Ophiuchi), 2626/+7 (61 Cygni), 3018/+15 (Eta Cassiopeiae), 1521/+16, 1532/-3, 2026/0, 2228/-4,
2623/+11. Since all other PSL systems have StarGates, Players should use the StarGate markers to mark those systems that have had their StarGates destroyed.
[31.7] XENOLINK
Players may wish to combine the two Xenophobe scenarios into one long game. To do so, play the First Incursion scenario until all three Xeno StarGates are found and eliminated (neutralized) regardless of PSL home systems destroyed. When all three Xeno StarGates have been neutralized, assess the damage that the PSL has suffered and make the following force reductions (from the original eighteen PSL StarForces) for the Second Incursion, based on that damage:
A. Remove three PSL StarForces for each PSL home system destroyed.
B. Remove one PSL StarForce for each secondary colony destroyed.
C. Remove one PSL StarForce for each five tertiary systems destroyed (rounding fractions up).
D. Remove one PSL StarForce for every three PSL StarForces that suffered a destroyed result in the First Incursion.
Reduce the Xenophobe StarForce order of battle (the original twelve) by the following amount: One StarForce for each StarGate neutralized in the First Incursion (since all three must be neutralized in order for the First Incursion to end in a linked game, this reduction is academic). One Xenophobe StarForce for every two that received a destroyed result in the First Incursion.
Do not use the Standard Results of the First Incursion detailed in 31.62. Rather, use the actual results of the First Incursion as obtained in the game. Second Incursion Xenophobe StarGates must be placed on the same side of the Stellar Display as in the First Incursion (i.e., positive or negative).
A NOTE ON THE OPTIONAL RULES [Sections 32.0 through 37.0] The Optional Rules are just that: rules which the Players may add to the game at their discretion. Players may use some, all, or none of the Optional Rules as they desire. The Optional Rules will always complicate a given scenario, so Players should proceed with caution and not feel compelled to add every (or any) Optional Rule. Some of the Optional Rules can be used as balancing elements for Players whose style of play matches the flavor that a given rule lends to a given scenario. There will be a necessary period of experimentation in which Players can discover which Optional rules appeal to them. The most complicated game possible would be one which uses both Xenophobe scenarios in a linked Advance Game, employing all of the Optional Rules. This would not necessarily be the best game possible (and has a good chance of being the worst).
[32.0] RESERVE STARFORCES
GENERAL RULE: As much as one-third of a Player's current StarForce strength may be placed on reserve status in a given Game-Turn. Such units have the plot code "Rs" assigned to them in the Stellar Shift Plot Phase and may not shift during that Shift Execution Phase. After all normal Stellar shifts have taken place, and after it is known which LiteZulus are being contested, but before it is known exactly what forces are contesting the LiteZulus, the StarForces on reserve status have their reserve plot modified to indicate which of the contested LiteZulus they can be called into. A given unit cannot be slated as a reserve for more than one contested LiteZulu per Game-Turn.
CASES:
[32.1] HOW RESERVE STARFORCES ARE CALLED INTO CONTESTED LITEZULUS
After two Tac-Turns (or one Combat Segment in the Basic Game) have elapsed m a given LiteZulu, Players who have reserve StarForces on call to that LiteZulu may call them to appear at the beginning of the third Tac-Turn (or second Segment). Not all of the StarForces on call to that LiteZulu need be called in, nor need any be called in at that time; they may be called in at the beginning of some later Tac-Turn (or Combat Segment). Reserve StarForces may Overshift.
[32.11] Reserve StarForces called into a contested LiteZulu appear in Stellar Mode (meaning, in the Basic Game, they have a Combat Strength of "2") and must be plotted to appear (in the First Execution Phase) in a MiniLiteZulu which will be occupied by a Friendly, un-neutralized StarForce or StarGate which is already in the LiteZulu.
[32.12] In the Tac-Turn in which they appear, reserve StarForces may be plotted to perform any action which could normally be plotted for the Second Execution Phase of that Tac-Turn. No plot may be written for the First Execution Phase. They have 32 TelePoints available for plotting.
[32.13] Reserve StarForces are subject to the effects of any First Execution Phase Enemy casts which may be made into their MiniLiteZulu-of-appearance. Their Anti-cast depends upon what they have been plotted to do in the Second Execution Phase.
[32.2] LIMITATIONS ON RESERVE STARFORCES
[32.21] No more than one-third of a Player's total current StarForce strength (not counting neutralized StarForces) may be placed on reserve status in a given Game-Turn. This third is calculated by rounding down, but can never be rounded down to less than one StarForce eligible for reserve status.
[32.22] StarForces which have a reserve plot written for them in one Game-Turn may not have any other Stellar plot written for them in the following Game-Turn. If the Player wishes to take a unit off reserve status, he must not write any plot for that unit in the Game-Turn following that in which the "Rs" plot was last written for that unit.
[32.33] Neutralized units may not be placed on reserve status.
[32.3] RESERVE STARFORCES AND STARGATES
[32.31] Friendly StarGates: Reserve StarForces may use the next-Game-Turn capacity of a Friendly StarGate in the LiteZulu in which they are being held in reserve. This is calculated exactly as described for the advance use of StarGate capacity for break-off (see 3.34).
[32.32] Reserve StarForces may not in any way use the capacity of the StarGate in the LiteZulu to, which they are being called.
[32.33] Enemy StarGates: Reserve StarForces may be called into a LiteZulu in which there is an active Enemy StarGate. They are subject to the normal addition of four Lites to their nominal shift distance with the modification that for every Friendly StarForce which began the Tac-Turn (or Combat Segment) in the contested LiteZulu, they may reduce the addition by one Lite (until it is reduced to zero addition). In this calculation, StarForces which begin the Tac-Turn in a disrupted state count as one-half (i.e., there must be two Friendly disrupted StarForces in order to reduce the shift addition by one Lite).
If the Enemy StarGate is itself disrupted at the time of the reserve call the standard distance addition is reduced to two Lites before calculating further reductions. Note that the presence of Enemy StarForces has no effect upon any of these calculations.
[32.4] SPOILING RESERVES
Enemy Units may attempt to spoil reserve forces by attacking them before they can be called. Such situations should be resolved first before resolving other contested LiteZulus.
[32.41] If reserve StarForces are challenged by Enemy StarForces while they are standing by on reserve, they are considered to be in Stellar Mode (in the Basic Game, this means they will have a First Combat Segment strength of "2" even though they began the Game-Turn in that LiteZulu). If the reserve forces were slated for a destination which called for the use of a Friendly StarGate, the reserve units so slated must deploy in the MiniLiteZulu of that StarGate (meaning in the Basic Game that they cannot attack nor be attacked in the First Combat Segment).
[32.42] Reserve StarForces which suffer a combat result, Tac shift, change to Battle Mode, or make a combat cast while standing by on reserve, immediately have their reserve plot cancelled (they may not be called that Game-Turn and are freed from the restrictions of 32.22). In the Basic Game, forces which a Player wishes to maintain on reserve status in a contested LiteZulu may not use their strength to attack and may not increase their strength to "3" after the First Combat Segment. They may only defend until the Player decides to release them from reserve status.
[32.43] If two or more LiteZulus are contested while having reserves standing by in them. Players must resolve them in order of "greatest involvement". "Greatest involvement" is ranked in the following order:
-
Contested LiteZulu with Friendly Reserves standing by which has Friendly reserves on call to that position (i.e., a reserve with a reserve on call).
-
Contested LiteZulu with the greatest number of forces standing by on reserve.
-
Contested LiteZulu whose reserve is on call to the contested LiteZulu with the greatest total forces involved.
[32.44] If even when following the above priority of resolution, a conflict still arises (i.e., reserves standing by in a contested LiteZulu, while their reserve destination is being resolved), the Player may commit such reserves if he leaves behind forces which exceed the Enemy spoiling the force by at least one StarForce (a StarGate is equivalent to two StarForces in this calculation). Note that the Friendly StarGate in such a contested LiteZulu cannot perform a Gate Shift (GS) for the exiting Reserve StarForces.
[33.0] FAKERFORCES
GENERAL RULE: Each StarForce is composed of four Teleships. This rules allows StarForces to be broken up into four individual Teleships. These individual Teleships are known as FakerForces. Though they represent only a single ship, FakerForces are represented on the Stellar Display as StarForces, and are thus used to deceive the Enemy Player.
PROCEDURE: At the beginning of any Game-Turn in the scenario, Players may split their StarForces into FakerForces. No more than 10% of a Player's total StarForces may be split in this manner (round fractions up, i.e., 10% of eleven equals two StarForces which equal eight FakerForces). FakerForces are represented by StarForce counters for all purposes, and Players must make a notation on their plot sheets as to which StarForces are actually FakerForces. The true composition of FakerForces is not revealed until they are in the same LiteZulu as an Enemy StarForce or StarGate. At the beginning of the game certain letters are assigned FakerForces (see 33.2).
CASES:
[33.1] CAPABILITIES AND LIMITATIONS OF FAKERFORCES
FakerForces count as one-quarter of a StarForce for all StarGate capacity considerations, Basic Game combat losses, and victory point calculation purposes.
[33.11] FakerForces have the exact same Stellar Shift Range as a full StarForce. On the Tactical Display their Tac-shift Range and TeleValue is as indicated on the TelePoint Cost Table on the map.
[33.12] FakerForces may only enhance for each other on a one-for-one basis. They may never enhance for a StarForce even if there are four FakerForces in the LiteZulu. StarForces may, however, enhance a destination for as many as four FakerForces (if all are coming from the same point of origin; if not, the StarForce may only enhance for as many FakerForces as are coming from the same point of origin). Similarly, StarGates may enhance for as many as sixteen FakerForces if all are coming from the same point of origin. If FakerForces are coming from different points of origin, the StarGate may enhance its LiteZulu for as many as two groups of four FakerForces. Each group counts as one StarForce against the basic Gate capacity of two StarForces per Game-Turn. The same capacity considerations apply when plotting "GS" or "EGS" or "GGS" operations for FakerForces.
[33.13] In the Basic Game Combat, each FakerForce is worth one-half of a Strength Point (this never is increased or decreased). There must be at least two FakerForces in the same LiteZulu in order to contribute any Strength to the attack (an odd halfpoint may however be contributed to the defense and the defense total is rounded up). FakerForces are equivalent to one-quarter of a StarForce for loss purposes.
[33.14] FakerForces may be re-combined into a StarForce if all four FakerForces end the Shift Execution Phase in the same (uncontested) LiteZulu. They may not be recombined when on the Tactical Display or when in a Basic Game combat situation.
[33.15] FakerForces have the same abilities as Starforces with respect to intelligence gathering on the Stellar Display and the Tactical Display. They perform as a StarForce in the Zulu Coordinate Readout Segment of the Stellar Game-Turn and the Position Phase of the Tac-Turn.
[33.16] FakerForces may not be placed on reserve status.
[33.17] The only time FakerForces are revealed to be such is when they are adjacent to an Enemy StarGate (in the non-Xenophobe scenarios), when they are in a contested LiteZulu, or when they are on the Tactical Display.
[33.2] PLOTTING FAKERFORCES
The letter designations of FakerForces and StarForces are interchangeable; in any Stellar Plot Phase in which FakerForces and StarForces are in the same LiteZulu the owning Player may redesignate the units, switching the designations of the StarForces and FakerForces. In this way the Enemy Player will never be able to permanently discover the true composition of a Player's forces. Players should be scrupulously accurate in these redesignations and be prepared to offer proof upon challenge.
[33.3] DEPLOYMENT
Before the beginning of the game the owning Player may deploy his FakerForces as he wishes in any LiteZulu containing a Friendly StarGate, so long as at least one FakerForce remains in its starting LiteZulu, i.e., in the LiteZulu of its component StarForce. (Exception: no FakerForce of either Player may begin the game in the Eta Cassiopeiae LiteZulu in the 21.0 scenario).
[34.0] GATELINK
GENERAL RULE: StarGates may be linked together in a chain like arrangement of Gate-to-Gate-to-Gate (etc.) shirts. All Gates involved in such a GateLink must be assigned exclusively to that operation and must, of course, be Friendly, un-neutralized StarGates.
CASES:
[34.1] GATELINK CAPACITY
All the StarGates in the Link have a combined capacity equal to that of one StarGate. GateLink are unidirectional if the maximum capacity of four StarForces are sent through the Link. GateLink are bidirectional if the normal, two StarForce limit is observed.
[34.2] ORIGINS AND DESTINATIONS
The GateLink must be a linear linkage (there can be no branching out of the Link to different StarGates even if the minimum capacity is used). There may be no closed loops in the GateLink. Each StarGate in the Link must be within twenty Lites of the next StarGate in the link. Overshifting is prohibited in a GateLink.
[34.21] If maximum capacity is being used, all the StarForces involved must begin in the same LiteZulu (one of the "ends" of the Link), but need not end in the furthest StarGate in the Link. Some may drop off the Link at intermediate StarGates within the linkage. If normal capacity (two) is used, the GateLink is bidirectional and the StarForces involved may each come from a different end of the Link (they must start in the ends of the Link and there can only be two StarGates designated as the ends). Once again, they need not complete the full linkage but may drop off at any intermediate StarGate in the Link.
[34.3] PLOTTING A GATELINK
Plot the GateLink by writing, in order of linkage, the identity numbers of the StarGates involved. Example: 4-1-6-2. Since the positions of all StarGates (except in the Xenophobe scenarios) are known Players can simply write the StarGate identity number of their point of origin and destination inserting the code "GL" between them. Example (referring to the Link just described): 4GL6. This would indicate a GateLink shift beginning at StarGate "4" and ending at StarGate "6".
[34.31] Reserve StarForces cannot use GateLinks.
[34.32] Xenophobe StarForces may plot a GateLink between two or three of their StarGates even if none are within twenty Lites of another. The Xenophobe Player can be assumed to be linking into StarGates further "into" his system which fill the gaps in the linkage. Therefore the Xenophobe Player could link all three of his StarGates in any order he desired.
[34.33] Just as all other plots, GateLinks do not persist from Game-Turn to Game-Turn; they must be replotted each Game-Turn as desired. Of course, the linkage can be modified in subsequent plots.
[34.34] A Player can set up any number of GateLink systems in a given Game-Turn providing that none share a common StarGate.
[35.0] SITUATIONAL CONTINUITY
GENERAL RULE: In both the Basic and Advanced Games, there are artificial constraints which force the resolution of combat situations within the Game-Turn in which they occur. This is done primarily for purposes of simplicity. If they wish, Players may continue combat situations from Game-Turn to Game-Turn until they are resolved naturally (i.e., without forcing stalemateending breakoffs, etc.).
CASES:
[35.1] DURATION OF COMBAT SITUATIONS PER GAME-TURN
In the Basic Game, each Situation is played for a period of six Combat Segments in the first Game-Turn; in the Advanced Game each combat situation is played for a period of twelve Tac-Turns in the first Game-Turn. If the situations are unresolved at the end of these periods, that situation persists into the next Game-Turn. These periods are referred to as situation Cycles. The second and subsequent Game-Turns into which a situation persists are two Cycles in duration. Situations which persist into a second or subsequent Stellar Game-Turn are called prolonged situations.
[35.2] FORCES INVOLVED IN THE FIRST AND SECOND CYCLES OF PROLONGED COMBAT SITUATIONS
In the First Cycle of a prolonged situation, only the forces which remained in the LiteZulu at the end of the previous Game-Turn are involved. Forces which Stellar shifted into that LiteZulu in the current Game-Turn are not considered to have arrived until the very beginning of the Second Cycle of that Game-Turn.
[35.3] WHEN AND HOW NEW FORCES ARRIVE IN A PROLONGED SITUATION
StarForces which Stellar shift into a contested LiteZulu arrive at the very beginning of the Second Cycle. In the Basic Game they arrive just as inshifting StarForces usually do, i.e., with a Combat Strength of "2" per StarForce. In the Advanced Game, StarForces arrive in Stellar Mode in any pre-plotted MiniLiteZulu at plus or minus five, or at any point in the "500" ring of hexes, just as usual Incoming StarForces pre-plot the MiniLiteZulu in which they will appear during the Stellar Shift Plot Phase of that Game-Turn.
[35.31] In the Basic Game, Players must decide if they wish to engage in-shifting StarForces in combat (using only First-Cycle StarForces to do so, see 8.2) in the First Combat Segment of the Second Cycle. The same restrictions apply as in the Basic Game, with the following additions:
A. If Alpha Player is in-shifting and also has First Cycle StarForces present, Bravo Player must be able to attack/defend with all his available forces if he exercises his option to do so. This means that if Bravo is the StarGate owning Player he may not exercise his option and may only use his First Cycle StarForces and his StarGate against Alpha's First Cycle StarForces. Alpha's in-shifting StarForces must be ignored for the First Combat Segment of the Second Cycle.
B. If both Players have in-shifting StarForces as well as First Cycle StarForces (and possibly a StarGate) both must wish to engage in-shifting forces and both must be able to involve their entire available force with the entire Enemy force, as per condition A, above. If one or the other Player does not wish to engage in-shifting Enemy StarForces or cannot fulfill the conditions to do so, then only First Cycle forces can be involved in combat in the First Combat Segment of the Second Cycle.
[35.32] In the Advanced Game, arriving StarForces make normal plots for the First Tac-Turn of the Second Cycle. Their availability for combat is solely dependent upon the availability of targets or attackers within range.
[35.33] Reserve StarForces may only be called in during the Second Cycle.
[35.4] HOW UNITS MAY LEAVE A PROLONGED SITUATION
StarForces may only leave a prolonged situation in the same manner that they leave a normal situation: by combat break-off.
[35.5] CONDITIONS FOR PERMANENT
NEUTRALIZATION OF STARGATES In order for a StarGate to be permanently neutralized, the Enemy Player must have at least one unit in the LiteZulu with the neutralized StarGate for one complete Combat Segment (or two Tac-Turns) without Friendly StarForces being present.
[35.6] STELLAR SHIFTING AND STARGATES IN PROLONGED SITUATIONS
StarGates which are involved in prolonged situations may not be used for Stellar shifting operations of any kind.
[36.0] BATTLE MODE CREW FATIGUE
The Telesthetic crews of StarForces suffer from great fatigue if the StarForce is in Battle Mode on two or more consecutive Game-Turns. A StarForce may never be in Battle Mode for more than three Game-Turns in a row. The Basic Game Battle Mode equivalent is the increase to a three Strength Point unit in the second Combat Segment of a combat situation. When using this rule, Players have the option to decline this increase and remain in the two Strength Point Stellar Mode.
CASES:
[36.1] EFFECTS OF TWO CONSECUTIVE GAME-TURNS OF BEING IN BATTLE MODE
If a given StarForce changes to or stays in Battle Mode for two consecutive Game-Turns it suffers the following limitations on its performance in the third Game-Turn:
A. It adds two Lites to the effective distance of any Stellar shift it may make or enhance in the third Game-Turn. This does not include GGS and GS type shifts (where the crew of the StarGate is actually doing all the shifting).
B. It must always allocate at least one Strength Point to the defense in any third Game-Turn Combat Segment (or, in the Advanced Game, may not make a cast with more than half its TelePoints in any Tac-Turn in the third Game-Turn).
[36.2] EFFECTS OF THREE CONSECUTIVE GAME-TURNS OF BEING IN BATTLE MODE
A StarForce which remains in or changes to Battle Mode for three consecutive Game-Turns suffers the following effects in the fourth Game-Turn (this is in addition to the effects it suffered in the third Game-Turn):
A. The StarForce is neutralized (in place) for the fourth Game-Turn. It recovers from this neutralization in the Neutralization Recovery Phase of that Game-Turn.
B. If the StarForce is neutralized as a result of combat or break-off in the third Game-Turn, the StarForce is neutralized until the Neutralization Recovery Phase of the fifth Game-Turn.
[36.3] RECOVERY FROM BATTLE MODE FATIGUE
A StarForce recovers from the effects of two consecutive Game-Turns of Battle Mode by suffering the effects of the third Game-Turn without changing to or remaining in Battle Mode during the third Game-Turn. It becomes completely normal during the Neutralization Recovery Phase of the third Game-Turn. A StarForce recovering from the neutralization effect of three consecutive Game-Turns in Battle Mode does so during the Neutralization Recovery Phase of the fourth Game-Turn.
[37.0] SEQUENTIAL PLAY
GENERAL RULE: Players who dislike plotting or who would like to play a game against themselves solitaire fashion may use the following suggested Sequential Play approach.
CASES:
[37.1] SEQUENTIAL STELLAR SHIFTING
All StarForces are represented by individual counters on the Stellar Display. Players take turns moving one of their units at a time, alphabetically according to identity code. For example, Alpha Player shifts StarForce "A"; Bravo Player shifts StarForce "A"; Alpha shifts "B", etc., until all StarForces have been accounted for. Players must still record the Zulu coordinates of their StarForces (unless they trust each other implicitly and can keep the relationships in their head. This is possible in scenarios with small orders of battle). All shifts are considered to take place simultaneously. Players alternate by Game-Turn the Player who'll be first to move his first unit.
[37.2] SEQUENTIAL BASIC GAME COMBAT
Each Player takes one of the spare Decimal Randomizer sets and uses it to declare how many Strength Points he is using to attack. Numbers larger than nine can be represented by showing two or more chits. Players reveal their attack strength allocation simultaneously.
[37.3] SEQUENTIAL ADVANCE GAME TAC-SHIFTING
Players indicate their allocation of TelePoints to Tacshifting by making their Tac-shifts, each Player alternating with the other in Tac-shifting one unit at a time and announcing their expenditures as they make them. Players Tac-shift units furthest from the center of the Tactical Display first, working their way inward, unit by unit.
[37.4] SEQUENTIAL ADVANCED GAME COMBAT
Players make their combat casts alternately, one unit at a time. The unit furthest from the center of the Display makes its cast first, then the other Player makes a cast with his unit furthest from the center of the Display. Units which have not yet made a cast and who could possibly be affected by a cast being made, must have their Anti-cast announced by the owning Player before the casting Player announces the strength of his cast. All cast effects are still applied simultaneously and additively.
[37.5] CAUTIONARY NOTE
Of course, Players realize that the structure of the standard game is built around simultaneous plotting and that any attempt to circumvent that structure will result in distortions. Players who really dislike plotting should play scenarios with small orders of battle. If they have opponents that they really trust, much plotting can be done on the "keep-it-in-your-head" honor system. The sequential system presented here is just a rough guide -Players will have to make on-thespot decisions when conflicts and questionable situations arise.
[38.0] THE RESCUE MISSION
A Solitaire Game
GENERAL SITUATION: After the First Xenophobe Incursion, it was discovered that a faulty Conversion Trigger had destabilized the star of an inhabited system. Analysis indicated that the star would take several years to go nova, and so, an orderly evacuation program was instituted allowing an eighteen-month safety margin. Near the end of the program, quite unexpectedly, new data indicated that the star would go nova in no more than ten days. Calling in additional StarForces, the PSL began a crash evacuation program to rescue the 20 million humans remaining on the single planet in the system.
GENERAL RULE: Players have twelve StarForces available to lift off 60 Population Points (each Population Point represents a third of a million humans). A combined set of two Decimal Randomizers is used to simulate the uncertain time of the nova. The actual star in question is determined randomly at the start of the game. Players win the situation by getting all the population safely off the planet.
[38.1] DETERMINING THE LOCATION OF THE ENDANGERED SYSTEM
Pick a chit from the Stellar Randomizer and read the top two-digit number. Read that number as one of the hexes in the "2000" column of hexagons (the same column that Sol and 70 Ophiuchi are in). If the bottom number of the chit is positive trace a clockwise orbit around Sol maintaining a constant hex distance from it (this will describe a large hexagonal circle just like the rings of Zulu Limits printed on the map). If the bottom number is negative, trace the orbit counter-clockwise. The first tertiary star system that the orbit traces through (in a two-dimensional sense) is the endangered system. If there is no tertiary system in that orbit, pick another chit.
[38.2] INITIAL STARFORCE DEPLOYMENT
Four StarForces at 2020/0 (Sol), two StarForces at 2336/4-17 (Sigma Draconis), four StarForces at the endangered star system, and two StarForces at the (undestroyed) tertiary system nearest to the endangered star (in true distance). If two stars are equally near, use the one which is also nearest to Sol. All StarForces are empty. All systems have StarGates except the endangered star and those destroyed in the First Incursion (see 31.62).
[38.3] SIMULATING THE UNCERTAINTY OF NOVA
Take two Decimal Randomizer sets and place them in a container. Each Game-Turn (during the un-used Combat Phase), the Player makes one or two chit draws from this Nova Randomizer to determine if the star goes nova at that point (ending the game, destroying whatever population remains in the system, as well as any StarForces which are presently in that LiteZulu).
How to Draw Chits from the Nova Randomizer Draw the first chit; if it is not a Zero, stop, do not place the chit back in the Randomizer. Go on to the next Game-Turn; the star has not gone nova. If the chit is a Zero, place it back in the Randomizer, make a second draw. If the second draw is not a Zero, keep that chit out and go on to the next Game-Turn. If the second chit drawn is a Zero, the star novas and the game immediately ends. Note that the total number of chits in the mix decreases by one chit each Game-Turn (which, of course, increases the chances of the star going nova in the next drawing). This procedure will provide a maximum of 18 safe Game-Turns; the star is guaranteed to explode on the nineteenth Game-Turn.
[38.4] HOW POPULATION POINTS ARE RESCUED
Each StarForce can lift one Population Point. To load a Population Point on a StarForce, it must begin and end the Game-Turn in the endangered star's LiteZulu. To unload the population Point, the StarForce must begin and end the Game-Turn in the LiteZulu of any other star system on the Display (except those destroyed as a result of the First Incursion, see 31.62). Loaded and unloaded StarForces may participate in any sort of shifting and enhancement that the standard and optional rules allow. Overshift results remain the same. StarForces may not perform enhancing operations while loading and unloading.
[38.5] VICTORY LEVELS
Victory is measured in terms of how many Population Points are saved (each equaling one Victory Point). A perfect score of 60 Victory Points is a Decisive Victory over the situation; a score of 50 to 59 is a Substantive Victory; 40 to 49 is a Marginal Victory. Less than 40 Points is a defeat. If a StarForce is lost in the rescue attempt (either by Overshift results or being incinerated) subtract three points from the score. Don't forget to count as lost any Population Points on destroyed StarForces at the time of destruction.
[39.0] VERBAL PLOTTING
GENERAL RULE: If Players trust each other, they may do much of the plotting for StarForce in their heads and only occasionally write down coordinates, and such, to support their memories. Combat allocations can be simply announced more or less simultaneously. This technique was used in much of the playtesting of the game and was very effective in speeding up play (particularly the Advanced version with its two levels of plotting).
[40.0] GAME NOTES
[40.1] STARFORCE PLAYER'S NOTES
OVERALL APPROACH The essence of strategy and tactics in StarForce is the indirect approach. Players will be rewarded very rarely if they do the predictable. The unexpected is the key to victory. Most of the scenarios deal with relatively balanced forces. However each of these situations generally has a multiplicity of victory methods. There is an obvious common victory point, the holding of a certain LiteZulu, or an apparent defensive situation, such as the Human League having to neutralize all the Rame StarGates. There is usually a "sneak" victory possibility, though, such as the apparent unlikelihood of the Rame neutralizing the Sol StarGate. This can give the side with a slightly inferior force, or position, the key to winning. Even if this secondary victory possibility is sometimes too obvious, it still does gain an advantage in the diversion of forces to cope with an unknown threat.
This comes about due to the most important strategic fact in the game, that is, that neither Player is ever fully aware of the strength that a Player has in a given occupied hex, until it is too late to react to this threat. The only revelation of course comes when the actual combat (or tactical situation) comes about. The only way to rectify a misdeployment against a number of threats at that point is limited (and optional rules) method of Reserve StarForces.
The problem is occasionally compounded by the fact that it is impossible even to determine at which LiteZulu the StarForce may be. This rarely is worrisome since it is unusual that different targets are close in hexes but distant in Zulu coordinate.
Essentially Players must divide their available strength and take full advantage of all the victory condition possibilities in the game. Most of the scenarios have no limit, so there is no hurry in achieving a victory (a common fault is being in a rush and charging in: it ruins the flavor of the game). One of the playtesters compared StarForce to two karate experts feinting at one another until one scores the telling blow. It is accurate and the best way to play the game. Players should avoid direct combat until they are virtually certain of victory, since it is relatively difficult for an intruder to win using the basic game system. StarForces should constantly feint towards the victory and suspected points of weakness in the Enemy systems or forces. Eventually he will appear to make a mistake, or leave a portion of his units exposed to more of yours. Then lunge for the kill, and hope he hasn't sucked you in. But do not be obvious about it. Keep your feints out there: the conventional wisdom that cautions against the classic error of "dividing your forces" is not necessarily applicable in this game. There is really no defense in StarForce. The best defense is, of course, a good offense. The only truly defensive situation is when you have made a mistake or been out-maneuvered, and have to rush available StarForces to a critical point being attacked and threatened. There, you are often forced to stand fully on the defensive; but frequently, even in this situation, you may zing back to the semi-suicidal full attack (no defense).
ADVANCED GAME Strategically, the only difference in the Advanced Game is that it is almost impossible to eliminate StarForces, due to randomization. It is simply another reason to avoid purposeless combat.
The problems of defending and the opportunities for threatening on the Tactical Display are even more than on the Stellar Display. The big factor is that the defense of different units is not additive. If you find yourself outnumbered, you should utilize your full shift to dance around. As the opponent spreads out through the tactical volume, either to chase you or to approach your StarGate, you may catch him at a disadvantage.
A key point in attempting to neutralize a StarGate is to hold one StarForce aside. Thus even if your StarForces that are attacking the StarGate happen to be randomized, you still achieve full neutralization effects against the StarGate. This is less worrisome if the opposing Player has no StarForces.
Again, in the Tactical Game, patience is a great virtue. The Player who rushes in and attempts to neutralize the StarGate from some distance will find his efforts fruitless due to the attenuation effect. Unless there is severe outnumbering, which is rare, you will have to creep up on the StarGate, MiniLiteZulu by MiniLiteZulu, always trying to outguess the StarGate's occasional full combat cast. Take your time. A somewhat cautious approach will enable you to come within one MiniLite of an unsupported (by StarForces) StarGate without suffering a cast at greater than the zero column.
GENERAL DOCTRINE 1. Never use Overshift unless necessary to shift into a victory condition point where the probabilities are in favor of your having a large superiority.
-
Never stand still on the defensive in a single LiteZulu unless you think it is seriously threatened at that point in time. Keep your StarForces shifting.
-
Avoid combat except to win: the combat results table is built to exchange forces and you have no assurance that it will be to your benefit to exchange.
-
If break-off is necessary, get to a Friendly StarGate. Staying in an adjacent LiteZulu leaves you open to an attack when you are relatively defenseless.
-
On the Tactical Display, spread your StarForces apart throughout the sphere to reduce the effect of overlapping combat casts.
-
When attacking a StarGate, converge on it from different three-dimensional directions as much as possible, again to avoid the StarGate's combat cast. When defending a StarGate, it always helps to have a supporting StarForce present to avoid a methodical siege. You must assault a StarGate with at least two StarForces and preferably three.
-
In the Xenophobe scenarios, the PSL Player must avoid getting bogged down in combat or defending secondary or tertiary star systems. His StarForces should be used primarily to search out the Xenophobe StarGates. Losing the Star systems is less expensive than permitting him to continue infiltration.
-
Never lose sight of the immensity of the volume represented by the Stellar Display. It is almost impossible to be caught in mid-space, and if you are careful, your opponent will never discover the strength of a given force until you want him to.
-
Don't establish a discernable pattern of shifting, or allocation of defensive/offensive strength in combat. The more unpredictable you can be, the more credible in your threats, then the more off-balance your opponent will become. You must combine aggressiveness with subtlety and indirection.
-
Establishing "picket lines" or "screens" of units in space never works. It is a waste of available force and is easily countered by the Enemy. The environment is a vast three-dimensional sea - not a small, flat lake.
[40.2] STARFORCE DESIGNER'S NOTES
If the human race (and other intelligent races) travel to the stars and colonize the planets of those stars, what sort of communication is necessary between those planetary societies to 1.) make possible a multi-world political structure, and 2.) make feasible an interstellar war between competing, multi-world organizations? Transportation systems relying on vehicles moving through space at sub-light or even trans-light speeds would probably not answer the needs of such a multiworld system. Travel through space at great speeds (as far as anyone knows) always involves messy things like Einsteinian time-dilation effects (time slowing down as you go faster) and the apparent impossibility of traveling faster than light.
If we are going to have "interstellar empires" the space between the stars must be shrunken down to the time-scale of the space between continents (at least). And if we are going to have combat between fleets in space, the weapon system used should have a vast range and be virtually instantaneous in the projecting of its effect. Electromagnetic effects and even guided missiles using the same movement technique as the ships would not be adequate for the task. A ship that can leap between stars is not going to have any trouble evading something as sluggish as a laser beam.
All of these considerations and others lead to the postulation of the movement system used in StarForce. The scale of the environment dictated the design of the game. The "invention" of a completely new science that has no perceptible relation to presentday science was done with the attitude that trying to extrapolate present-day science 500 years into the future was an impossible task anyway, so why not fabricate one out of whole cloth to get the technology that the situation demands. If we posit the situation, the technology rises to meet it. For the most part, the interstellar wars depicted by the scenarios are short-term affairs to establish or reassert political and economic dominance. Nobody wants to use the overwhelming technology to incinerate whole planets (except the psychopathic Xenophobes). Since the main resource is the Telesthetic crews of the ships themselves, and these crews must be drawn from a large population base, it's in no one's interest to kill crew members either. The StarForces in the game are basically merchant ships with a military capability. There are no standing space forces simply because such a waste of shipping and rare Telesthetic crew members just to fight an occasional war would be ridiculous. And since the weapon system is a product of the movement technique, there's no real reason to have "warships" as opposed to "merchant ships". All the ships are the same class simply because that class of ship makes the most efficient use of the rarified crew members.
From a purely game playing point of view, StarForce was deliberately designed to be different. This is taking a chance since some gamers may not like the "cold bath" effect of such a strange game-system and decide to "get out of the water". Nevertheless, the designer felt it worthwhile to explore the outer edges of hex-grid conflict simulation systems in an attempt to produce an interesting game. The science-fictional nature of the subject matter allowed this to be done.