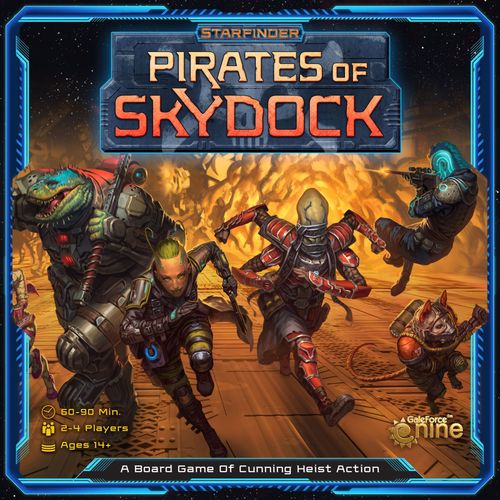
Starfinder: Pirates of Skydock
Starfinder: Pirates of Skydock Rulebook
Table of Contents
Table of Contents
How to Win
Each player will need to complete at least one objective. When the ship launches, the player with the most Glory and Support will be declared captain and win the game.
Components
Component List
- Game board
- Tourist Guide
- 9 Room tiles
- 4 Character Boards
- 7 Character standees
- 20 Energy Markers (plastic)
- 1 20-sided die
- 170 Tokens:
- 1 Launch token
- 1 Alert token
- 1 First Player token
- 10 Guard tokens
- 21 Character tokens
- 56 Character Abilities
- 44 Glory tokens (24 1-Glory, 12 5-Glory, 8 10-Glory)
- 20 Support tokens
- 16 Neutralization tokens
- 105 Cards:
- 7 Character cards
- 10 Objective cards
- 36 Scheme cards
- 18 Loot cards
- 20 Encounter cards
- 10 Secret Backer cards
- 4 Player Reference cards
Component Overview
Game Board. The board that depicts the vessel that the players are trying to steal. The board is divided into a number of rooms. Three of the rooms are labeled, indicating that these Room Tiles should always be placed in these rooms. The different rooms are connected by corridors. Some of the corridors have arrows that indicate the patrol route for any Guards patrolling the ship.
Launch Token. This token is placed on the Launch Track on the game board and keeps track of the status of the launch. When this token is at the end of the Launch Track during the Upkeep phase, the vessel launches and the game ends.
Alert Token. This is used to keep track of the current Alert Level on the ship. As the Alert increases, it can have several effects on the game. If the Alert climbs too high, the ship will lock down, meaning the players will not be able to steal it, and all players will lose.
Guard Tokens. There are several guards on the ship, looking for any sign of trouble and who will do whatever they can to stop the characters from stealing the vessel. They have multiple effects on the game, but in general they make things more complicated for characters when they are in the same room. Guard tokens have two sides: an active side and a stunned side.
First Player Token. Used to indicate the starting player every round.
Room Tiles. Unique rooms placed on the game board during setup to determine the configuration of the ship for that individual game. Each of the rooms has an associated action that characters can take. These tiles have two sides. It is recommended that you play the first game using all tiles on the A side. In future games, any number of Room Tiles can be on the A side or the B side.
Character Standees, Tokens, and Cards. Each character has a matching standee, some tokens, and a single card.
- The standee is used to represent the character's location on the game board as they move around the ship and attempt to steal the vessel.
- Character tokens are used for players to track their success on accomplishing the objectives. In order to win, players will need to have their Character token on at least one Objective card to indicate they accomplished the necessary steps to steal the ship.
- The Character card is dual-sided. One side shows the starting Glory and Character Abilities that character starts with. The other side has a portrait of the character as well as their unique power.
Character Abilities. Character Abilities are represented by tokens that players can slot into their Character Boards. These are the actions that will be available to players on their turn depending on how they spend their Energy Markers. Players will acquire more over the course of the game. Their location in the Character Board is very important since many cards enable players to use adjacent Character Abilities as a bonus action or activate entire rows.
These tokens have a number of slots at the top to indicate their level. The number of colored slots is the level of that ability, while the total number of slots indicates the maximum level possible. When players choose to level up a Character Ability, they remove their current one and replace it with a version that has one more colored slot. Remember that these tokens are double-sided with a different level of the same ability on each side.
Energy Markers. Small tokens used to determine what abilities a character is activating during their turn. These are placed on Character Abilities during the Planning Phase and dictate what a character will be able to do.
Glory Tokens. As players accomplish their goals in an attempt to steal the ship, they have the opportunity to gain Glory. This is recorded through the use of Glory tokens. The Glory tokens are public information and can be checked by players at any time.
Support Tokens. Over the course of the heist, players may receive Support for their actions. The most common way this will happen is when a player decides to assist another player to complete an Objective. When a player receives Support, they gain a random Support token from the pile. A player may always check their own Support tokens, but these are kept face-down and hidden from other players.
Neutralization Tokens. Tokens placed over Character Actions on a player's Character Board. When a player has a Neutralization token covering a Character Action, they cannot use that Character Action. Character Abilities with Neutralization tokens can still have an Energy Marker, but the player cannot use that ability as long as the Neutralization token covers it. These tokens are dual-sided with an Assigned side and a Recovering side.
20-sided Die. Several actions in the game are not guaranteed to succeed. When there is a chance an action will not succeed, players will have to roll a die in order to see whether or not they succeed. This is described in more detail under Challenges on page 15. The 20 on the die is represented by the symbol of Besmara, The Pirate Queen.
Character Boards. A dual-layered board players use to represent their character. It has a spot for the Character card as well as three rows for the Character Abilities. This board tracks the actions each player can take as they use their board to build their character.
Objective Cards. These cards represent the tasks that players must complete in order to steal the ship. Each of these Objectives has specific conditions that explain how to fulfill the task. When players complete the task, they gain a certain amount of Glory as indicated on the Objective. In order to complete the Objective, players will need to use Scheme cards.
Scheme Cards. Cards that represent the specific steps characters take in order to complete the necessary Objectives. Scheme cards can be used in one of three ways. Each Scheme card has a text ability that can be triggered on a player's turn during the Action phase. The player discards the card and the associated ability takes effect. Each player may only play one Scheme card on an individual turn for the text ability. Note that some Scheme cards can be played on other players' turns. If a player plays a Scheme card on another player's turn, they can still play one on their turn.
These cards also have symbols in the top-left corner which indicate the resources they provide. Players need to play enough Scheme cards to match the required resources on the Objective cards. For more information about completing Objectives, see Completing Objectives on page 16.
Finally, each Scheme card may be discarded when attempting Challenges to increase the number rolled. For more information about using Scheme cards during Challenges, see Creating Icons on page 17.
Loot Cards. As players spend their time exploring the ship, there is the opportunity to gain Loot stashed about the ship. This Loot is represented on these cards and can be used in one of two ways. First, all Loot has a text ability that indicates when it can be used and what bonus it grants. When a player uses a piece of Loot for the text ability, they discard the card and gain the appropriate bonus. There is no limit to the number of Loot cards a player can use on a turn.
The other use of Loot cards is indicated by the symbols on the left edge of the card. These symbols are used when a player decides to salvage a piece of equipment to grant them a new ability or improve an existing one. For more information about using Loot cards in this way, see Improving a Character on page 13.
Encounter Cards. As the players wander the ship, they will occasionally find themselves in unpredictable situations. These situations are represented by the Encounter cards. Each Encounter card describes the situation and the associated rewards or penalties.
Encounter cards are split into two halves. The top half of the card is used for guard encounters and the bottom half is used for random encounters. Both types of encounters also have icons for the various Alert Levels. When a player needs to resolve an encounter, the encounter only occurs if the current Alert Level is marked on the Encounter card. The guard encounter always applies regardless of the Alert Level, but the alert levels are included as a visual reminder.
Secret Backer Cards. Each character has connections to one secret backer, as represented by these cards. These secret backers can help a character become the captain of the ship. The Secret Backer card specifies the requirements the player needs to fulfill in order to gain the favor of the secret backer. If they do so, they will receive the additional Support from the secret backer at the end of the game. These cards are hidden from all other players until the end of the game.
Setup
Game Board Setup
- Game board. Place the game board in the center of the table, and place the 20-sided Die within reach of all players.
- Room Tiles. a. Place the Bridge, Drift Engine, and Dock Room Tiles on the spots marked for them on the board. These Room Tiles are always the same and in the same location on the board every game. b. Take the remaining Room Tiles and randomly place a Room Tile in each available spot on the board. For the first game, it is recommended to have all Room Tiles on the A side. For future games, any number of Room Tiles can be on either side.
- Objectives. Shuffle the Objective cards and place three face-up beside the board. Return the others to the box. Note: If two of the Objectives have a requirement of needing to be in the same room, discard the second one drawn and replace it with another Objective card from the deck.
- Card Decks. Shuffle the Scheme cards, the Loot cards, and the Encounter cards, and place the decks beside the game board as shown.
- Launch Token. Place the Launch token on the highest numbered spot of the Launch Track.
- Alert Token. Place the Alert token on the first spot of the Alert Track.
- Support Tokens. Place the Support tokens face-down, shuffle them, and arrange them in a pile.
- Guards. Place one Guard token on the Drift Engine and one Guard token on the Bridge. Place the remaining Guard tokens below the Alert Level track.
- Ability & Neutralization Tokens. Sort the Ability tokens by type and place them with the Neutralization tokens in piles accessible to all players.
Player Setup
-
Character Boards. Give each player a Character Board and four Energy Markers. Place the remaining Energy Markers in a pile accessible to all players.
-
Choose Characters. Each player chooses a character and takes the matching:
- Character standee with plastic base, assembling and placing it on the Dock room tile.
- 3 Character tokens.
- Character card.
- Starting Glory shown on the Character card.
- Set of Character Abilities shown on the Character card and places them in the corresponding spots in their Character Board.
Note: Make sure the levels match your character card.
After setting up their character, each player places their Character card in their Character Board with the special power side face-up.
-
Secret Backers. Deal two random Secret Backer cards to each player and place the others back in the box. Each player selects one and returns the other to the box. Players may look at their Secret Backer cards, but these are kept secret from other players.
-
First Player. The player who most recently was on a ship becomes the start player and takes the First Player Token.
-
Draft Additional Abilities. The start player chooses an available level 1 Character Ability that they will start the game with and slots it into their Character Board. After they choose, the next player in clockwise order chooses. This continues until it is the last player's turn to choose. They choose two Character Abilities and then the other players choose their second starting ability in a counterclockwise order. The start player will be the last player to choose their second starting Character Ability.
For more information about gaining Character Abilities, see Character Boards on page 8.
Objective
The players are each trying to steal the ship depicted on the game board before it launches. In order to do so, they must accomplish at least one of the Objectives. The game ends when the ship's Launch counter reaches LAUNCH. At that point, only players who have completed at least one Objective will have a chance to win the game. Of those, the player who has the highest combination of Glory and Support will win the game. While it is only necessary to complete a single Objective, completing Objectives is the primary way to gain Glory.
General Rules
Character Boards
Before explaining the steps of the game, it is important to know some details about the Character Boards and the Character Abilities.
Whenever a player gains a Character Ability, they must place it in a row in the left-most empty spot of that row. The player may place it in any row they choose, provided there is still space in that row. If there are no spaces in any row, the player may not gain an ability.
Some effects will upgrade an existing ability in the Character Board. In this case, the previous ability is either flipped or replaced with a new Character Ability token that is one level higher. In this case, the relative position of the other Character Abilities do not change their orientation.
Character Hands
Over the course of the game, players gain Scheme cards and Loot cards. Both of these card types are added to a player's hand and kept hidden from other players. The total hand size for players is 5 cards. That can be made up of any combination of Scheme cards and Loot cards. The hand size is only checked, and cards discarded during the Upkeep phase at the end of every round.
General Rules
There are a couple of general rules to be aware of when playing the game.
- If a card or Character Ability ever contradicts the rules in this book, the text on the game component takes precedence.
- If a player needs to draw from a deck and the deck is empty, shuffle the discards to form a new deck and then draw.
Gameplay Rounds
The game is played over several rounds. Each round is made up of the following phases:
- Planning Phase
- Action Phase
- Upkeep Phase
1. Planning Phase
Players do three things during this phase, in any order: draw 2 cards, upgrade, and place Energy Markers.
Draw 2 Cards. Each player draws two cards and adds them to their hand. This can be any combination of Scheme cards or Loot cards. For example, one player could choose to draw two Scheme cards, while another player draws a single Scheme card and a single Loot card. Note that this can temporarily put a player over their hand limit as the hand limit is only checked during the Upkeep Phase.
Note: The first turn of the game, each player draws four cards instead of two. Just like on later turns, this can be any combination of Scheme or Loot cards.
Upgrade. Players can also upgrade their character as described under Improving a Character on page 13. Players can use Loot cards they drew this phase to immediately upgrade their character. All the players can do this at the same time. If multiple players want to gain the same Character Ability and there are not enough Character Abilities in the supply, the player closest to the First Player token (in clockwise order) gains their ability first.
Place Energy Markers. Each player places their four Energy Markers on their Character Board. When placing Energy Markers on the Character Board, each Energy Marker must be placed on a single Character Ability. Each Character Ability can only have a single Energy Marker placed on it. Beyond that limitation, players are free to place their Energy Markers however they see fit. Be aware that some cards may be used during this phase to give players additional Energy Markers or change the rules for placing them.
All players can assign their Energy Markers at the same time. Once all players have finished assigning their Energy Markers, play proceeds to the next phase.
Example: This round, Keskodai assigns his Action tokens to Move twice, Heal, and Scheme. He will be able to do these actions in any order during the Action Phase. Keskodai gains an additional Glory whenever he uses the Heal action to remove one or more Neutralization tokens.
2. Action Phase
This is the phase where players perform actions in an attempt to steal the ship and gain Glory or Support. Play begins with the first player and continues clockwise around the table. When it is a player's turn, they remove an Energy Marker from their Character Board and take the corresponding action underneath that Energy Marker.
Claiming First Player. A player can remove an Energy Marker and choose to take no action. If they do so, they claim the First Player token if it has not already been claimed. This can be done even if that player currently has the First Player token. They take the token and flip it to the Claimed side. A player may not claim the First Player token if it has already been claimed. In this case, a player who removes an Energy Marker and does not take the action does not gain any bonus.
After removing a token and optionally taking the action, play proceeds to the next player in a clockwise order.
No Energy Markers Left. If a player has no Energy Markers on their Character Board, they are skipped and play proceeds to the next player in clockwise order. If no players have any Energy Markers left, this phase ends and the game proceeds to the Upkeep Phase.
Action Sequence. Players can select any Energy Marker on their board and take the corresponding action. There are no restrictions over which Energy Marker the character removes. In this way, the Energy Markers assigned in the Planning Phase indicate the actions the player will have available to them in a turn, but the player has the ability to choose the order of these actions over the course of this phase.
Player Turn Example. It is Xero's turn and they are playing Navasi. They remove an Energy Marker from an Interact ability to complete an Objective. They play Blackmail a dock official to gain a +4 bonus to their Interact roll. Even though they have Disconnect the power cables, they cannot play it for an additional +4 because they are limited to playing one Scheme card per player turn for the text effect. They may still discard Scheme cards after rolling for the +2 bonus since that is not a text effect on the Scheme card. Brandon's character is in the same room, so they play Lend some muscle to give Xero an additional +2 bonus. Brandon gets to draw a Support token because of the card effect. Brandon cannot play any more Scheme cards on Xero's current turn, but they may play a Scheme card when the next player takes their turn.
Actions
Scheme. Using this action enables a player to gain additional Scheme cards. In order to gain Scheme cards, the character must be in a room with the Scheme icon. They gain a number of Scheme cards based on the level of their Scheme ability. Remember that this can temporarily put a player over their hand limit.
Players may immediately use a Scheme card after drawing it if they have not already played a Scheme card this turn.
Loot. Using this action enables a player to gain a Loot card. In order to gain Loot, the character must be in a room with the Loot icon. Whenever a player takes the Loot action, they draw a Loot card and then must attempt a Challenge to see if they are caught. If the character passes this Challenge, nothing happens. If they fail the Challenge, they must spawn a Guard token in the same room as their character. See Challenges on page 15.
Play a Loot. A player can play any number of Loot cards on their turn for the text effect, unless the Loot card indicates that it needs to be played during a different phase. Players can also use Loot to improve their character as described under Improving a Character on page 13. Players can even use Loot they gained on the turn when they acquired it.
Play a Scheme. A player can also play one Scheme card per player turn for its text ability. A player can play a Scheme card on another player's turn.
Move. When a character moves, they go from one room on the ship to an adjacent room. Two rooms are considered adjacent if they are connected by a corridor. Each move ability will have a number after it indicating the number of adjacent rooms the character may move with that action. Characters do not need to use all of their movement (e.g. a character with a Move 2 ability may move to an adjacent room). The arrows on corridors do not affect player movement and are only used for the guards.
Random Encounters. If the character ends their movement in a room with the Random Encounter icon, the player must draw an Encounter card and resolve the random encounter on the card. Each Encounter card will have the effects of the encounter described on it. Remember that random encounters might not have any effect depending on the current Alert Level. See Alert Level on page 14.
Guard Encounters. If a character leaves a room with any Guard tokens, they must draw an Encounter card and process the guard encounter on the card at the end of their movement. When processing the guard encounter, if there is a Challenge, remember to take into account the penalties of the Guard tokens from the room the character left. Guard tokens in the room that the player moved into do not have any effect. Guard encounters always take effect, regardless of the Alert Level.
If both the above conditions are met, the player draws a single Encounter card and processes both halves of it, starting with the guard encounter before processing the random encounter.
If the player takes a move action and does not move (i.e. they choose not to move and instead remain in the same room), they do not draw an Encounter card.
Interact. This action lets a player take the action associated with their character's current room on the ship. If the ability of a room has a Challenge associated with it, the player must spend the Energy Marker before attempting the Challenge. See Challenges on page 15. Remember that some Character Abilities grant players bonuses when attempting to interact.
Players must also use the Interact action to complete Objectives. Some Objectives have additional requirements that a player must fulfill in order to complete the Objective. This is described under Challenges on page 15.
Attack. Using this action enables a character to attack a guard in their room. This action always requires passing a Challenge. If the attack fails, the player gains a Neutralization token.
If the attack succeeds, the player then decides to either knock the guard out or airlock them:
- If the character knocks the guard out, flip the Guard token to the stunned side and the player gains a Loot card.
- If the character airlocks the guard, remove the Guard token and return it to the box; it is no longer in play. When airlocking a guard, the player also gains 2 Glory.
Heal. When using this token, the player removes a Neutralization token from the target. The player can target any character in the same room as their character, including themselves. When the target is healed, the Neutralization token is immediately removed. If that action still has an Energy Marker on it, it can be used later in the round. The player doing the healing gains 1 Glory per Neutralization token that is removed (when the Heal action is upgraded, it can Heal multiple Neutralization tokens with a single action).
Modifying Abilities
When assigning a Neutralization token, place the token with the Assigned side (the side with the Assigned marking) face-up. Neutralization tokens may be placed over a Character Ability with an Energy Marker. However, unless the character is healed before removing that Energy Marker, they won't be able to use the Character Ability this turn. Character Abilities that have a Neutralization token covering them cannot be used. This is true both when removing Energy Markers and when a player can activate Character Abilities as a result of card text.
Gaining Neutralization Tokens
When a player gains a Neutralization token, they must roll the 20-sided die to determine where the Neutralization token is placed on their Character Board. The Neutralization token is placed on the slot with the matching number. If a player rolls and that slot already has a Neutralization token or is an empty slot, the player may place it anywhere on their Character Board. They must cover a filled-in slot; the player may not place the Neutralization token over an empty slot. In the rare instance that every available slot has a Neutralization token, the player does not gain a Neutralization token.
Example: The placement roll is a 13, so the token covers the Move ability as shown.
Improving a Character
Characters are scavenging the ship, always looking for spare parts that they can use to improve their chances of stealing the ship. If a character finds the right combination of pieces, they might be able to build something to help them accomplish their mission. Players can use Loot cards to either acquire new Character Abilities or upgrade existing ones.
A player may discard any Loot on their turn to acquire a level 1 ability of any type matching one of the icons on the edge of the card. The Loot card is represented by the symbols along the left edge. These symbols indicate which ability can be gained or upgraded. If a Loot card has multiple symbols, that means it can be used for any of the matching abilities. The diagram below shows the possible symbols on the Loot cards.
Acquiring a New Ability
The player finds the appropriate Character Ability token and inserts it into their Character Board. They must add it at the end of one of the rows on the Character Board. Once an ability has been added, it cannot be moved or removed!
If a player wants to gain or upgrade an ability and there is no corresponding Character Ability token with that ability, they cannot gain that new ability.
Upgrading a Current Ability
Character Abilities are divided into levels, indicated by the colored lines at the top of the Character Ability token. In order to upgrade a Character Ability, a player must discard a Loot card with a symbol matching the ability they are upgrading. After discarding the Loot card, the player removes the Character Ability token and slots the upgraded ability in the same slot. The Character Abilities are double-sided, so for many abilities, it is a matter of flipping the Character Ability to the other side. However, when a player upgrades an ability from level 2 to level 3, they will need to find a new Character Ability token with the corresponding level 3 ability. If a player is replacing an ability token, return the lower-level ability token to the box. It is no longer available for players to use.
During the Action phase, a player can acquire a new ability or upgrade an existing one at any point on their turn, even immediately after acquiring the Loot. Players can upgrade their characters even if the ability they are upgrading currently has an Energy Marker on it. They can also upgrade their character during the Planning phase.
Diagram examples: A Loot card with all six ability icons "can be used to gain any level 1 ability, or upgrade any ability to the next level." A Loot card with an Interact and Attack icon "can be used to gain either of these level 1 abilities, or upgrade an ability of this type to the next level."
Alert Level
The alert can increase as a result of Encounter cards, taking actions in rooms, or during the Upkeep phase if characters are seen by guards. When the alert increases, move the Alert token to the next space on the Alert Track. The Alert Track has multiple rows that are different colors which correspond to different Alert Levels. These Alert Levels can impact encounters, rooms, or Objectives. When the alert is at the end of a row and the alert increases, it moves to the first spot on the following row. The end of any row is indicated by the number of players. When playing with three or four players, additional spots will be available.
Some spaces on the Alert Track are marked for use only with certain player counts ("Used if there are 2, 3, or 4 players", "Used if there are 3 or 4 players", "Used only if there are 4 players").
Running Out of Guard Tokens. If players ever need to add Guard tokens and there are no more Guard tokens in the supply, increase the Alert token one space for each Guard token that cannot be added. If this increases the Alert token to a new Alert Level, do not increase the Alert token for the Guard token that would be added for moving to a new Alert Level.
Every time the Alert token moves to a new level, place one Guard token on the Dock room. If the Alert token ever reaches LOCKDOWN, the game immediately ends and all players lose.
Reminder: place a Guard at the Dock when the Alert token reaches this space (each new level).
The effects of Encounter cards also depend on the current Alert Level. See the Appendix - Alert Levels for the Challenge difficulty at each Alert Level.
Challenges
There are several times in the game where the result of a character's actions are not guaranteed. In these cases, the character will have to attempt a Challenge.
All Challenges have a number that indicates how hard the Challenge is. This is the Difficulty Class (DC) of the task. In order to succeed, the player needs to roll the 20-sided die and have a total value (after adding or subtracting the appropriate modifiers) equal to or greater than this number. The DC for Objectives is indicated on the card. For all other challenges, the DC is based on the current Alert Level on the Alert Track. As the alert increases, Challenges become more difficult to succeed.
Some Rooms and Encounters have bonuses and penalties in brackets. For example, a room may read "Challenge [-2 penalty]: Remove or add one [guard icon] to any room," or an encounter may read "Challenge [+4 bonus]: If you fail, discard a random card from your hand." (The bracketed icon in the first example is a symbol that is not recoverable as text from the source.)
Guard Token Penalty. Each active Guard token in the same room as a character applies a –2 penalty to any Challenges attempted by that character. Stunned guards do not modify the Challenge roll.
Discarding Schemes. After rolling, a player may discard any number of Scheme cards to increase the value of their roll by 2 per Scheme card discarded. In this case, the text or symbols on the Scheme card do not [word not recoverable from the source]. All Scheme cards have this text as a reminder: "Discard after rolling for any Challenge: +2."
If the final value of the roll is equal to or greater than the DC of the Challenge, the character succeeds. If the value is less than the DC of the Challenge, they fail. There is no penalty to failing the Challenge unless the Challenge indicates otherwise.
Bonuses and Penalties
Several things can modify the number a player rolls. Bonuses are always good and are added to the roll, while penalties are always negative and subtracted from the roll. Regardless of bonuses or penalties, a roll of a 1 on the die always fails and a roll of a 20 always succeeds.
The most common source of bonuses comes from the modifier listed on a Character Ability, and the most common source of penalties are text effects described on the Room or Encounter card.
Example: These abilities all provide a +2 bonus to the Challenge roll.
Completing Objectives
In order to complete an Objective, the player needs to meet the conditions described on the card and take the Interact action.
Every Objective has a number of required symbols on it that correspond to symbols on Scheme cards. Scheme cards must be discarded that match all of the required symbols on the Objective. If a player does not have enough Scheme cards to cover the requirements for the Objective, they may ask for help as described under Asking For Help on page 17.
Objective example: Reconfigure Docking Clamps (At the Dock: 16+. If successful, discard these Schemes to complete this Objective.)
To attempt this objective, a character must:
- Be at the Dock.
- Perform an Interact Action.
- Succeed at a Challenge with a DC of 16.
If successful, they will then need to discard Scheme cards with the required symbols (or discard cards with symbols as described on the following page). Finally, they will place their character token on the Objective card and gain 6 Glory (5 + 1).
Here are all the symbols that might appear on Scheme cards: Logic, Credit, Navigation, Access, Tactical, Diplomacy, and Wild. The Wild symbol "can be used to fulfill any single symbol requirement."
After completing an Objective, the player adds one of their Character tokens to the Objective card. This indicates they are one step closer to stealing the ship! In addition, when a player completes the Challenge without asking for help, they gain the Glory indicated on the card. A player does not gain this Glory if they asked for help to complete the Objective.
In addition to the required symbols, an Objective may have one or more of the following requirements, all of which must be met:
- The character must be in a specific room.
- The character must pass a Challenge. The Scheme cards are only discarded if the character succeeds at the Challenge.
- Be on the last space of the track on the Objective card. Some Objectives will have instructions on how a player may advance their Character token on the track. When it is on the last space of the track, the player may take an Interact action to complete the Objective.
Players cannot attempt to complete an Objective that already has their Character token on the Objective card.
Asking for Help
When attempting to complete an Objective, a player can ask for help. A player asks for help before removing the Energy Marker on the Interact action. In this case, if another player agrees to help, they are obligated to provide that help after the current player spends the Energy Marker.
When a player asks for help, they indicate which symbol they need in order to complete the Objective. They may only ask for help with one symbol on the Objective. The current player must supply the other symbols with Scheme cards from their own hand. A player may ask for help even if they have a Scheme card they could use to complete the Objective.
The player who agrees to help can be located anywhere on the ship. If the Objective card has a Challenge, the player asking for help attempts the Challenge. If they succeed, the player providing help must discard a Scheme card containing the asked-for symbol. The current player needs to discard Scheme cards for the other required symbols. Both players place their Character tokens on the Objective card, marking it as completed for both of them. However, neither player gains any Glory for this. Instead, each player draws a Support token and places it face-down near their Character Board. Players may check the value of their Support tokens at any time.
Players can provide help on Objectives they have already completed. A player can do this in order to gain the reward of a Support token for providing help.
Note: It is faster to complete Objective cards by asking for and providing help to other players. However, it is important to remember that Support tokens have a random value, and even the highest-valued Support tokens are worth less than the Glory a player can receive by completing an Objective card on their own.
Players can trade in any number of Scheme cards when they are completing an Objective. However, players cannot trade in Scheme cards to represent any icon when they are answering a call for help.
Asking for Help example: For example, Navasi is on the Bridge, intending to complete the Install Backdoor into the System Objective (At the Bridge: an 18+ Challenge; if successful, discard these Schemes to complete this Objective). She has three Scheme cards, and could cover both the required symbols. However, since the check requires her to roll an 18, she'd rather save her Scheme cards to potentially modify her roll. She asks if anyone can help on one of the required symbols. Altronus has already completed the Objective and is located on the Docks, but he can still help. He agrees to provide the symbol. Navasi rolls the die, and gets a 13. Her Character Ability gives her a +2 bonus, but she is still only at 15. She discards both of her extra Scheme cards for a total of +4 to give her 19, enough to complete the Objective. Good thing she asked for help! She discards her Scheme card and Altronus discards his card. Both players draw a Support token, and Navasi puts her Character token on the Objective card to show she's completed it.
Creating Icons
When a player is attempting to complete an Objective and has to discard Scheme cards with matching symbols, they can discard any two Scheme cards to represent any one symbol. In this case, it does not matter what symbols are on the Scheme card or how many there are; any two cards can be used as any icon.
Example: A player is trying to Bribe Dock Officials. In order to do so, they need to discard two symbols as shown on the card. They have the following Scheme cards: Slip the guards poisoned drinks; Dismantle part of the ship; and Cast a bit of chronomancy. The player can discard Slip the guards poisoned drinks for the first required symbol and both of the other Scheme cards to fulfill the second requirement.
(The symbols on the Scheme cards and the Objective in this example are shown as icons in the rulebook and are not recoverable as text from the source.)
Upkeep Phase
During this phase, perform the following steps in this order:
- Discard to 5 cards. Any character who has too many Loot or Scheme cards must discard down to their hand limit. The default hand limit is a combination of 5 total Loot and Scheme cards.
- Launch Track. Move the Launch token one space closer to Launch. If it has reached the final space, the game ends. Skip the rest of the Upkeep Phase.
- First Player. If the First Player token is not claimed, rotate it one spot clockwise. If it is claimed, flip it to the unclaimed side.
- Guards Patrol. a. Each active Guard token that is not in a room with a character will move to the next room following the arrows on the Game Board. b. Any room with at least one Character standee gains a Guard token. c. Increase the Alert token 1 space for each character that is in the same room as a Guard token. d. Each character in a room with at least one active Guard token must pass a Challenge or gain a Neutralization token. Don't forget the –2 Penalty per Guard token present. e. Flip each stunned Guard token to its active side. f. If there are 3 or more Guard tokens in any room, remove all but 1 of the Guard tokens and return them to the supply. Each character in the room with those Guard tokens gains 1 Neutralization token. If there are no characters in the room, increase the Alert token by 1 space.
- Characters Recover. a. Remove any Neutralization tokens with the Recovering side face-up. b. Flip any Neutralization tokens from the Assigned side to the Recovering side.
After finishing these steps, play proceeds to the Planning Phase of the next round.
Note: Step 4b is reconstructed from a partly overlaid text layer; the Quick Reference summary of the same step reads "Spawn a Guard in each room with one or more players."
End of Game
The game will end in one of two ways:
- The Alert token reaches the LOCKDOWN space of the Alert Track. In this case, the game ends immediately and all players lose.
- The Launch token reaches the LAUNCH space of the Launch Track during the Upkeep phase. In this case, determine the winner as follows.
In order for a player to be eligible to win the game, they must have a Character token on at least one Objective card. If they do, they might be the character who steals the ship and emerges as a new pirate captain! If no Character tokens are placed on any Objectives, the players have failed in their mission and all players lose.
Each player determines their score by adding together their Glory and Support. Their Glory is indicated by the Glory tokens next to their board. Support can come from:
- Their Secret Backer card if they met the requirements on the card. This is the only time the conditions are checked.
- Support tokens.
The player with the highest score is the new captain and wins the game. In the case of a tie, the player with the greatest total Support wins the game. If there is still a tie, the player who completed their Secret Backer objective is the winner. If there is still a tie, players share the victory.
Appendix - Alert Levels
The Alert Level is determined by the location of the Alert token on the Alert Track. While some card or room effects reference the Alert Level, the Alert Level also indicates the DC for all Challenges that are not associated with completing Objectives.
- White: DC of Challenges is 5.
- Yellow: DC of Challenges is 8.
- Orange: DC of Challenges is 11.
- Red: DC of Challenges is 14.
The numbered Alert Track spaces (5+, 8+, 11+, 14+) and the 2p, 3p, 4p player-count markers on the Alert Track are part of the board diagram and are not fully recoverable as text from the source.
Appendix - Ability Tokens
Here are all the ability tokens in the game and their effects at each level.
| Ability | Level 1 | Level 2 | Level 3 | Level 4 |
|---|---|---|---|---|
| Move | 1 | 2 | ||
| Interact | +0 | +2 | +4 | +6 |
| Scheme | Draw 1 | Draw 2 | Draw 2, Keep 1 | Draw 3, Keep 2 |
| Loot | +0 | +2 | +4 | +6 |
| Attack | +0 | +2 | +4 | +6 |
Heal (ALL): Remove all Neutralization tokens from yourself or from a character in your room. Gain 1 Glory for each token removed.
The Scheme row's level-3 and level-4 entries (Draw 2, Keep 1 and Draw 3, Keep 2) and the Move and Heal level mapping are read from the text layer in column order and are not fully confirmed.
Important Terms
- Adjacent: Two rooms are considered adjacent if a corridor connects the two rooms.
- Difficulty Class (DC): How hard a Challenge is to complete. When a player attempts a Challenge, they roll the 20-sided die. A 1 always fails and a 20 always succeeds. For any other number, the player adds the modifiers and then compares the result to the DC. If they rolled equal to or greater than the DC, they succeed.
- Room: The game board is split into a series of rooms that characters and guards can move between.
Quick Reference
Round Sequence
- Planning Phase (simultaneous, p.9): Draw 2 cards, Scheme or Loot in any combination. Discard Loot to upgrade or gain abilities. Place 4 Energy Markers.
- Action Phase (clockwise from 1st player, p.10): Remove 1 Energy Marker to take the associated action, or to claim first player if it is unclaimed. Play 1 Scheme card per player turn. Discard Loot cards for text or to upgrade or gain abilities.
- Move: move up to the number of rooms listed. Draw an Encounter if leaving a room with a Guard token, or entering a room with a Random Encounter icon.
- Interact: use your current room's effect, or complete an Objective (p.16). Roll the challenge to succeed (if required). When completing an Objective, you may also Ask for Help, and may use any 2 Scheme cards as 1 symbol (p.17).
- Loot: draw 1 Loot card, then pass a challenge with this ability's bonus to avoid spawning a Guard in your room.
- Attack: pass a challenge to attack a Guard token in your room. If you succeed, either airlock them (remove from game) and gain 2 Glory, or stun them and draw 1 Loot card (p.15).
- Heal: remove the listed number of tokens from yourself or a character in your room. Gain 1 Glory per token removed.
- Scheme: draw and keep the listed number of Scheme cards.
- Upkeep Phase (in order, p.18): 1. Discard down to 5 cards in hand. 2. Move the Launch counter down 1. The game ends if at Launch. 3. First Player rotates clockwise (if unclaimed). 4. Guards Patrol: a. Guards in rooms without players move once. b. Spawn a Guard in each room that contains one or more players. c. Increase alert by 1 for each player seen. d. Guards attack: pass a challenge or gain 1 Neutralization token. e. Flip stunned guards face-up. f. Groups of 3 Guards deal 1 automatic [icon not recoverable], then return 2 to the supply. 5. Characters Recover: a. Remove Recovering tokens. b. Flip Neutralization tokens.
Alert Level and Challenge DC (see Appendix - Alert Levels): White 5, Yellow 8, Orange 11, Red 14.
The Quick Reference card's icon key and the remaining symbol labels are graphic and are not recoverable as text from the source.