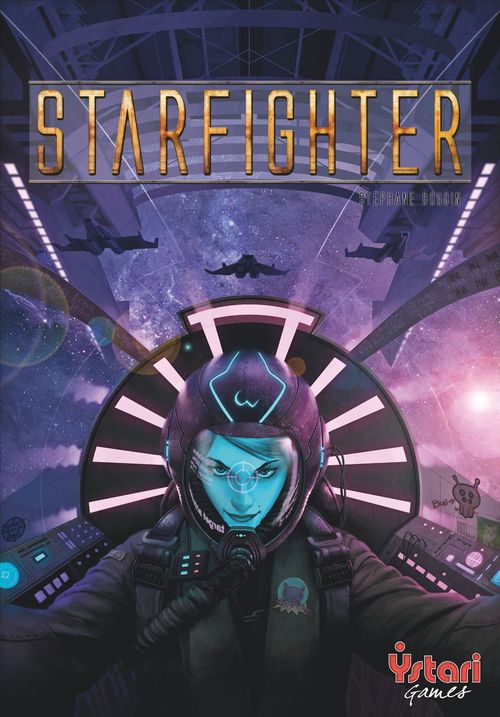
Starfighter
Starfighter Rulebook
Table of Contents
Table of Contents
Timeline
2029: The Very Great Depression. The economy of the USA irreparably crashes. In a desperate attempt to address the situation, the country sells off many technological patents. It's a failure, and the USA suffers a balkanization of its territory, with many states declaring themselves independent and taking up conventional war between themselves. This results in a deregulation fatal to the former superpower.
2035: Numerous natural phenomena of great magnitude devastate the islands and shores of the Pacific. Los Angeles, San Francisco, Beijing, and many other great cities and regions are ravaged. The survivors attempt to come to an agreement, as they know they cannot wait for help from the rest of the world: they decide to form the Pacific Alliance, which turns its back on the continents and looks to the sea. "Crisis Communism" is instituted and individual property disappears. The "dictate of mandatory solidarity" becomes vital for the survival of all.
2036: A group of rich amateurs from 9 different nations decides to buy NASA's supplies and installations. They then organize the recruitment of many thousands of "space citizens", young, brilliant, full of potential, and of all nationalities. Their goal is to create a "spaciarchy", a new nation with its eyes turned towards Earth's orbit and space. This is the beginning of a strict program of genetic selection.
2040: Three large Russian companies, Gazoil, Enercentral, and Feroxy, are regrouped under a single board of directors after a series of aggressive corporate mergers. The conglomerate turns its eyes to bankrupt Eastern-European countries. In exchange for assuming and managing their debts, these countries accept the domination of the conglomerate, becoming the properties of the three companies. All of the citizens become employees of the conglomerate, which takes the name of Bielomoldavia Eco-State Consortium, SA. As the USA is tearing itself apart, it doesn't react, while the European Union, mired down in its endless policies, is too slow and can't react either.
2050-2080: Beginning of the conquest of the solar system by various private groups or new states. Mankind settles Mars, has stations in orbit around Venus, and has begun to claim the asteroid belt.
2051: Founding of the Asteroid Mining Co. by groups of independent (and slightly deranged) miners as well as deserters from various factions. They quickly begin to exploit many groups of asteroids by harvesting their mineral wealth savagely (and with a high rate of fatalities). Settlement of the MystiGeek (a tiny group made up of computer pirates, extremist fanatics from various transcendent sects, and young fans of online games) on reclaimed and jury-rigged space stations. They choose to settle in the earth's Lagrange points. A small group of followers with deep mystical beliefs quickly take over the rest, and the whole group becomes the Mystics of the Lagrange.
2071: Revolt on Mars of the workers, the colonists, and of the lesser employees of the Valles Marineris Mining Company. Creation of the free commune of Vale Marineris.
2075-2100: Humankind settles and exploits the mineral riches of the moons of Jupiter, Neptune, and Saturn.
2090-2100: Different human factions begin to oppose one another in conflicts of limited scope, notably for access to mineral and energy resources.
2110-2112: First Solar War. The Mystics of Lagrange face-off against the Interstellar Interest Block (I2B) for possession of the Trojan asteroids of Jupiter (the "Achilles Group"). This is no more than a series of skirmishes between fleets of small ships, with few losses. The cruisers are not very numerous, lightly-armed, and each side only risks them after taking vast precautions, until March 9th 2112: the Mystics of Lagrange manage to destroy an enemy ship for the first time. The war ends a short time later with no change to the status quo.
2112: Second Solar War. The Interstellar Interest Block (I2B) contracts itself to the Pan-Eurasian Confederation against the Asteroid Mining Co. to establish a control point on Amor, an asteroid. Other factions ally themselves to one group or the other during the war, which remains limited to a dozen protagonists. The I2B suffer great losses during this conflict: it is dismantled, and its CEO and executive committee are executed live by mercenaries hired by the Pacific Alliance. The audience rating gained during this incident begins to gain the attention of the larger media groups, notably the most recent and aggressive among them: Centiprod.
2113: Beginning of the Third Solar War. The Asteroid Mining Co., allied to the Grouping of European Banks, violently opposes the Mystics of Lagrange for possession of some of the asteroids in the Kuiper belt. The battles, which continue near Makémaké, a dwarf planet in the belt, drag into the conflict other Earth- and Mars-based factions: Bielomoldavia, S.A., the Europasia (formerly the Pan-Eurasian Confederation), Valle Marineris, the Group of Independent Miners for Liberated Industries (G.I.M.L.I.) are, among others, participants in a series of indecisive fights and battles.
2114, September 17th: Professor Hirapati's team, on location on Eris, detects a message of extra-terrestrial origin (it's "The Message"). They begin translating and decrypting it.
2115: The Third Solar War becomes widespread and grows to include the whole solar system, mainly via space battles of medium intensity. Alliances are made and broken, as are defections from each faction. The combined use of large-scale cloning and of systematic media coverage of the conflicts contributes to the generalized chaos. Thus throwing into battles increasingly disparate forces, for minor or even nonexistent strategic gains. The financial and interested engagement of large ad groups and bankers (who refuse to allow decisive battles) changes the face of the conflict. This becomes an additional, even central, method of ensuring the satisfaction of viewers and of the clients of the large ad and financial groups. In this climate, two corporations become unavoidable by the other factions, but without engaging themselves directly in the conflict: Centiprod and P.C.O. (Product, Consumption, and Opportunity). The battles become small, often very weak, and rarely contain more than two cruisers. Fighter pilots, who often have a very brief career, become true stars, gladiators of the modern age. It's the era of the Starfighters.
Contents
- 3 double-sided Cruiser boards, each showing the name of the Cruiser, an armor track, and four levels of spaces (Level 0 through Level 3) across 5 sectors (columns). Five sectors on each board form the deployment zone for the Cruiser's Squadrons, and Draw symbols mark certain spaces.
- 100 different Squadron cards. Each card shows a level (0-3), effect symbols, reminder icons (indicating the number of Fighters and/or effects on the other section of the card), an upper section, and a lower section. The front of each card is different; the ID code is on the front. The back of every card is identical, showing two Fighters.
- 20 Damage tokens (discs)
- 2 armor tokens (cubes)
- 1 Initiative pawn
Object of the Game
The goal of each player is to damage the armor of the enemy Cruiser enough to cause its surrender.
To do this, each player will play Squadron cards from their hand onto their Cruiser board to attack their opponent and trigger various effects until victory is claimed.
Setup
Training
For the first few games, we suggest players play only with the Cruisers of Ares and Athena classes, and the green ID coded Squadrons (the blue ID coded squadrons should be returned to the box). This is the Training mode.
Skirmish
For subsequent games, players can use all cards and all Cruisers. This is the Skirmish mode.
Setting up the game
A first player is randomly chosen, and they take the Initiative pawn.
Starting with player one, both players choose a Cruiser board and place it in front of themselves, with an armor token on the highest value of its armor track. The 5 sectors (columns) of the two Cruisers must be facing each other at the beginning of the game.
The Squadron cards are shuffled to create a draw deck, back side up. This Deck is common to both players.
The stockpile of Damage tokens is placed next to the draw deck.
The game can now begin.
Game Overview
A game of Starfighter is played over a series of rounds. Each round is divided into three phases: Reinforcements, Deployment, and Combat.
1) Reinforcements
Each player draws as many cards as there are Draw symbols visible on the 5 sectors of their Cruiser board.
Be careful: the Squadron cards are double-sided. Players must hold their cards so that the back is facing their opponent.
Example 1: on the first round, as the boards are empty, Athena and Ares each draw 5 cards.
Example 2: on the second round, Ares draws two cards as he only has two visible Draw symbols on his board (as the Squadron cards played on the previous round are hiding his other Draw symbols).
Important: only the Draw symbols of the Cruiser board itself are taken into account during this phase. The effect of the Draw symbols present on the Squadron cards is explained in the Effects section below.
2) Deployment
Starting with the player who has the Initiative pawn, each player plays in turn one card from their hand to a sector of their Cruiser board.
The cards are always played from bottom to top in a sector: the first card of a sector must be played on that sector's zero space (the lowest one), the next one on the level 1, etc. Cards will therefore partially stack during the game. The lower part of the card played will always cover the upper section of the last card played in this sector. A card cannot be played into a sector where all the spaces are occupied.
Moreover, to play a card, you must take into account the side of the card played, its orientation, and its level.
a) Side of the card:
A player always has the choice of playing a card from their hand either face up or face down.
b) Orientation of the card:
A card is always played with its upper section facing the opponent. So, if a card is played:
- face up: the ID code should be in the lower right corner towards you, and the level of the card should be in the upper left towards the opponent,
- face down (side without an ID code): the Fighters are on top towards the opponent.
c) Level:
Each card has a level ranging from zero to three, shown in the upper left corner of the card (the cards without a level indicated are level zero).
- level zero: the card can be played on any free space,
- level 1, 2, or 3: the card can only be played on a space of same level as itself.
A player can always choose to play a card face down. This way, a player has zero-level cards available for them.
When a card is played, its effects are immediately applied (see the Effects section below for more details).
Example of deployment in one sector:
Turn 1 – As this sector is empty, Ares must first play a level 0 card. Not having any, he plays one of his cards face down. It's then his opponent's turn to play.
Turn 2 – Ares then plays a level 1 card in this sector, which covers the upper section of the card played here during turn 1; he then applies the effect of the card.
Turn 3 – Not having a level 2 card on his hand, and wanting to continue his deployment in this sector, Ares then plays another card face down, and as such will later be able to play a level 3 card in this sector.
Pass: a player can, at any time, decide to pass instead of playing a card. That player can then no longer play cards until the next round. The player who passes first during the deployment phase takes (or keeps) the Initiative pawn. The other player can then play as many cards as he wishes.
This phase ends when both players have passed.
Combat
3.1 Initiative
The player with the Initiative pawn can move their Cruiser, by shifting their board relative to that of their opponent, by one sector to the left or to the right. At the end of the movement, there must still be at least two sectors from each Cruiser facing each other. The movement of the Cruiser is not mandatory. The player then chooses the resolution order of the battles: from right to left or from left to right.
During a Combat phase, for each opposed Cruiser sector (columns which are directly lined up with one another) there will be a battle. Each battle is dealt with one after the other following the chosen resolution order (left to right, or right to left) and none of the sectors may be skipped.
Example of a Combat phase between Ares and Athena: Athena passed first during the deployment phase. She chooses to move her Cruiser to the right and decides that battles will be resolved from left to right (sectors 3, 4, and then 5). There are no battles in sectors 1, 2, 6, or 7, which have no opposing sectors facing them.
3.2 Battles
A battle in two opposed sectors is resolved in two phases:
a) Forces present:
Each player takes a number of Damage tokens equal to the number of visible Fighters in their opponent's sector. This total is determined at the beginning of the battle (any Fighter which is damaged or which appears during this battle will not change this initial number of Damage tokens).
b) Damage:
The player with the Initiative pawn places their Damage tokens on their Fighters in the sector where the battle is taking place first, at the rate of one token per Fighter. Then, it will be the other player's turn to do so.
The tokens must be placed from top to bottom: begin by placing all of the tokens possible on the card in the highest space in that sector. When the last Fighter on that card is damaged, the card is destroyed. The card is then discarded and the tokens present on it are returned to the stockpile.
This reveals the upper section of the card which may be underneath it: if this card has an effect symbol, the consequences of it are immediately applied (see the Effects section below for more details). Then, if the player still has tokens to place, they continue on placing them on this card. And so on.
When all of the cards of a sector have been destroyed, the remaining Damage tokens reduce the armor of the player's Cruiser by that amount (the cube is moved the appropriate number of spaces on the armor track, and these remaining Damage tokens are returned to the stockpile).
Damage Tokens:
- The Damage tokens still present on a card which has not been destroyed remain in place from one round to the next. Therefore, the damaged Fighters will not be taken into account when calculating forces present in subsequent turns.
- Damage tokens which end up being covered (due to a movement or a card being flipped, or a new card being played – see Effects section below) are immediately returned to the stockpile.
Example (cont'd): Combat column 3: Ares takes 2 Damage tokens and Athena none. As Ares lacks Fighters in this sector, his Cruiser directly loses 2 armor points.
Combat column 4: Ares takes 3 Damage tokens, Athena 4. Athena places the first 3 on the Fighters of her level 1 card, which is destroyed. This reveals the upper section of the card underneath and its effect is applied (her Cruiser loses 1 armor point). Then one of the Fighters on the upper section of this card receives the last token. Ares places all 3 tokens on his level 1 card: as one of the four Fighters remains intact, the card and the tokens remain in place for the next round.
Combat column 5: no Fighters are present in column 5 on one side or the other, so nothing happens.
3.3 End of Combat
Once all battles are resolved, the player who has the Initiative pawn hands it to their opponent.
Effects
The effects represent the consequences of daring maneuvers made by the pilots.
The effects of a card are triggered immediately each time it becomes visible, meaning:
- When a player plays the card from their hand to their Cruiser board (deployment phase);
- When the upper section of a card becomes revealed following the destruction or movement of the card covering it;
- When the card itself is moved, turned over, or pivots so that one of its effects, hidden until now, becomes visible.
Training Mode Effects
Draw: the player takes the top card of the draw deck and places it next to their board without looking at it. On the next round, the player adds it to their hand in addition to the cards drawn during Reinforcements.
Lateral Movement: the player moves any card (on their own board or the opponent's) to the left or right to an adjacent sector so that it becomes the highest card of that sector. If a space is freed due to this effect, the other cards are moved to fill it.
Vertical Movement: the player moves any card (on their own board or the opponent's) so that it becomes the highest card in its sector. If a space is freed due to this effect, the other cards are moved to fill it.
Free Movement: the player moves any card (on their own board or the opponent's) to any other sector on that same board, so that it becomes the highest card of that sector. If a space is freed due to this effect, the other cards are moved to fill it.
Pivoting: the player modifies the orientation of a card of their choice (on their board or their opponent's). The upper section of this card then becomes its lower section and vice versa.
Destruction: the player destroys a card of their choice (on their board or their opponent's). The card is placed in the discard pile. If a space is freed due to this effect, the other cards are moved to fill it.
Damage to Enemy Cruiser: the armor of the Enemy Cruiser is reduced by one point.
Damage to Own Cruiser: the armor of the Player's own Cruiser is reduced by one point.
Skirmish Mode / Total War Effects
Force field: whenever a card with a force field suffers damage, it only suffers a total of one point (placed on one of the Fighters on the card): additional damage on that card is therefore all ignored (absorbed by the force field).
Shield 2/3/4: when a card with shields suffers damage, the Damage tokens are first placed on the shields. Once there are as many tokens as there are shields (one ellipse = one shield), additional tokens are then distributed to the Fighters. At the end of a round, the tokens placed on shields are returned to the stockpile (shields regenerate).
Barrel Roll: the player flips over (back / front without changing its orientation) a card of their choice (from their own board or their opponent's).
Damage on Fighter: the player puts a Damage token on the highest card from any sector. The shield rules apply if necessary. It's not possible to directly inflict one point of damage to the enemy Cruiser. If the last Fighter of a card is damaged, the card is destroyed.
Important Clarifications
- An effect must always be applied when possible. It is possible to apply an effect without triggering any consequences, for example a vertical movement in a sector containing only one card.
- The effects of movement, barrel roll, pivoting, destruction, and damage on a Fighter can be triggered on any board (the player's own or their opponent's). It's the player who controls the card whose effect becomes visible who chooses on which board, sector, and card this effect is applied to.
- The cards of a player may never change boards. Thus, following an effect, a player can only move one of their cards into a sector of their own Cruiser or one of their opponent's cards into a sector of the enemy Cruiser.
- If, following a destruction or movement effect, cards from a given sector wind up separated by an empty space, the player must immediately move their top cards downward in order to fill this space. The effects which appear due to this empty space are therefore not triggered.
- Players need only respect the level of the card for its initial placement (deployment phase). Thus the level is no longer taken into account when an effect moves or turns a card over, or if it is moved to fill a space.
- When an effect causes another effect to be revealed, this second effect is also triggered immediately in turn.
- If two effects are revealed simultaneously, the player chooses which effect is triggered first. The second effect will only be applied after the resolution of the first effect and any effects that this first effect may have revealed. If the second effect is masked in the meantime, it will then no longer trigger.
Example: Ares chooses to play the 3-10 card (red border), thus covering the upper section of his level 2 card (yellow border). He applies both effects of the newly-played card in the order of his choice: he chooses to draw first (the card drawn this way is placed, face down, near his board) then to perform the lateral movement of a card to an adjacent sector. He chooses to move his level 2 card, making its effect visible again and inflicts 1 damage to the enemy Cruiser. He moves his level 3 card to immediately cover the other cards of his column (the effect of his level 1 card – vertical movement – has thus not become visible again and isn't triggered).
Example (cont'd): Ares places the 3-35 card (blue border) and applies the card's two effects: he starts by drawing then decides to pivot his level 2 card (red border). The effect on that card's upper section (draw) is covered while the lateral movement effect is revealed. He then applies this effect on that same card (red border) and moves it to an adjacent sector. The upper effect becomes visible again and Ares draws an extra card. He immediately moves his level 3 card to fill the space made (without triggering any extra effects).
Example (end): on the next Combat phase, Ares suffers 4 damage points in that sector. The first point destroys the highest card (blue border) and reveals the vertical movement effect of the level 1 card (yellow border). Ares decides to apply the effect on the level 0 card (red border) and place it at the top of that sector (and thus covering again the movement effect). The next 2 points of damage destroy the red-bordered card, revealing the movement effect again. He decides to apply this effect to the opponent's board to influence a future combat (which is not shown in this example). The last point of damage is placed on the card.
To claim victory in Starfighter, it is vital to optimize the triggering of effects to chain a maximum of them, and don't hesitate to apply your effects to your opponent's cards.
End of the Game
When one of the two players' Cruisers reaches 0 armor points (whether due to battle or the effects of a card), the game ends at the end of the current round: any additional points of damage still reduce the armor (which can go into negative values). The player whose Cruiser has the highest armor value is declared the winner. In case of a tie, it's the player who has the most cards in hand (counting the cards from any Draw effects from the last round) and on their board who wins the game.
Total War Mode
The Total War mode, unlike the Training and Skirmish modes, calls upon each player to create their draw decks in advance.
Each player creates their fleet using all of the cards at their disposal (it's possible to use two sets of the game so that each player has access to all of the cards). Each player chooses a Cruiser from among those available, then the cards for their draw decks. A draw deck must contain at least 25 cards. There is no maximum limit to their number of cards. A draw deck can only contain a single copy of each game card, which can be identified by its ID code.
Before the beginning of the game, each player reveals to their opponent the Cruiser they've chosen. Each player shuffles their own draw deck and will have their own discard pile during the game.
Prepare the rest of the game materials as in a Training or Skirmish mode game.
A Few Extra Notes
Draw: the players may not look at the cards in the draw deck, or change their order. A player may, at any time, count the number of cards remaining in the draw deck. When the draw deck is empty, the cards from the discard pile are shuffled to form a new draw deck. Reminder: in Total War mode, each player has their own draw deck.
Hand: there is no limit to the number of cards a player has in hand. The cards are always held in hand in the same direction, with the ID code at the bottom. A player can count the number of cards in their opponent's hand.
Discard: this is formed during the game by the discarding of destroyed cards. Reminder: in Total War mode, each player has their own discard pile.
Information: At any point, a player may check both sides of the cards they've played (this is only used for the Barrel Roll effect, so it's pointless to do so in Training mode). A player can also check the visible face of cards played by their opponent, notably their upper sections, which are hidden by other cards (reminder icons are used to facilitate reading the card).
Thanks
The author would like to thank all the people who have supported the game and taken part in its evolution, notably Olivier, Ludovic, Thomas, Cédric, Emmanuel, and François; Cédric and Stéphanie (Protoludiques); Grégory (Vassal Factory); Yoshiaki, Matthieu, Alexia (CNJ Boulogne); Benjamin and Benjamin (prototype artwork).
The publisher would like to thank its shock team, the "Ystari team", for its unfailing support, and specifically Dominique for his precious help.
Quick Reference
The rulebook's back page repeats a condensed reference summary of the game's phases and effects.
Game Overview
The players play through rounds until the armor of a Cruiser reaches (or goes under) 0.
Phase 1 - Reinforcement: the players draw as many cards as they have visible Draw symbols on their boards (not on their Squadron cards). They add to their hand the cards obtained through the Draw effect during the previous round.
Phase 2 - Deployment: starting with the player who has the Initiative pawn, the player plays a card during their turn, whilst respecting its level, and triggers its effects. The first to pass takes (or keeps) the Initiative pawn. The other player can continue playing cards until they pass.
Phase 3 - Combat:
- 3.1 - Initiative: the player who has the Initiative pawn can move their Cruiser one sector to the right or to the left. They then decide in which direction combat will be resolved.
- 3.2 - Combats: sector by sector, damage is inflicted on Fighters and eventually to Cruisers. The player with the Initiative resolves first. When a card is destroyed, effects which are revealed are applied.
- 3.3 - End of Round: the Initiative pawn changes player. Shields regenerate (Skirmish / Total War).
Training Mode
Draw: the player takes the top card of the draw deck and places it next to their board without looking at it. On the next round, the player adds it to their hand in addition to the cards drawn during Reinforcements.
Lateral Movement: the player moves any card (on their own board or the opponent's) to the left or right to an adjacent sector so that it becomes the highest card of that sector. If a space is freed due to this effect, the other cards are moved to fill it.
Vertical Movement: the player moves any card (on their own board or the opponent's) so that it becomes the highest card in its sector. If a space is freed due to this effect, the other cards are moved to fill it.
Free Movement: the player moves any card (on their own board or the opponent's) to any other sector on that same board, so that it becomes the highest card of that sector. If a space is freed due to this effect, the other cards are moved to fill it.
Pivoting: the player modifies the orientation of a card of their choice (on their board or their opponent's). The upper section of this card then becomes its lower section and vice versa.
Destruction: the player destroys a card of their choice (on their board or their opponent's). The card is placed in the discard pile. If a space is freed due to this effect, the other cards are moved to fill it.
Damage to Enemy Cruiser: the armor of the Enemy Cruiser is reduced by one point.
Damage to Own Cruiser: the armor of the Player's own Cruiser is reduced by one point.
Skirmish Mode / Total War Mode
Force field: whenever a card with a force field suffers damage, it only suffers a total of one point (placed on one of the Fighters on the card): additional damage on that card is therefore all ignored (absorbed by the force field).
Shield 2/3/4: when a card with shields suffers damage, the Damage tokens are first placed on the shields. Once there are as many tokens as there are shields (one ellipse = one shield), additional tokens are then distributed to the Fighters. At the end of a round, the tokens placed on shields are returned to the stockpile (shields regenerate).
Barrel Roll: the player flips over (back / front without changing its orientation) a card of their choice (from their own board or their opponent's).
Damage on Fighter: the player puts a Damage token on the highest card from any sector. The shield rules apply if necessary. It's not possible to directly inflict one point of damage to the enemy Cruiser. If the last Fighter of a card is damaged, the card is destroyed.